Ok you guys… if this post just doesn’t have my name written all over it, then I’ve done a horrible job of portraying myself online. By now, you are probably very aware that I live in the San Francisco Bay area, love me a good glass of white wine (ahem! my picture speaks a thousand words), and gravitate to ANYTHING that sparkles. There is nothing better in the WORLD then when I get to combine these three things. And if you’re anything like me, you’d agree.
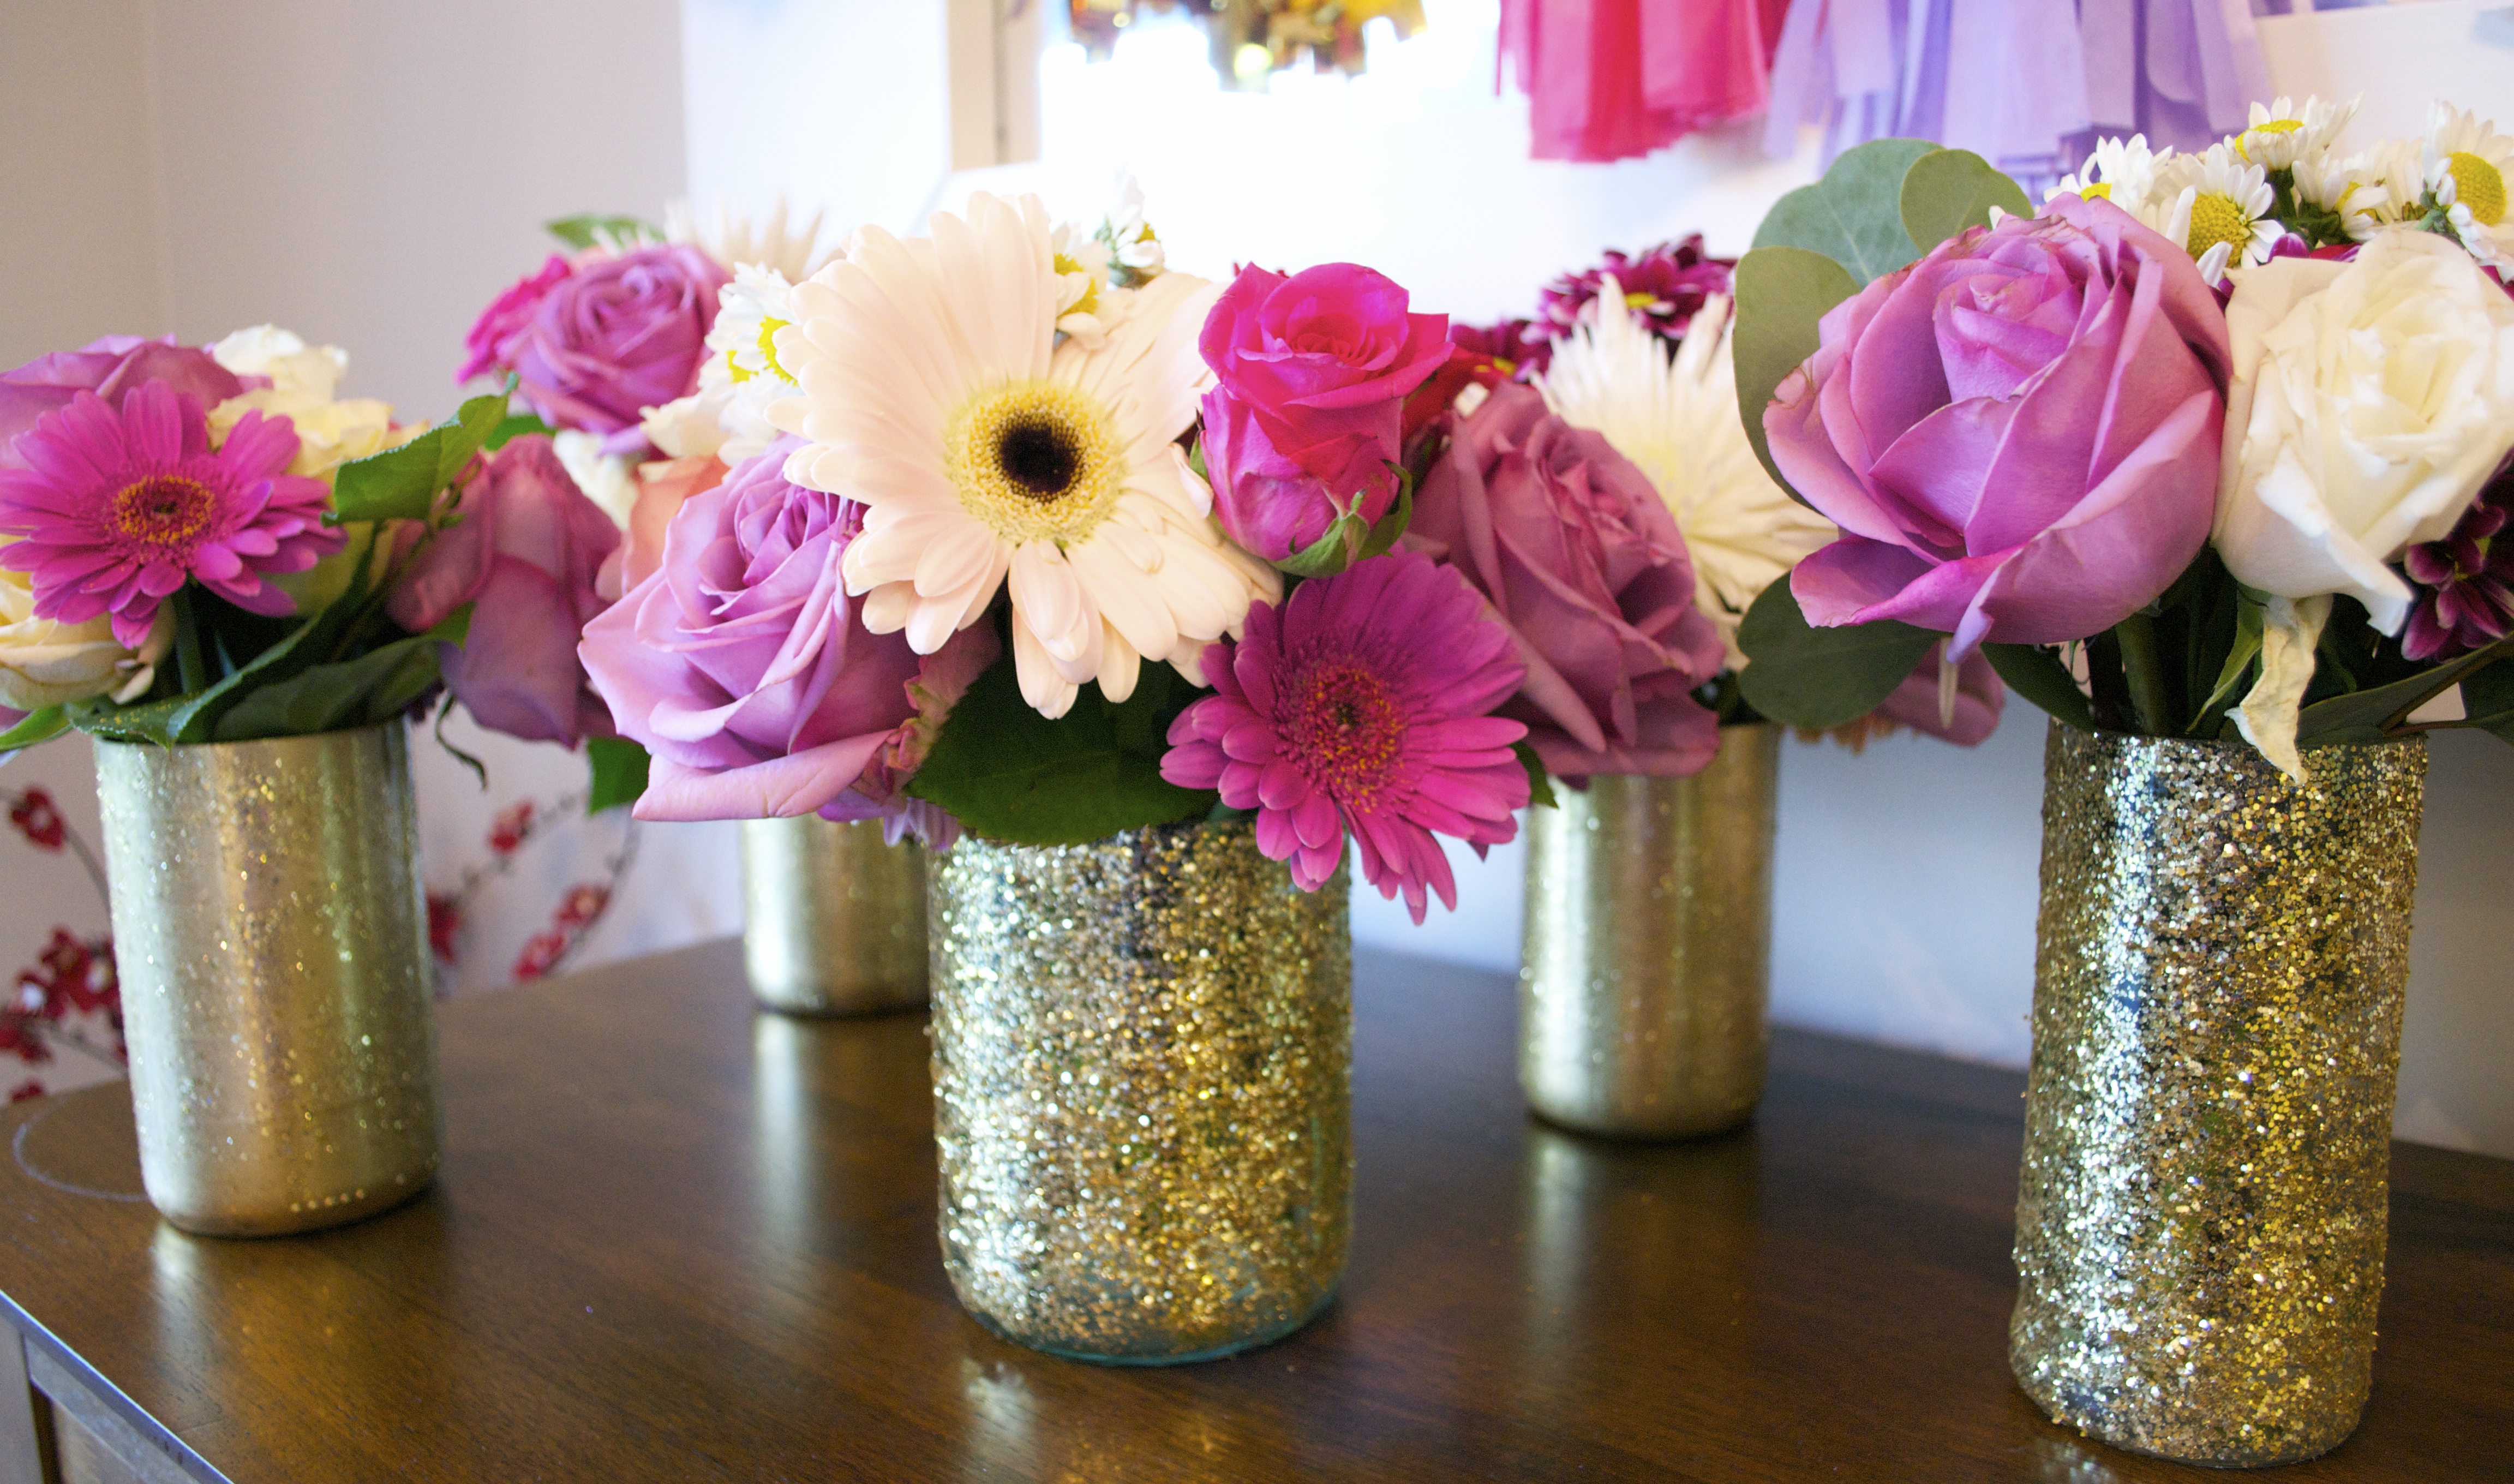
A few weeks ago, I threw my girlfriend the most fun baby shower. I came up with a chic Valentine theme (I threw it right before Valentine’s day) and wanted to incorporate all the typical colors: red, pink, purple, and gold. I mean, adding gold just gives everything a more sophisticated feel, right? I had already incorporated bits of gold into some custom banners and tassel garlands for the decor, and now it was time to work on the floral arrangements.
For those of you that have ever thrown a party before, you know that the flowers can be one of the most expensive things you can buy (besides the alcohol). It’s extremely hard to skimp and save. And when you’re making your own floral arrangements, almost as expensive as the flowers themselves, are the vases you put them in.
I had decided I wanted gold vases, since the florals were going to be pink and red hues. It would tie everything together quite nicely. However, a typical vase (like this one I had my eye on) cost anywhere between $15 and $35 (this one was $25). And again, I knew I could make something just as cool, if not cooler, myself. So I got to work.
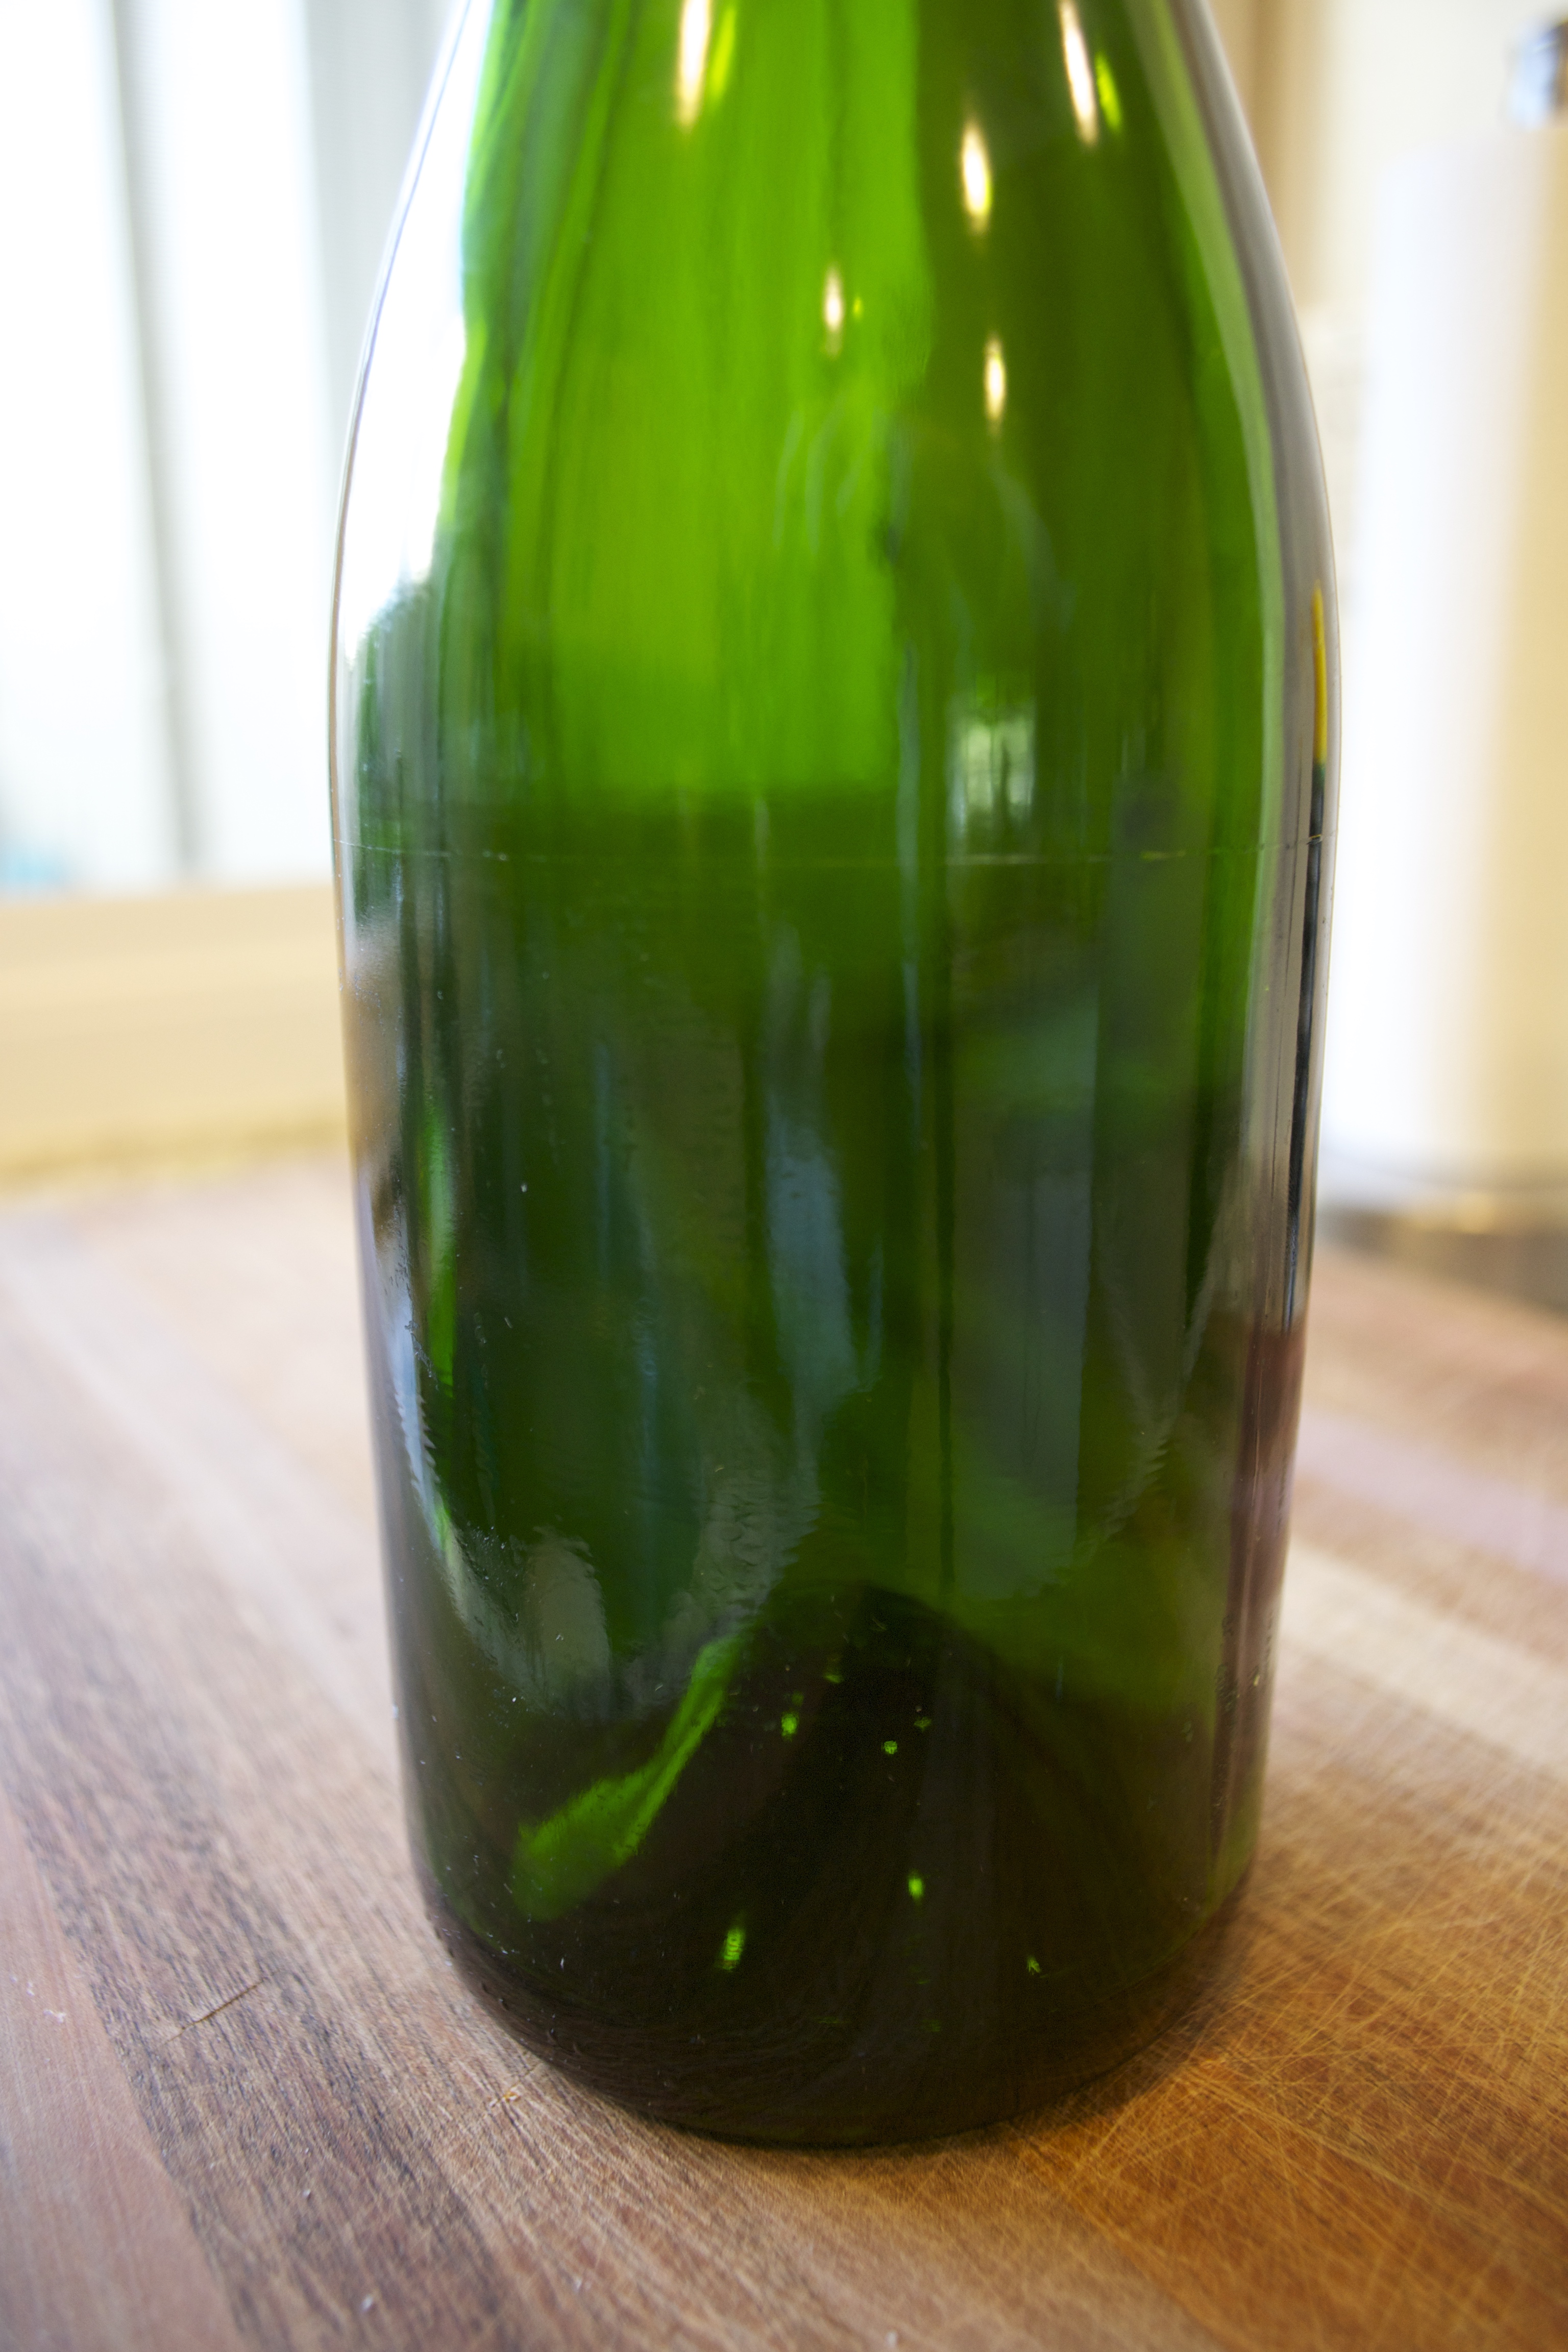
A quick backstory – and quite possibly a tip for you – I always save my wine bottles after I drink the wine. I never know the things I can do with them or when a crafting project will come to mind. I thought to myself, “Hey, what a fun idea! I have so many wine bottles sitting in my garage. I can make those into my vases!” So I got to work.
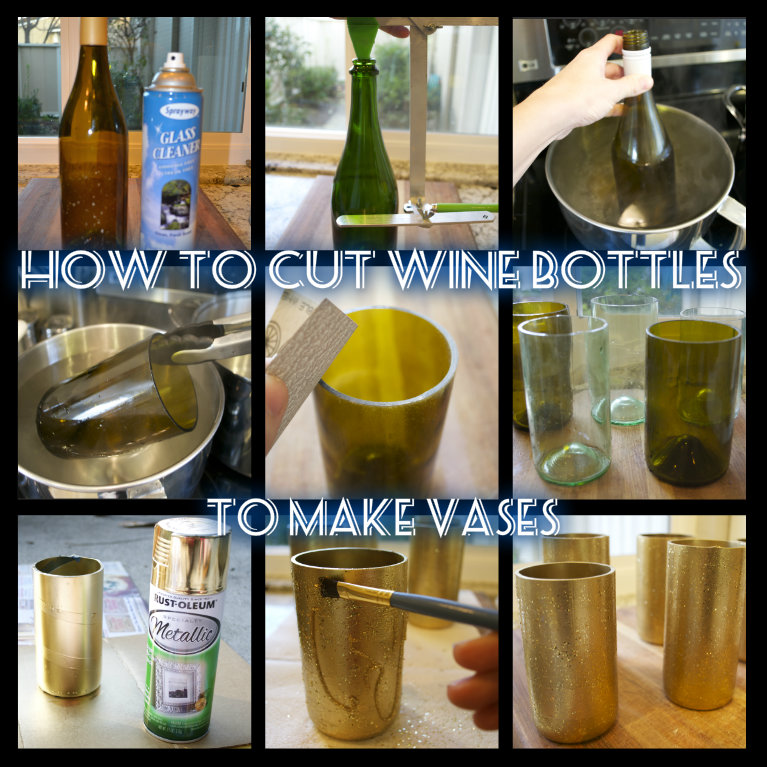
Steps to Cut Your Wine Bottles Into Vases
The Necessary Tools:
- Bottle Cutter
- 2 LARGE Pots (large enough to completely submerge your wine bottle up to the neck)
- Pair of tongs (to handle the bottle once cut)
Step 1:
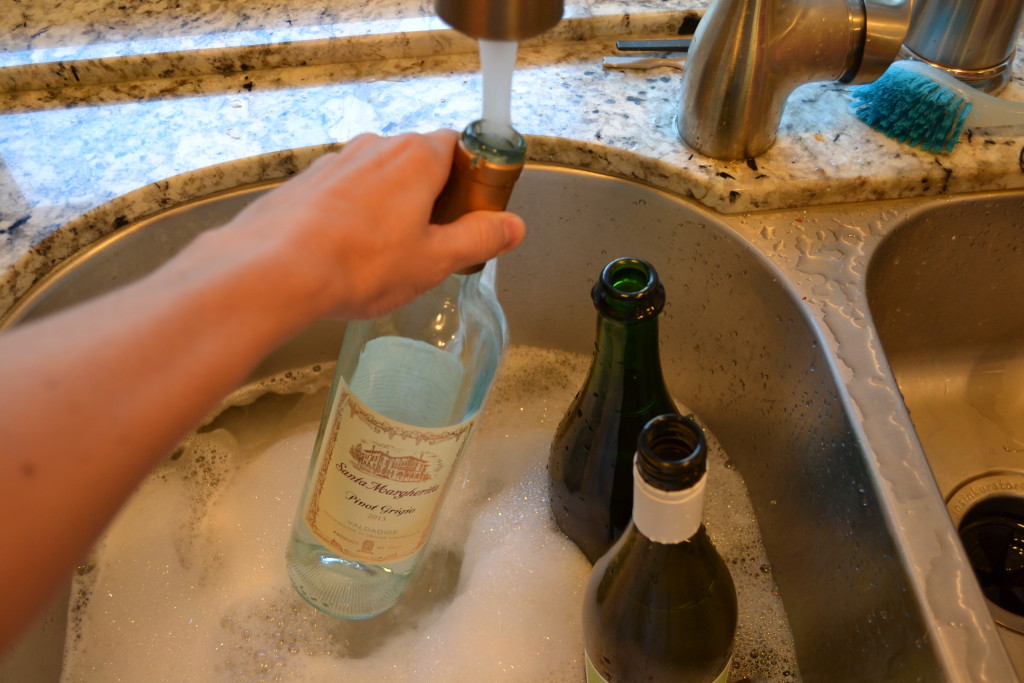
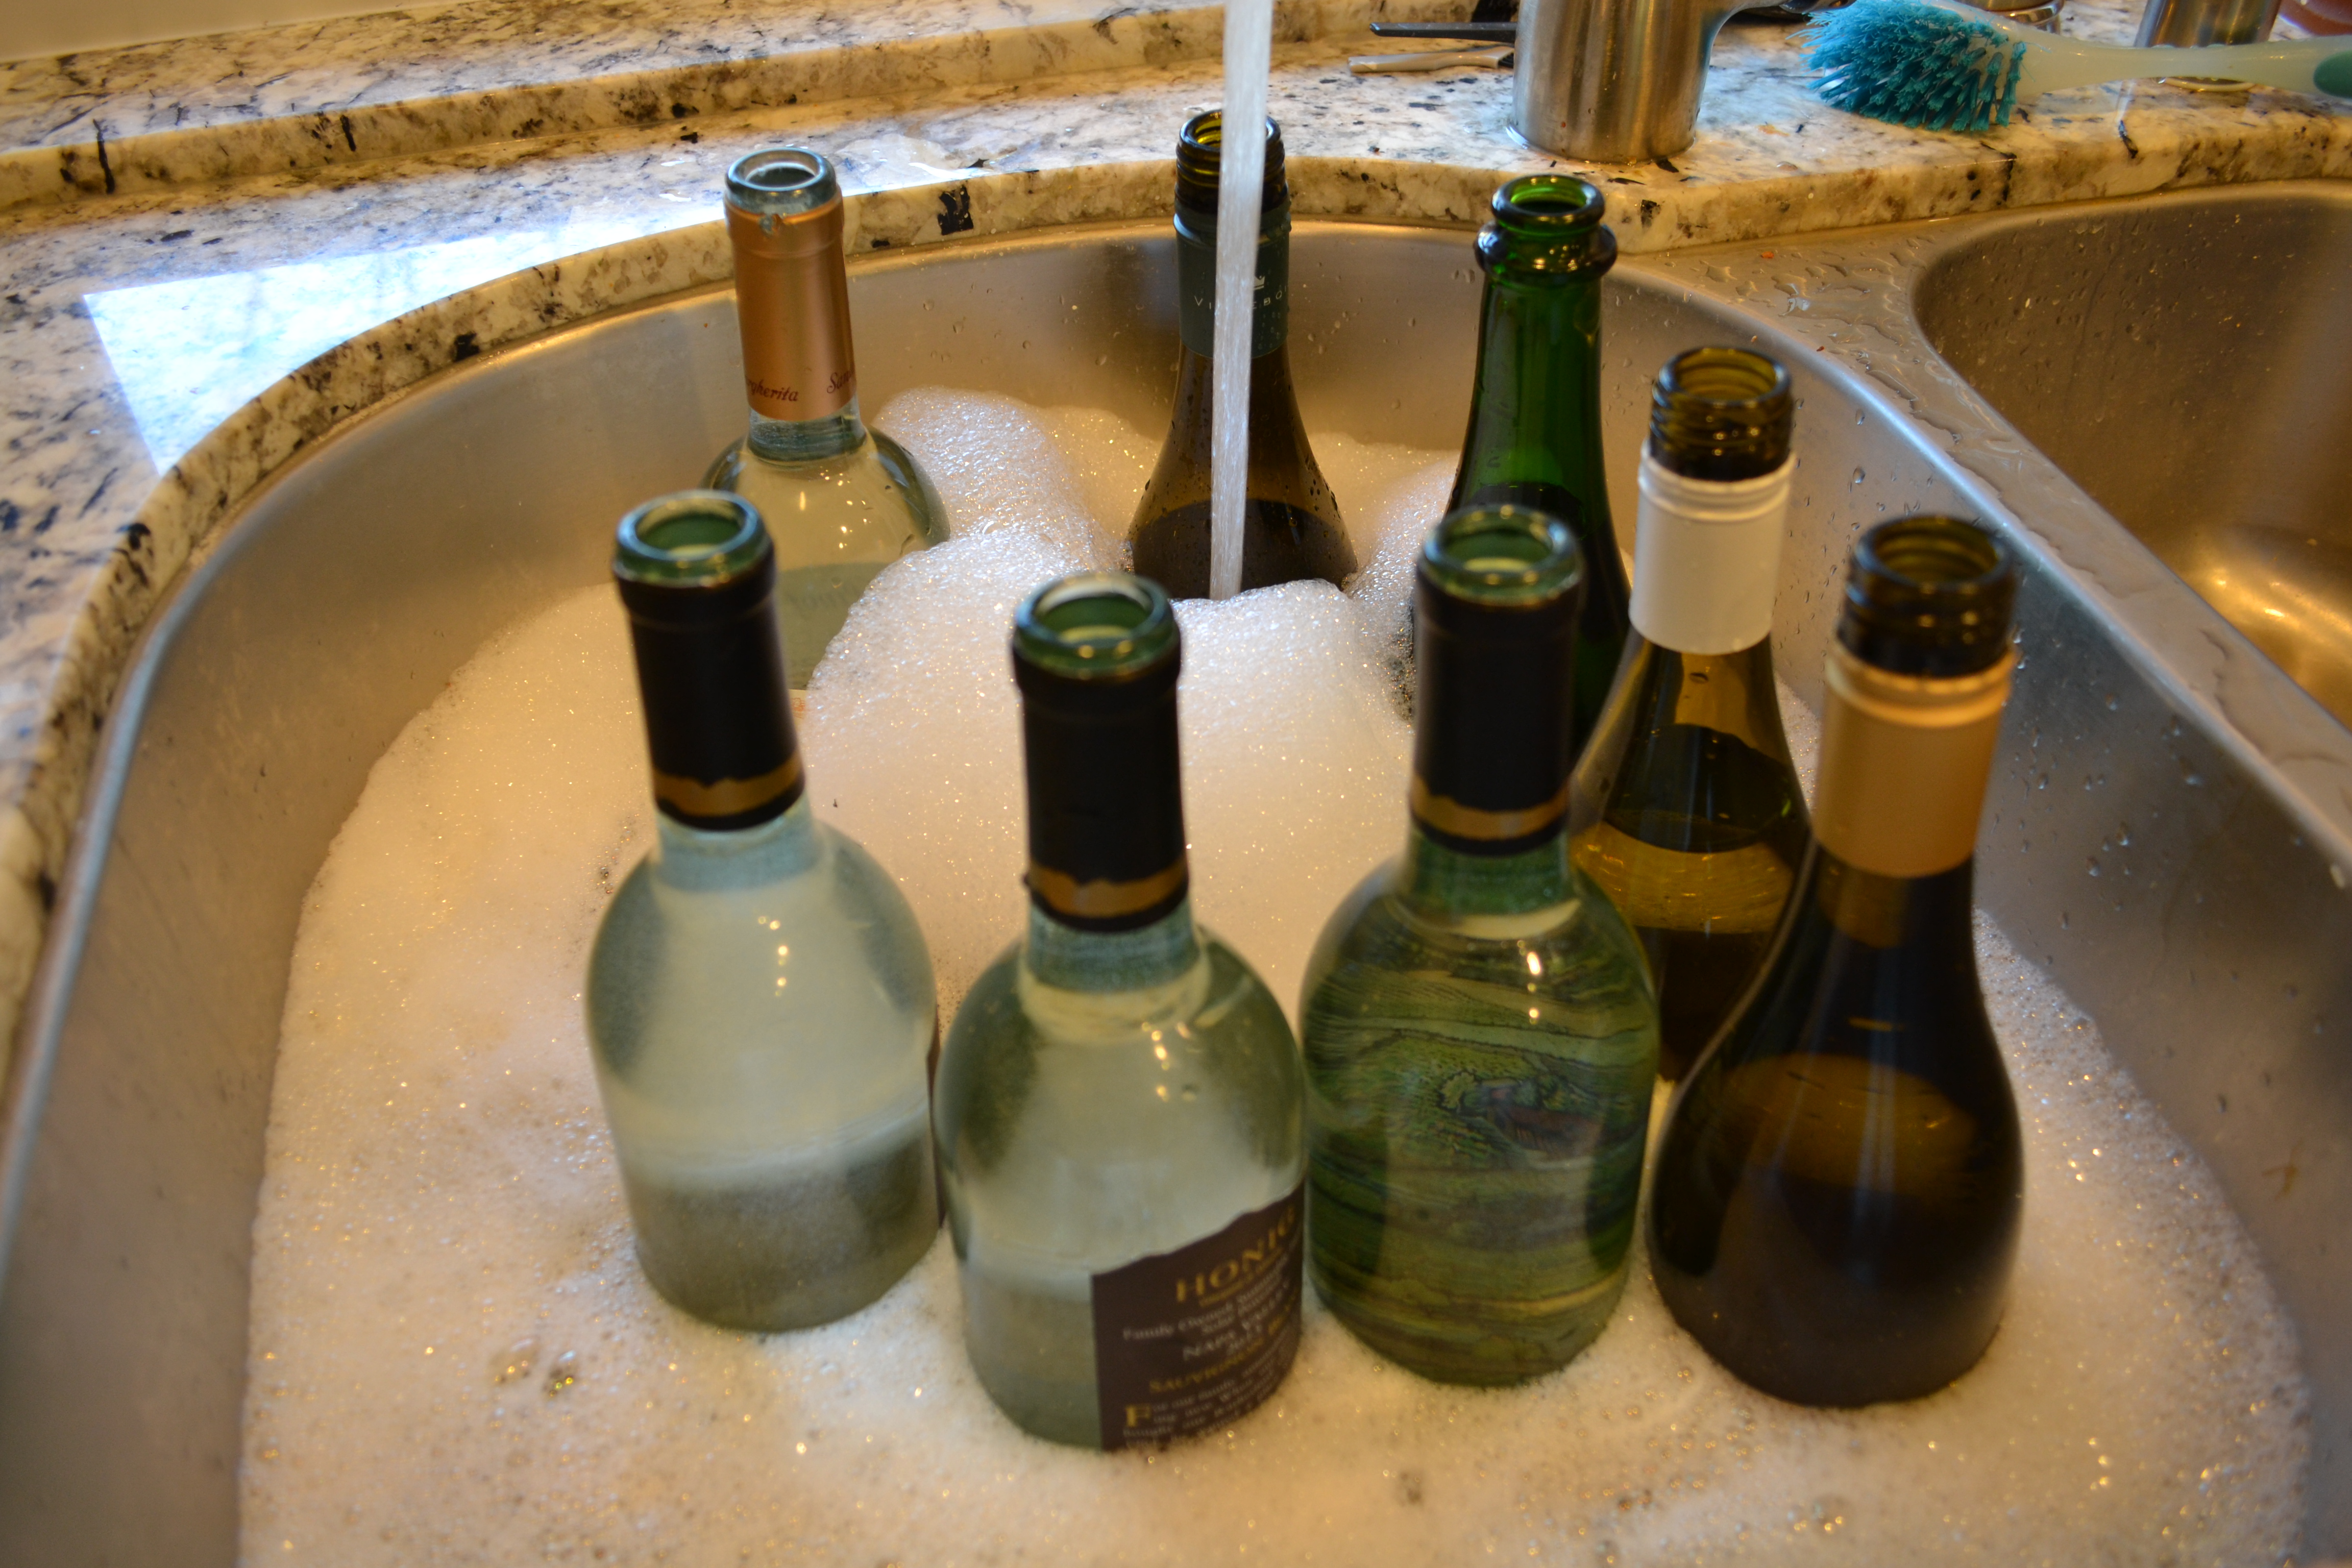
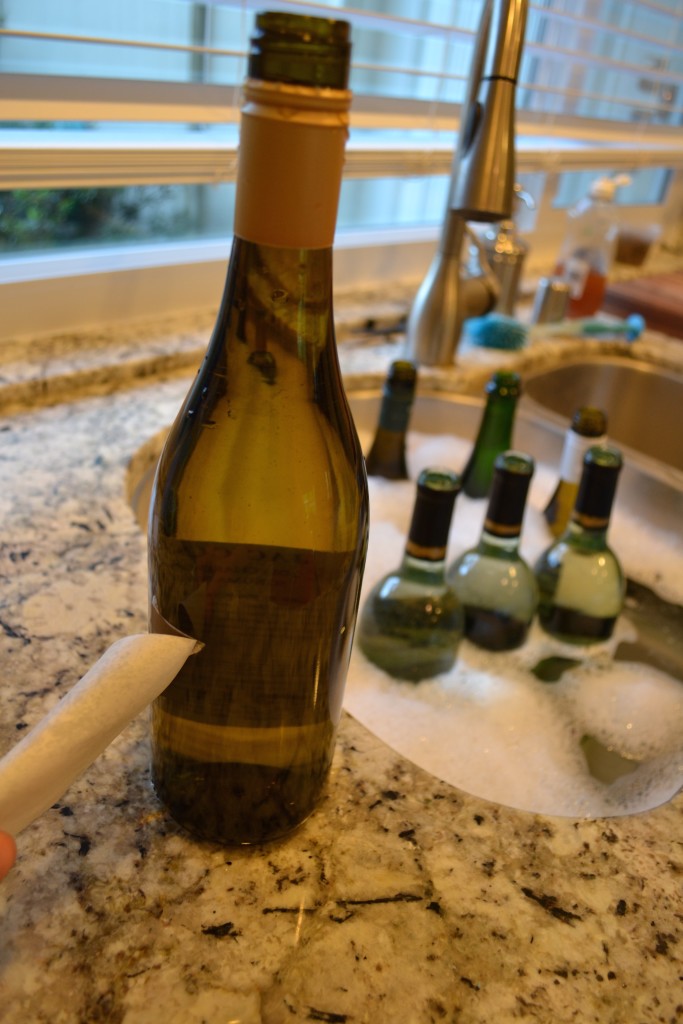
- Make sure to get all the labels and glue residue off your wine bottles.
- I do this by soaking them in the sink in HOT water for a few minutes with some dish soap. Then peel the labels off.
- Whatever doesn’t come off, I spray with glass cleaner and rub away with a gritty towel.

Step 2:
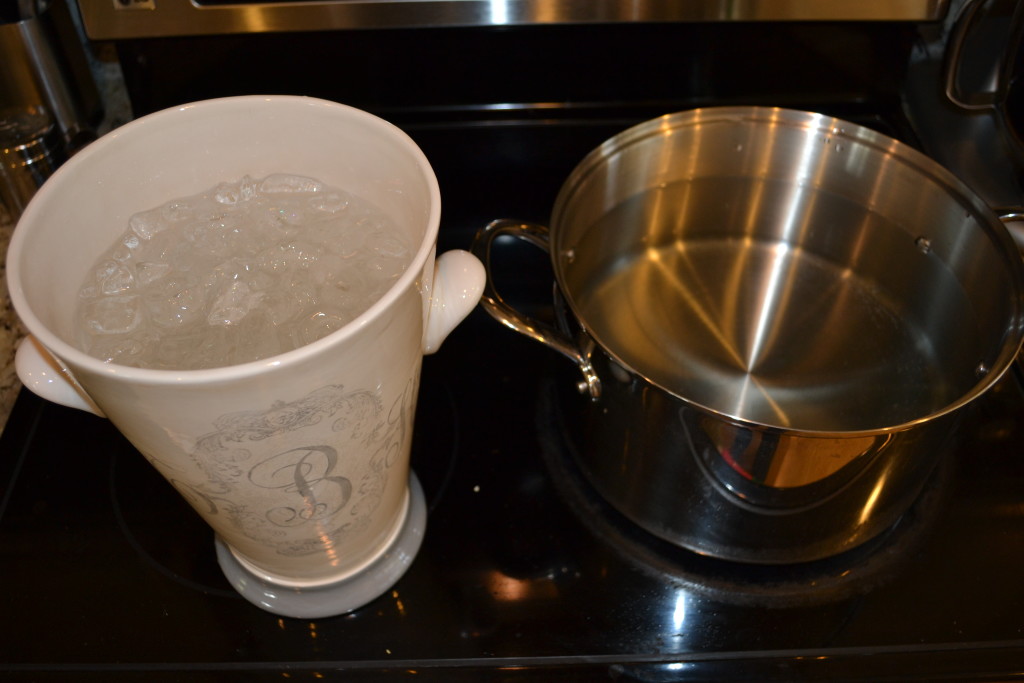
- Take your 2 pots and set them up next to each other.
- Fill one with water and LOTS of ice, and bring the other to a boil on your stove.
Step 3:

- Take your bottle cutter and score a fine line around the entire circumference of your wine bottle where you want it cut (the instructions in the G2 bottle cutter explain this process perfectly).
Step 4:
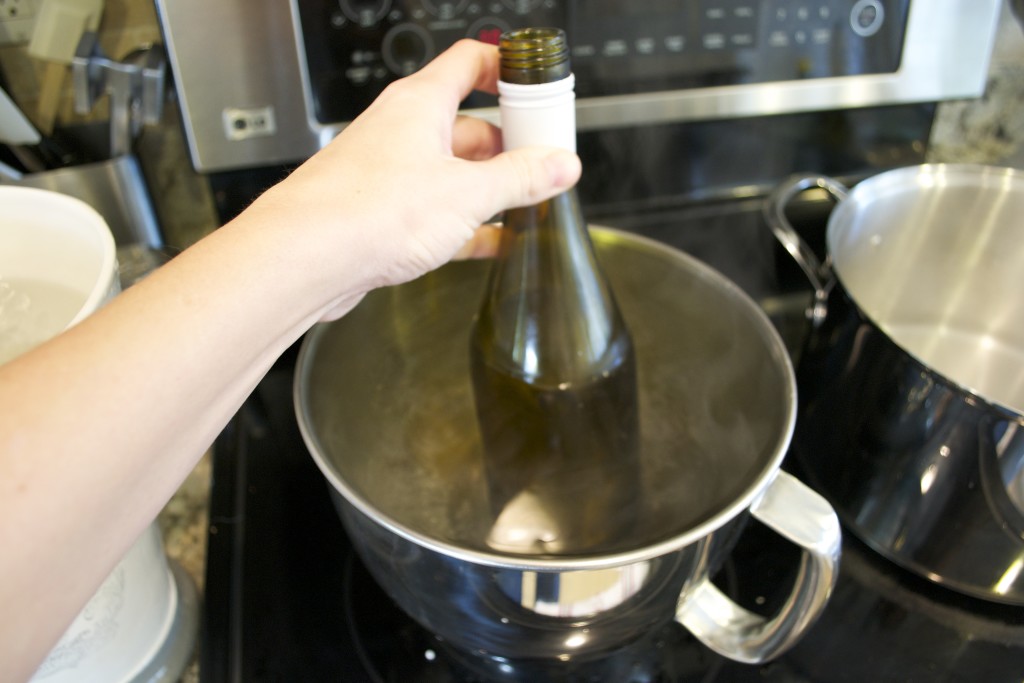
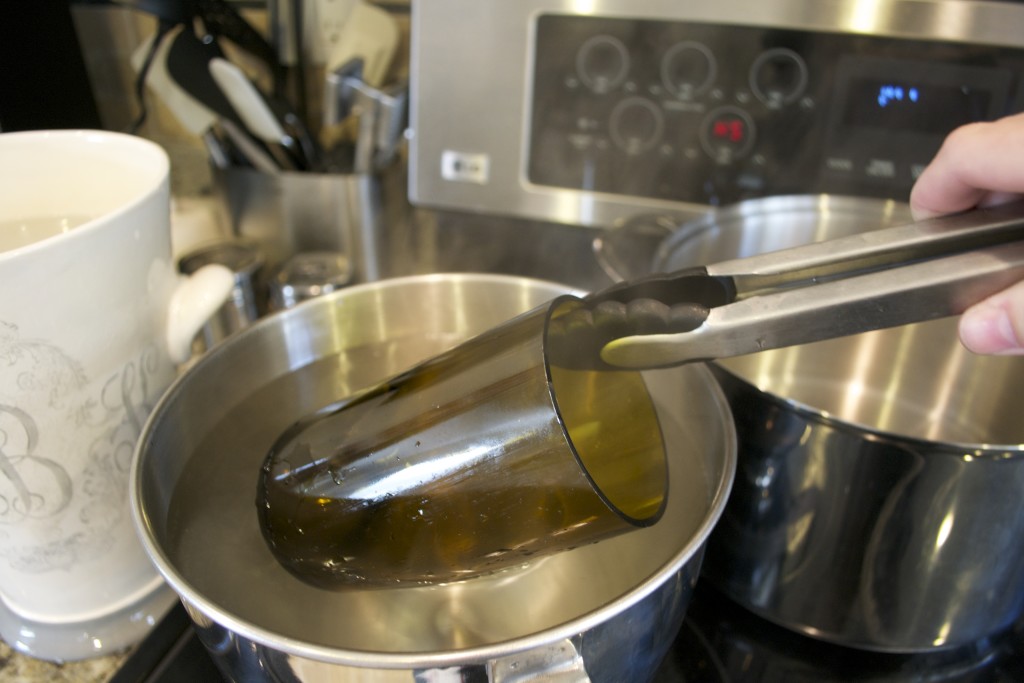
- Gently take your scored bottle and place it in the boiling water for 5 SECONDS (making sure the score on the bottle is COMPLETELY submerged into the water).
- Make sure your bottle DOES NOT touch the bottom of the pot.
- I made this mistake at first and the bottom of the bottle broke off. This is why it’s SO IMPORTANT to have large enough pots.
- Make sure your bottle DOES NOT touch the bottom of the pot.
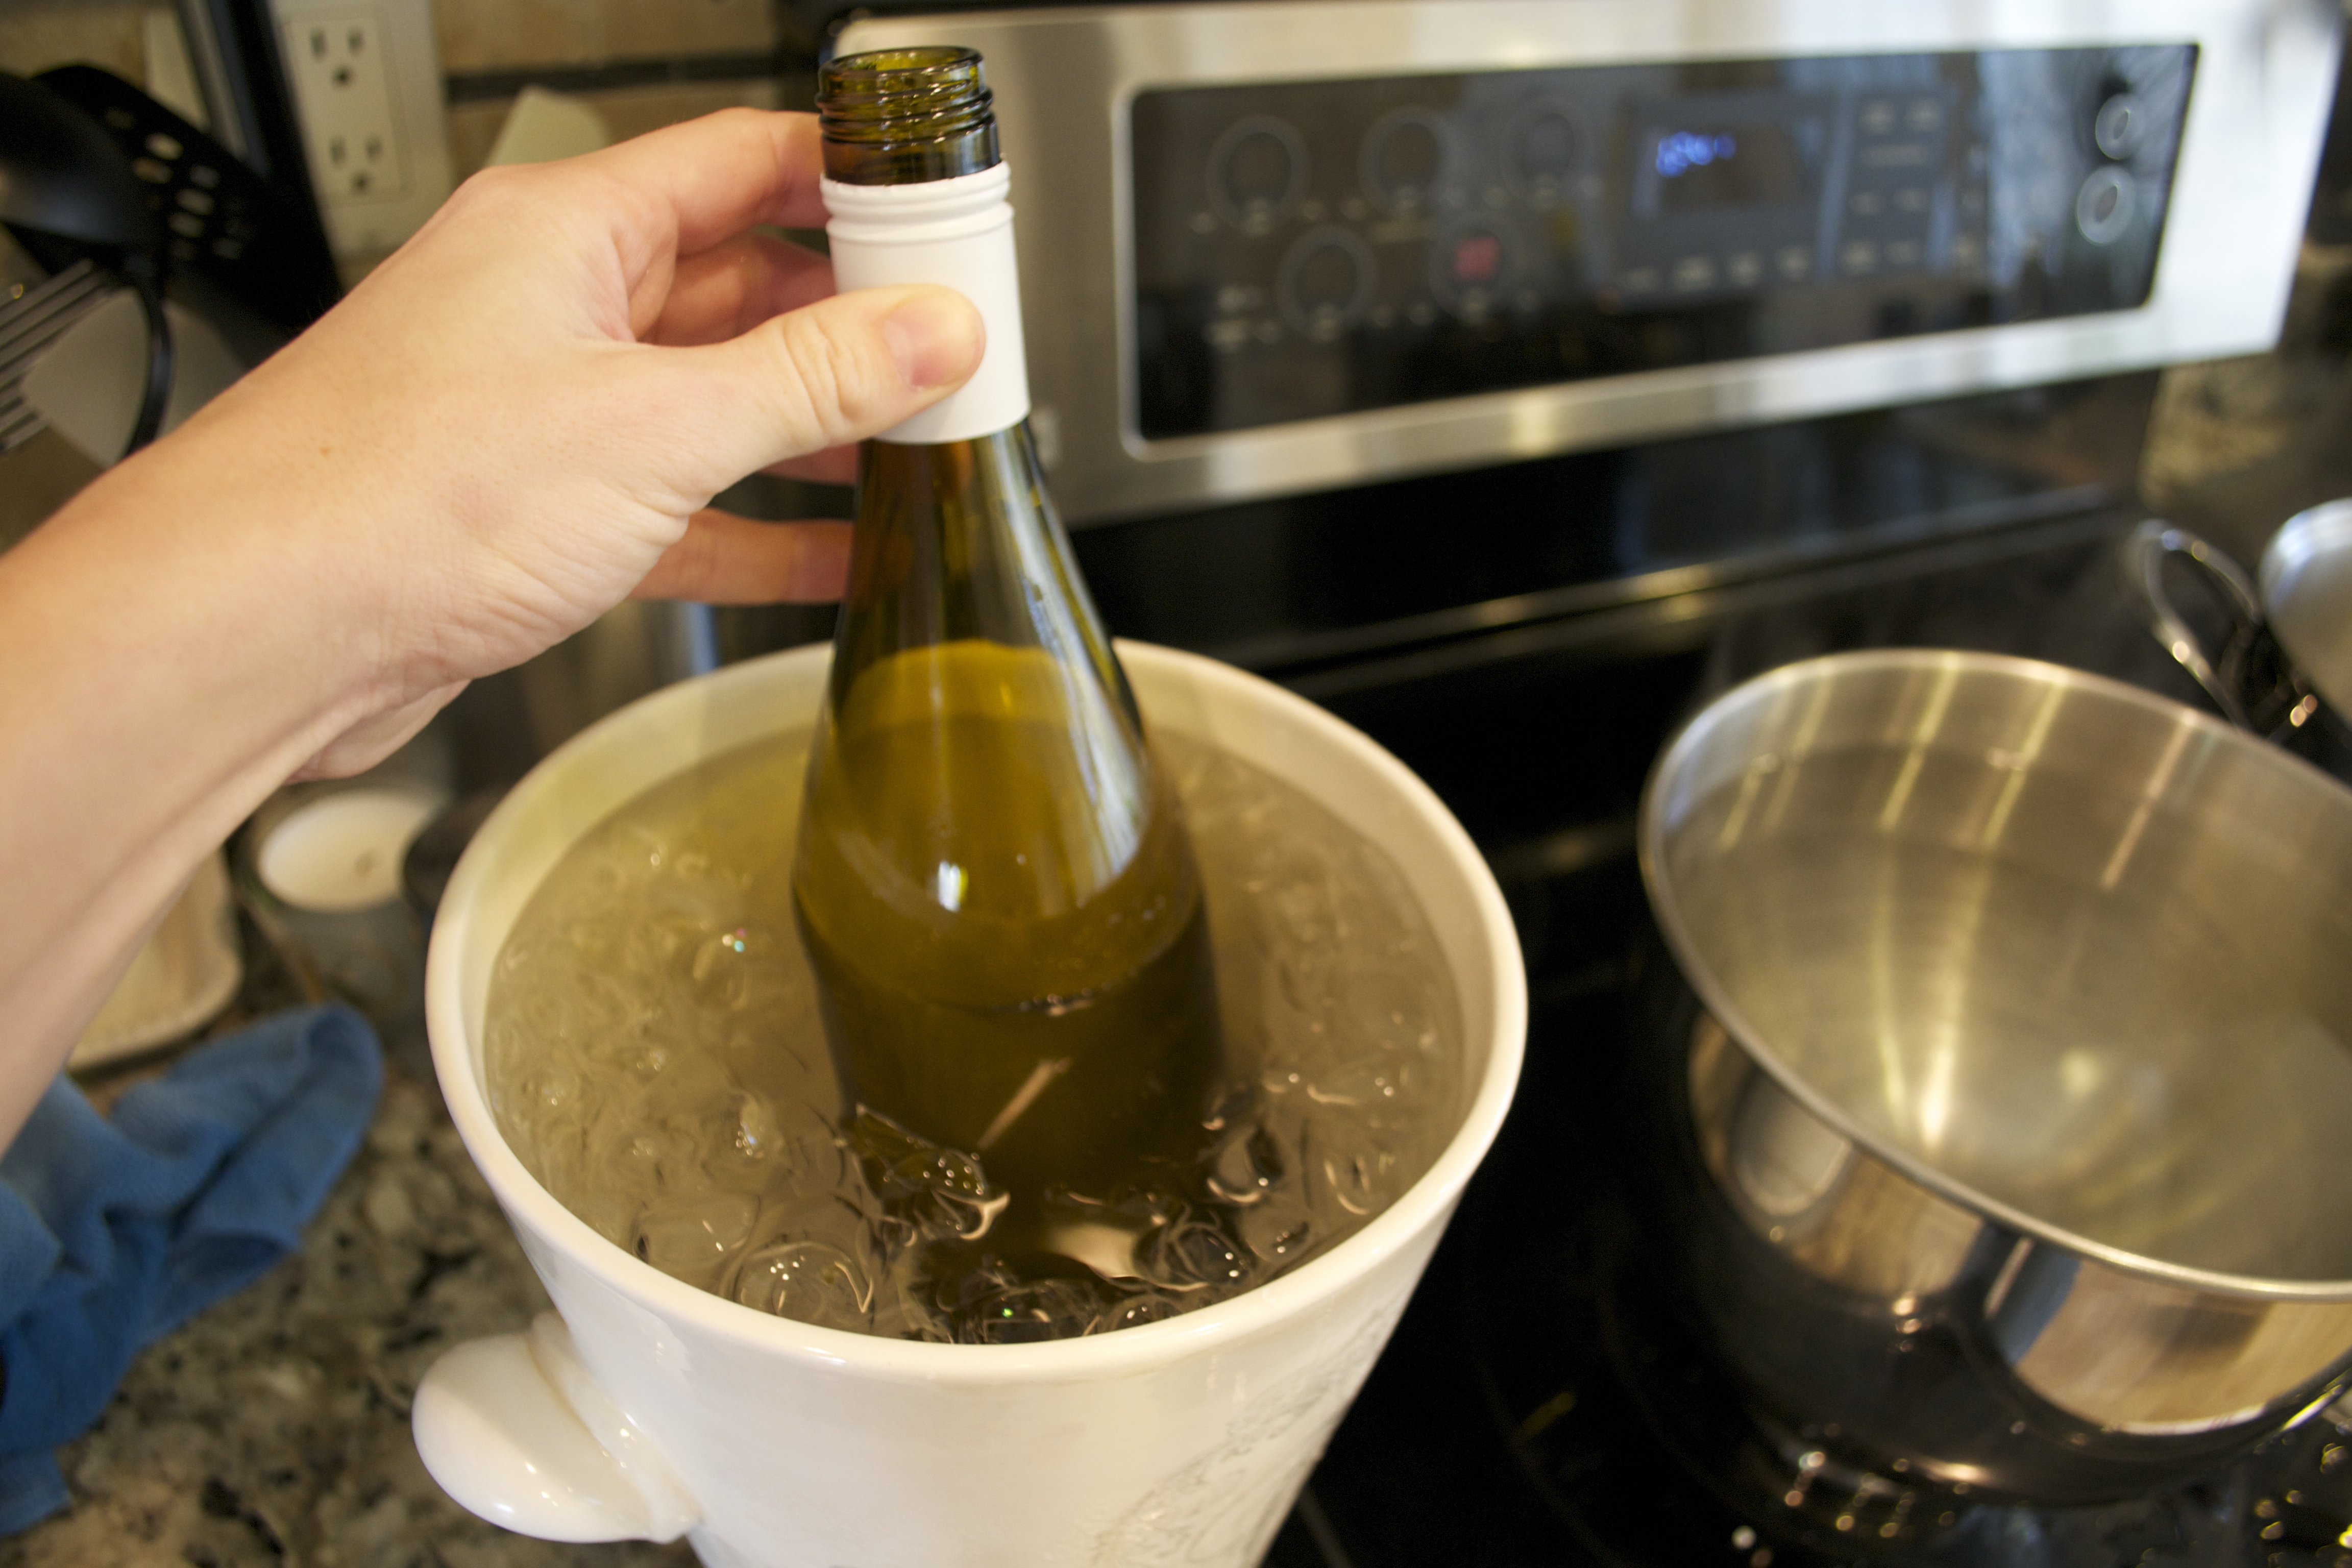
Step 5:
- Take your bottle out of the boiling water, and COMPLETELY submerge it (up to or past the score line) into the ice bucket of water for 5 SECONDS.
- You may hear a cracking noise. That is the bottle breaking at the score. It is totally normal.
Step 6:
- The bottle will most likely not break right away. Repeat steps 3 and 4, alternating between the boiling water and the ice water until your bottle breaks at the score line.
- This will most likely happen while you are taking your bottle out of the boiling water. DO NOT TOUCH IT!
- Use your tongs to pick up the bottle from the boiling water. It will be hot.
Step 7:
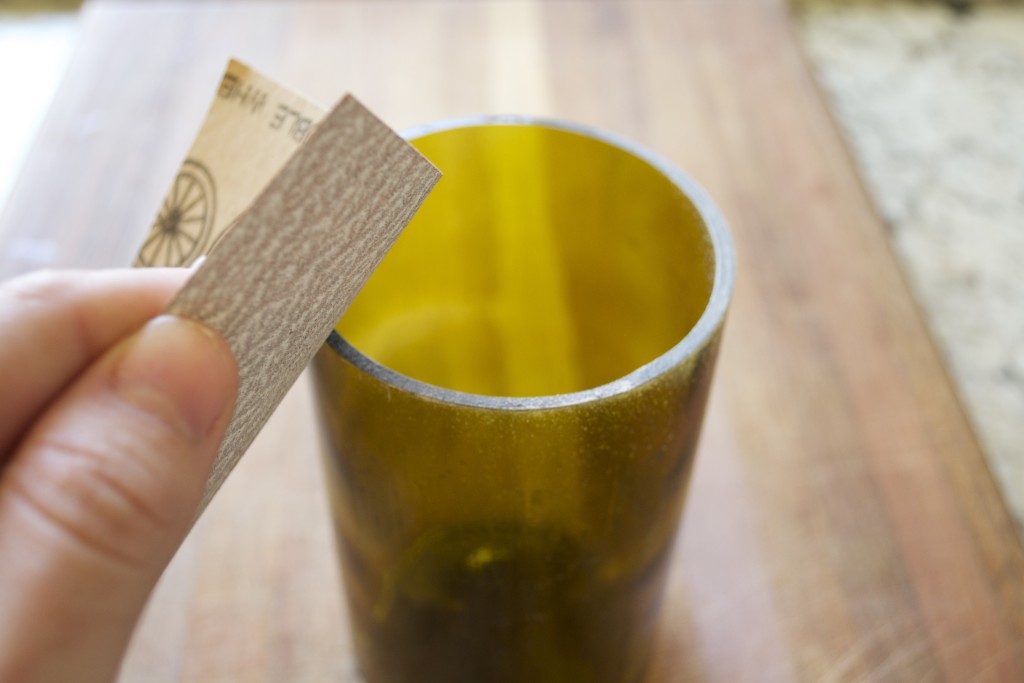
- Once the bottle has cooled, use the coarse sandpaper that’s provided with the bottle cutter to sand the edges of the cut bottle. This ensures the edges are smooth and will not cut anyone.
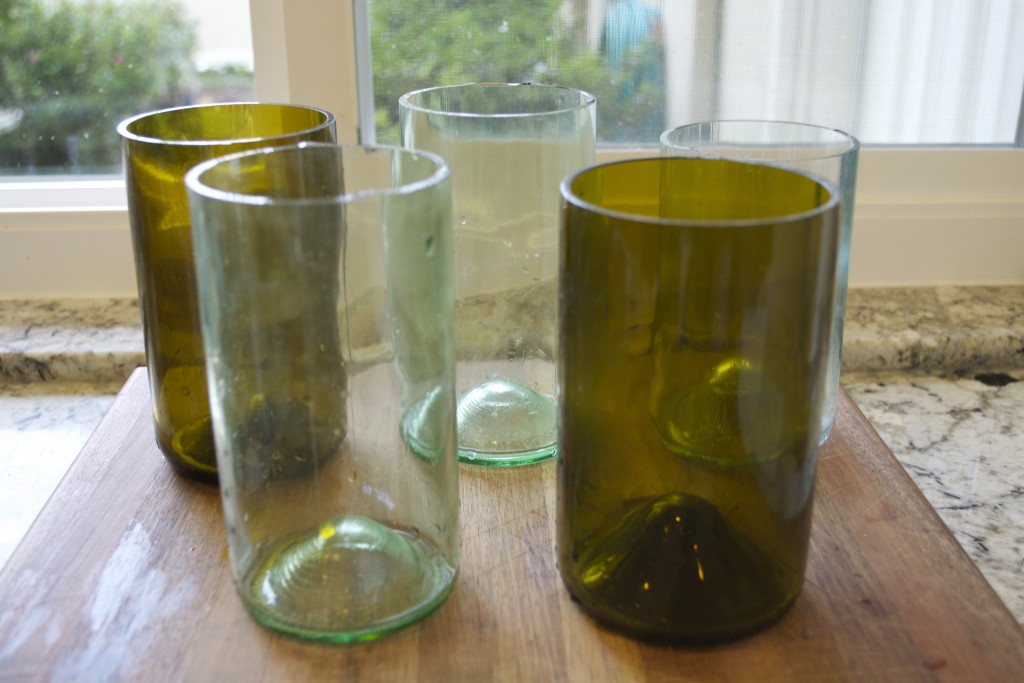
And that’s it! There are so many ways you can reuse your wine bottles with this technique. But for the Baby shower I was throwing, I wanted to use them as gold vases. Below are the steps I took to turn these bad boys into cute, Anthropologie-looking treasures.
Steps to turn Your Glass Vases into Gold Vases
The Necessary Tools:
- Spray Paint (I bought mine from Home Depot and used metallic gold. Similar product can also be found online here)
- Gold Glitter Glue and Gold Glitter
- Paint brush
Initially, I had imagined doing gold vases with pink designs. I tapes off the vases with edge lock tape and spray painted them.
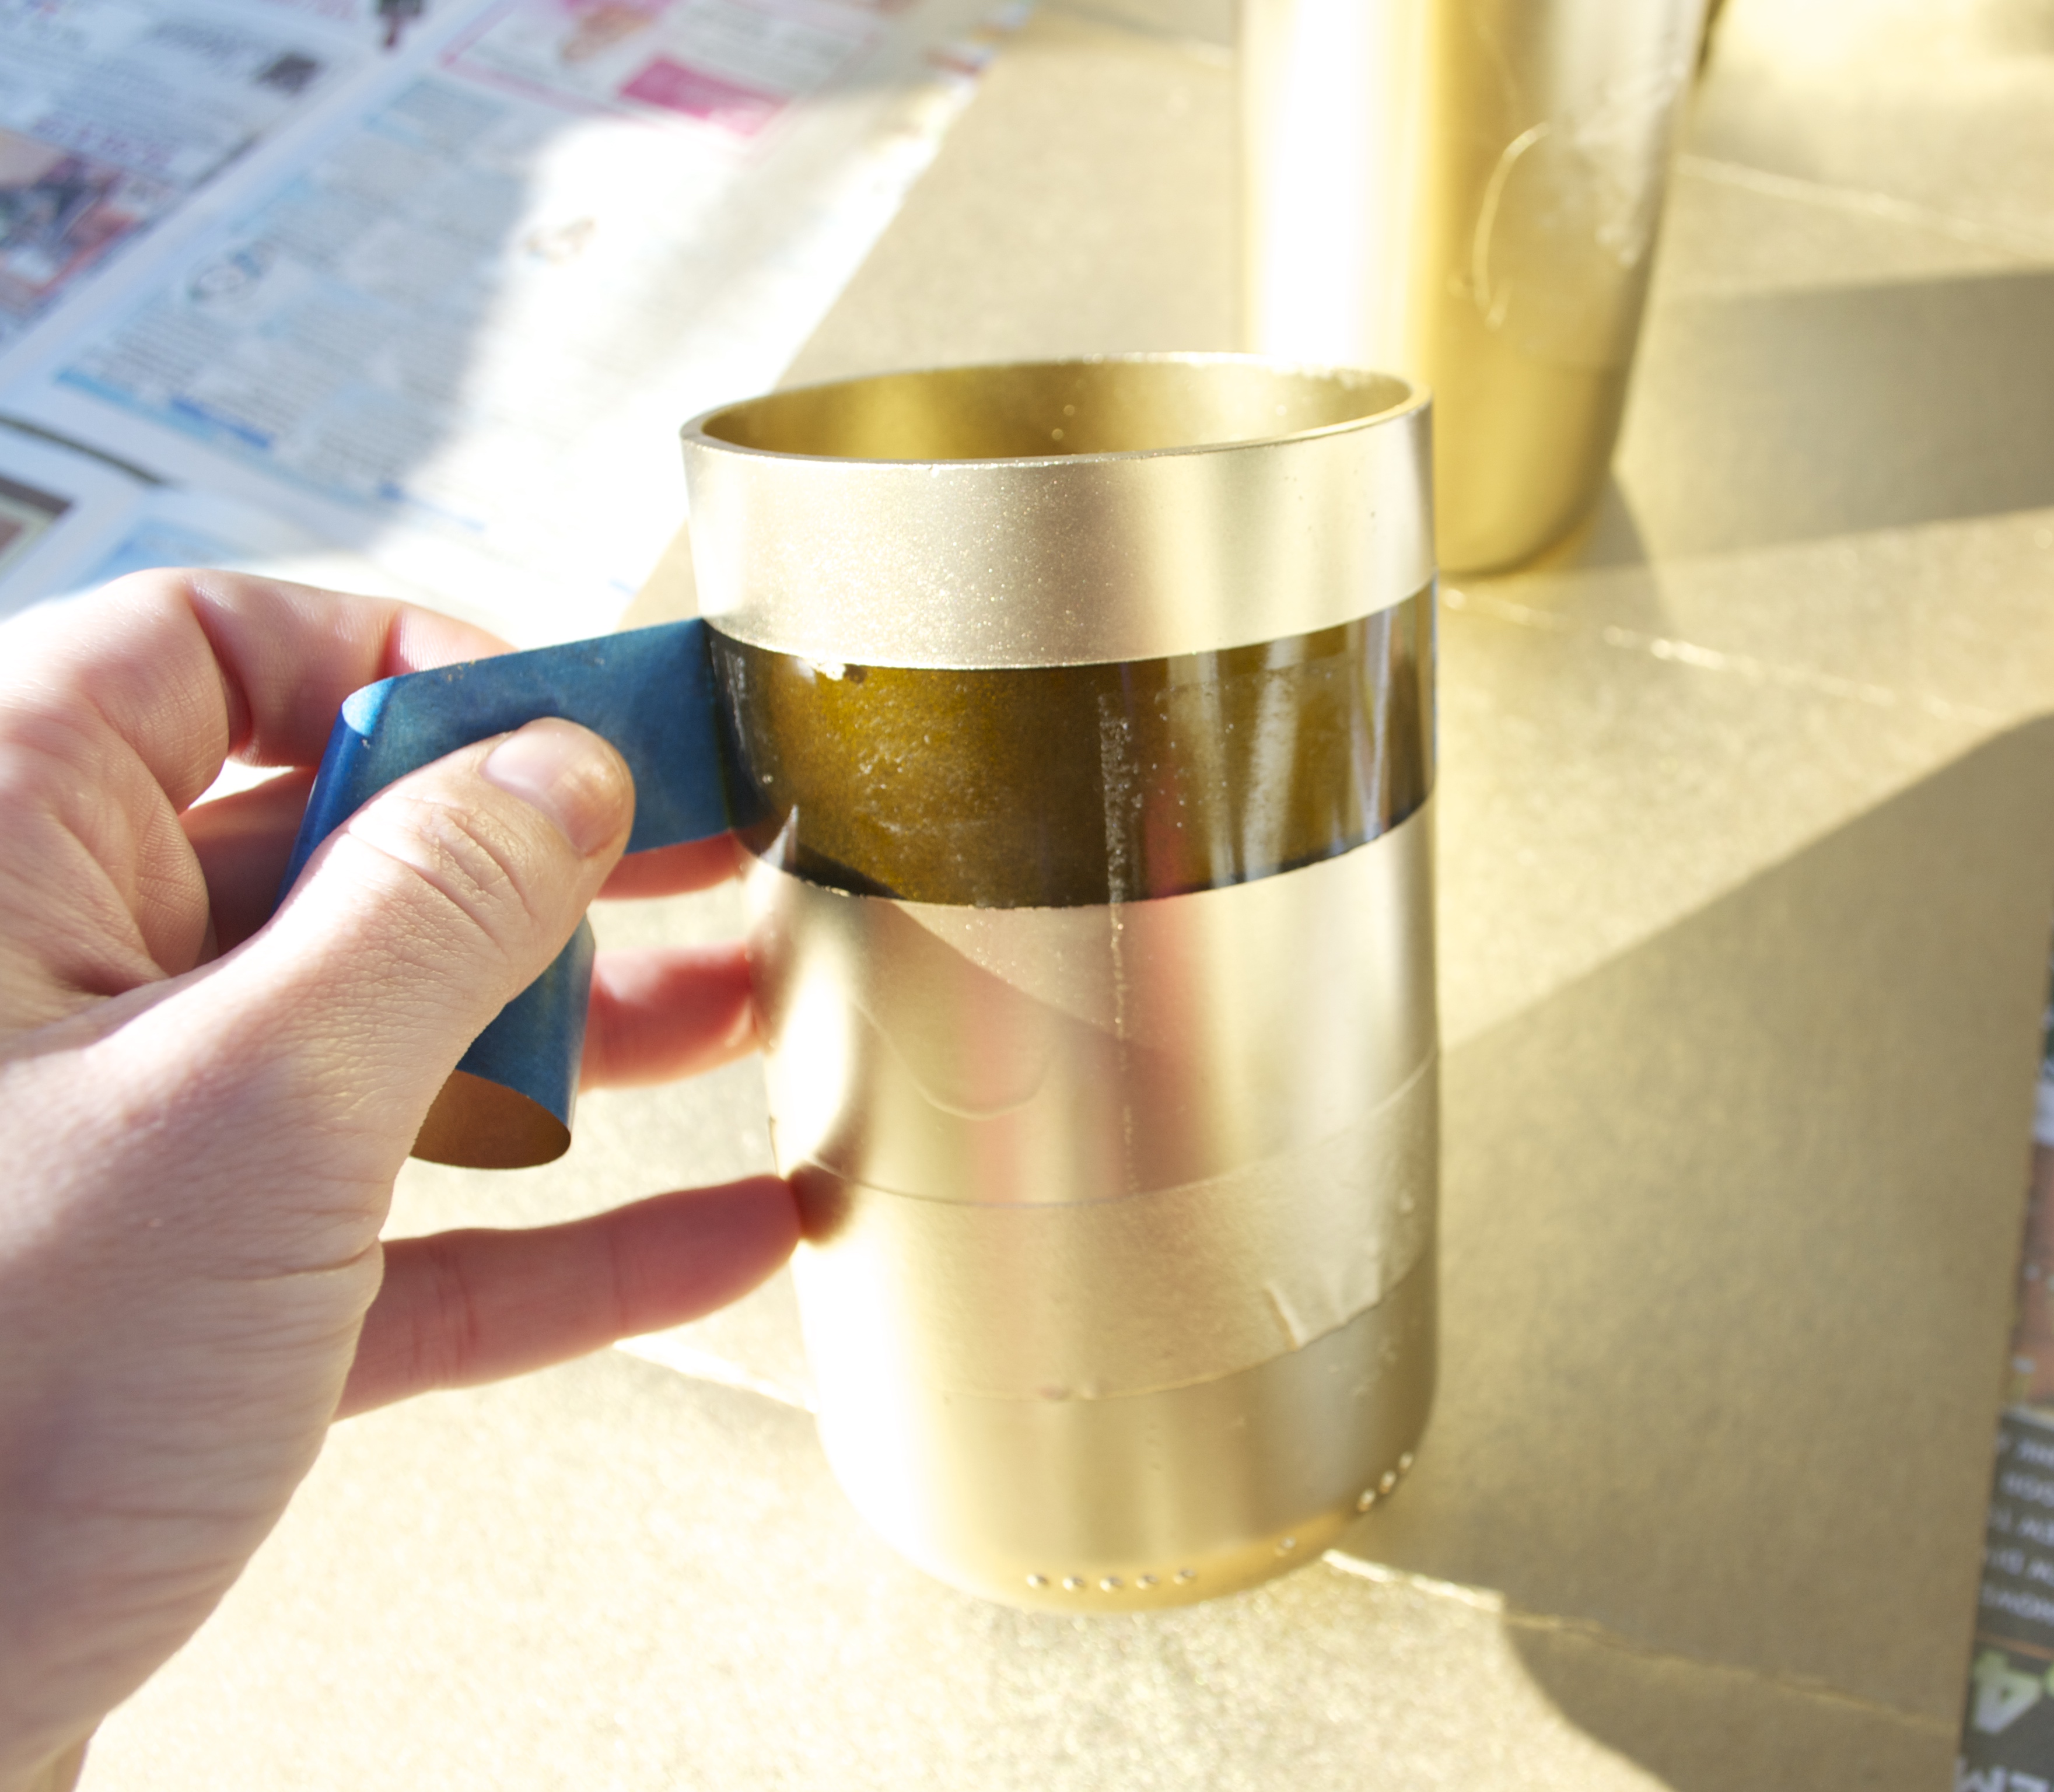
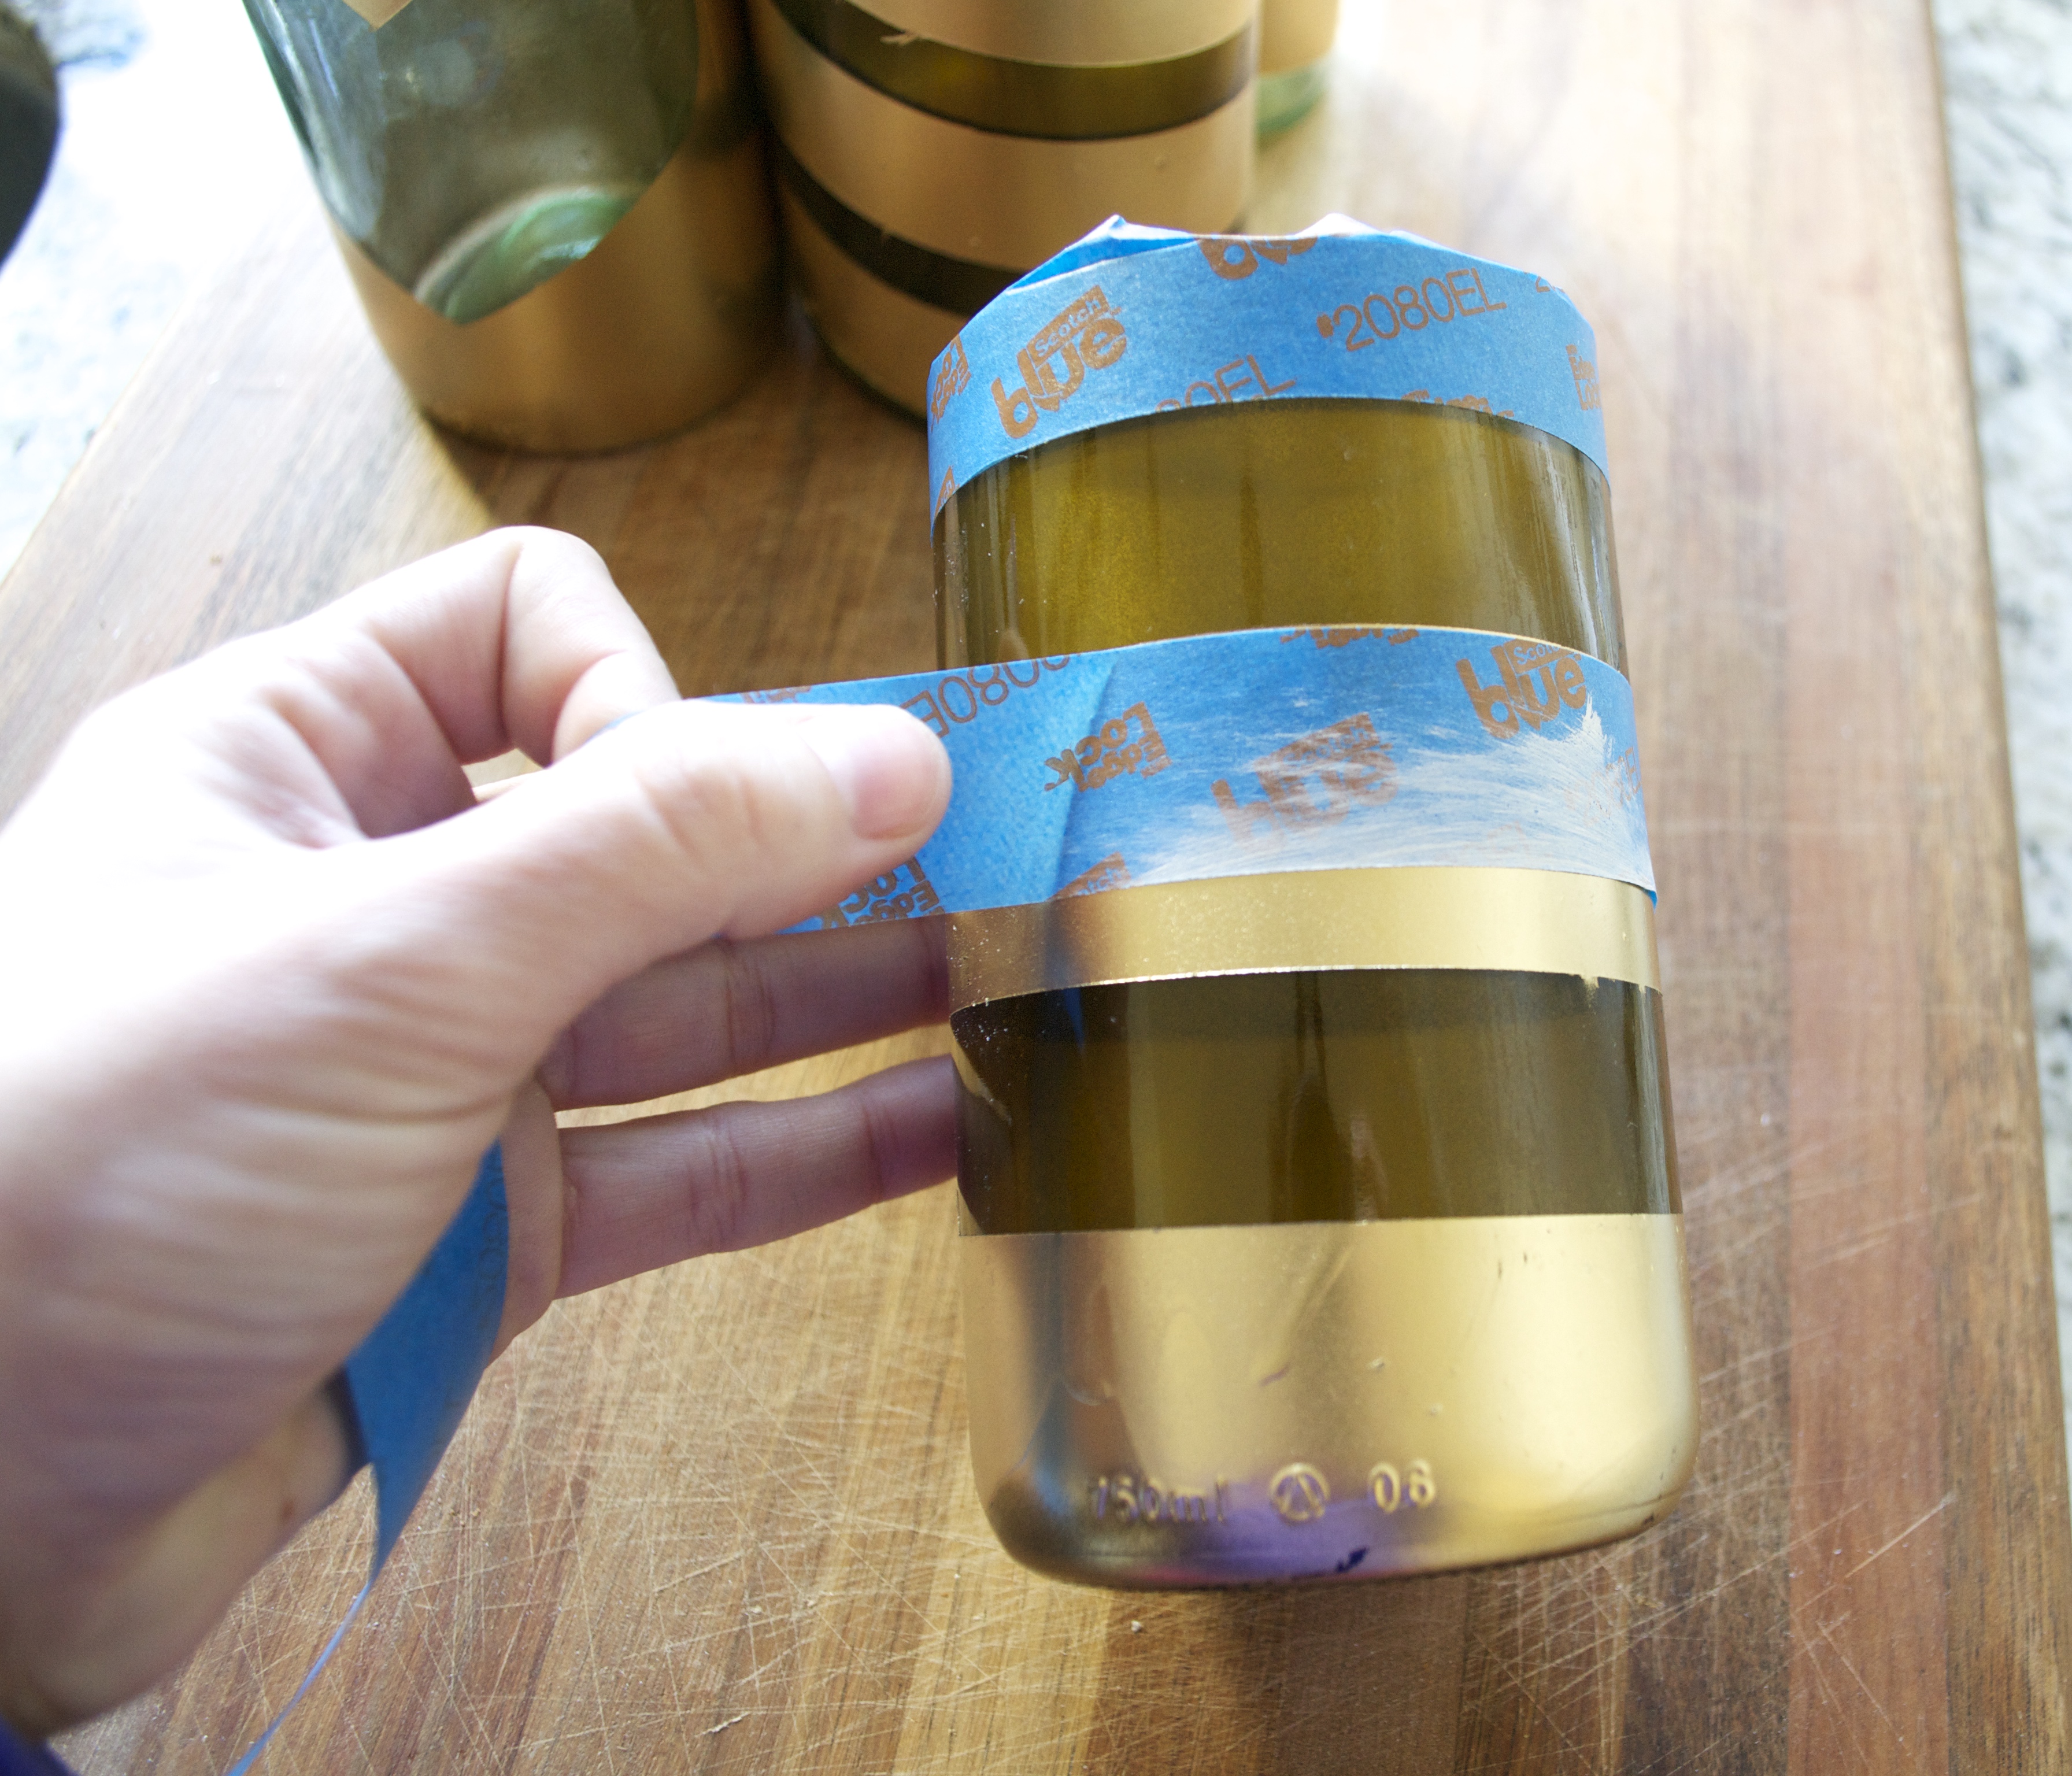
Gold at first, and then when the gold dried, taped off what was already gold and sprayed the unpainted parts pink. However, I obviously didn’t know exactly what I was doing. When I took the tape off, the gold paint had chipped off most everywhere, and the pink paint had run through onto the gold. It was a disaster.
So took all the tape off, and sprayed them completely gold. They turned out MUCH better, and looked much more chic (exactly what I was going for). I’ll eventually perfect my technique on different color designs (and I’ll most certainly let you know how I do it), but for now, solid gold it was.
Step 1:
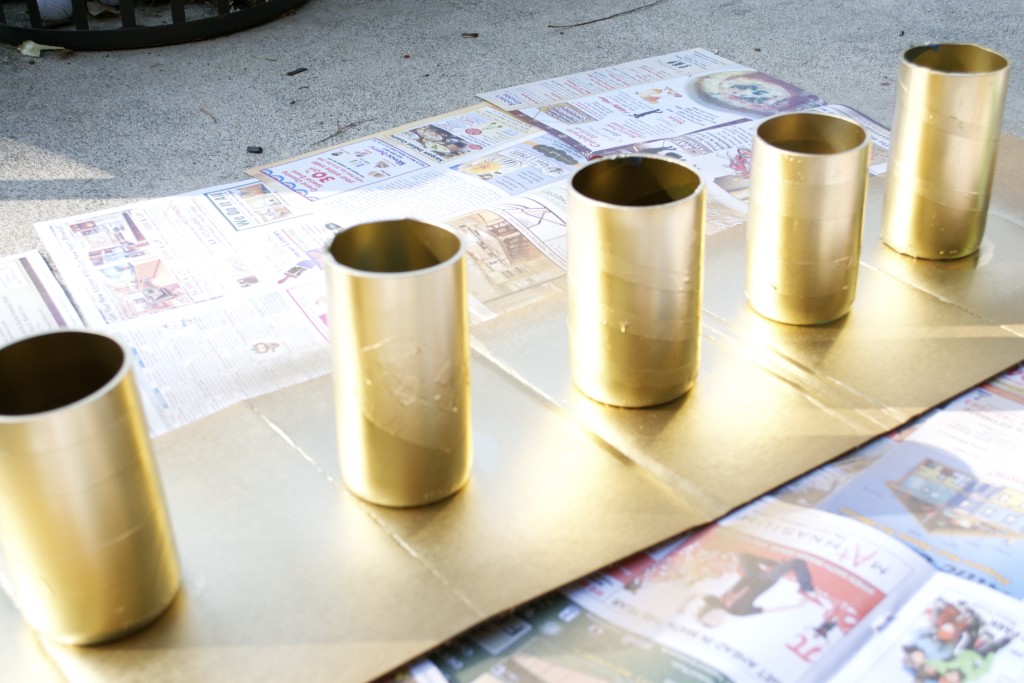
- Set up a clean area outdoors with newspaper.
- Set your cut bottles down on the newspaper
Step 2:
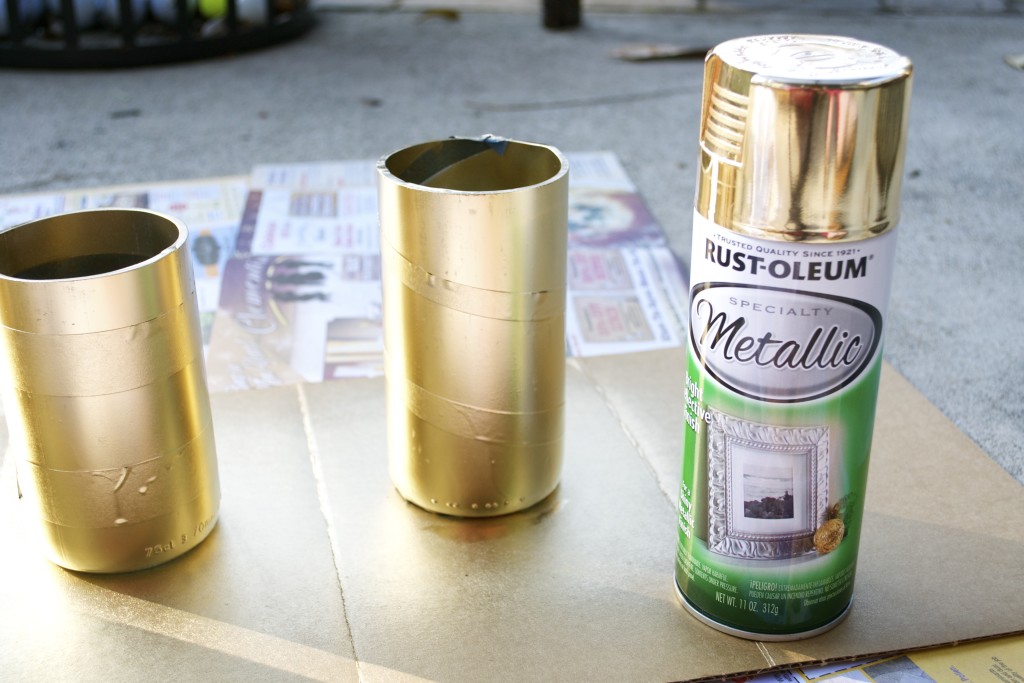
- Go to town! Spray the entire bottle (all sides) with gold spray paint. Go over them twice to ensure no spots are left untouched.
Step 3:

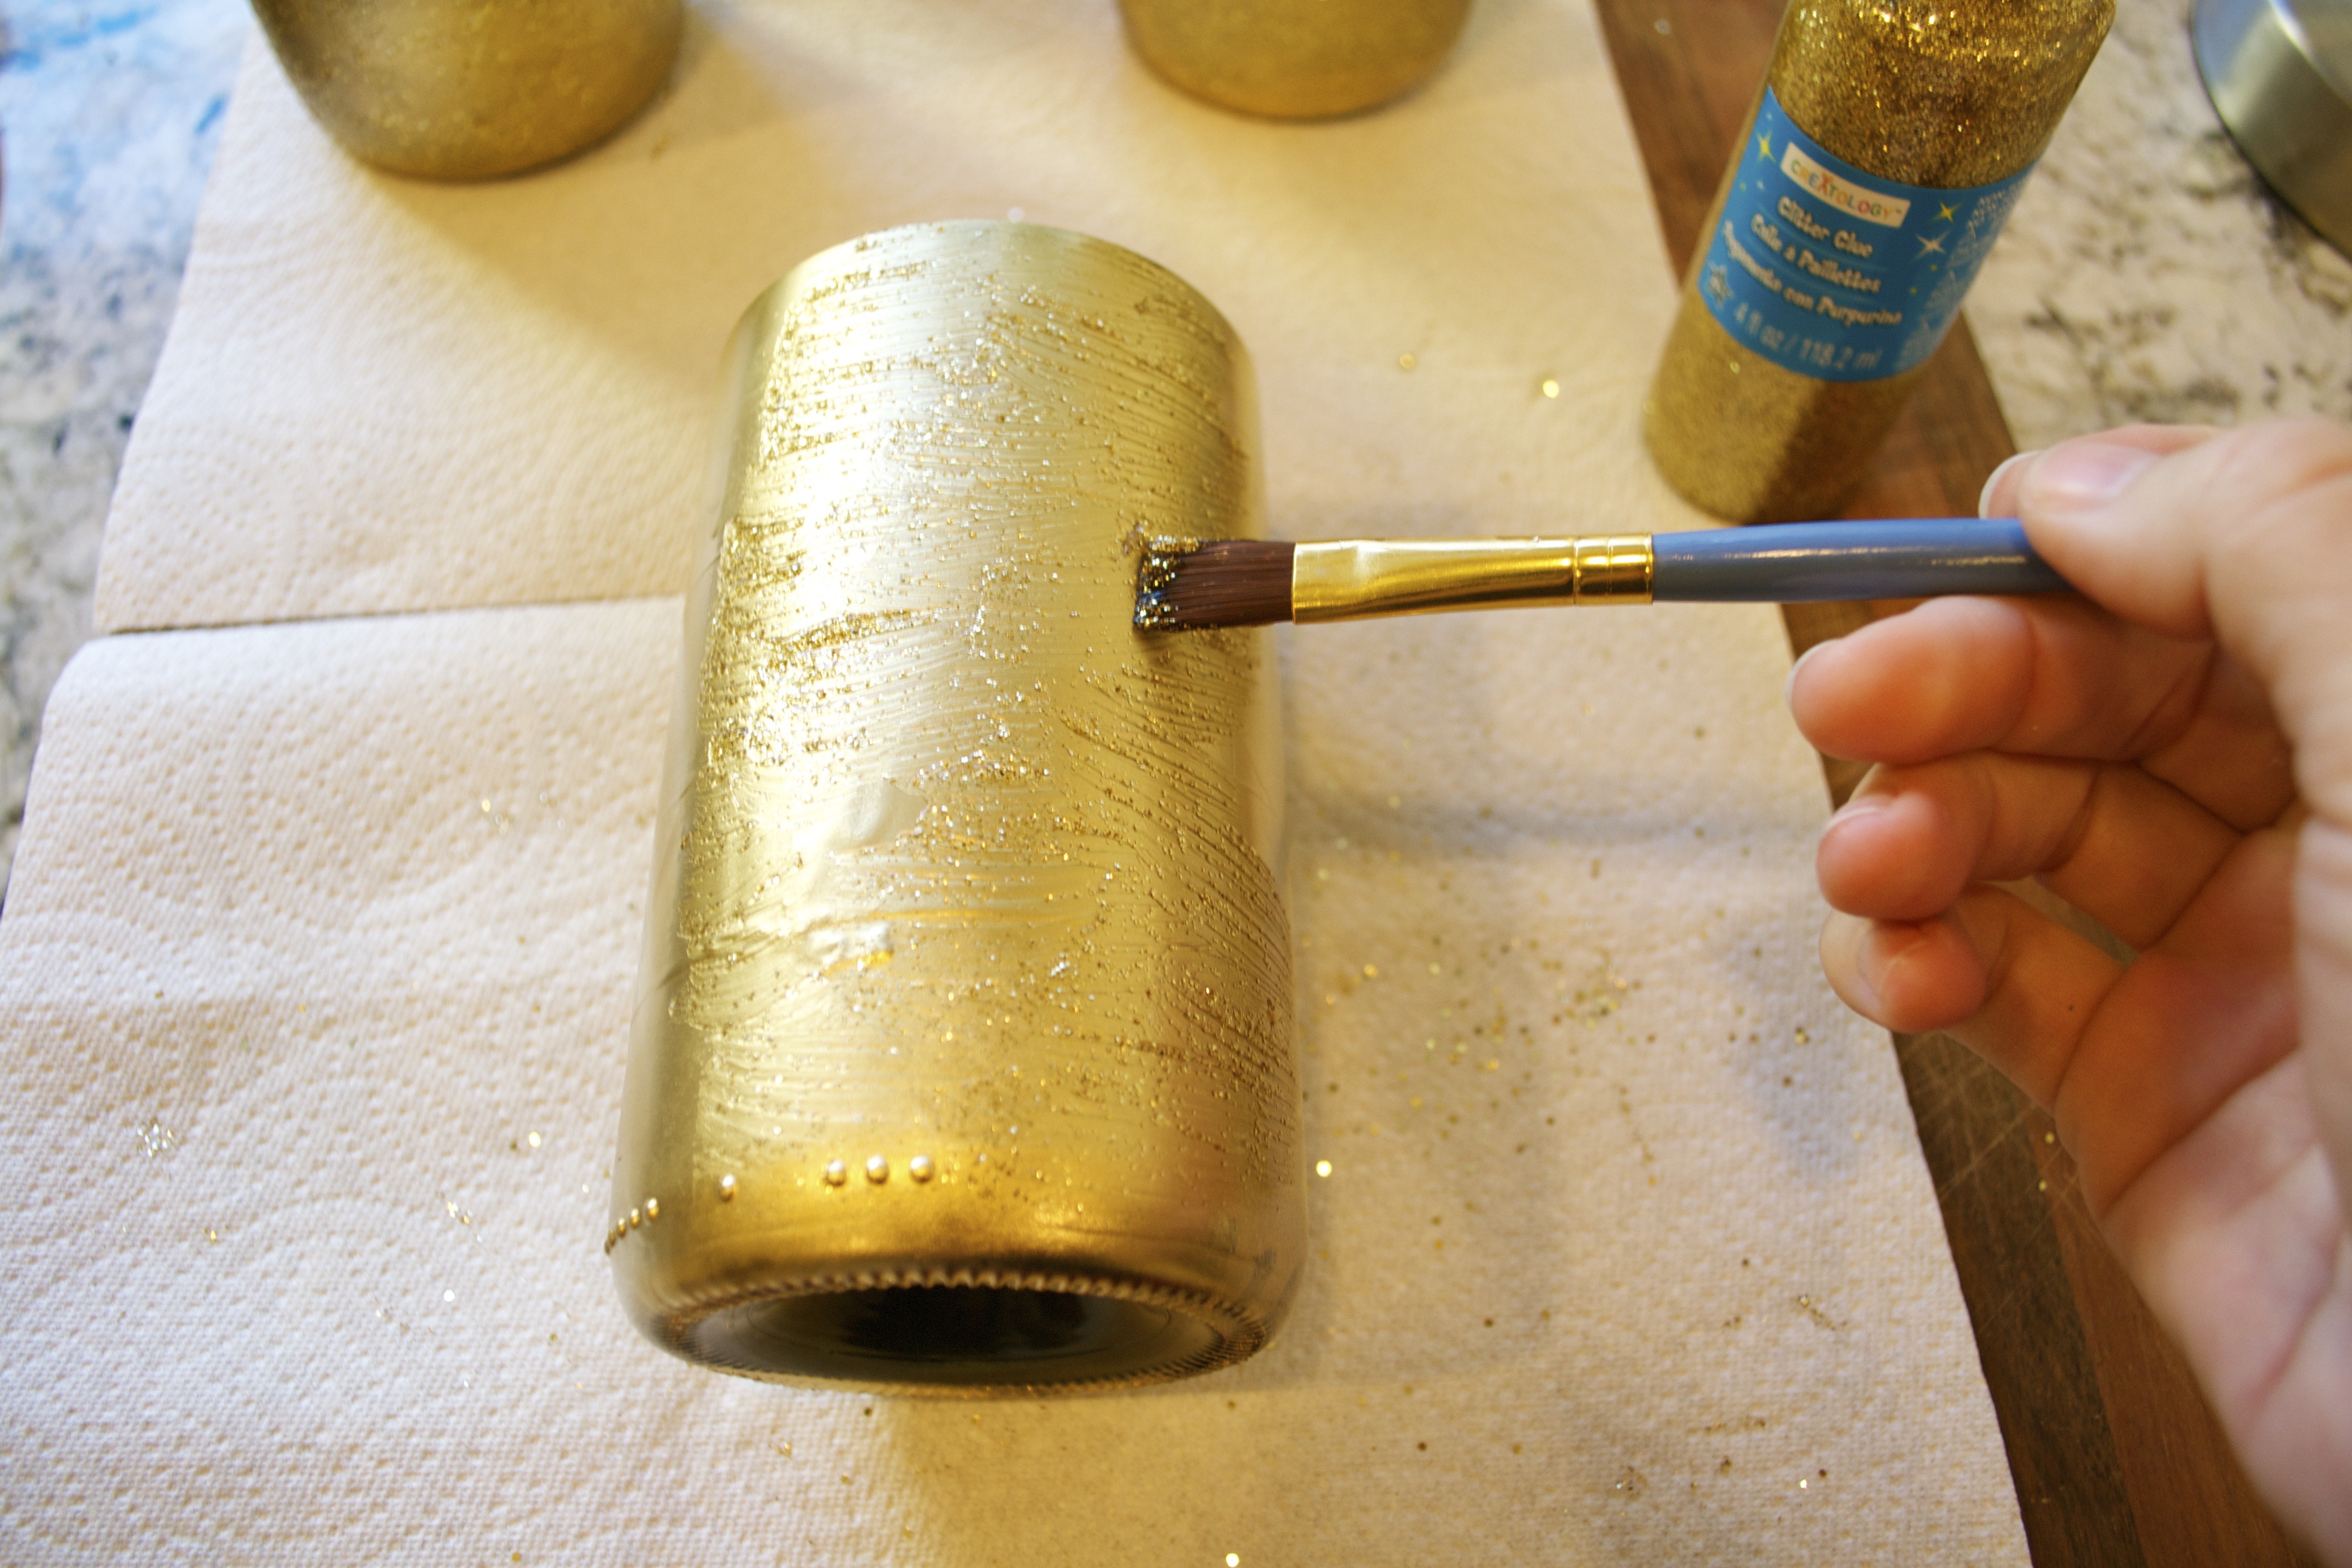
- Once completely dry (about a few hours), apply your gold glitter glue to each vase.
- Tilt and rotate the bottle as you squeeze the glitter glue onto it. Gently paint the glue evenly around the bottle.
Step 4:
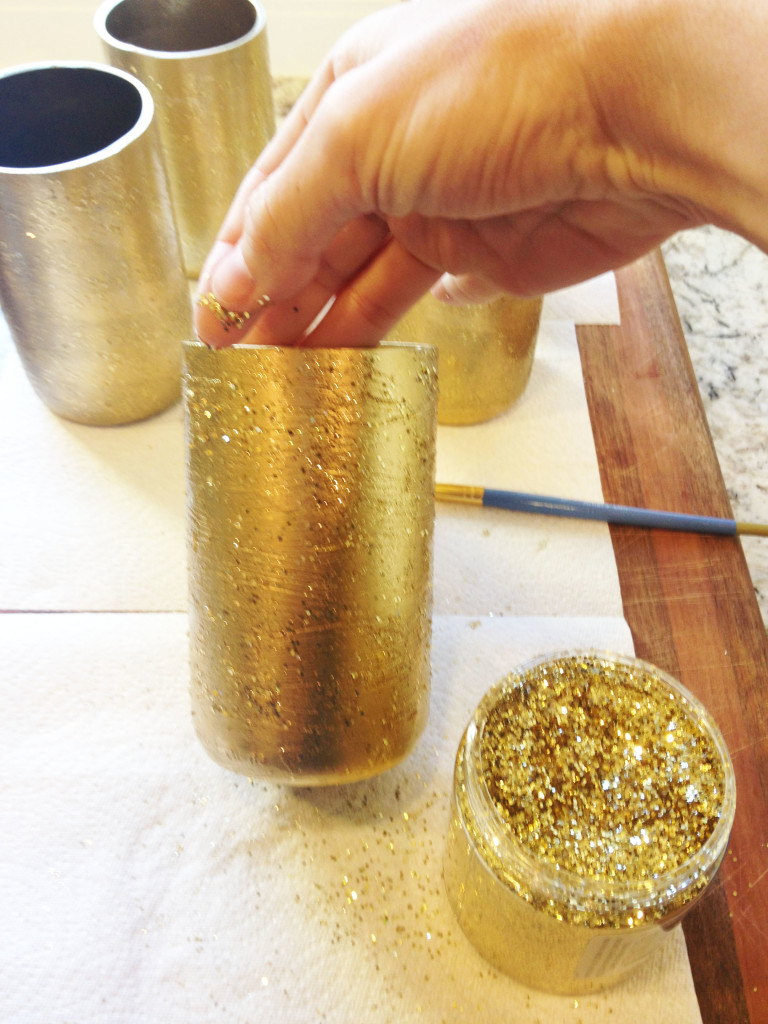
- Once you’ve painted an entire vase, and before the glue has a chance to dry, dust bits of gold glitter around the vase.
- Let dry.
Step 5:
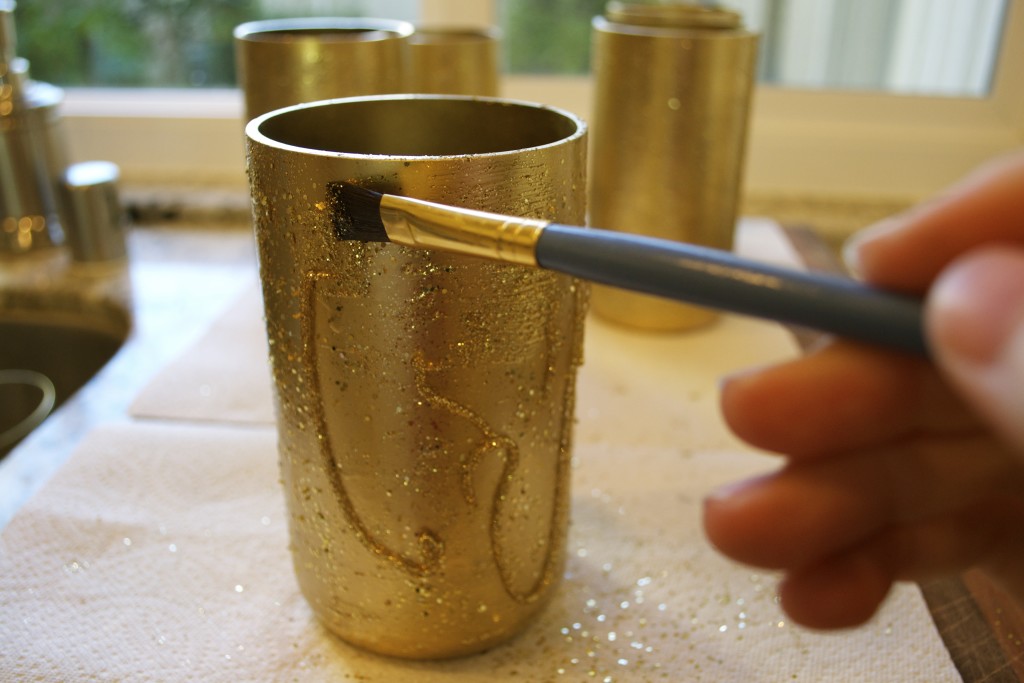
- Once the vases have dried, apply one last coat of gold glitter glue (same technique as before) around the entirety of each vase.
- This seals in the free glitter you’ve scattered around the vase, and adds one more layer of sparkle.
- Let dry.
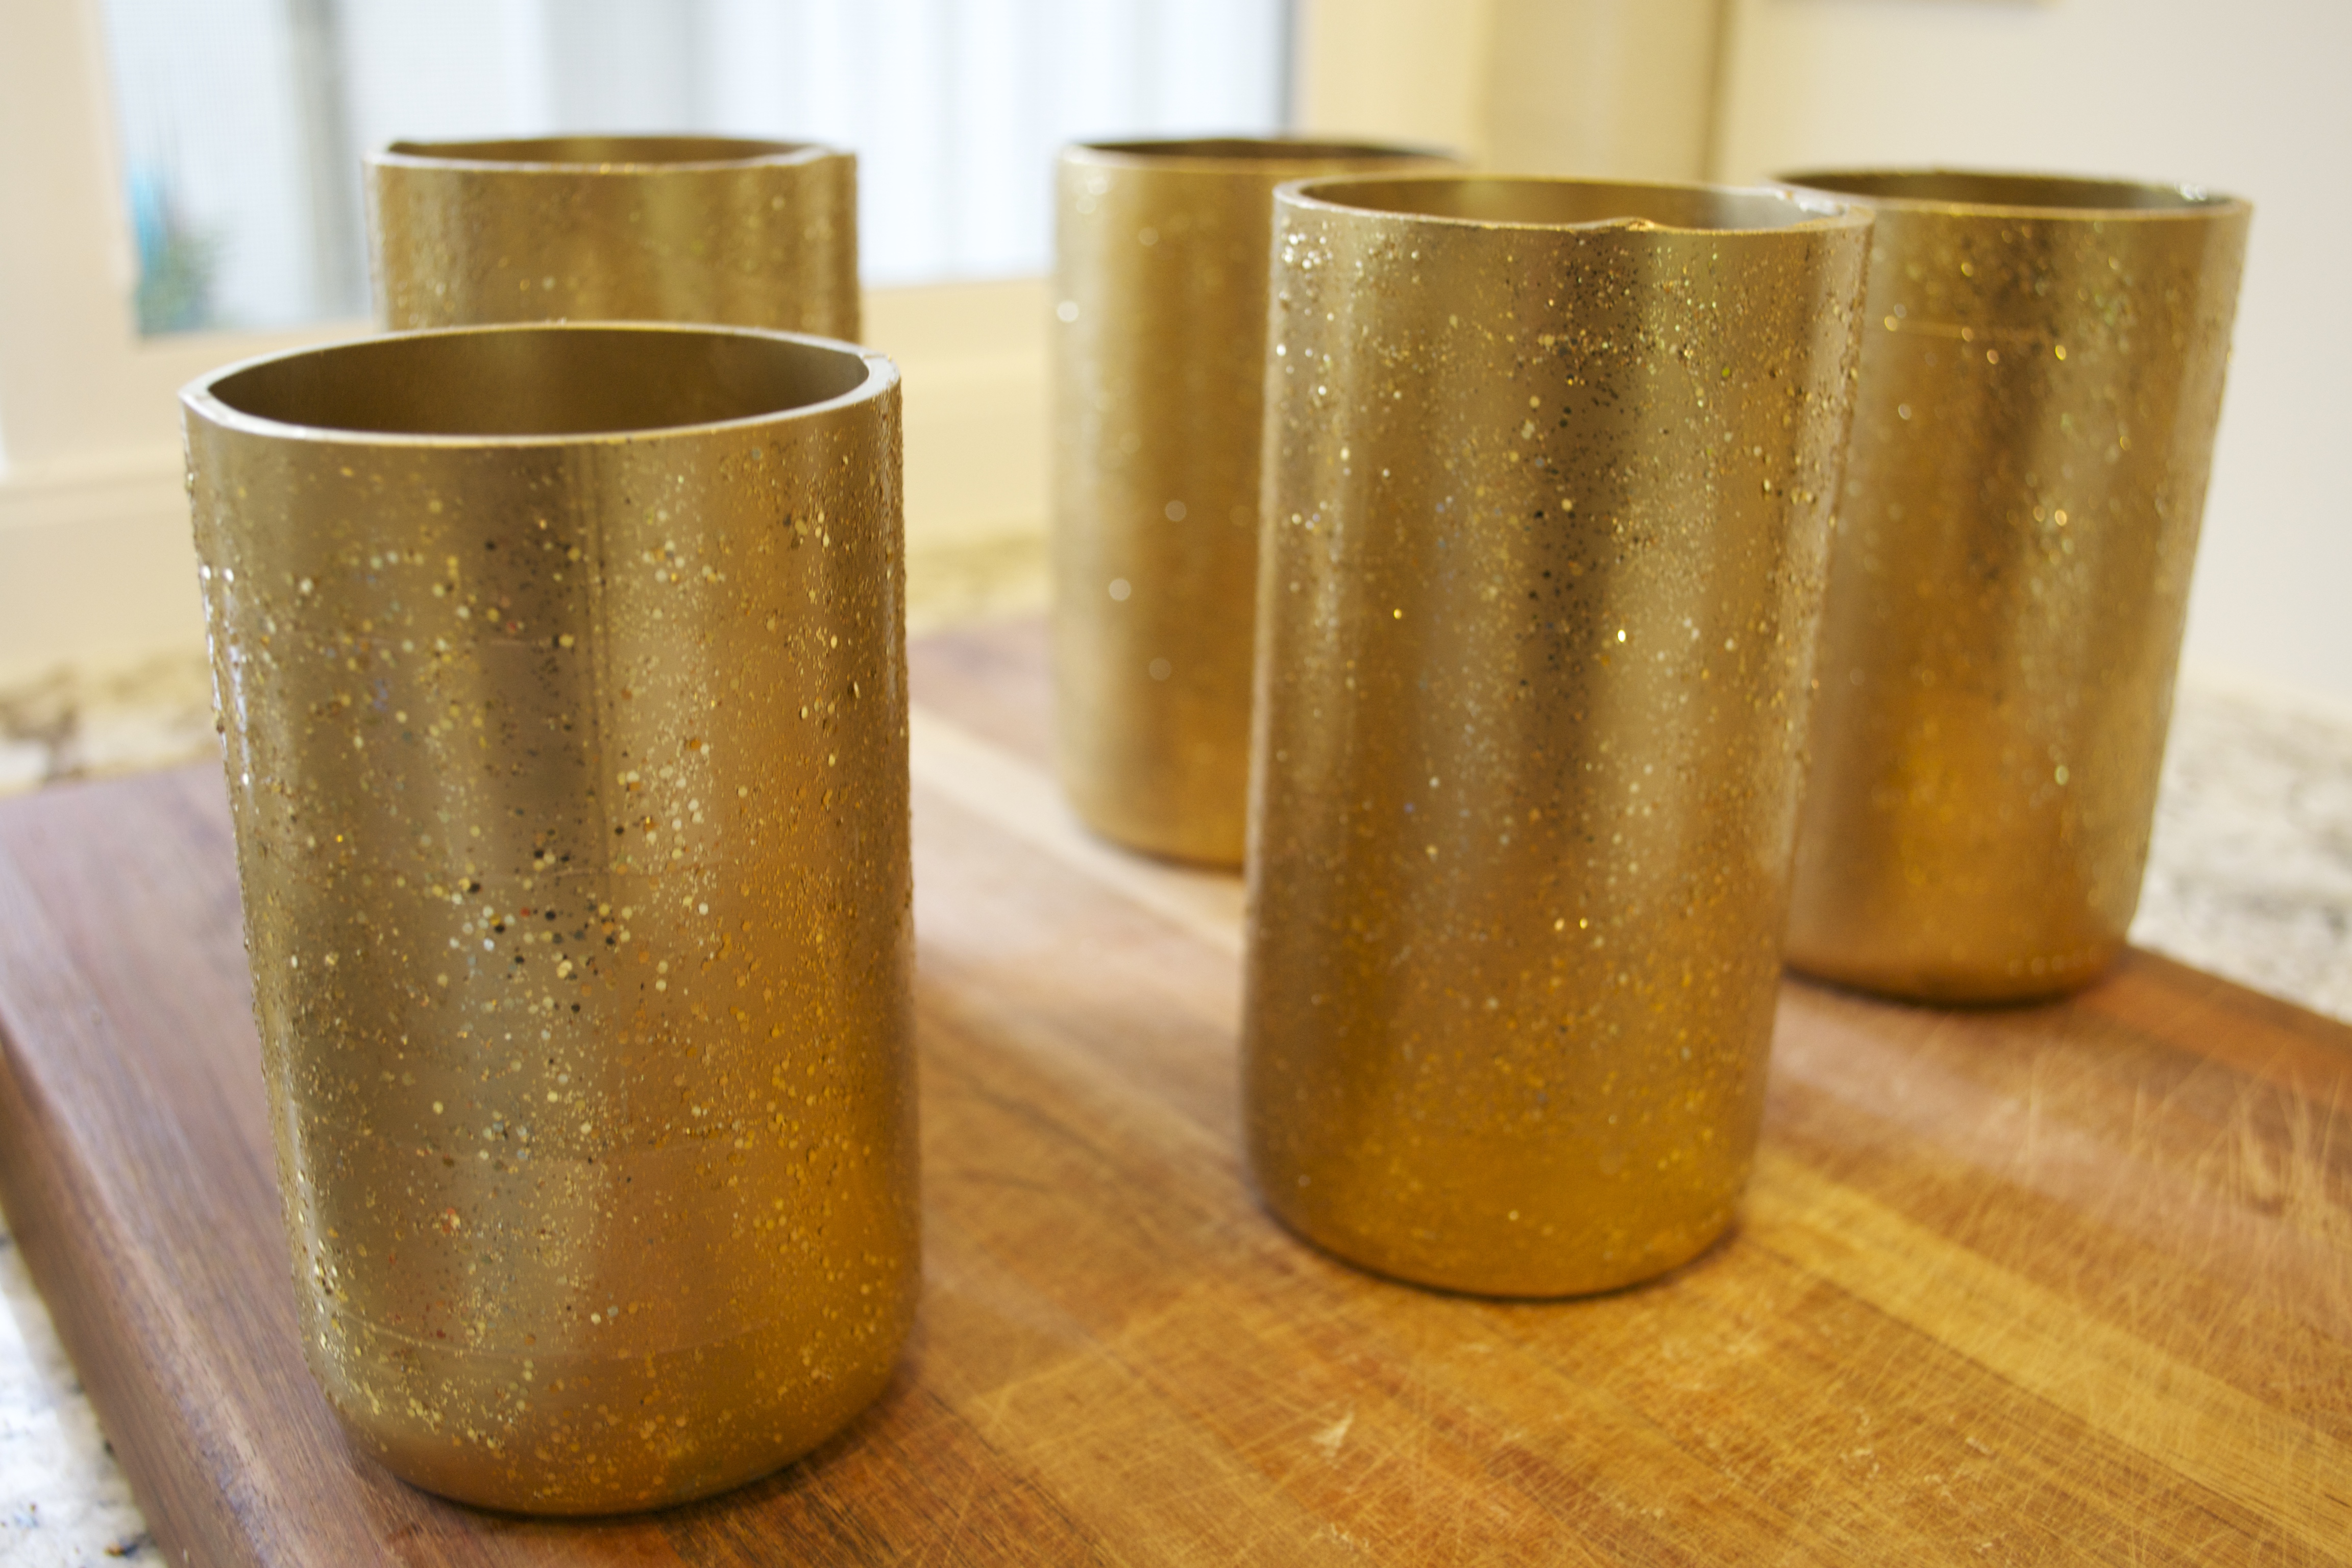
Ta da! You now have beautiful, homemade, gold glitter vases!
Ideas for Your Recycled Vases
Now, I know I’m partial to glitter. But I knew these were a hit when my husband walked into the room and commented on how cool they were. I’d done it! I’d gotten Travis to like something sparkly- hooray! If HE liked them, then I knew my girlfriends were sure to appreciate them, as well.
And you don’t have to use gold. If you like the glitter idea, run wild with different colors. Follow the same steps, just with the color palette of your choice. You can even mix it up, too. Paint them pink with red glitter, or green with blue glitter, with glitter alone, or with no glitter at all.
If you don’t paint the bottle entirely, or have flecks of bottle showing through your paint/glitter, you can put a tea candle inside and use them as candle holders. These make GREAT hostess gifts, too!
In a few weeks, I’ll show you a couple more things you can do with these bottles to reuse them. Not just as vases either…. There are so many things you can do with a wine bottle. So don’t throw yours away, just yet 😉
And if you need a recap of the supplies to DIY, here ya go:
Wine Bottle Vases:
- Wine Bottles (FREE if you drink wine. If not, you can buy them extremely cheap here).
- Bottle Cutter
- 2 LARGE Pots (large enough to completely submerge your wine bottle up to the neck)
- Pair of tongs (to handle the bottle once cut)
Gold Vases:
- Spray Paint (I bought mine from Home Depot and used metallic gold. Similar product can also be found online here)
- Gold Glitter Glue and Gold Glitter
- Paint brush
God i love your blog!
I will have to try this.