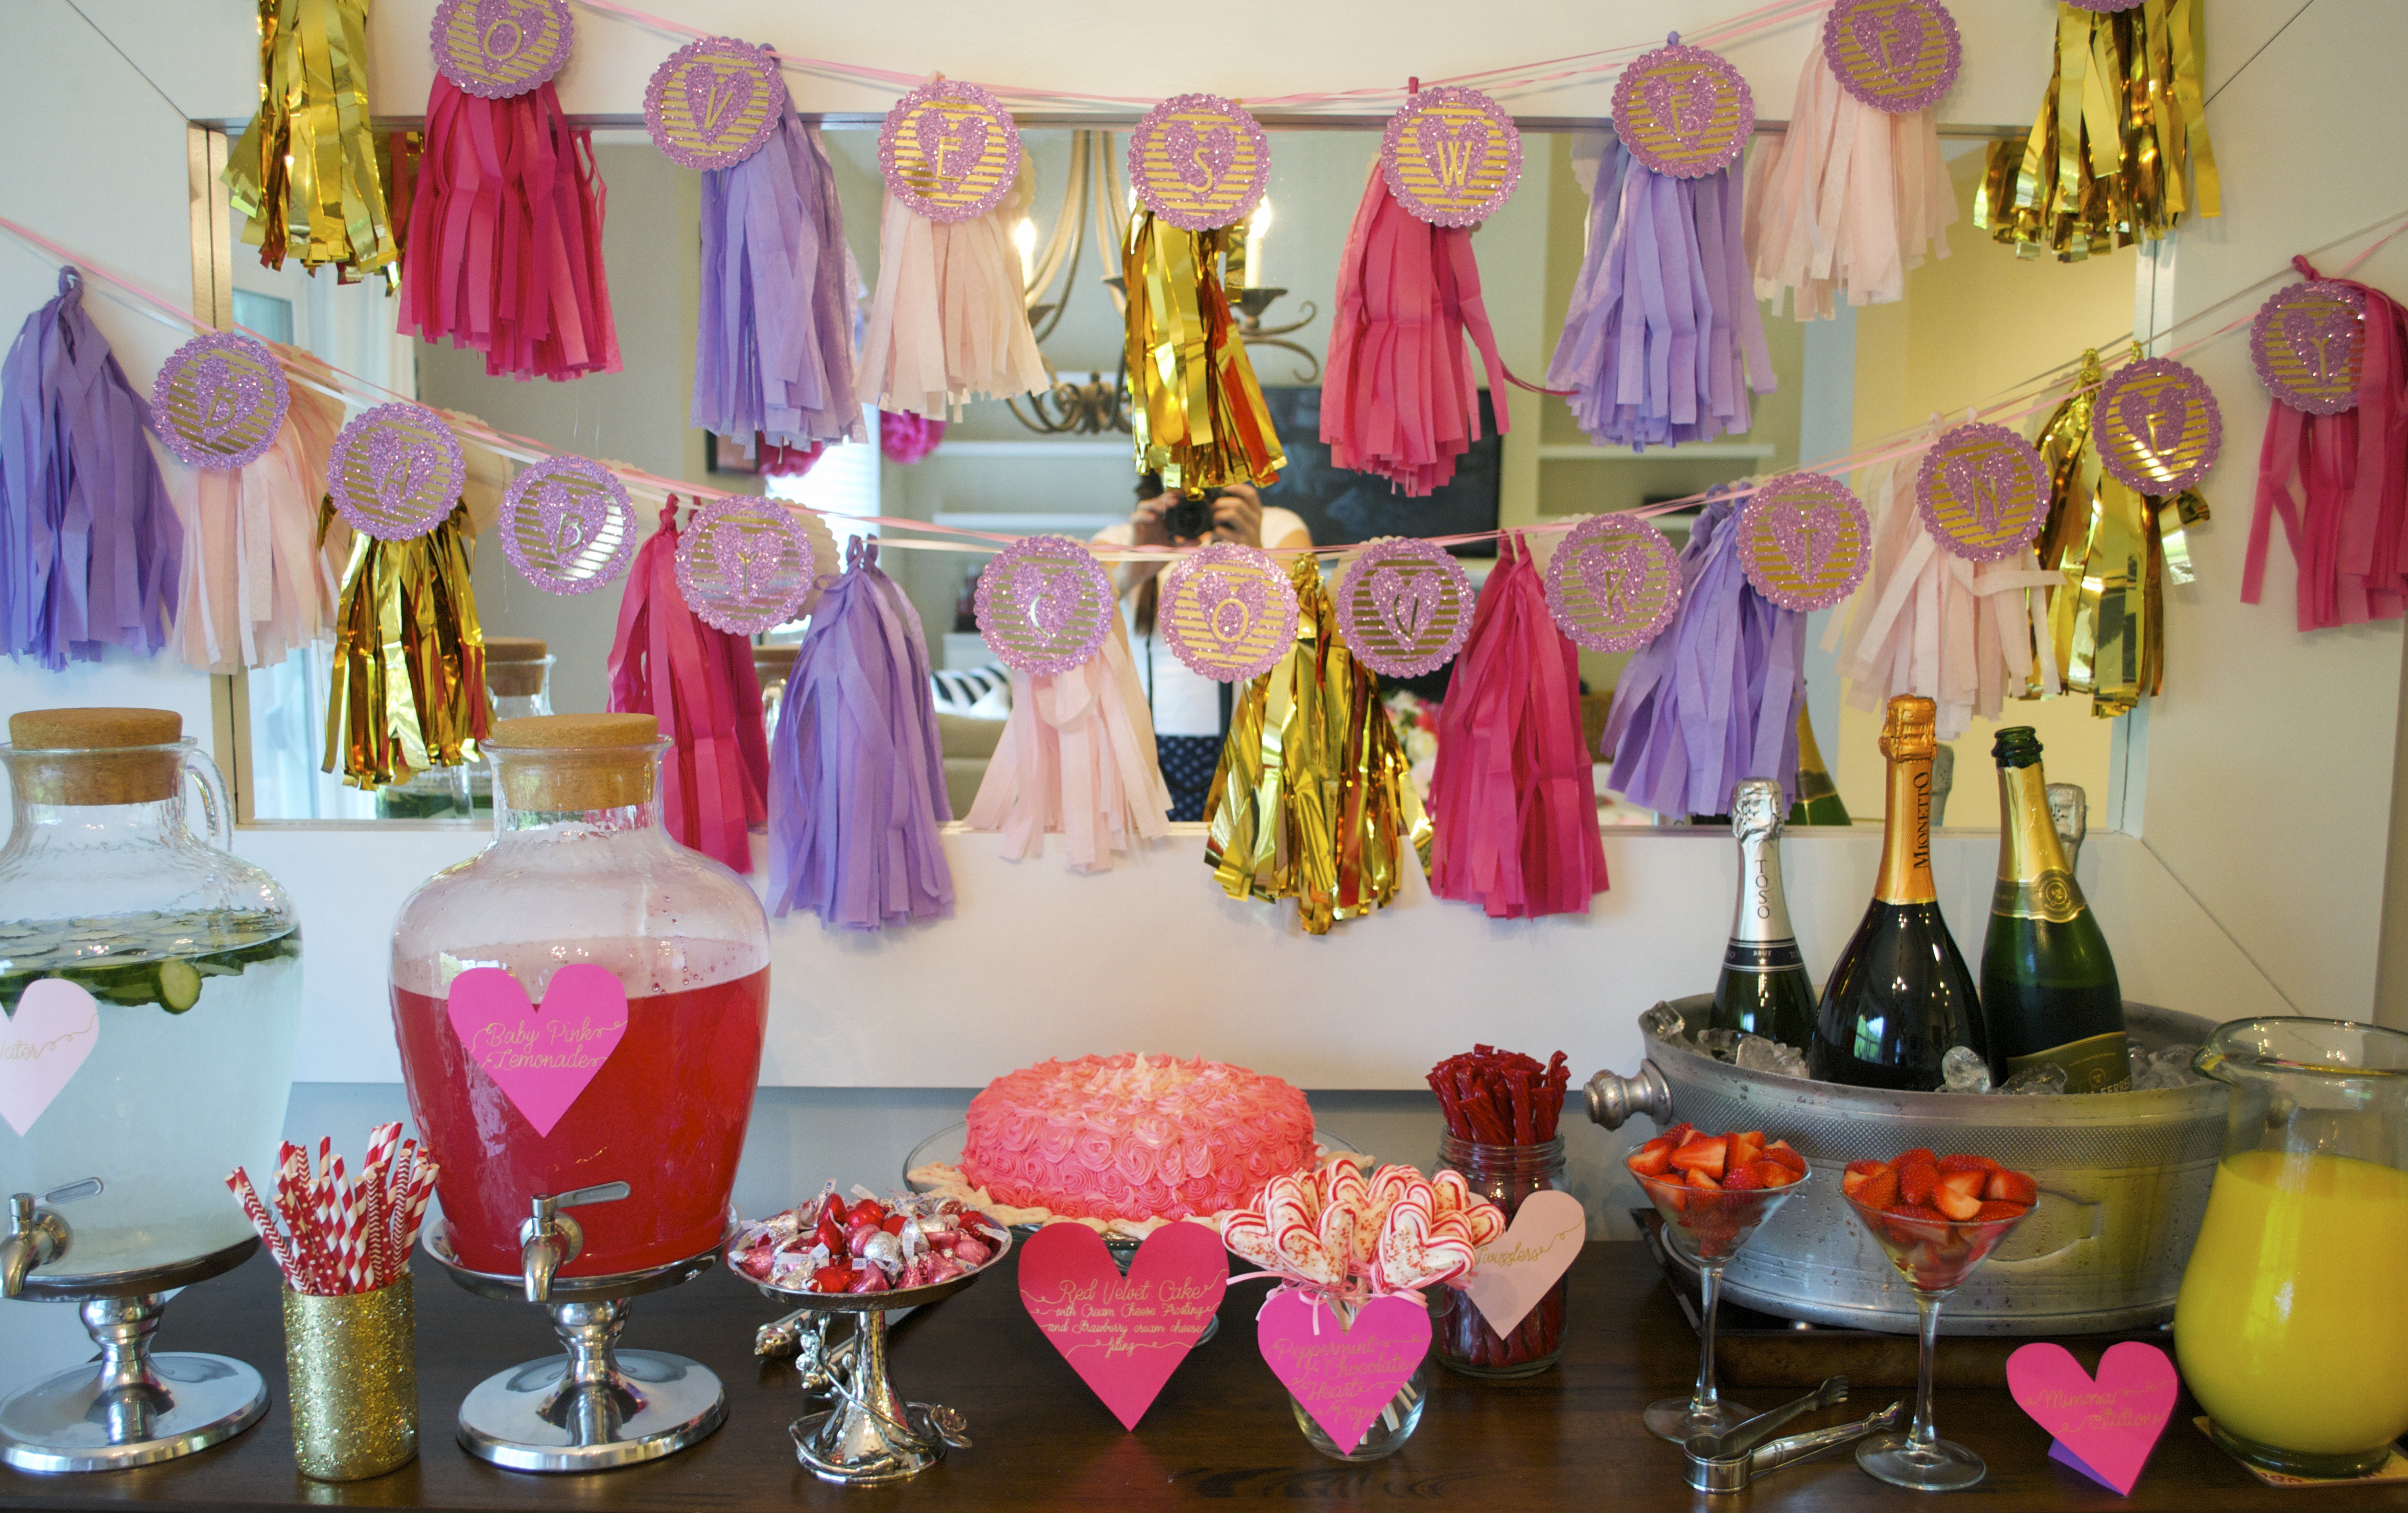
Oh baby! So many posts lately about the fun-filled baby shower I threw for my friend Kendra the weekend before Valentine’s day. If you’ve been reading along with my last couple posts, it was Valentine themed… I called it “Baby Love”. So many shades of pink, red, purple and gold to welcome baby girl Courtney into this world.
If you haven’t been reading along, I’d suggest you take a look at my overview of the party, as well as my 3-D heart garland tutorial. Both give you the insight you’ll need to see how special the day was.
If you have been following, kudos to you! You probably get by now that I LOVE crafting. It’s partially because really enjoy making things by hand, and partially because I don’t like paying retail for ANYTHING.
The decor for this party was no exception. As I mentioned with my 3-D heart garlands, nothing compared to them in retail stores. And if I were to get something similar, it would have cost me around $150. For mine, I spent $7 – another reason why it’s so great to DIY!
Same thing went for custom baby shower banners. I wanted something pink and sparkly to hang from a large mirror that I have on the back wall of my dining room, and I wanted it to be customized for baby Courtney.
I found some similar items on Etsy for $60 – uncustomized, and I would need to buy two. $120 for another custom decoration that I could do myself. No thank you! So I got to work.
My work is now your gain! I found the supplies and tools to make the perfect DIY baby shower banner for baby Courtney. Below, I give you the tools and steps to make the sparkly banner. Later on in the week, I’ll show you how to make the tissue paper tassel garland that went along with it.
Altogether, I spent $7 to make the sparkly banner, and another $12 to make the tissue paper tassel garland. $19 is a lot more appealing than $120, wouldn’t you say?
Steps to Make a Custom DIY Baby Shower Banner
The Necessary Tools:
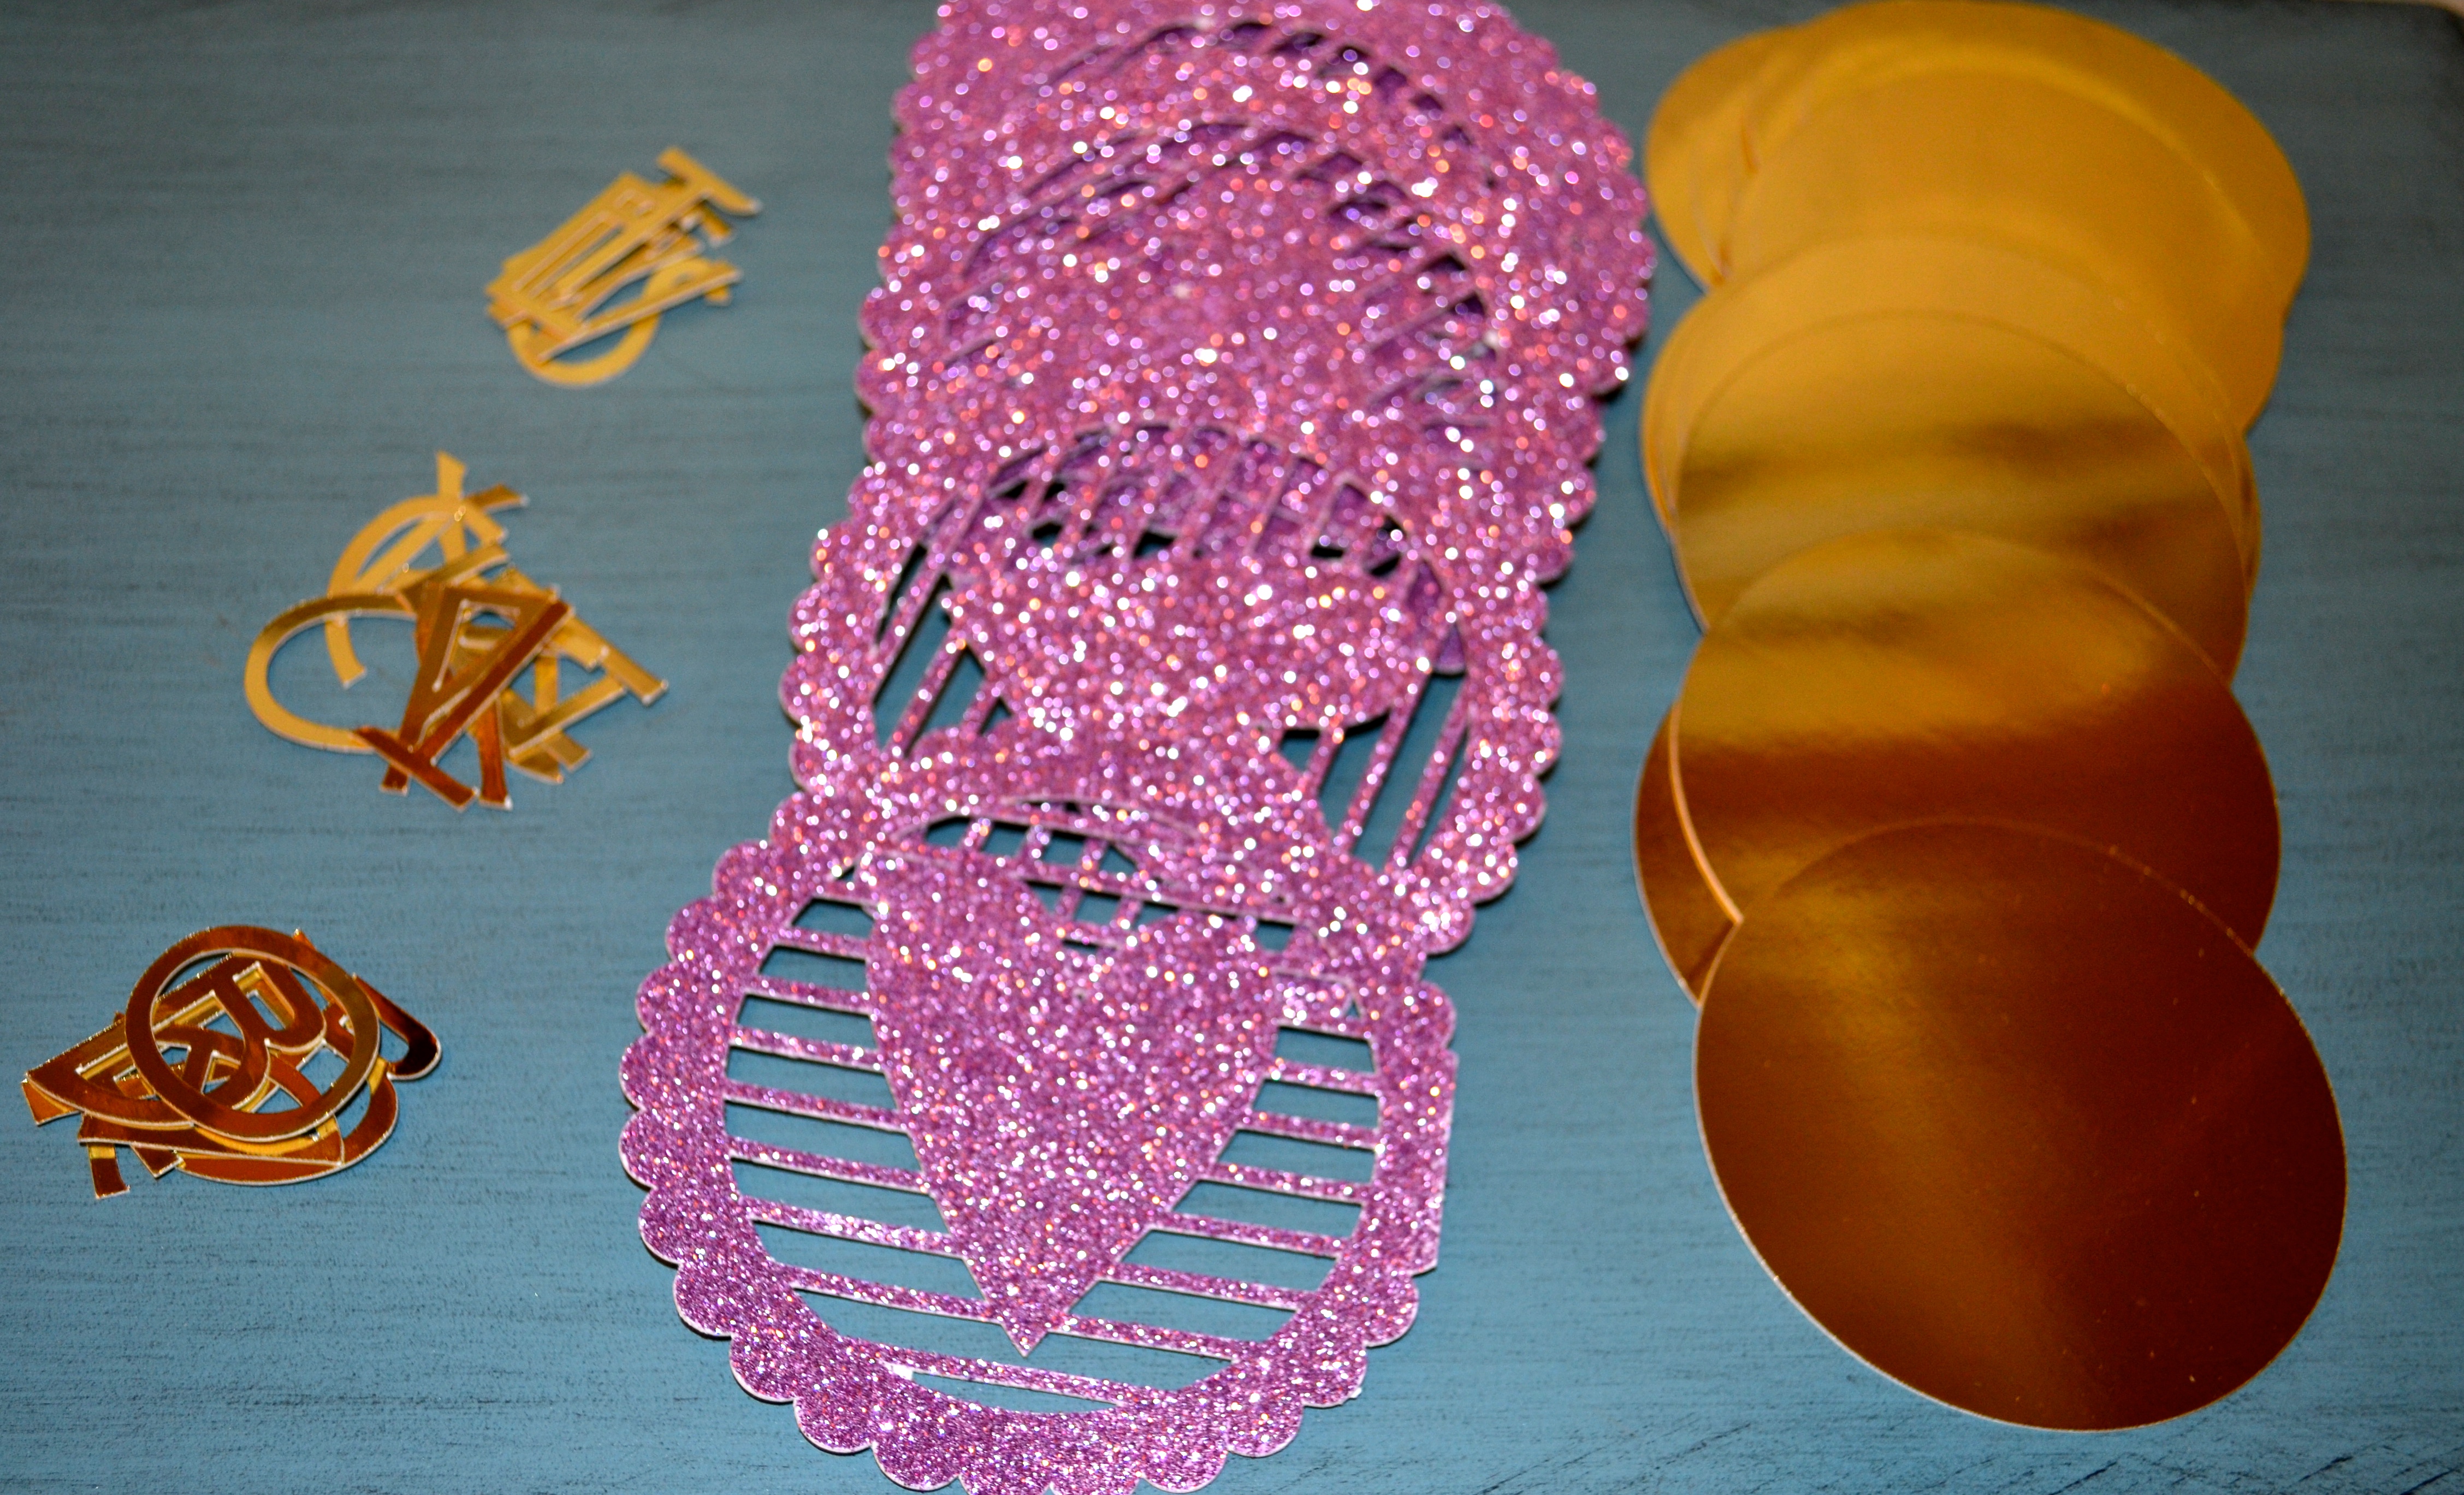
- Sparkle Cardstock: (4, 12×12” sheets needed)
- Metallic Gold Cardstock: (3, 12×12” sheets needed)
- ⅛” Pink Ribbon
- Small Hole Punch
- Silhouette Cameo Machine (OPTIONAL): $270
Step 1:
- Download the sparkle heart design here.
- If you do not have a Cameo, this design is probably too intricate for you to cut by hand. Use THIS design instead. Make sure to use a program that you can specify your paper size to be 12×12”.
Step 2:
- Feed your SPARKLE cardstock into your printer (Cameo or Inkjet), and print out this design (you may need to manually push the cardstock through an inkjet printer, as they’re often too thick for the printer to feed itself).
- Punch out the design from the cutting mat (on a Cameo) or cut the design by hand (if not using a Cameo).
- You’ll need to do this on 4 sheets of 12×12 sparkle paper to get the same design as mine.
- If you omit the baby’s name, you’ll only need 3 sheets.
Step 3:
- Download the metallic backing design HERE (this fits perfectly behind the circular sparkle design)
- Letters to spell out “Love Sweet Baby” are also on this design.
- If you want to also spell the baby’s name, you’ll need to create another design in your Cameo, or use a stencil on your metallic paper (if cutting by hand).
- The font I used for my text is DESDEMONA (128.4 pt), and can be found on 1001freefonts.com
Step 4:
- Feed your metallic paper into your Cameo or printer
- Punch out the design from the cutting mat (on a Cameo) or cut the design by hand (if not using a Cameo).
- You’ll need to do this on 3 sheets of 12×12 metallic paper to get the same design as mine.
- If you omit the baby’s name, you’ll only need 2 sheets.
Step 5:
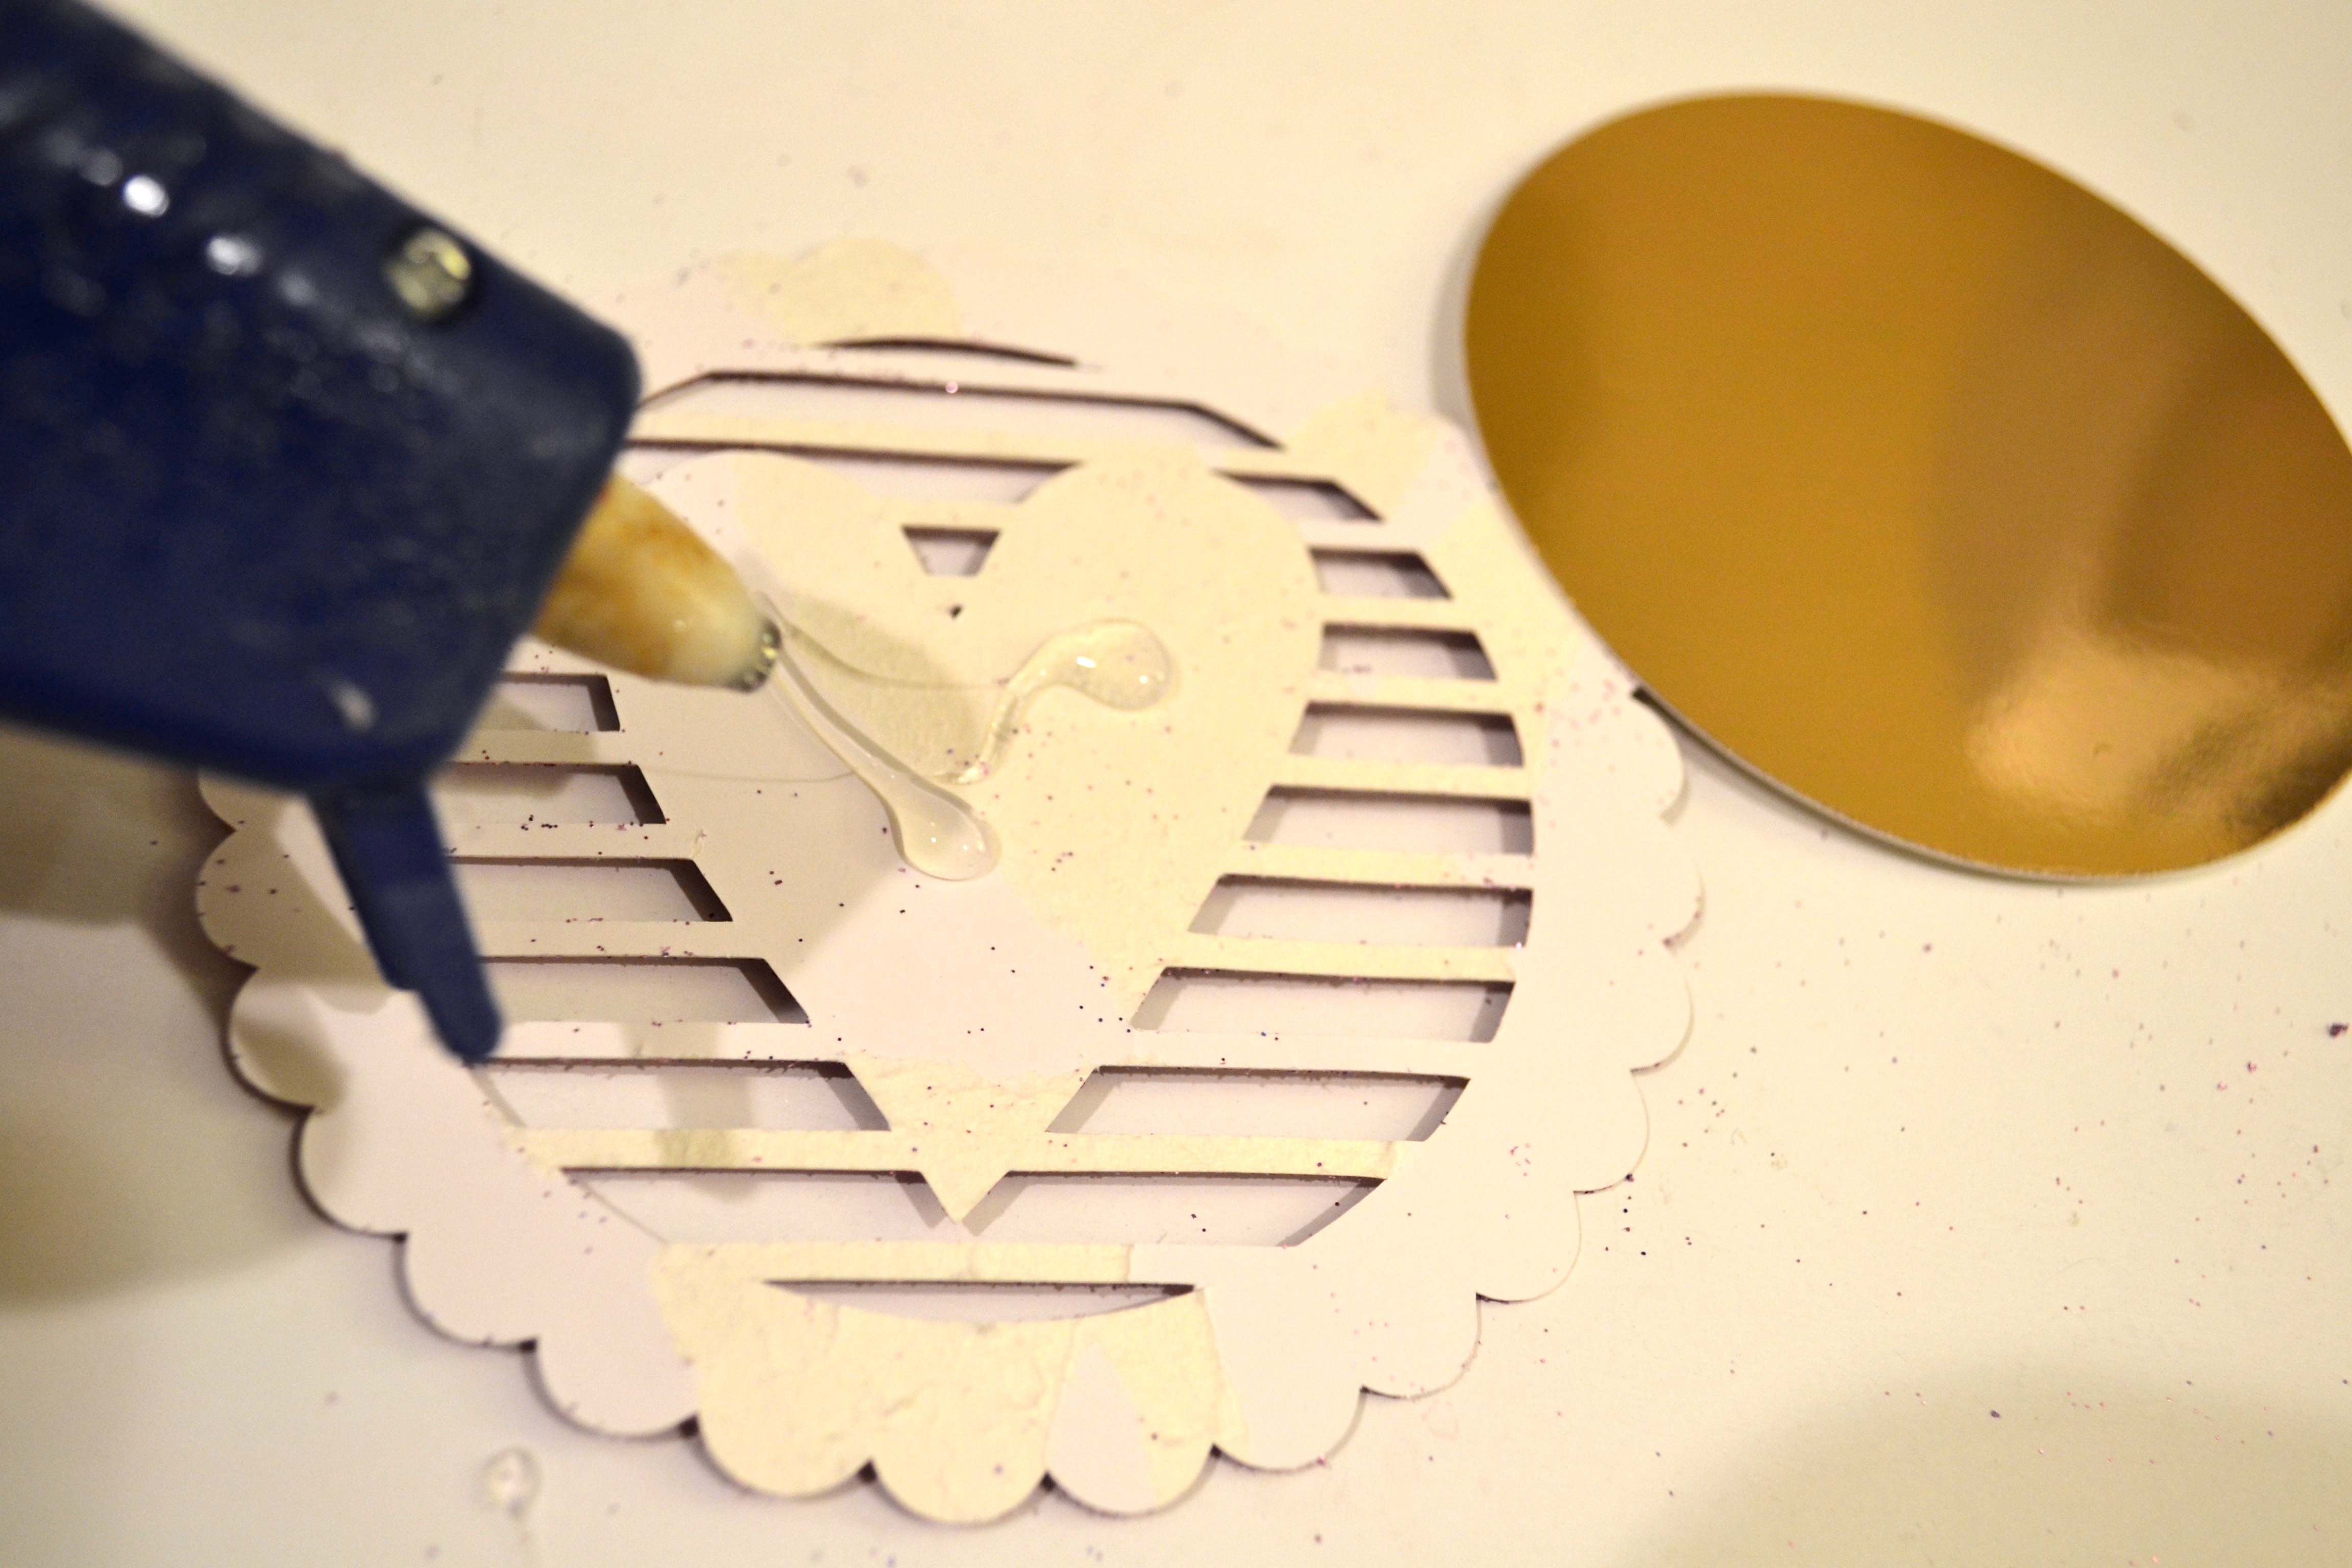
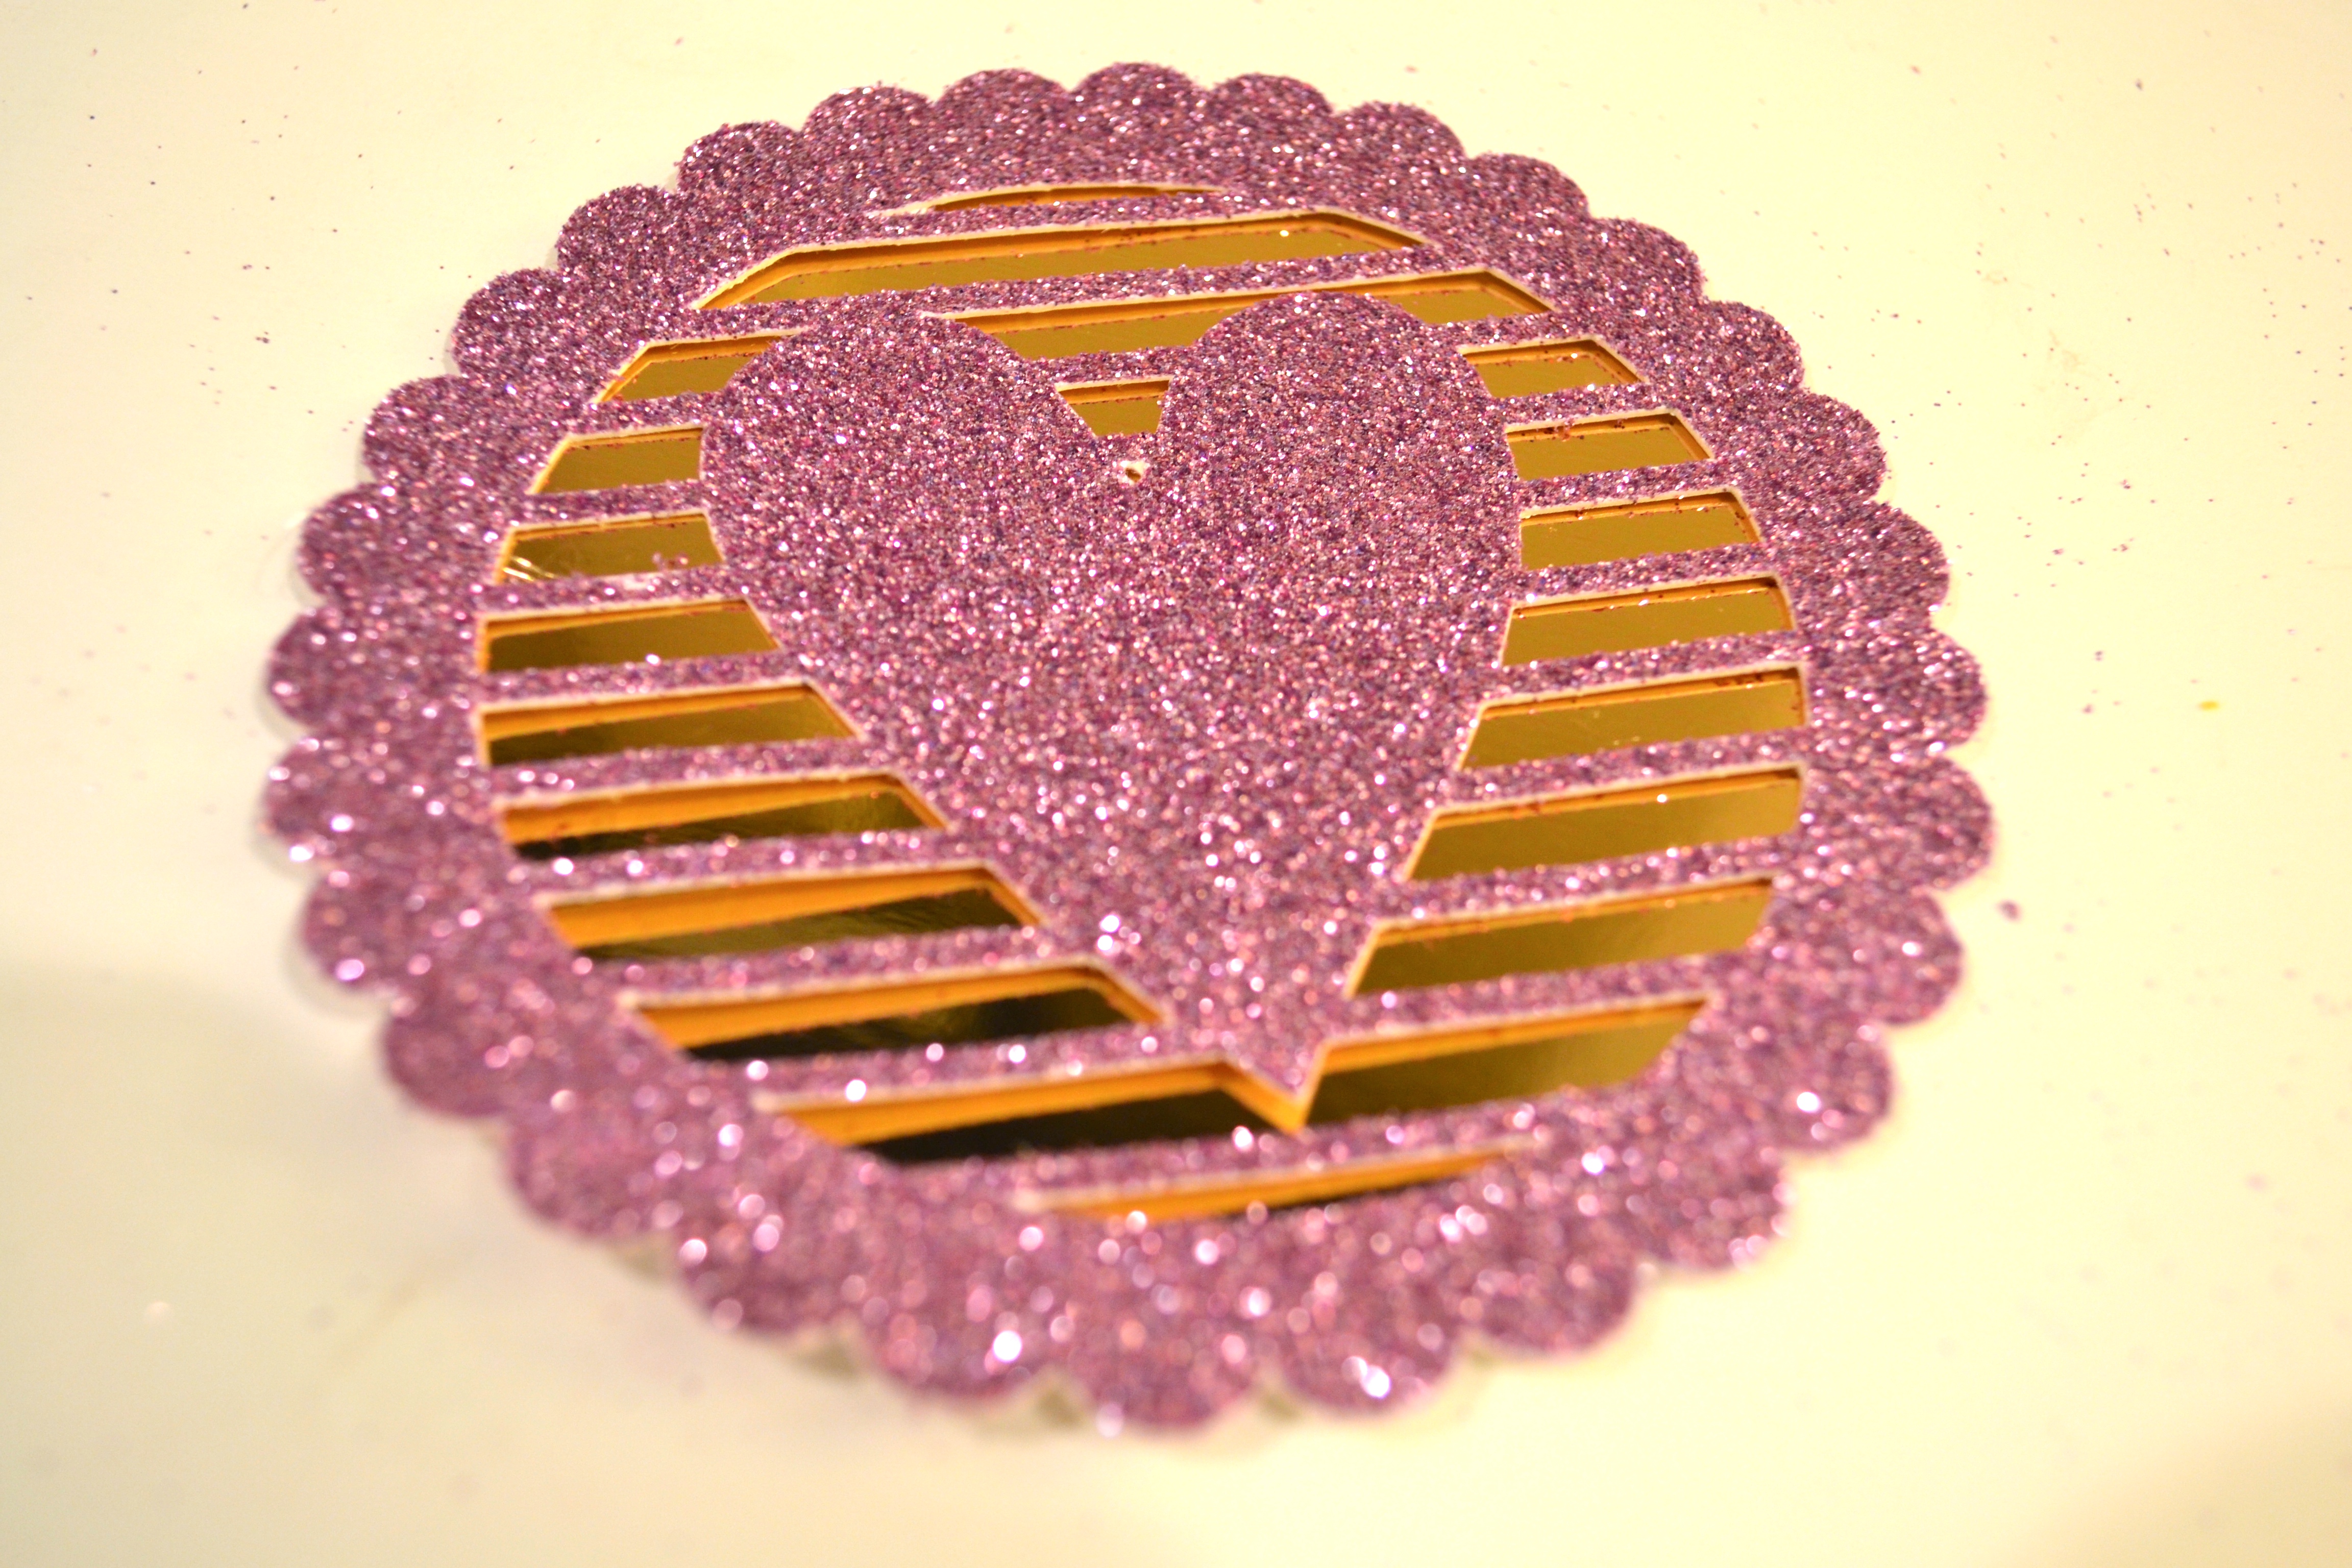
- Take your hot glue gun, and put glue on the back of your cut out sparkle designs.
- Place the sparkle design on top of one of the metallic circles you’ve cut out.
- Cameo users- this is a one step process.
- If you’re cutting my hand, You’ll need to glue the outer sparkle ring onto the metallic circle first, then the sparkle heart in the center of the circle second- 2 steps.
Step 6:
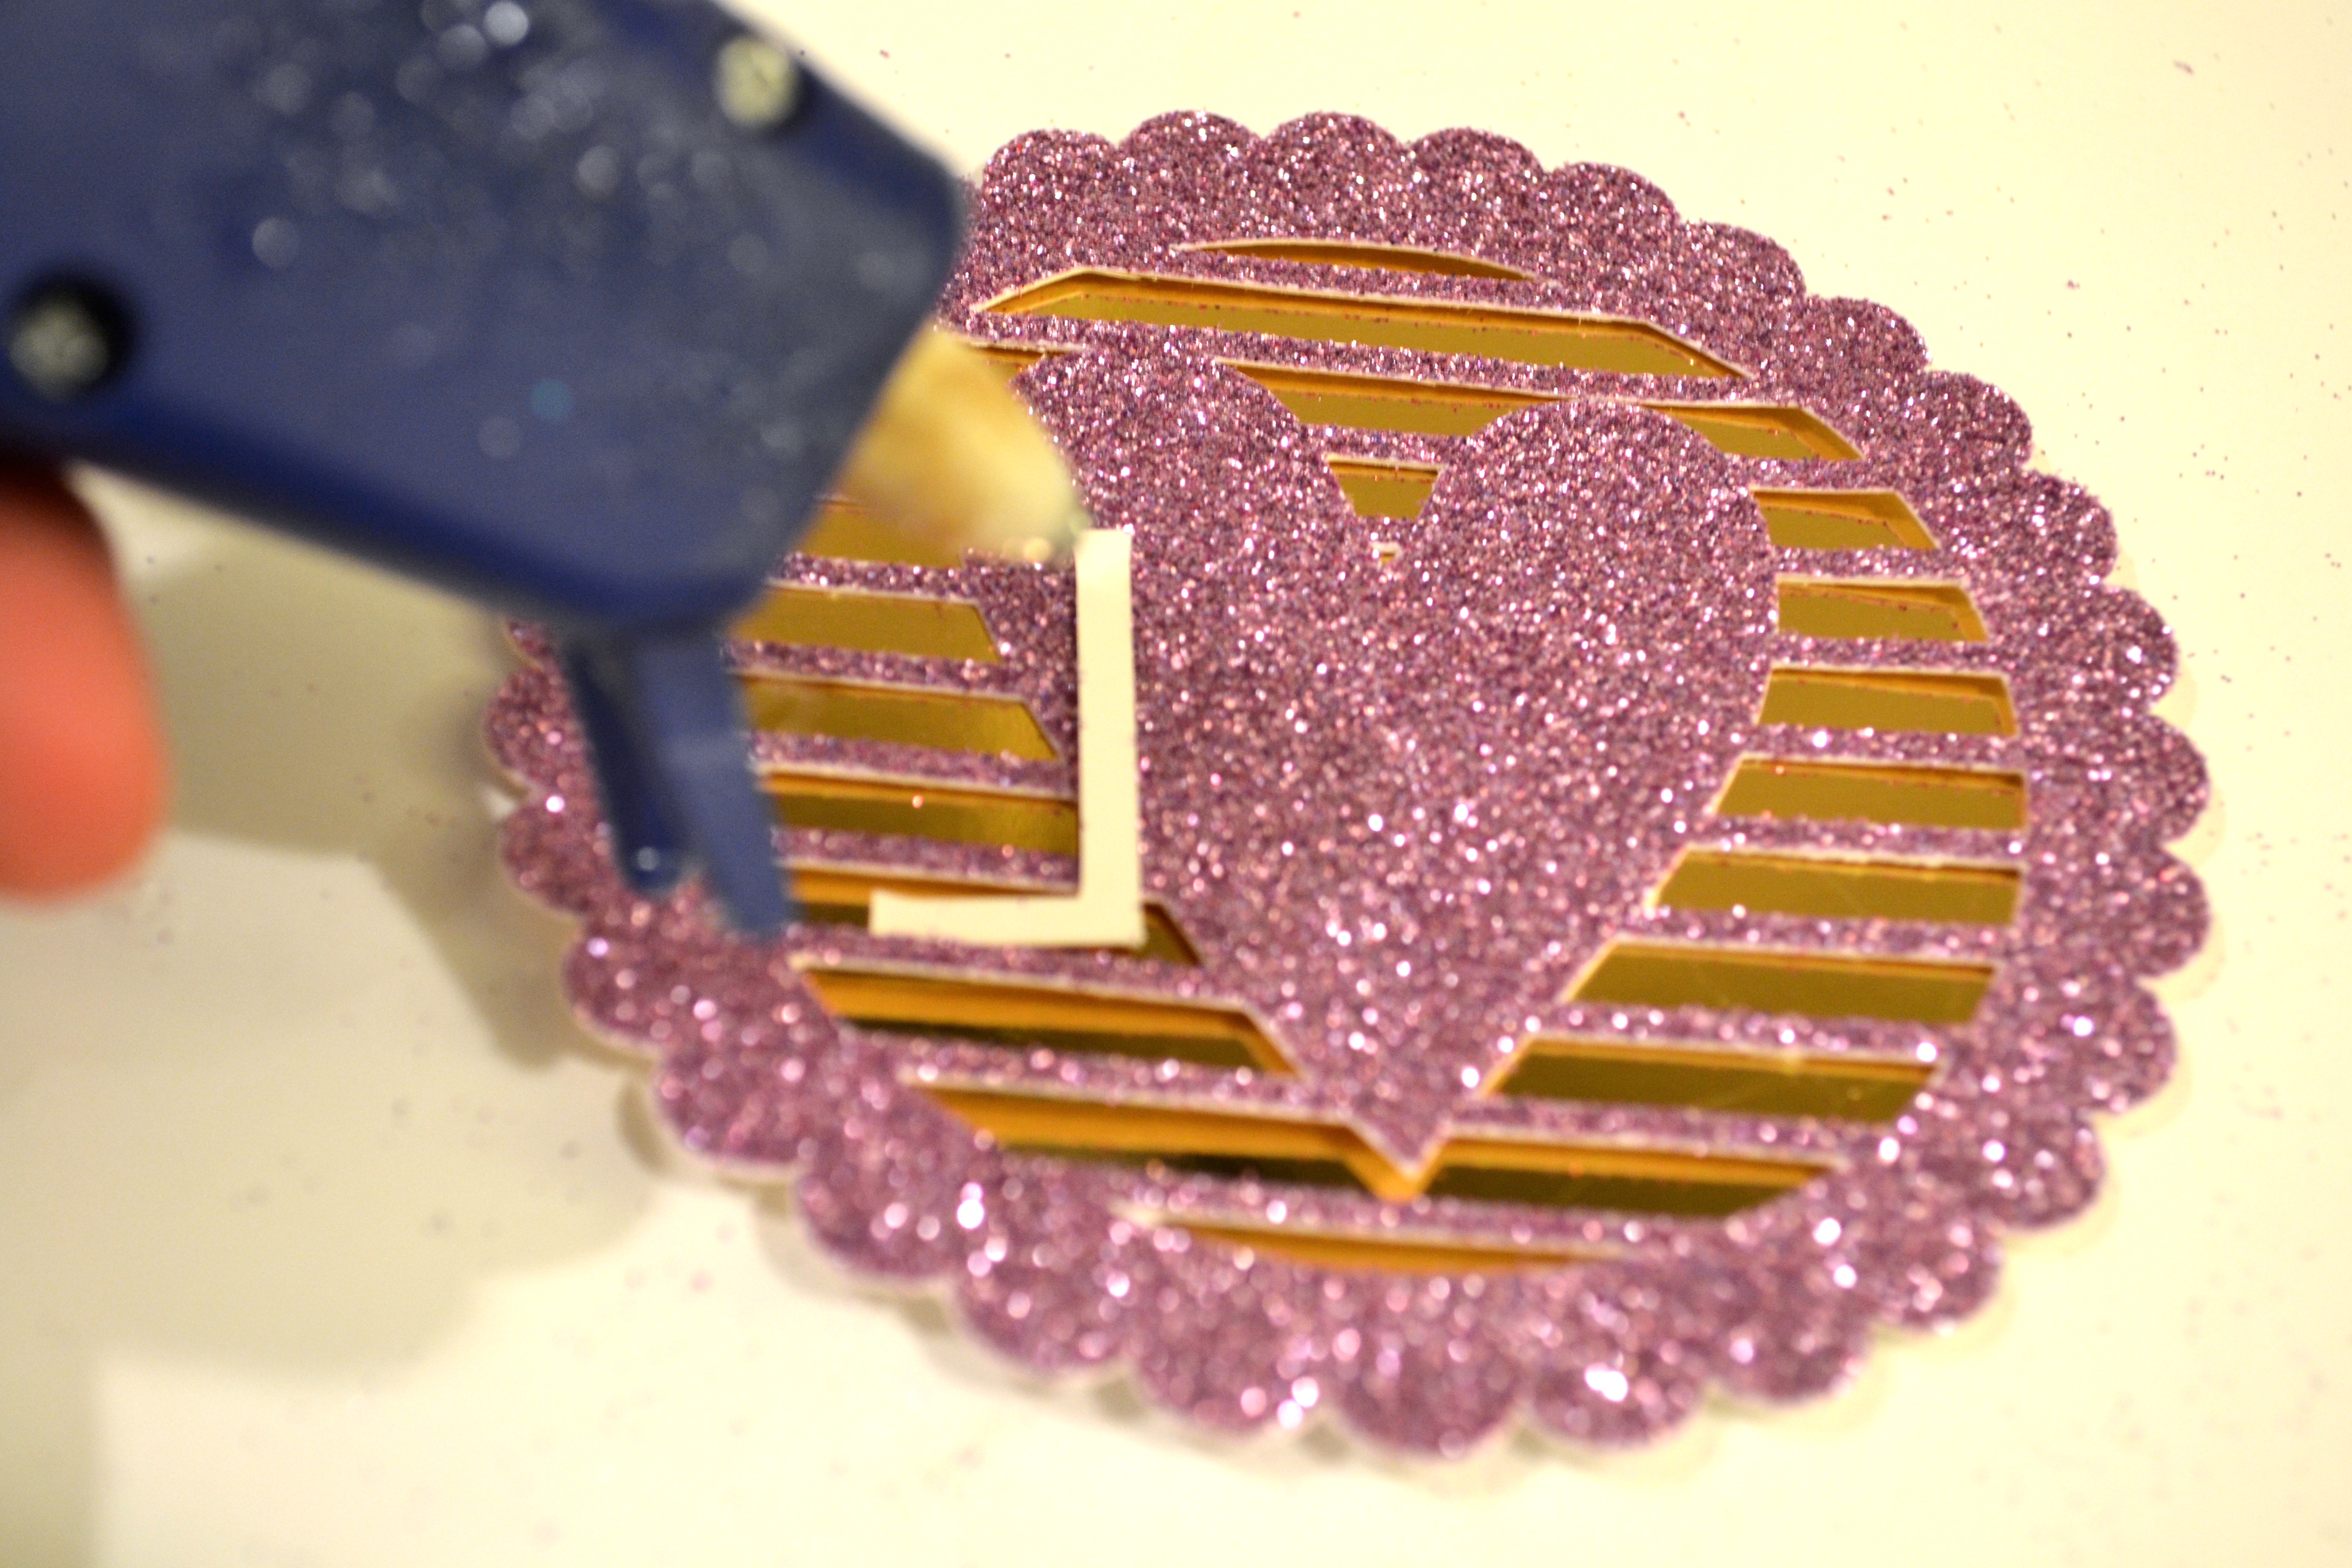

- Once all the sparkle designs are glued on top of the metallic circles, take your letters and put some hot glue on the backside of each letter.
- One by one, place each letter in the center of the sparkle hearts (the letters will be metallic and will show up nicely on top of the sparkle).
Step 7:
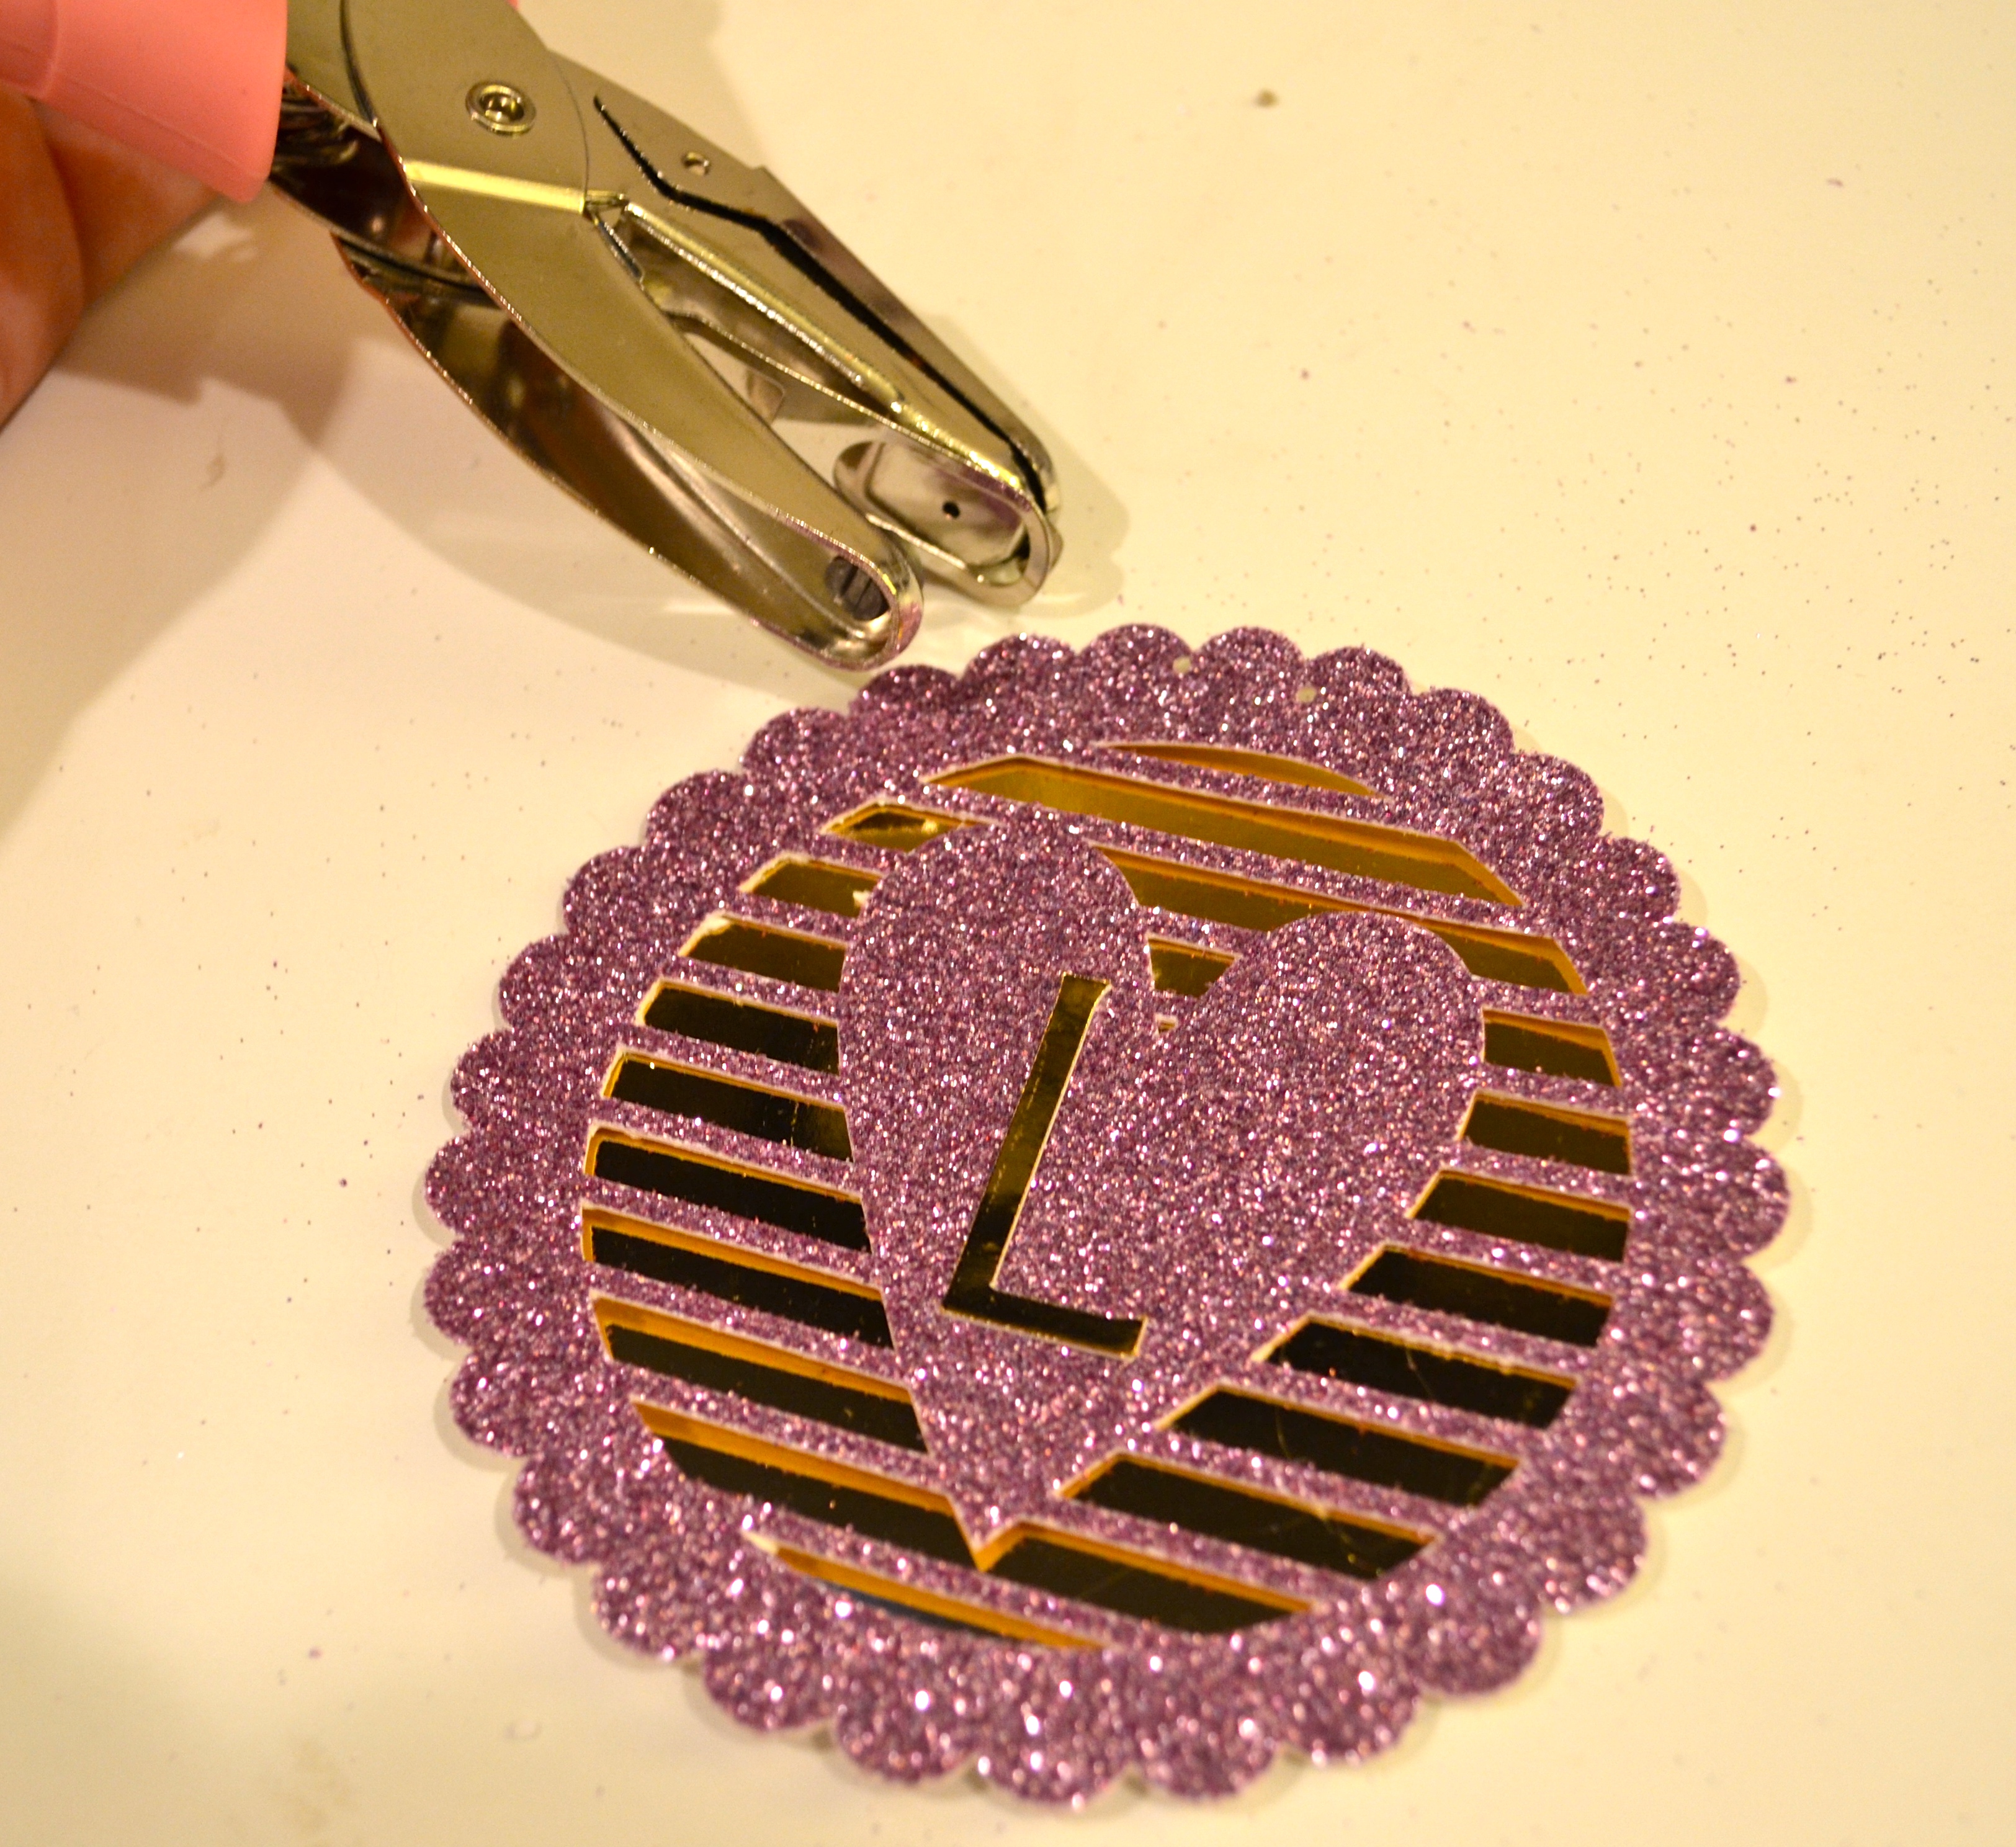
- Almost done! Take your small hole punch and punch two small holes in the top center of each sparkle ring.
Step 8:
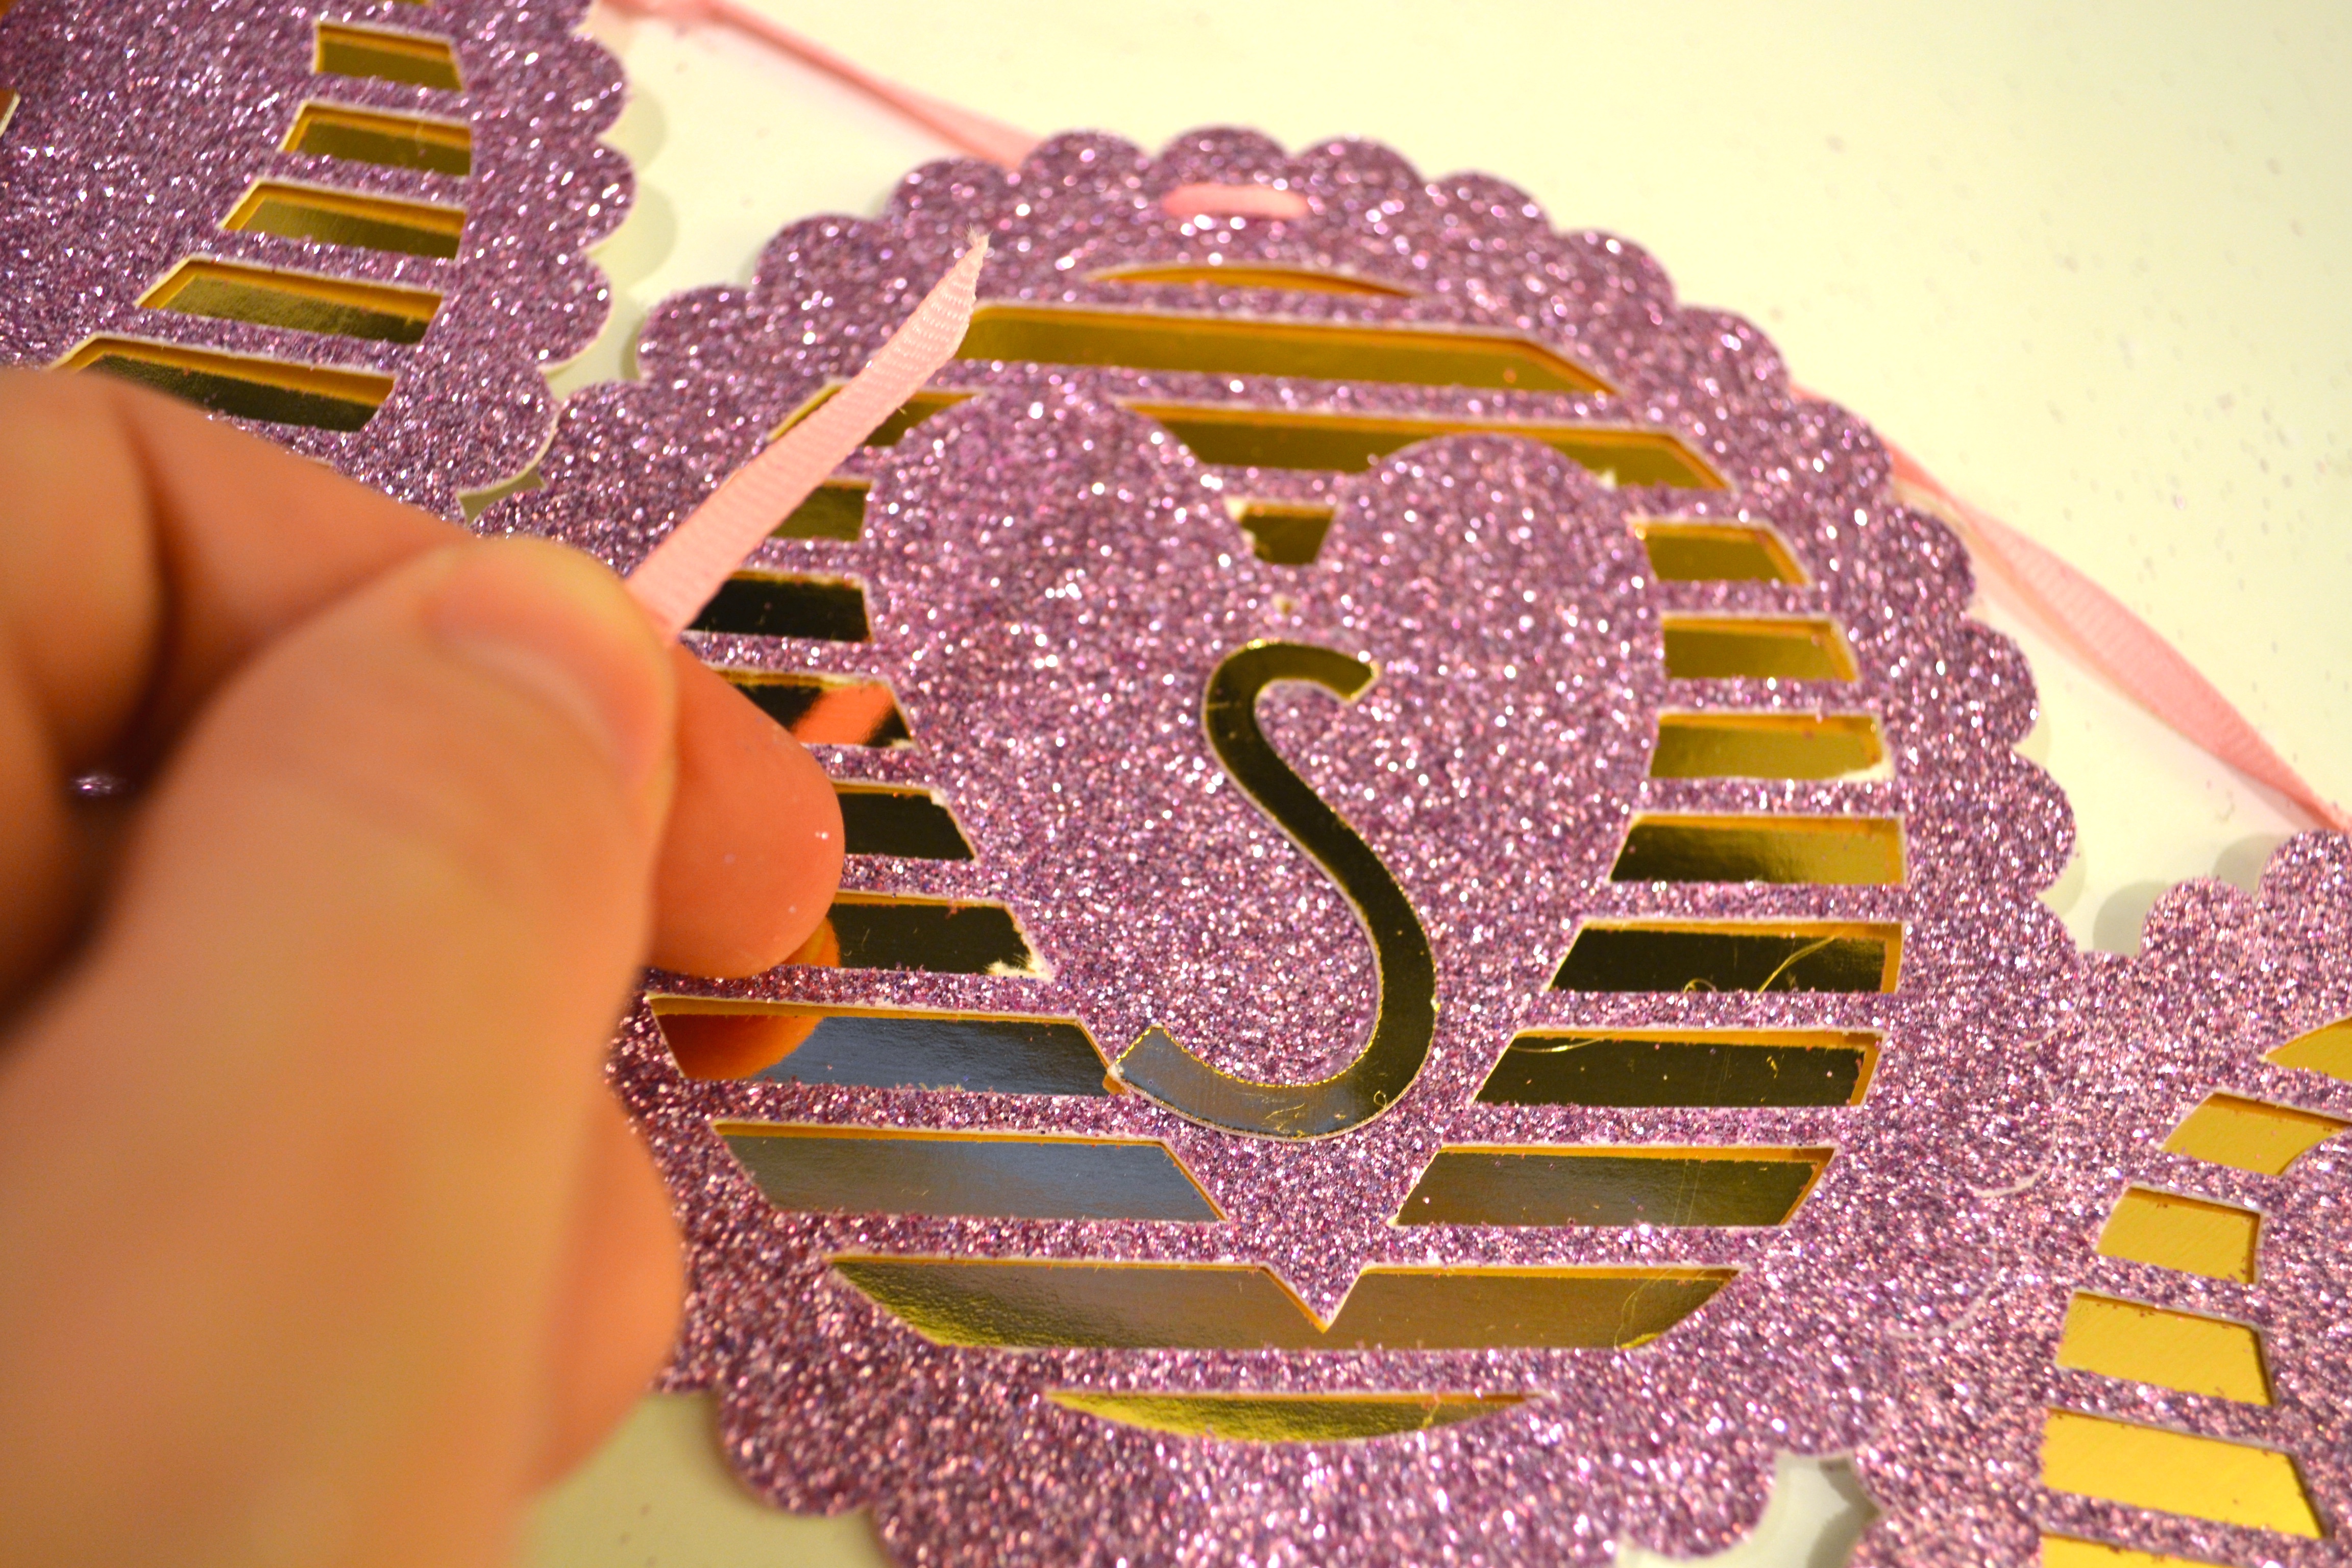
- Take your ⅛” ribbon, and feed it through the holes you’ve made in each design.
- Make sure to feed the letters through in the REVERSE order.
- Example, If you’re spelling out “Love Sweet Baby”, start with the Y, then B, then A, then B, and so on.
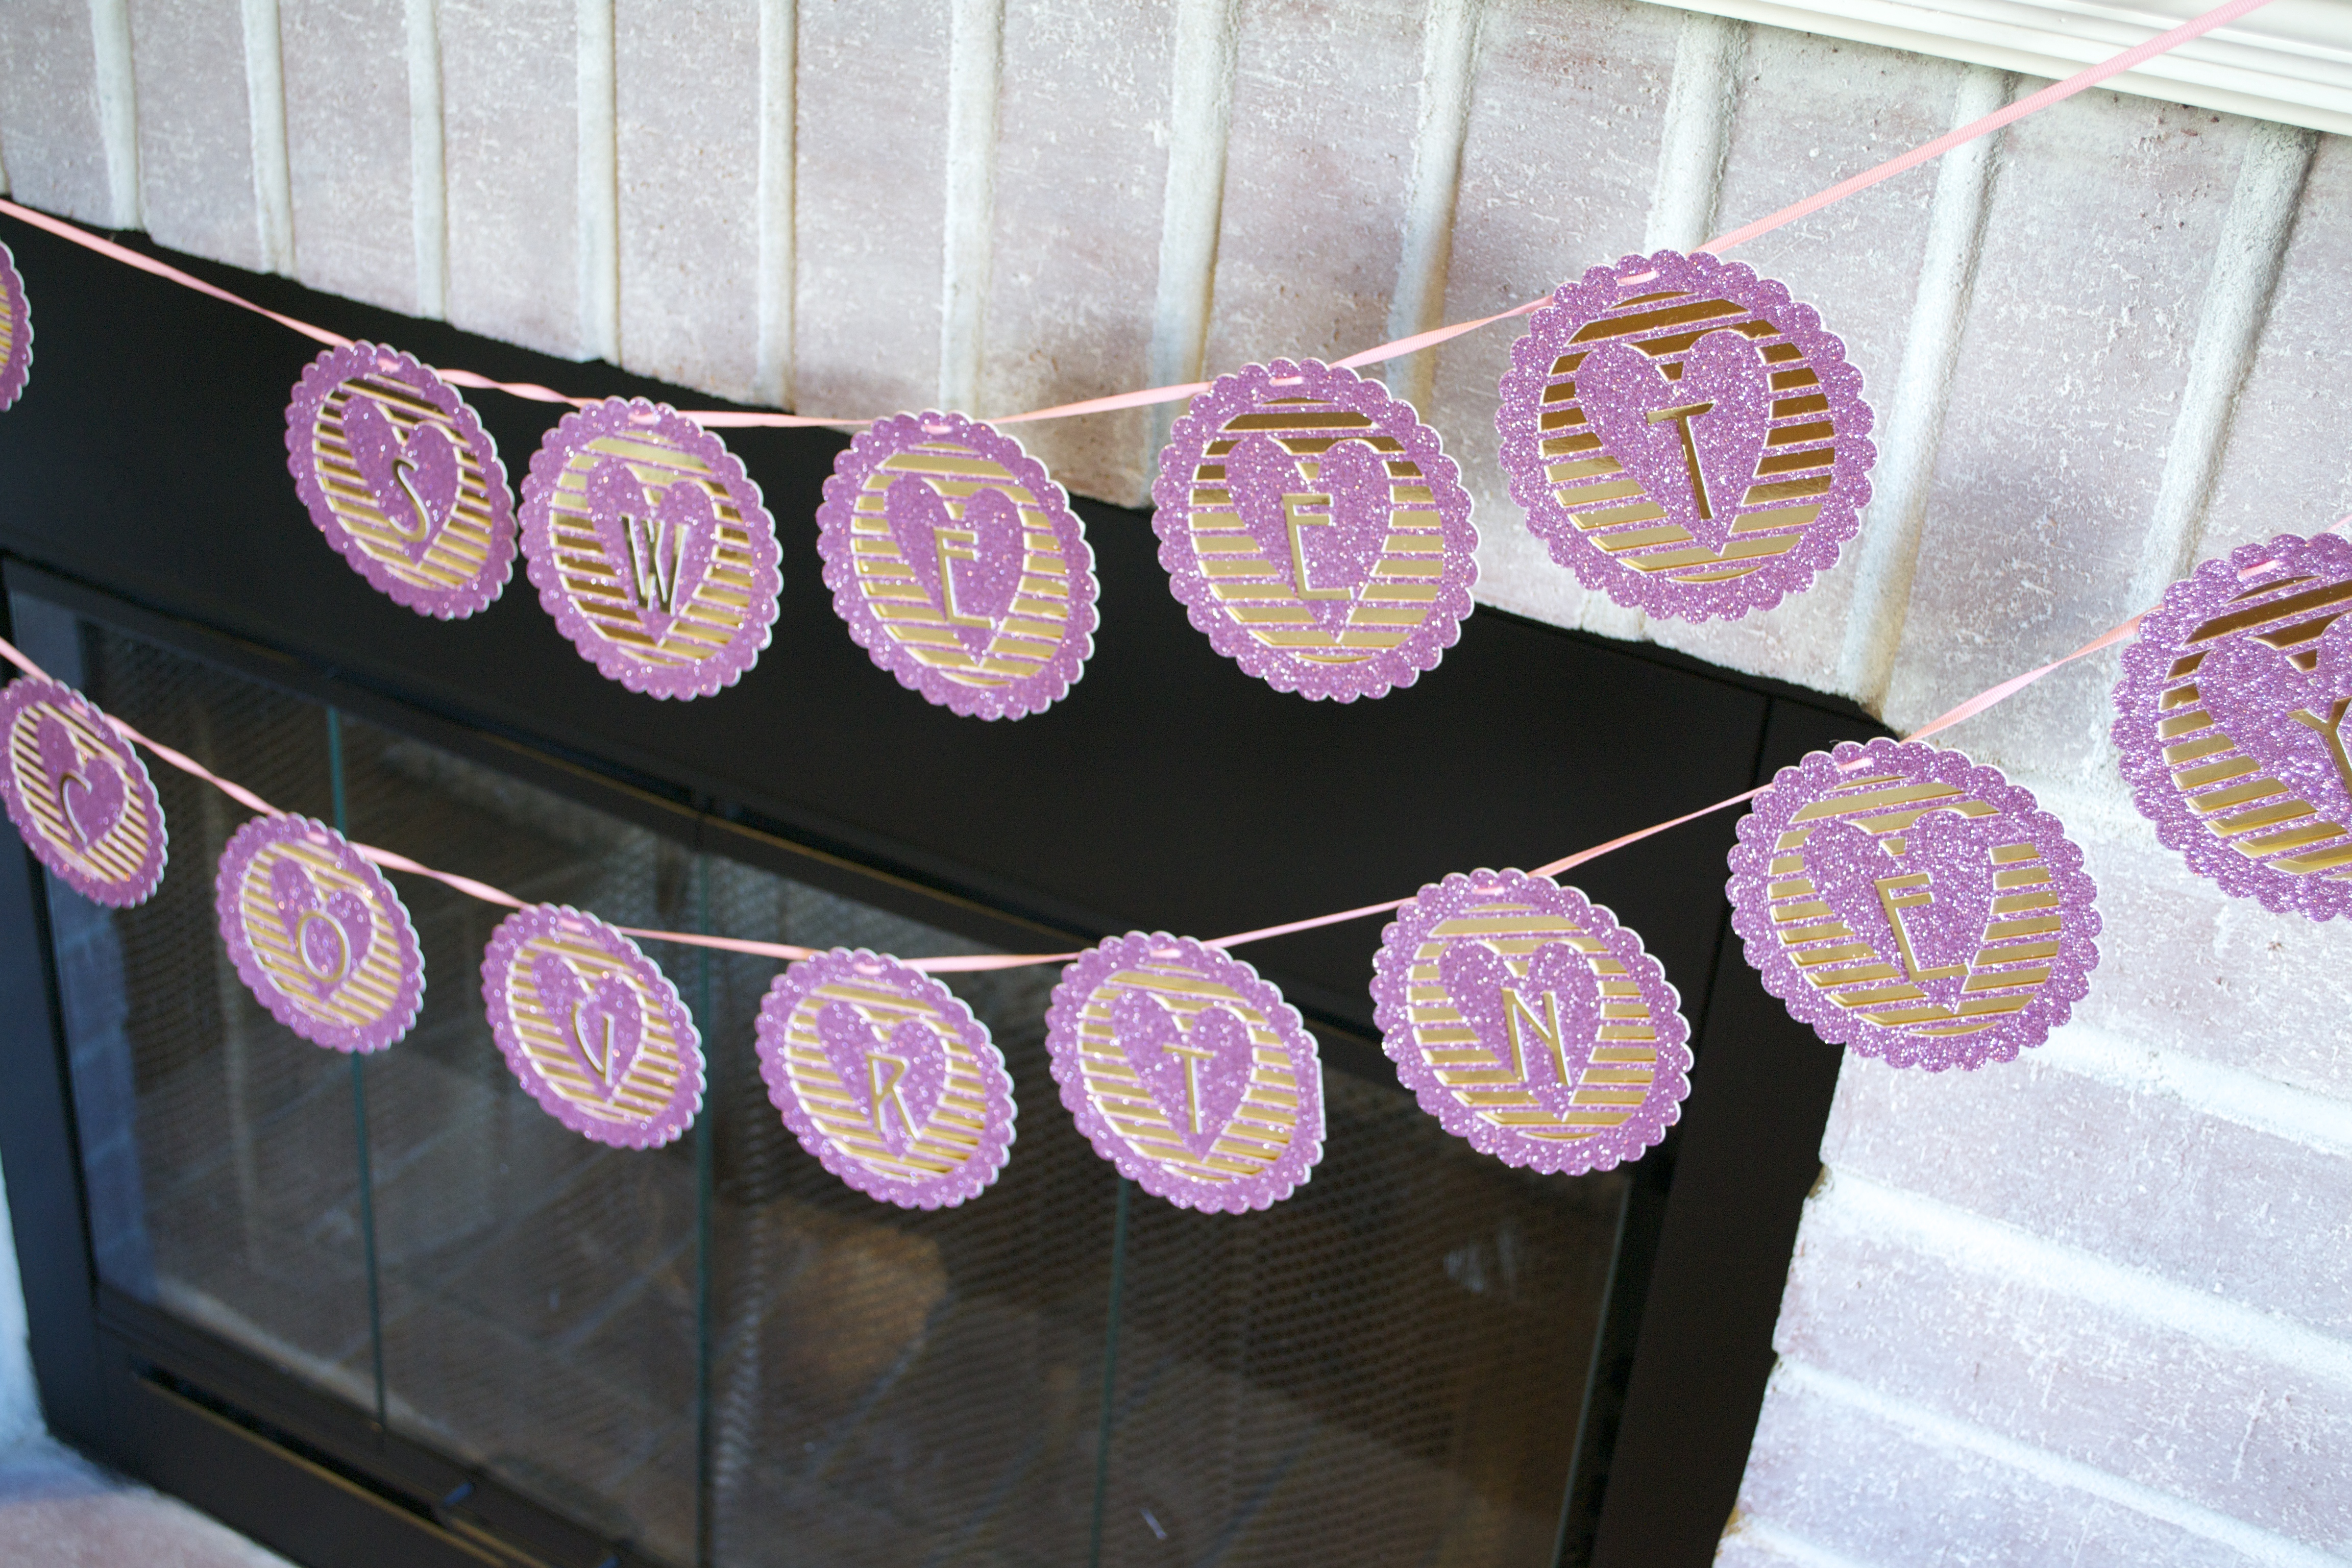
Ta da! Your custom sparkle banners are complete!
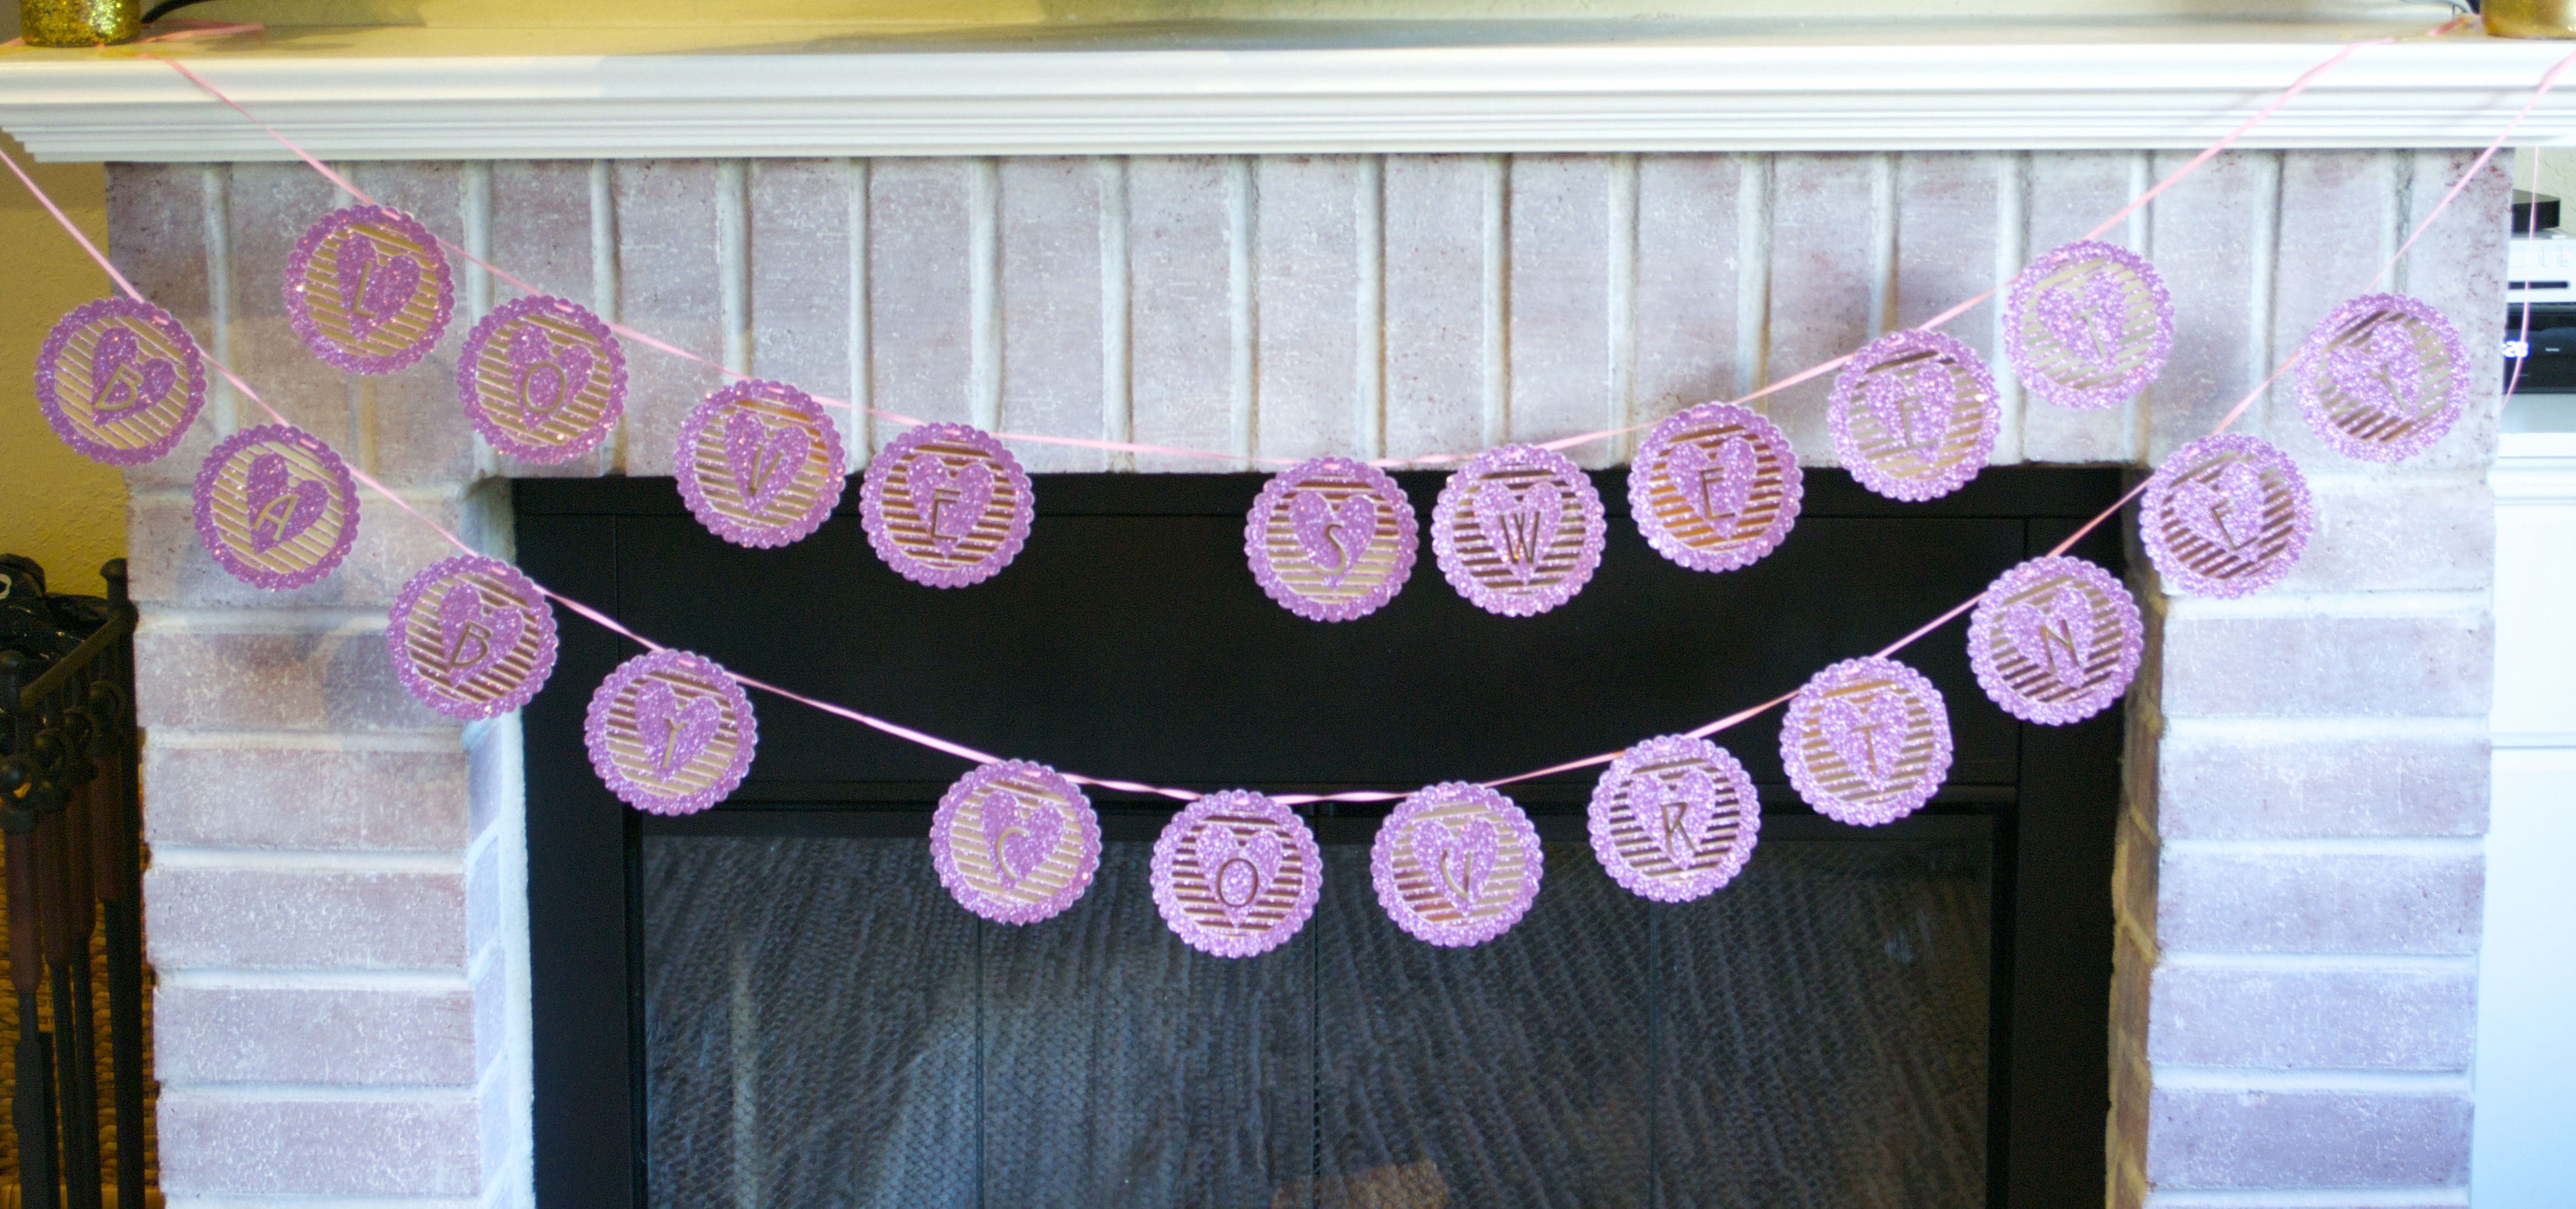
Not Just for Baby Showers – Uses For Your Custom Sparkle Banners
These make a great addition to any baby shower! Additionally, these are great for bachelorette parties, wedding showers, birthday parties, etc. The options are endless! Feel free to pick different color cardstocks according to the type of event you’re throwing, or gender of the baby you’re showering.
And to customize the lettering accordingly. If you’re using a Cameo, it’s easy to make a new document with whatever you want to say, and to print it out onto your metallic cardstock. Just make sure each letter is 2″ high by .75-1″ wide. If you want a bigger sign with larger letters, go for it! I made this one for a friend just last week, using different colored cardstock, and larger letters, but the same technique:
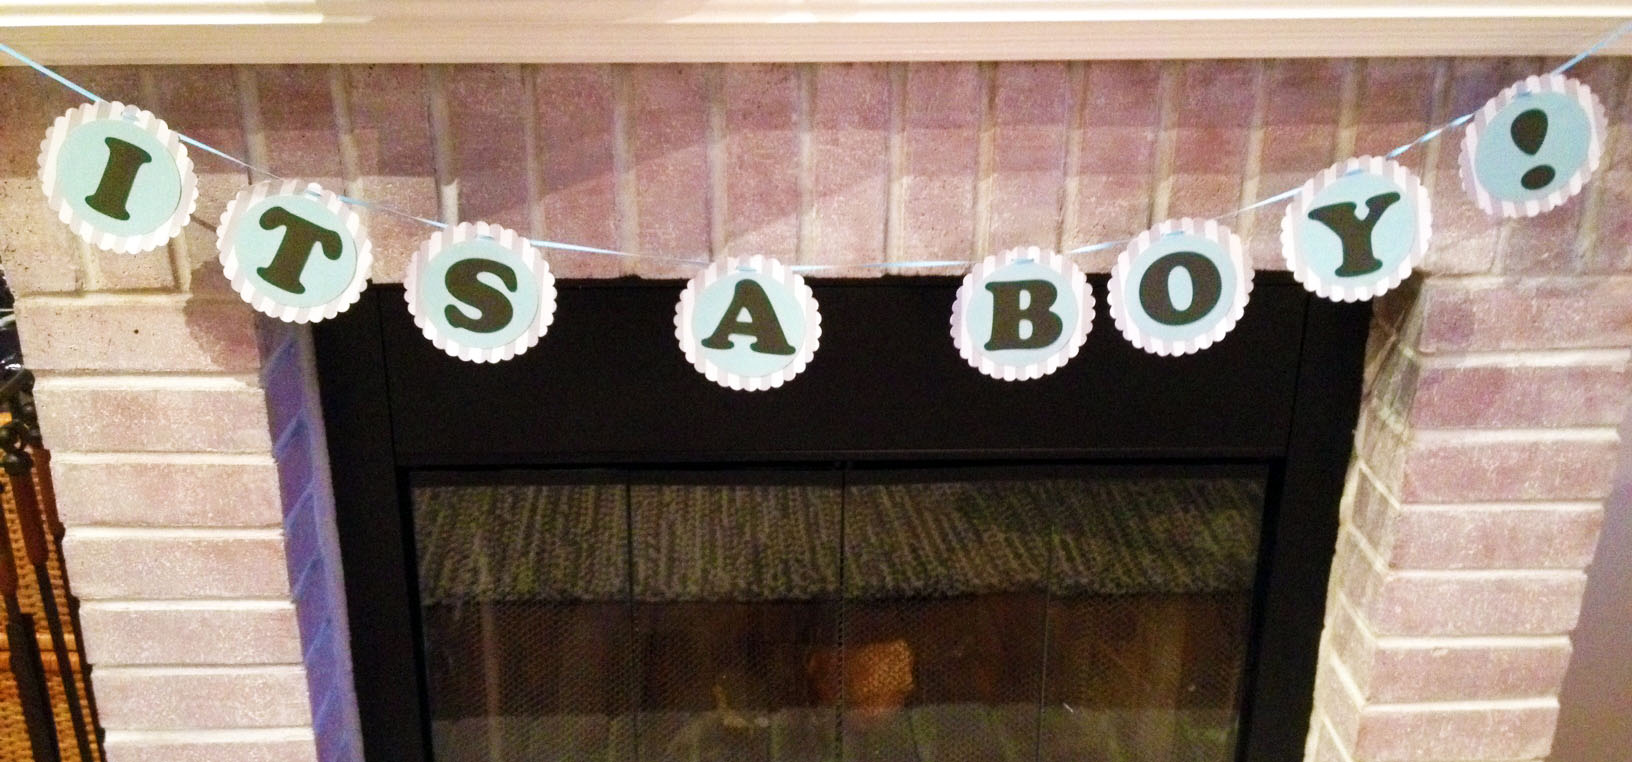
If you’re cutting by hand, get a 2″ stencil kit (or 4″ kit if you’re looking to make a bigger banner), and stencil whatever you want the banner to say onto your metallic cardstock. Easy peasy!
They’re unique, fun, and most importantly, COST EFFECTIVE! Again, if you don’t have the time or patience for this project, you can always buy one in my store. But if you want to DIY, here are all the supplies you’ll need:
The Necessary Tools:
- Sparkle Cardstock: (4, 12×12” sheets needed)
- Metallic Gold Cardstock: (3, 12×12” sheets needed)
- ⅛” Pink Ribbon
- Small Hole Punch
- Silhouette Cameo Machine (OPTIONAL): $270
- 2″ Stencil kit (only needed if not using a Cameo)
Downloadable Templates:
Leave a Reply