Well, the holidays are quickly approaching. I can’t even believe it’s mid November… where did this year go?! Maybe it’s because I’m getting old, but every year seems to fly by faster and faster. But I like to think it’s just because time flies when you’re having fun 😉 And this year, working on Miss Bizi Bee, has certainly been a BALL!
Now, for the last, I dunno, 3 or 4 years, I’ve been saying to Travis that I want to make us matching family pajamas for Christmas. But every time I think of it, it’s December already and all the fun Christmas fabrics at the store are sold out.
So then I revert to searching online to buy us matching family pajamas, only to find that they run about $40-50 each, and decide it’s best to wait until the following year when I can remember early enough to make them in time.
This has been a constant cycle for YEARS! Well now, with Miss Bizi Bee, there was no forgetting! But instead of trying to make them at first, I suggested I buy them for Travis and myself. Only because there are some REALLY cute ones I found online:


Source: Amazon (click on each picture for a direct link to each PJ set)
Plus, I was SUPER busy – and I had never made pajamas before – so I was afraid they’d be way too time consuming for the short windows of time I had to craft.
But, of course, Travis was having NONE of it! He refused to wear store bought family pajamas. He insisted I make them because “I had been talking about it for years” and he finally wanted his original homemade pajamas. Oh jeez! I had really put my foot in my mouth this time.
But it was a good kick in the pants (hehe, get it?). So I marched off to the store super early (in late Sept/ early October) to search for the best Christmas flannel I could find. What I ended up with was a green and white stripe and a red and green plaid. Not the cutest, but it was all they had so it would do. After all, I didn’t want to be left in the dust as in years past with all the Christmas colored flannel being bought up by those who got a head start on me. No sir, needed to make these family pajamas happen this year! No exceptions.
Unbeknownst to be, all the cute Christmas flannel comes out to play in fabric stores just right after Halloween. So when I began working on our pajamas on Nov 1st, and returned to the store for some more supplies, I found all the cute red and white striped, polka dotted, and snow flaked fabric I could have ever wanted!
Of course, I scrapped everything I has been working on, and bought entirely new fabric to make our matching family pajamas. So word to the wise, the BEST time to shop for ANY holiday pajama fabric, is about month and a half before the holiday. This way, all the cutest holiday fabrics will be for sale, and you’ll beat all the late shoppers to ensure you get the pick of the litter!
Anyway, I got to work and realized making family pajamas was a lot simpler than I had originally envisioned. Remember, I had NEVER done this before, and I did NOT work with any pattern.
Altogether, each pajama set took me about 3 hours to make. And all you’ll need to DIY is some cute fabric, and a pair of old pajama pants you’re ready to throw out. Then you’re set for your DIY adventure! Follow the steps below for the full DIY family pajama tutorial.
Steps to Make DIY Family Pajamas
The Necessary Supplies:
- Old pair of PJ pants
- Or if you prefer to work with a pattern, Family PJ Pattern Set
- 2 yards of flannel fabric (for EACH pair of pants)
- This will be the main color of the pants.
- 1/4 yard of a different flannel fabric (for EACH pair of pants)
- This will be the trim on the top and bottom of the pants.
- 10″ of a third flannel fabric (for EACH pair of pants)
- This will be the tie for the drawstring in the pants.
- 1″ Elastic ( about 10-20″ for each pair of pants)
- Sewing machine and thread
- Marker and scissors
- Cotton Shirt
- Heat Transfer Vinyl (you’ll need a Silhouette or any cutting machine for this)
- Or Iron on Printable Paper (to use with a printer)
- Iron
Step 1:
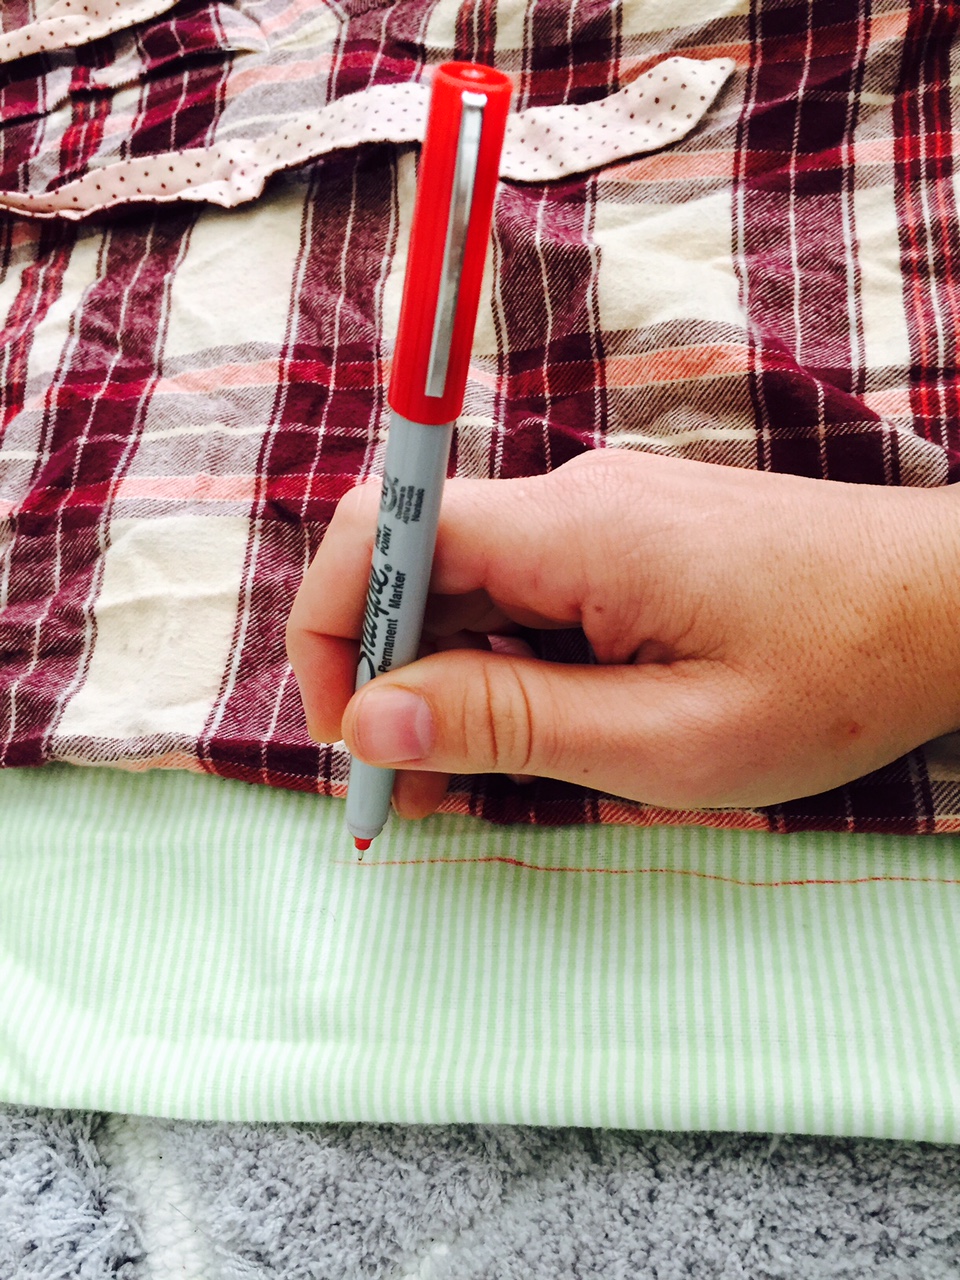
- Cut your PJ pants apart at each seam. Once cut, you should have 4 pieces (2 front pieces and 2 rear pieces).
- Take 1 front piece and one rear piece, and put them on top of your FOLDED 2 yards of fabric (main color).
- Make sure the fabric is FOLDED in HALF.
- Trace around the pieces, and then cut them out!
- If part of your piece is on the fold, make sure to cut at the fold, as well.
- Now, you should have 4 pieces (2 front and 2 rear) in your NEW FLEECE FABRIC.
Step 2:
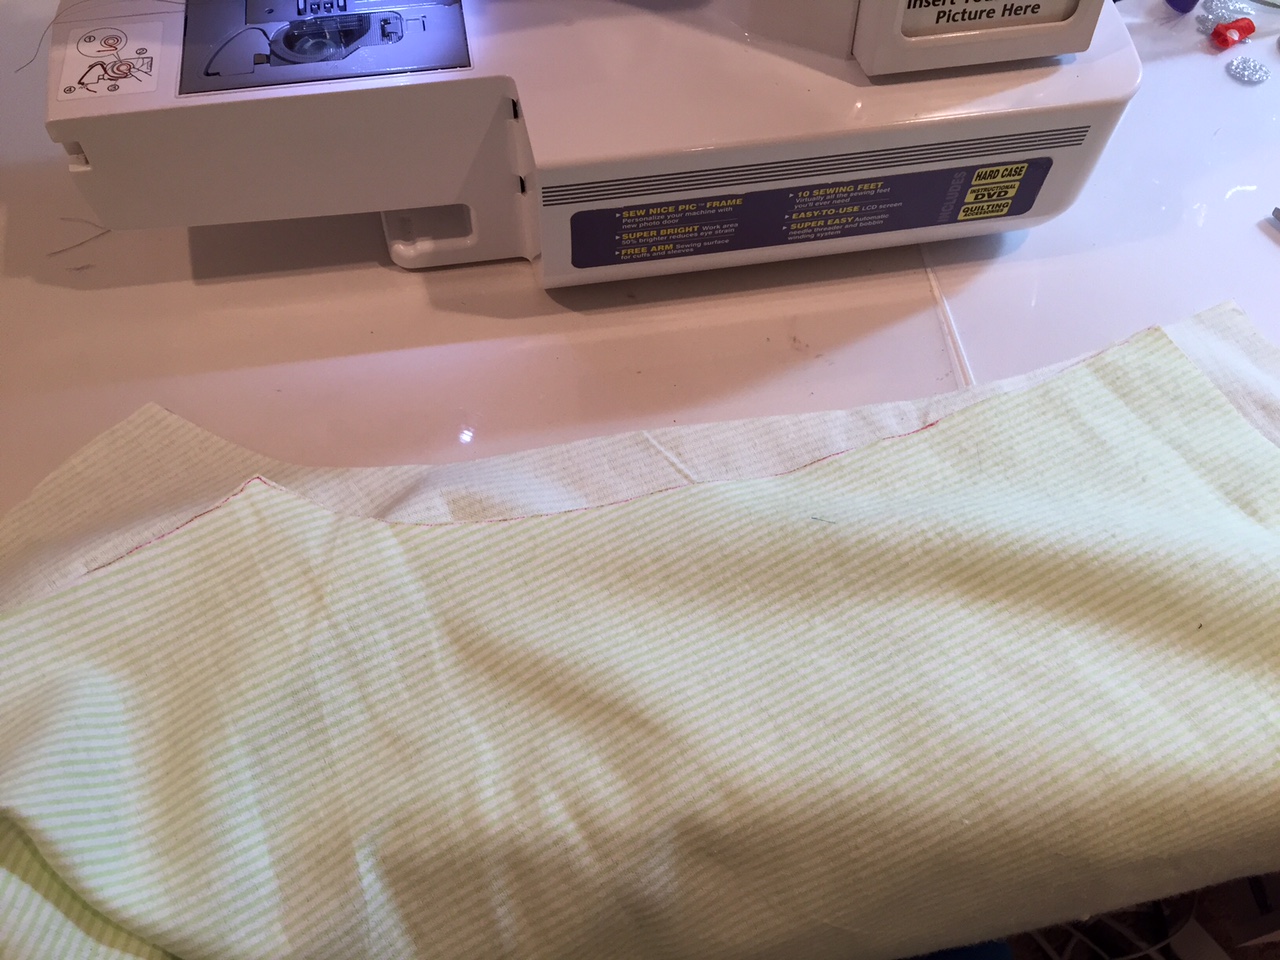
- You will notice a difference in the size of the front and rear pieces of fabric (the front have a smaller slope while the rear have a larger slope (giving room for the booty!).
- Take one front piece and one rear piece and put them together lining up the straight sides (with the right sides of the fabric facing each other so that you’re looking at the wrong side of the fabric).
- The sloping sides will be uneven, and that is HOW IT SHOULD BE.
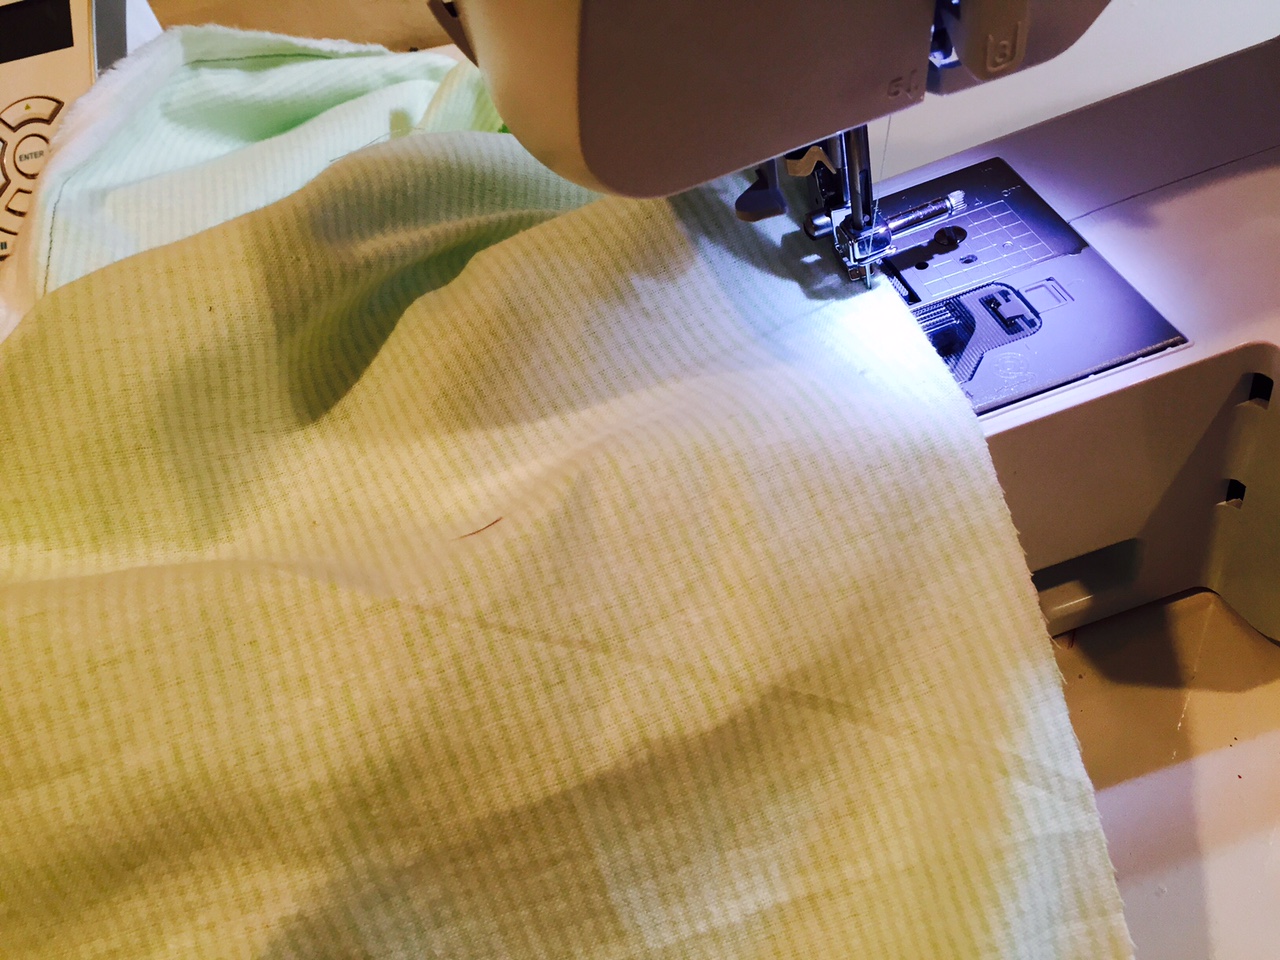
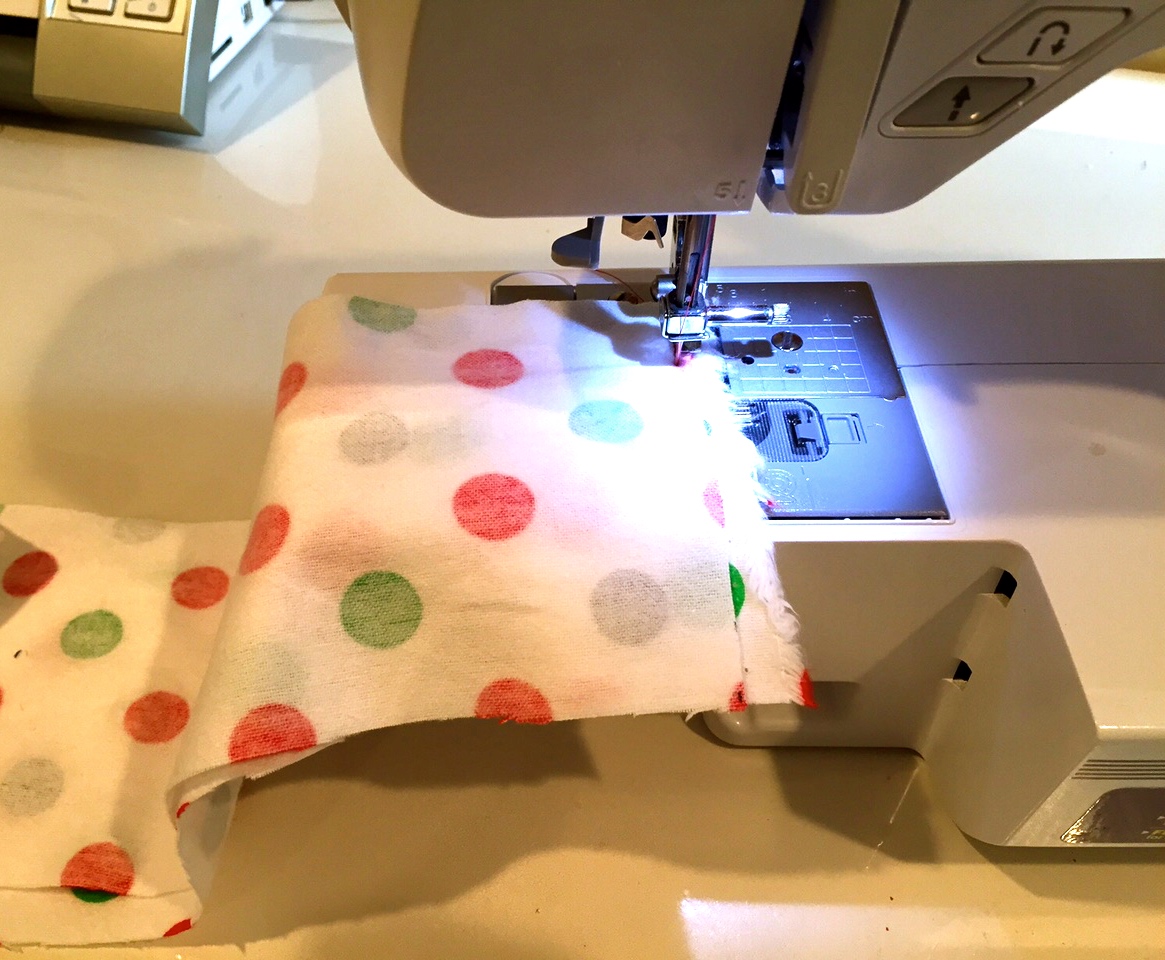
- Sew the pieces together on the long, straight side.
- Repeat this for your other 2 pieces of fabric (front and rear sides that have not been sewn together yet).
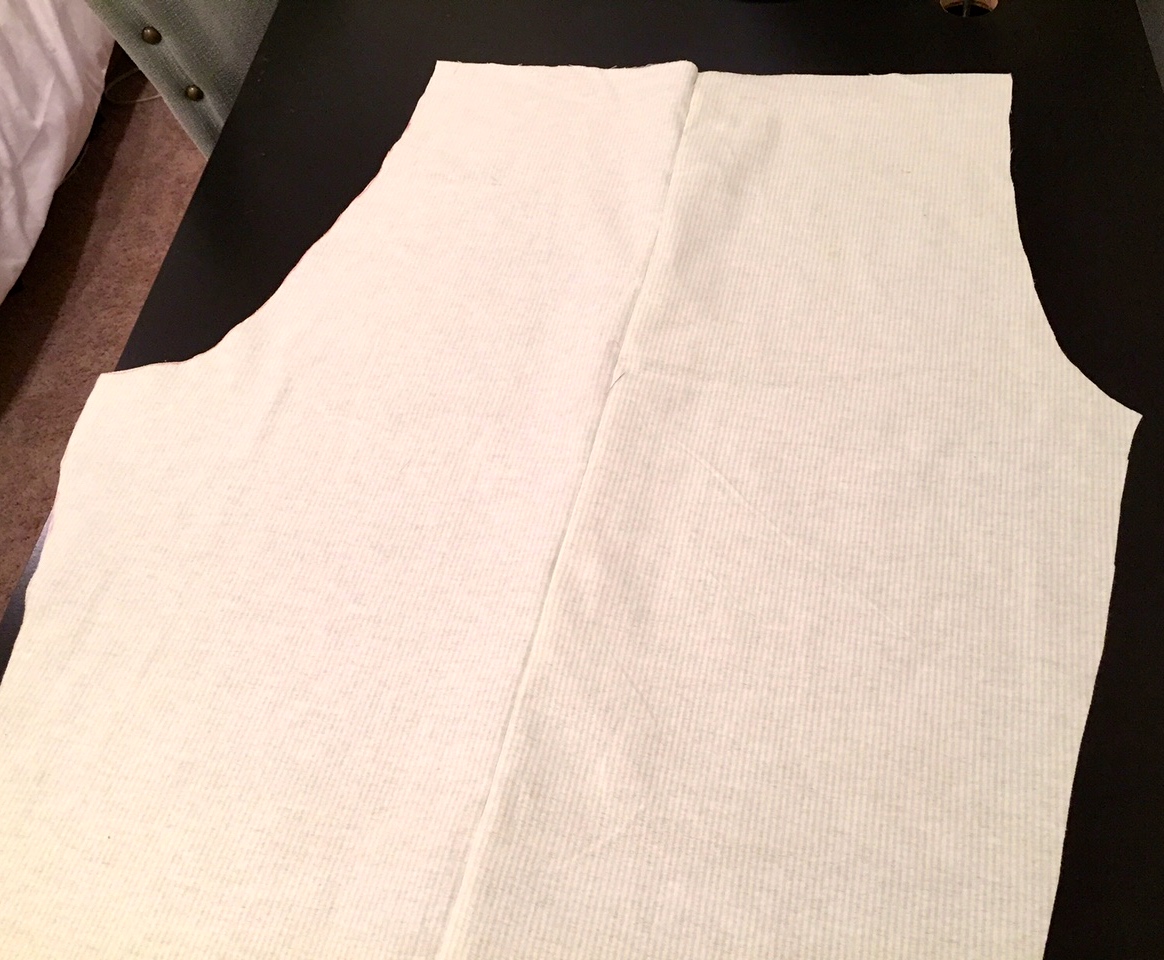
Step 3:
- Once you’ve sewn the front and rear pieces together, you have both leg pieces ready. Now, it’s time to sew them together!
- Take the pieces you’ve just sewn and again, put them right sides toward each other (wrong sides facing you).
- Line them up so the small slopes and the larger slopes (front and rear) are aligned perfectly.
- Now, sew together the small slopes (moving your fabric in a semi circle under your machine to make sure you sew the seam perfectly. And then, once finished with the small side, do the same thing (sewing together) to the larger slopes.
- Once the slopes are sewn, take the bottom tip of each one (the big and the small) and pull them inward to meet each other. This will be the center of your crotch area.
- Now, align the tips and the straight edges of each leg.
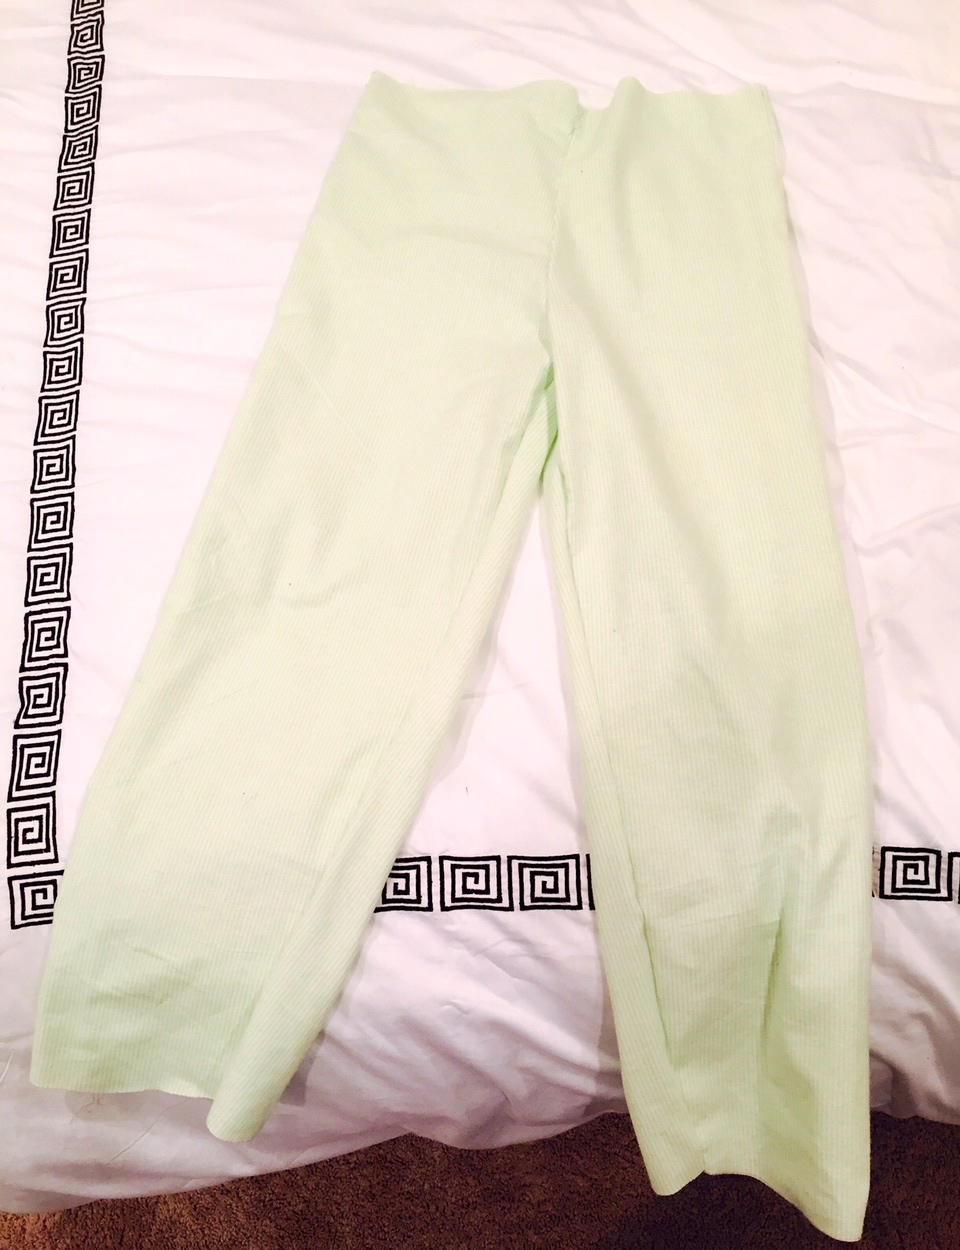
- Start sewing from the center of the crotch (where the tips of the slopes now meet) down the straight side of one leg to sew a seam down the leg. Repeat this on the other leg, starting at the center of the crotch and sewing all the way down.
- Now you have the majority of your pants sewn! It’s time to add the trim.
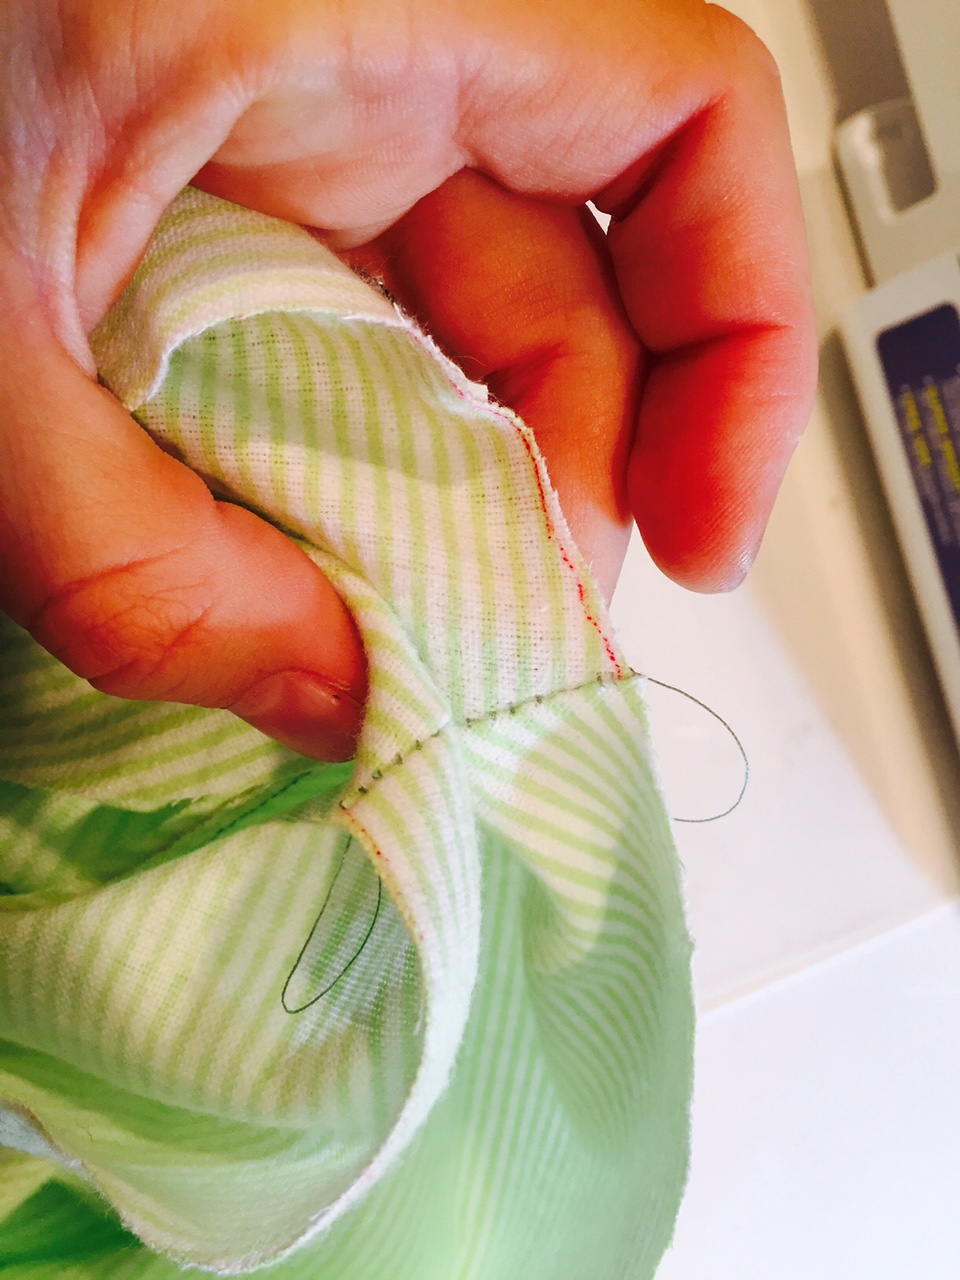
Step 4:
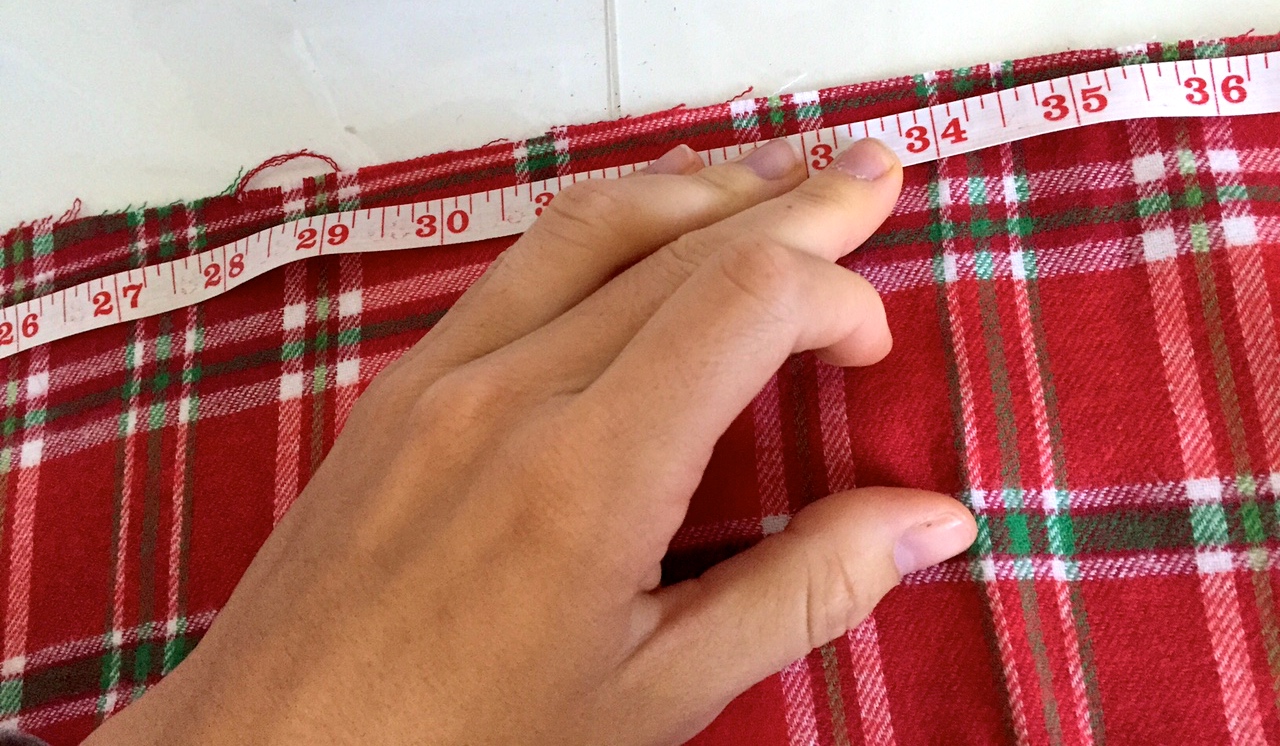
- Take a measuring tape and measure across the entire top circumference of the pants you just sew together.
- Take that measurement, and cut a piece that length (by 4.5″ wide) out of the fabric you are using for the trim.
- Fold that piece (right sides facing each other) to line up the two ends. Then, run the ends under your sewing machine to quickly sew the trim in a loop.
- Then, take that loop (turn it right sides out) and fold it in half (length wise). While folded, sew the edge of the folded trim to the top edge of the pants you just created.
- Make sure the pants are right side out and folded part of the trim is facing the bottom of the pants. This way, when you flip the trim so the fold is on top, your seam will be on the INSIDE of your pants.
- Yay! All done with the top trim. now repeat this entire step to add trim to the bottom of both legs.
Step 5:
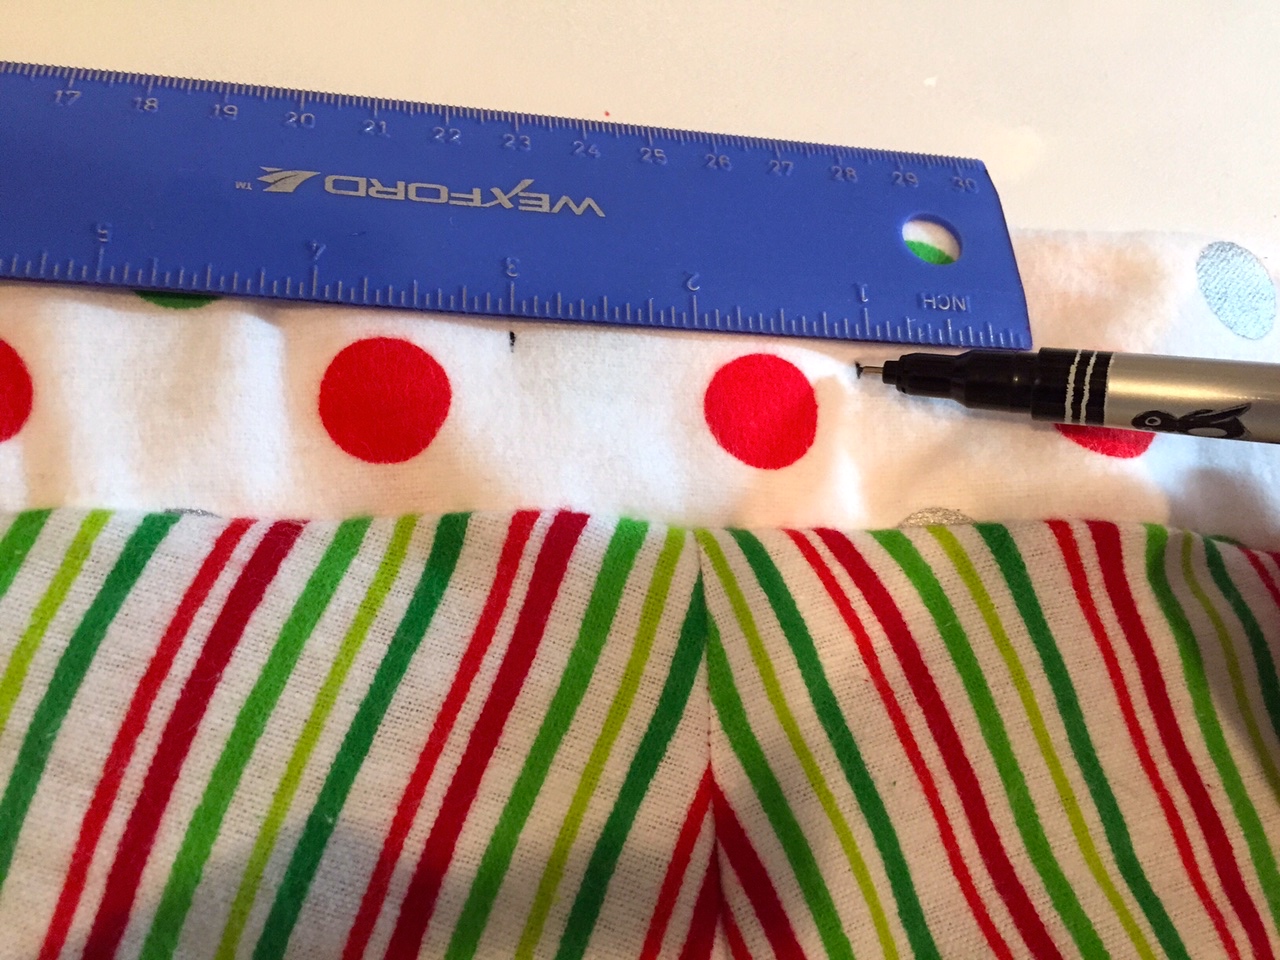
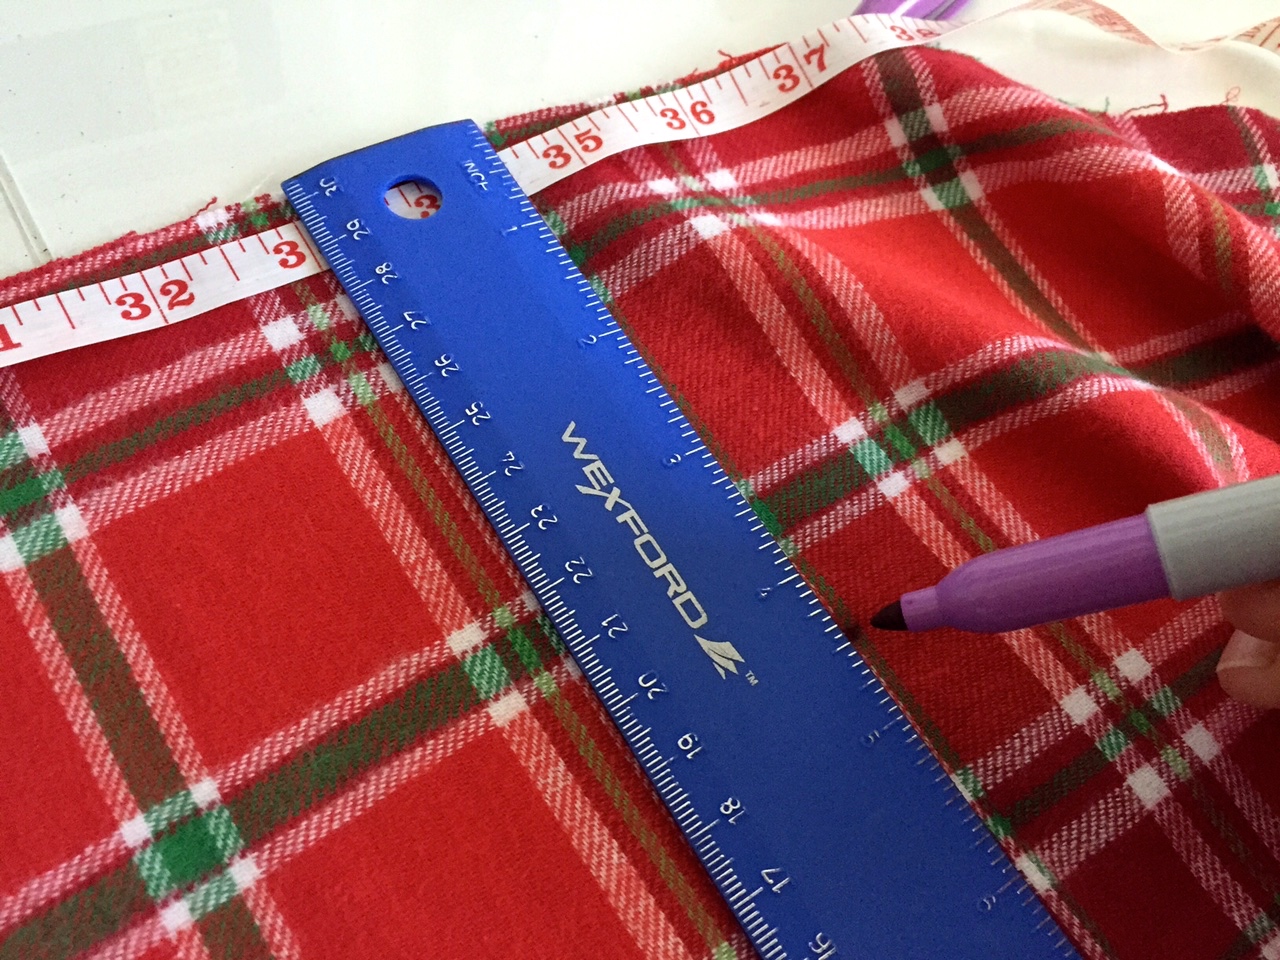
- Go to the trim on the top of your pants. Measure where the middle seam is (on the front of the pants) and then measure 2″ above (middle of the trim).
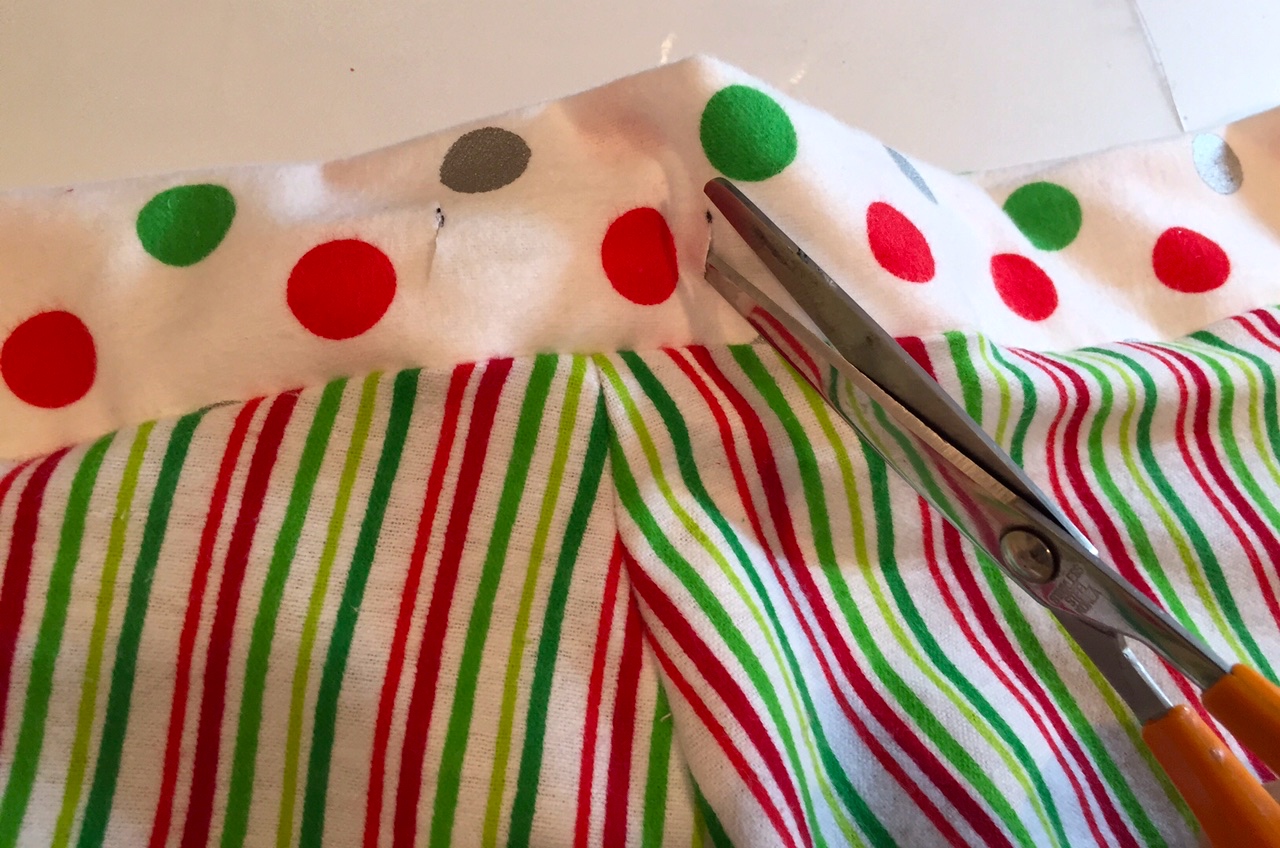
- Then, measure 1″ to each side of that point. This is where you’ll want to make 2 small cuts with your scissors (making sure you only cut through the front of the trim and not the back).
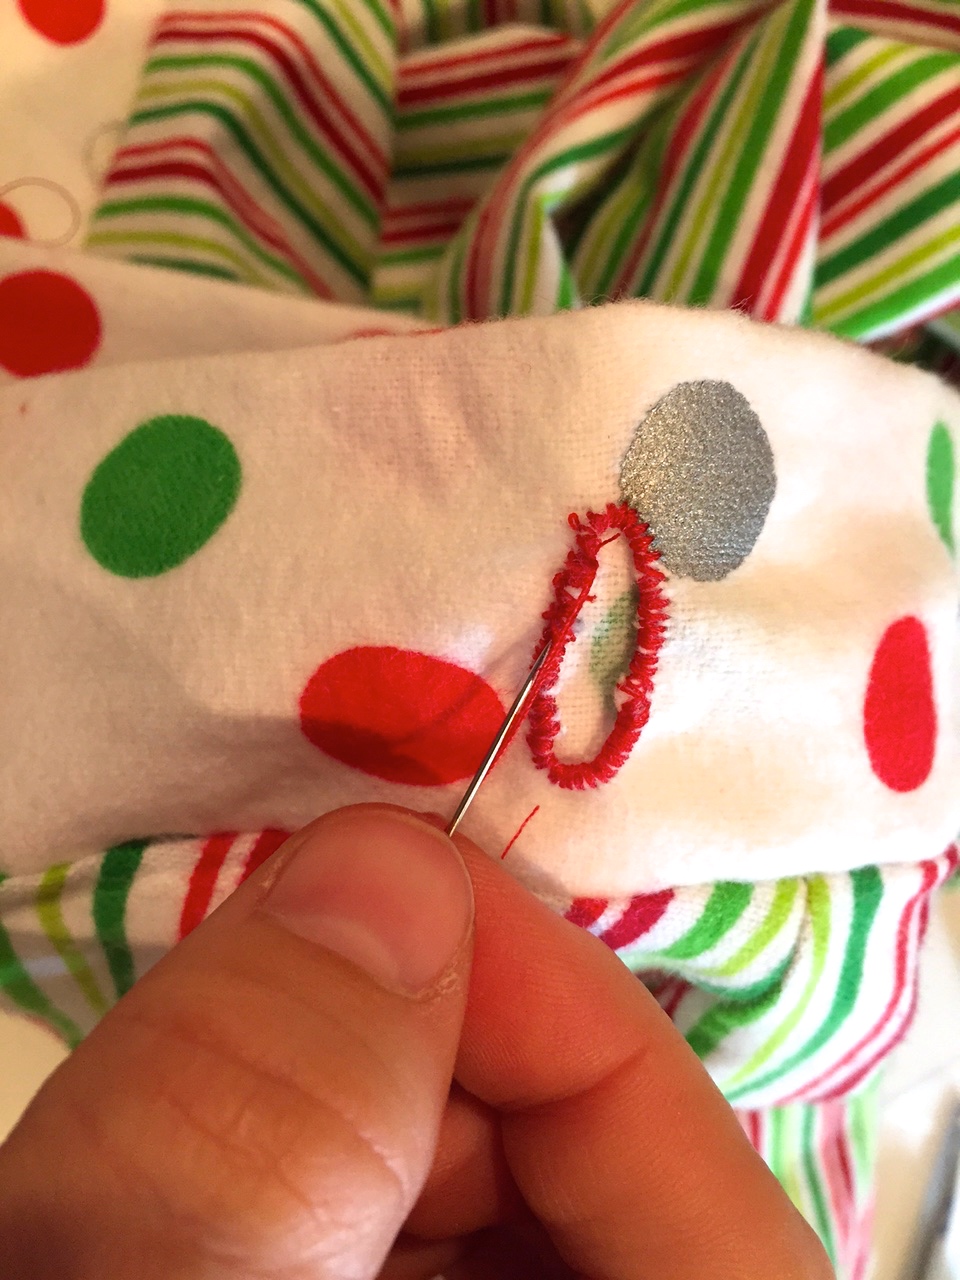
- Then, take your needle and thread and sew around the border of the 2 cuts you made, enforcing the fabric and making it hard to tear (these will be the holes for your draw string).
Step 6:

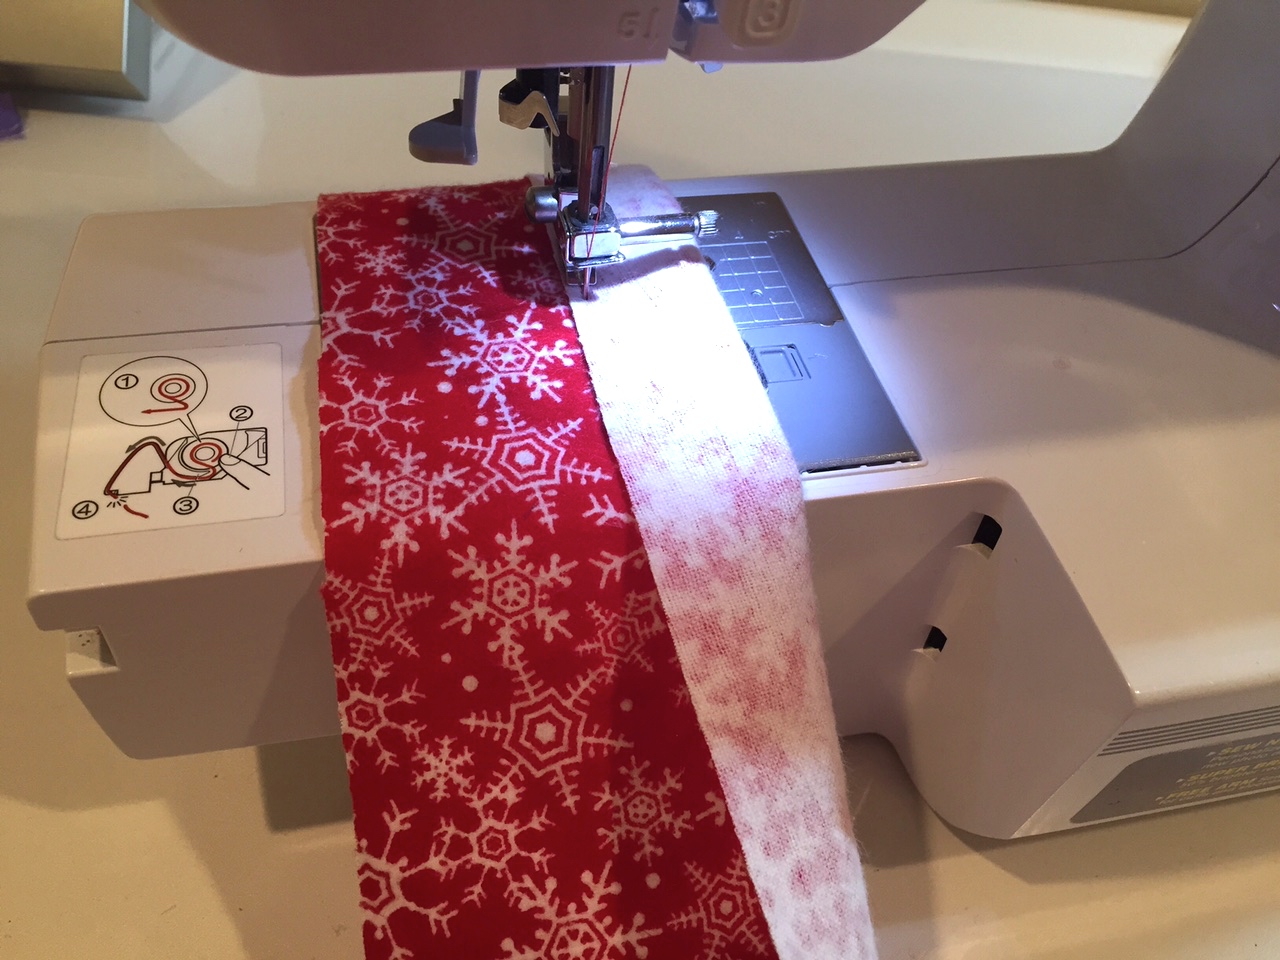
- Now, it’s time to make the draw string. Take your 10″ of fabric you bought for this, and cut it in half, length wise, so you have 2 equal pieces that are each 5″ wide.
- Fold one side in half (with right sides facing each other and the wrong side facing you) and sew the open end shut. So the same thing to the other piece.
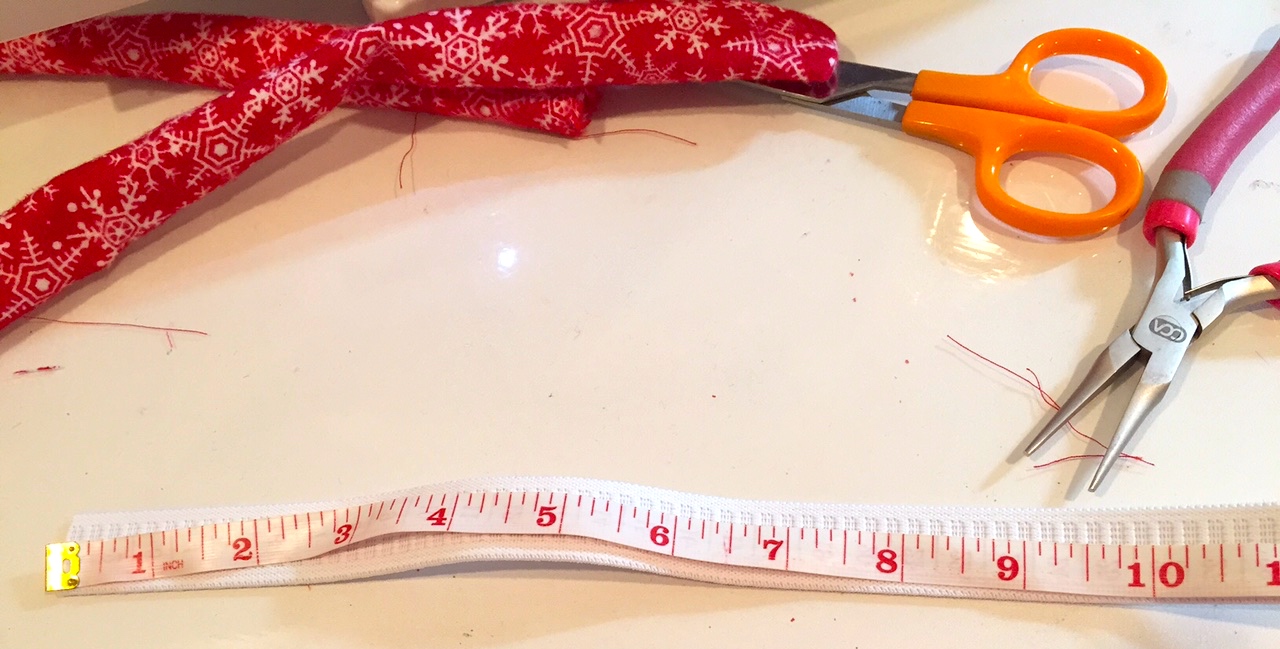
- Now, turn them right side out (you may need some help from tiny needle nose pliers to pull one side out through the other).
- Then, take your elastic and measure about 10-20″ (depending how large your waist is) and cut.
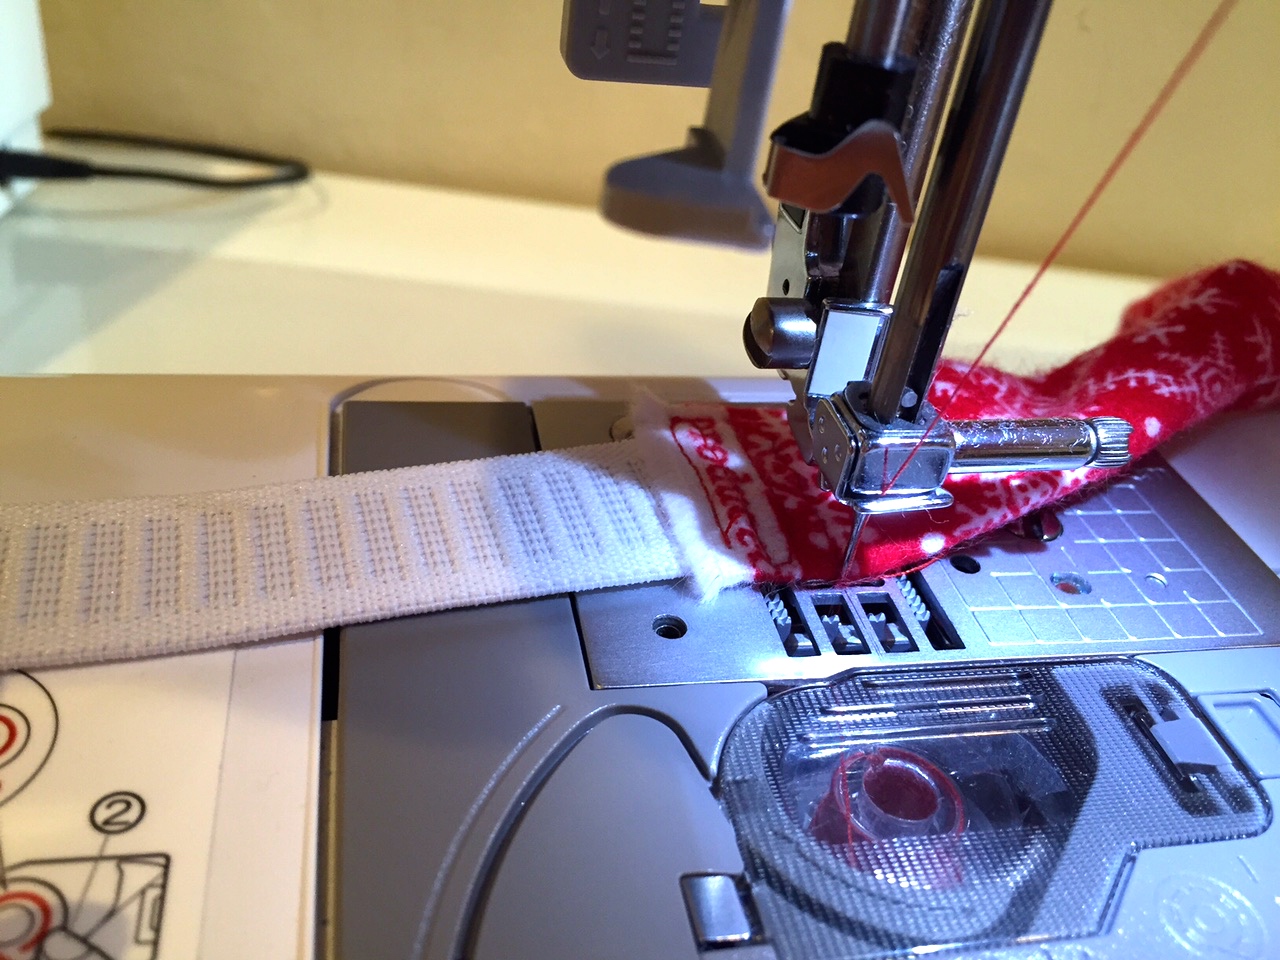
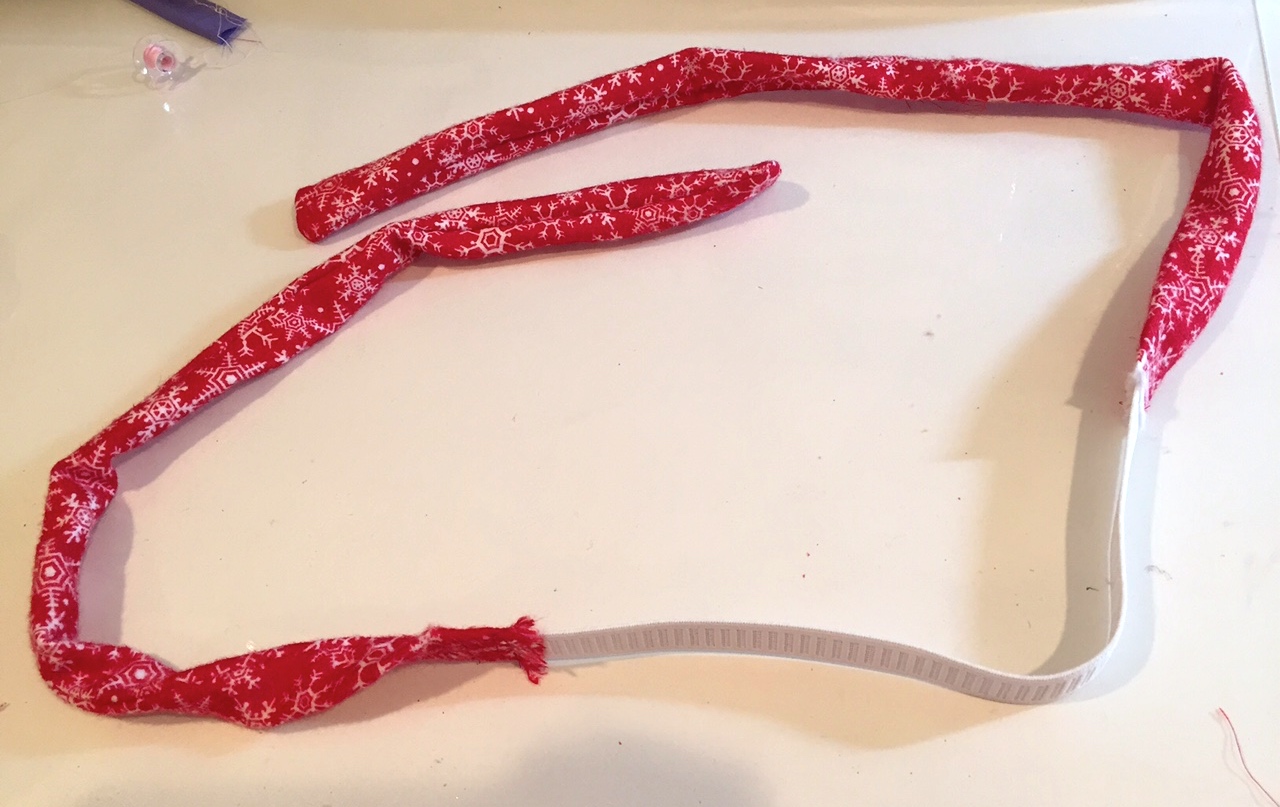
- Attach one piece of draw string fabric to each end of your cut elastic and then sew them onto the ends of the elastic to form one long drawstring.
- Now, you’re ready to put it through the trim of your pants to finish!
Step 7:
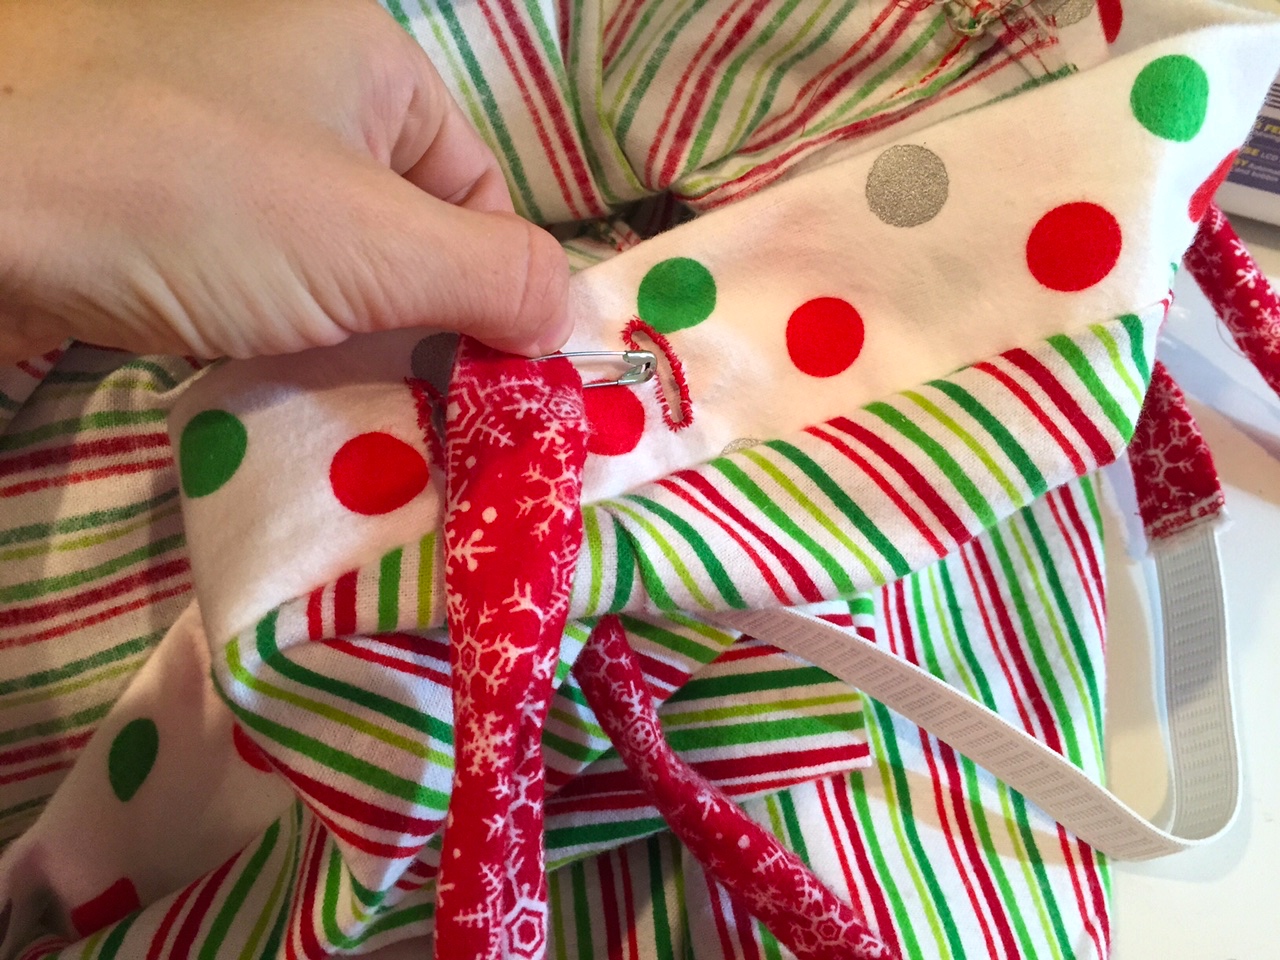
- Now that your drawstring is done, attach a safety pin to the end of one side and slip it through one of the hols you made in the top trim.
- The safety pin makes it easier to guide the string through the trim to the other side.
- Feel the safety pin through the trim and keep pulling it through until you reach around the entire trim and can pull the string out the other side.
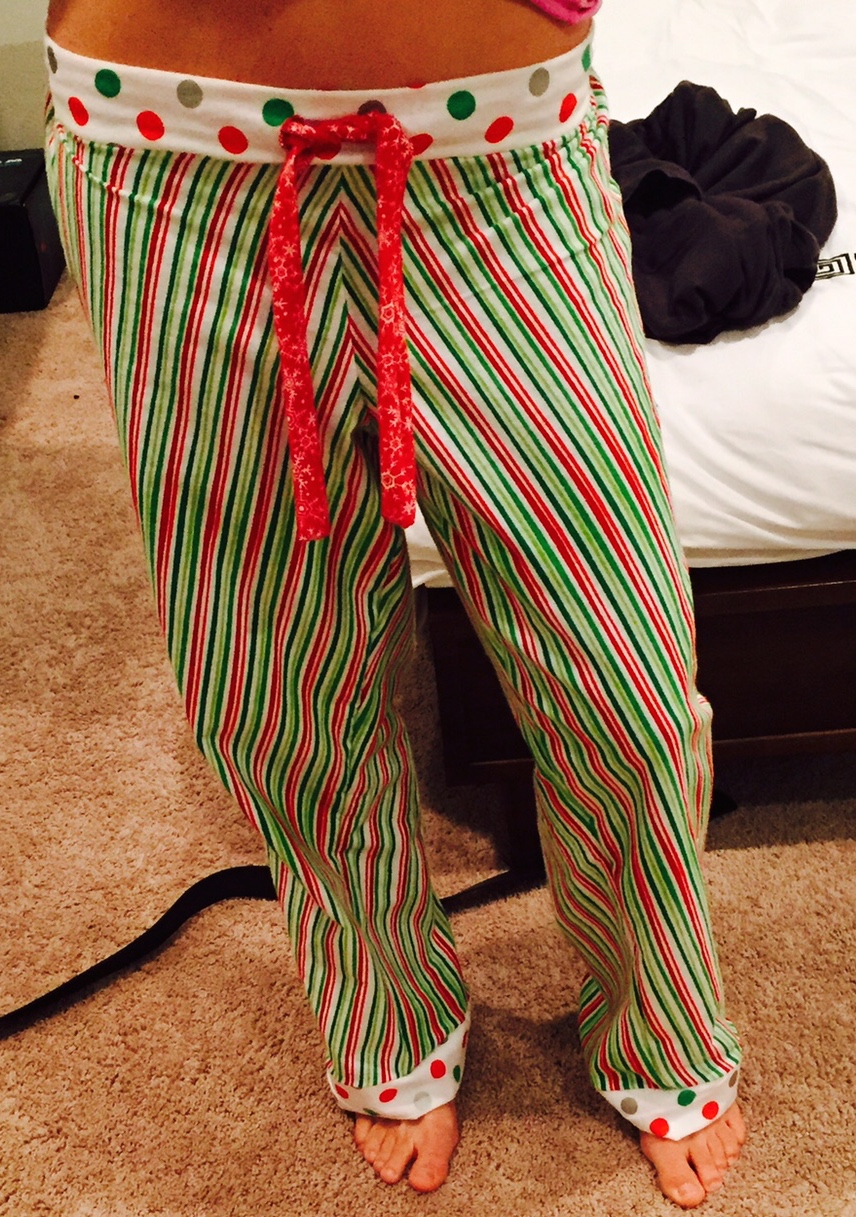
- Then, your pants are ready to wear!!
Step 8:
- Now, here’s the easy part! The shirt.
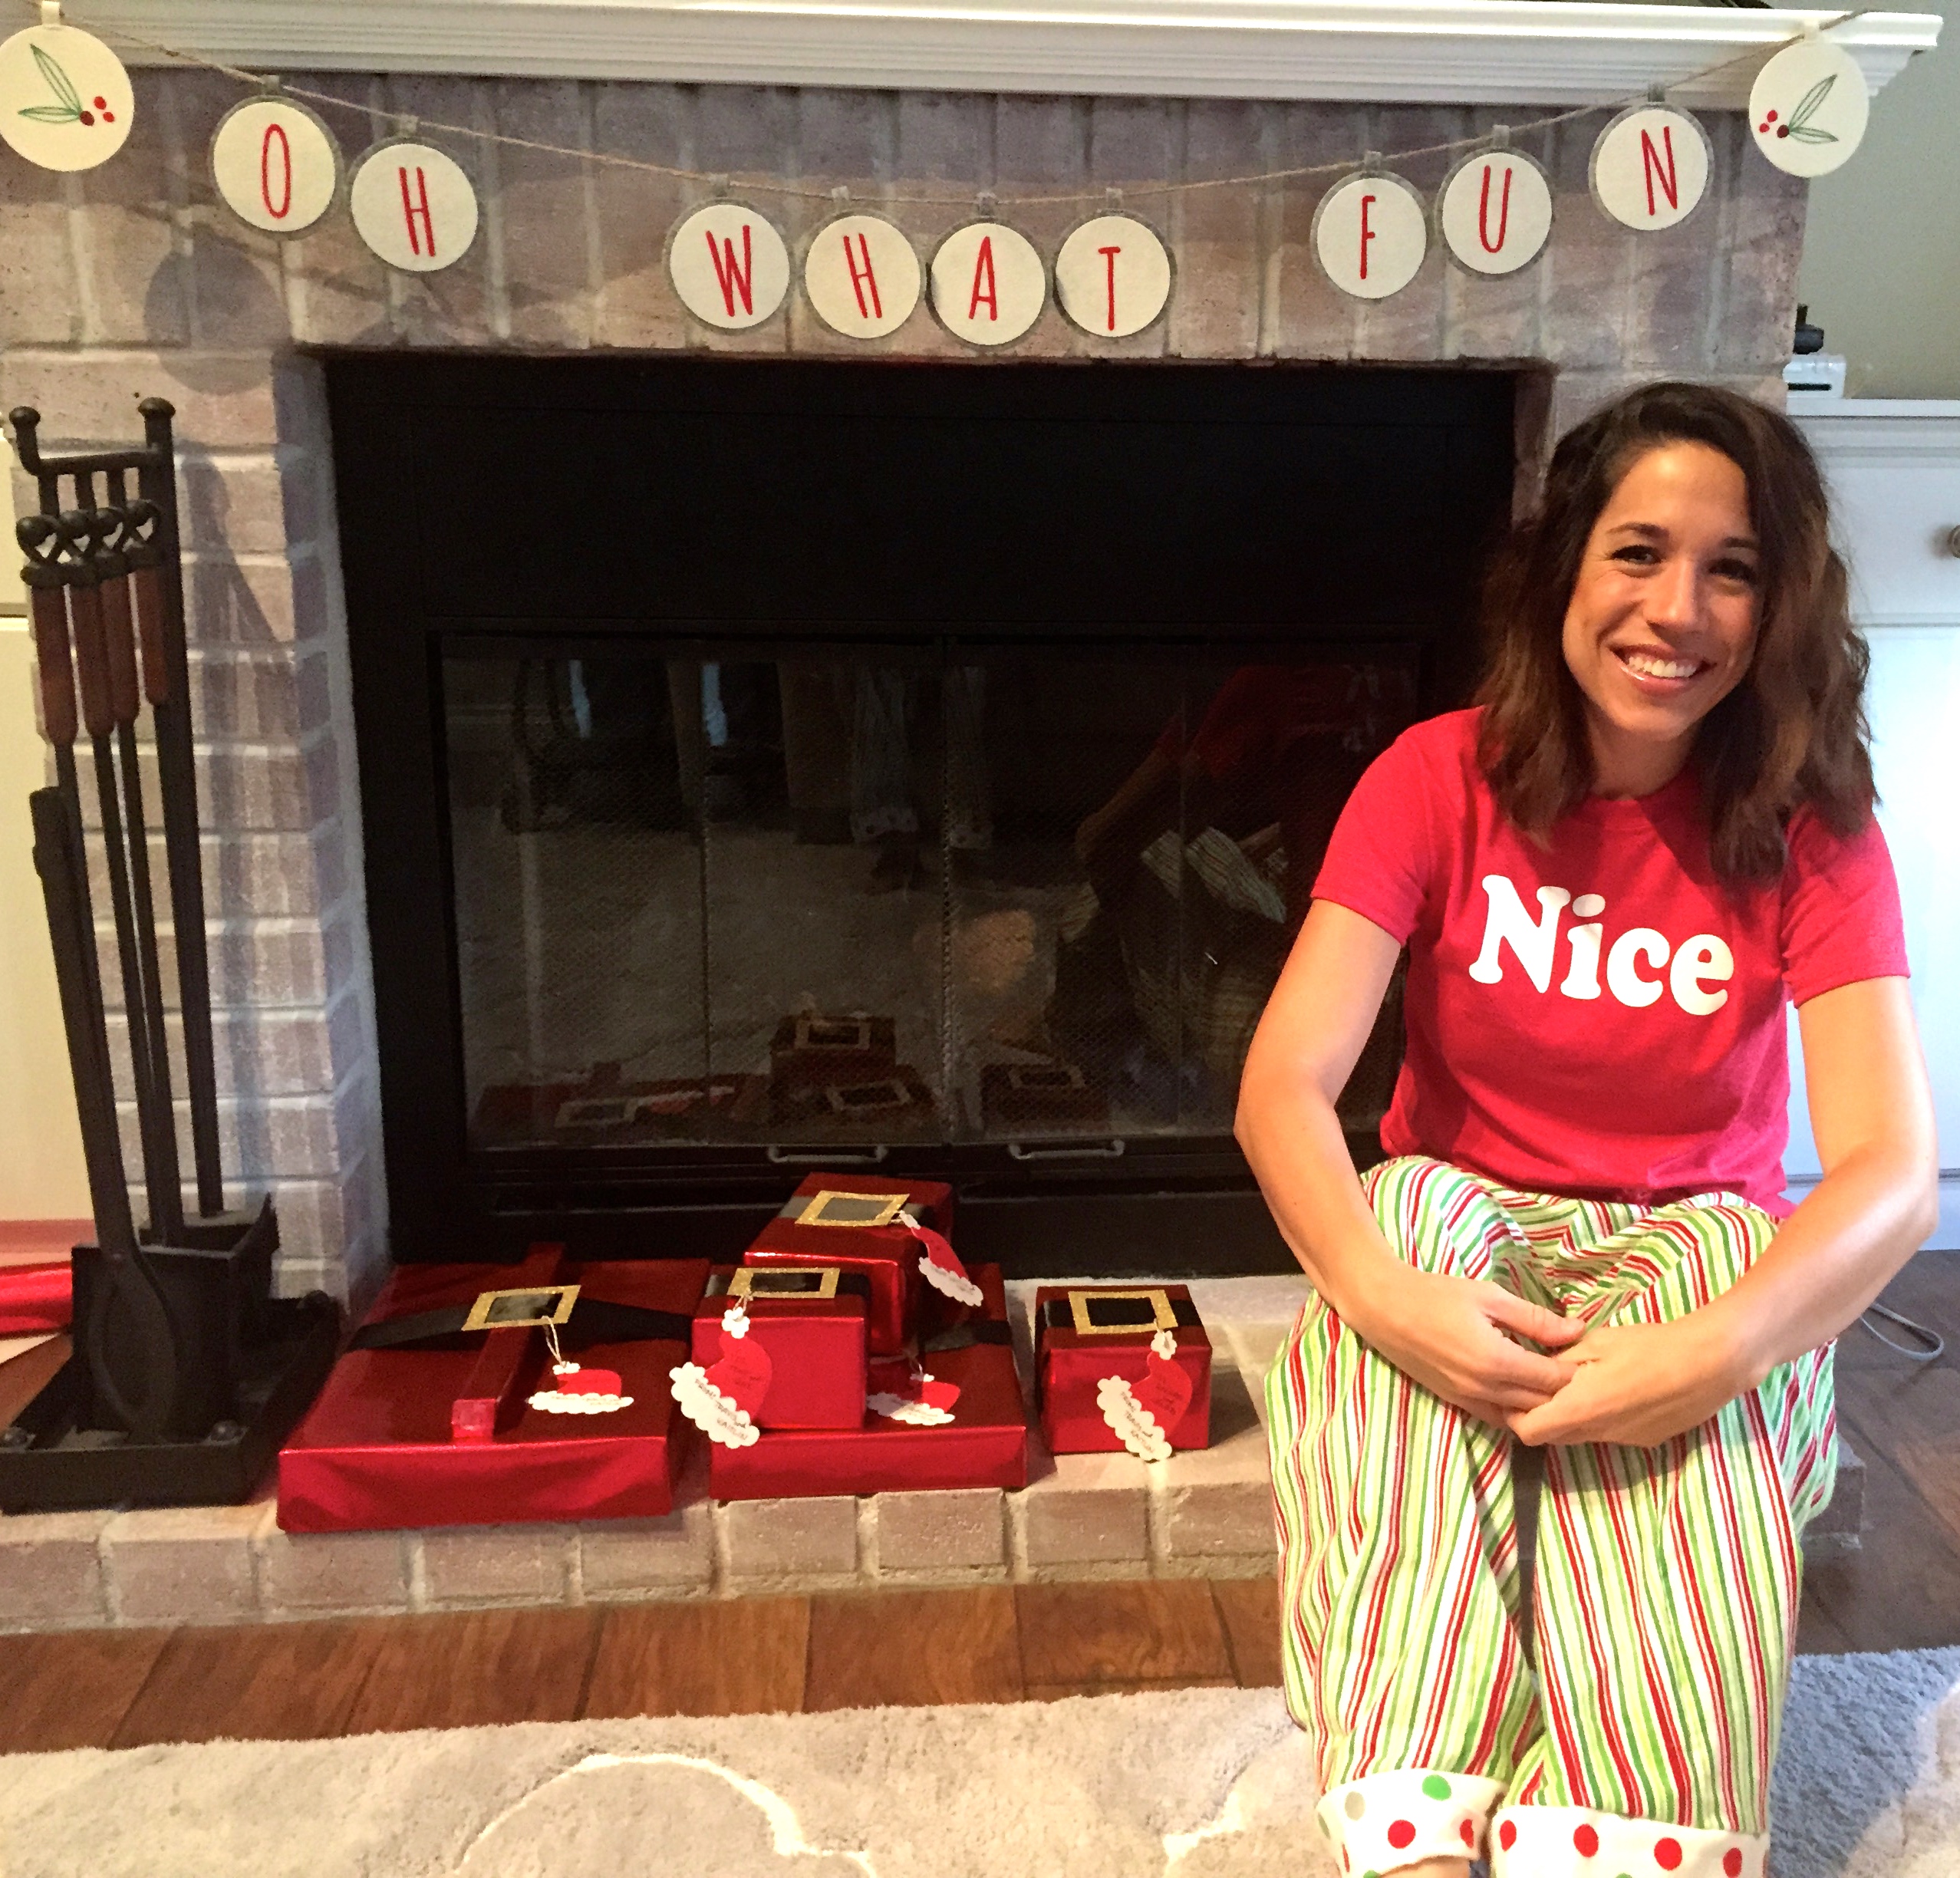
- Design what you want your shirt to look like in your favorite design program. Then, follow my tutorial to make custom shirts to print or cut your design out and iron it on your cotton shirt.
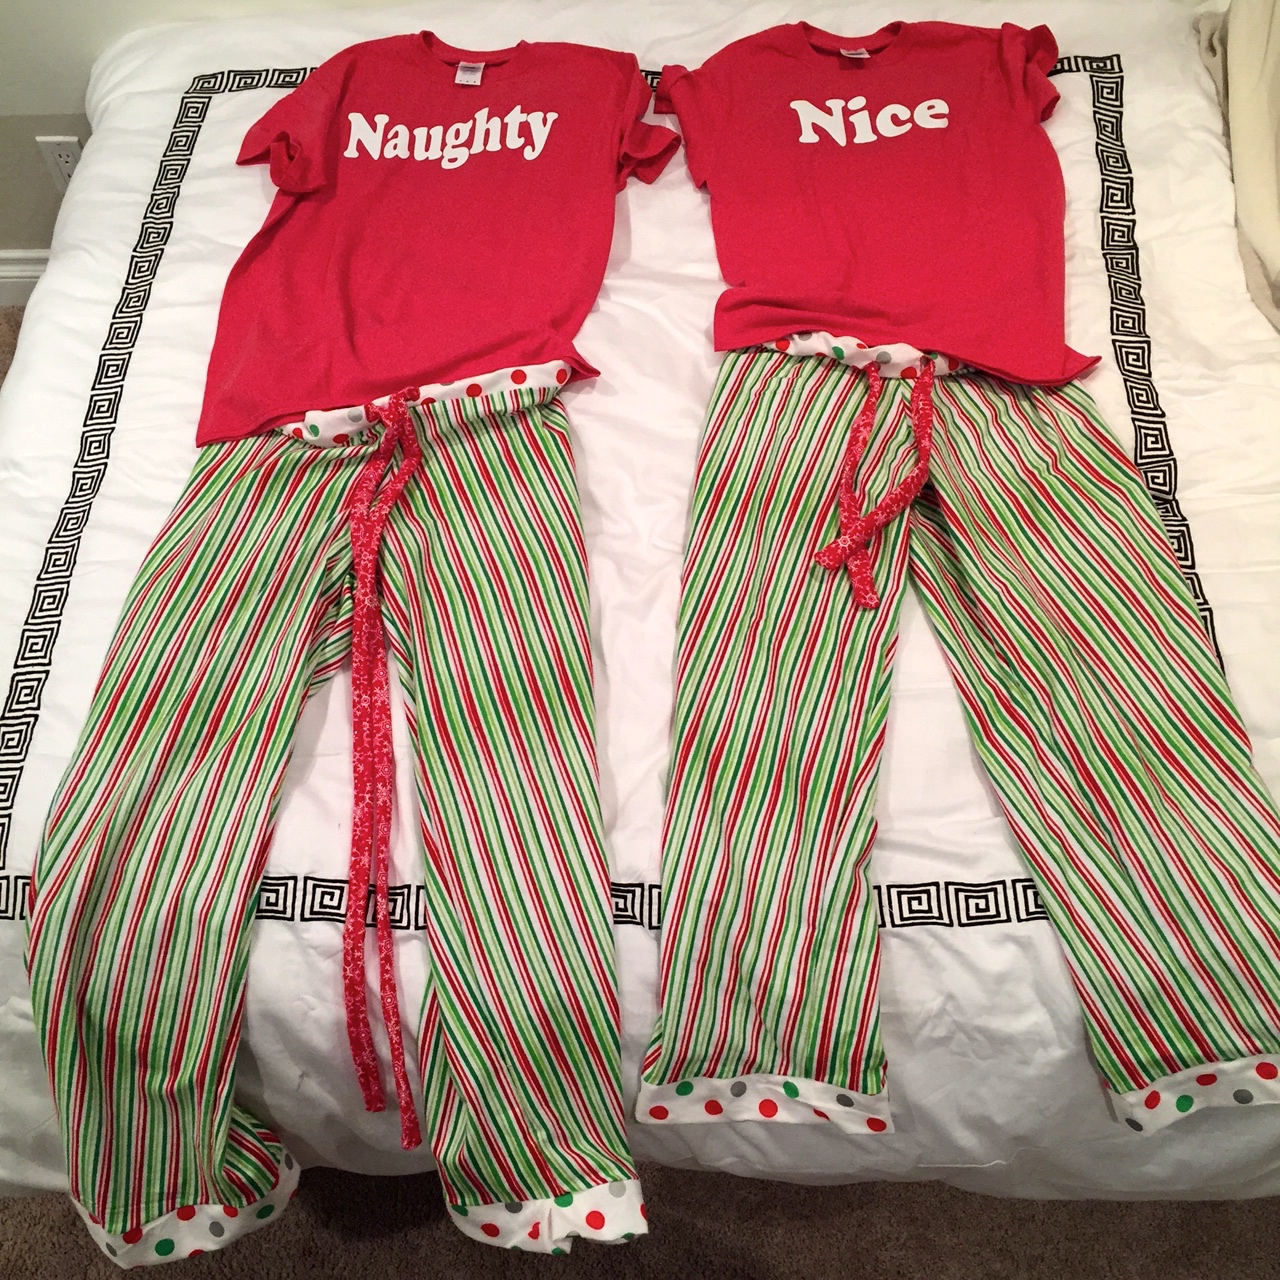
Then ta da!! Your pajamas are done!!
Repeat all the steps above for each person in your family to make it a family affair! Christmas morning never looked so festive!
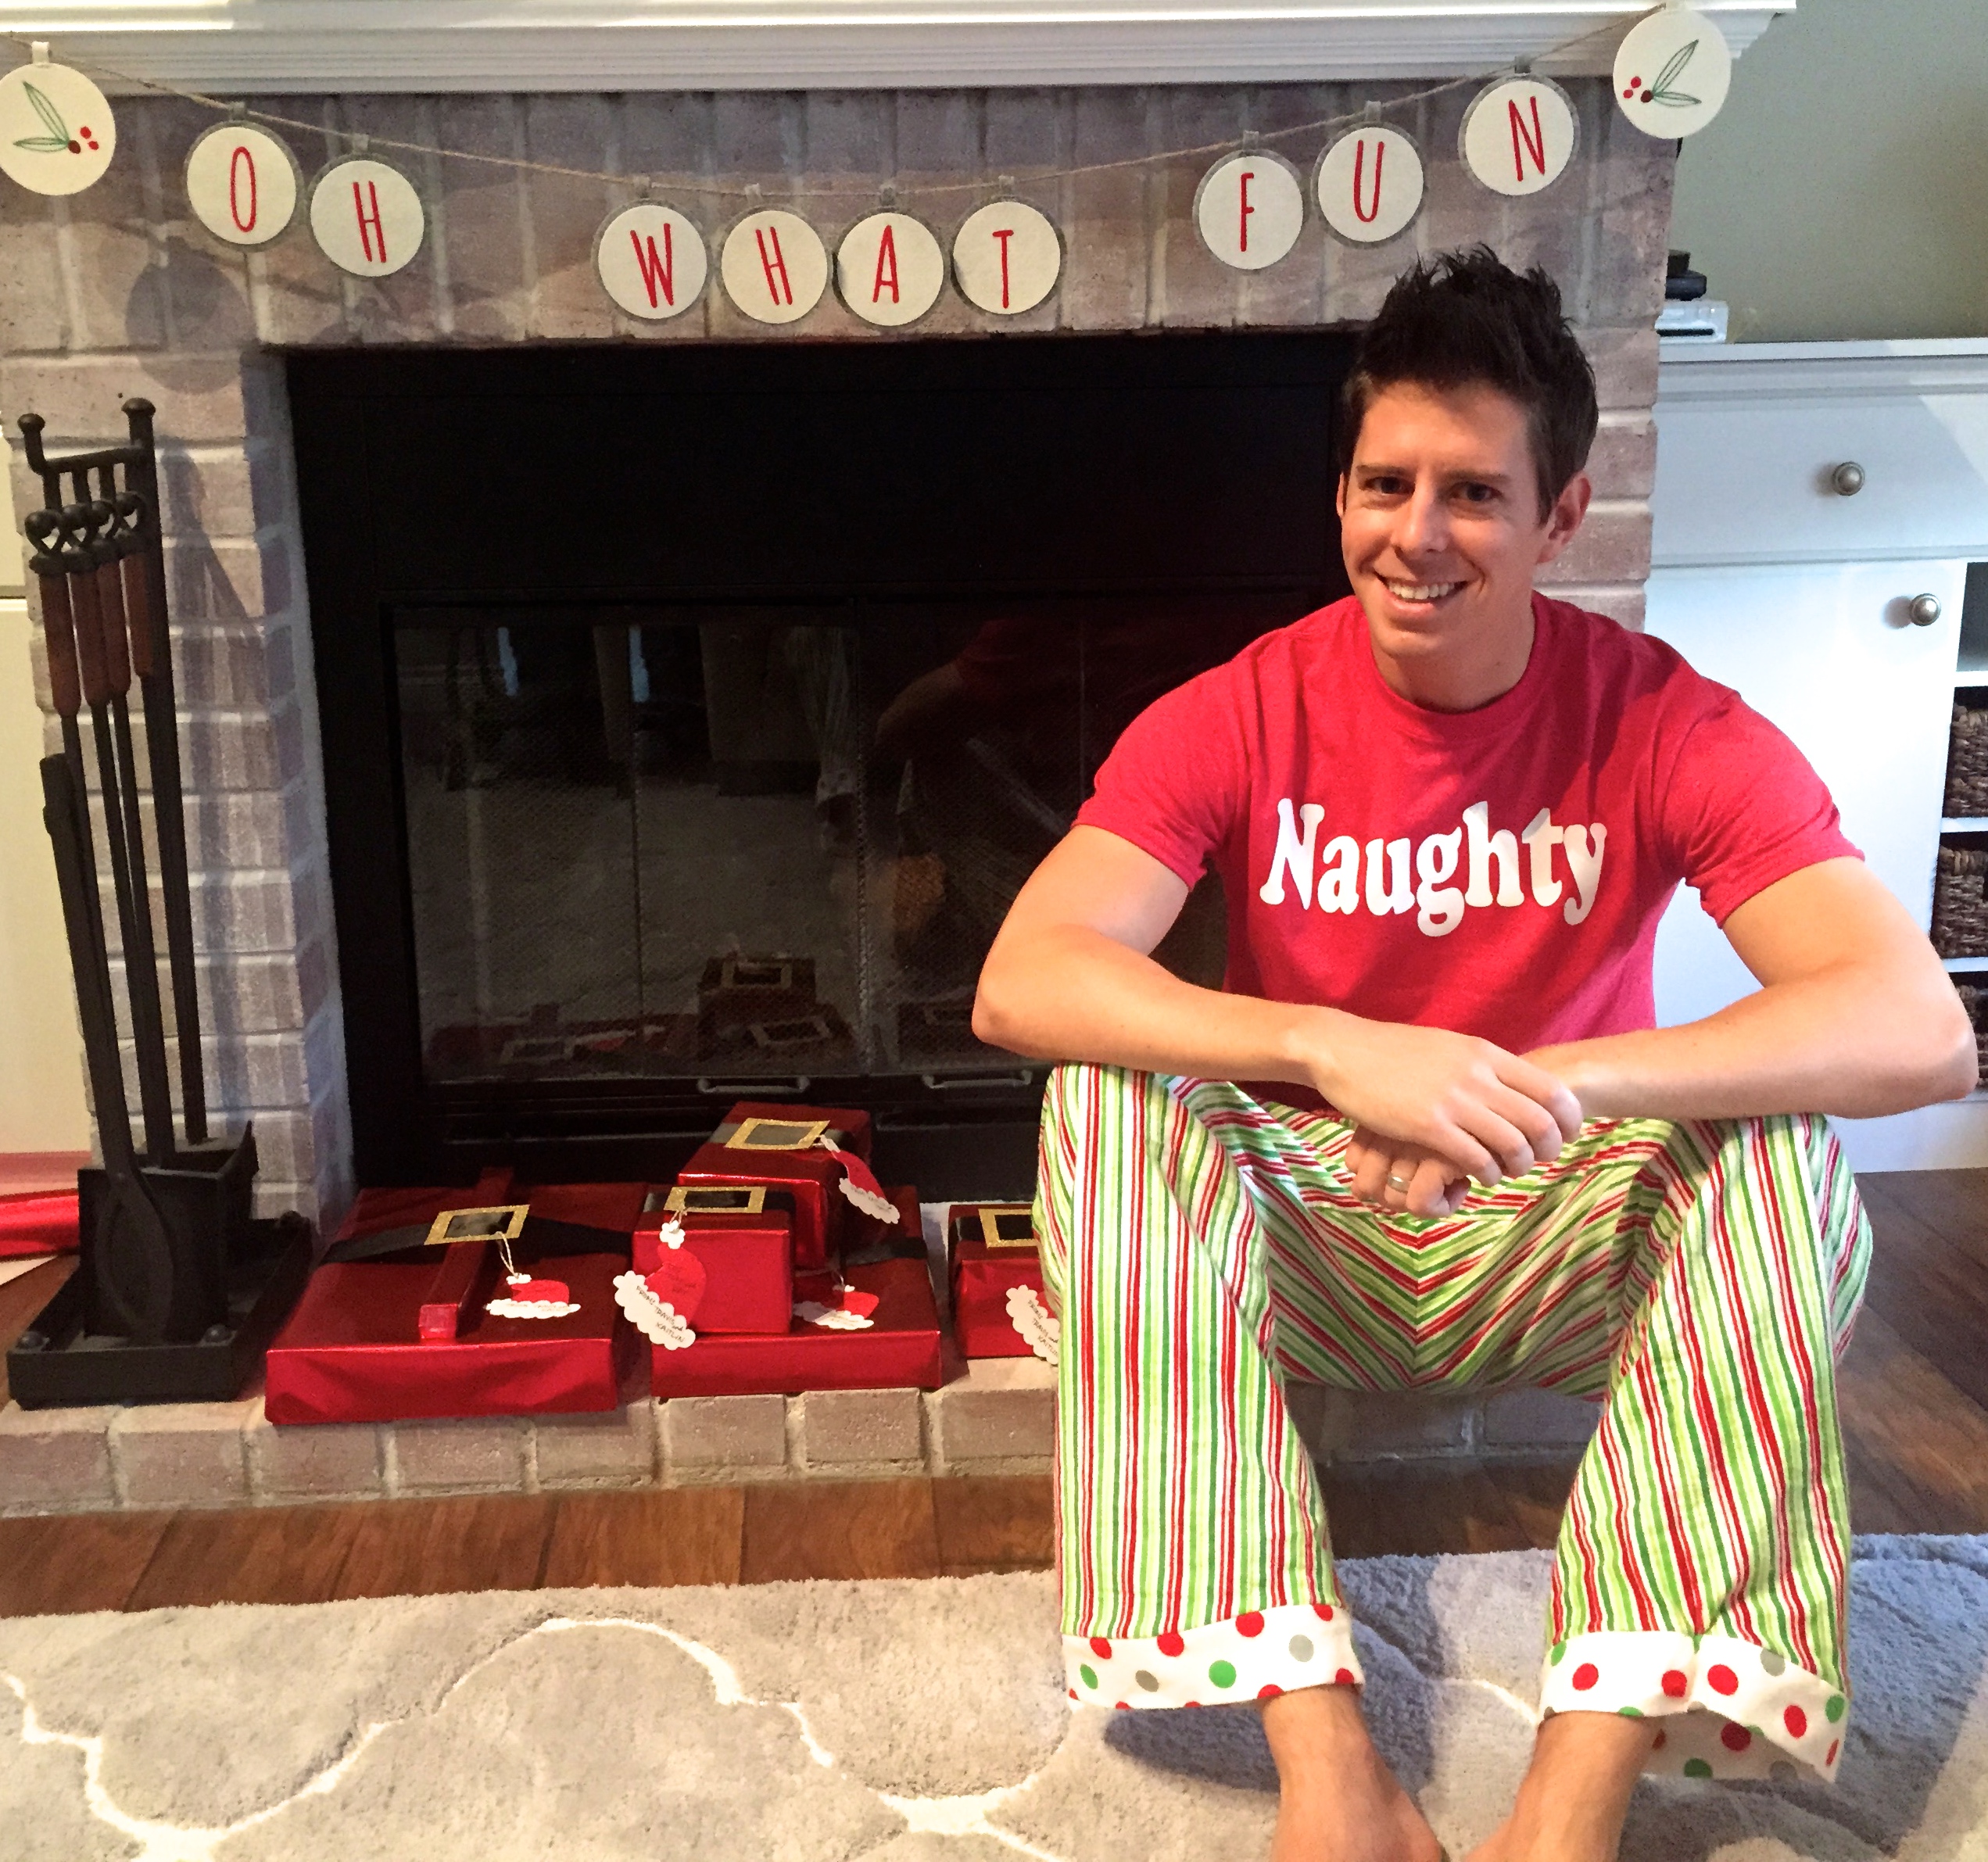

We just couldn’t help ourselves in the last pic 😉 You just want to squeeze everyone’s bum in these pants!
Yes, I could probably buy some that are equally as festive. But just knowing that these are a labor of love, for our little family, is what makes them so special. AND, the fact that NOBODY else anywhere has these exact PJs is totally priceless, no?
I was hoping to keep them a secret until Christmas eve, but i just needed to share them with you all now. Hopefully, this gives you enough time to go out and make some for your family holiday!
Unfortunately, I don’t sell the pants in my Etsy shop. For what I’d charge for the time it takes wouldn’t be worth it (you’re better off buying them retail. Machines can crank them out much faster than I can). Here are a few links for you if you don’t have time to DIY:
The women’s pants run between $20-40, the men’s around $20, and the children’s around $12.
And I DO, however, offer the custom pajama shirts in my Etsy shop. If you can find cheap pants, I’d be happy to create a custom shirt for you and your family to match!
But, the ultimate goal of this post is to inspire you to DIY. So if I’ve done that, YAY! You better get to shopping for that fabric before it runs out! Here’s a recap of everything you’ll need to DIY:
- Old pair of PJ pants
- Or if you prefer to work with a pattern, Family PJ Pattern Set
- 2 yards of flannel fabric (for EACH pair of pants)
- This will be the main color of the pants.
- 1/4 yard of a different flannel fabric (for EACH pair of pants)
- This will be the trim on the top and bottom of the pants.
- 10″ of a third flannel fabric (for EACH pair of pants)
- This will be the tie for the drawstring in the pants.
- 1″ Elastic ( about 10-20″ for each pair of pants)
- Sewing machine and thread
- Marker and scissors
- Cotton Shirt
- Heat Transfer Vinyl (you’ll need a Silhouette or any cutting machine for this)
- Or Iron on Printable Paper (to use with a printer)
- Iron
HAPPY CRAFTING!
Leave a Reply