By now, if you don’t know that I absolutely LOVE kids, you haven’t been reading my posts or following me on Facebook or Instagram. I absolutely ADORE children, especially babies. So much so that I recently quit my full time sales job in corporate america to focus on my passions: this blog and babies.
Wait… it’s not what you think. I’ve taken a part time nanny job as a means of income while I’m working on the blog. What better way to spend my time than playing with little ones? I get my baby fix, and have little people to actually give my crafts to when I make them.
I also love the fact that everyone around me is starting to have little ones. I am the last person to complain that my social media feeds have turned into pictures solely of weddings and babies. It actually makes me happy, and gives me so much inspiration for all the fun crafts I love to do.
Specifically, I have been obsessed with those big bows you see on tiny little girls. Not just the normal stretchy band with a ribbon bow on the end, but the thick banded, huge bows. I think there’s nothing cuter than seeing big baby eyes looking up at you from behind an oversized headpiece.
Maybe it’s the fact that I am super girly, or maybe it’s just the fact that big things on little people is just adorable. Probably a mix of the two. But I just can’t get enough.
And that’s why I decided to create this tutorial. I kept looking at these fun headbands and thinking, as I do with most things, “Those look pretty simple to make. I bet I could DIY”. And what do you know, I could! It took a couple of trial and error runs (getting the right fabric with enough stretch, etc), but I’ve perfected the big baby bow.
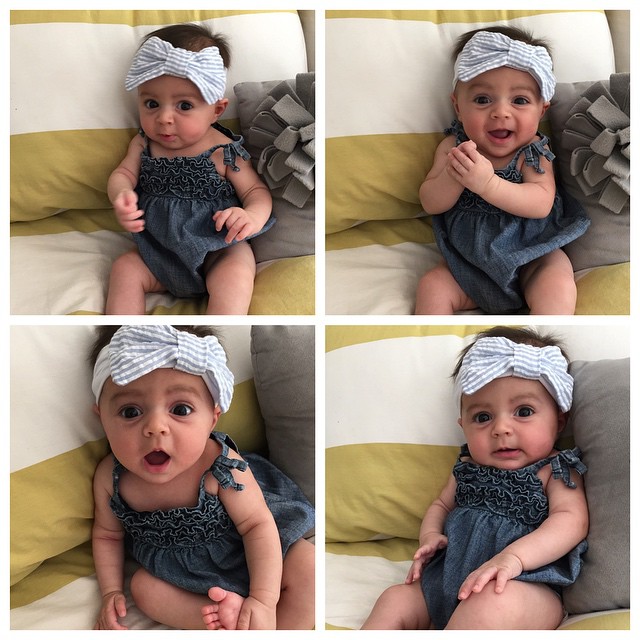
And just in case you’re wondering, yes, that perfectly precious baby model above is the offspring of a dear friend of mine from college (thanks for letting me borrow Tessa for this, Heather!). I can’t promise that all children who wear these bows will know how to work the camera as well as Tessa, but I can promise that they’ll look absolutely adorable!
Below are the materials you’ll need and the step by step instructions how to make baby headbands and bows.
Steps to Make Baby Headbands with Big Bows
The Necessary Tools:
- ⅓ yard of Stretch Jersey Knit Fabric (for the headband)
- ⅓ yard of any other type of fabric (I used plisse fabric because it’s soft to the touch for a baby)
- Sewing Machine
- Thread
- Needle
- Ruler
- Iron
Step 1:
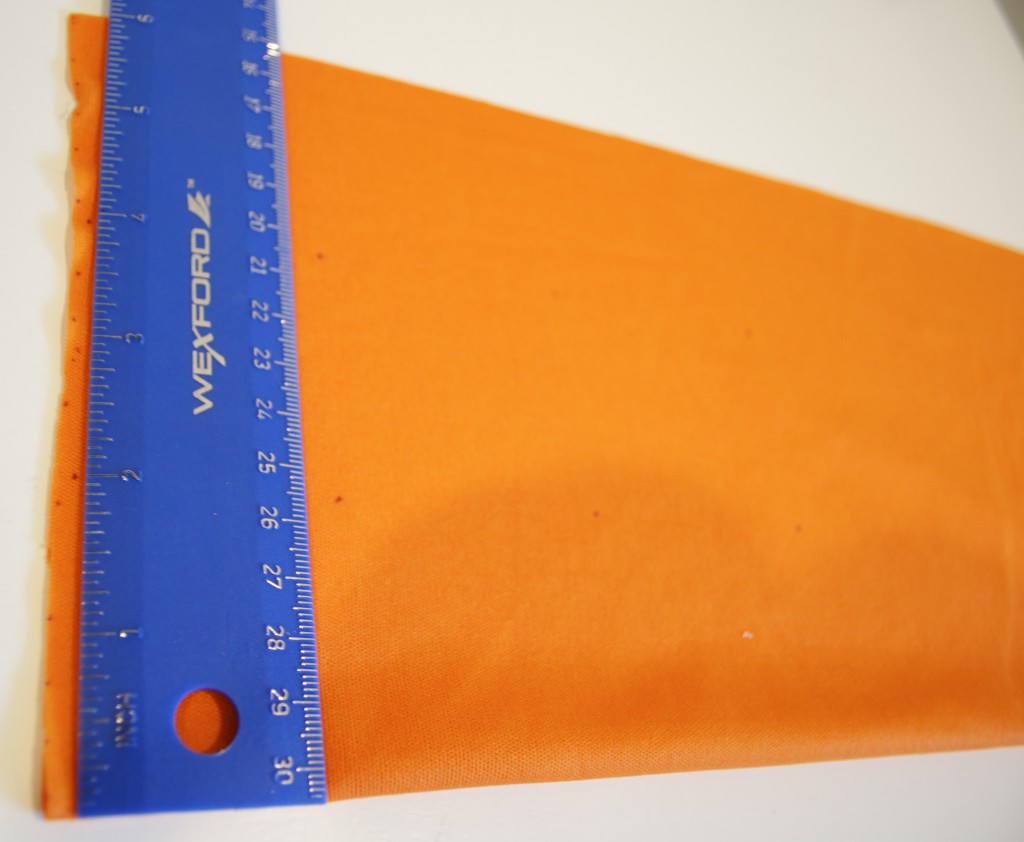
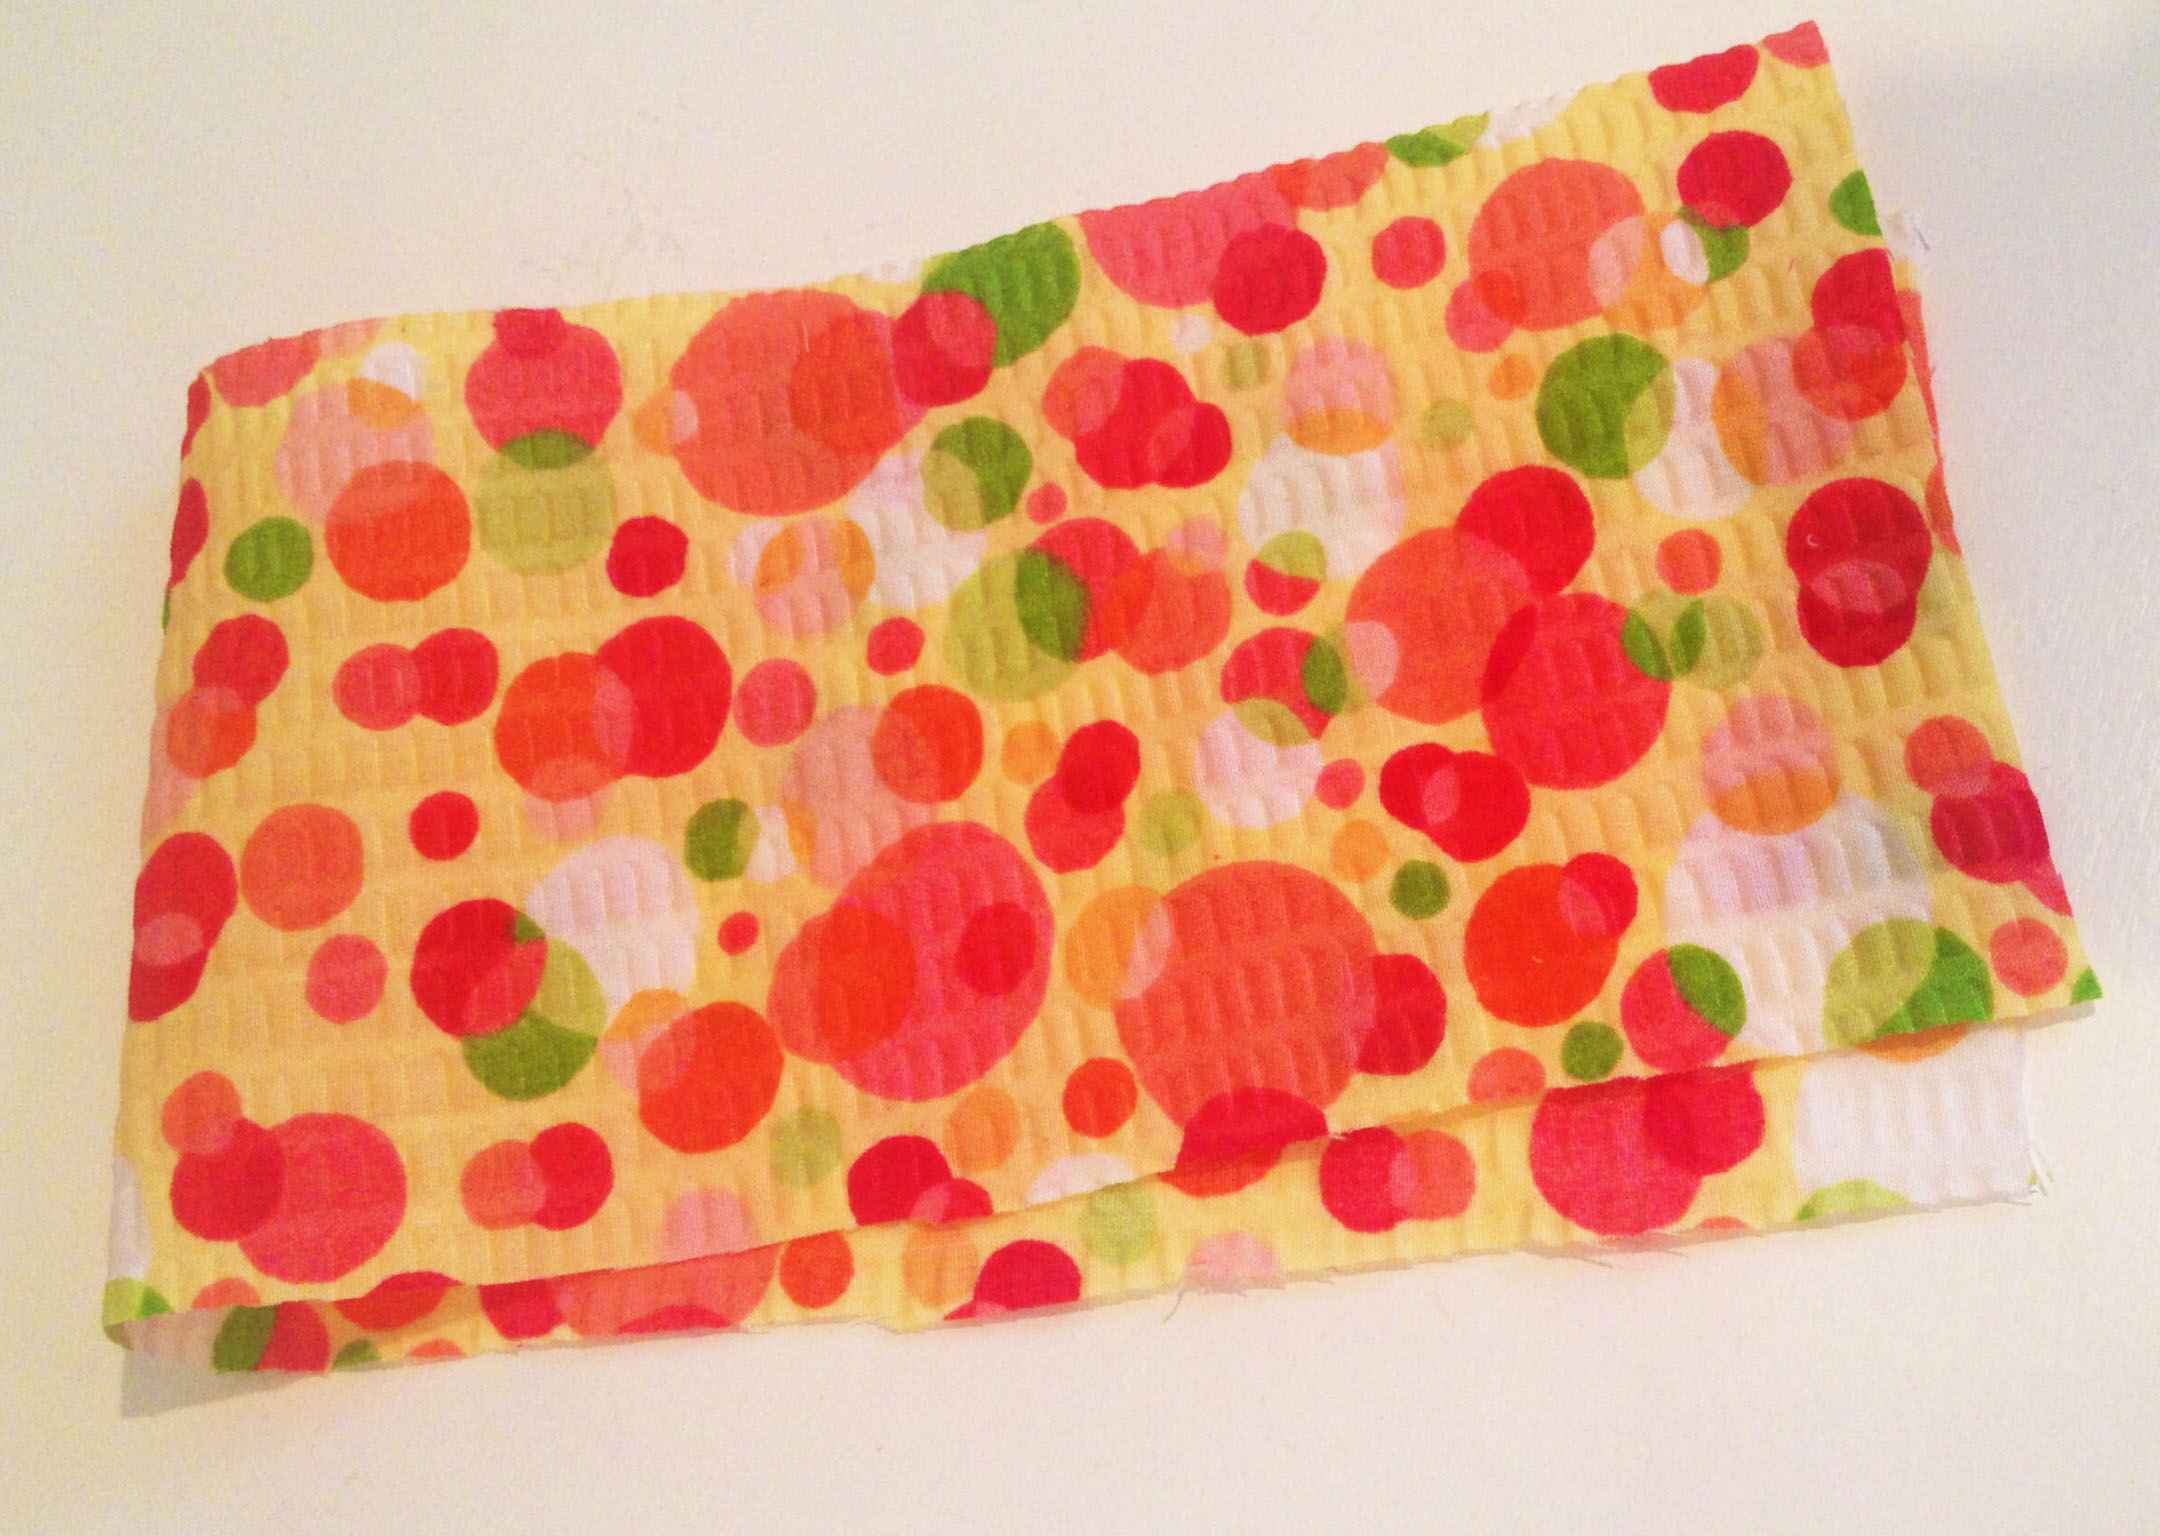
- Fold your stretch jersey knit fabric in half, the long way.
- Measure down the fabric every 2” (you should be able to make three, 2” strips when the fabric is folded in half).
Step 2:
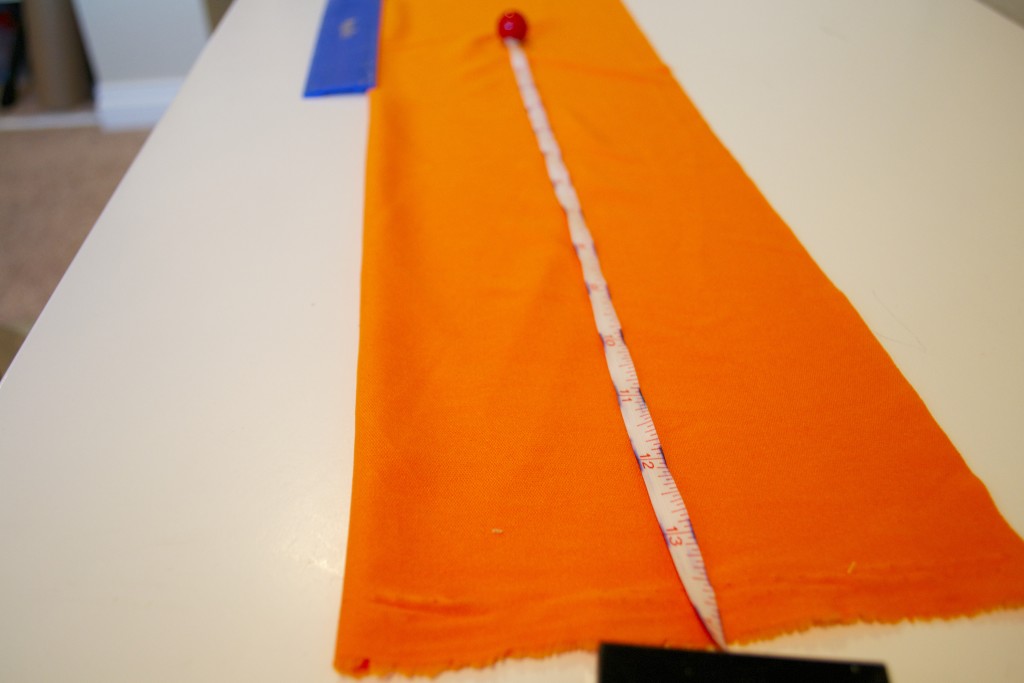

- Cut strips of fabric out at your 2” markers. Make them as long as the following chart suggests (according to the age of your child and the circumference of their head).
- My first headbands were for newborns, so I cut the strips 2” wide, and a length of 14” (assuming about ½” would be used for the seam).
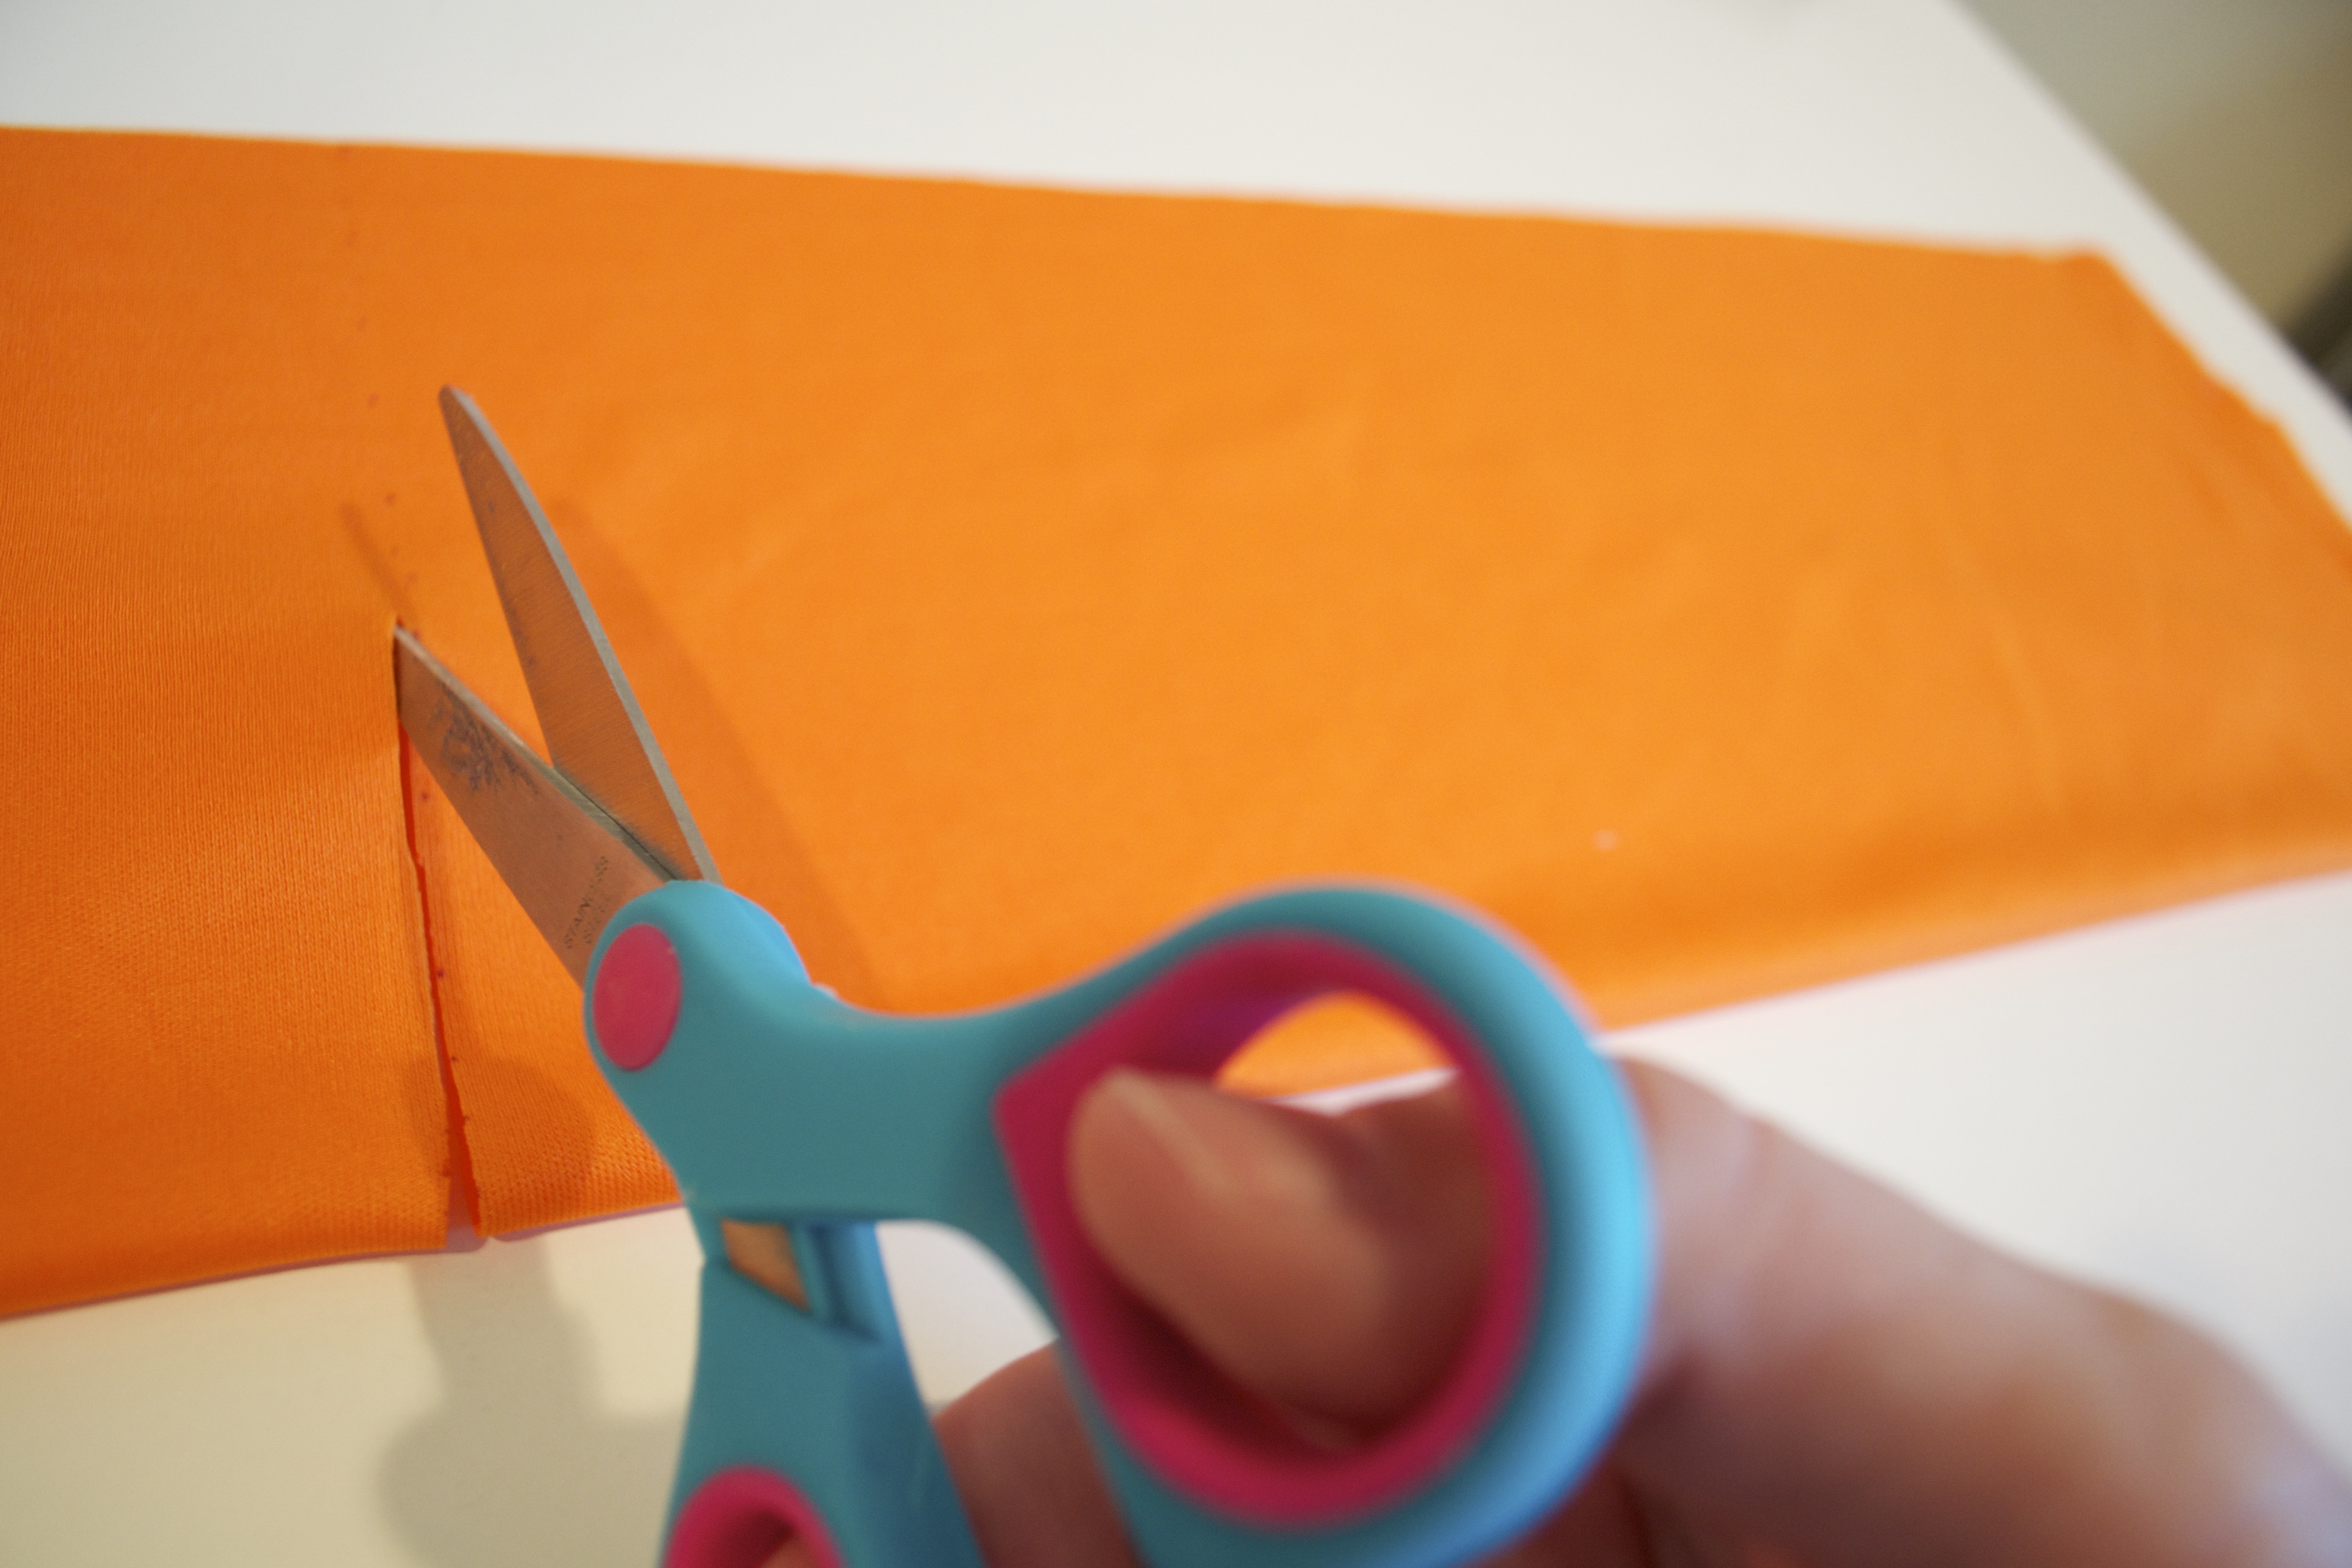
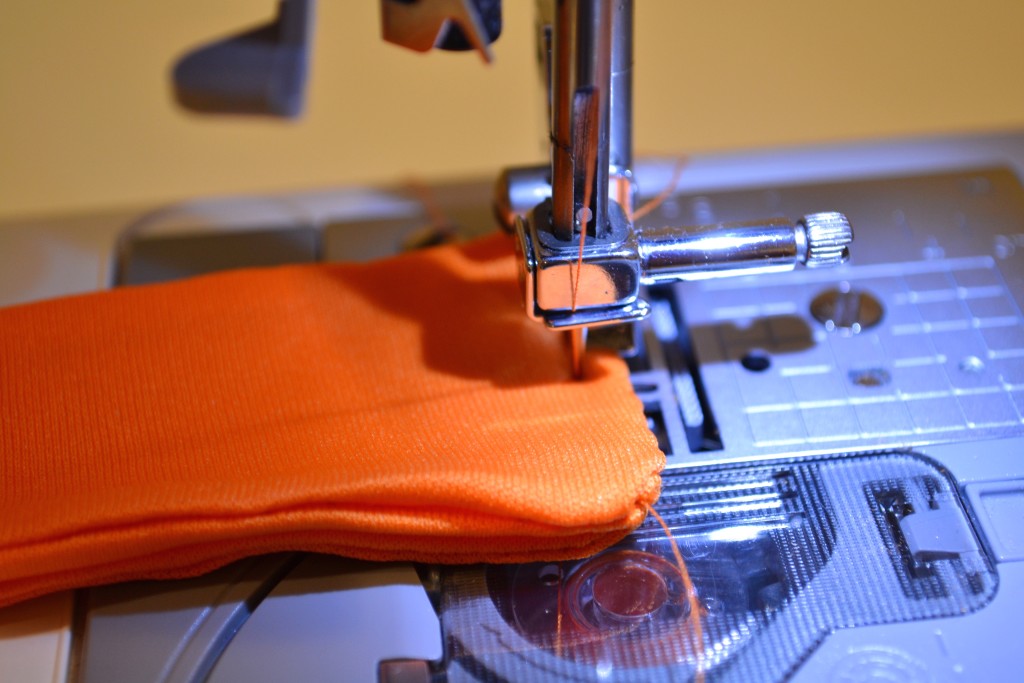
Step 3:

- Put the front of your fabric strips facing eachother (so that the wrong side is facing up), and sew the edges together with your sewing machine.
Step 4:
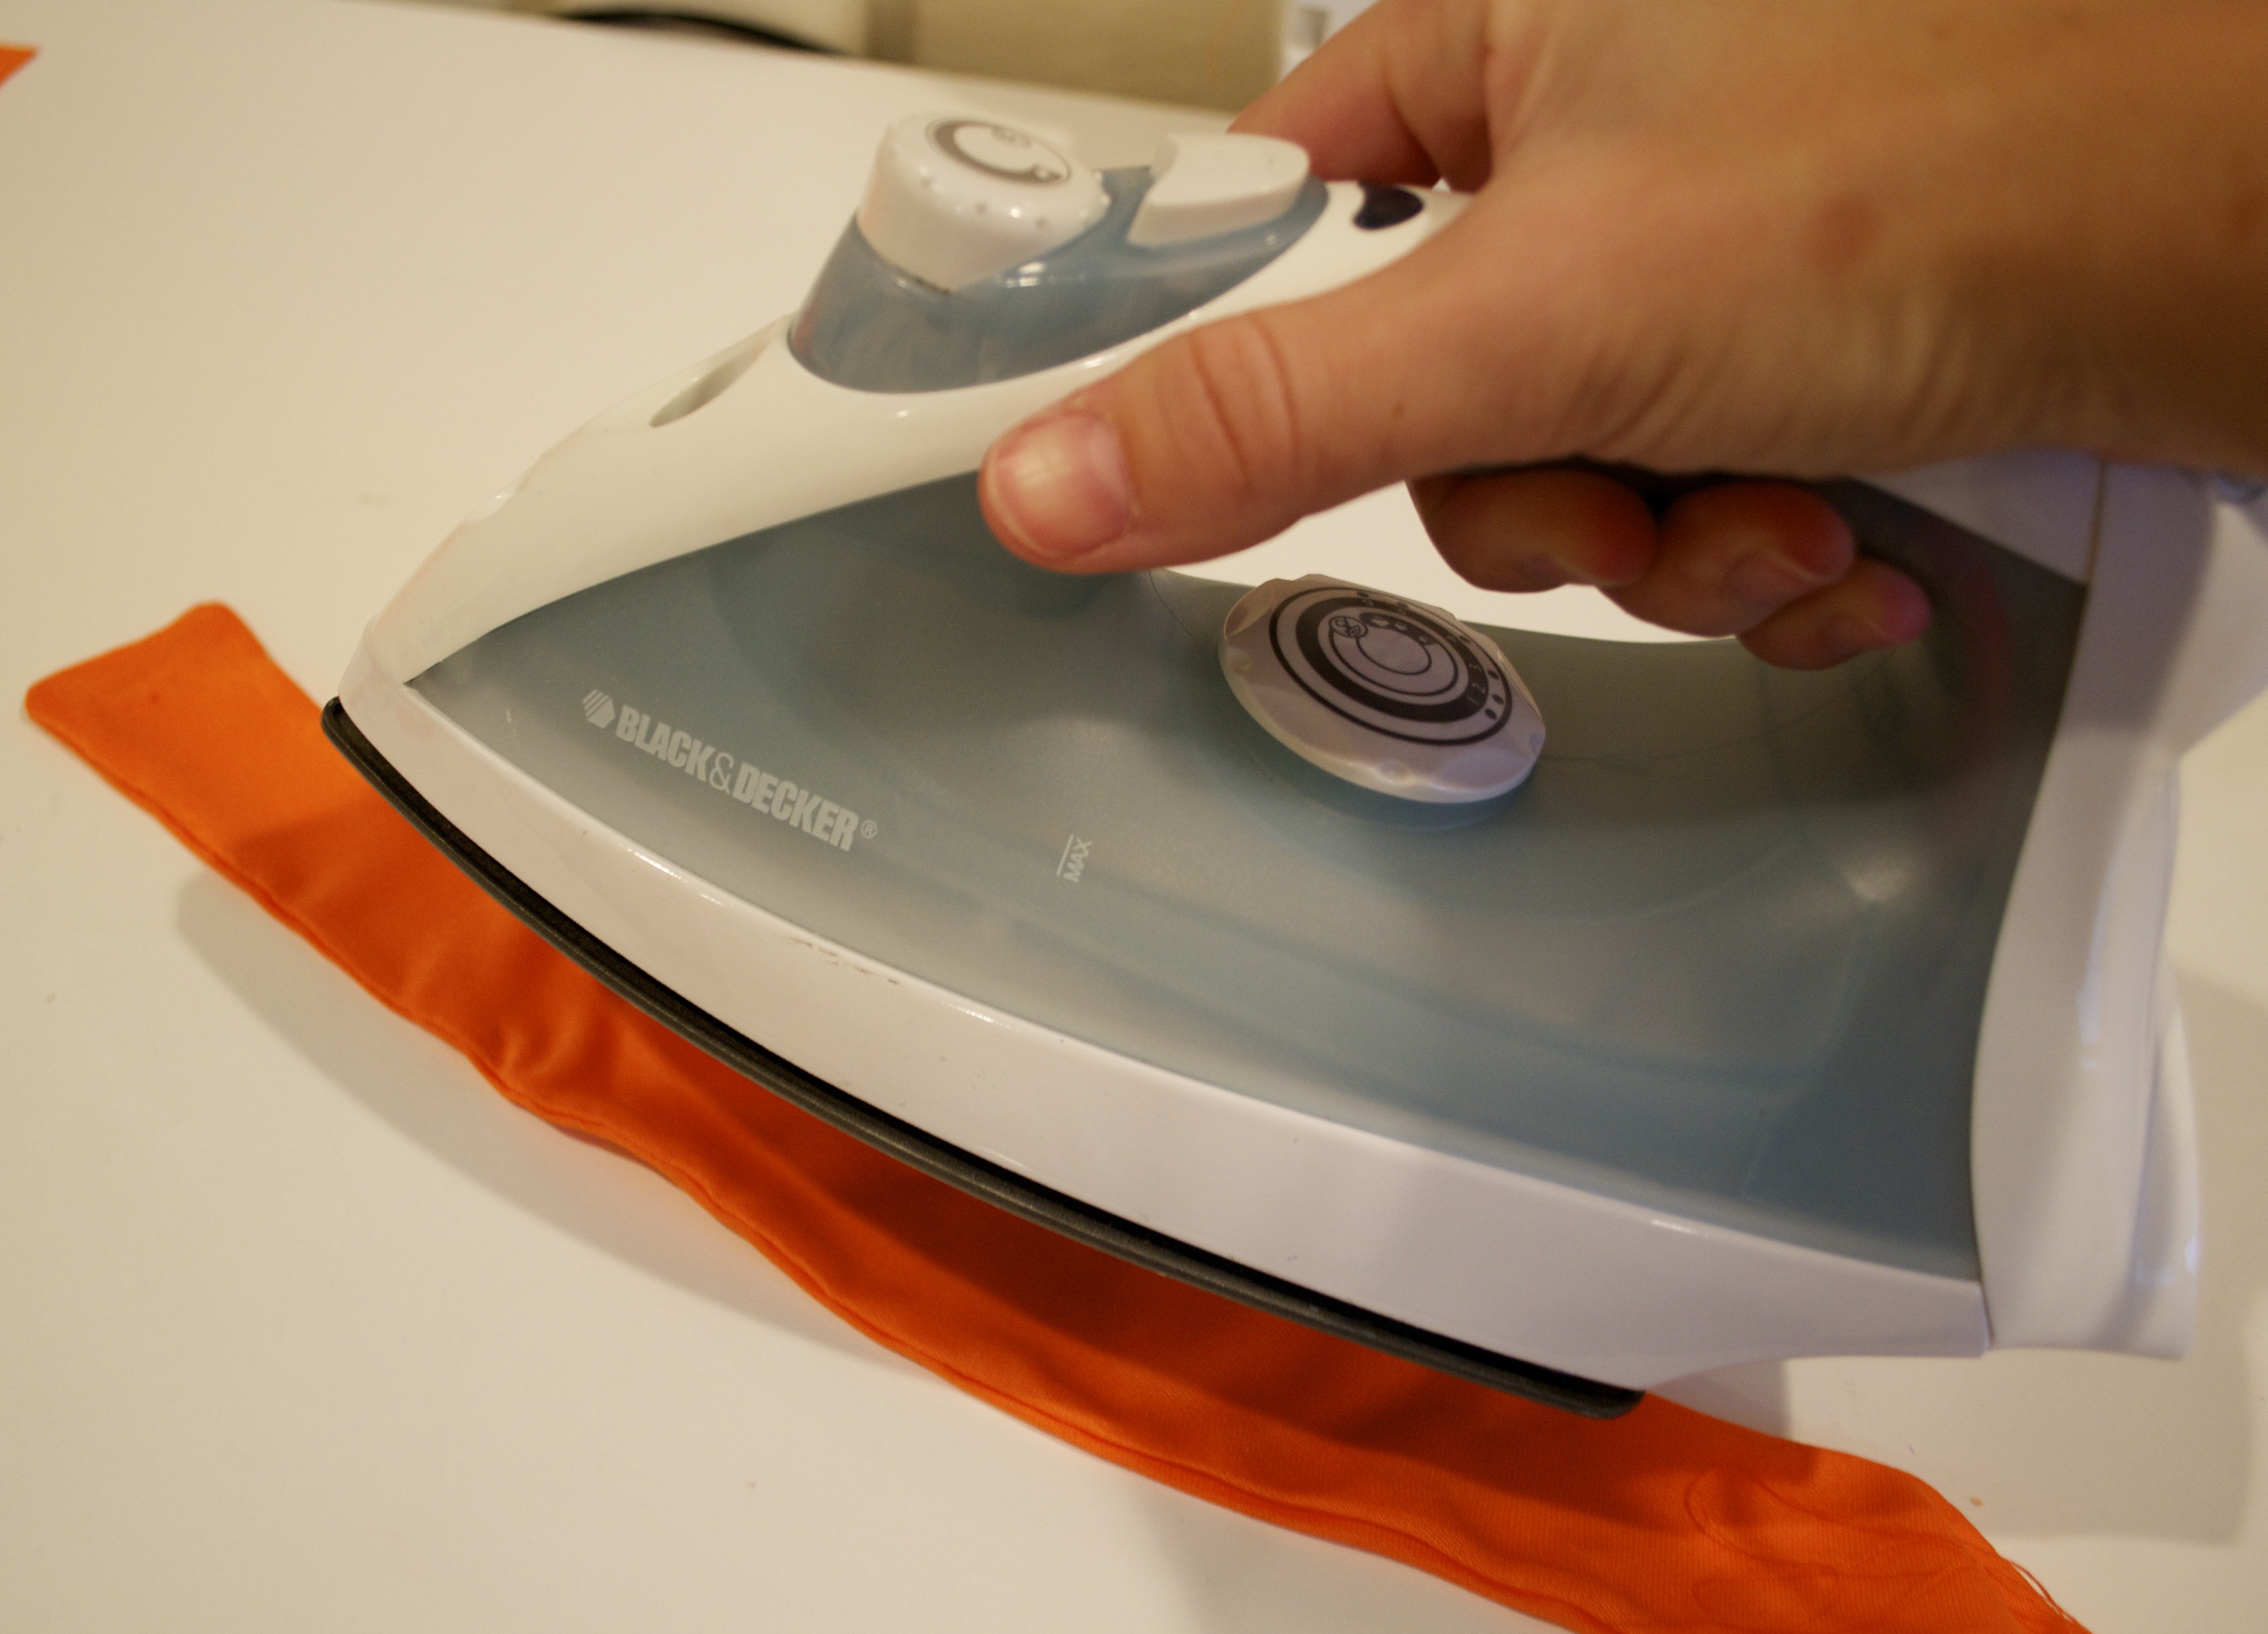
- Once the edges are sewn together, turn your fabric strip right side out.
- Gently iron the band so that the seams lie flat.
Step 5:
- Put the 2 ends of the band together, and run it through your sewing machine to make a seam and sew the ends together to form a complete band.
- Do not worry what the seam looks like, it will be hidden by the bow later.
Step 6:
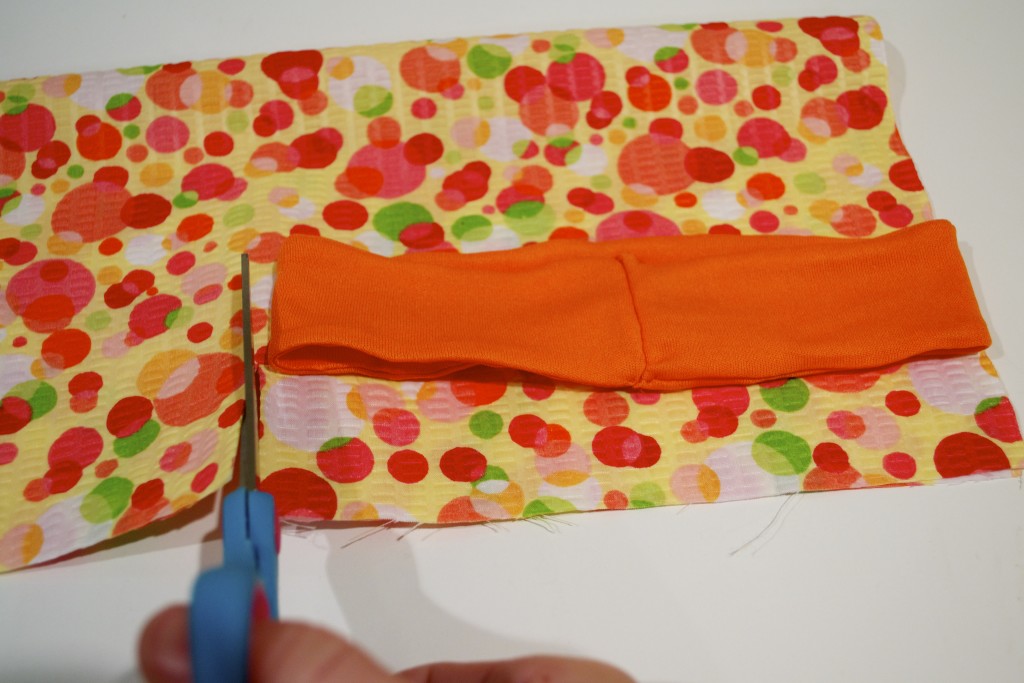
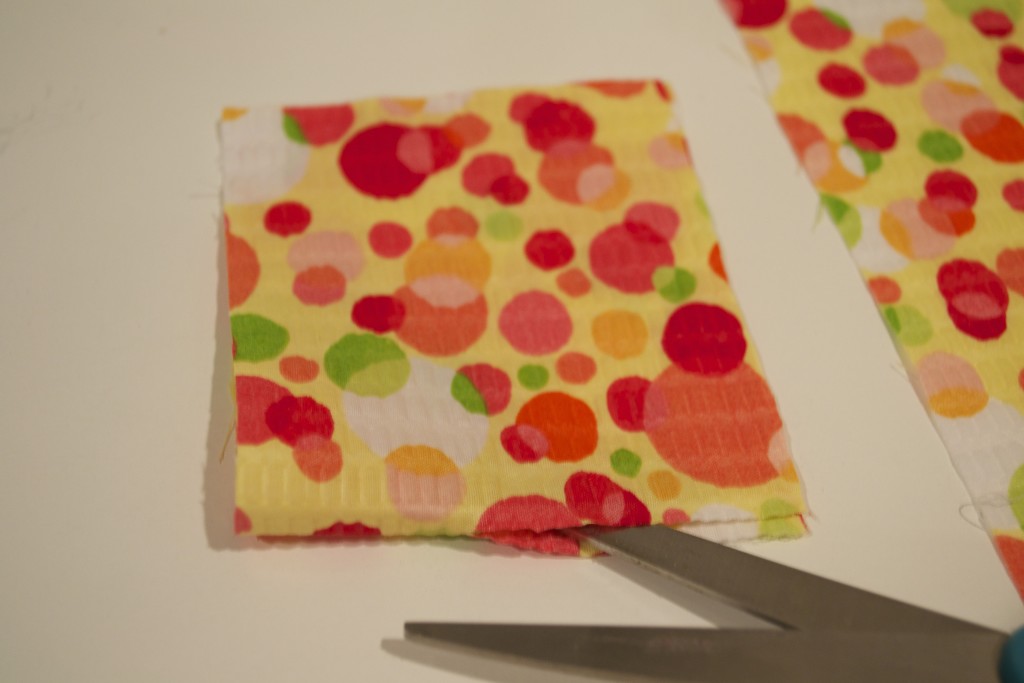
- Take your second fabric (mine was the plisse) and fold it in half the long way (just like you did with the jersey knit.
- This time, measure across the long fold every 4 or so inches (I measured every 4.25”).
- Cut the fabric, while it’s still folded, at every 4” mark. You will get pieces that look like this:
Step 7:
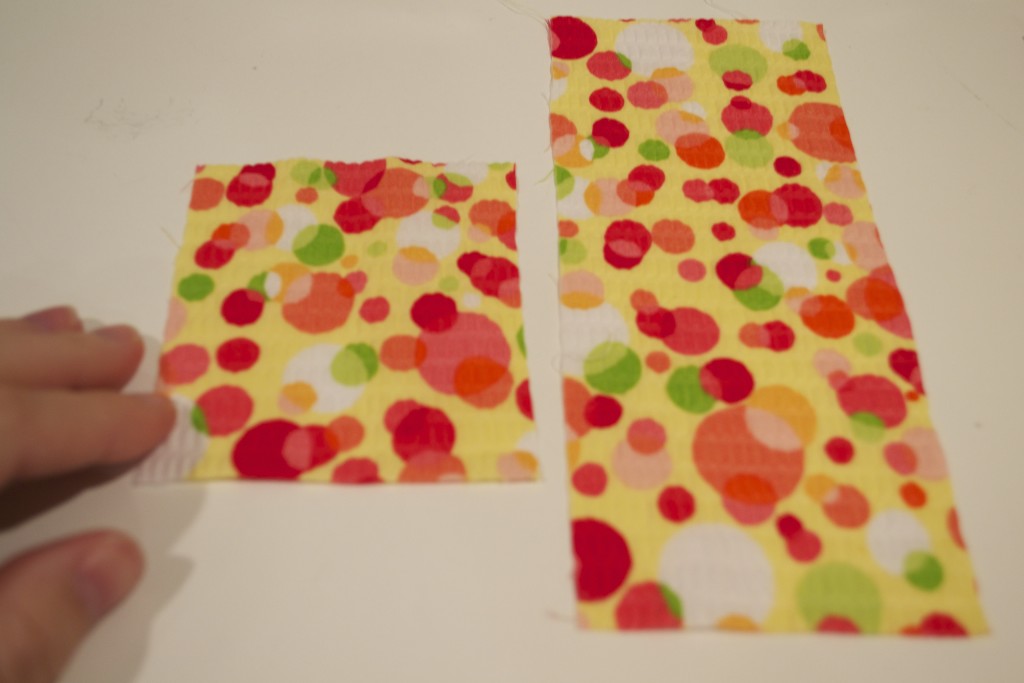
- Take one of the pieces you’ve cut out of your plisse fabric, and put it aside. This will become your bow.
- Take a second piece you’ve cut out of your plisse fabric, and cut it at the fold.
- Then, fold what you just cut in half, and cut it again (essentially giving you 4, small squares of fabric).
Step 8:
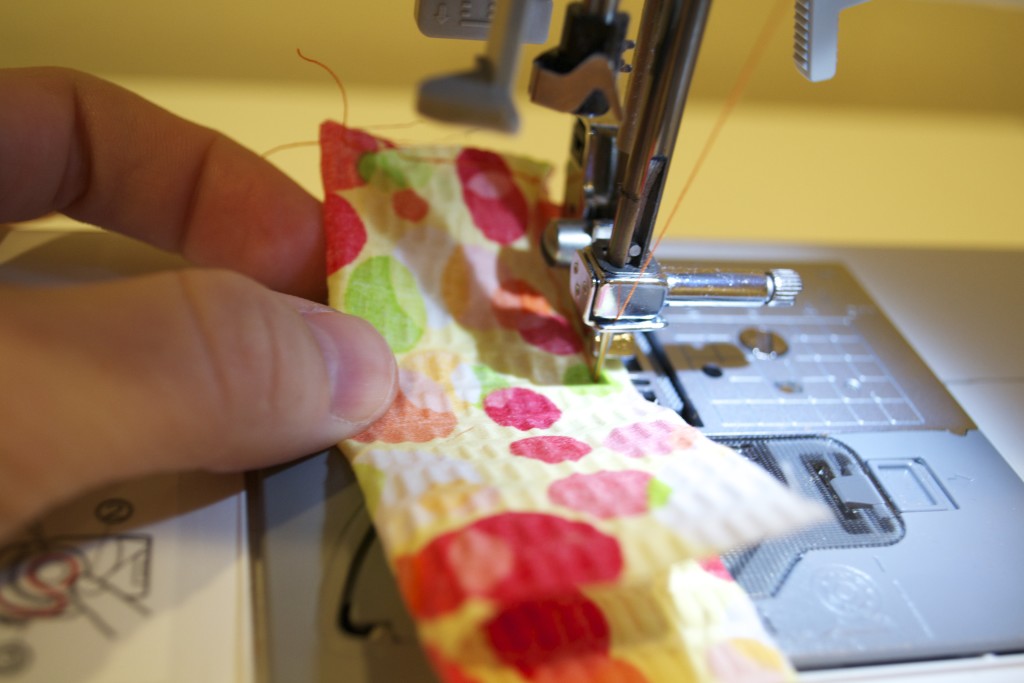
- Take one of your small squares and fold it in half, so the back of the fabric is up (the right sides are facing each other).
- Run it under your sewing machine along the edge.
- Turn it right side out.
Step 9:
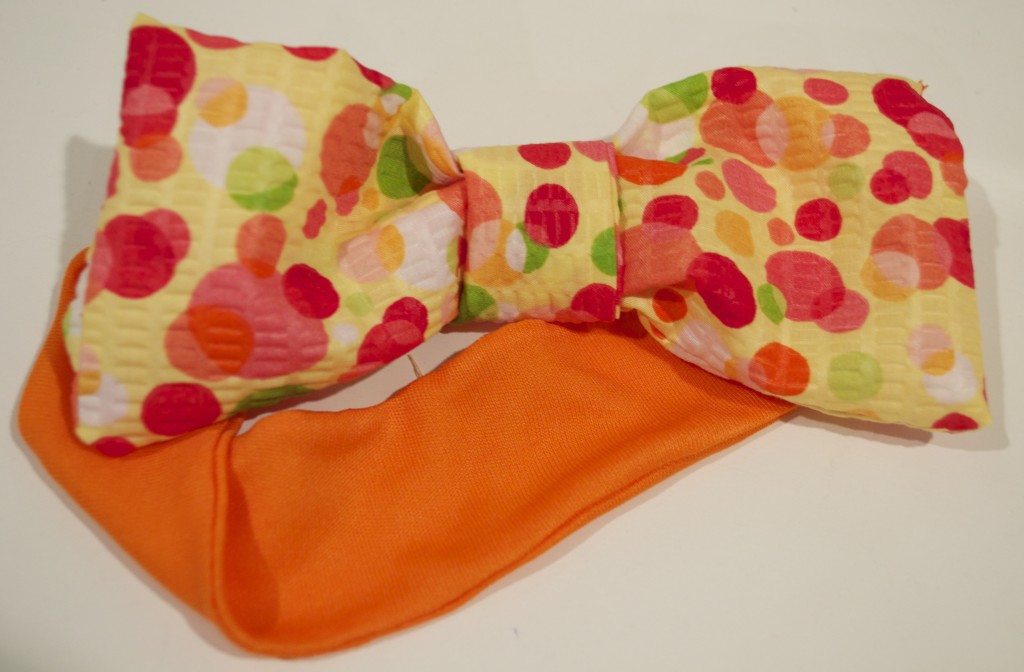
- Take the little tube you just created with your plisse fabric, and wrap it around the seam of your headband.
- Sew the ends of the tube together (either by hand or by sewing machine) so that it is sewn around the seam of the headband.
- Flip the plisse fabric around to that the seam you just created (to sew the tube together) is not seen.
Step 10:
- Take the piece of plisse fabric you put aside for your bow in step 6, and flip it so that the back of the fabric is showing (the front of the fabric is inward facing).
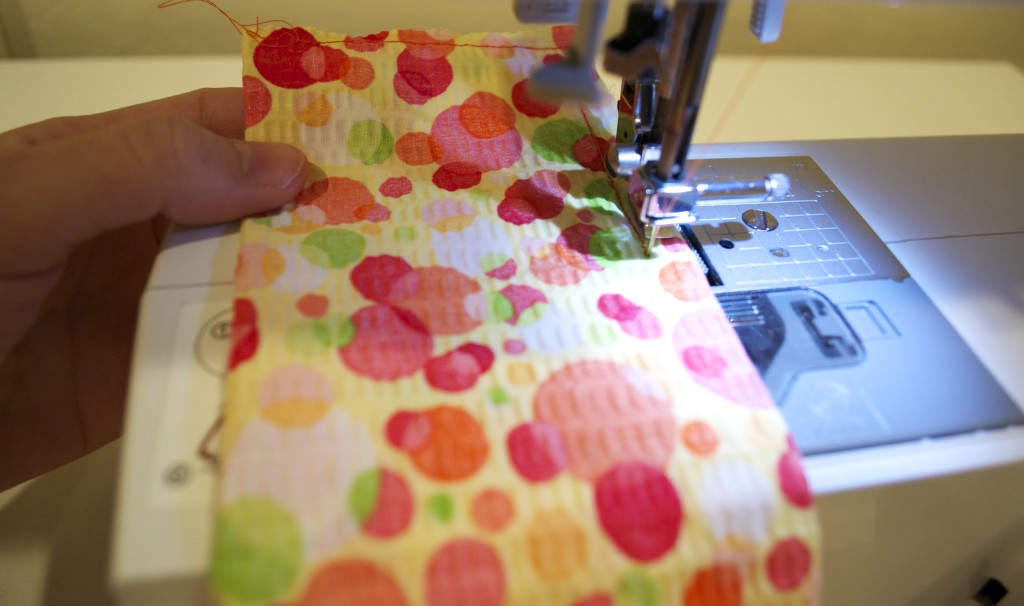
- Run it under your sewing machine, sewing it together on all edges.
- When you get to the last inch and a half, stop and take your bow out of the sewing machine.
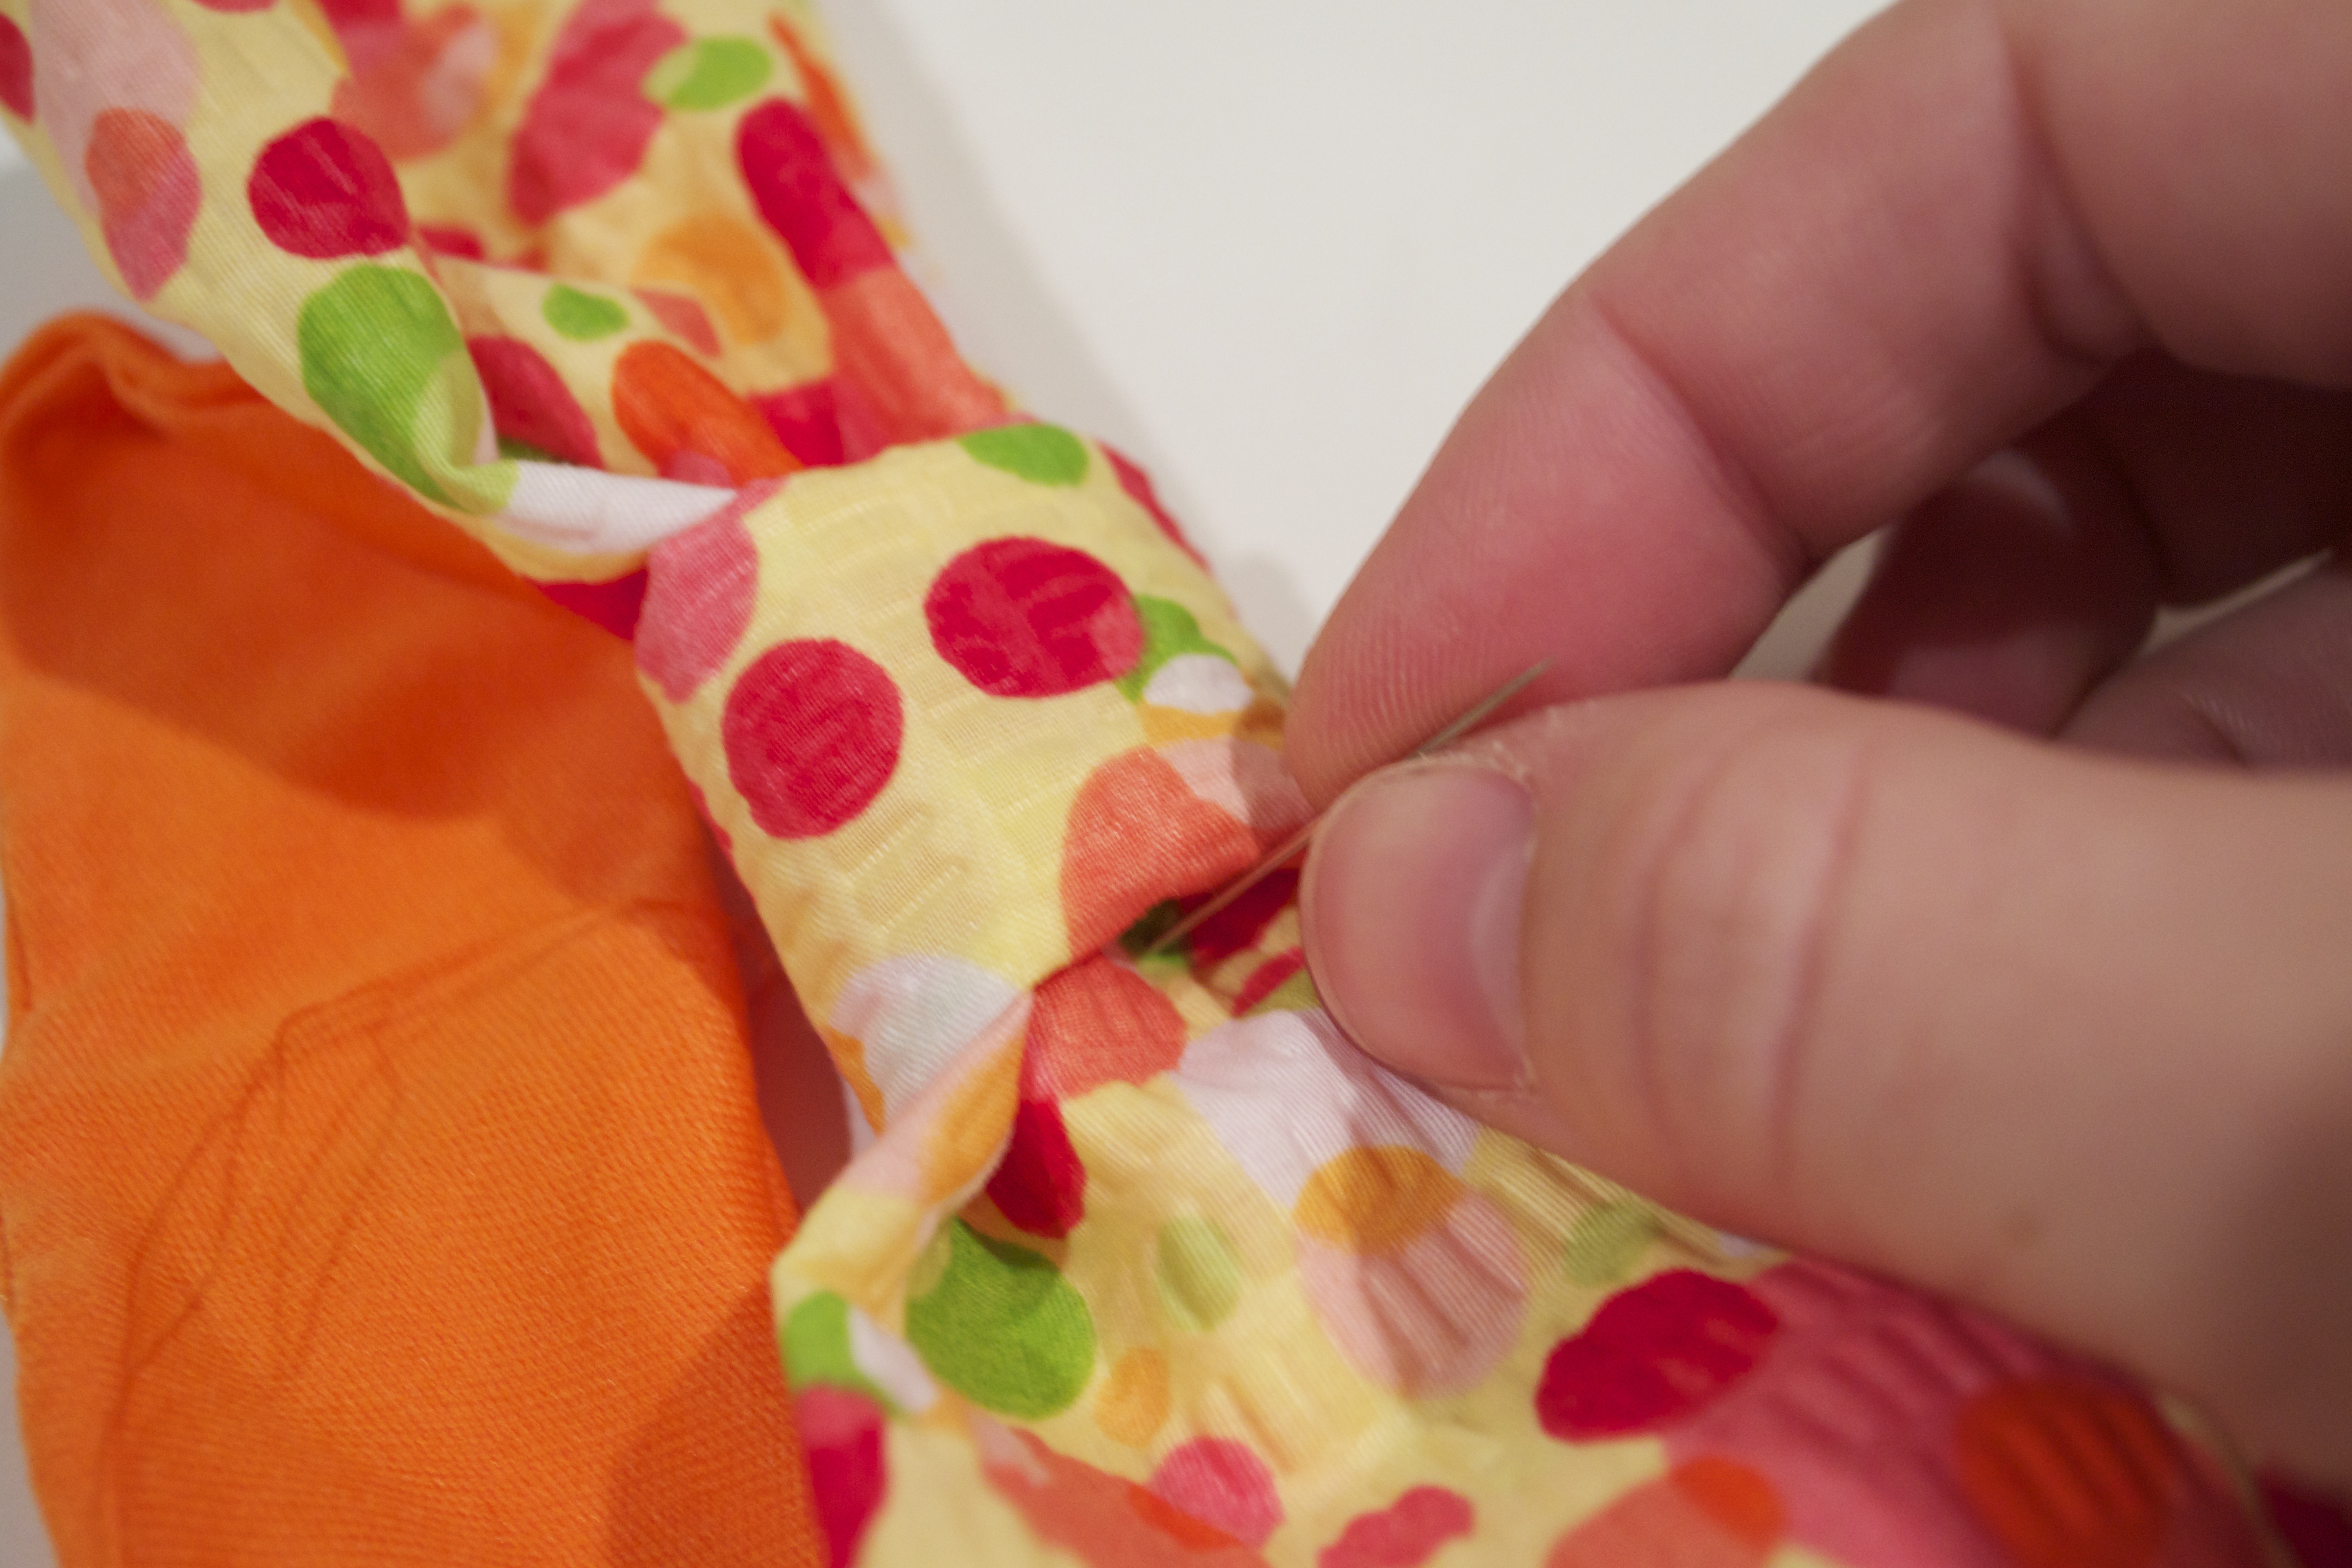
Step 11:
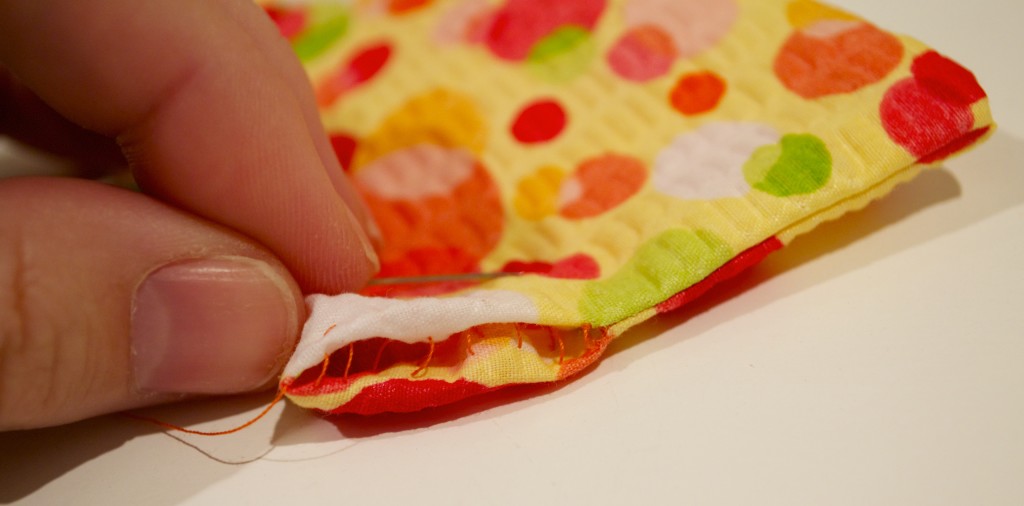
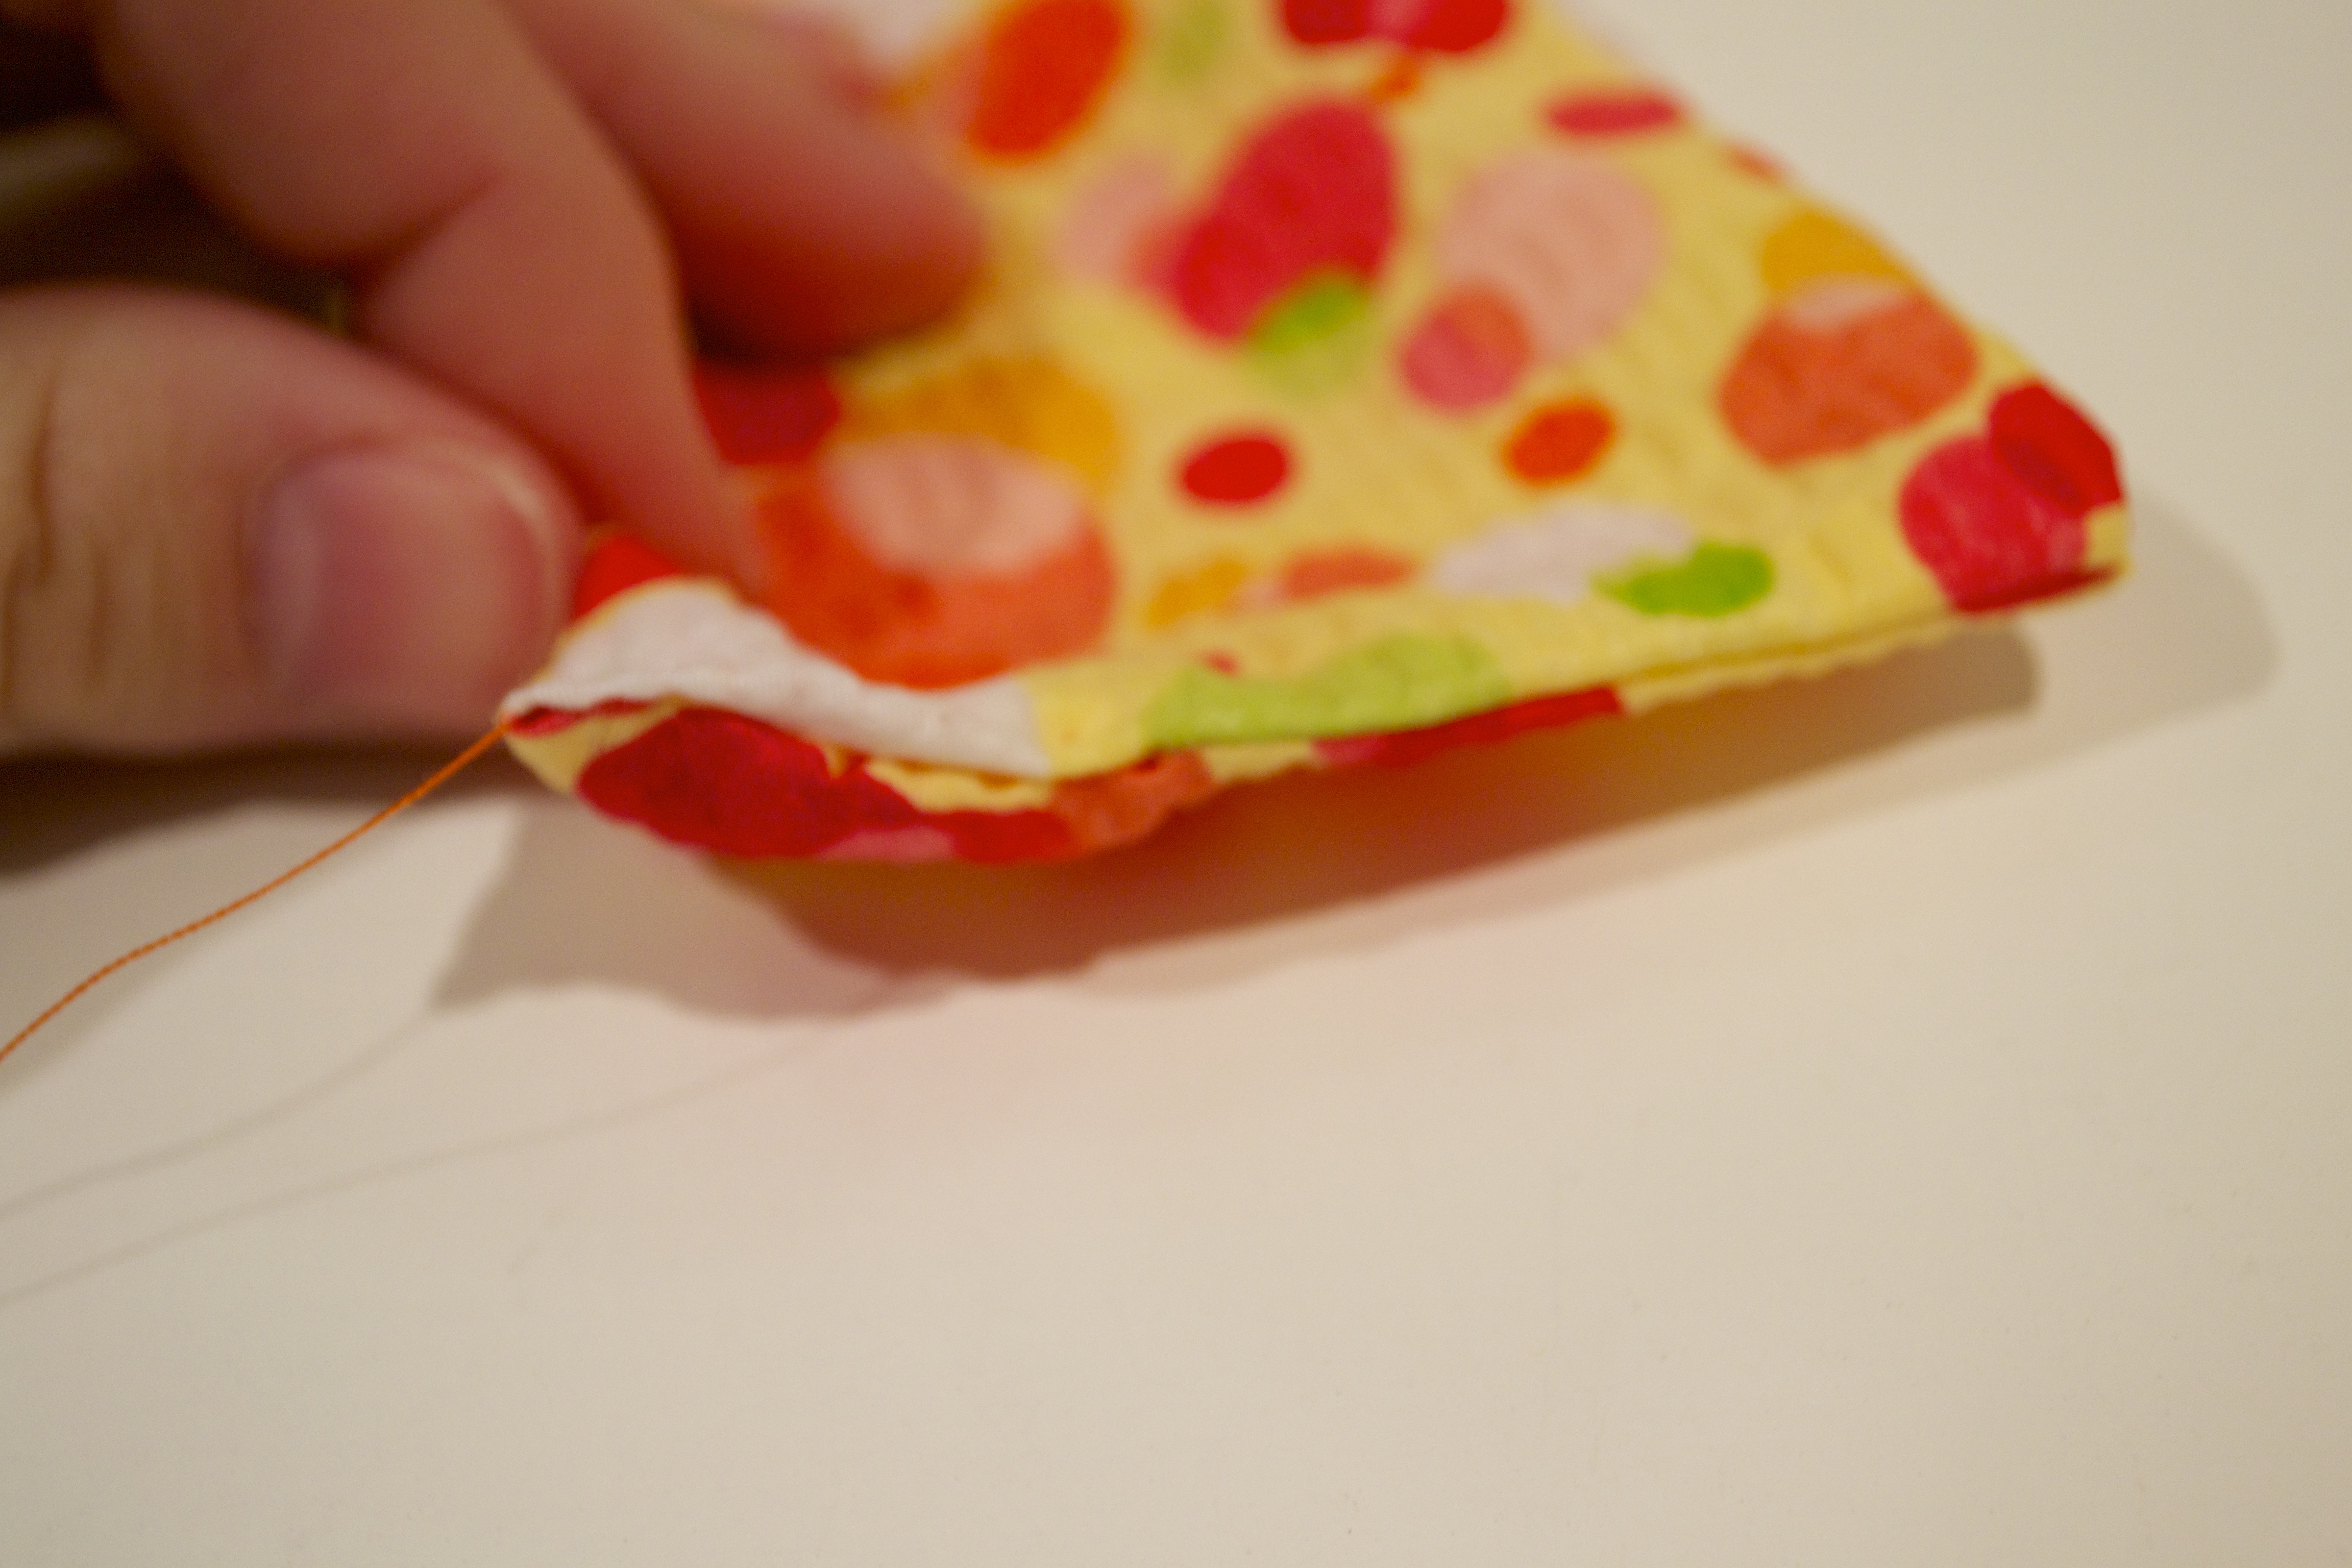
- Reach inside and turn your fabric right side out.
- Take your needle and thread, and use the ladder stitch that I love so much to stitch the last 1.5” together.
- When you use a ladder stitch, you loop the thread on the inside of the fabric, and wait until after a few loops to pull the thread tight. By doing this, you turn the fabric inward on itself, so that the thread on the seam is invisible.
Step 12:
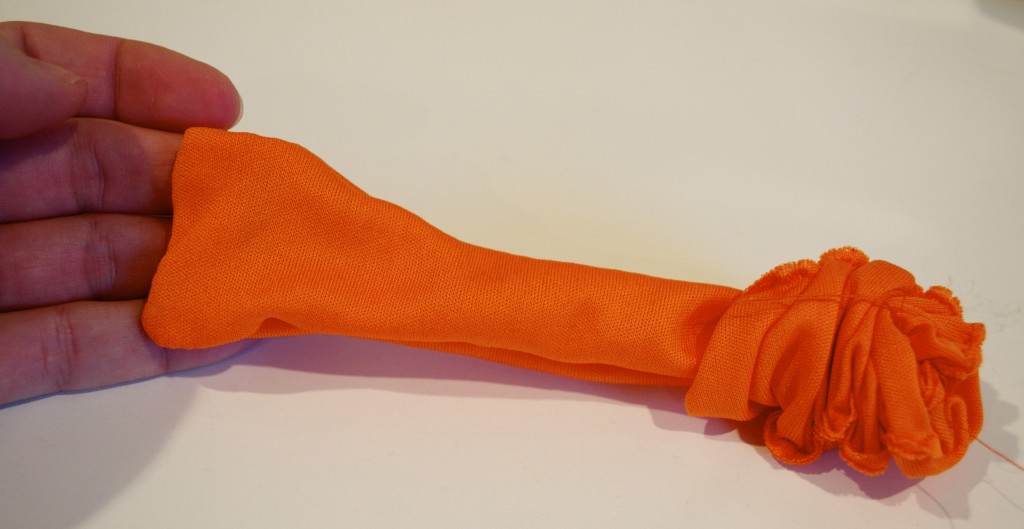
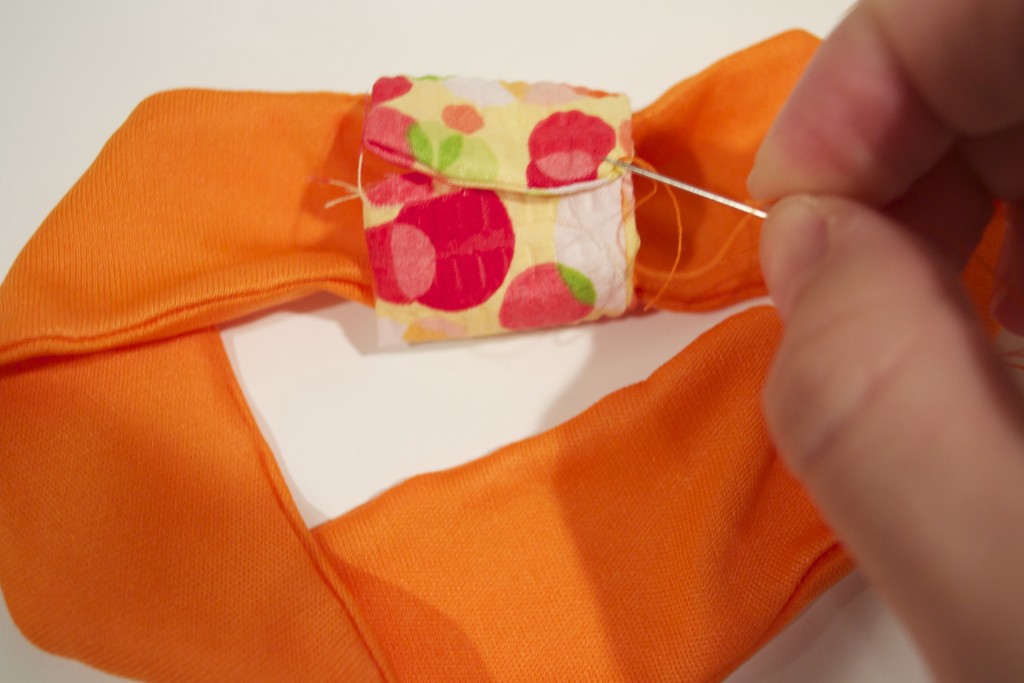
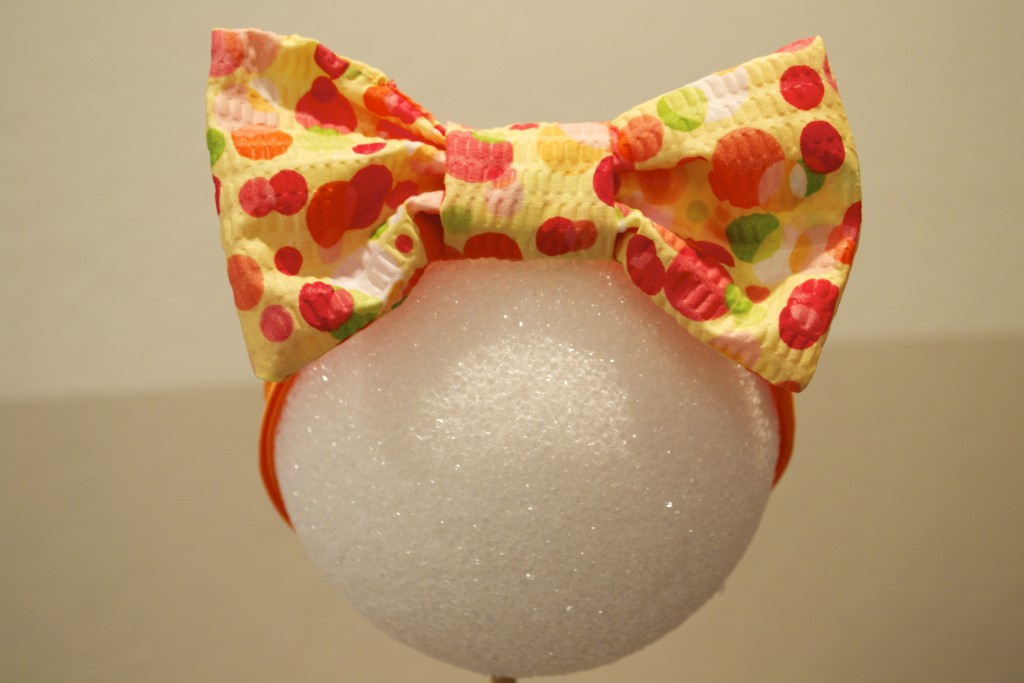
- Take your bow piece and bring it through the loop of fabric that is sewn around your headband.
- Now, it’s almost done! Use your needle and thread one last time to stitch inside the loop and ensure the bow, loop and headband are attached together
- Just 1 or 2 stitches all the way through all 3 pieces will do. You just want to make sure the bow doesn’t slide along the headband, and stays in place on the baby’s head.
And there you have it! So, so cute huh? And SO inexpensive because you only need a small bit of fabric to do it. By using ⅓ of a yard of 2 different fabrics, I can make roughly 8 bows. That’s probably more than you need (unless you want gifts for all your family and friends). But if you’re just looking to make one or 2 for your little one, I might suggest even getting less fabric.
But beware, if you’re not getting ⅓ of a yard, my dimensions in this tutorial will be off. You’ll have to measure everything out to ensure the headbands are 2” wide, and the bows are 4” tall by 5.5” wide.
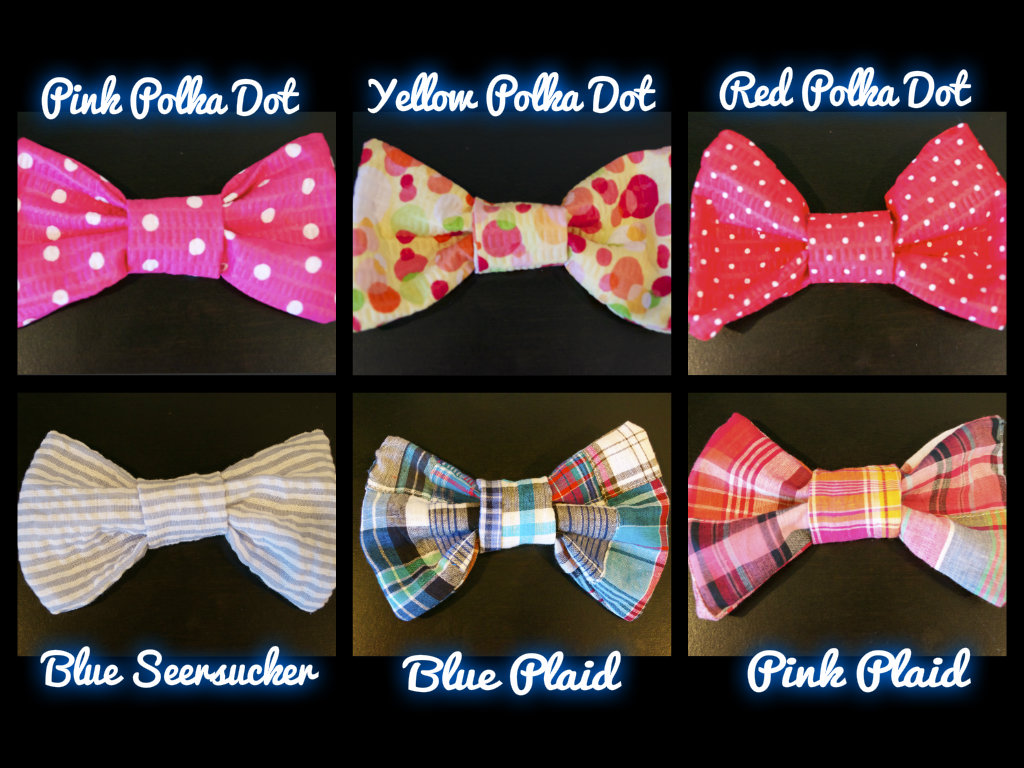
And if you don’t have your own sewing machine, or just don’t have enough time in the day (because let’s be honest, who does when you’re watching little ones?) I have these for sale in my Etsy shop. I have a ton of color options, and am adding more all the time. Here is a picture of just a few to show you all the cute options you can do with this simple tutorial:
But if you’re still pumped to DIY, bravo! Here’s a recap of what you’ll need:
- ⅓ yard of Stretch Jersey Knit Fabric (for the headband)
- ⅓ yard of any other type of fabric (I used plisse fabric because it’s soft to the touch for a baby)
- Sewing Machine
- Thread
- Needle
- Ruler
- Iron
Leave a Reply