Ah yes! It’s fall. Well, in my book it’s fall. And if you’re anything like me, as soon as school starts back up, “fall” has officially begun.
And when I think of fall, I think of falling leaves, crisp air, and my absolute FAVORITE day of the year… HALLOWEEN! That’s right, I’ve claimed this day as my favorite since I was a child. Not Christmas, not Thanksgiving, not even my birthday. Halloween trumps them all. Why you ask?
Well, do you really even wonder why? It’s the one day of the year everyone will dress up in unison, and play a character they don’t normally get to play. Homes are decorated with adorable pumpkins and black and orange decor, and sweet treats are everywhere.
But let’s be honest, the fun begins at a young age. Your teachers create fun Halloween arts and crafts for to make. Every channel plays exceptionally great nostalgic Halloween themed movies (ABC Family Halloween marathon anyone?) Your parents dress you up as your favorite character, and you get to eat as much of your favorite candy as you want. It really isn’t just a day. But it’s an entire month of excitement and thrill for a child to experience.
As you get older, the feeling stays with you and you want to recreate everything yourself. But, it’s more expensive than you think. Those glittery pumpkins that looked so adorable sitting on your fireplace when you were younger = $30 a pop! The life size ghost that stood outside your neighbor’s front door = $120! And the replica Little Mermaid costume that you wanted so badly in the store = $100! Not to mention the bags and bags of candy our parents bought for us to have for trick or treating and to bring to school for the school parade.
Yes, as we get older we realize exactly how much money our parent’s actually spent on every holiday to make it so perfect for our little spirits to remember. So over the next few weeks, I’m going to be focusing this blog on my favorite holiday and showing you a few tips and tricks to make the Halloween season so special without blowing your budget.
However, if you try to do them all (like I do) you will, in fact, spend a lot of money. Fair warning!
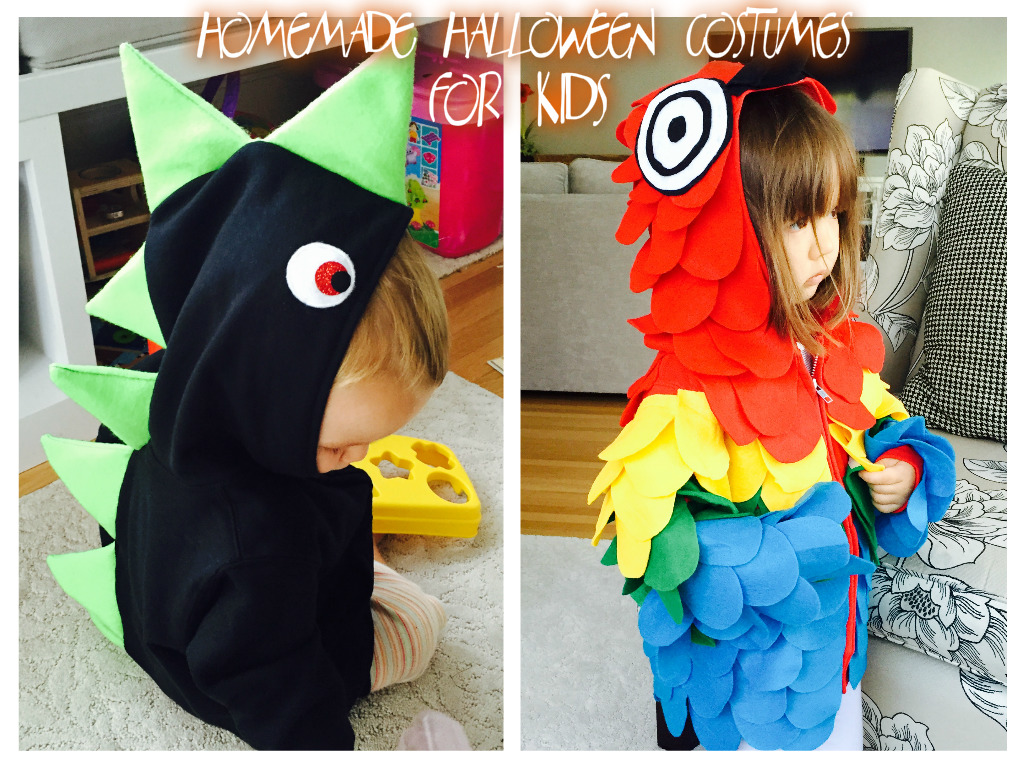
Homemade Halloween Costumes for Kids
So let’s start with what matters most – your child’s costume! Yes it’s those pictures in those costumes that make lasting memories. I still remember what I was every single year – and can tell you what year it was that I wore each costume. I may be a little on the OCD side, but I can tell you that costumes matter.
However, they can also be REALLY expensive. Sure, you can go to Target and pick up a $30 costume for your kid – but I guarantee you your child will be one of 20 Princess Elsa’s at her school wearing the exact same thing. Do you really want your kid to blend in? Absolutely not! Halloween is about expressing your individuality … and getting to go crazy in the most awesome costume EVER!
But buying a one of a kind unique costume can get really pricey (upwards of $150). And unless you’re a seamstress, making your child a custom home made costume is out of the question. Well, that is, until now.
I’ve found a way that even people that have no clue how to sew can make a rad costume for their kiddos. And all it takes is some felt and a zip up hooded sweatshirt in your child’s size. Yep, they’ll be stylish AND warm for the biggest dress up night of the year! But best part is, you won’t break the bank doing it! Each one of these costumes cost me less than $25 to complete. I’d call that a win/win right there 🙂
So below, I give you the step by step instructions how to make 2 of the most adorable homemade halloween costumes for kids.
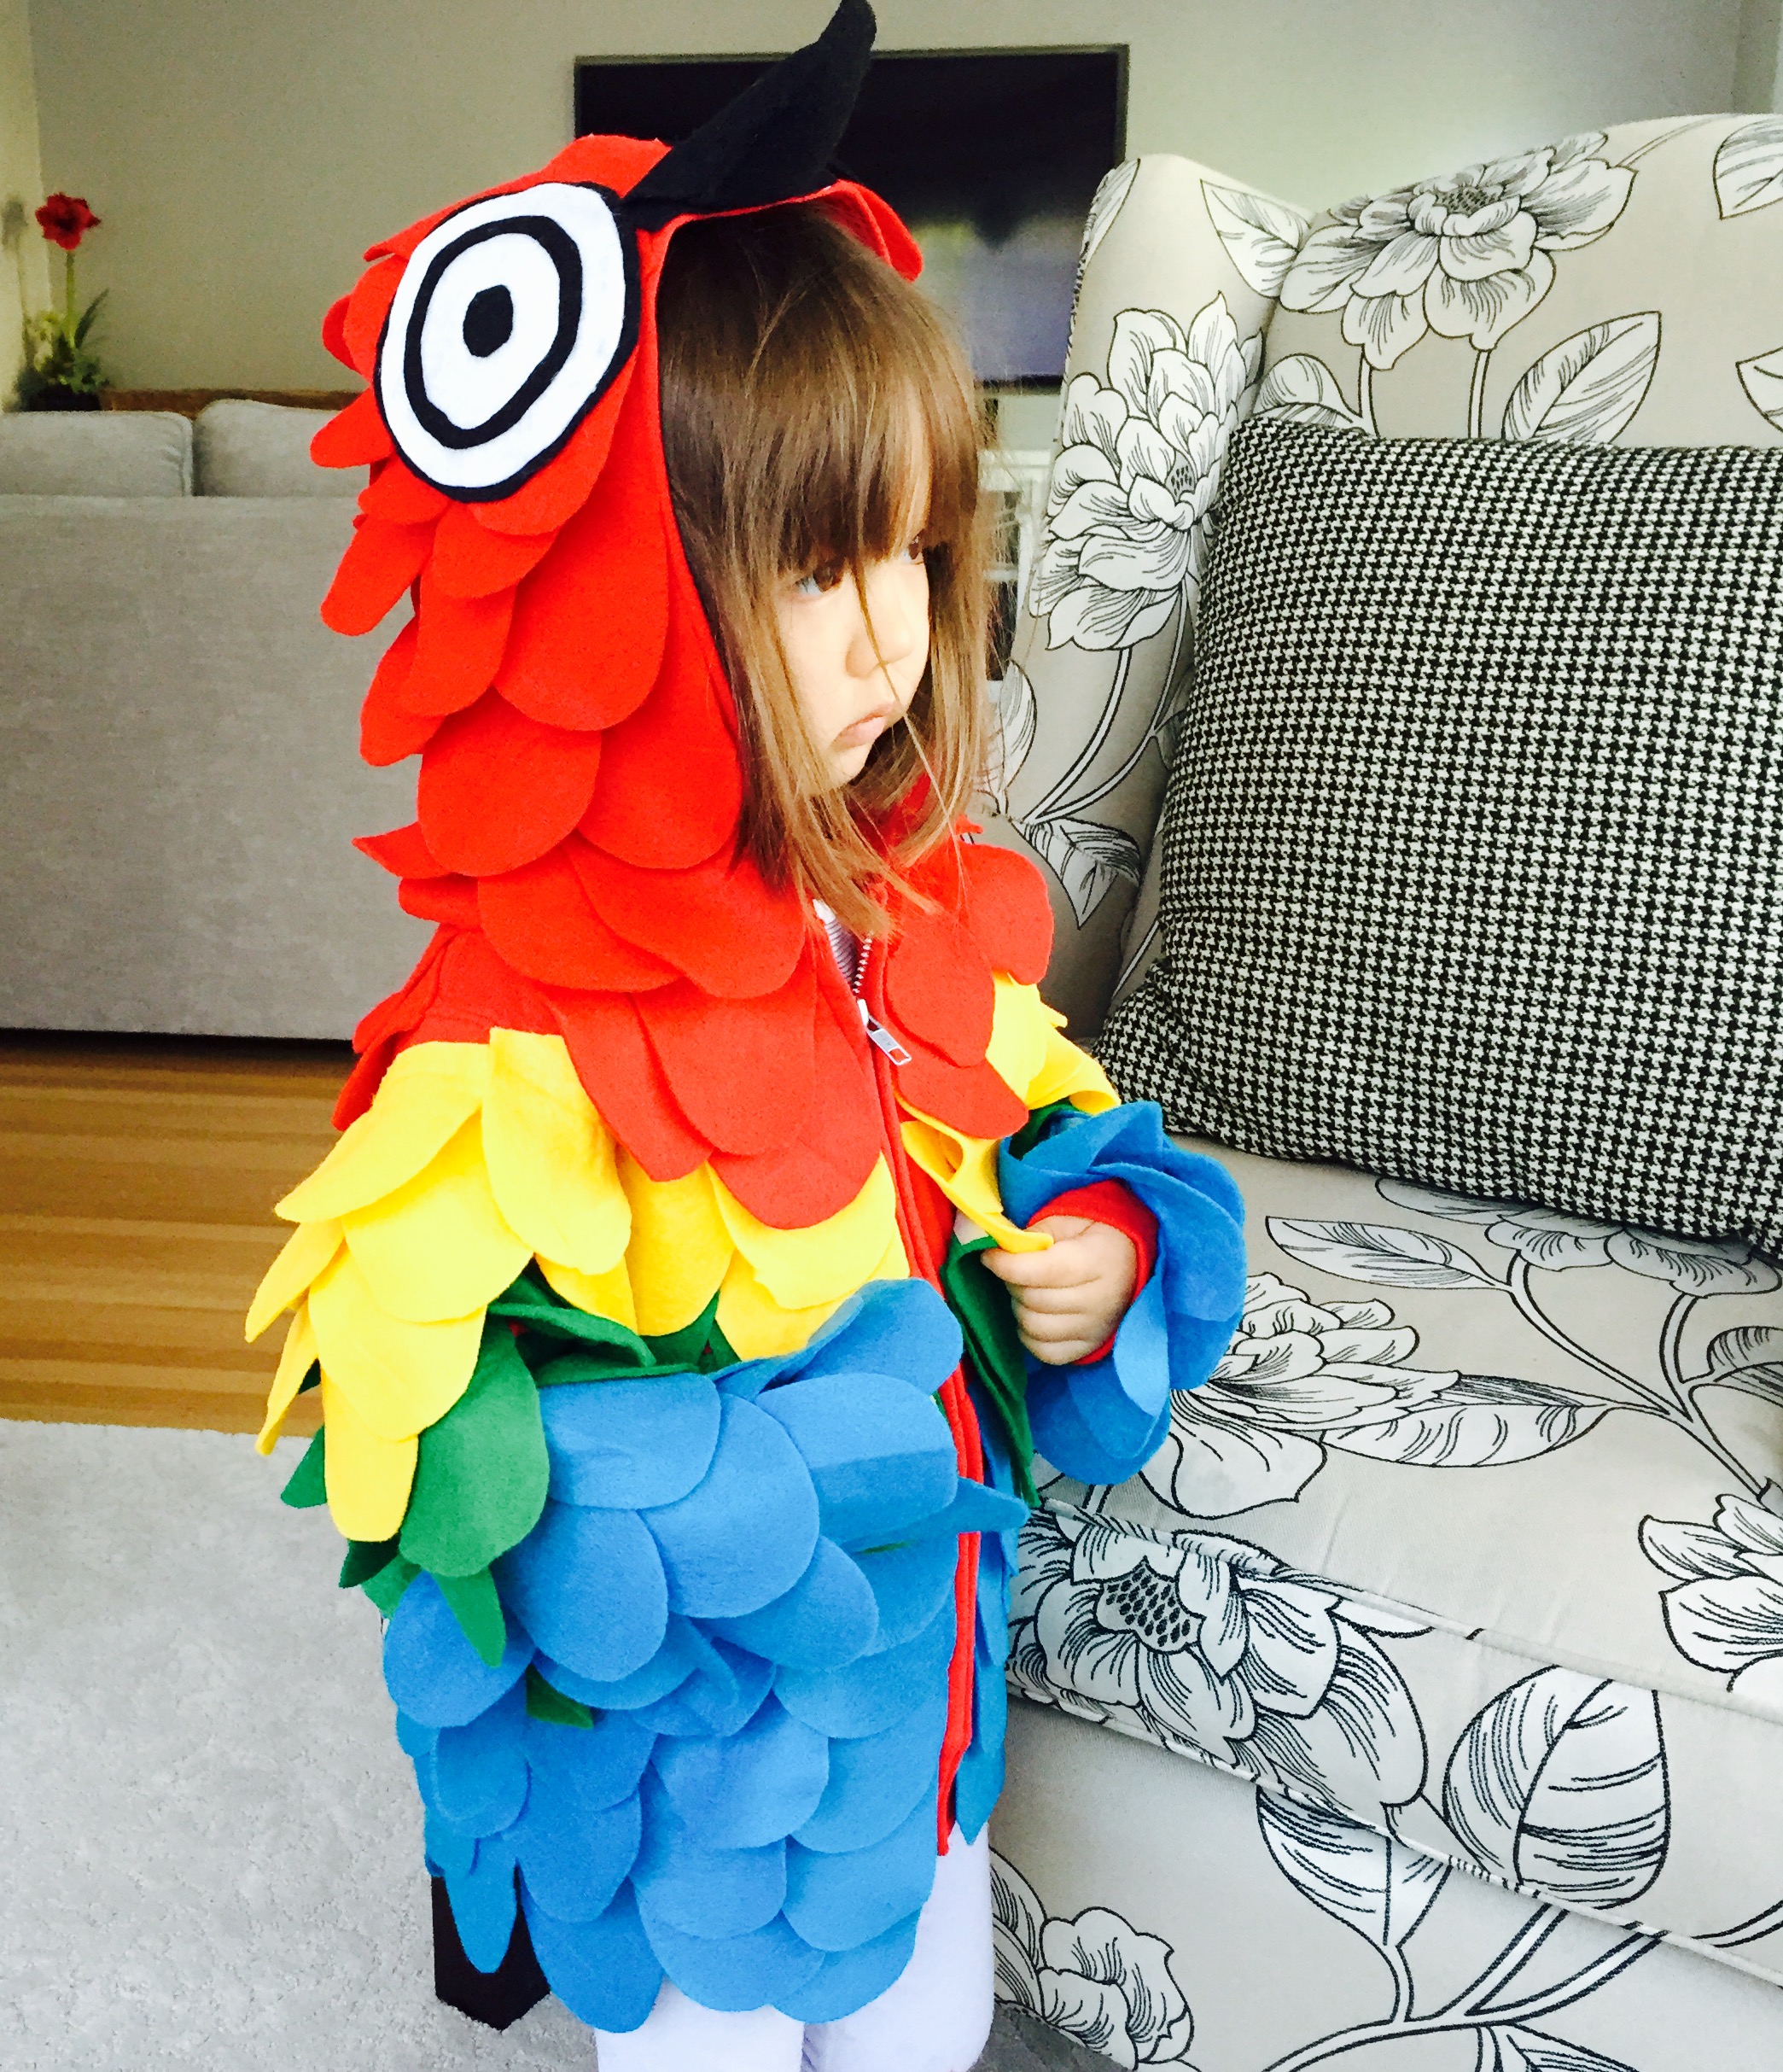
Costume #1 – A Bird
- Note: In this tutorial, I show a parrot as the example bird. But choose different color felt to make this hoodie into any bird of your choosing (tweety bird, owl, bald eagle, etc).
The Necessary Supplies:
- Child’s Hoodie
- Felt – 1/3 yard of each (just to be safe)
- Double sided heat transfer tape
- Stuffing or craft fiber fill
- Scissors
- Iron
- Ruler
- Marking Pen
Step 1:
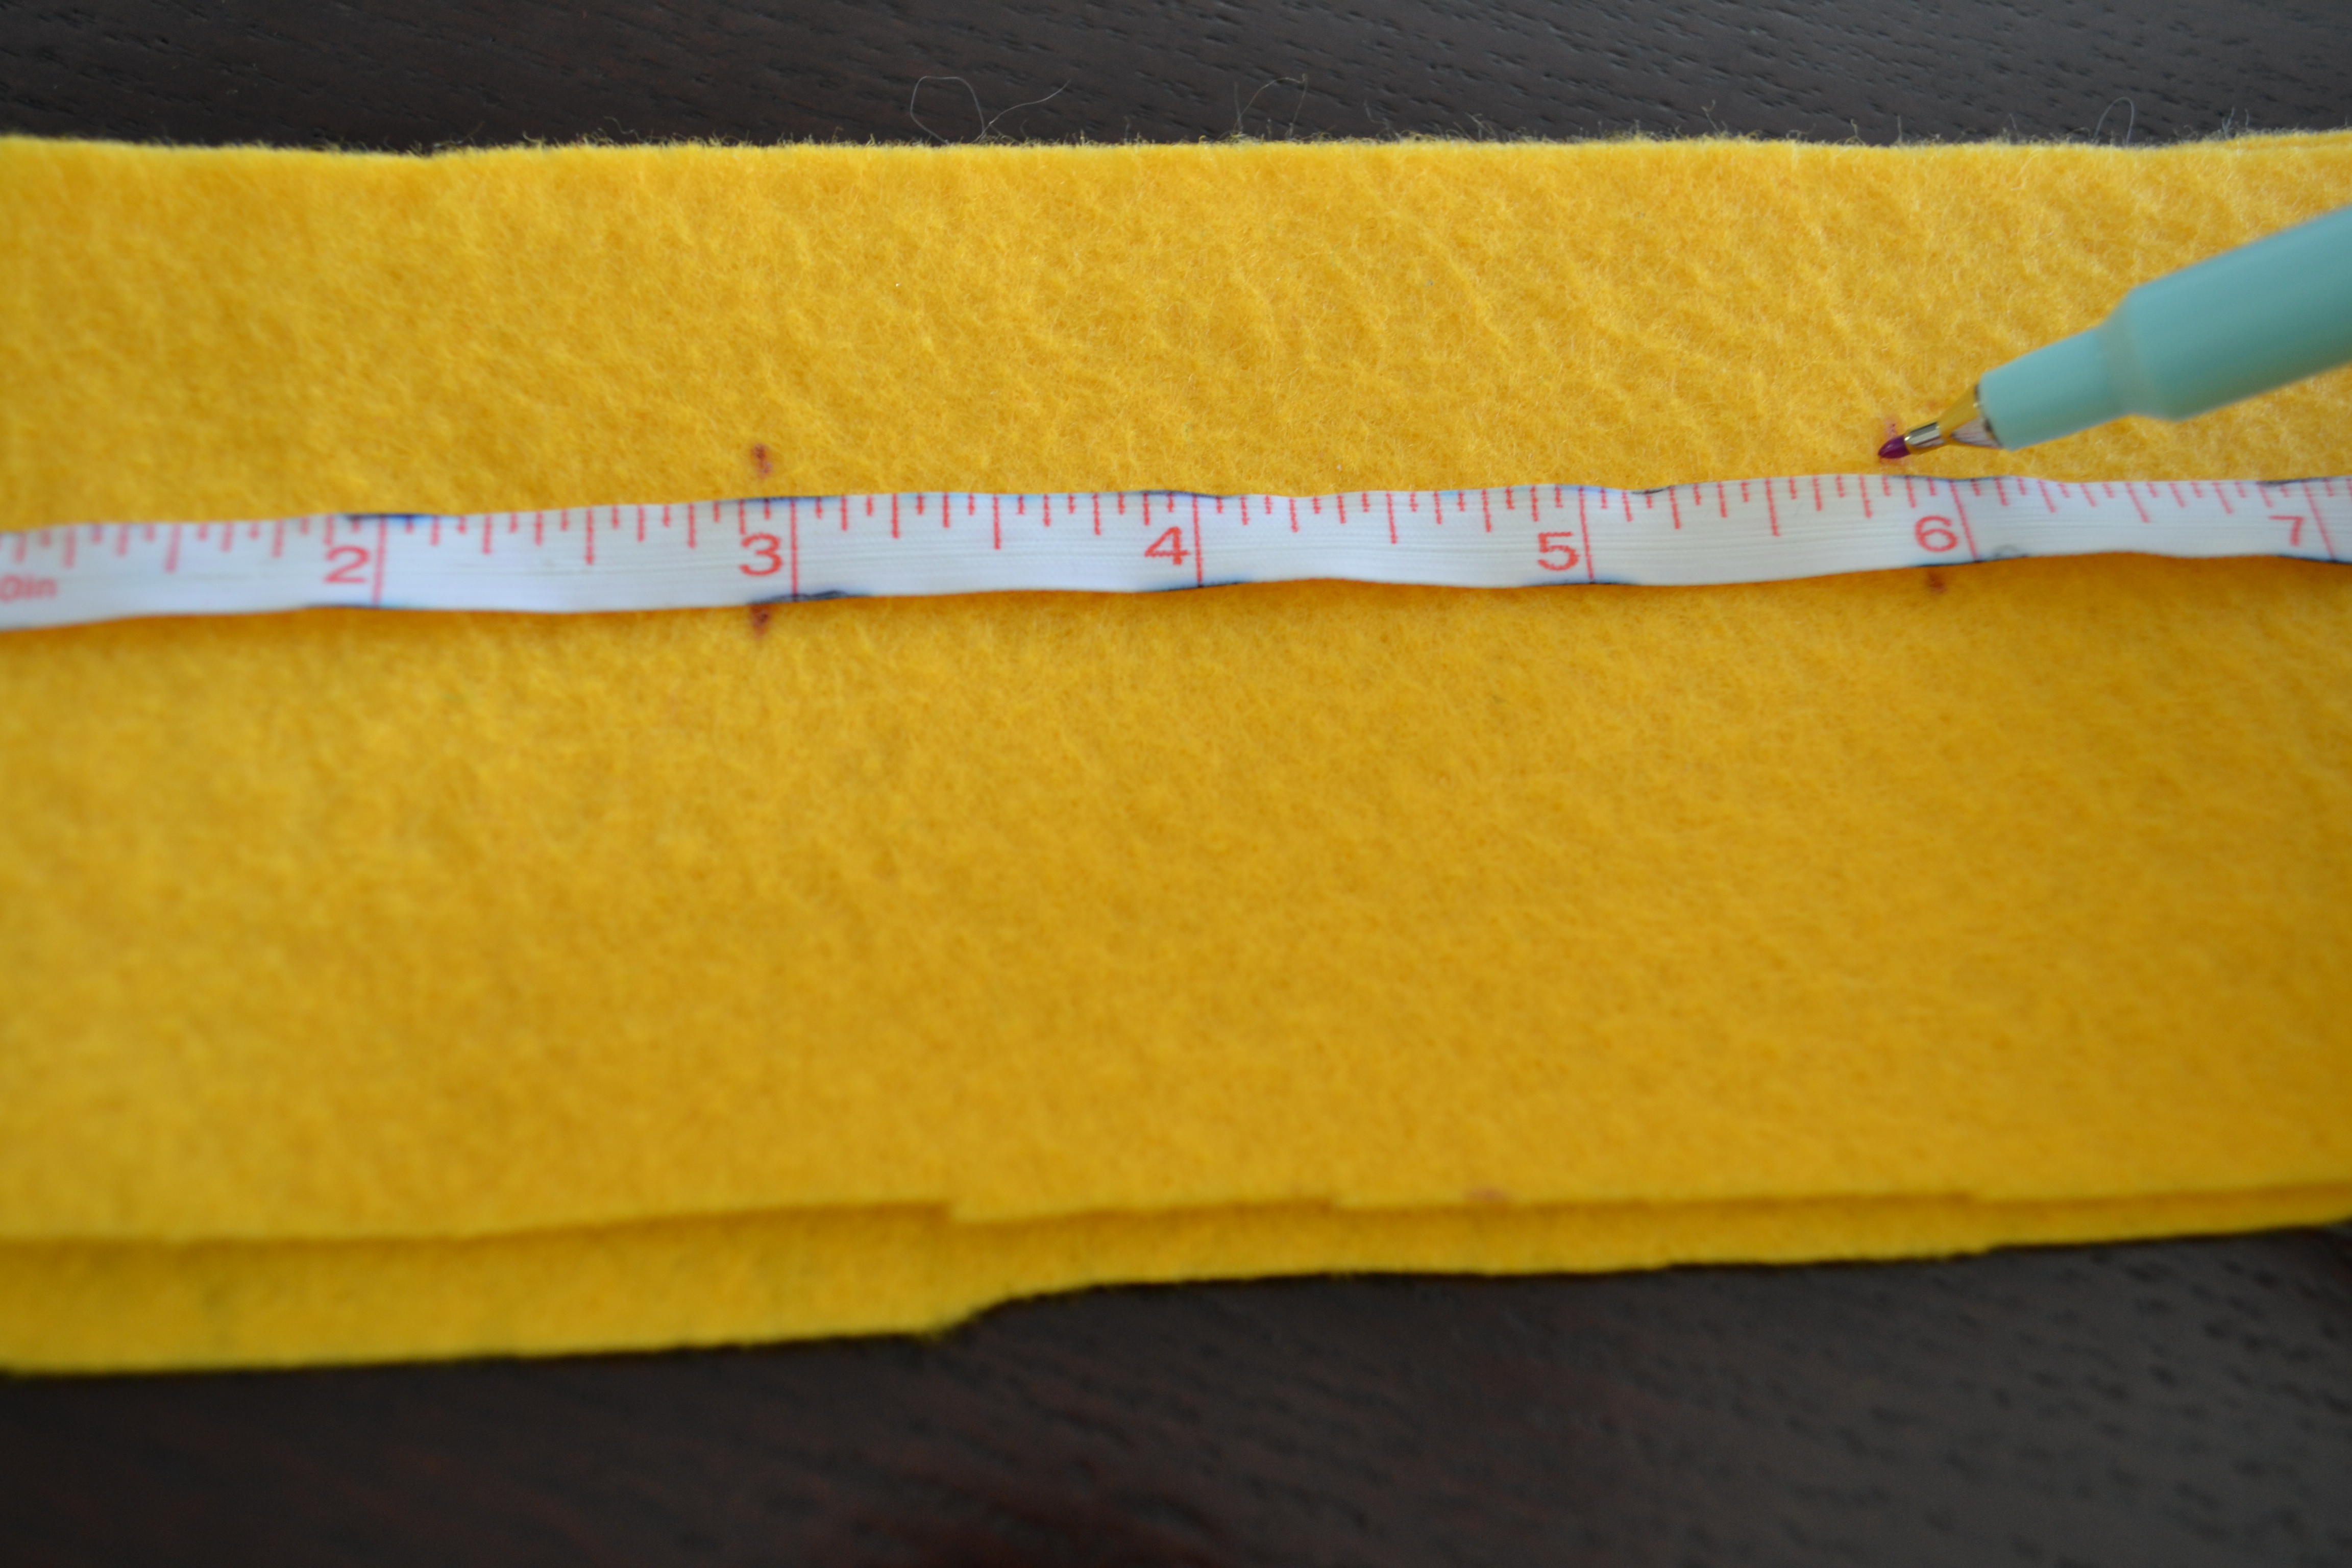
- Cut your colored felt into 3″ tall strips. Then, take your measuring tape and measure every 3″ along the felt strips, and proceed to cut the strips into 3×3″ squares.
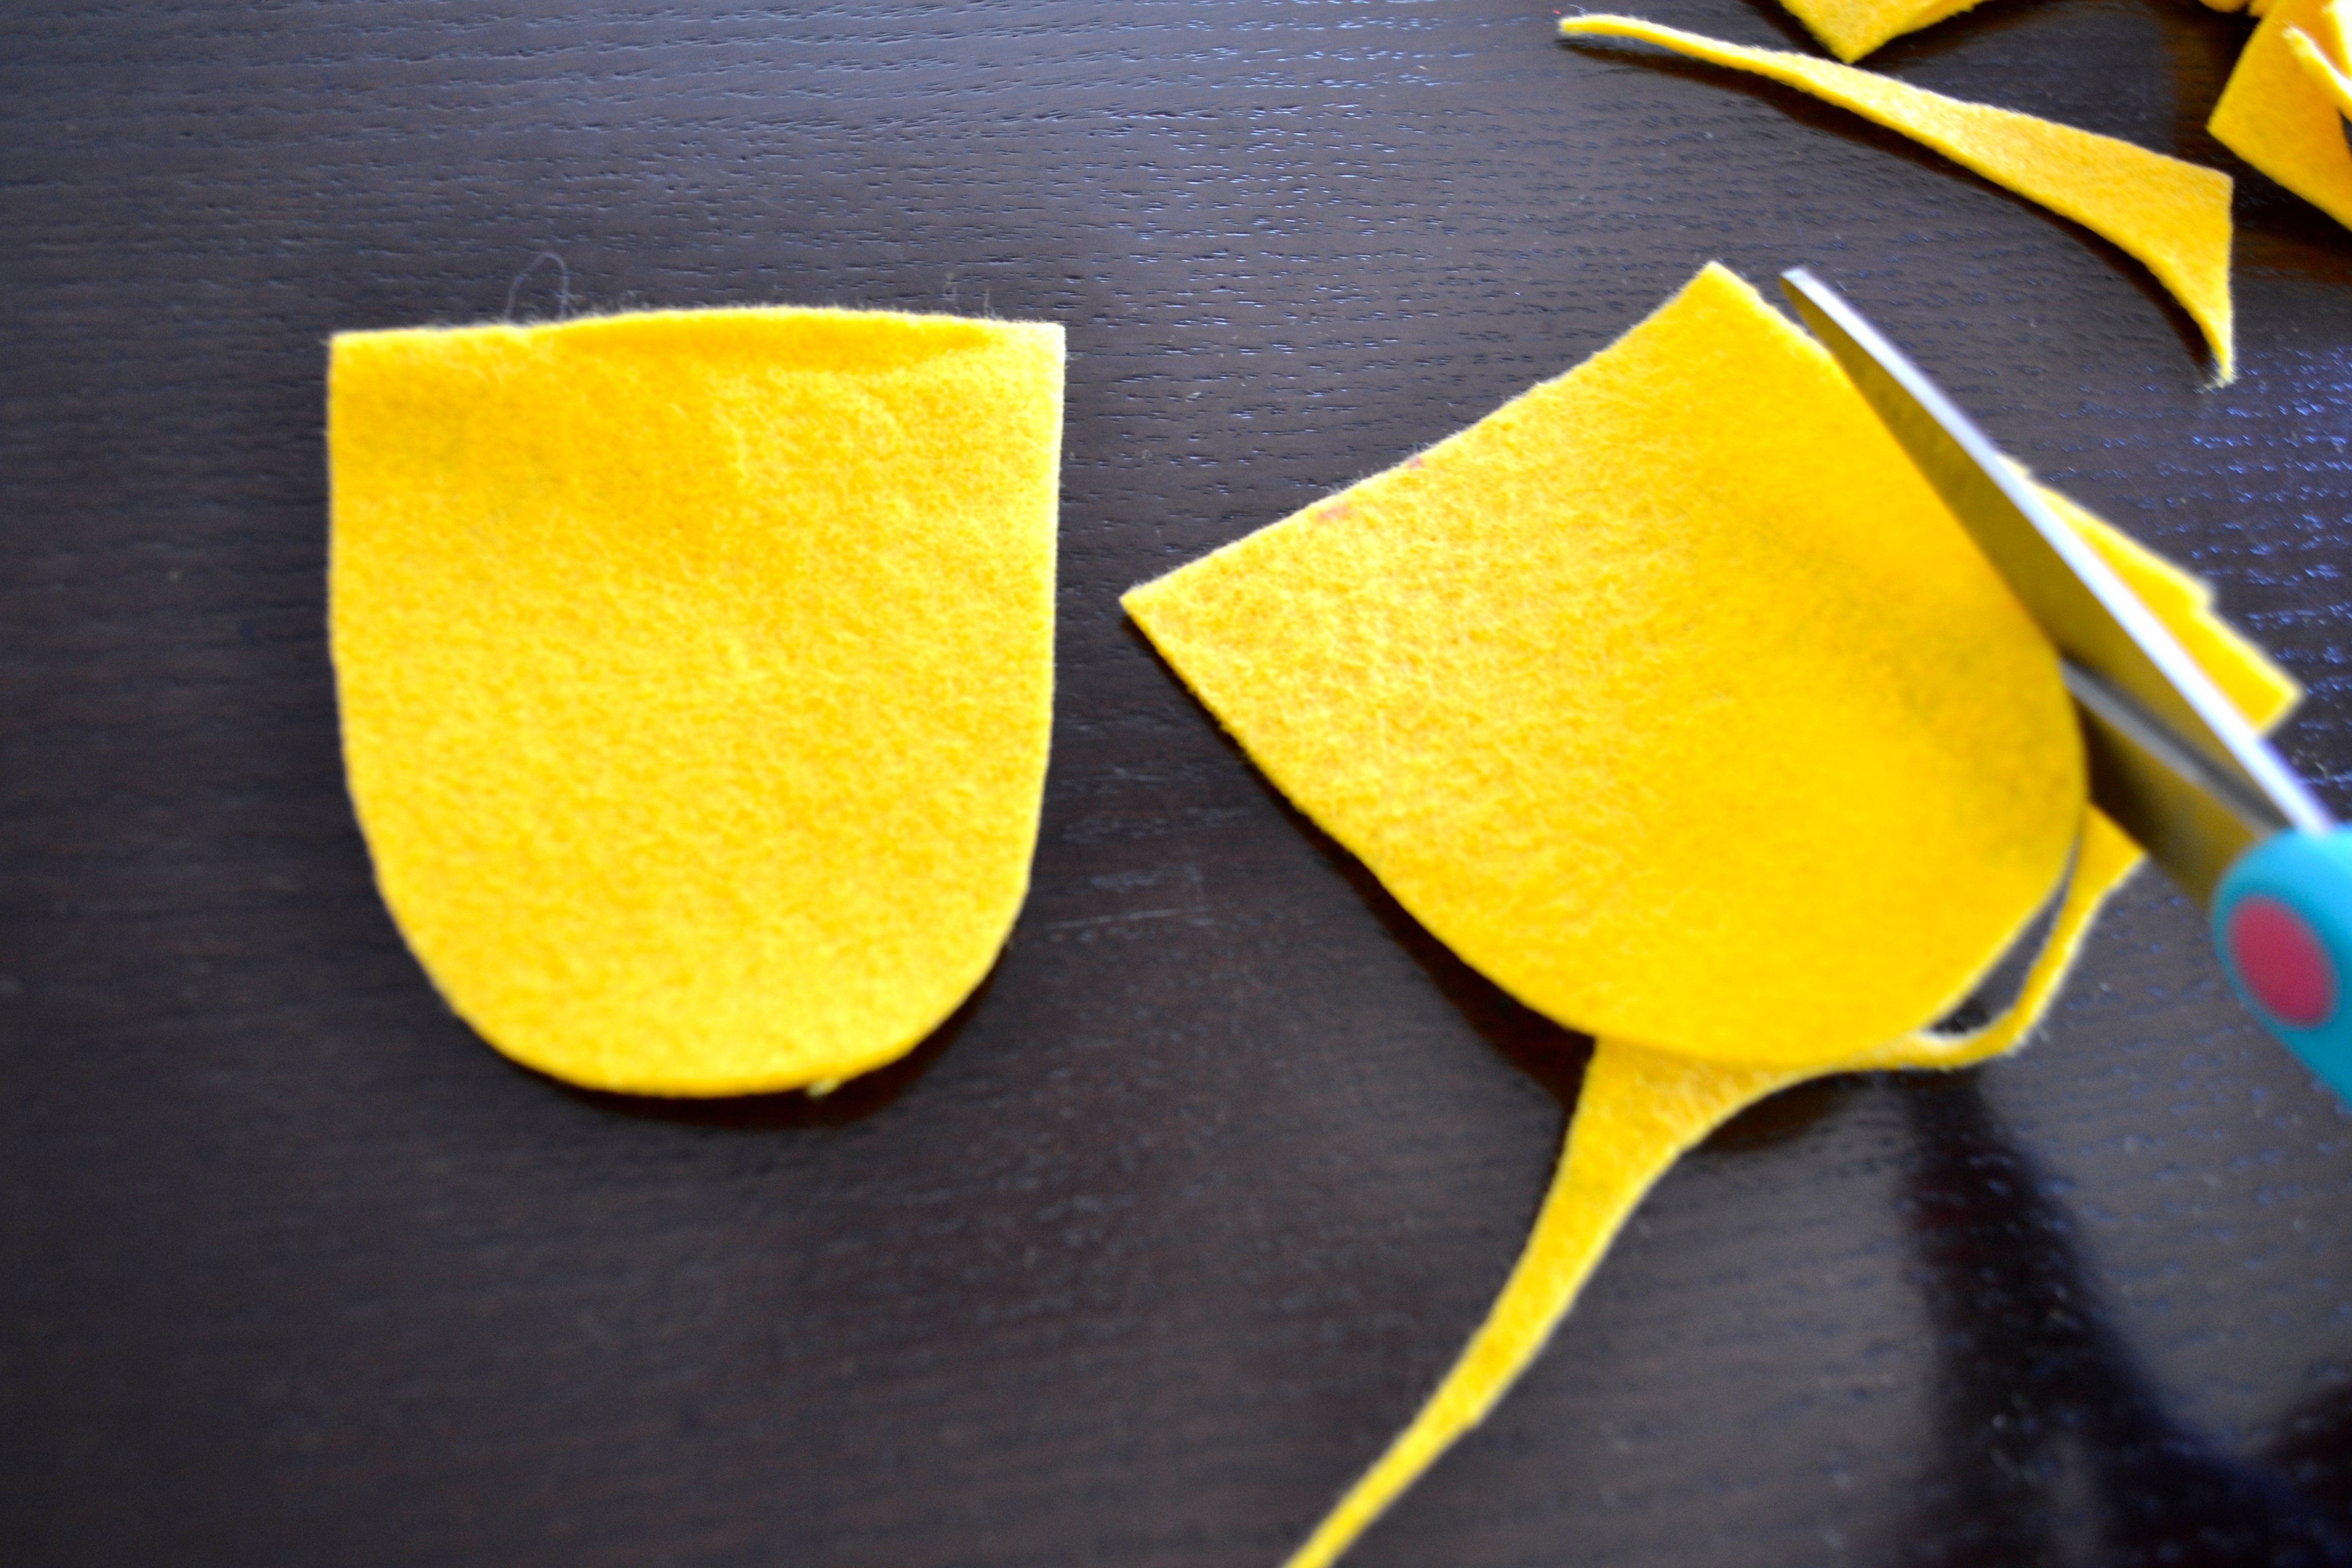
- Once in 3×3″squares, then use your scissors to cut a U shape out of each square (basically, just rounding off the bottom 2 corners of the square). These U shaped felt pieces will become your “feathers”.
Step 2:
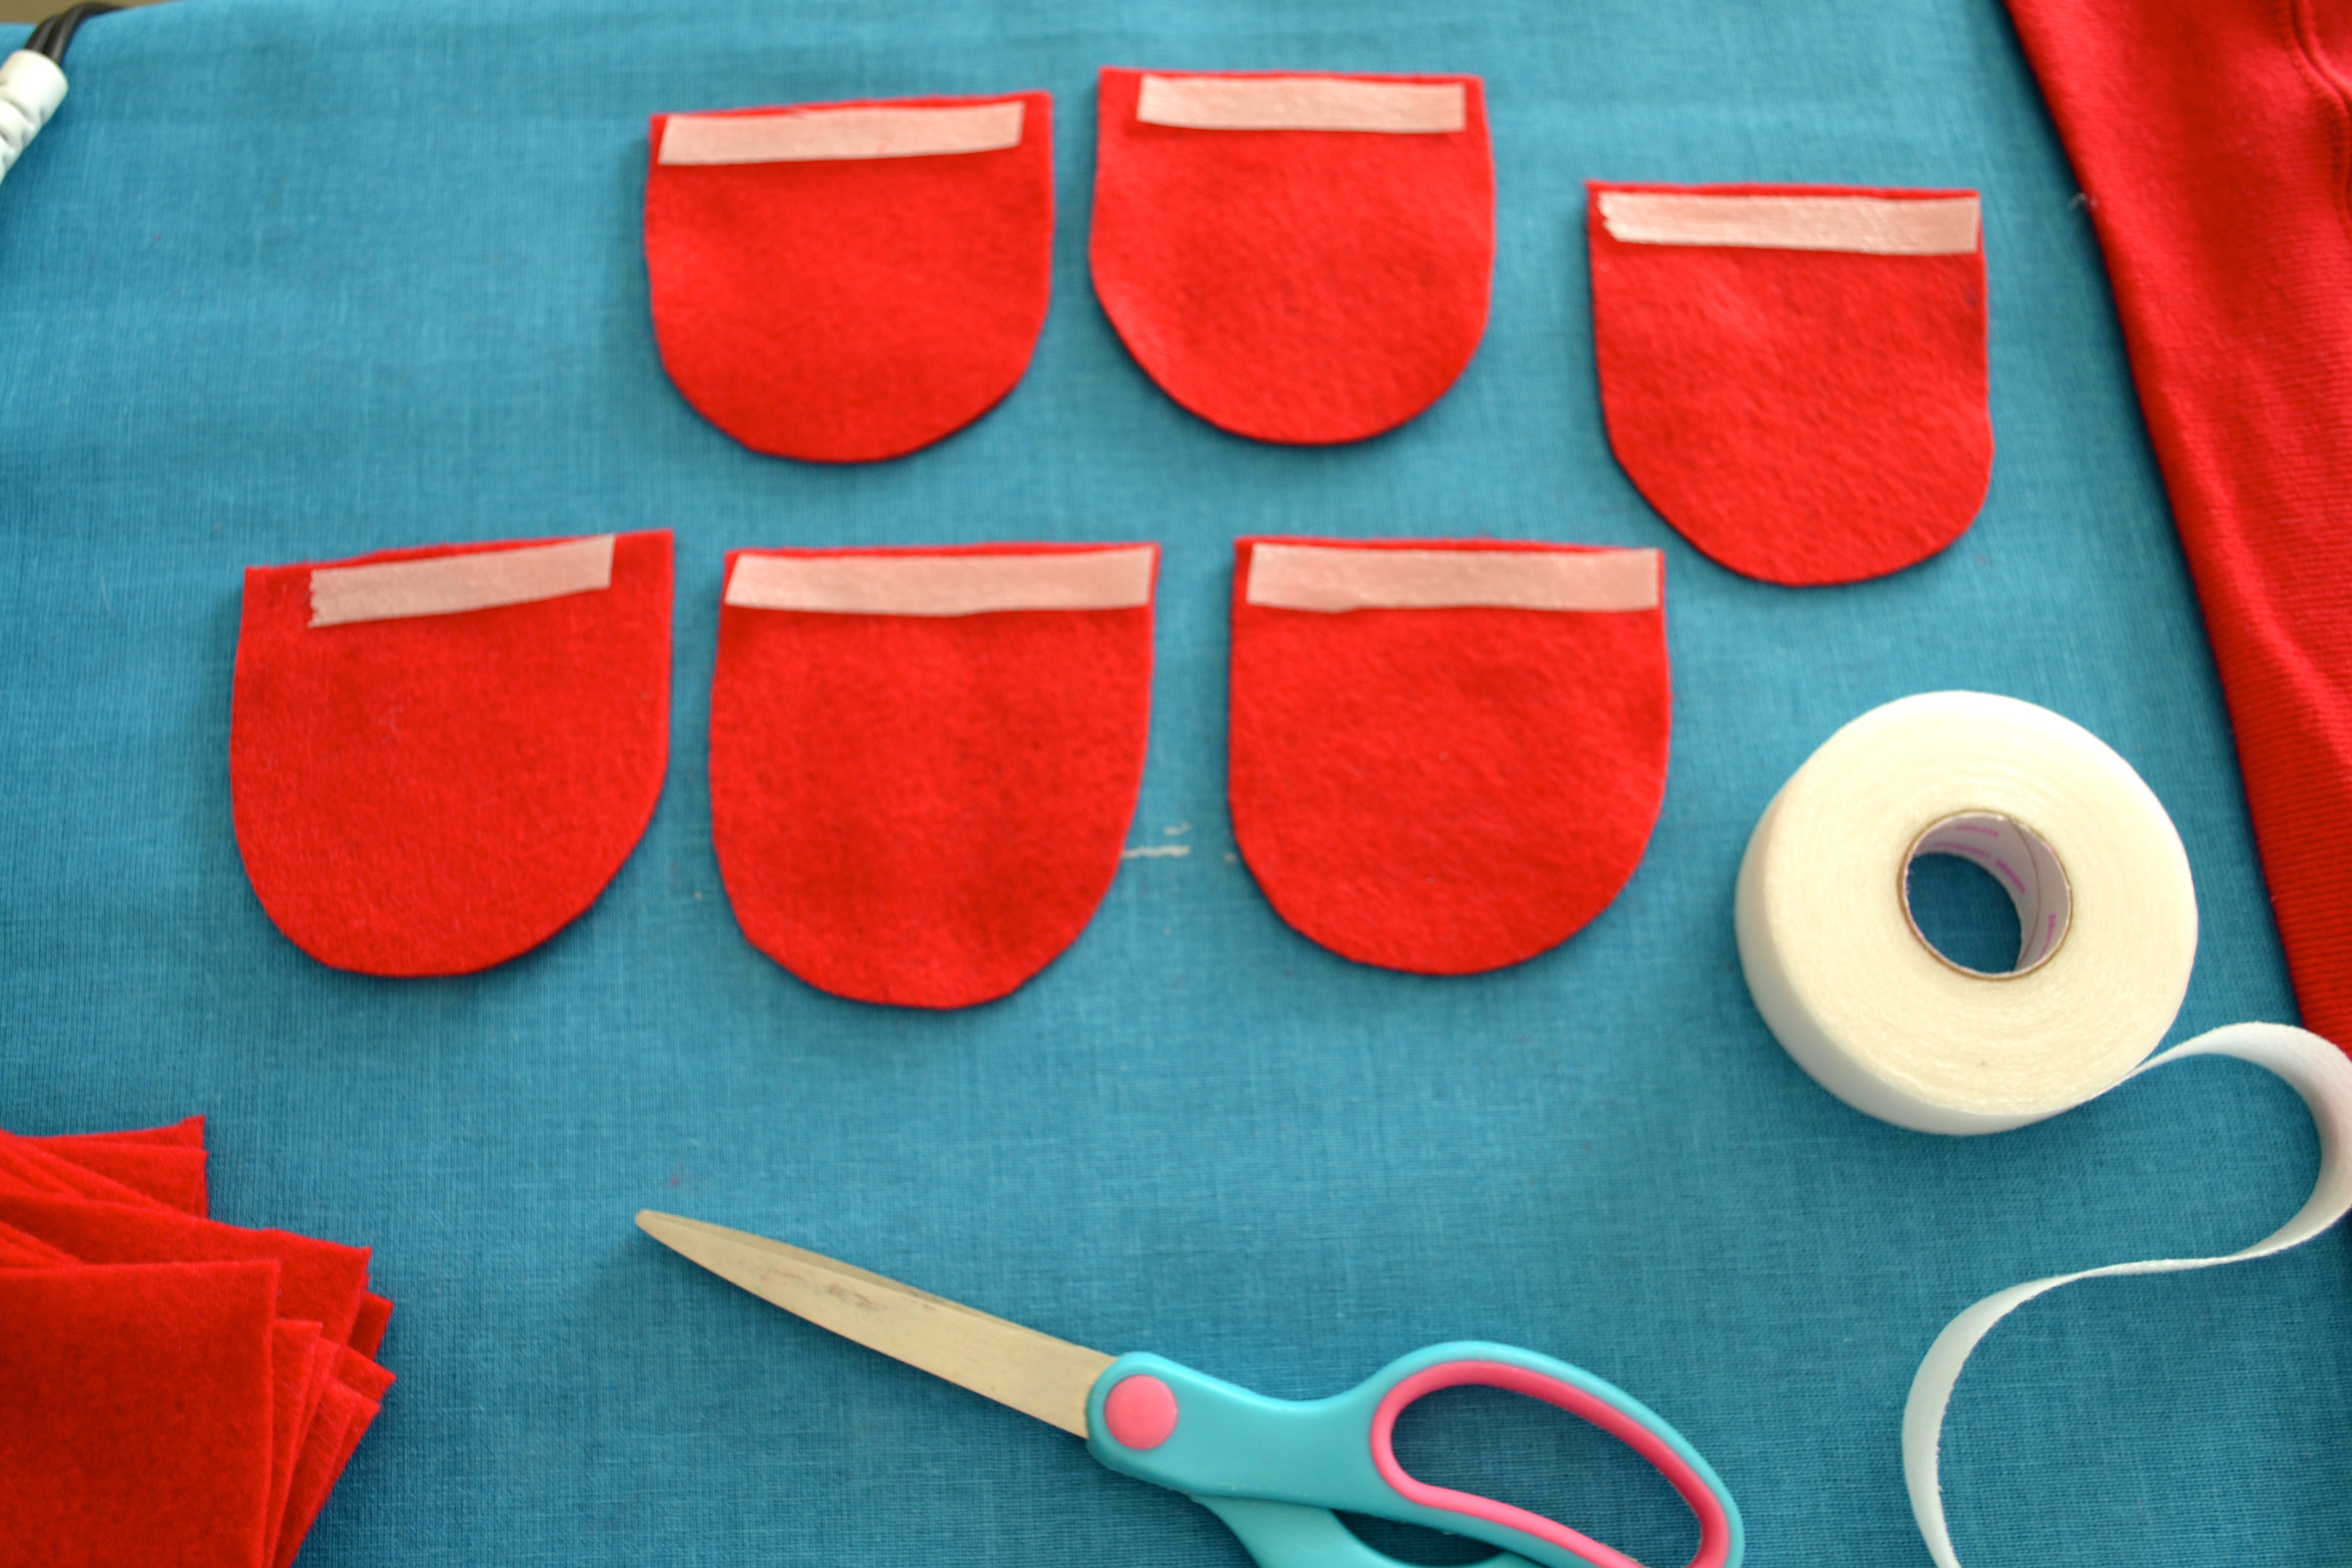
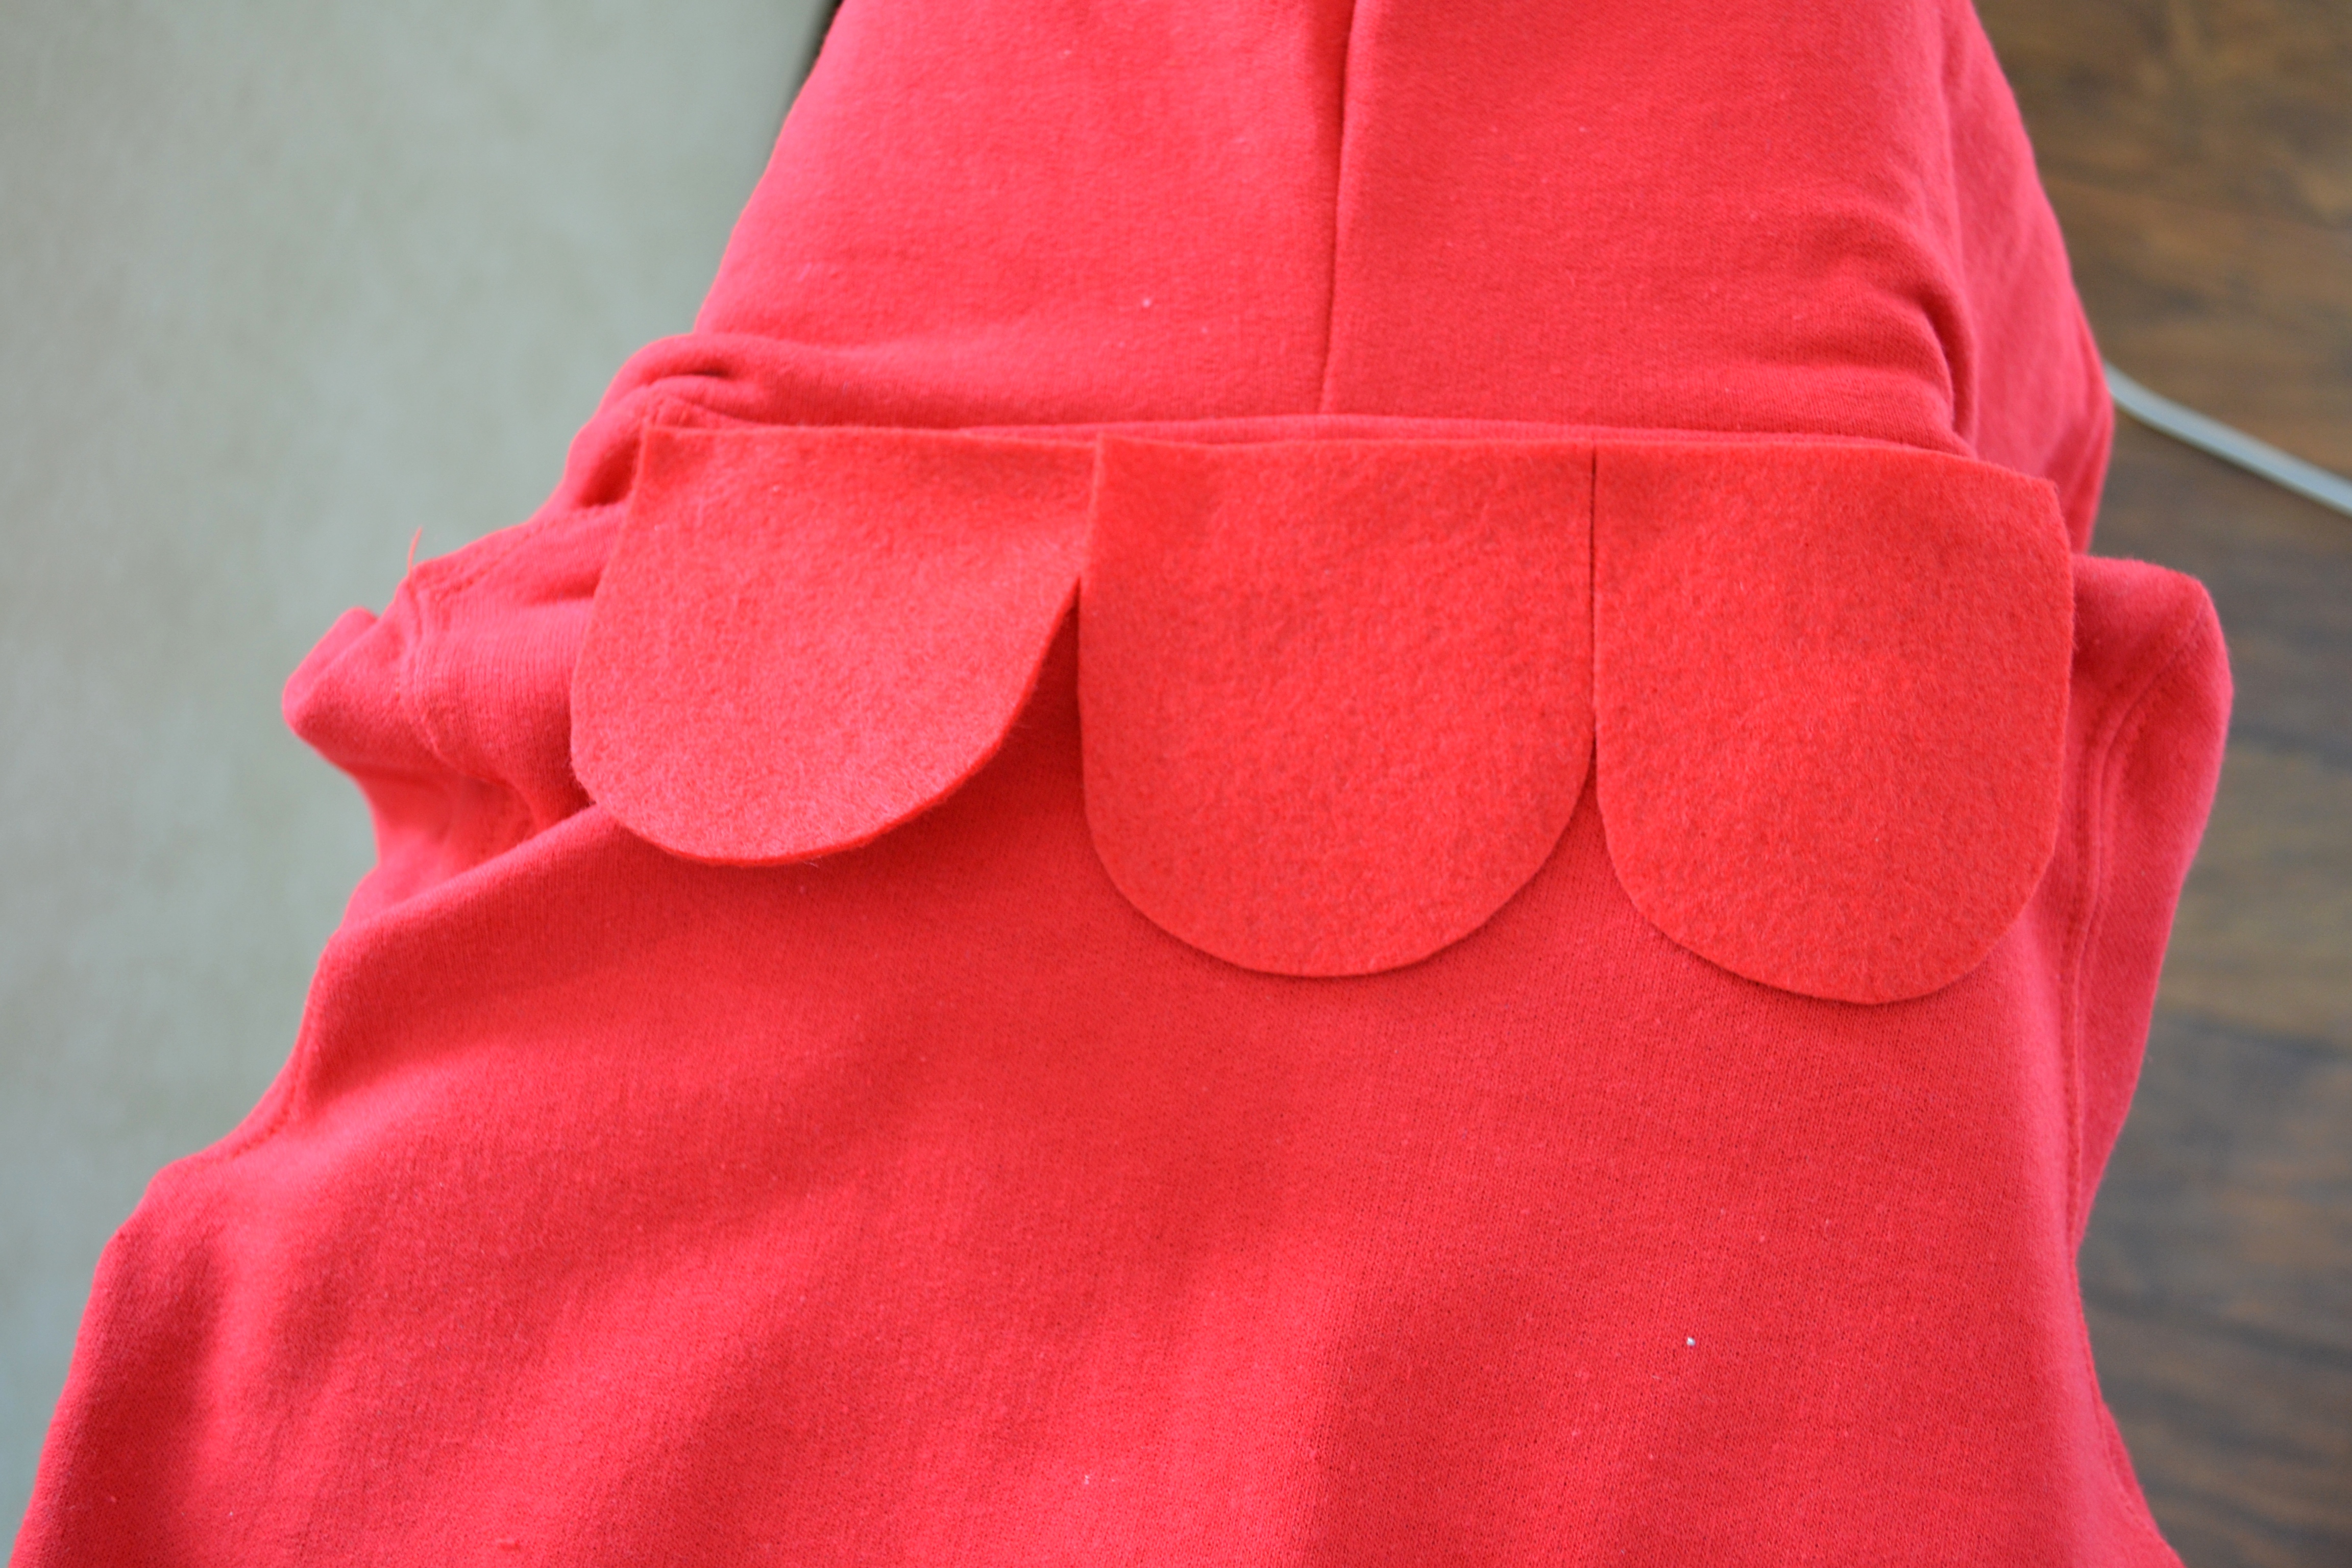
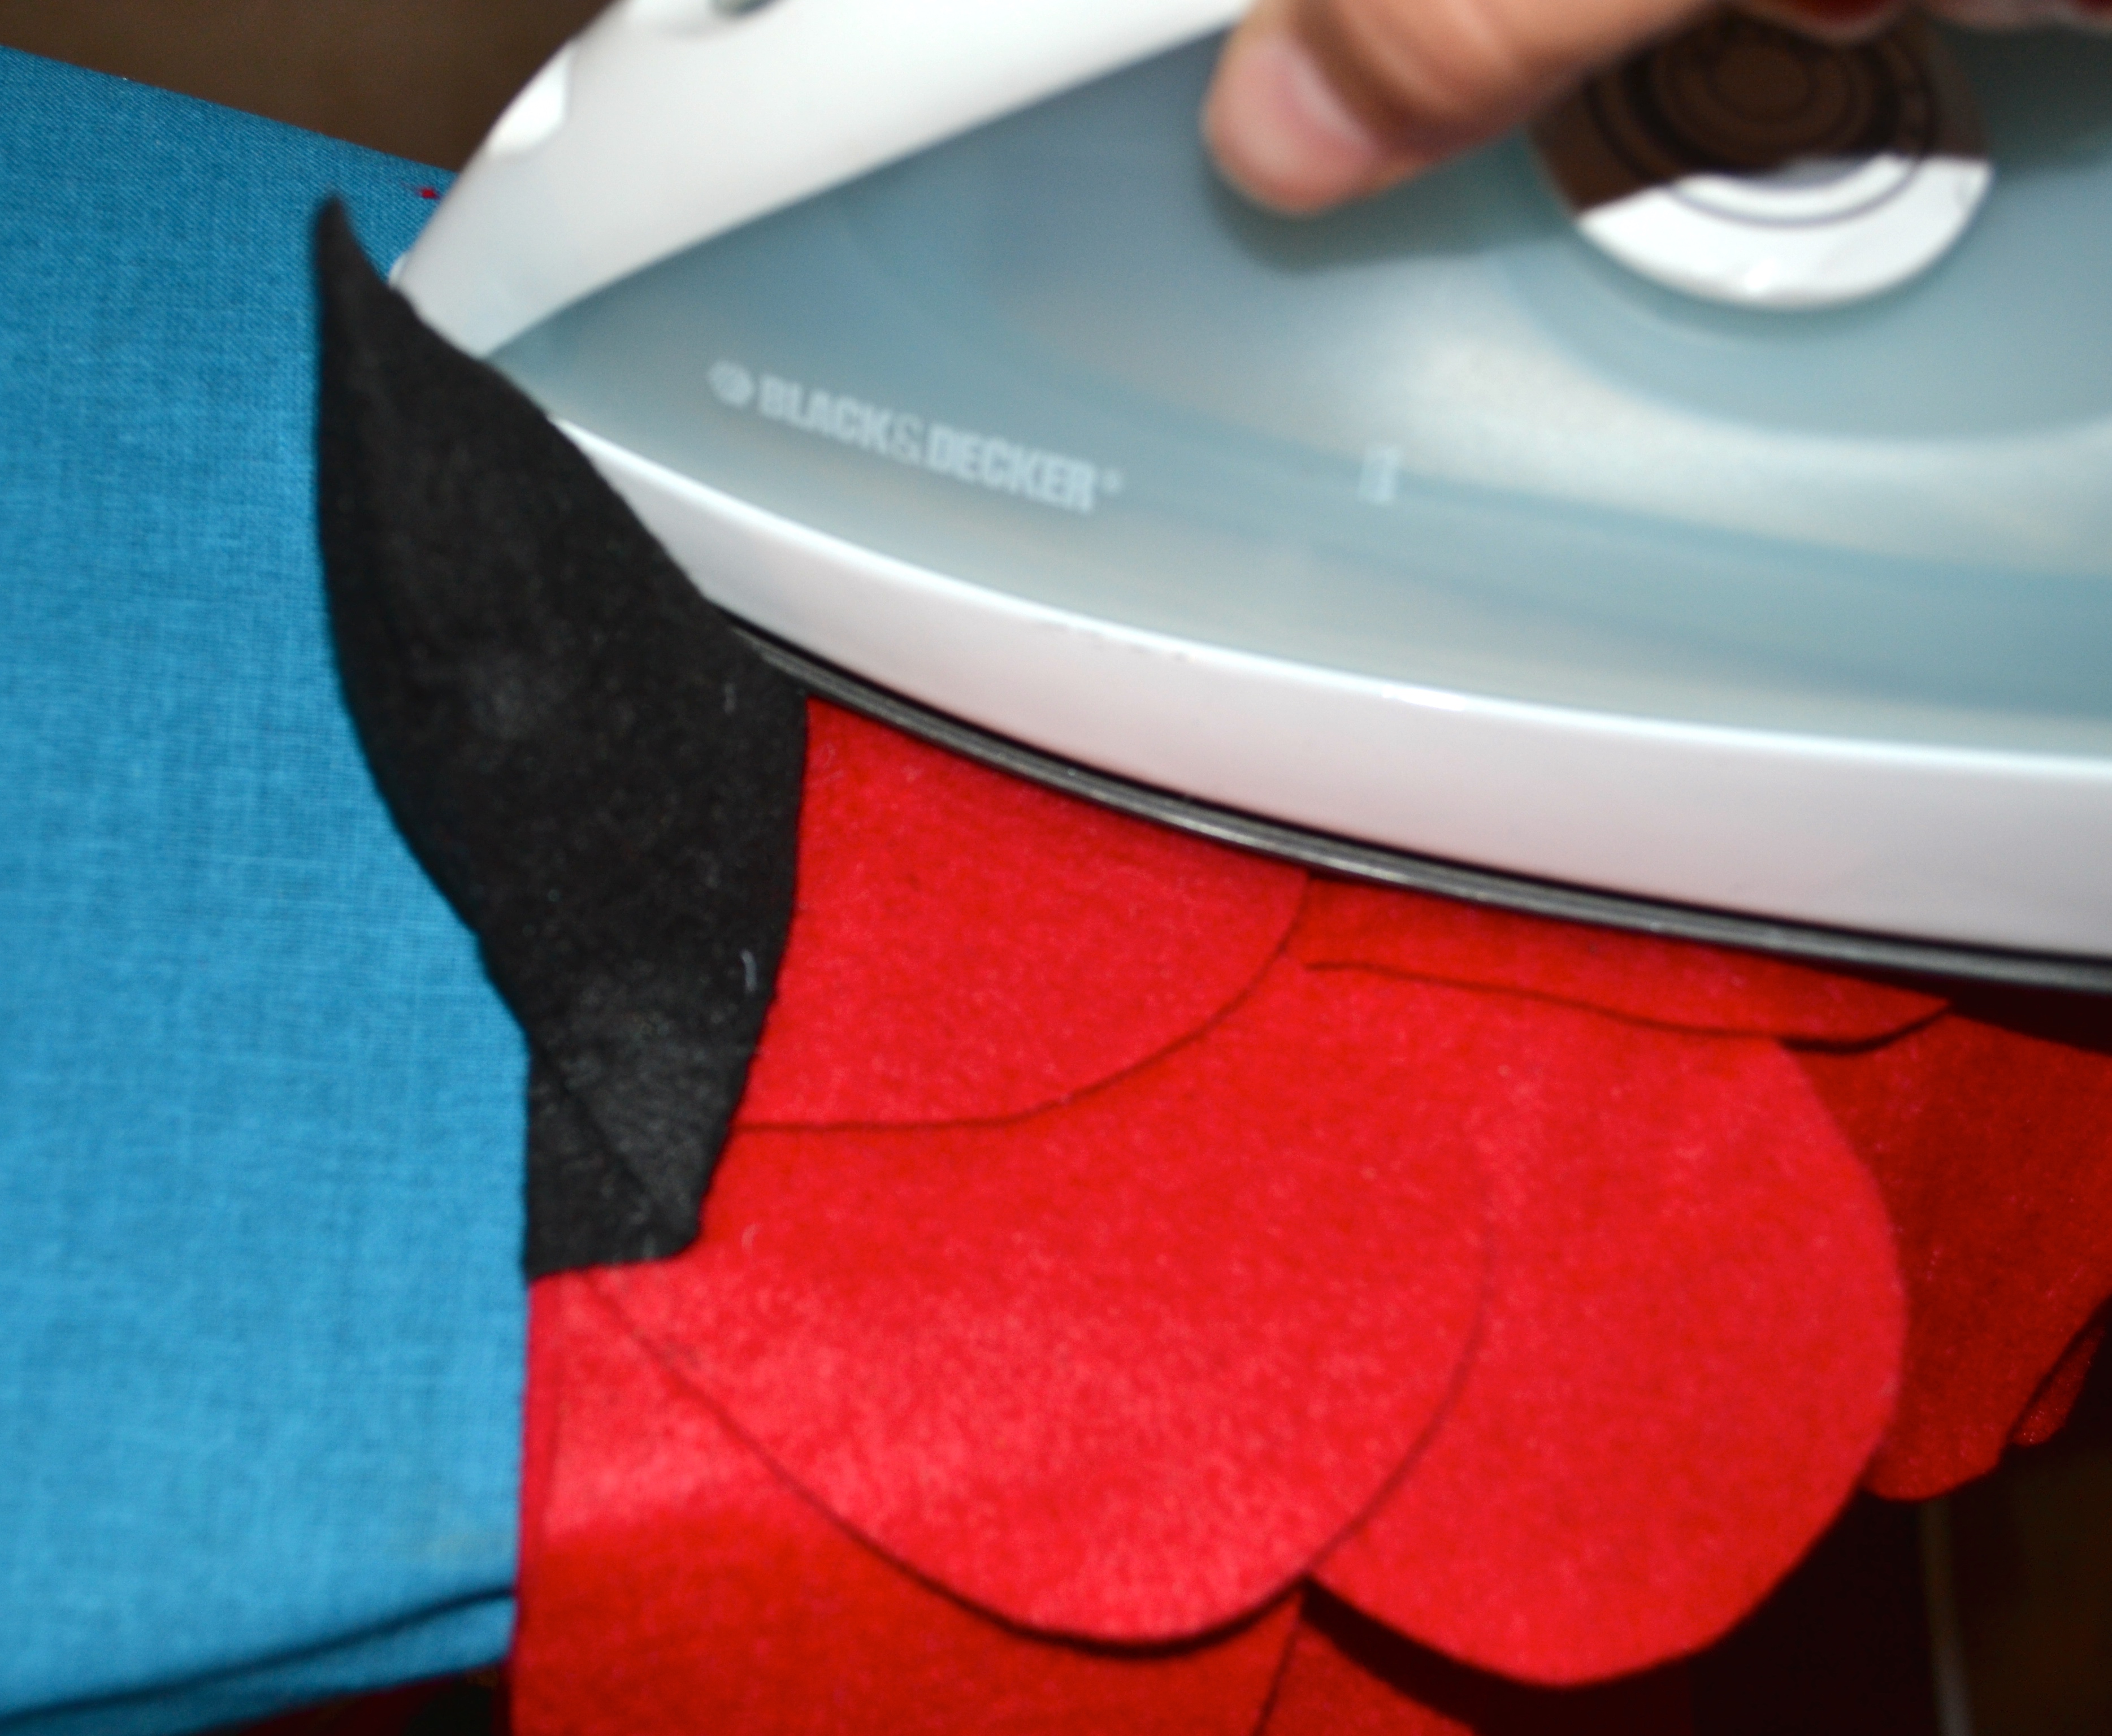
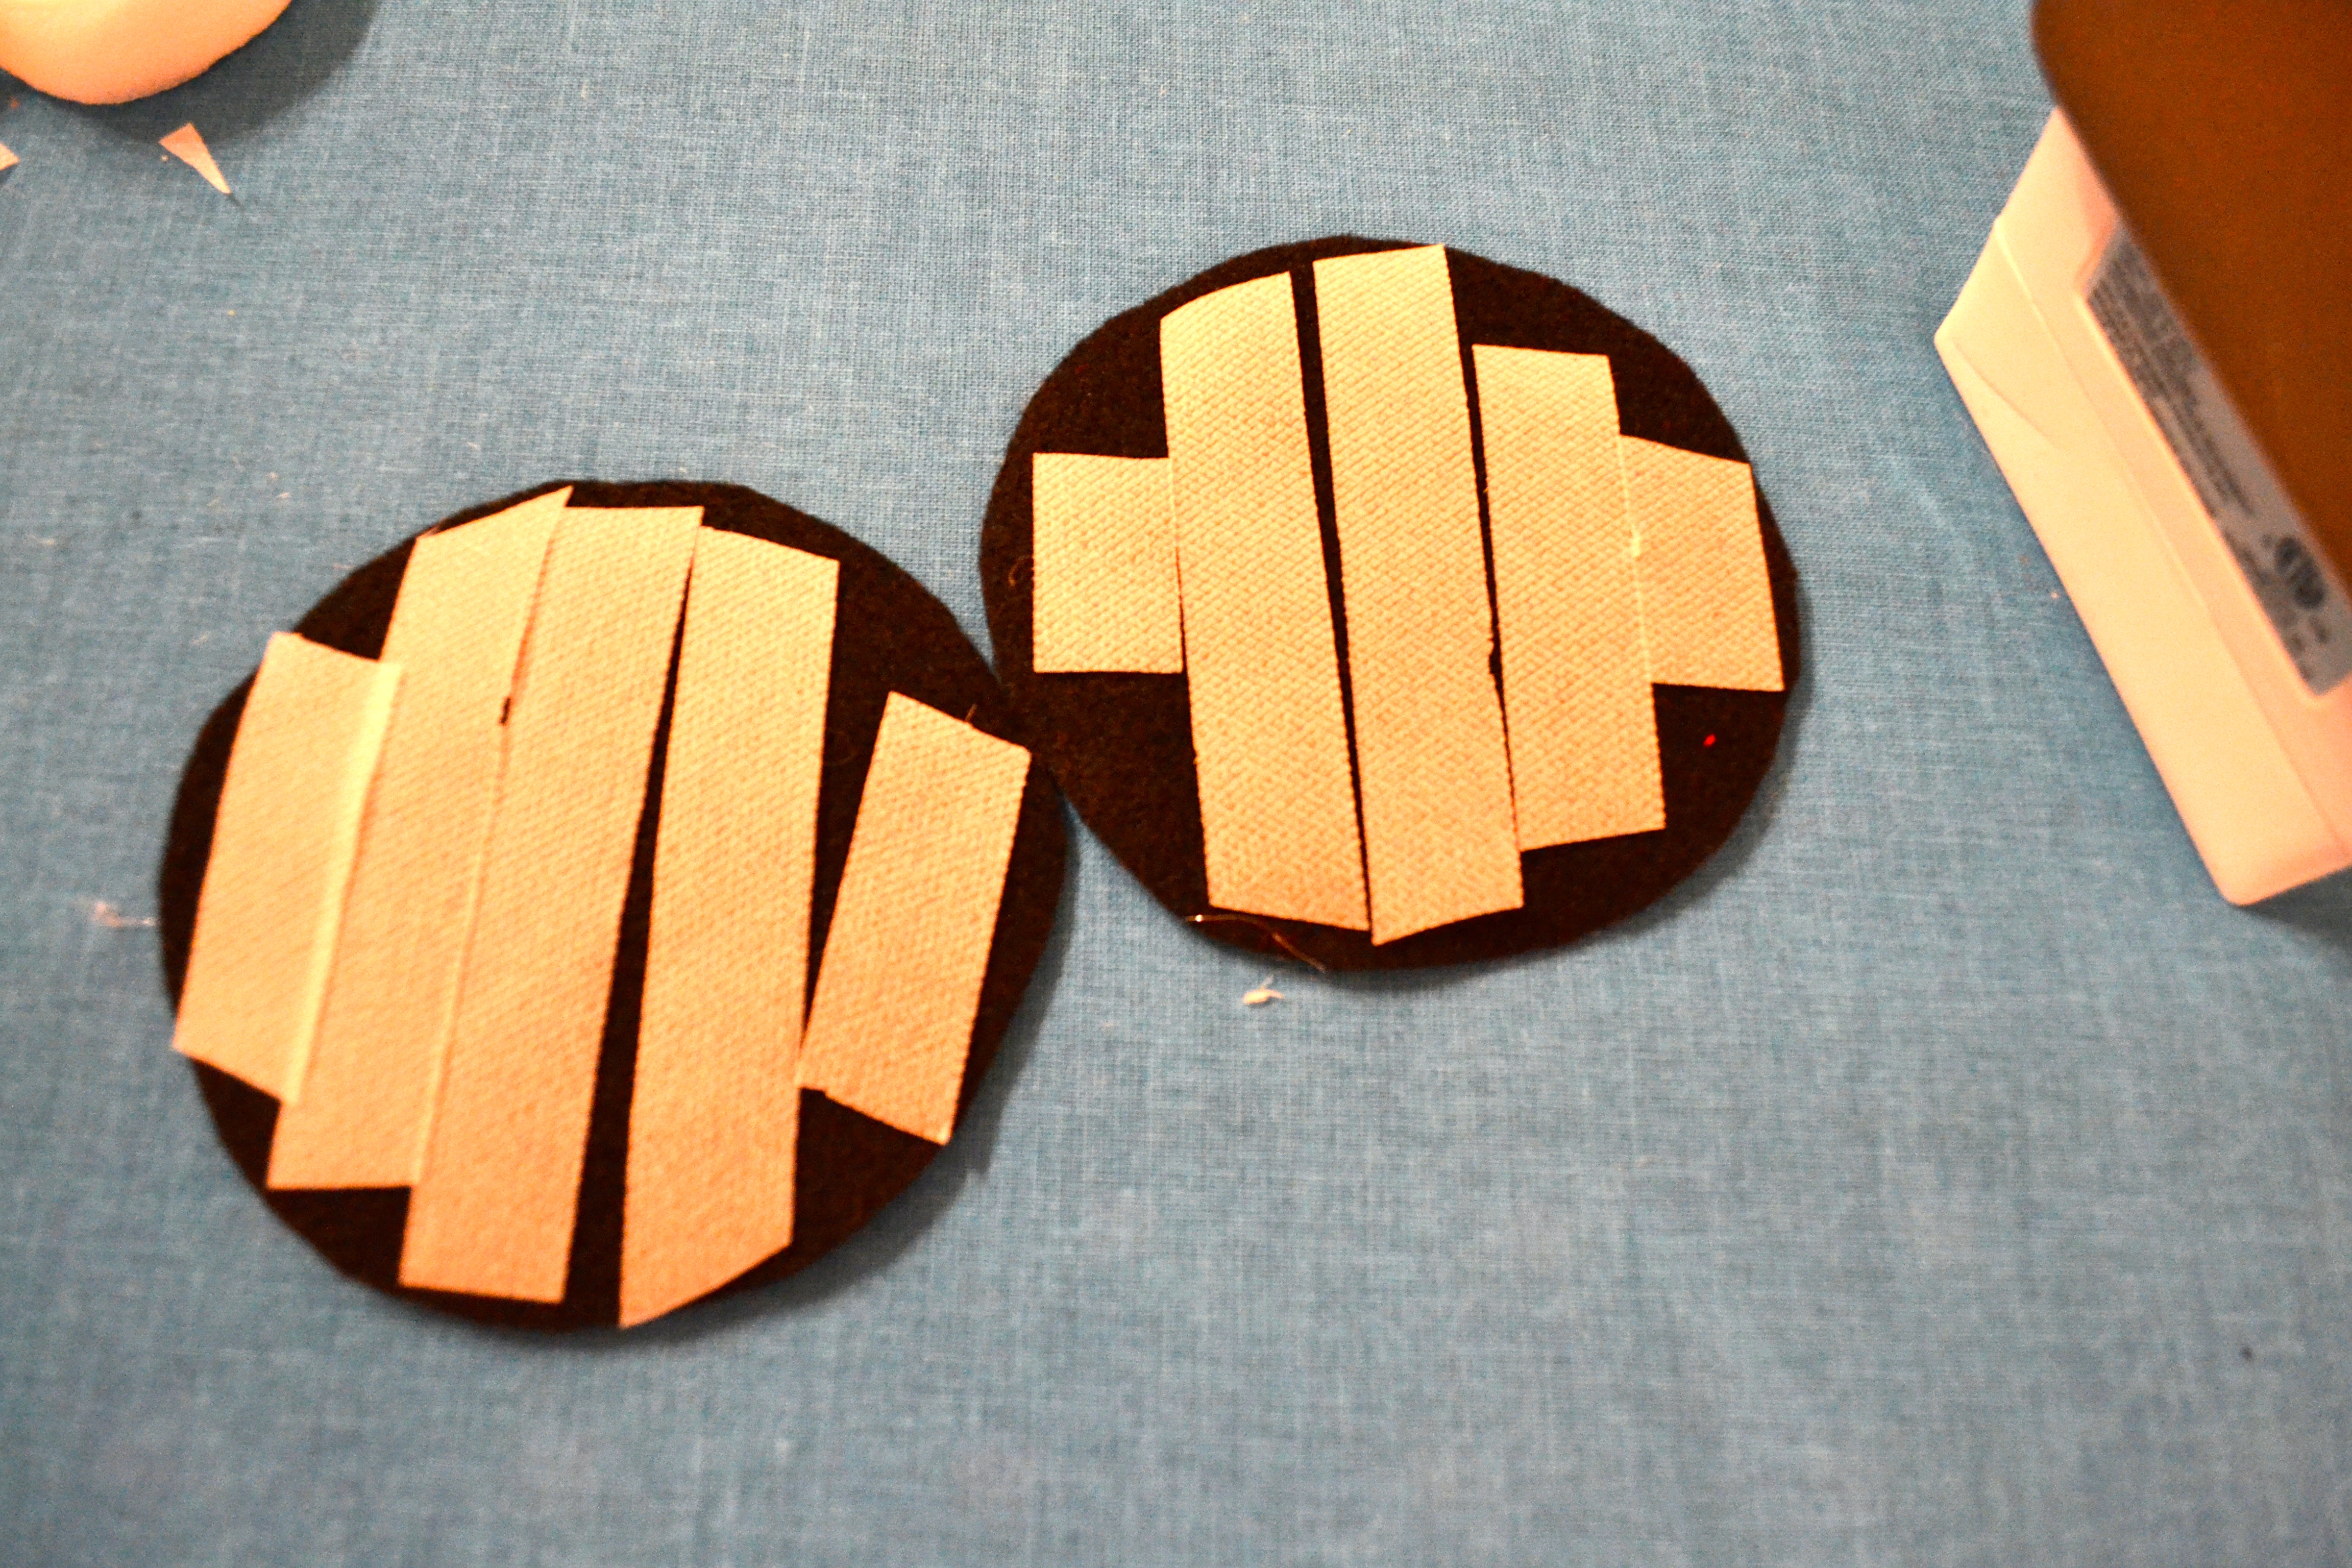
- Decide what color your first row of feathers will be. Take your double sided heat transfer tape and cut in in strips to fit the top of each U in that color.
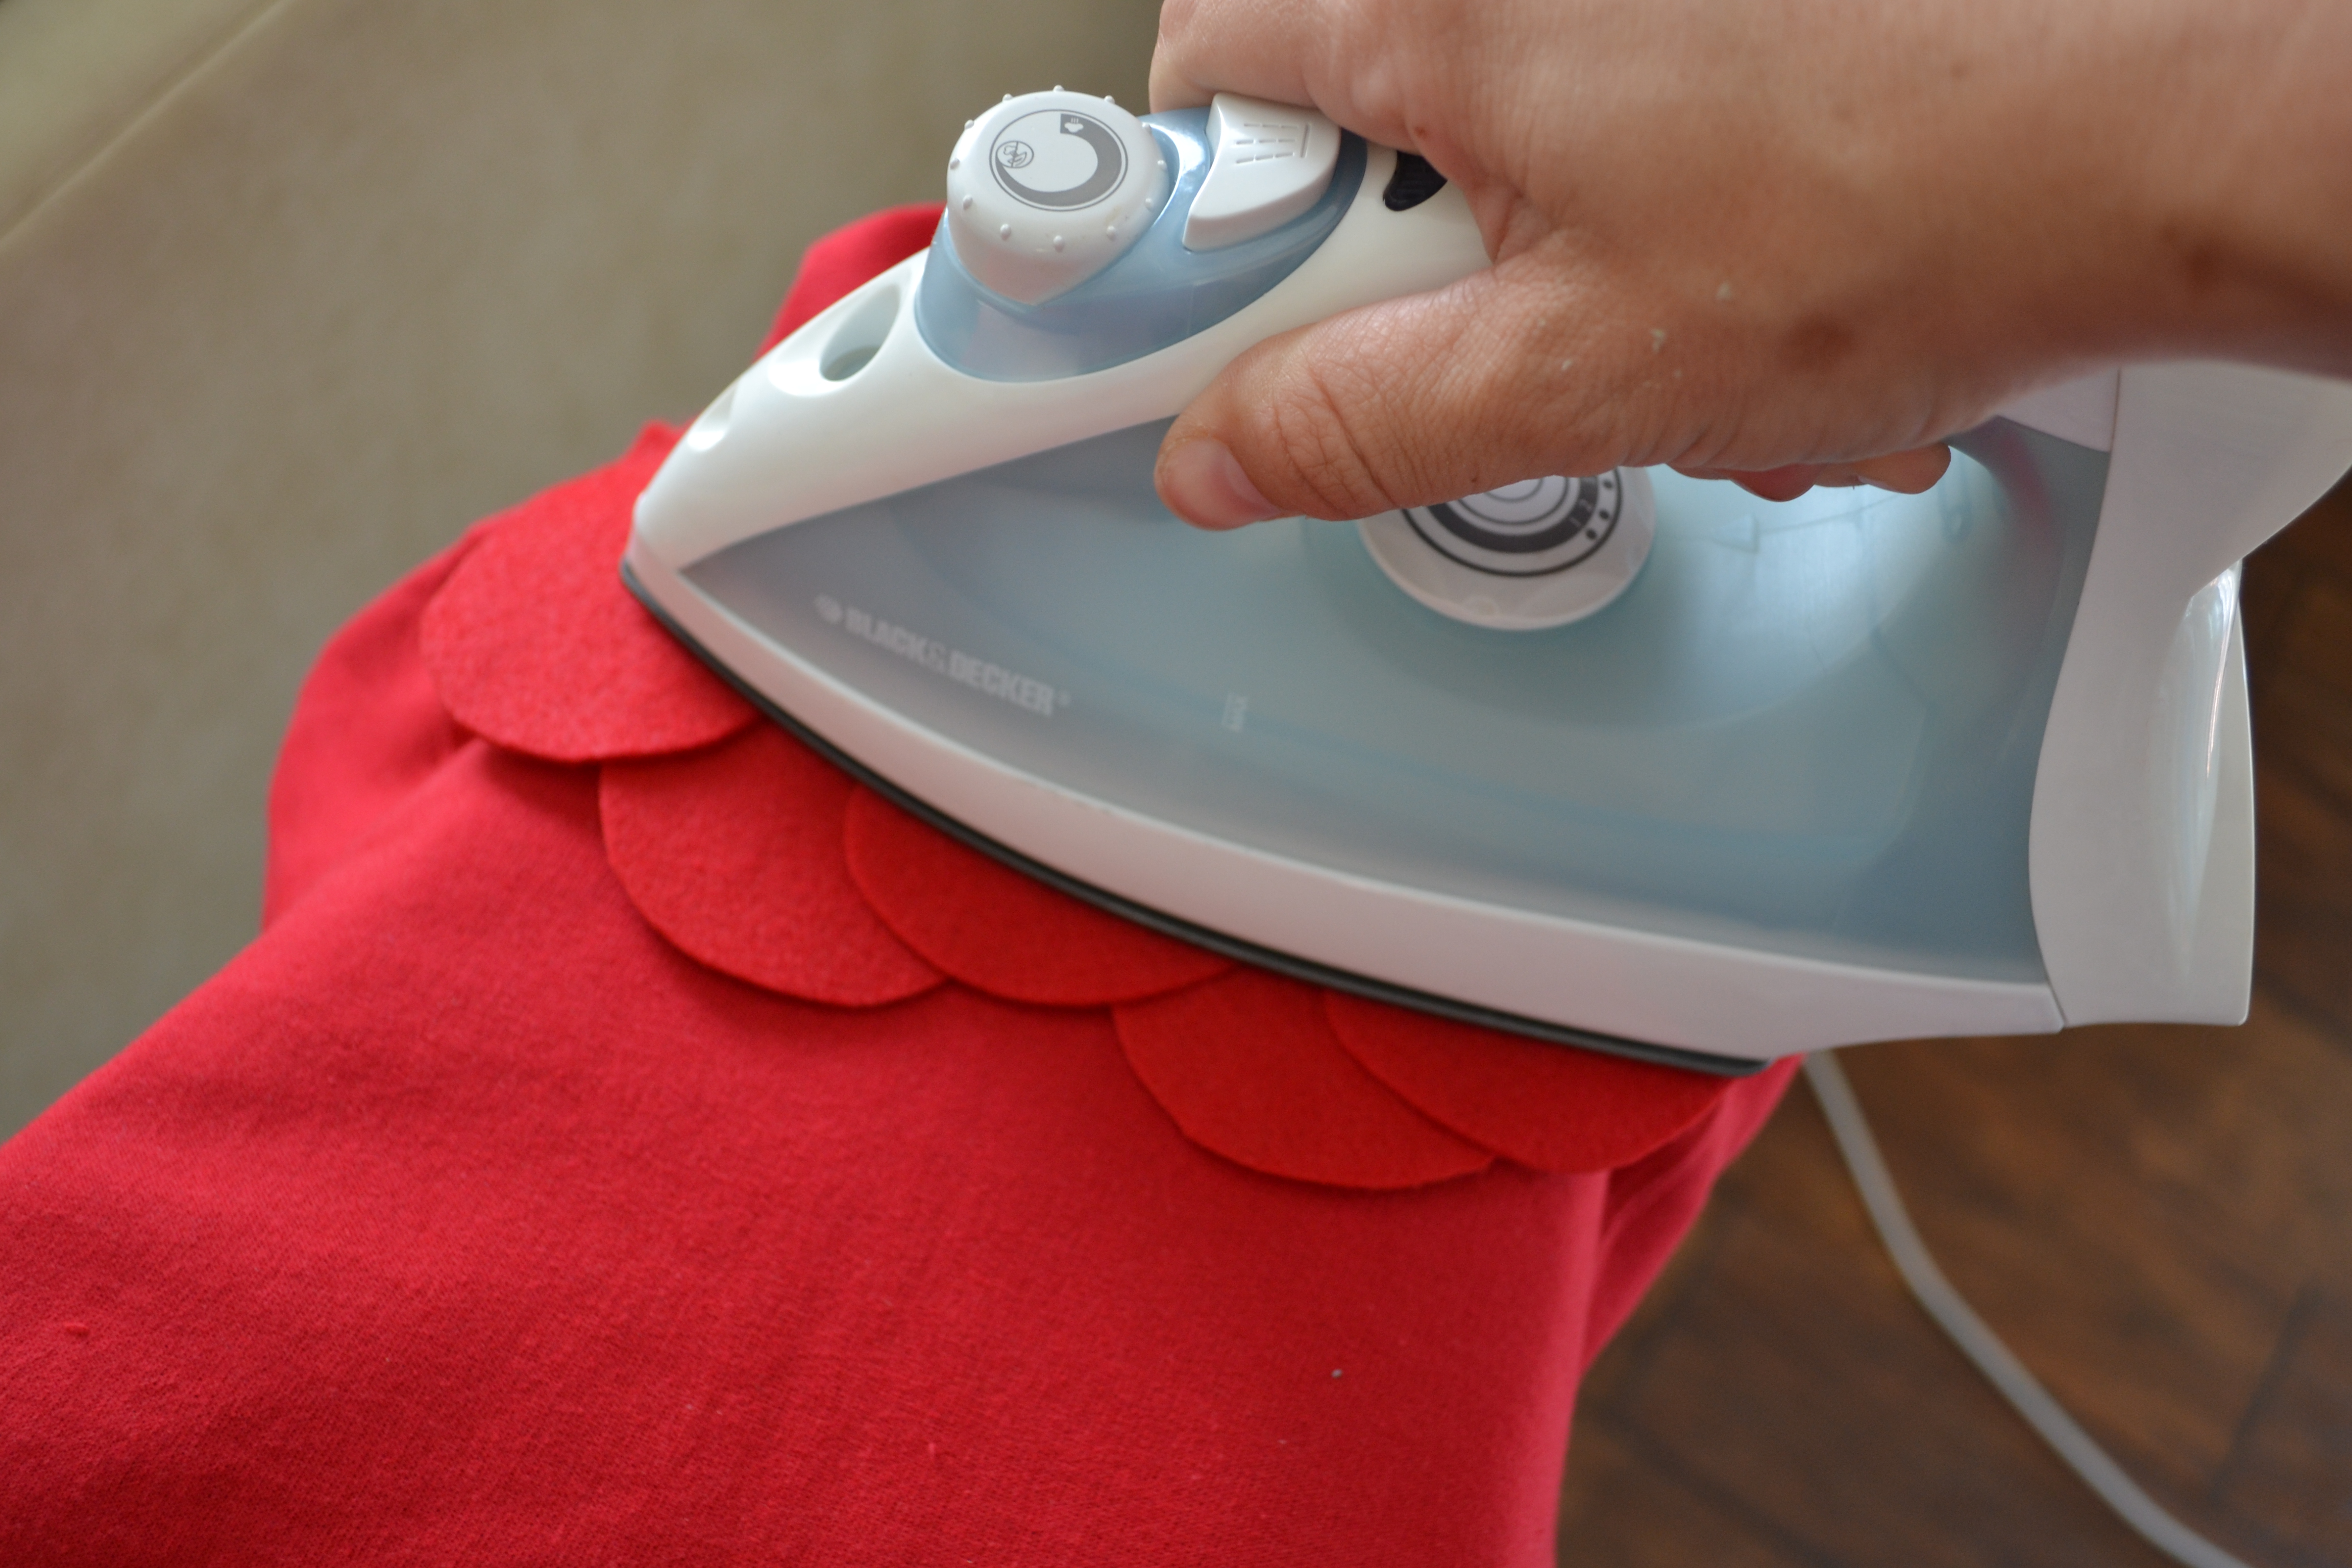
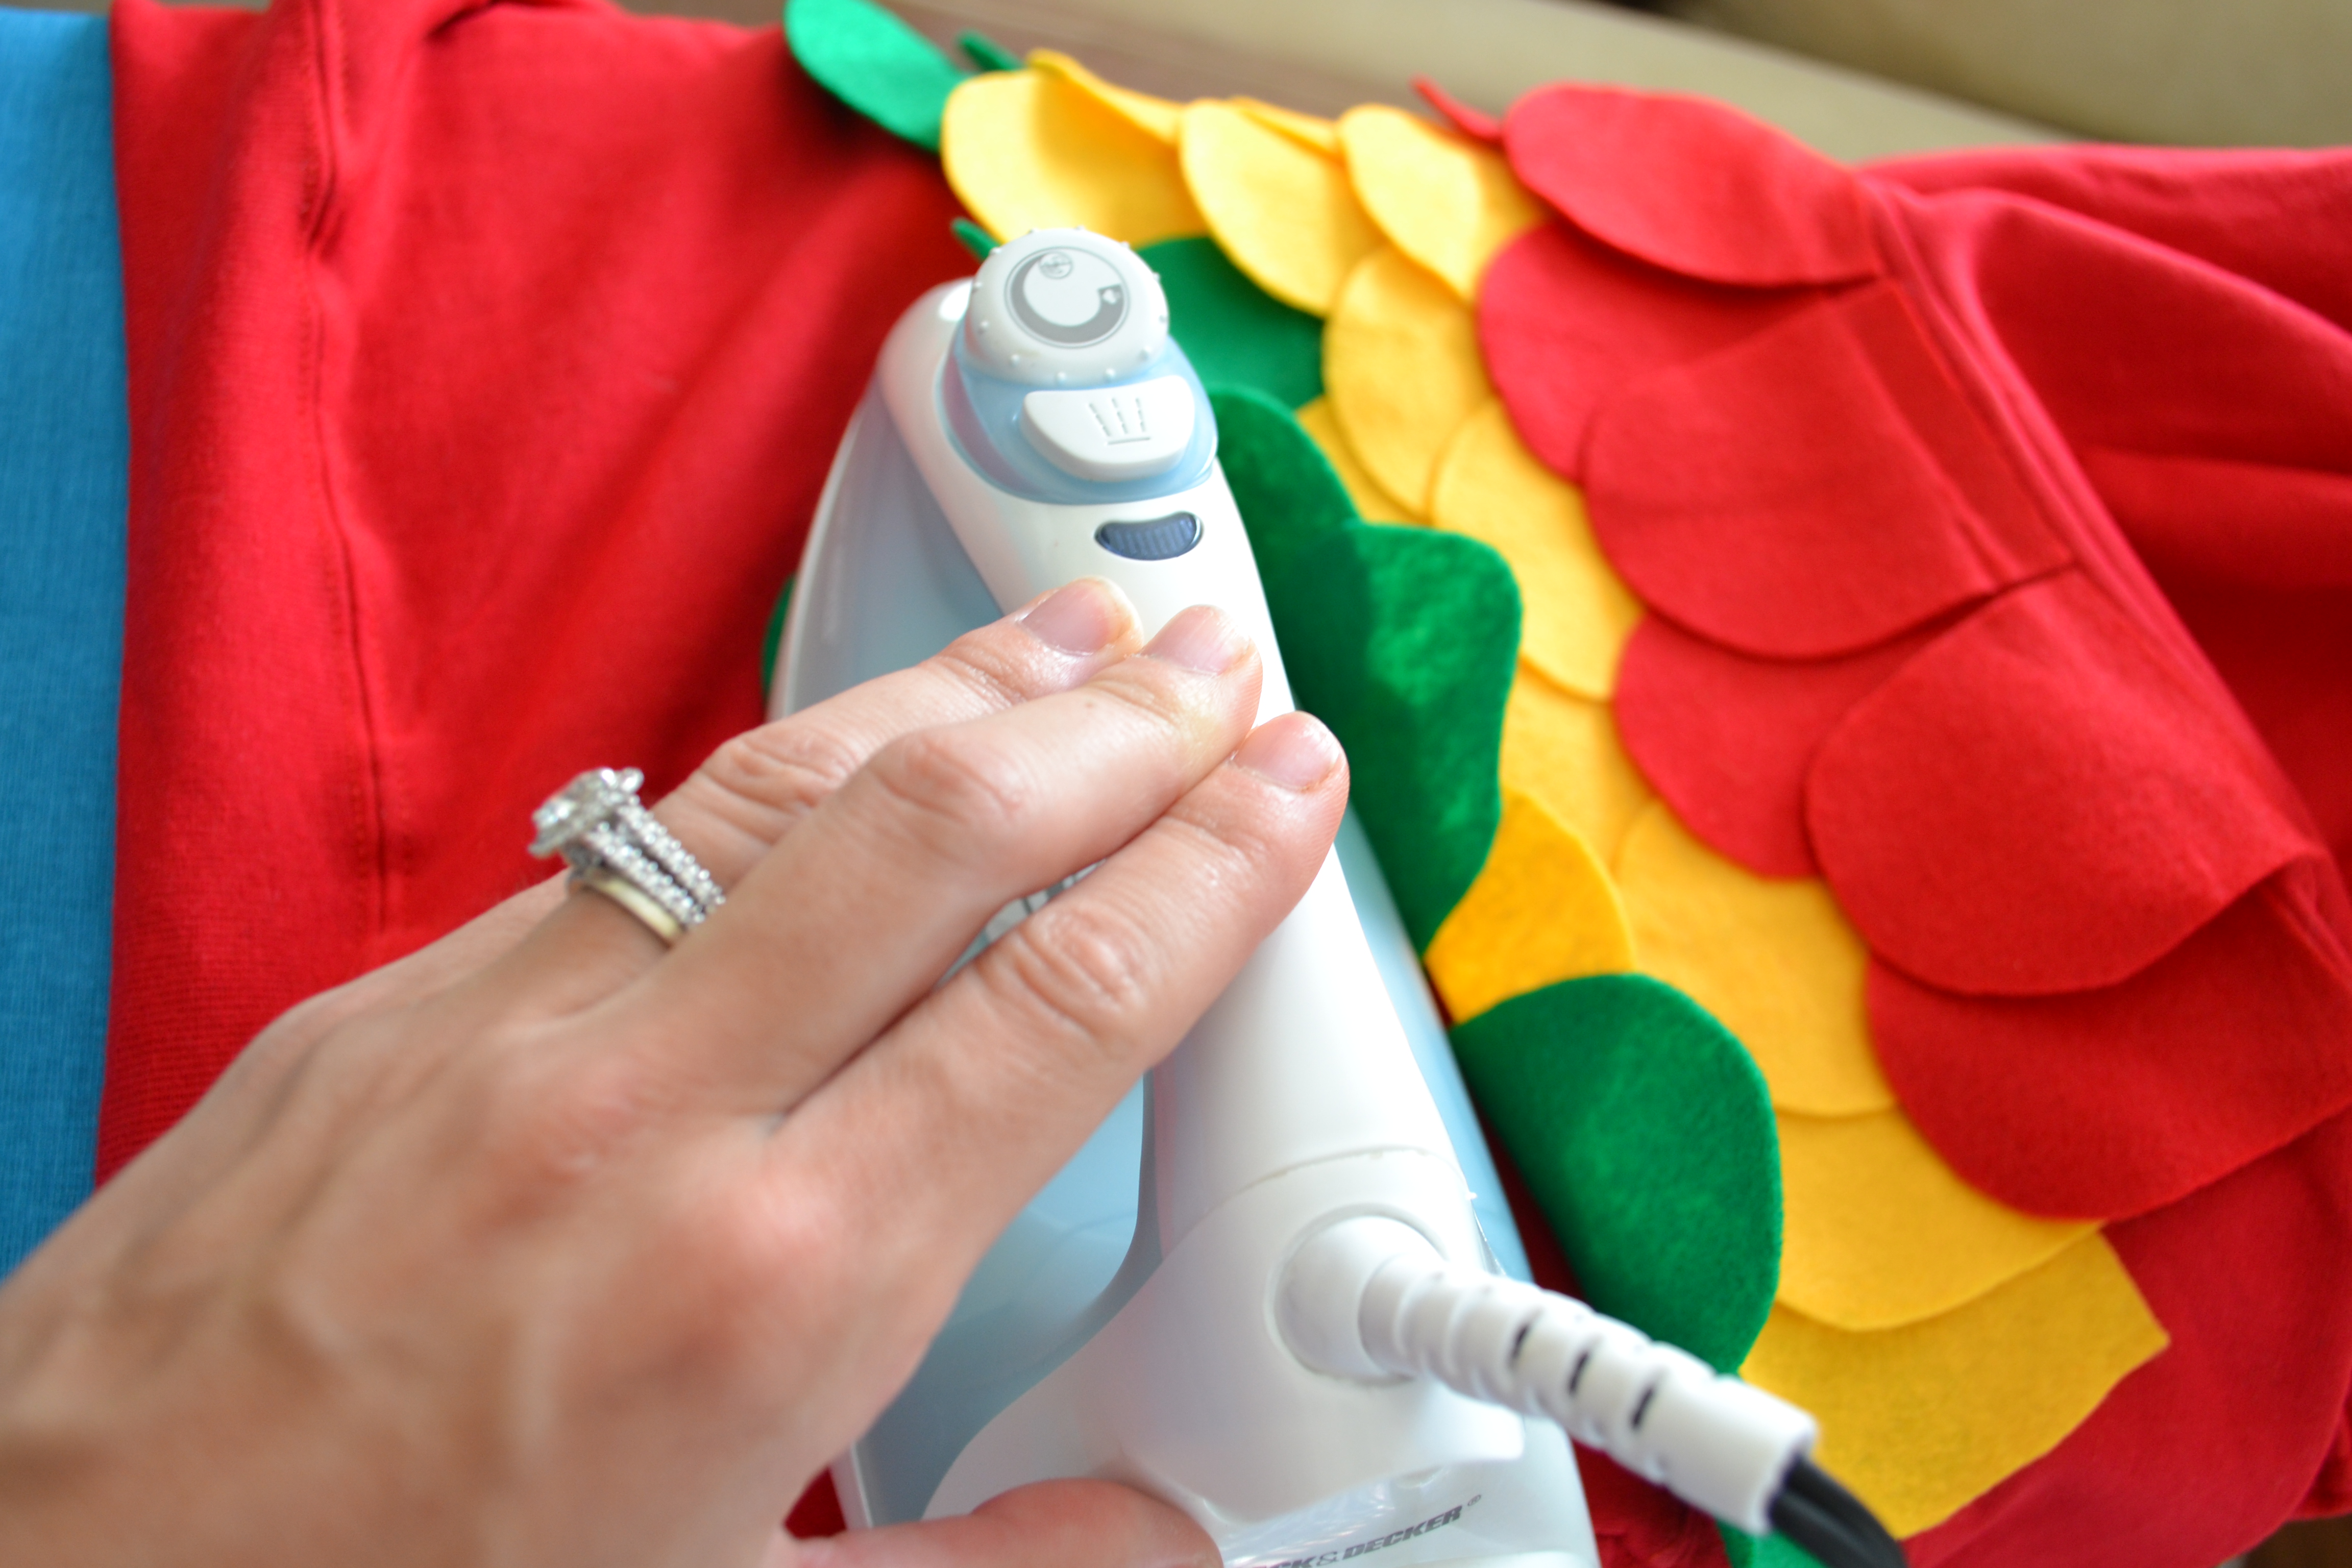
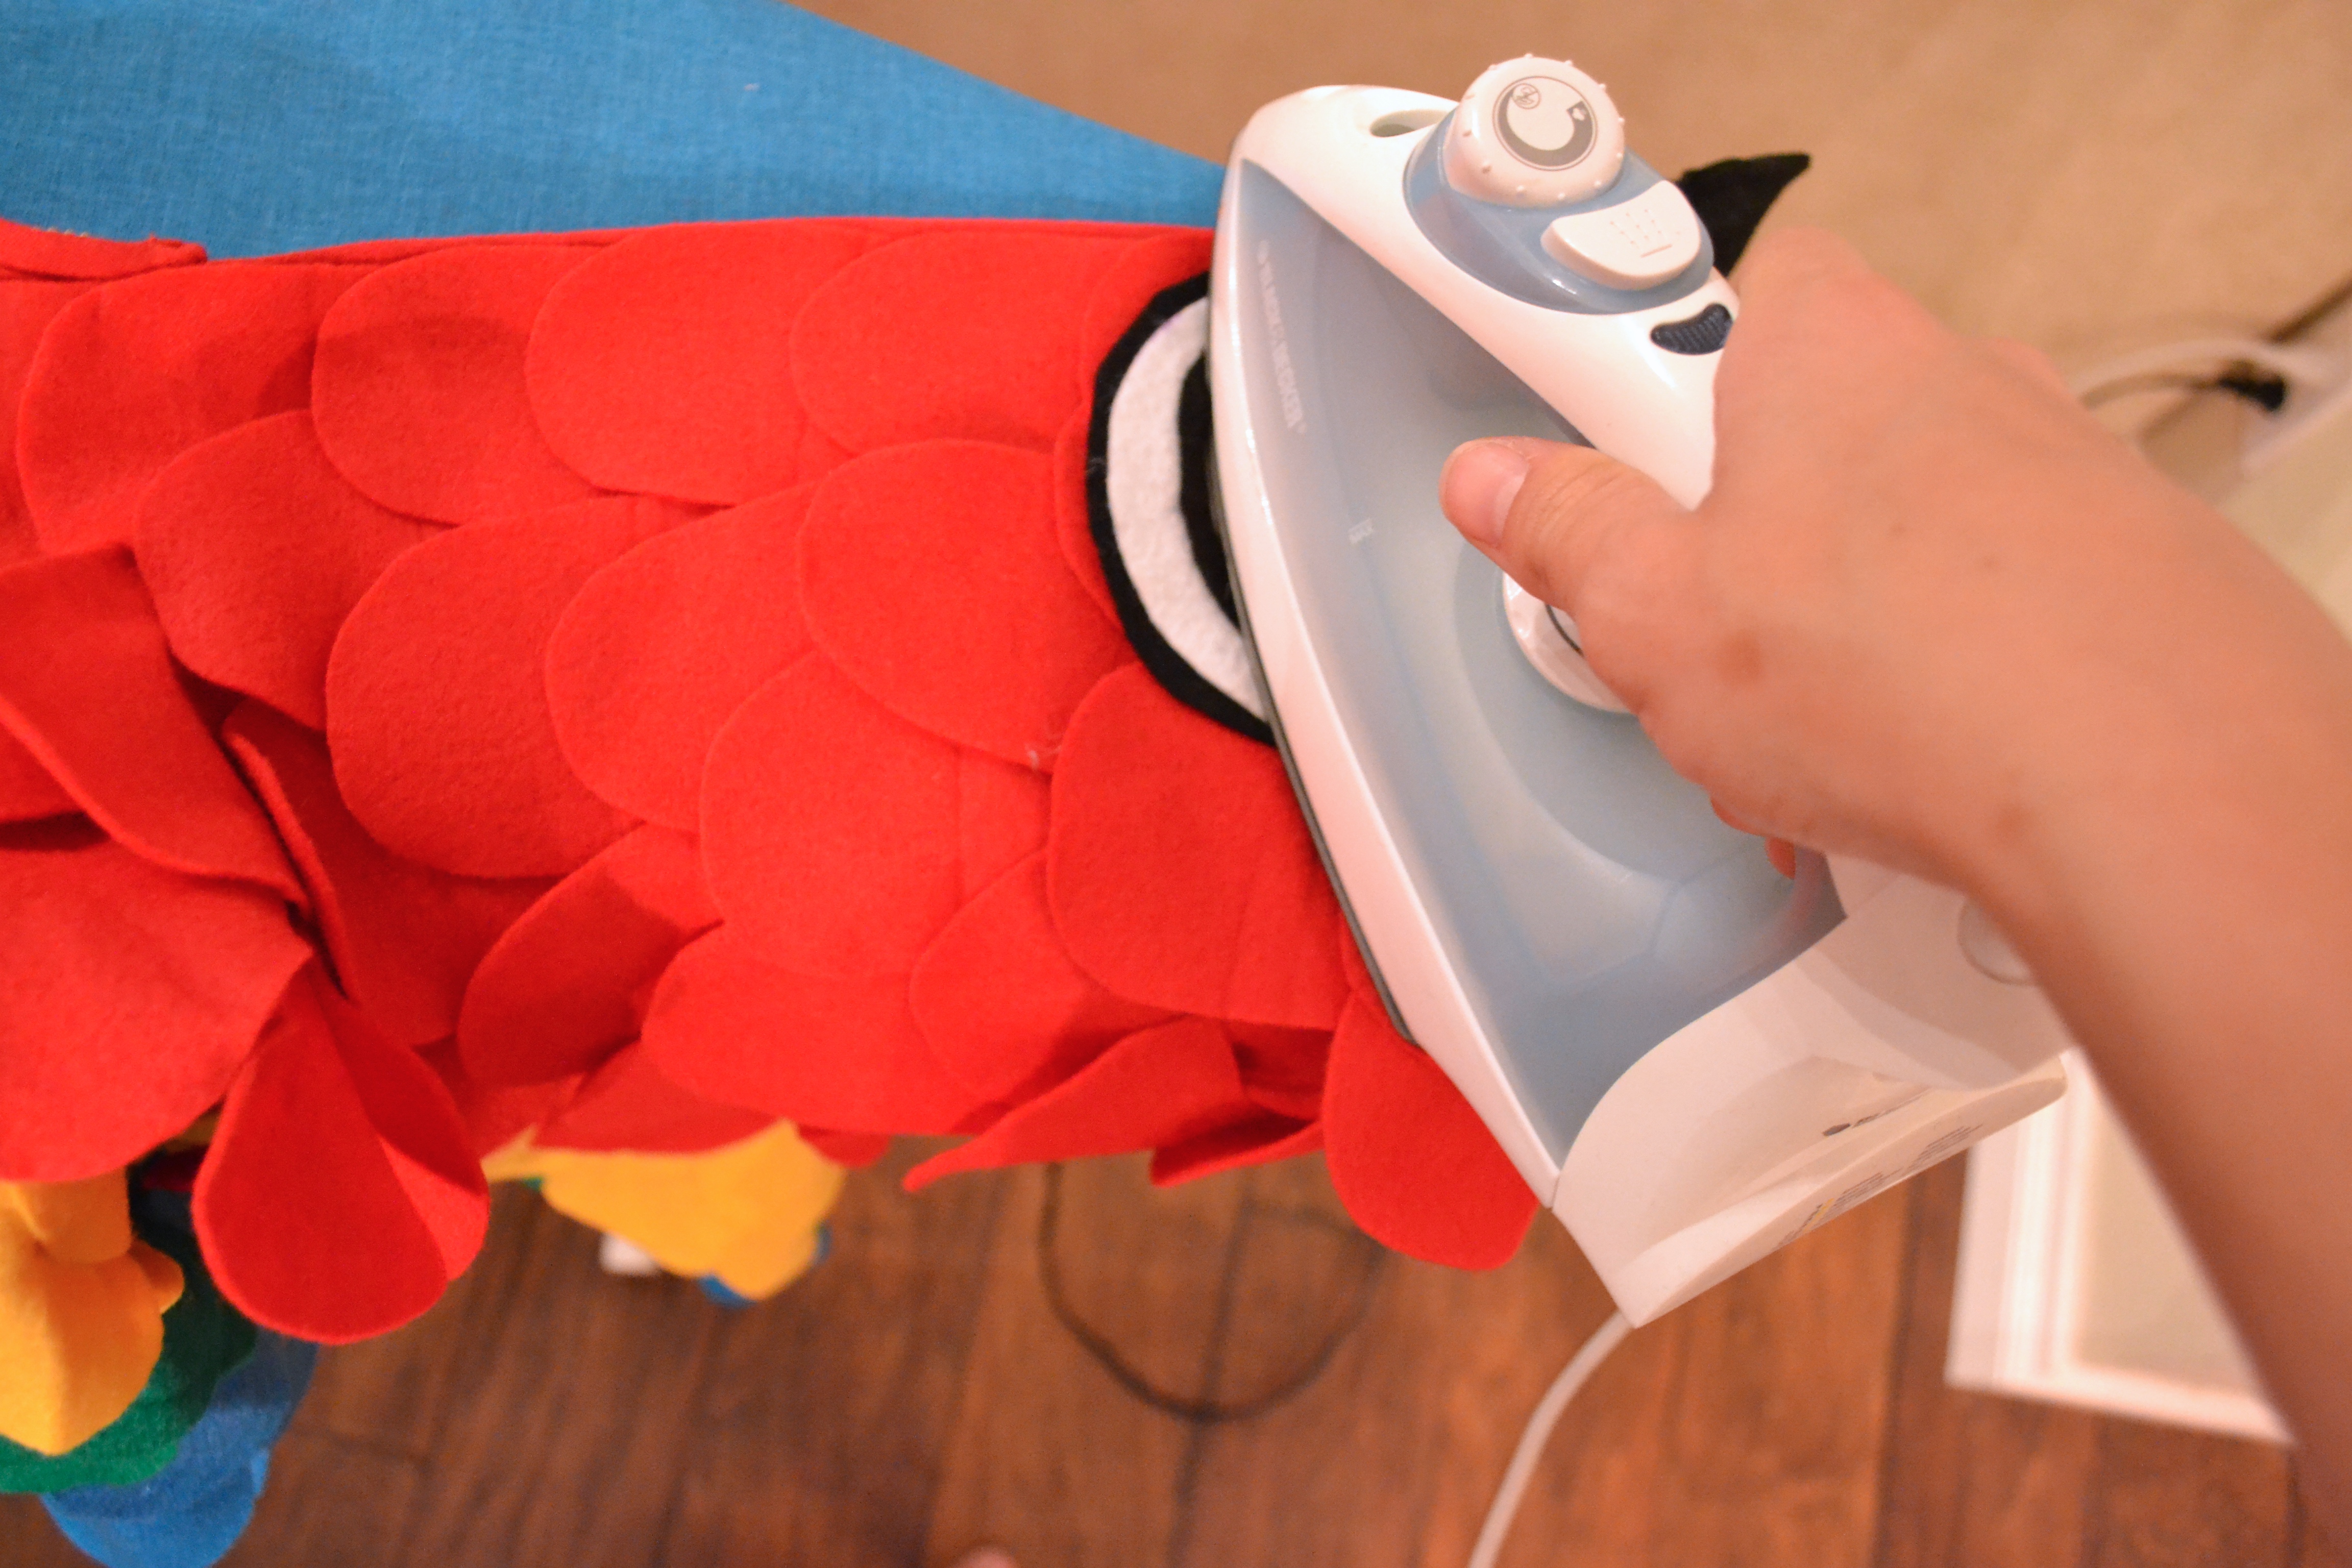
- Then, place the first few just under the bottom of the hood on the sweatshirt (tape side down) and iron over them (apply med/high heat for at least 15 seconds).
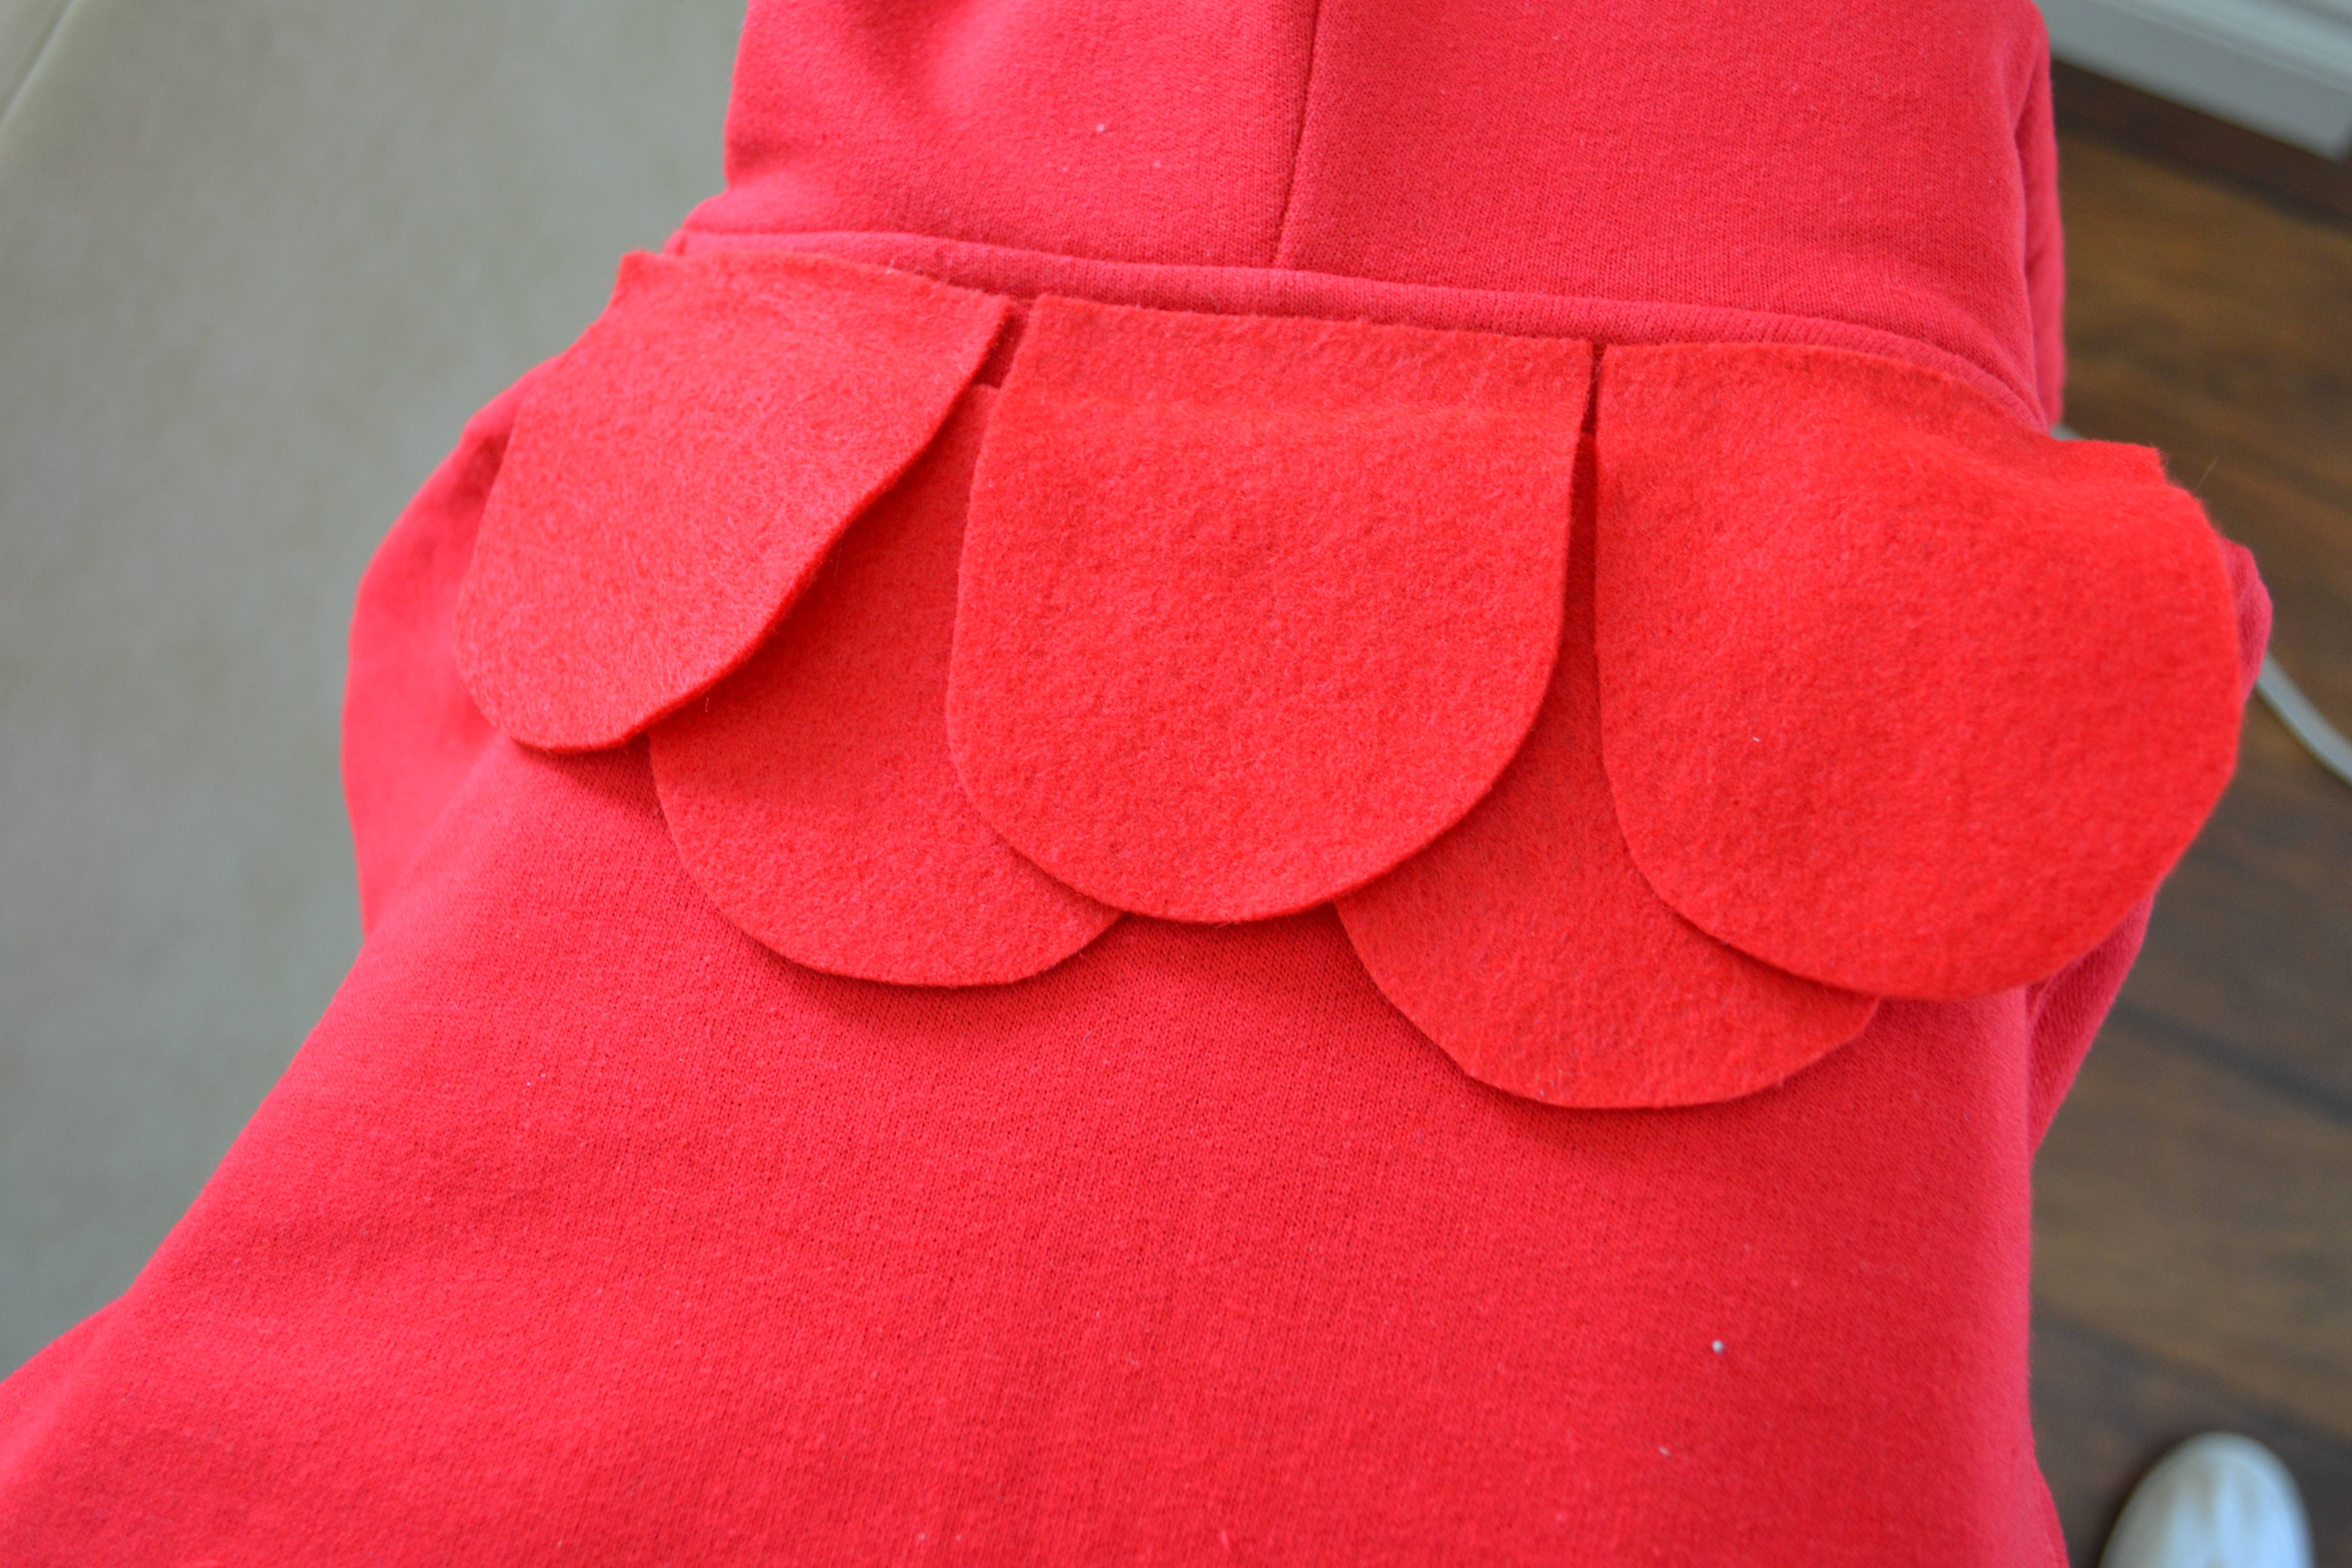
- Now, place a second row of feathers underneath the first – making sure you displace the feather enough so they can be seen through the gaps in the first row (see picture above for placement).
- Iron again (15 seconds of heat to adhere the feather to the sweatshirt).
Step 3:
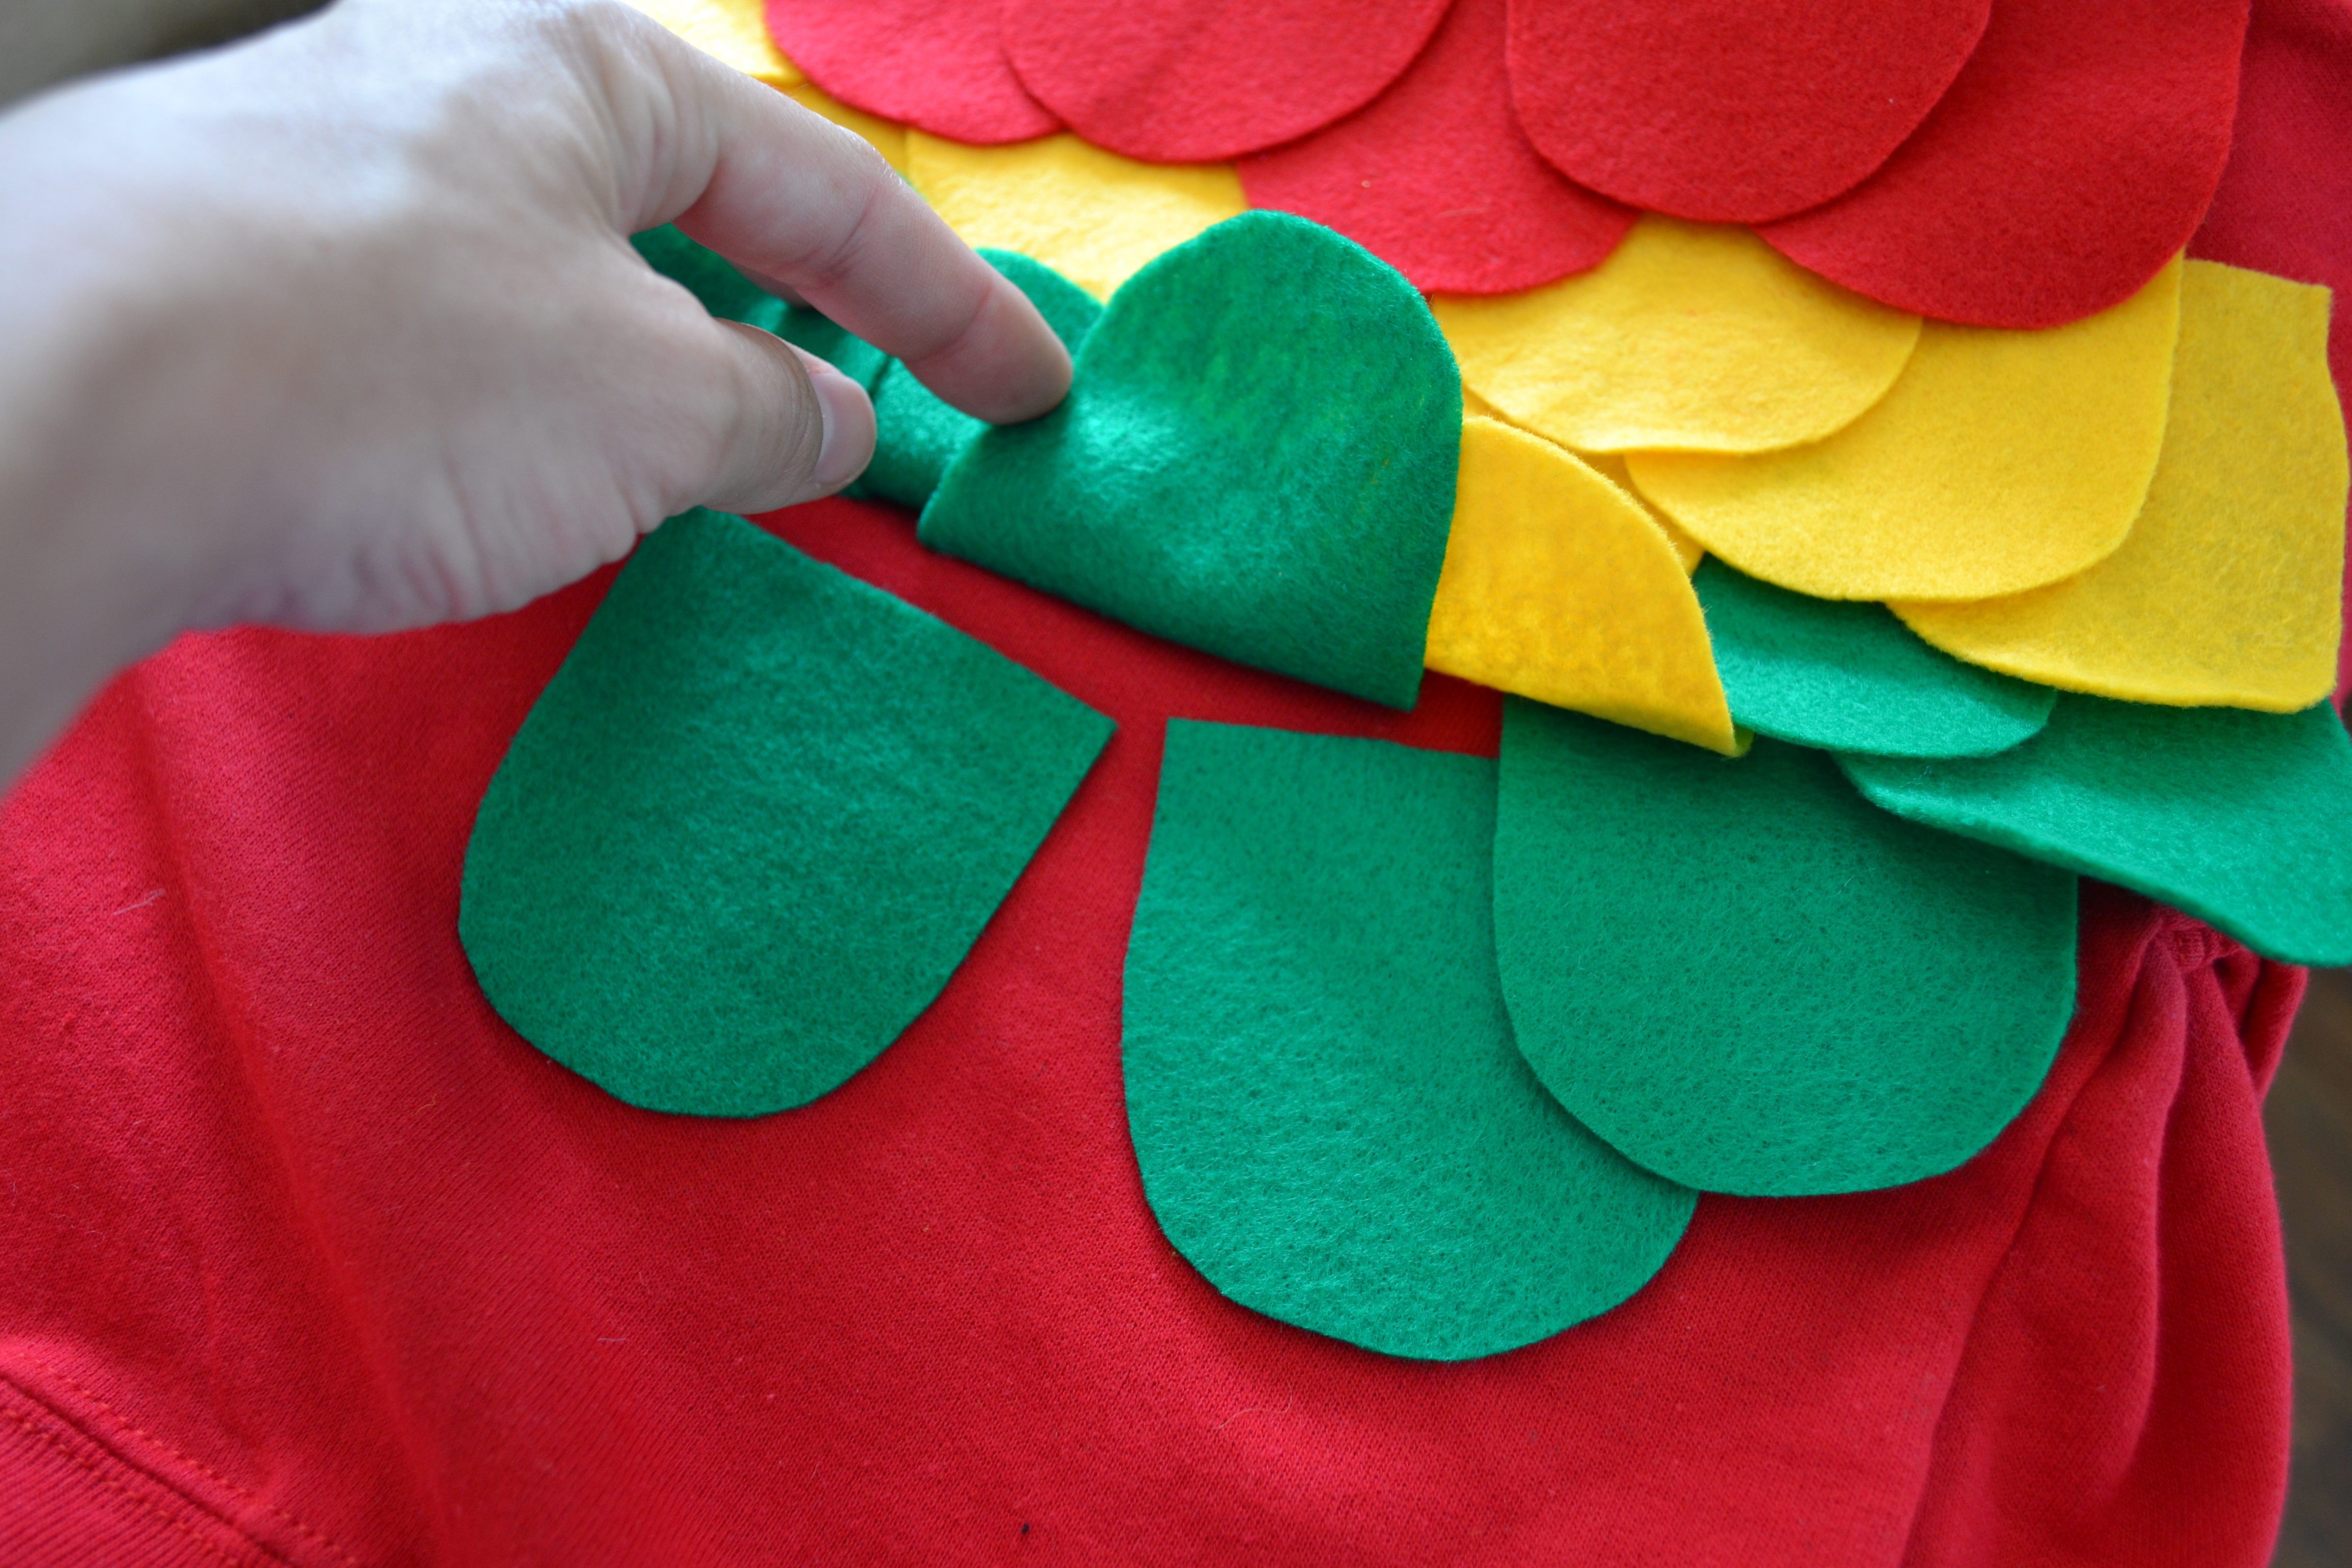
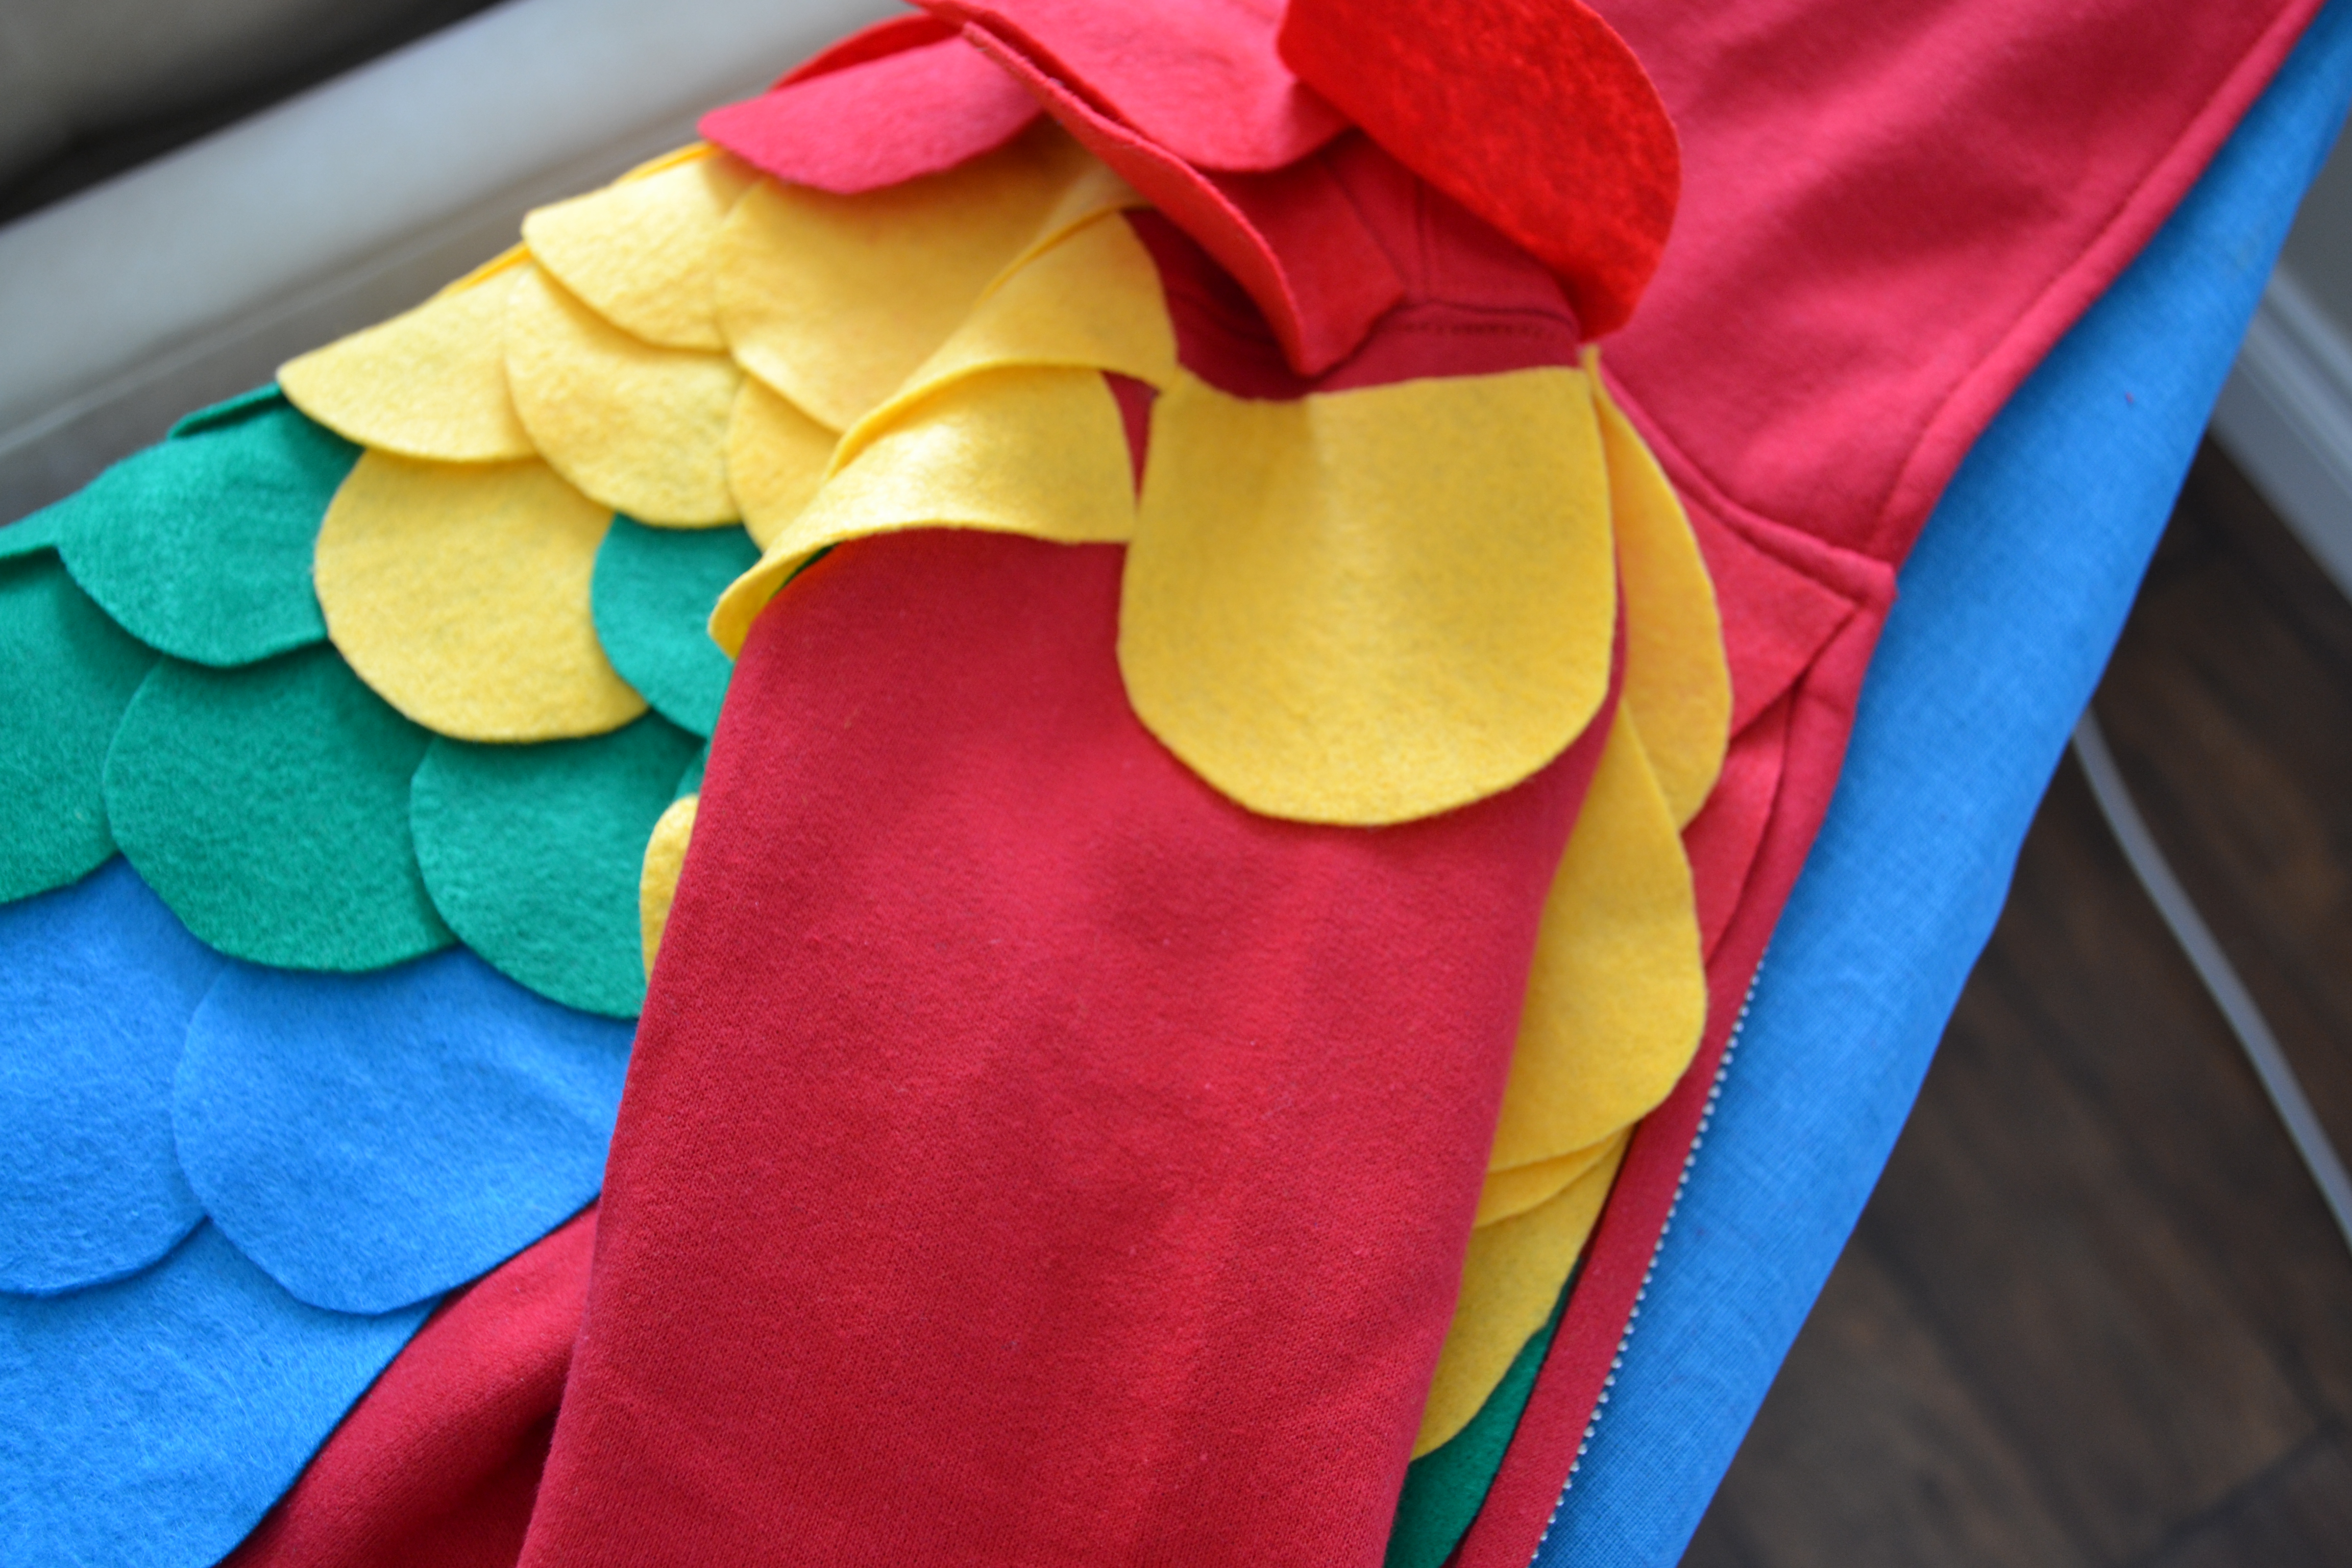
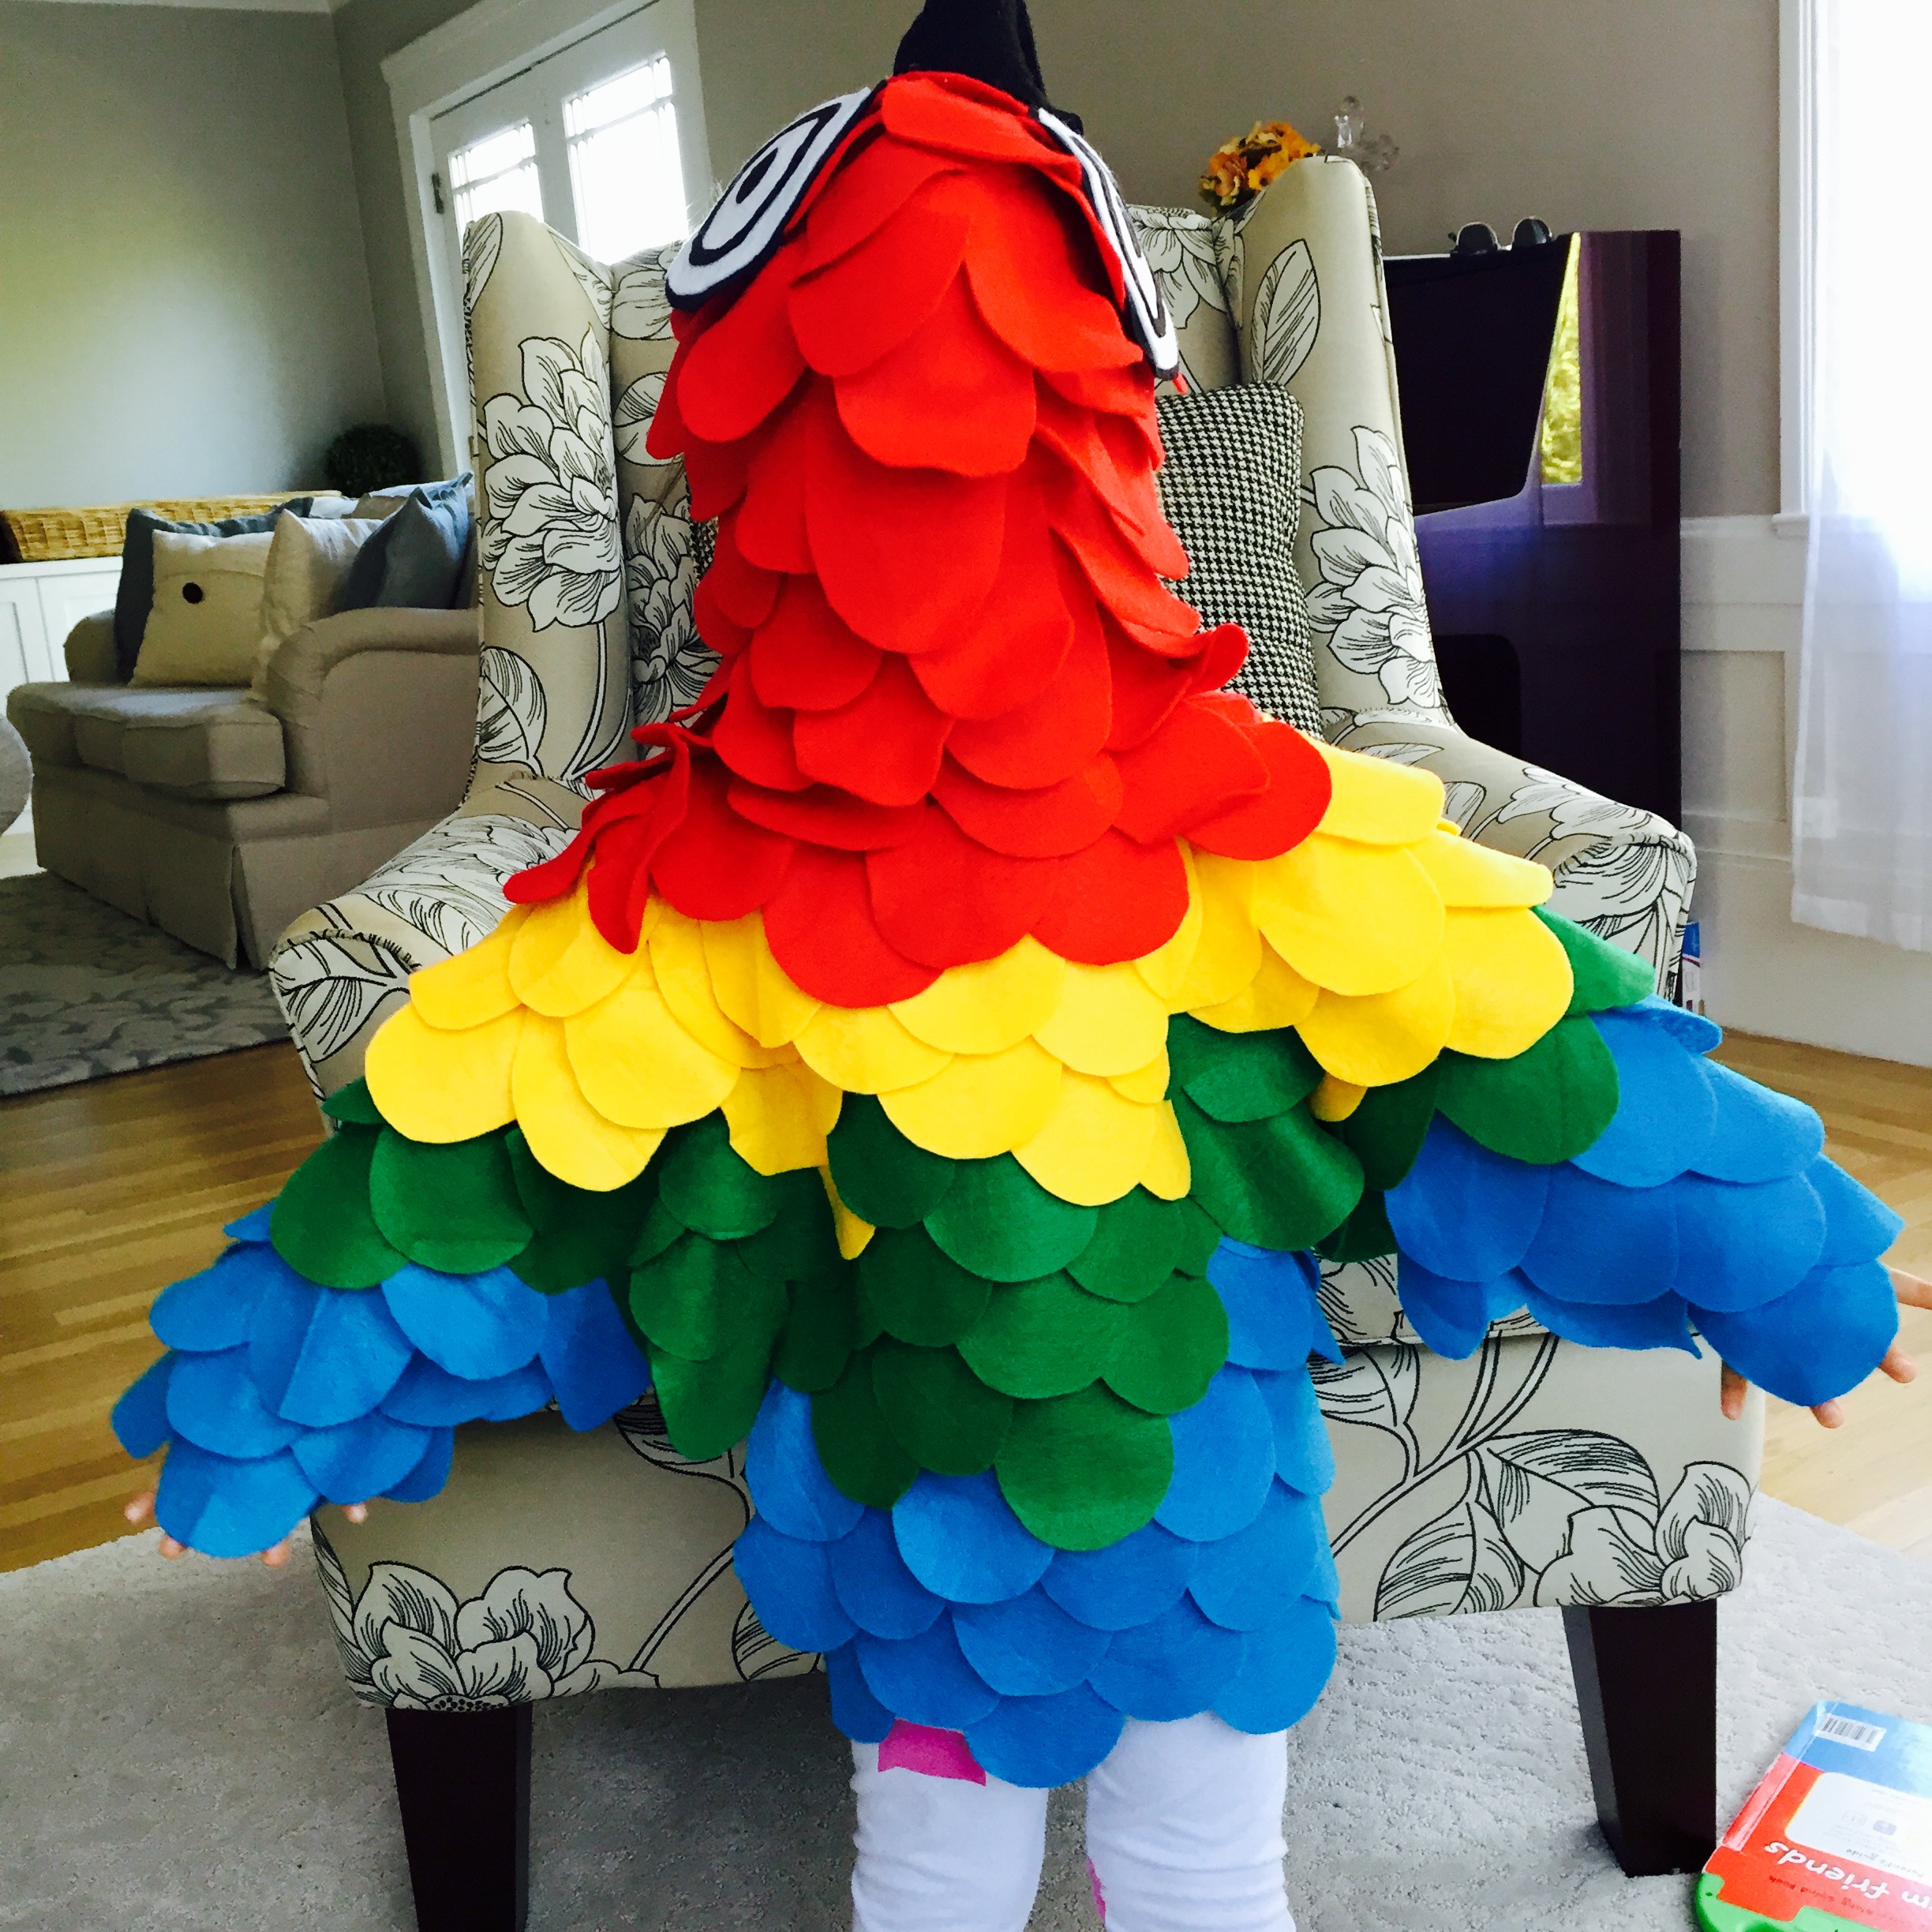
- As you make your way down the sweatshirt, start alternating colors.
- You can make this look like a seamless transition after 2 rows of the same color. For the 3rd row, add in the next color you’ll be using for a feather or two.
- Then make the majority of the 4th row your new color, with the 5th row being entirely your new color.
- Make a 6th row entirely with the new color, and then start alternating in another color on the 7th row.
- HINT: If you’re making an Owl – or another bird will all over color instead of color blocks – alternate all colors in each row. This will give the look of spotted feathers and texture rather than color blocking.
Step 4:
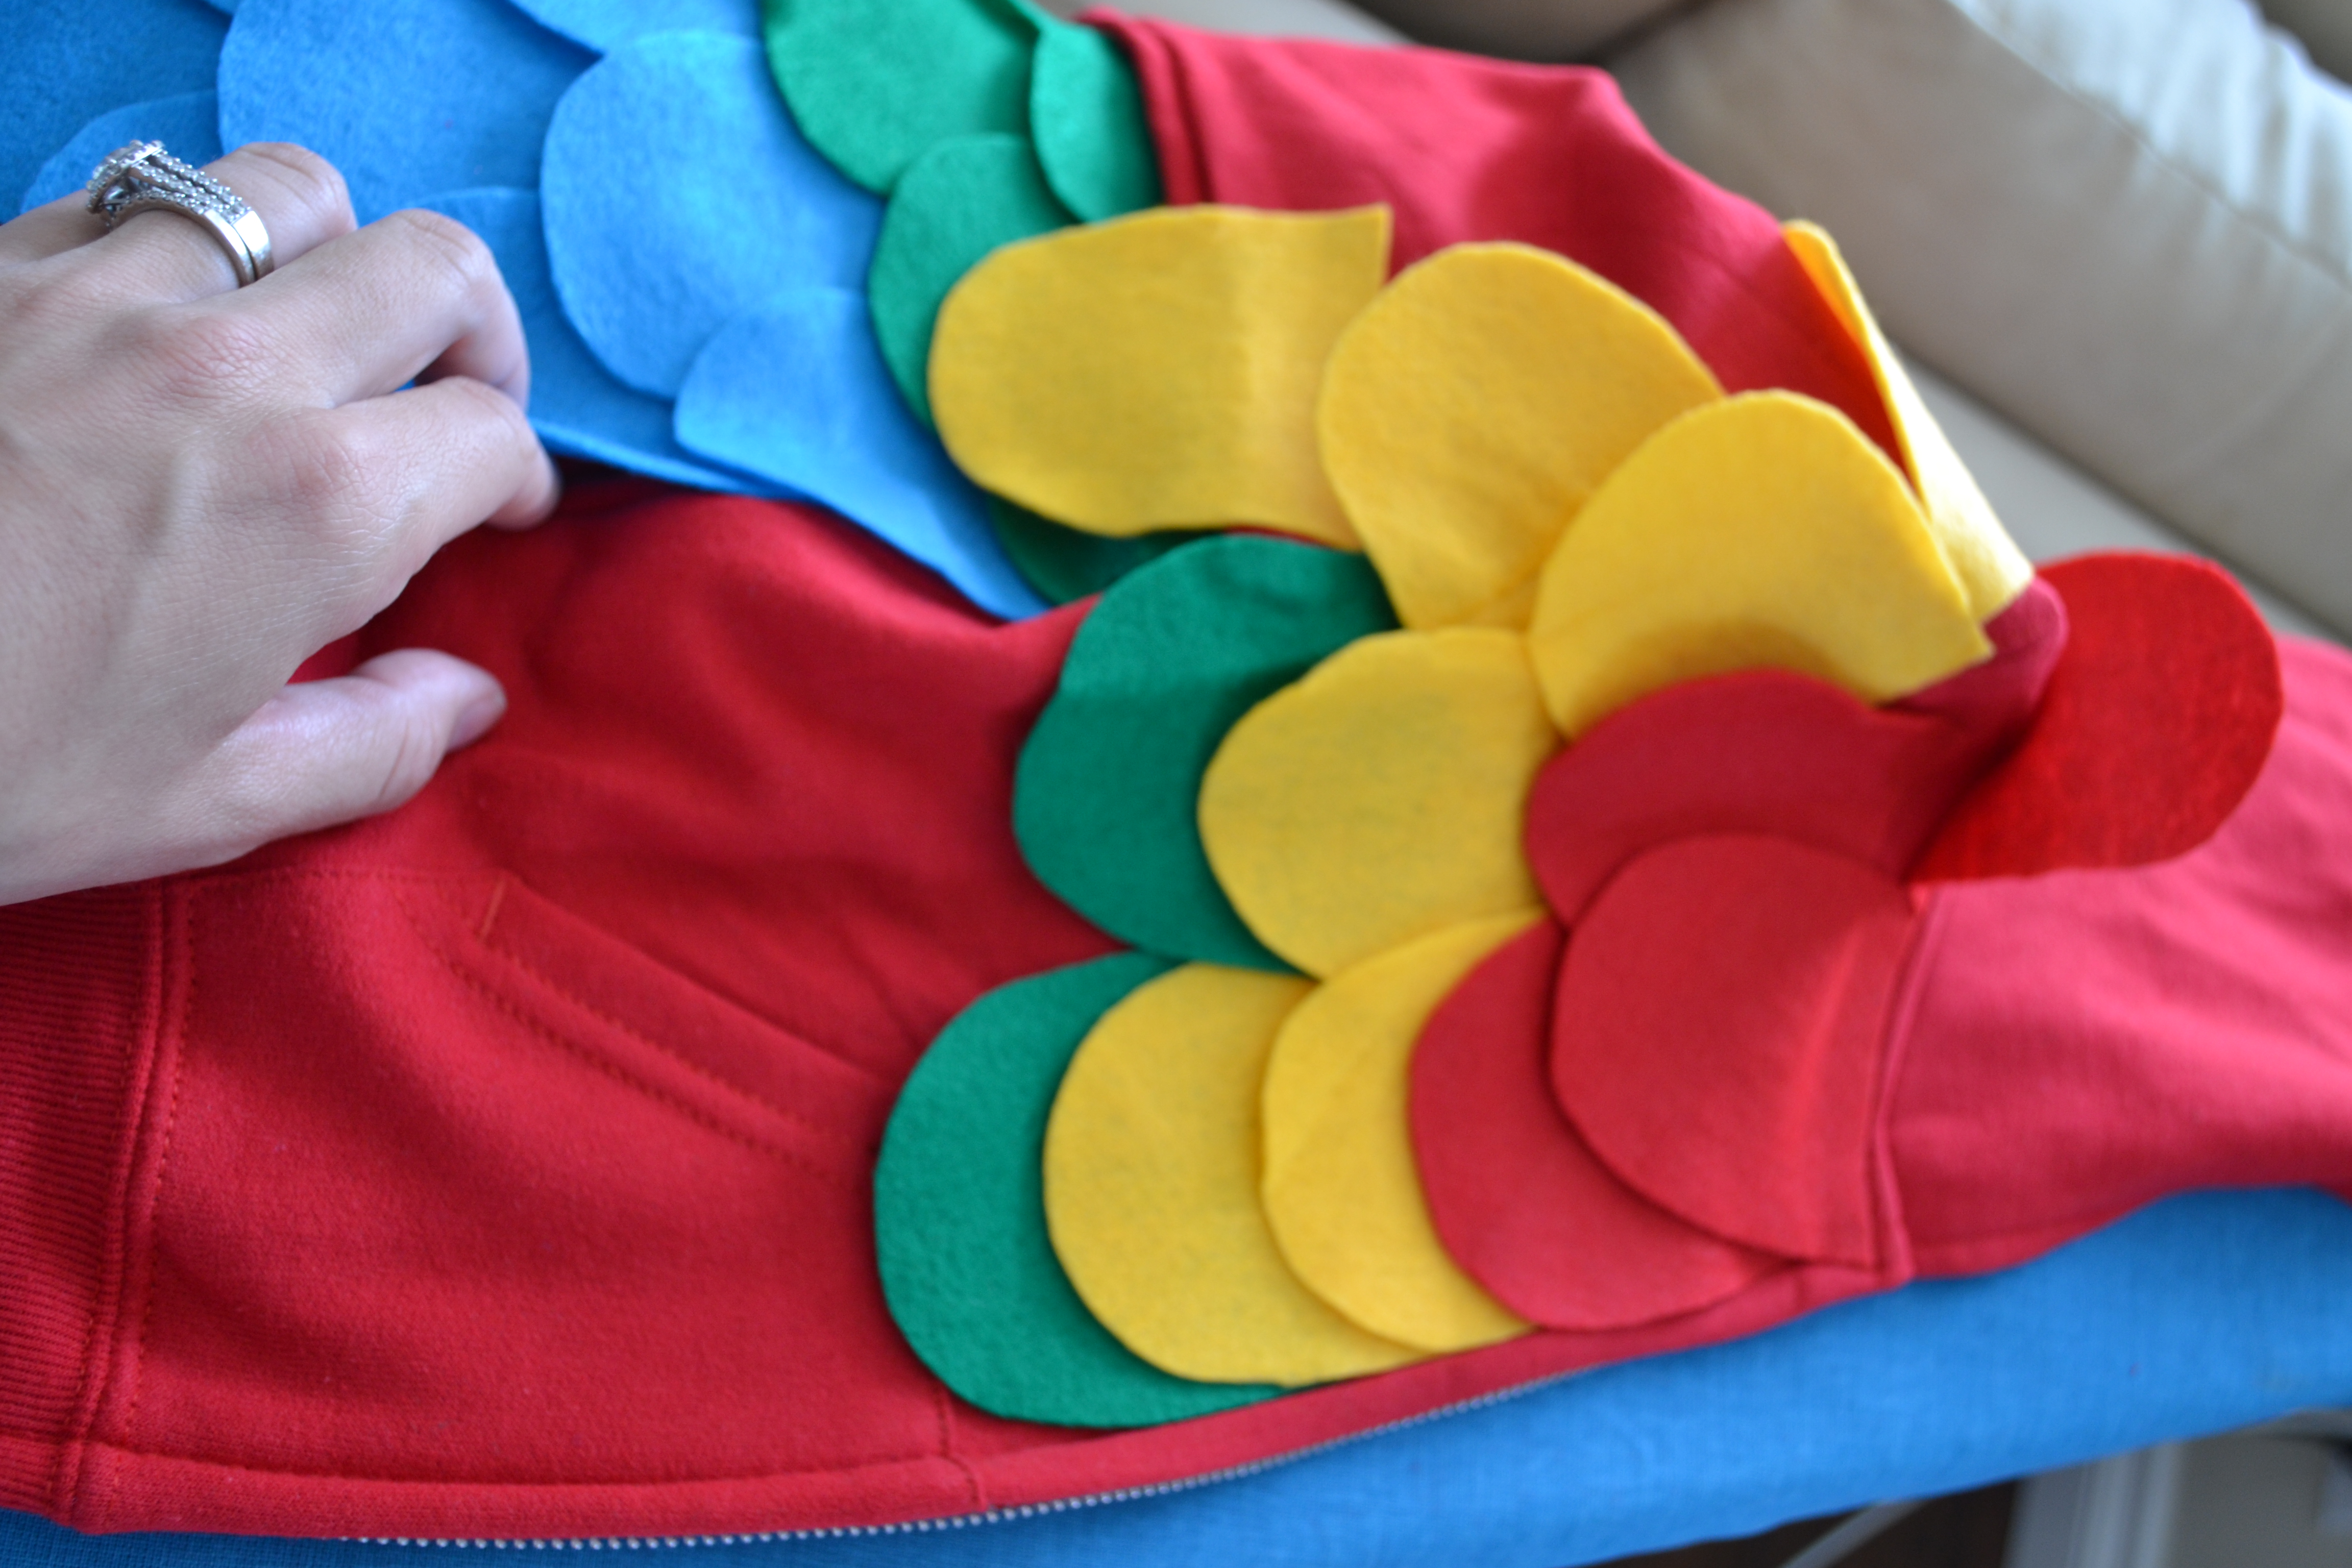

- Once you’ve finished the back of the sweatshirt, move on to the arms.
- Start adding feathers in the same pattern on the arms as you did on the back of the sweatshirt.
- You’ll only need about 2-3 feathers for each row, as you don’t want to go UNDER the arm. Only put feathers on the top and side parts that are visible.
- Again, make sure you heat the transfer tape for at least 15 seconds on med/high heat for good adhesion.
- After you’ve feathered the entire arm, start adding a few feathers going from the feathers on the arm to the feathers on the back of the sweatshirt (for the “wing” look”
- You can do this by ironing feathers on top of other feathers (instead of directly to the sweatshirt) until the feathers from the arm have reached the feathers from the back.
Step 5:
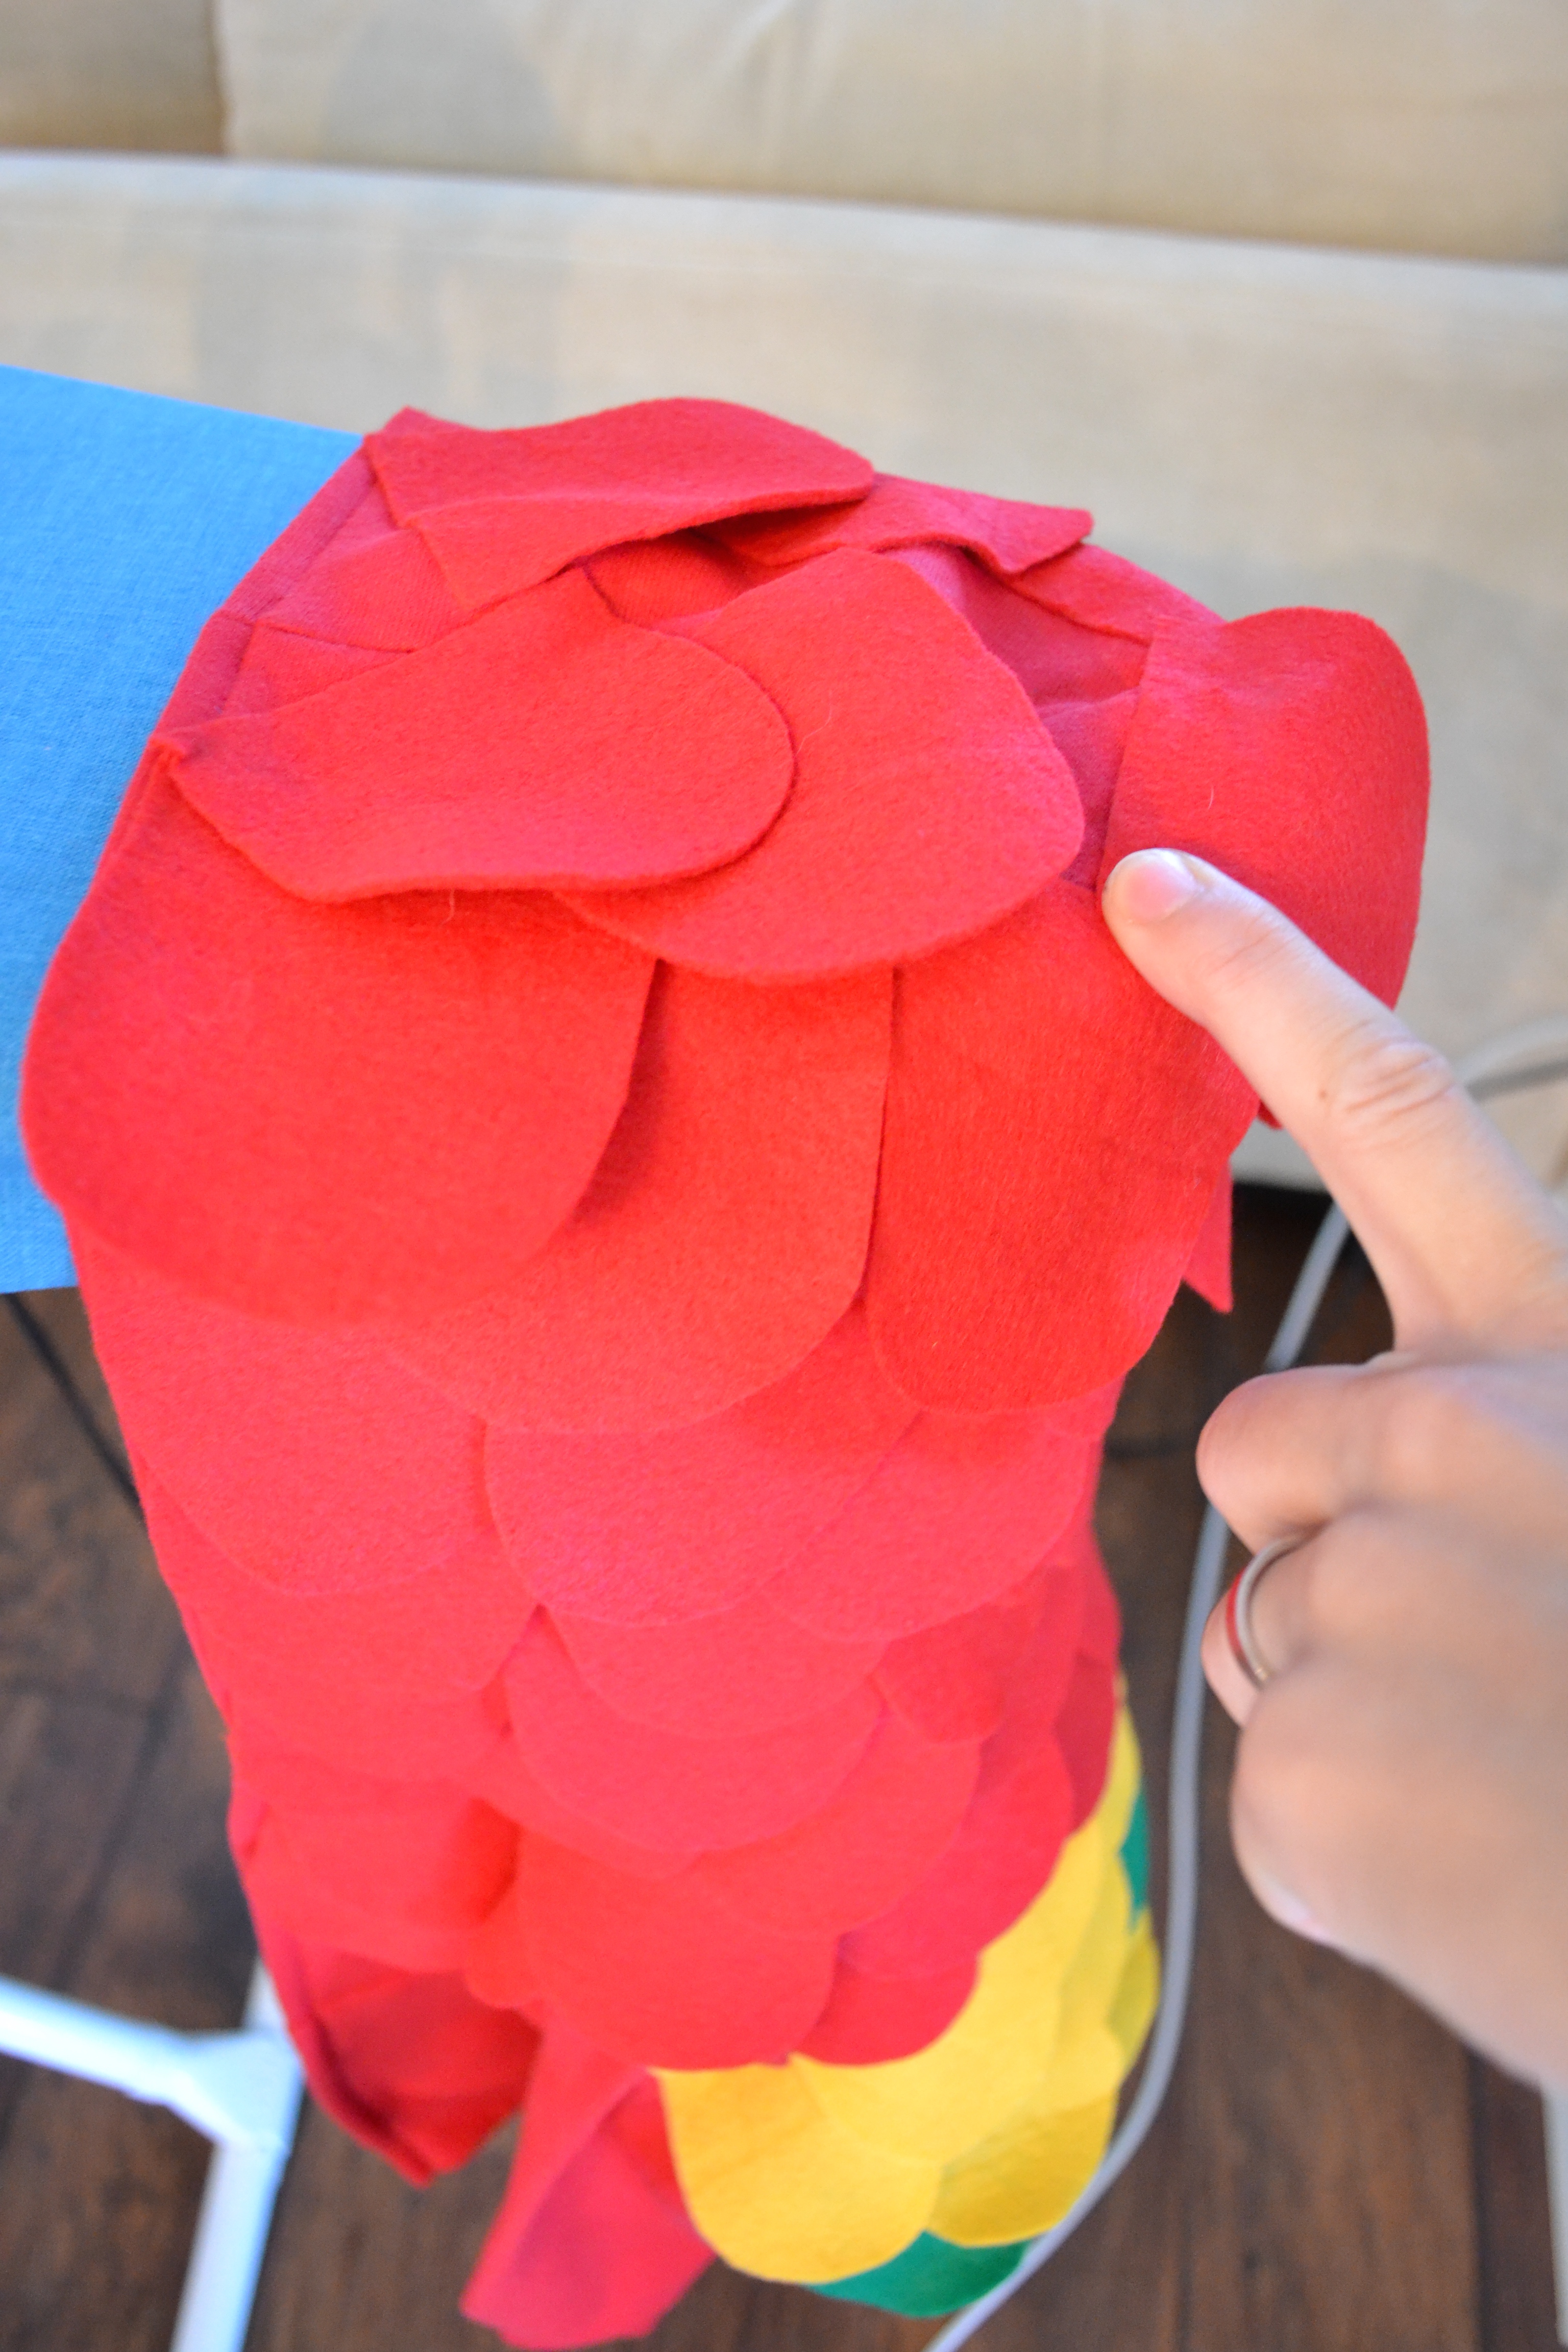
- Now, put feathers on the hood.
- To make sure you can get the entire hood, a pro tip is to hang it off of the tip of your ironing board. This gives support to the top part of the hood that is hard to reach when the hoodie is just lying flat 🙂
Step 6:
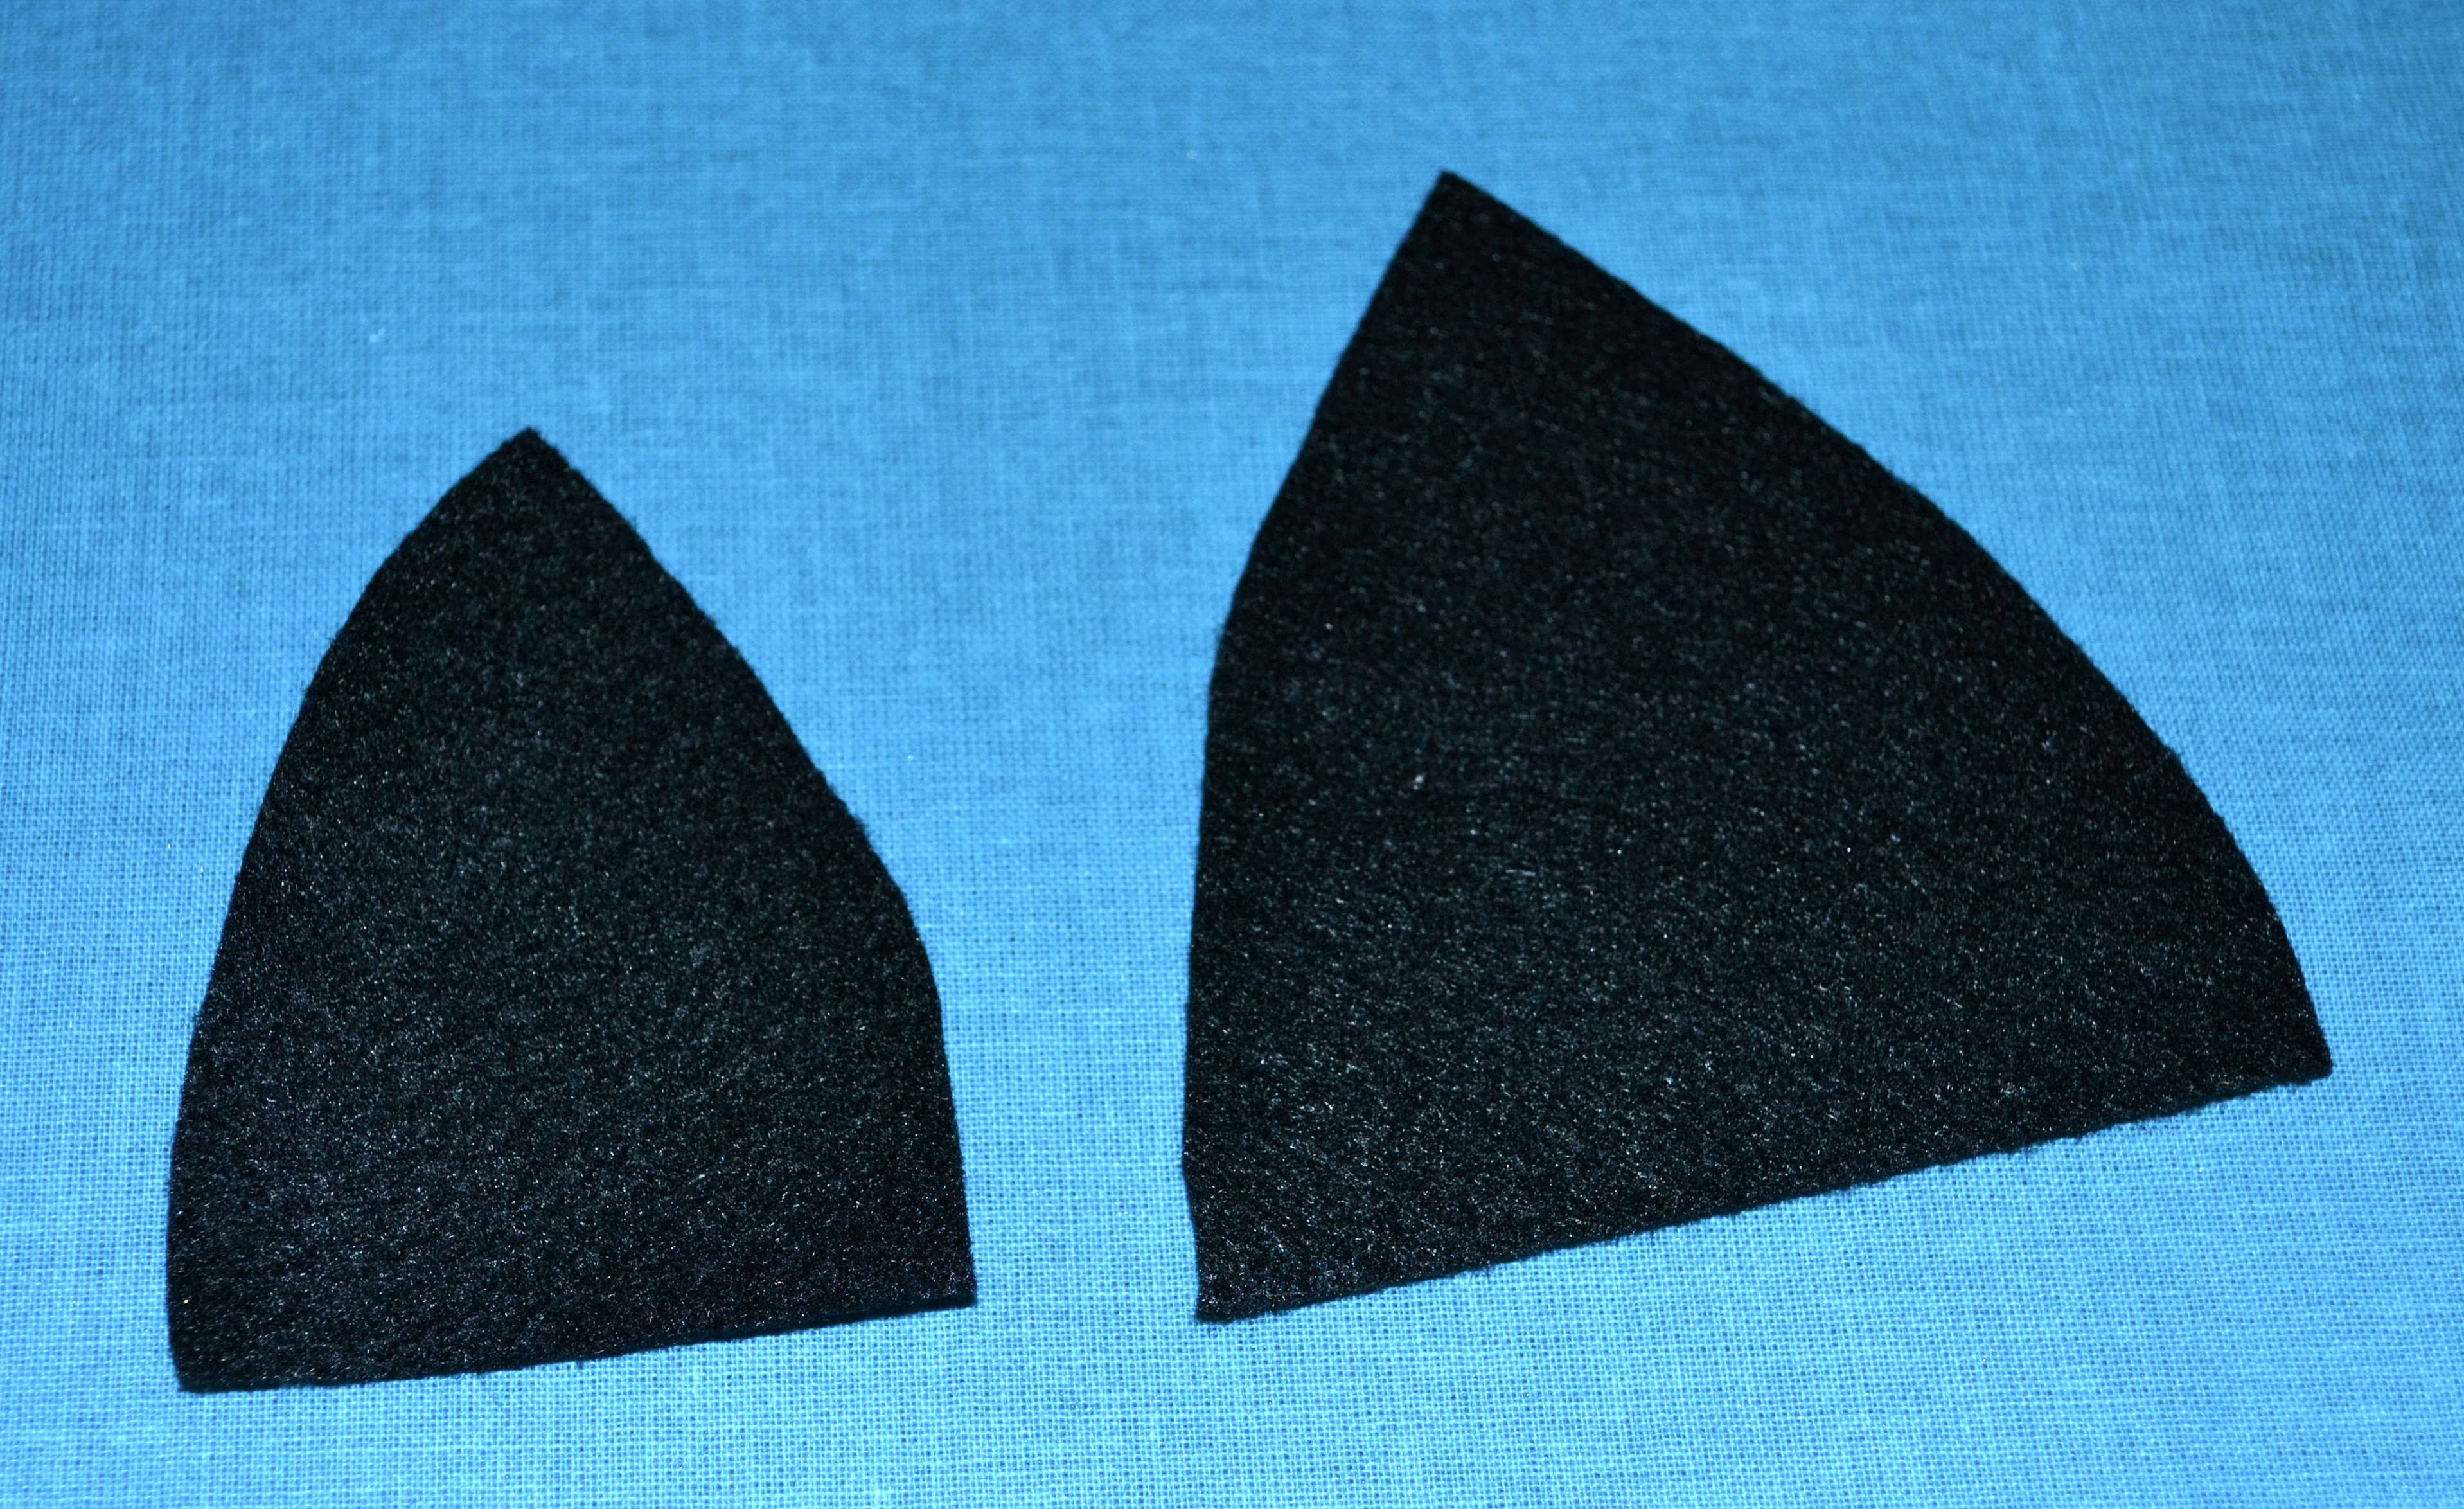
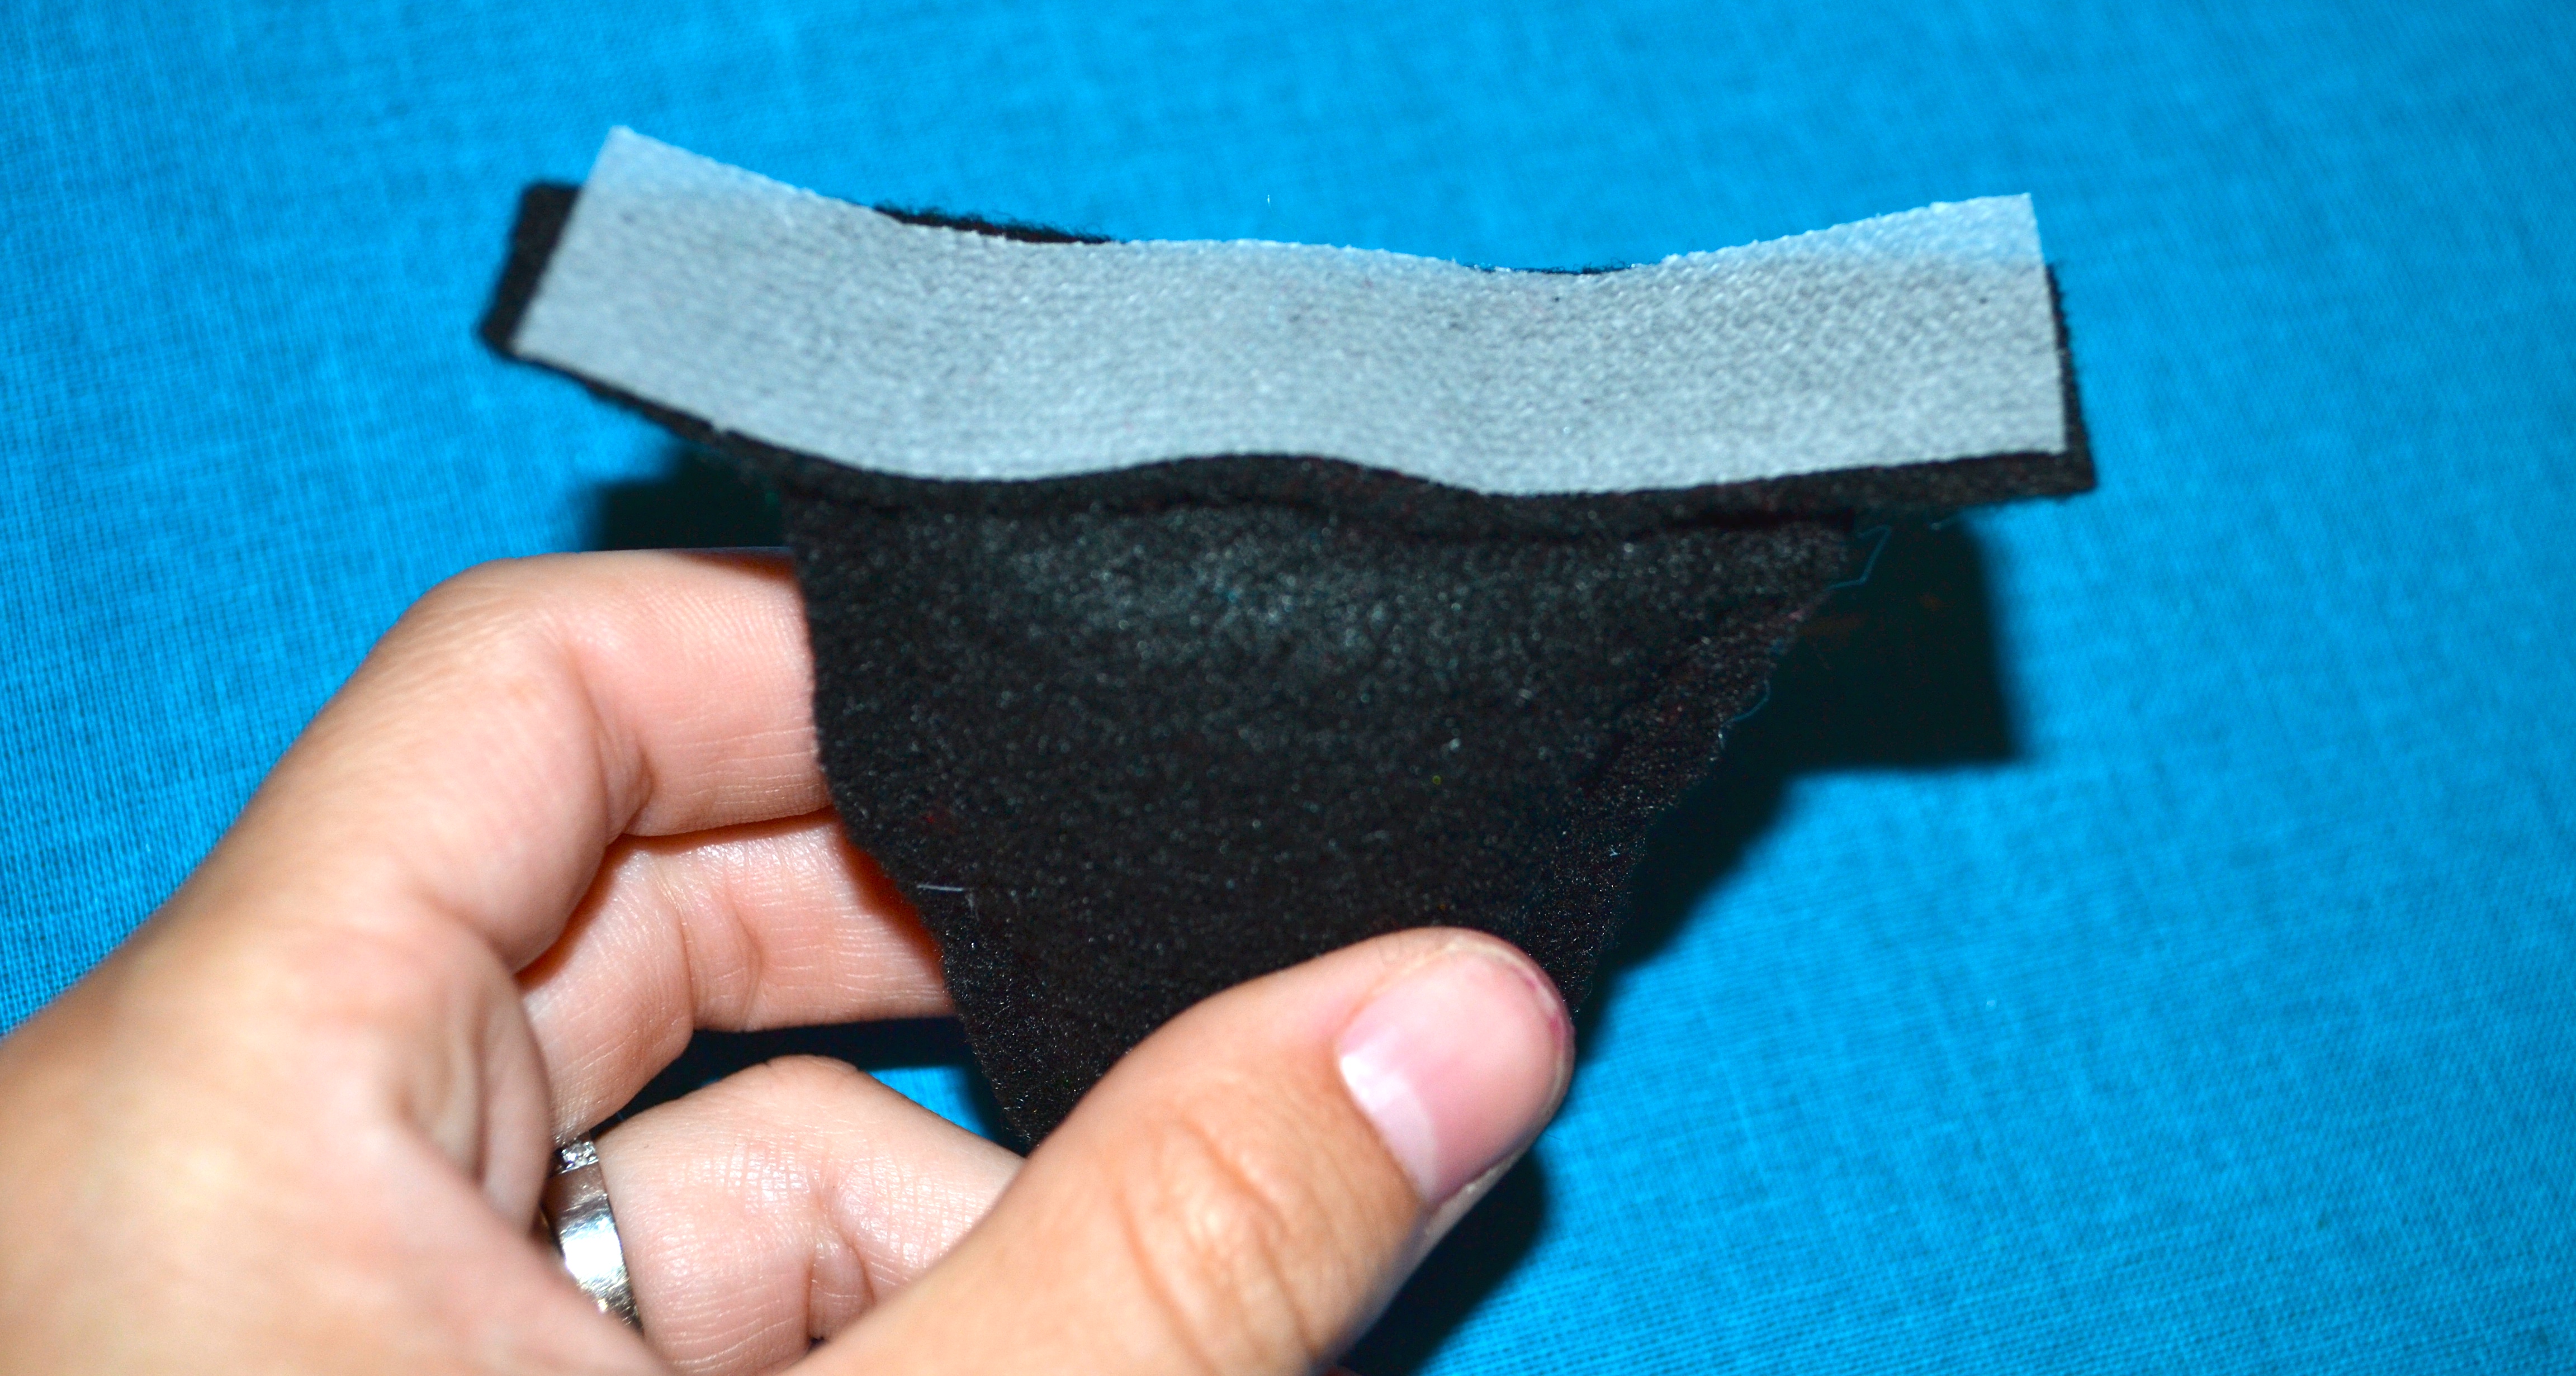
- Now it’s time to make the beak! Take your black felt and cut out 2 triangle shapes (I bowed mine out at the sides to make ti look more “beak like”).
- I also cut one triangle 3/4″ shorter than the other. You’ll see why at the end.
- Here, either take a needle and thread and sew the 2 triangles together, or use your transfer tape and fuse the triangles together at the sides.
- Either way, make sure to leave the bottom side UNTOUCHED and OPEN!
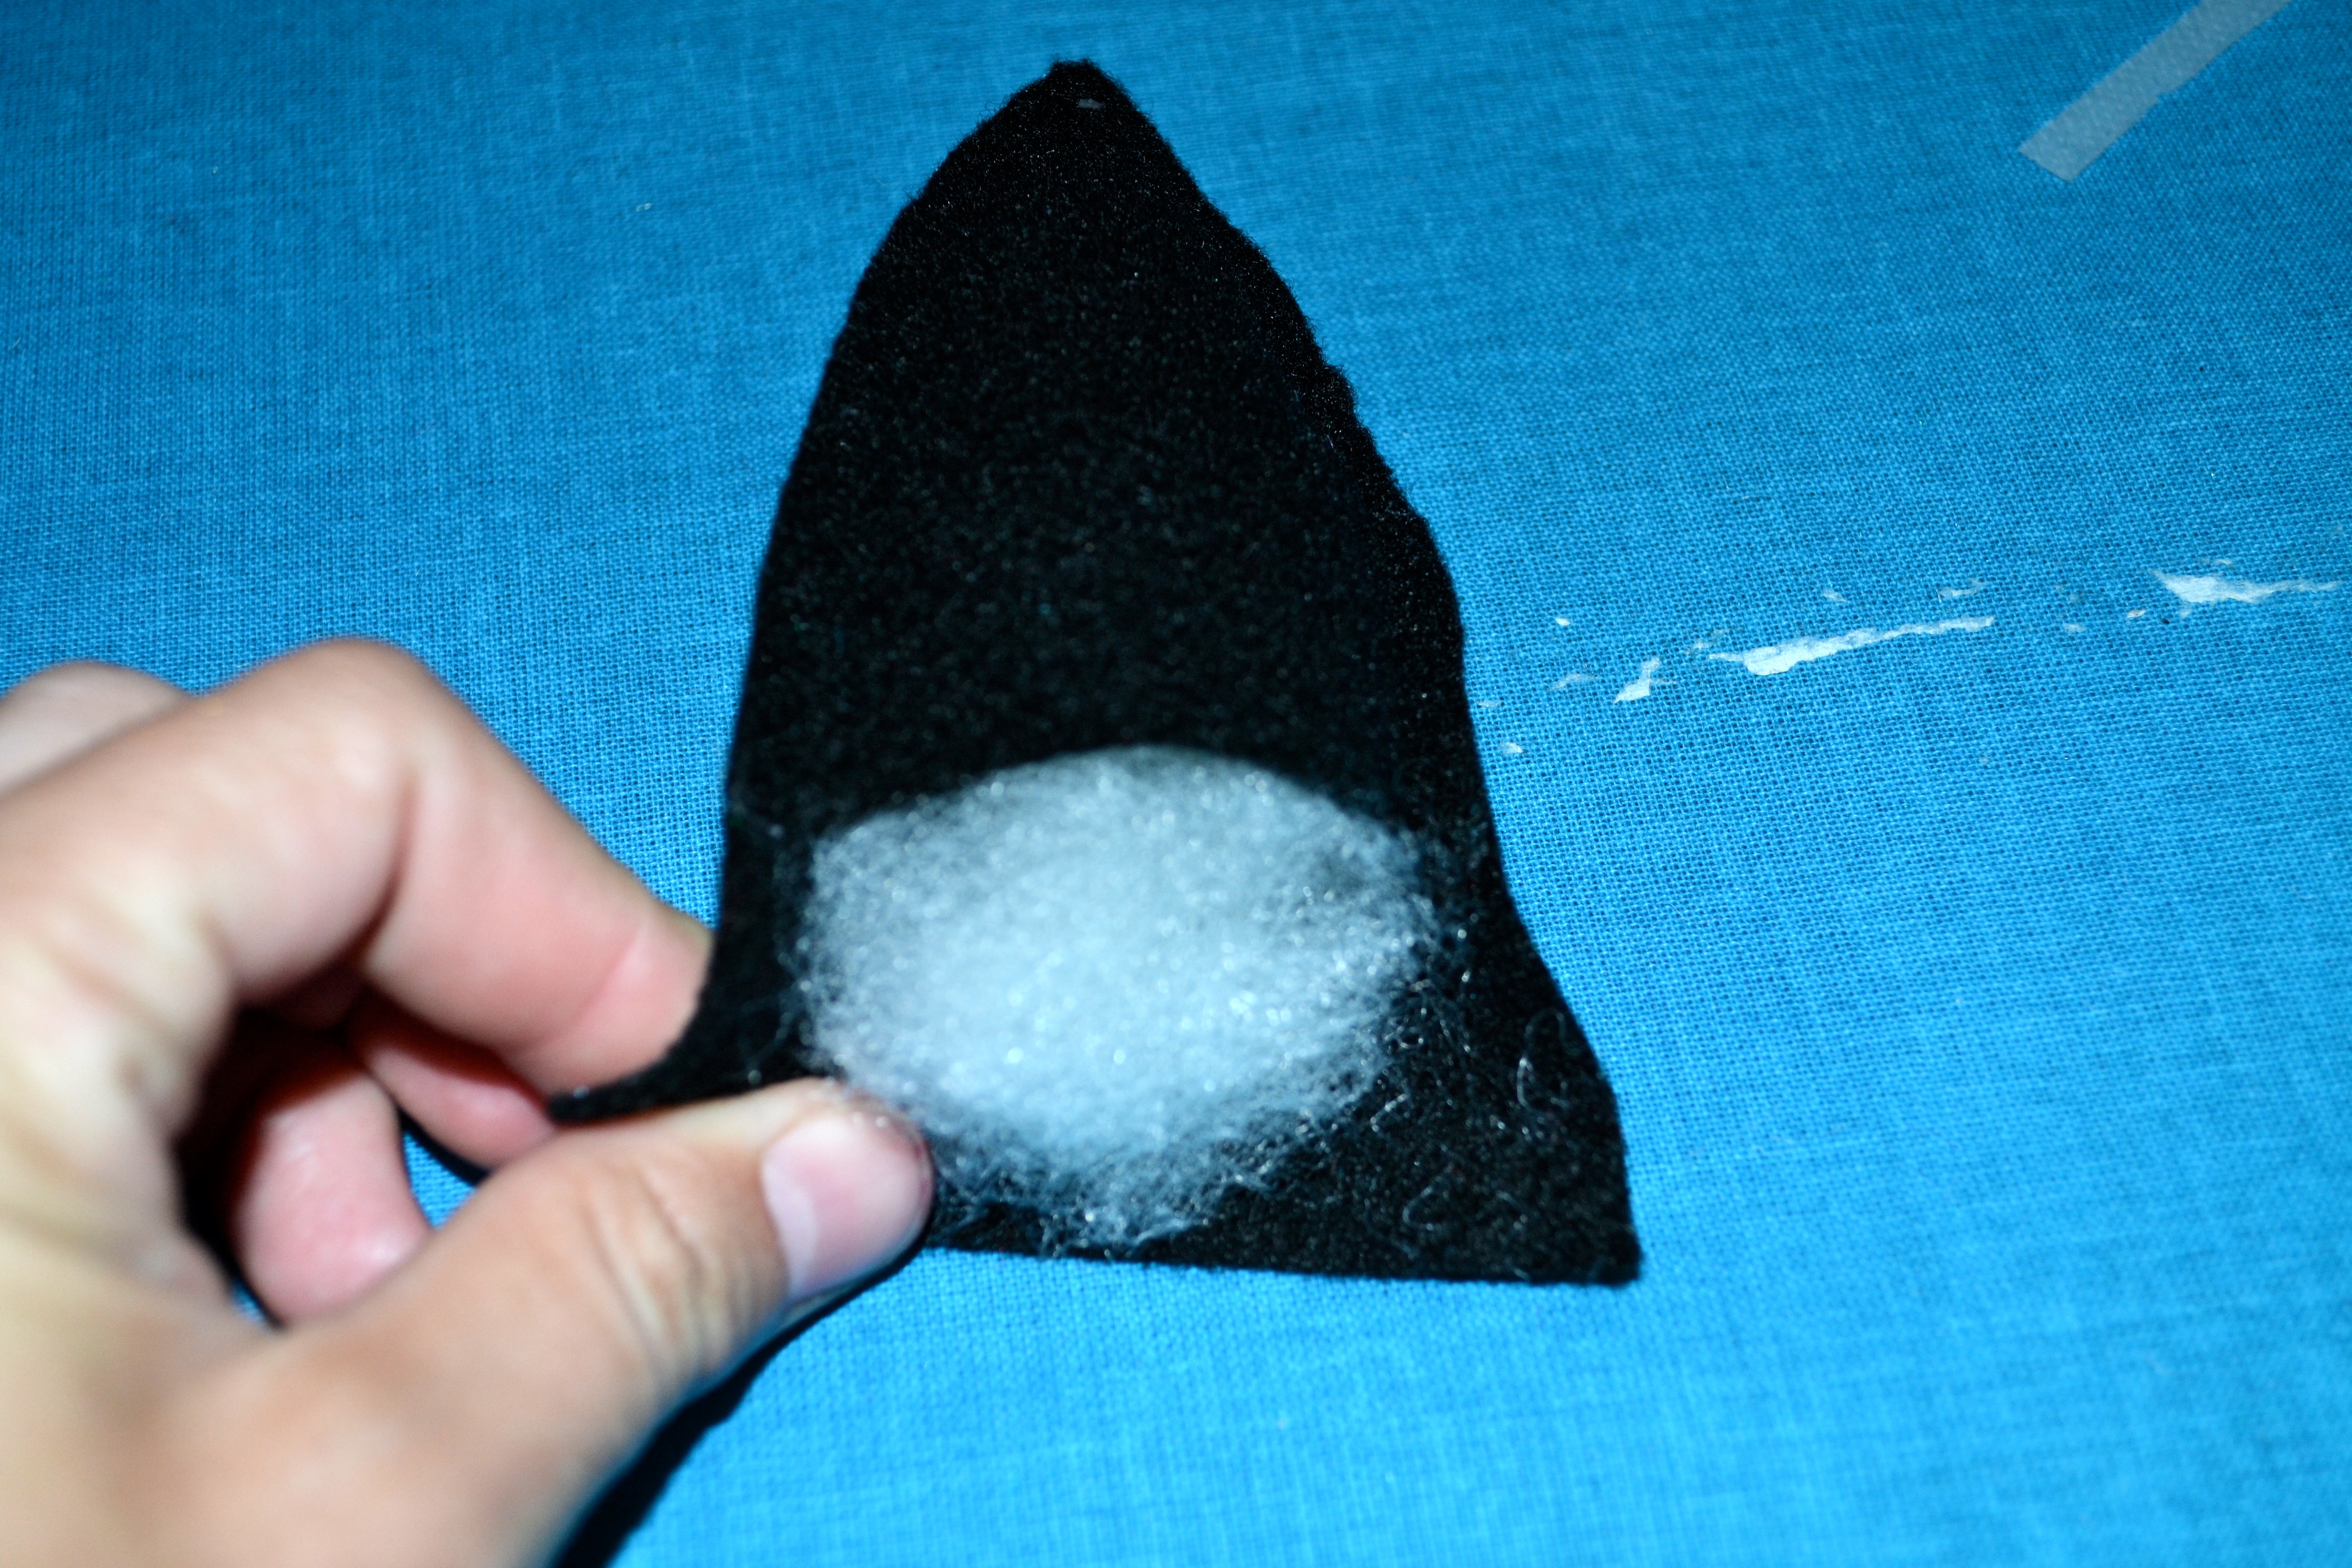
- Once the top sides are fused together, turn the beak inside out so that the seams are now on the INSIDE of the beak.
- Then, stuff the beak with your stuffing/craft batting.
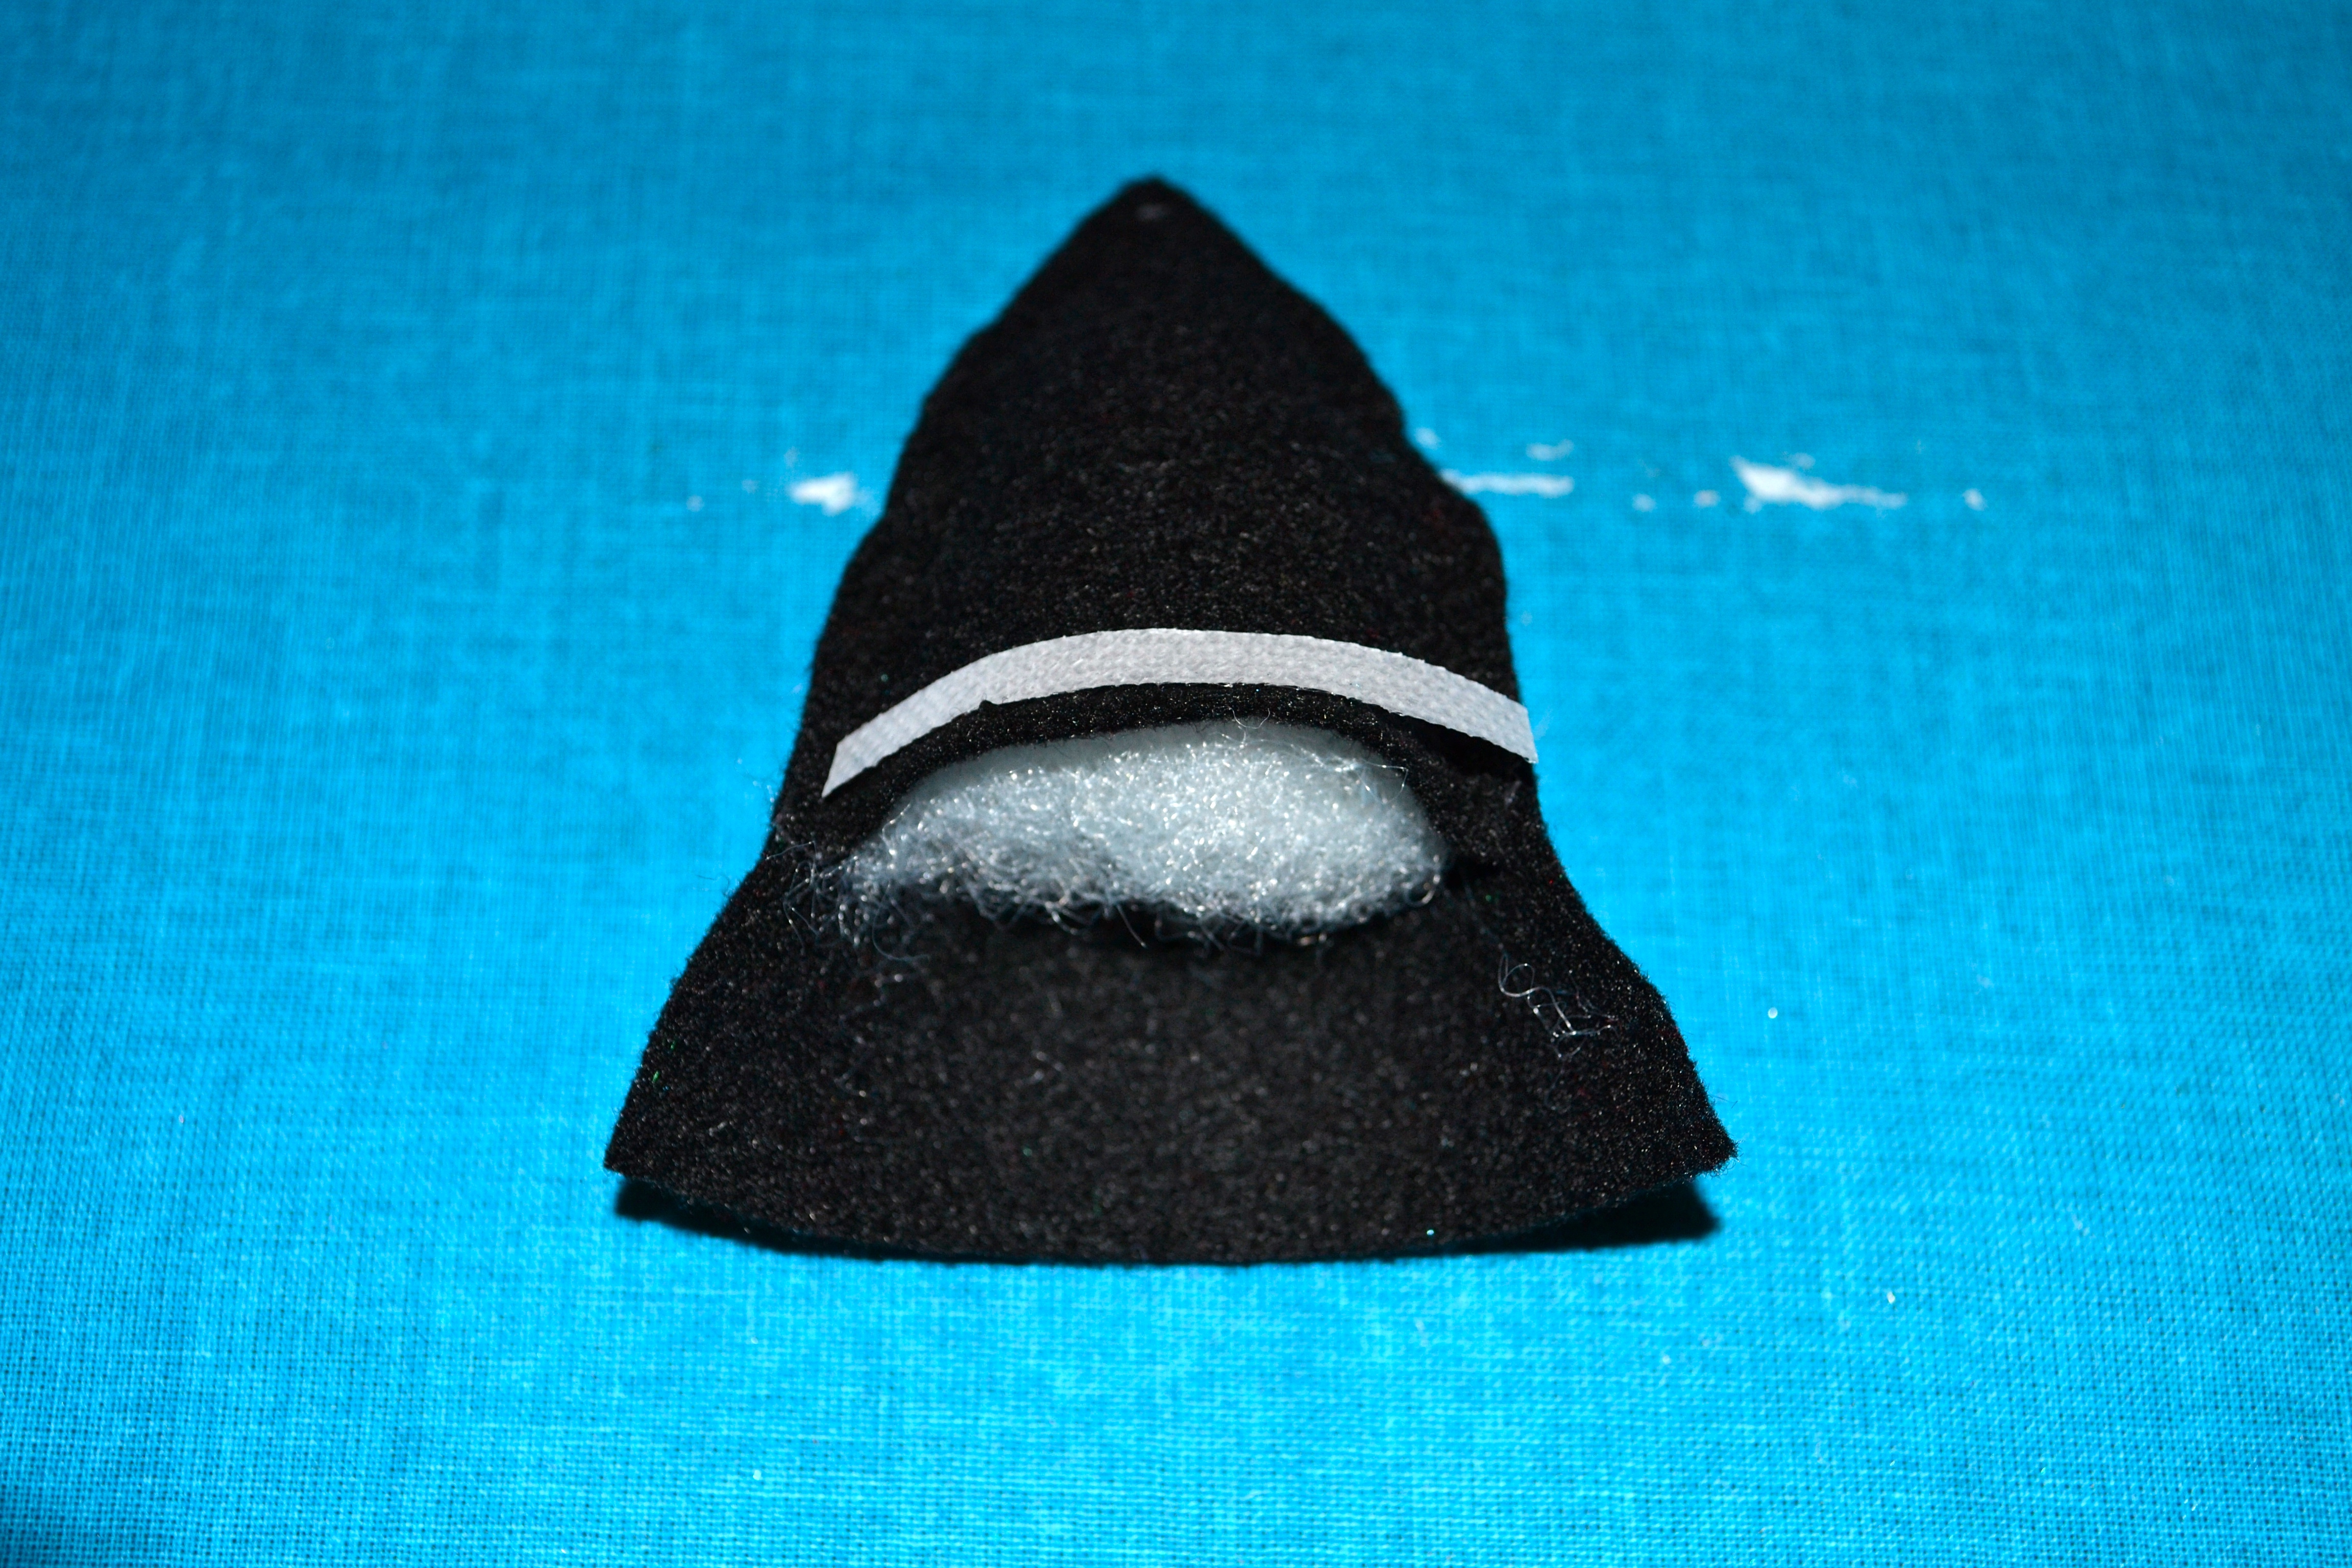
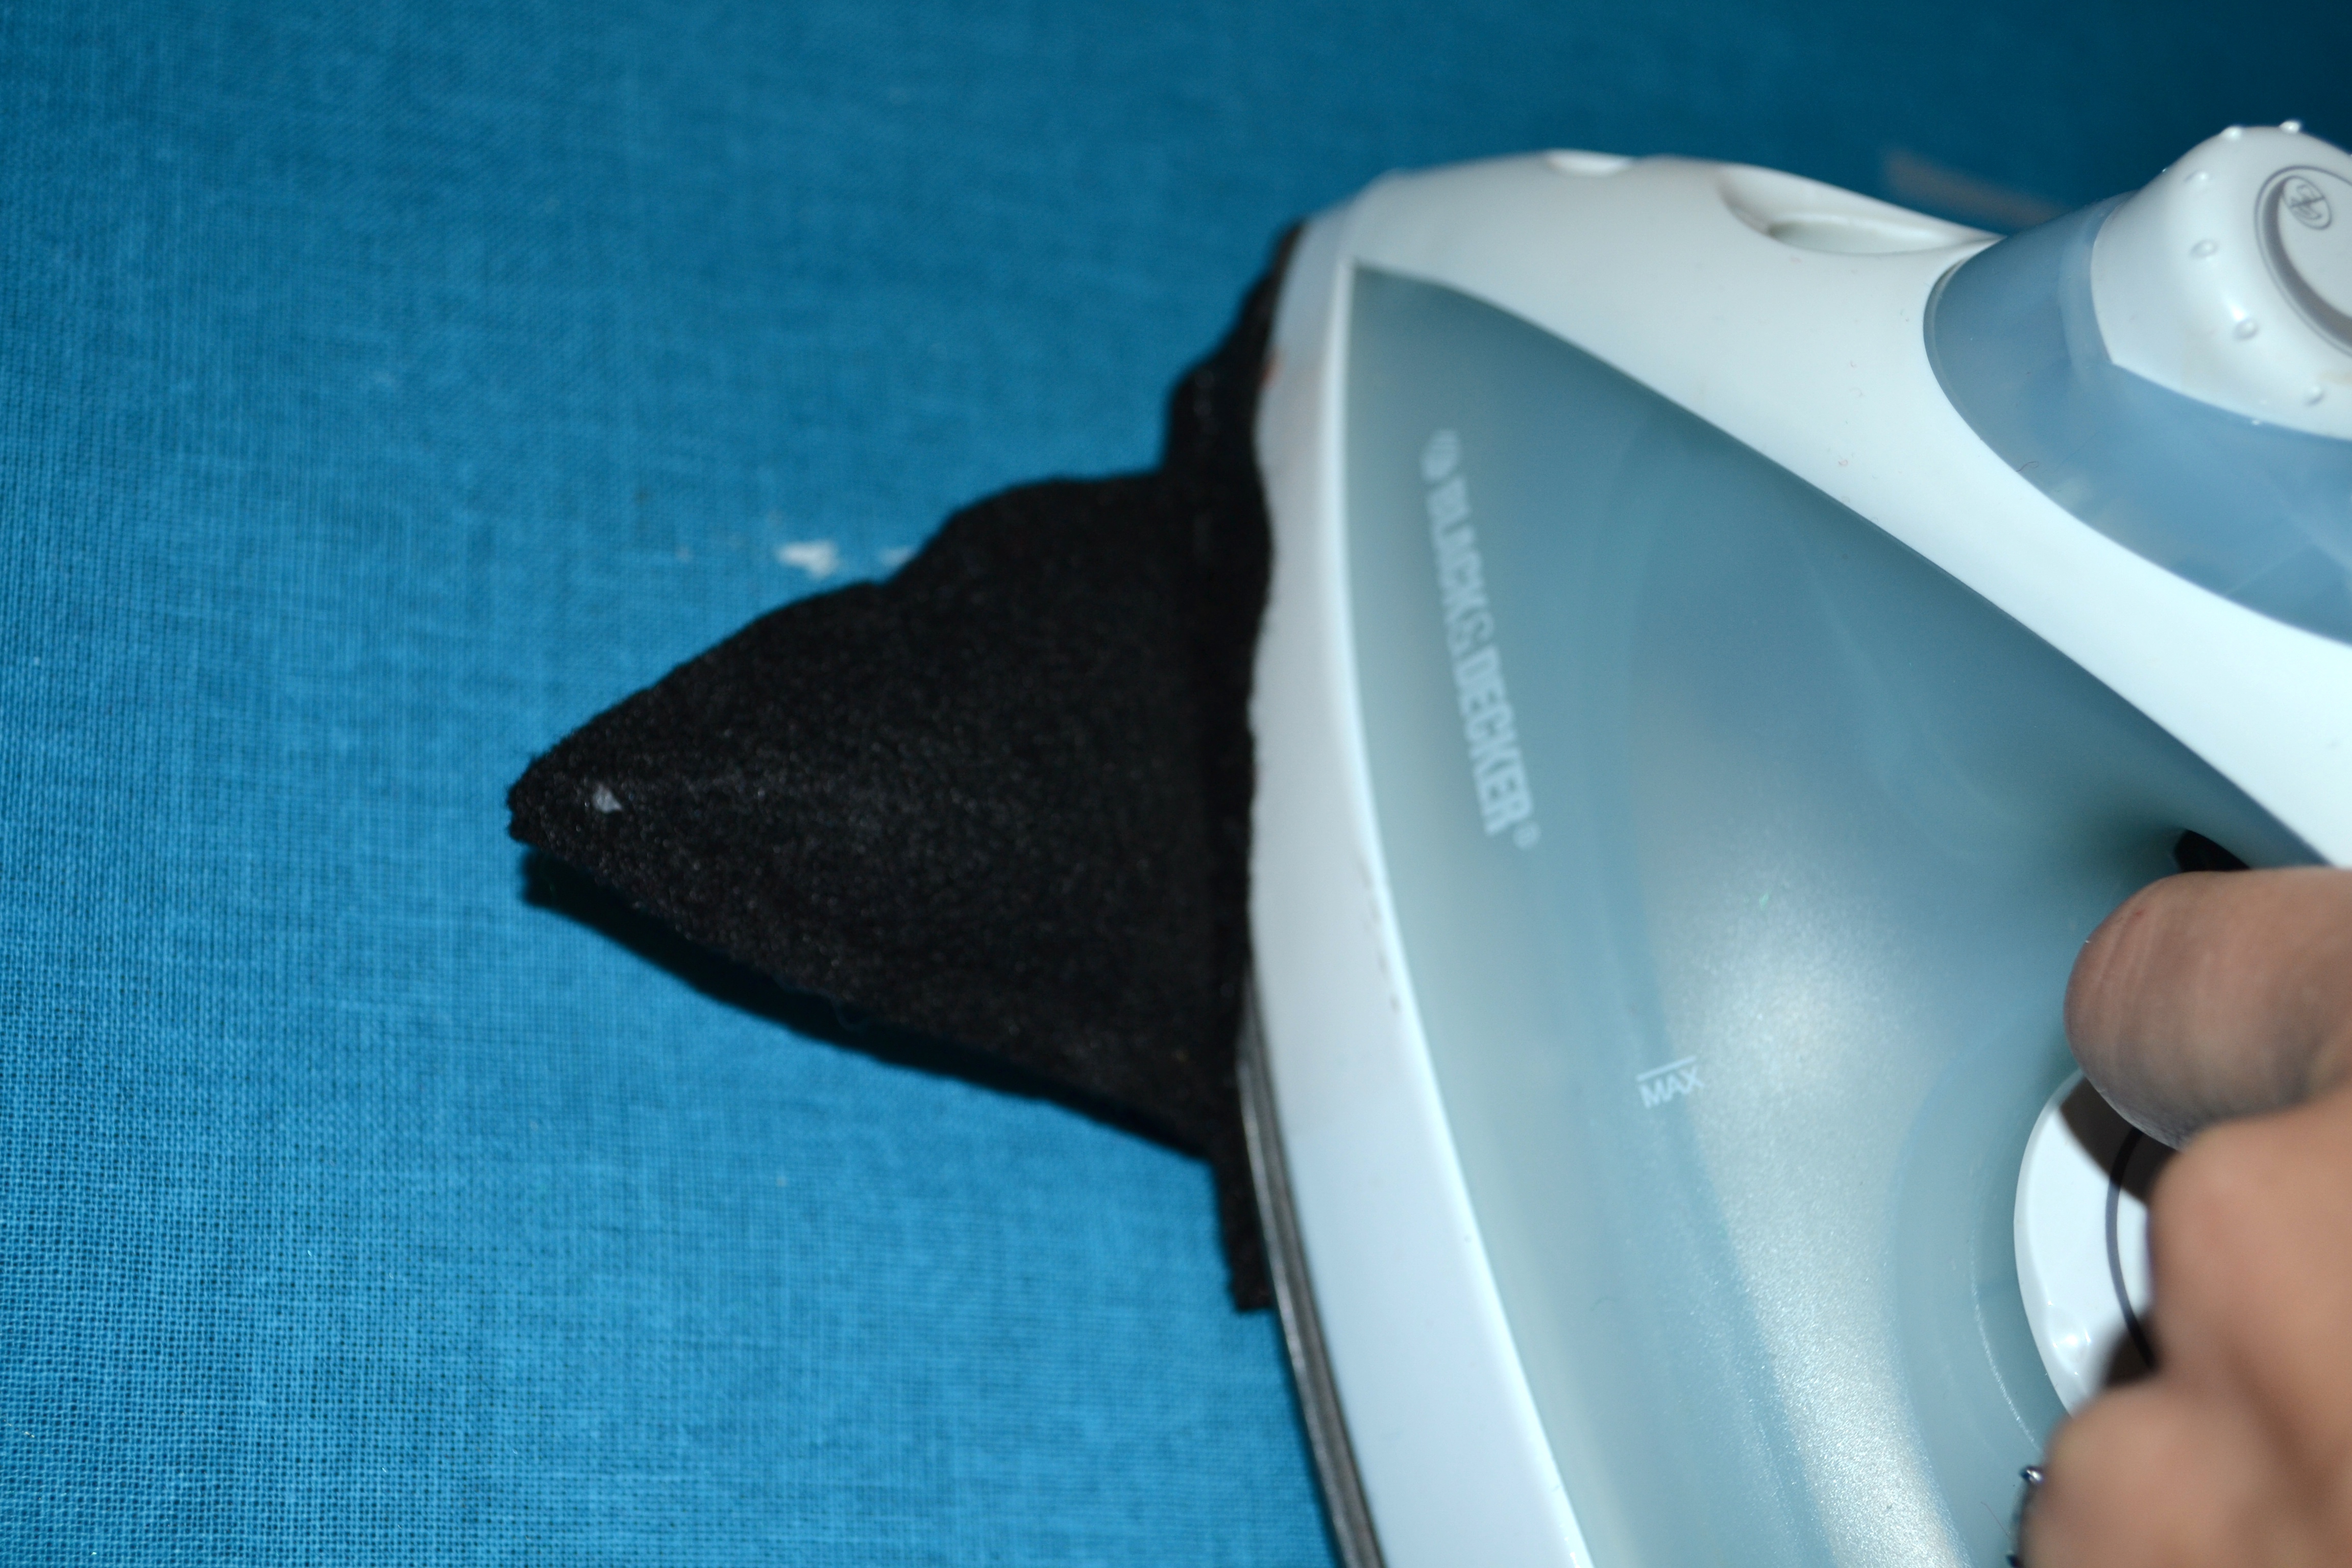
- Once it’s stuffed, take some transfer tape and put it on the top of the short side of the beak. Then, bring the long side around and over to cover the transfer tape. Now, apply heat from your iron to fuse the bottom of the beak together.
- Now, you have a perfect beak with a flat bottom that can easily be added to your costume!
Step 7:
- Finally, put a piece of transfer tape over the bottom of the flat side of the beak.
- Place the beak (tape side down) at the top center of your hood, and apply heat with your iron to adhere the beak to the hood of your costume.
Step 8:
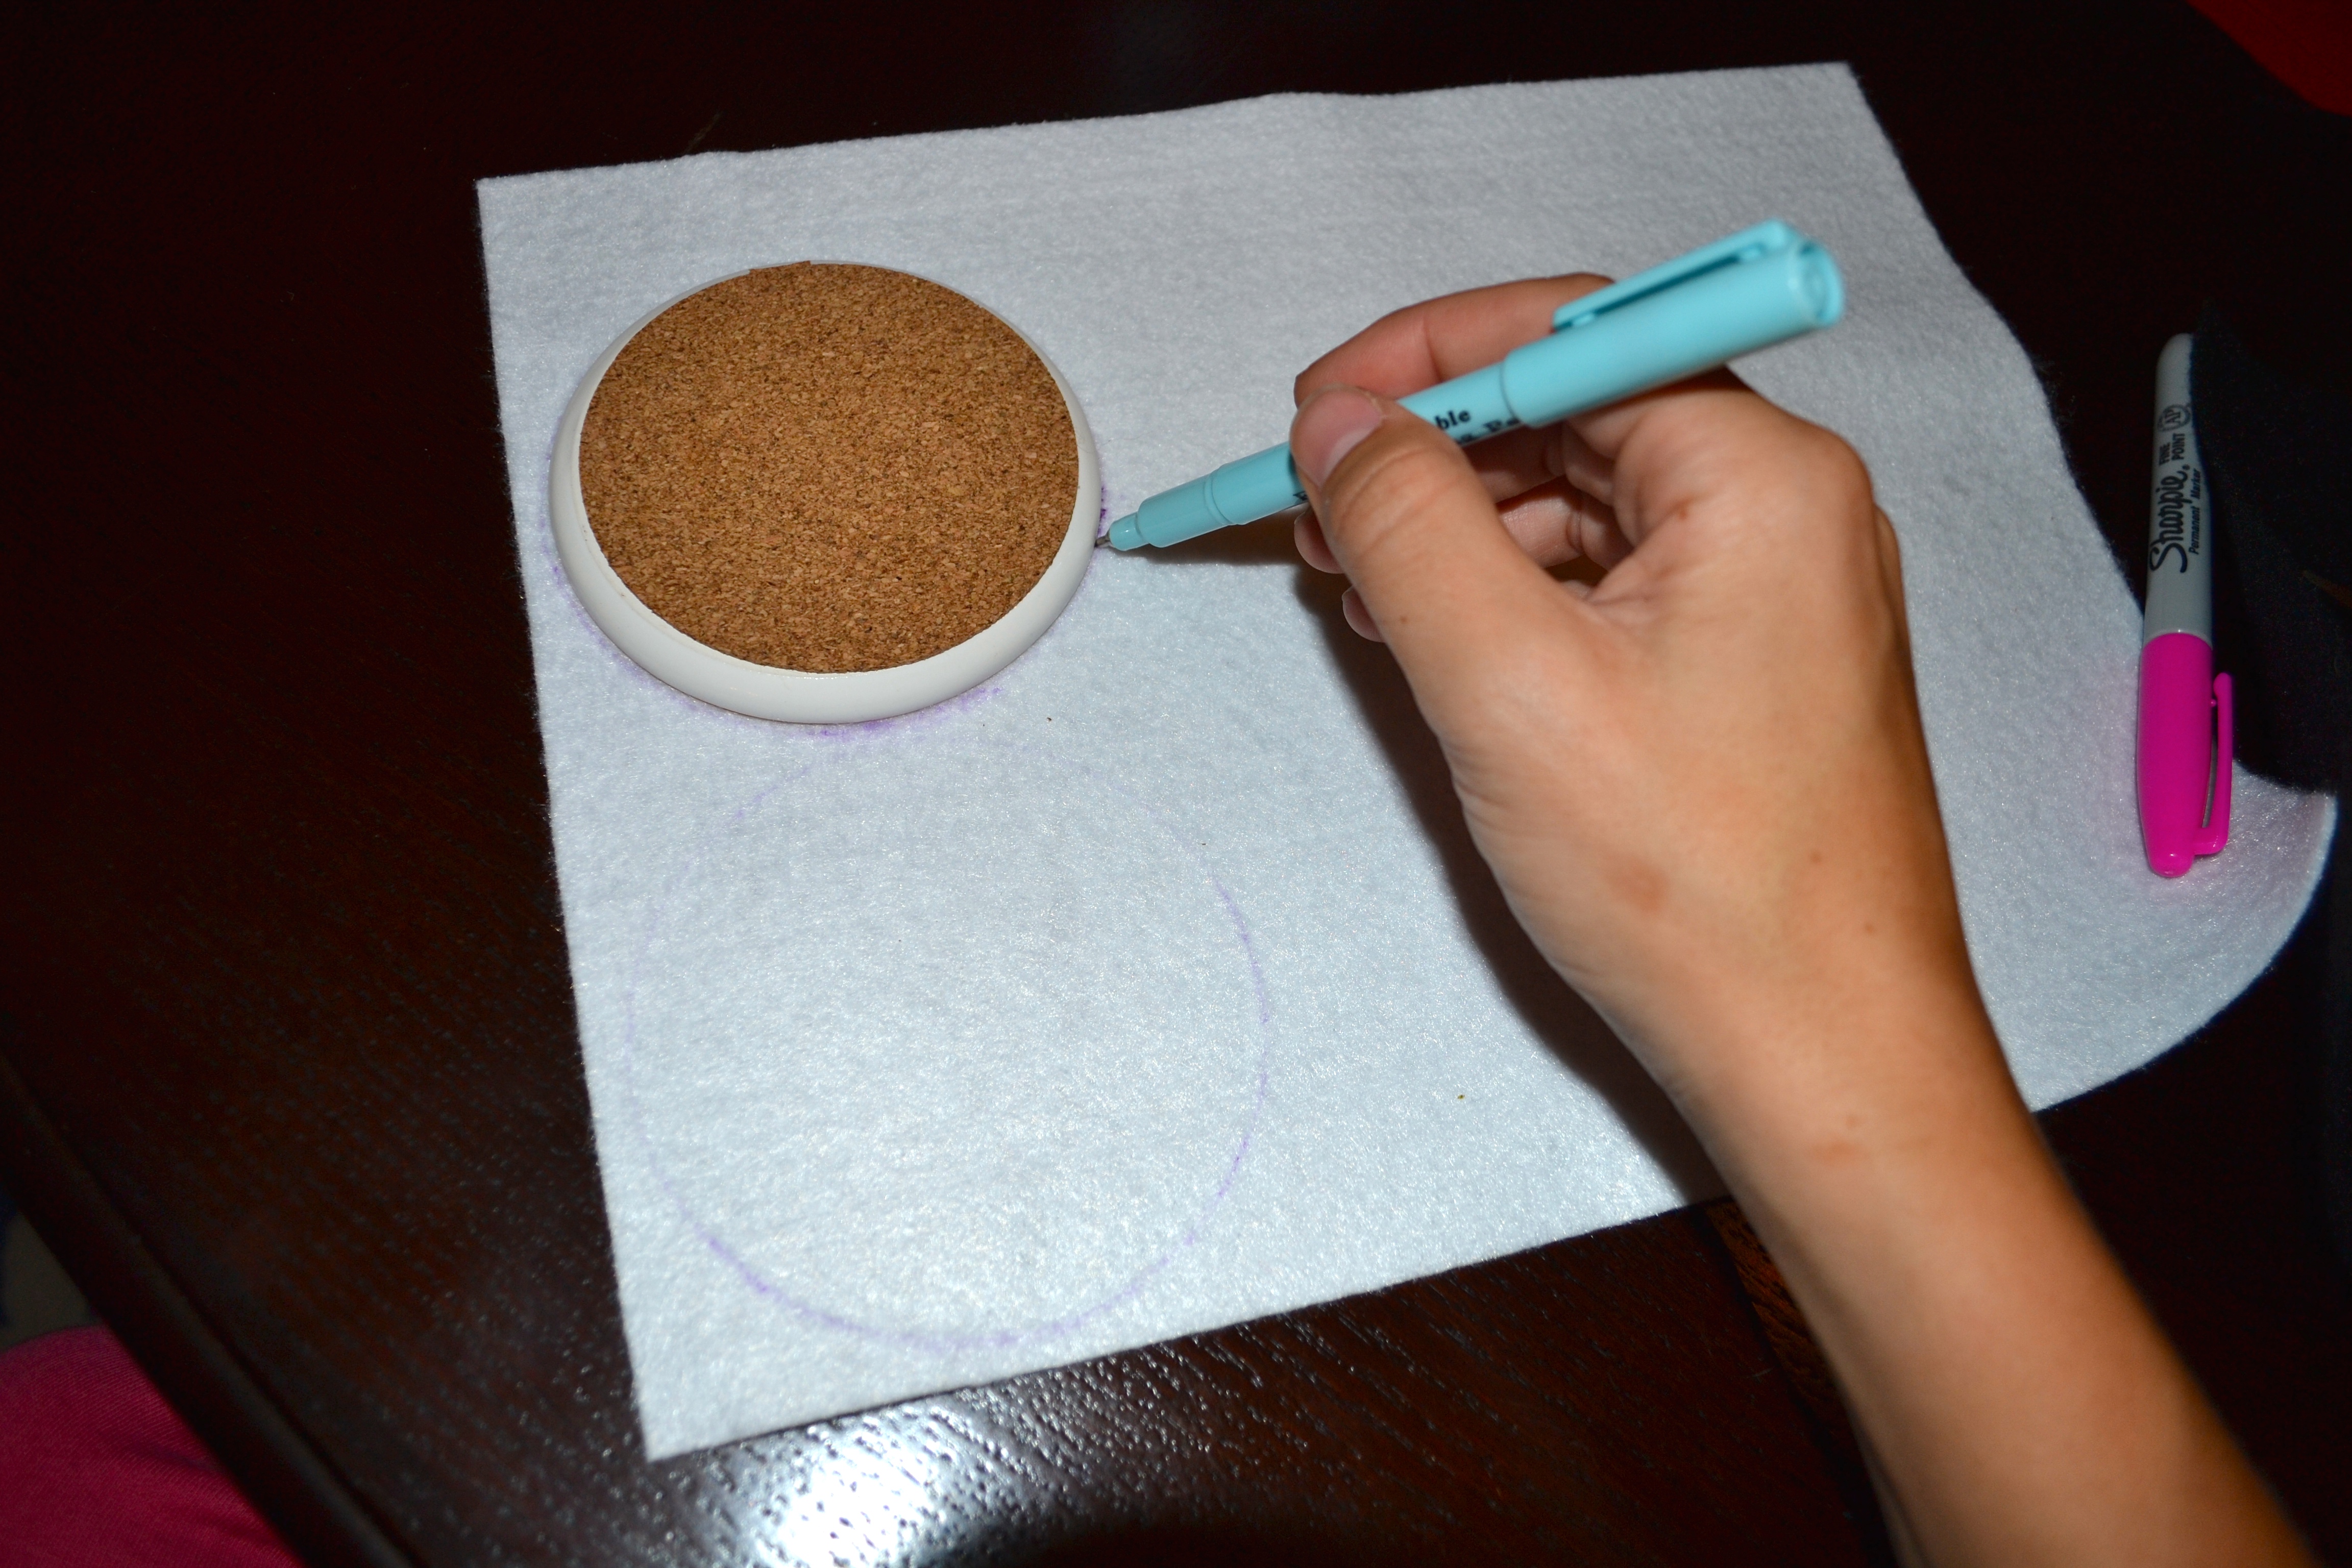
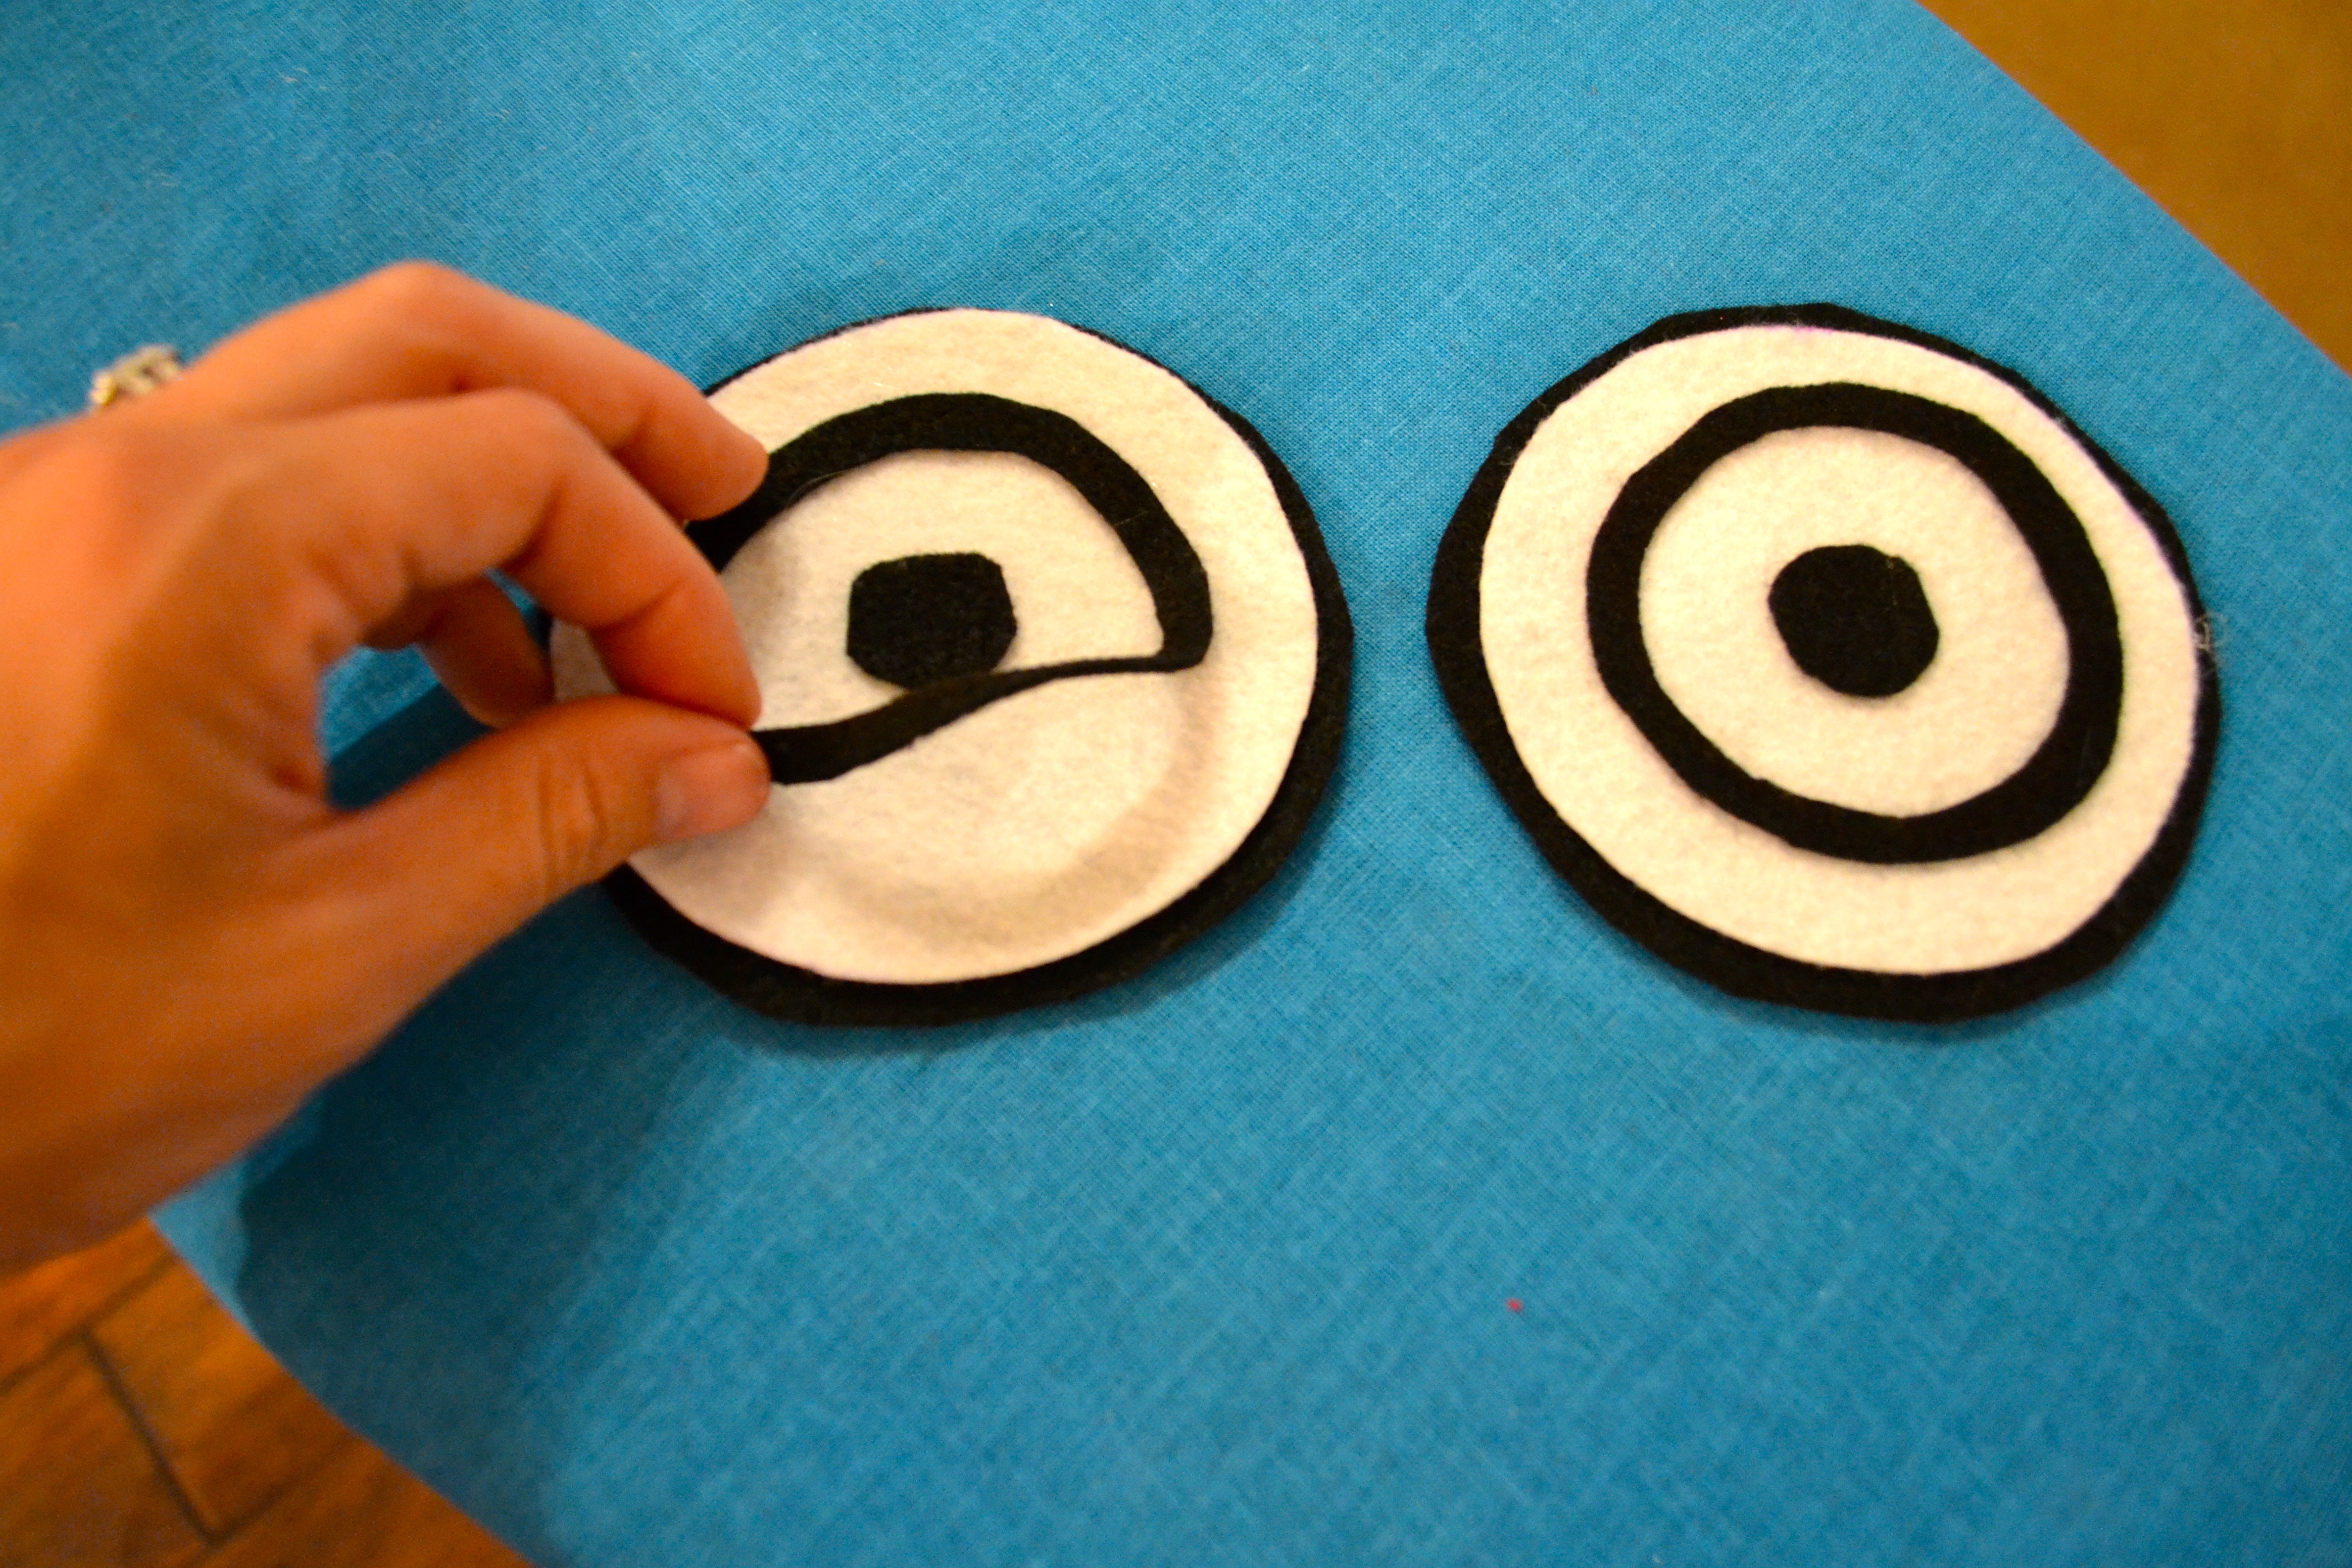
- Ok, last bit! Take a coaster, top of a cup, or something round and use it to trace a few circles on your white and black felt.
- Then, make one of the black circles your biggest. Take a white circle, and cut about 1/4″ off the diameter. Then take your next black circle, and cut about 3/4″ off the diameter. Next white one, another 1″ off the diameter. And finally, your last black circle, make it a tiny little circle (like an iris of an eye).
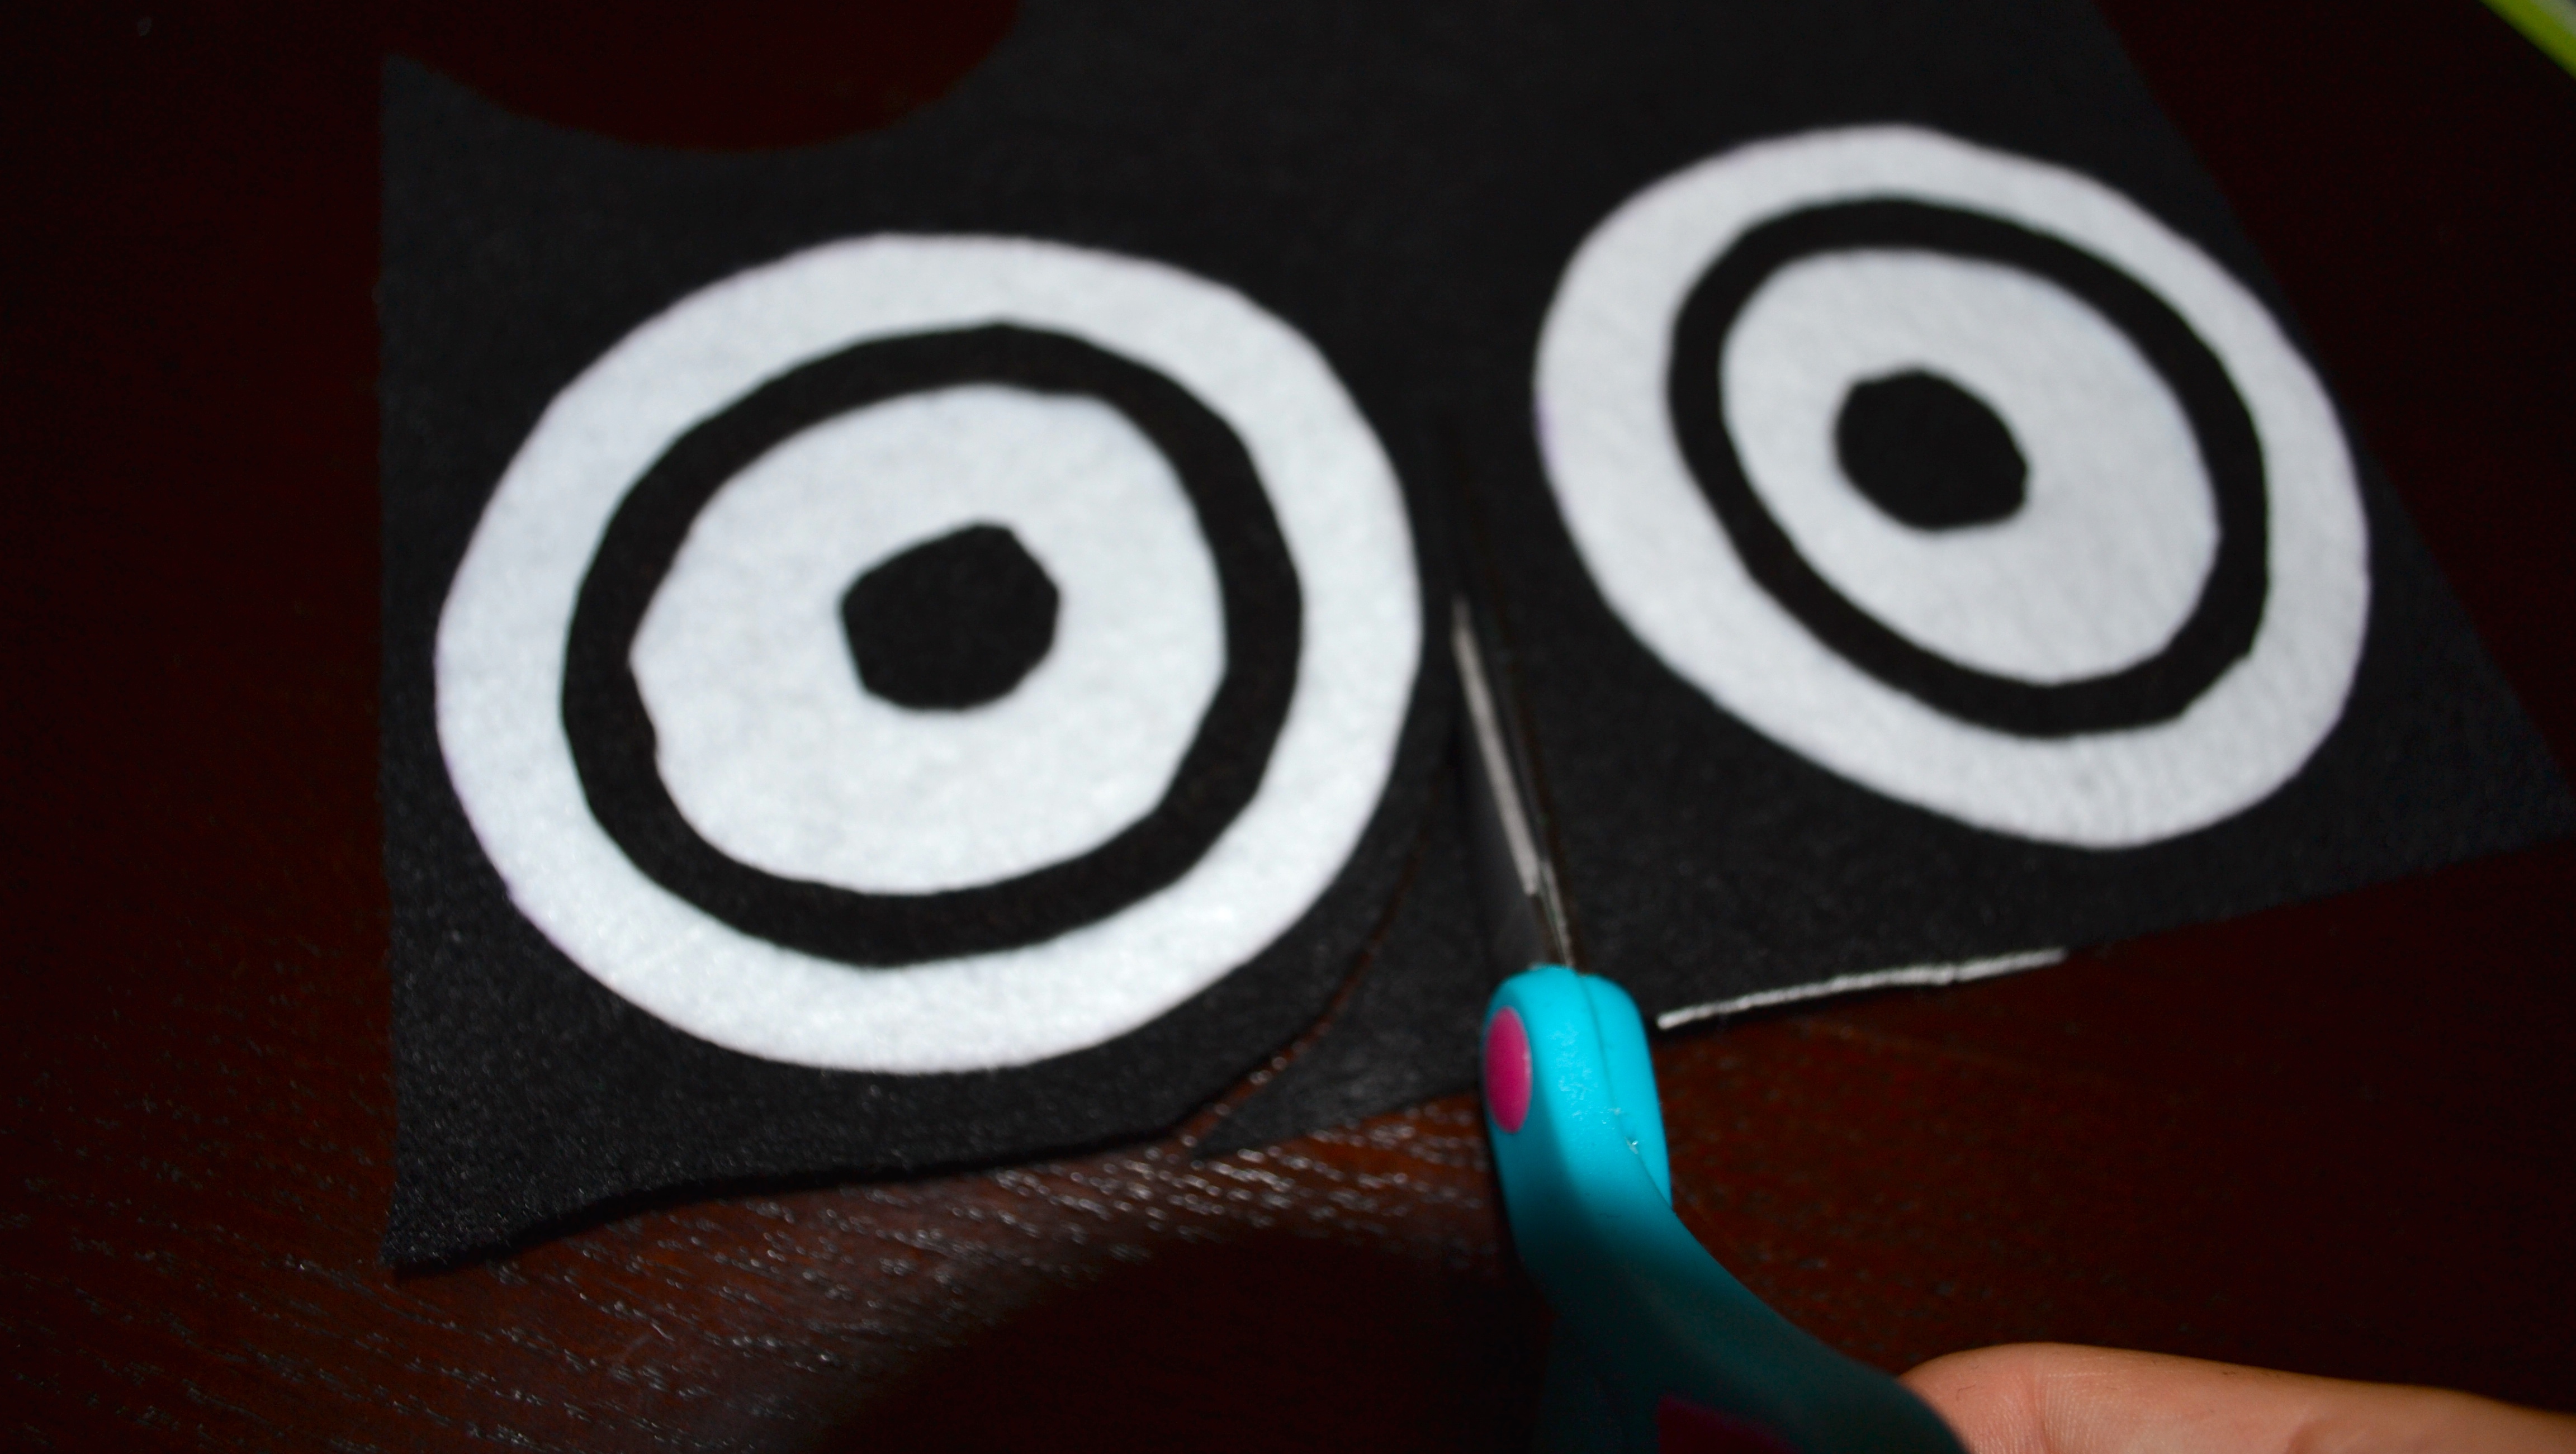
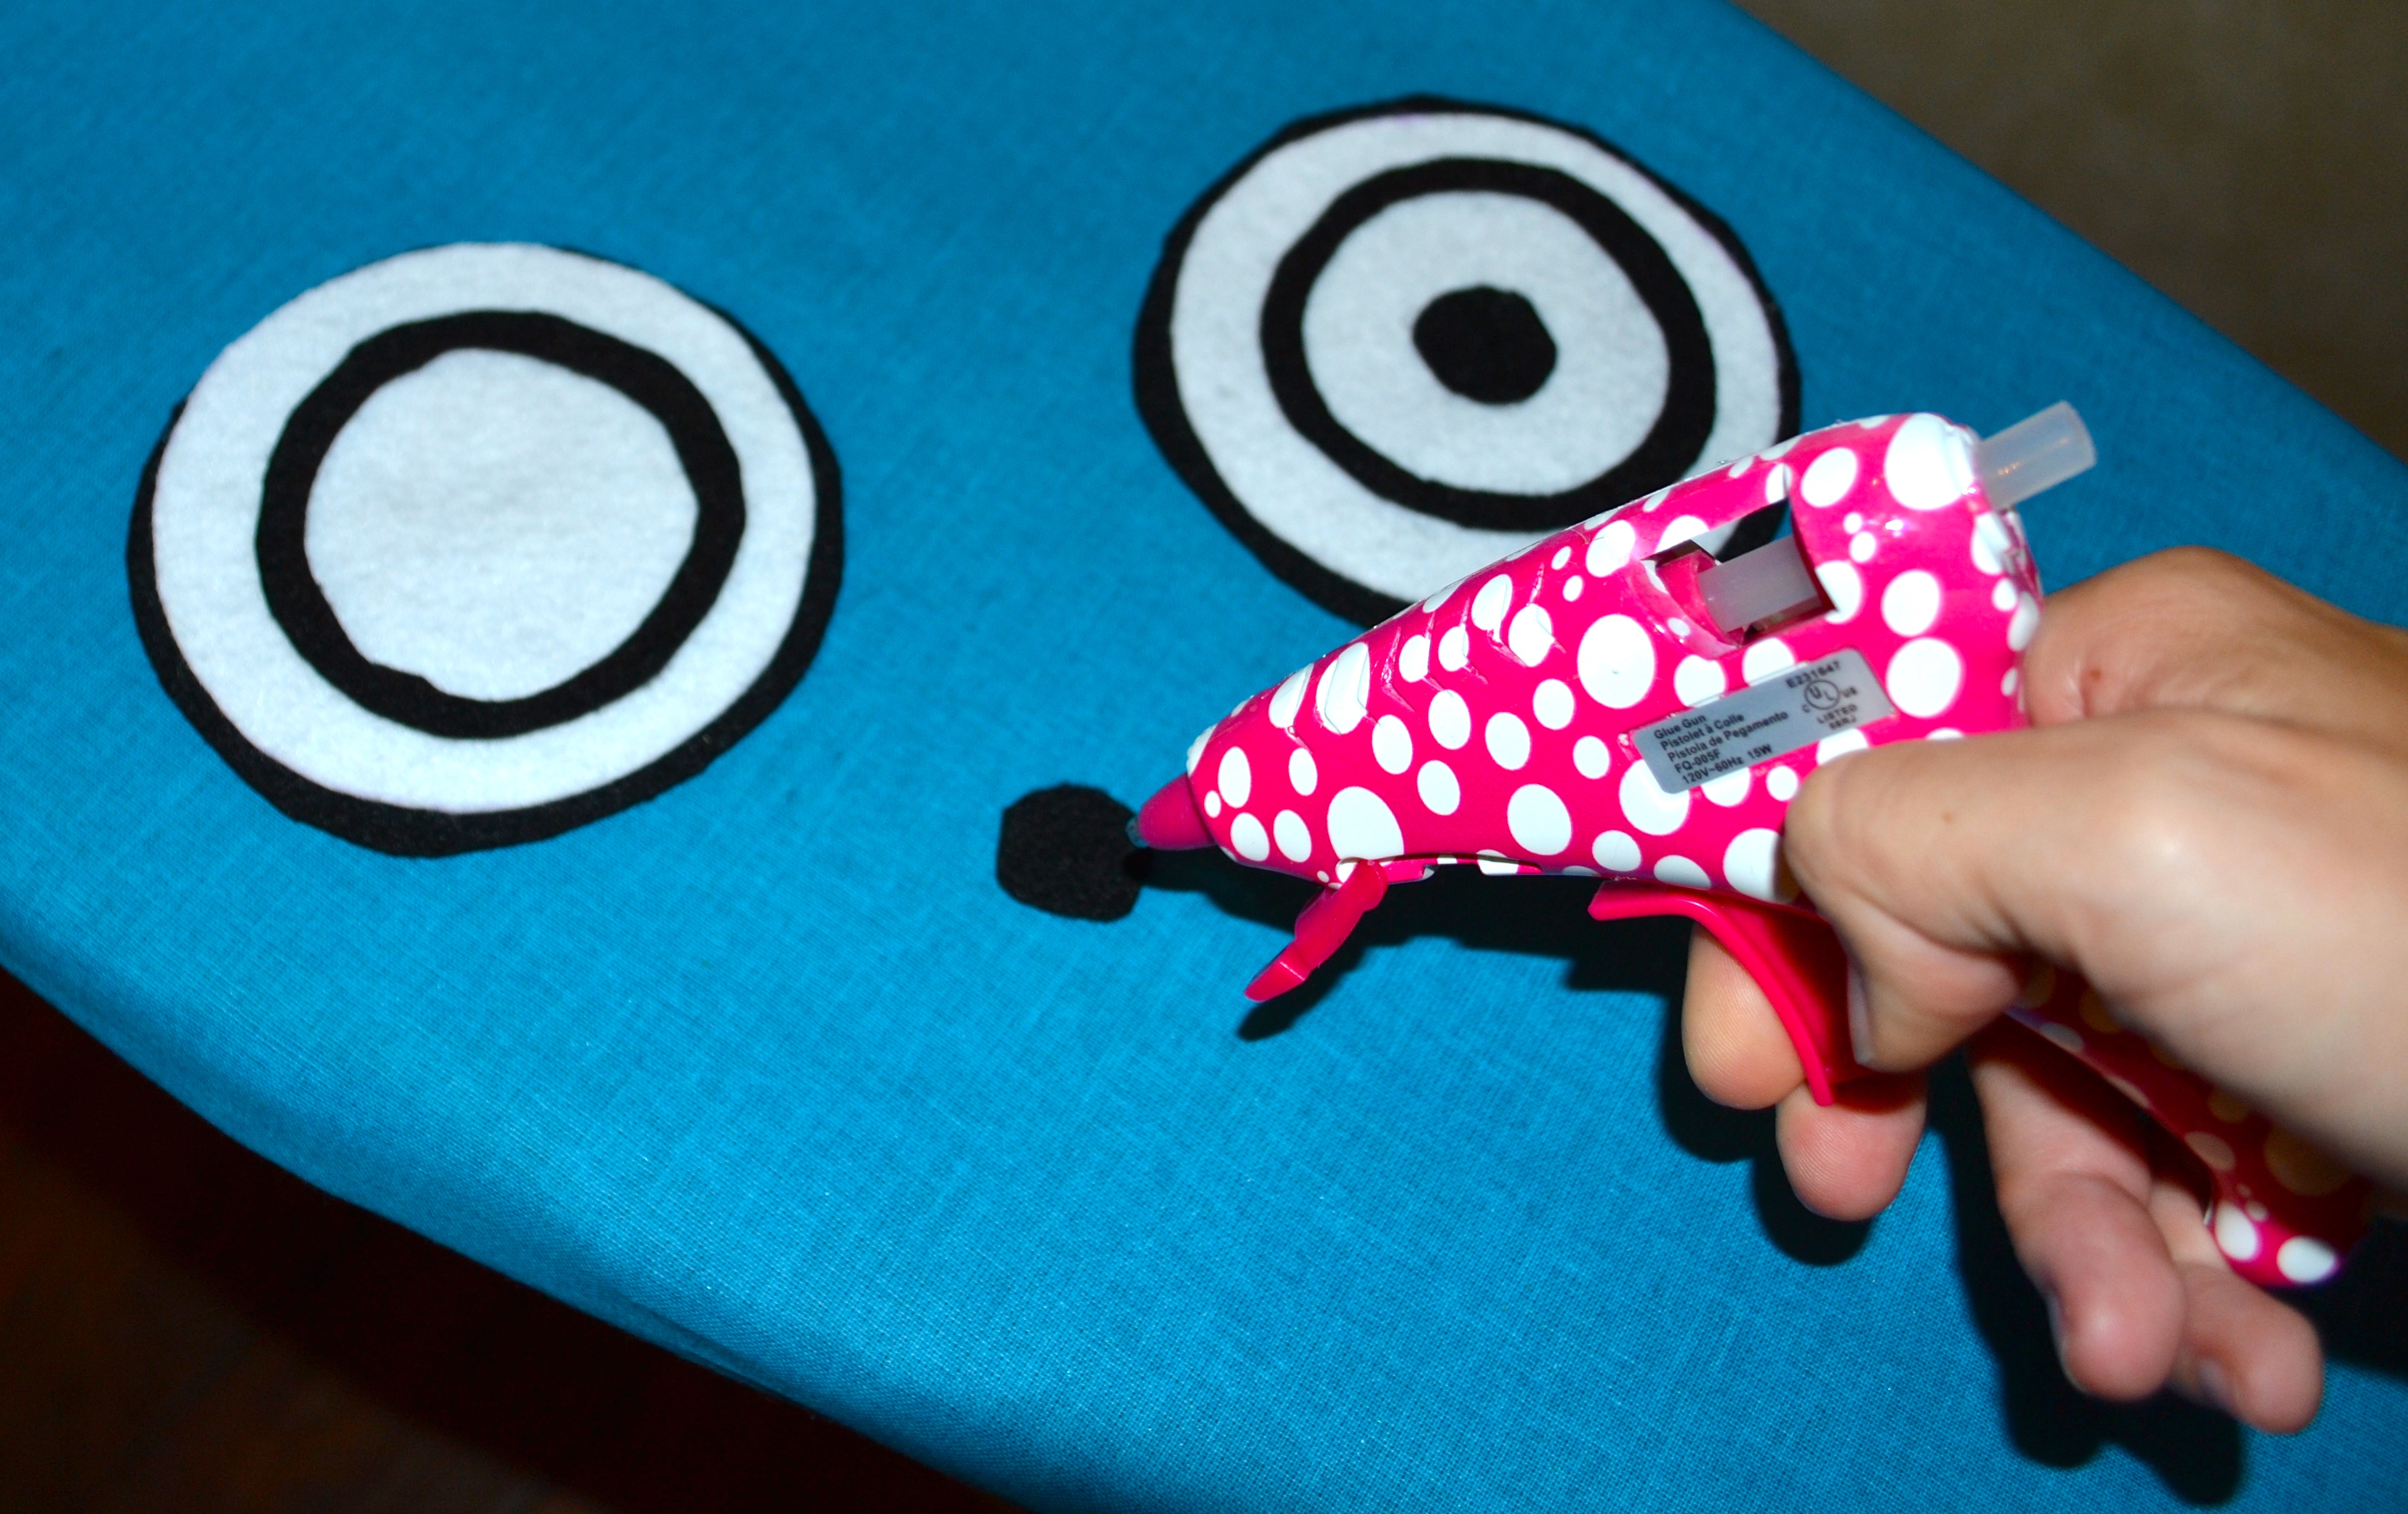
- Now, use your transfer tape to fuse all these together, in an alternating pattern. First, start with the largest black circle. Place transfer tape on the bottom of the largest white circle. Place the white circle on top of the back one, and use your iron to fuse them together.
- Continue this pattern, alternating black and white and going from largest circle to smallest circle until your eyes are complete.
- Finally, put transfer tape to cover the back of the eye you just made, and fuse it onto one side of the hood. Repeat on the other side with the other eye.
Ta da!!
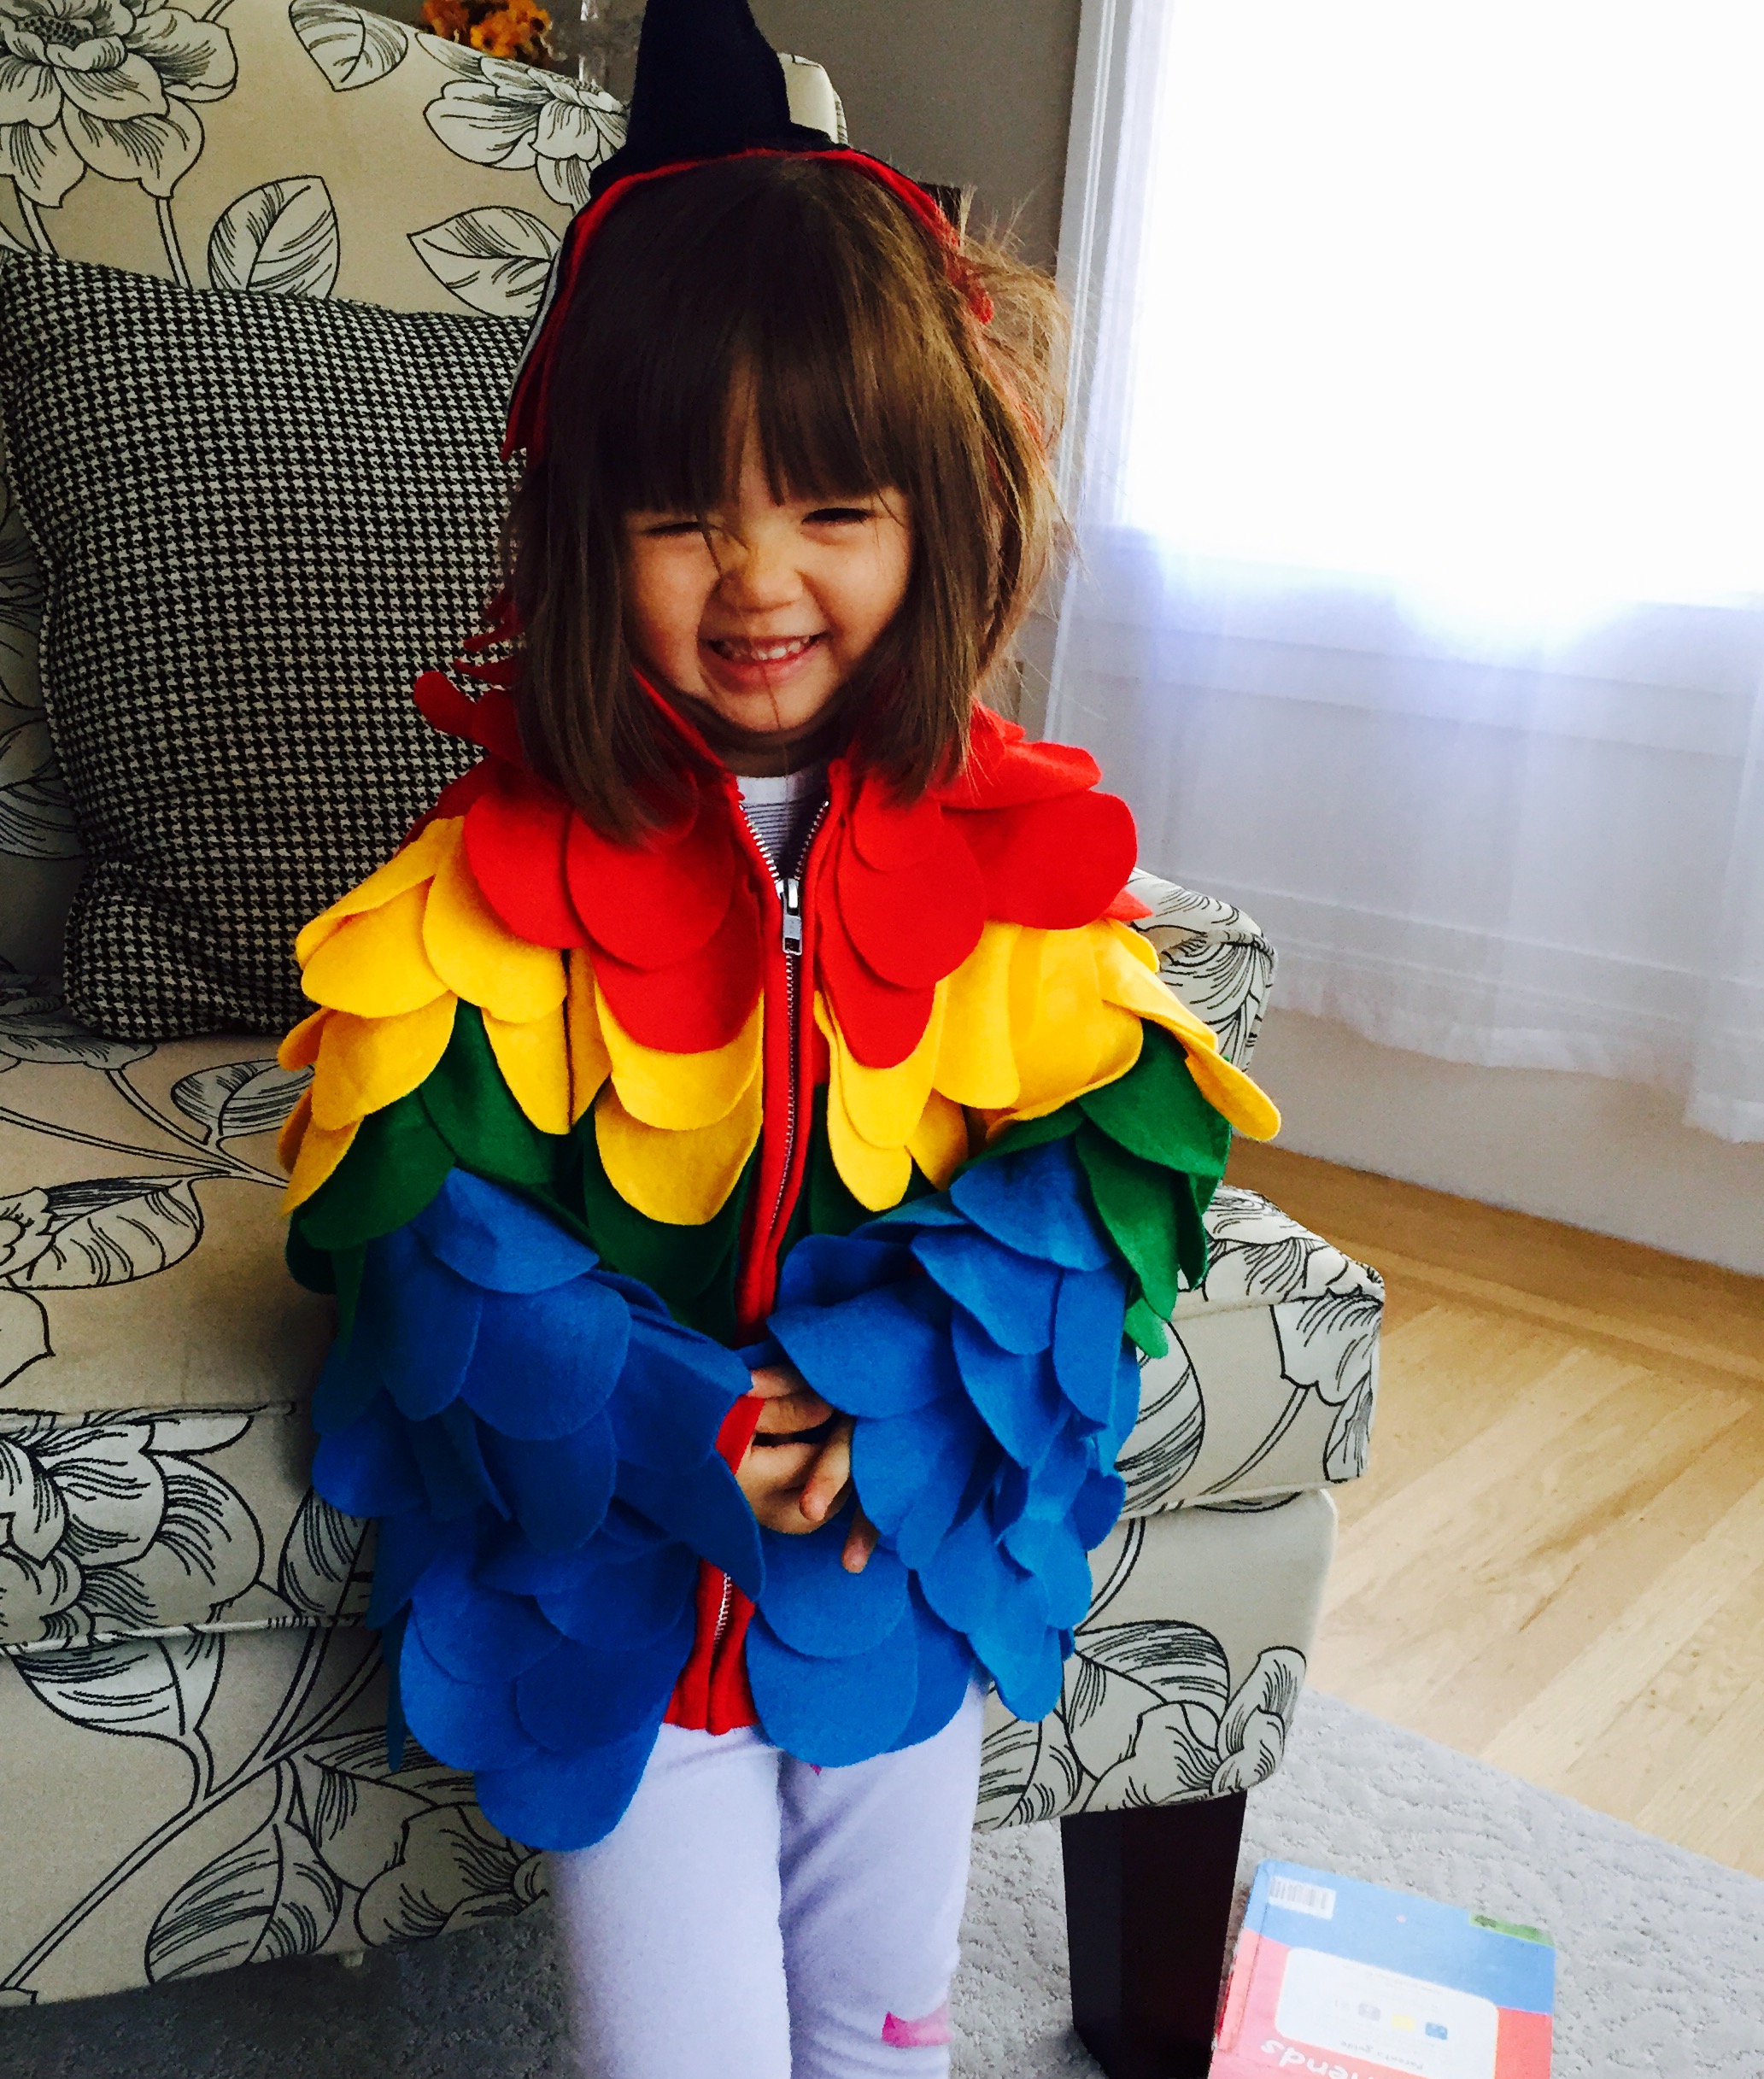
How adorable is that? And for under $25?!? Ain’t gonna find anything like that nowhere unless you DIY!
But I have to confess… this thing took me a REALLY long time to do. Like, a good 10-12 hours (if not a bit longer). So if you have the time (even an hour or two a night) and you plan ahead, you can make this adorable handmade halloween costume for your kid, too!
The BIGGEST bonus (even bigger than the money savings) is it’s an heirloom costume. It’s something your kid will remember fondly, and you can pass down from generation to generation. Their kid can wear it one day (assuming you take good care of it) and it will be a costume keepsake to treasure. I know I have quite a few of those myself. Maybe that’s why I have such fond feelings about this holiday.
Anyway… if you don’t feel like investing tens of hours on a single homemade costume, that’s fine too. Below, I give you the step by step instructions how to make another fun homemade costume. A dinosaur! And this one cost me even less (under $20) and only took me about 2 hours to complete!
Costume #2 – A Dinosaur
The Necessary Supplies:
- Child’s Hoodie
- Felt Fabric (about 1/4 Yard)
- Lime Green for the spikes
- Black, White, and Red Felt Fabric squares for the eyes
- Stabilizer fabric (thick/sturdy specialized fabric to keep the spikes sticking up)
- Ruler
- Marking Pen
- Scissors
- Needle and Thread
- Sewing Machine (optional)
Step 1:
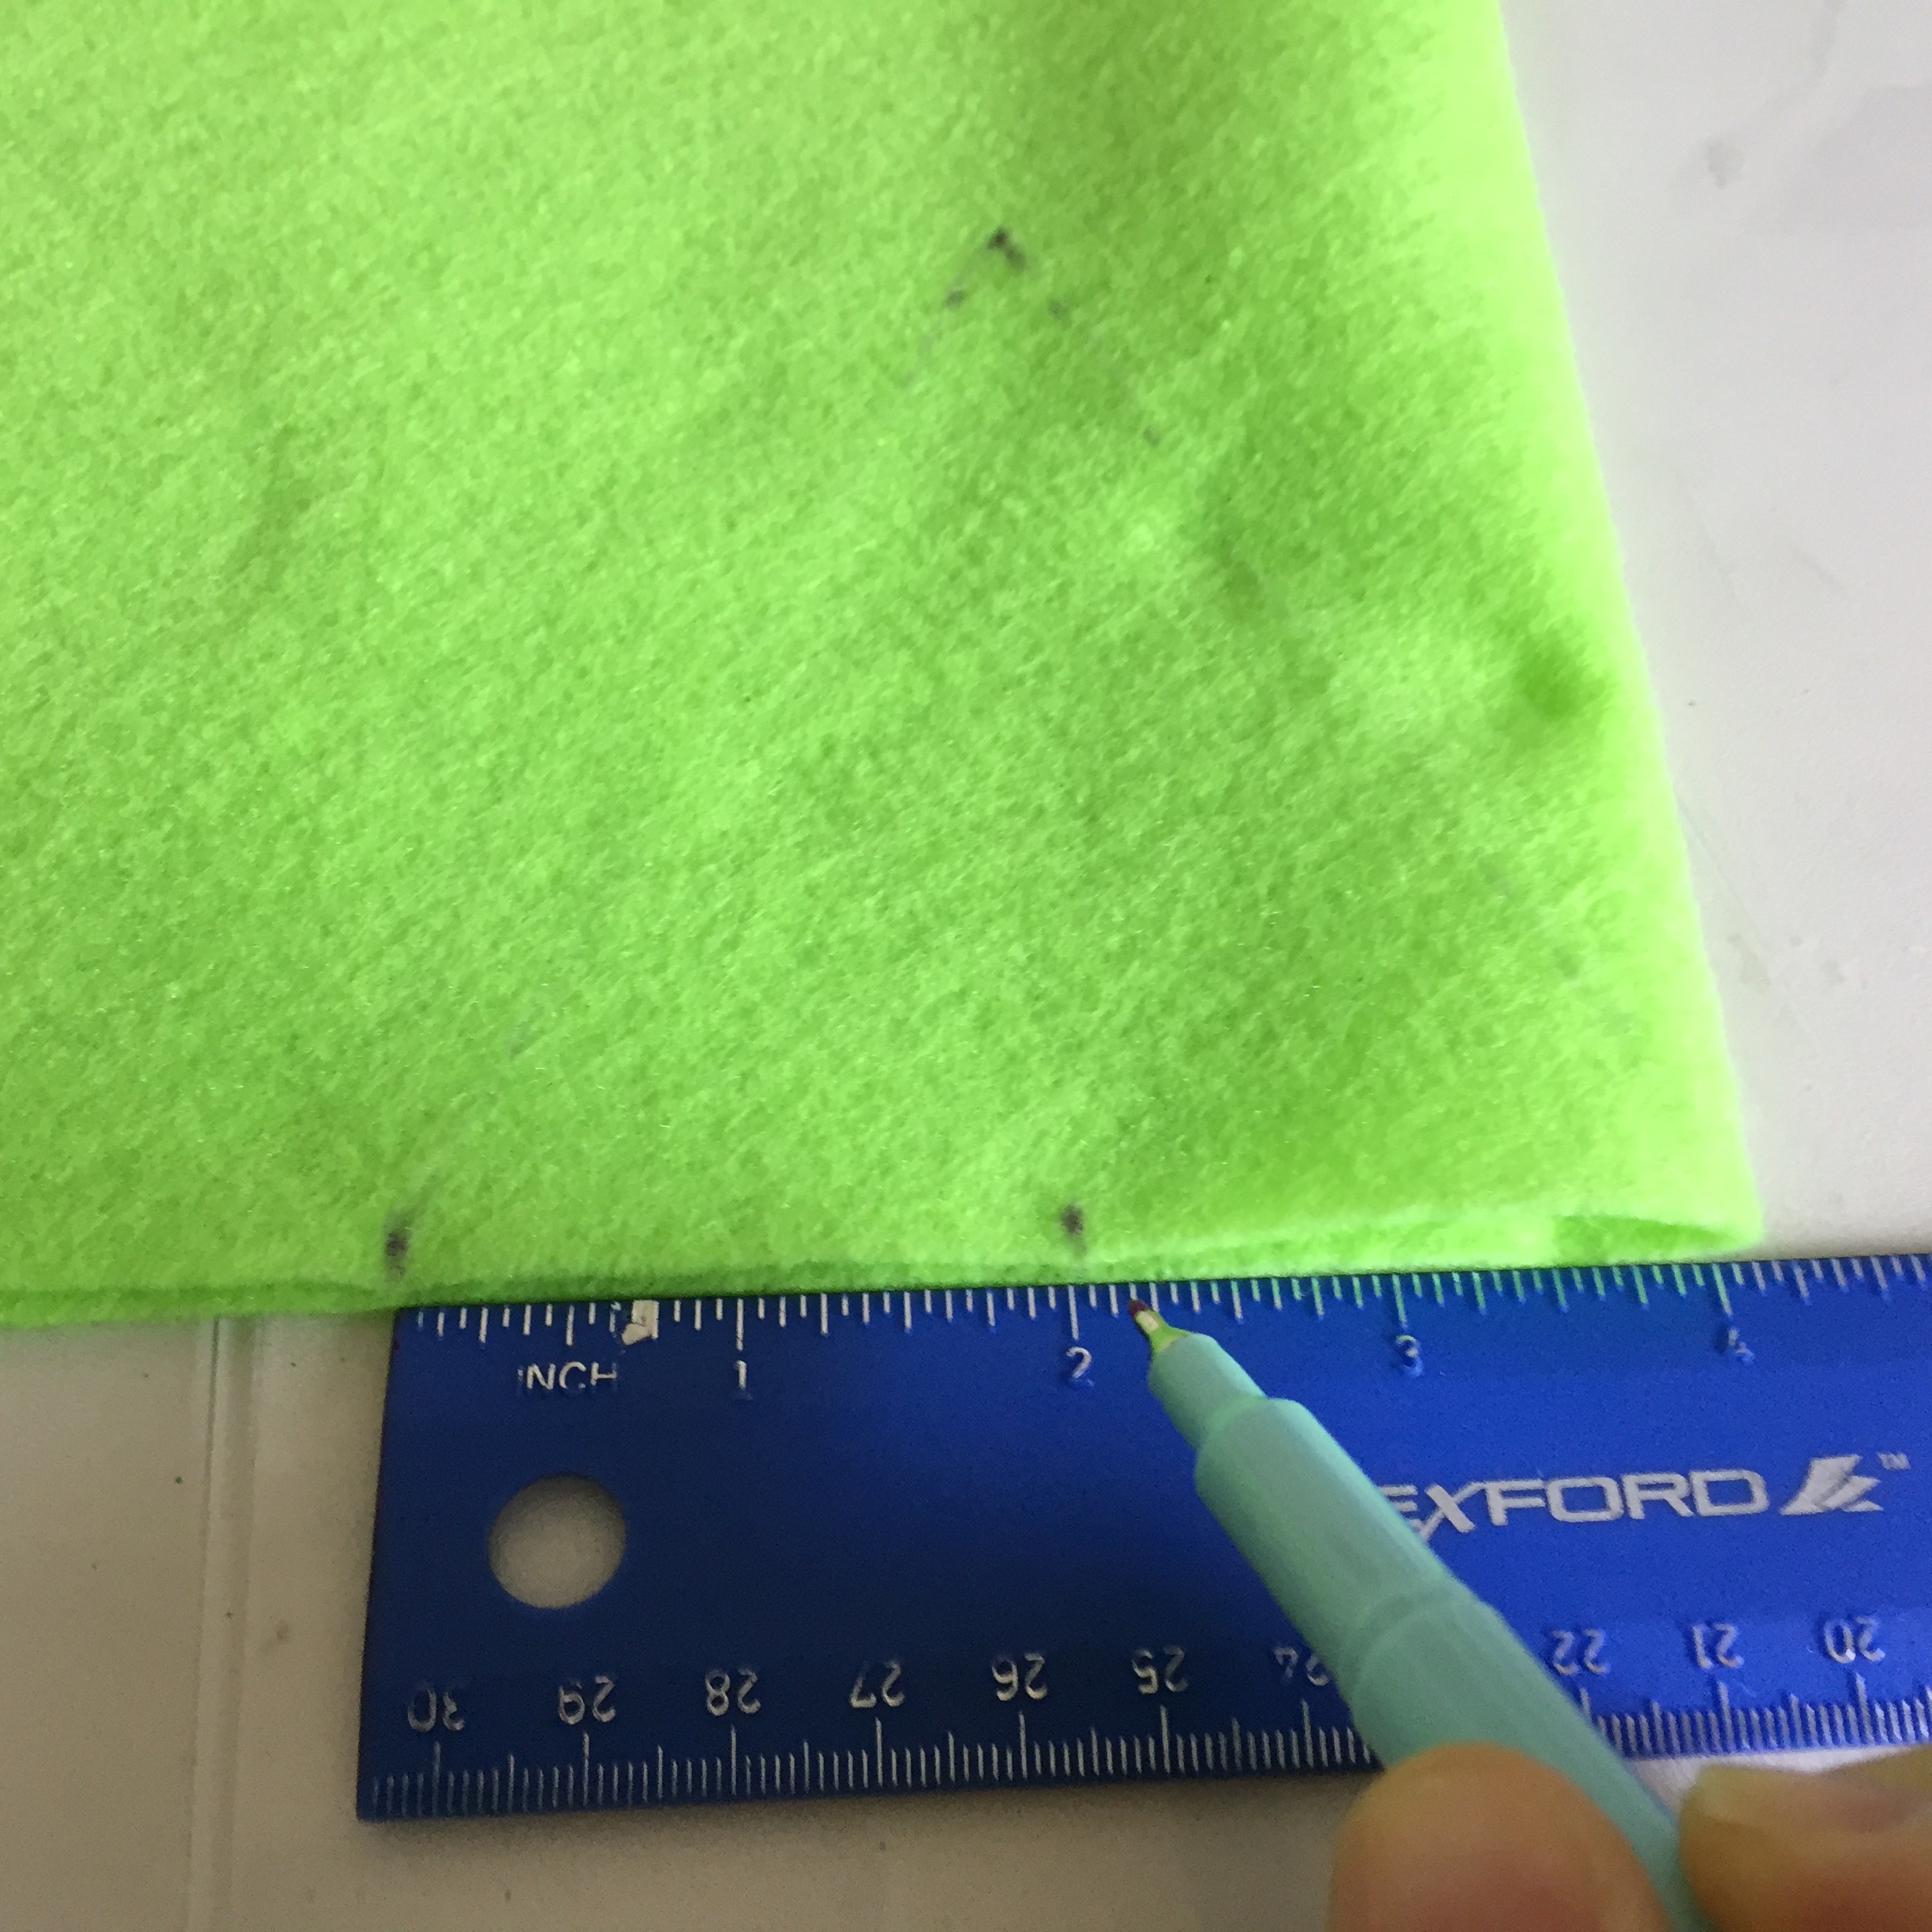
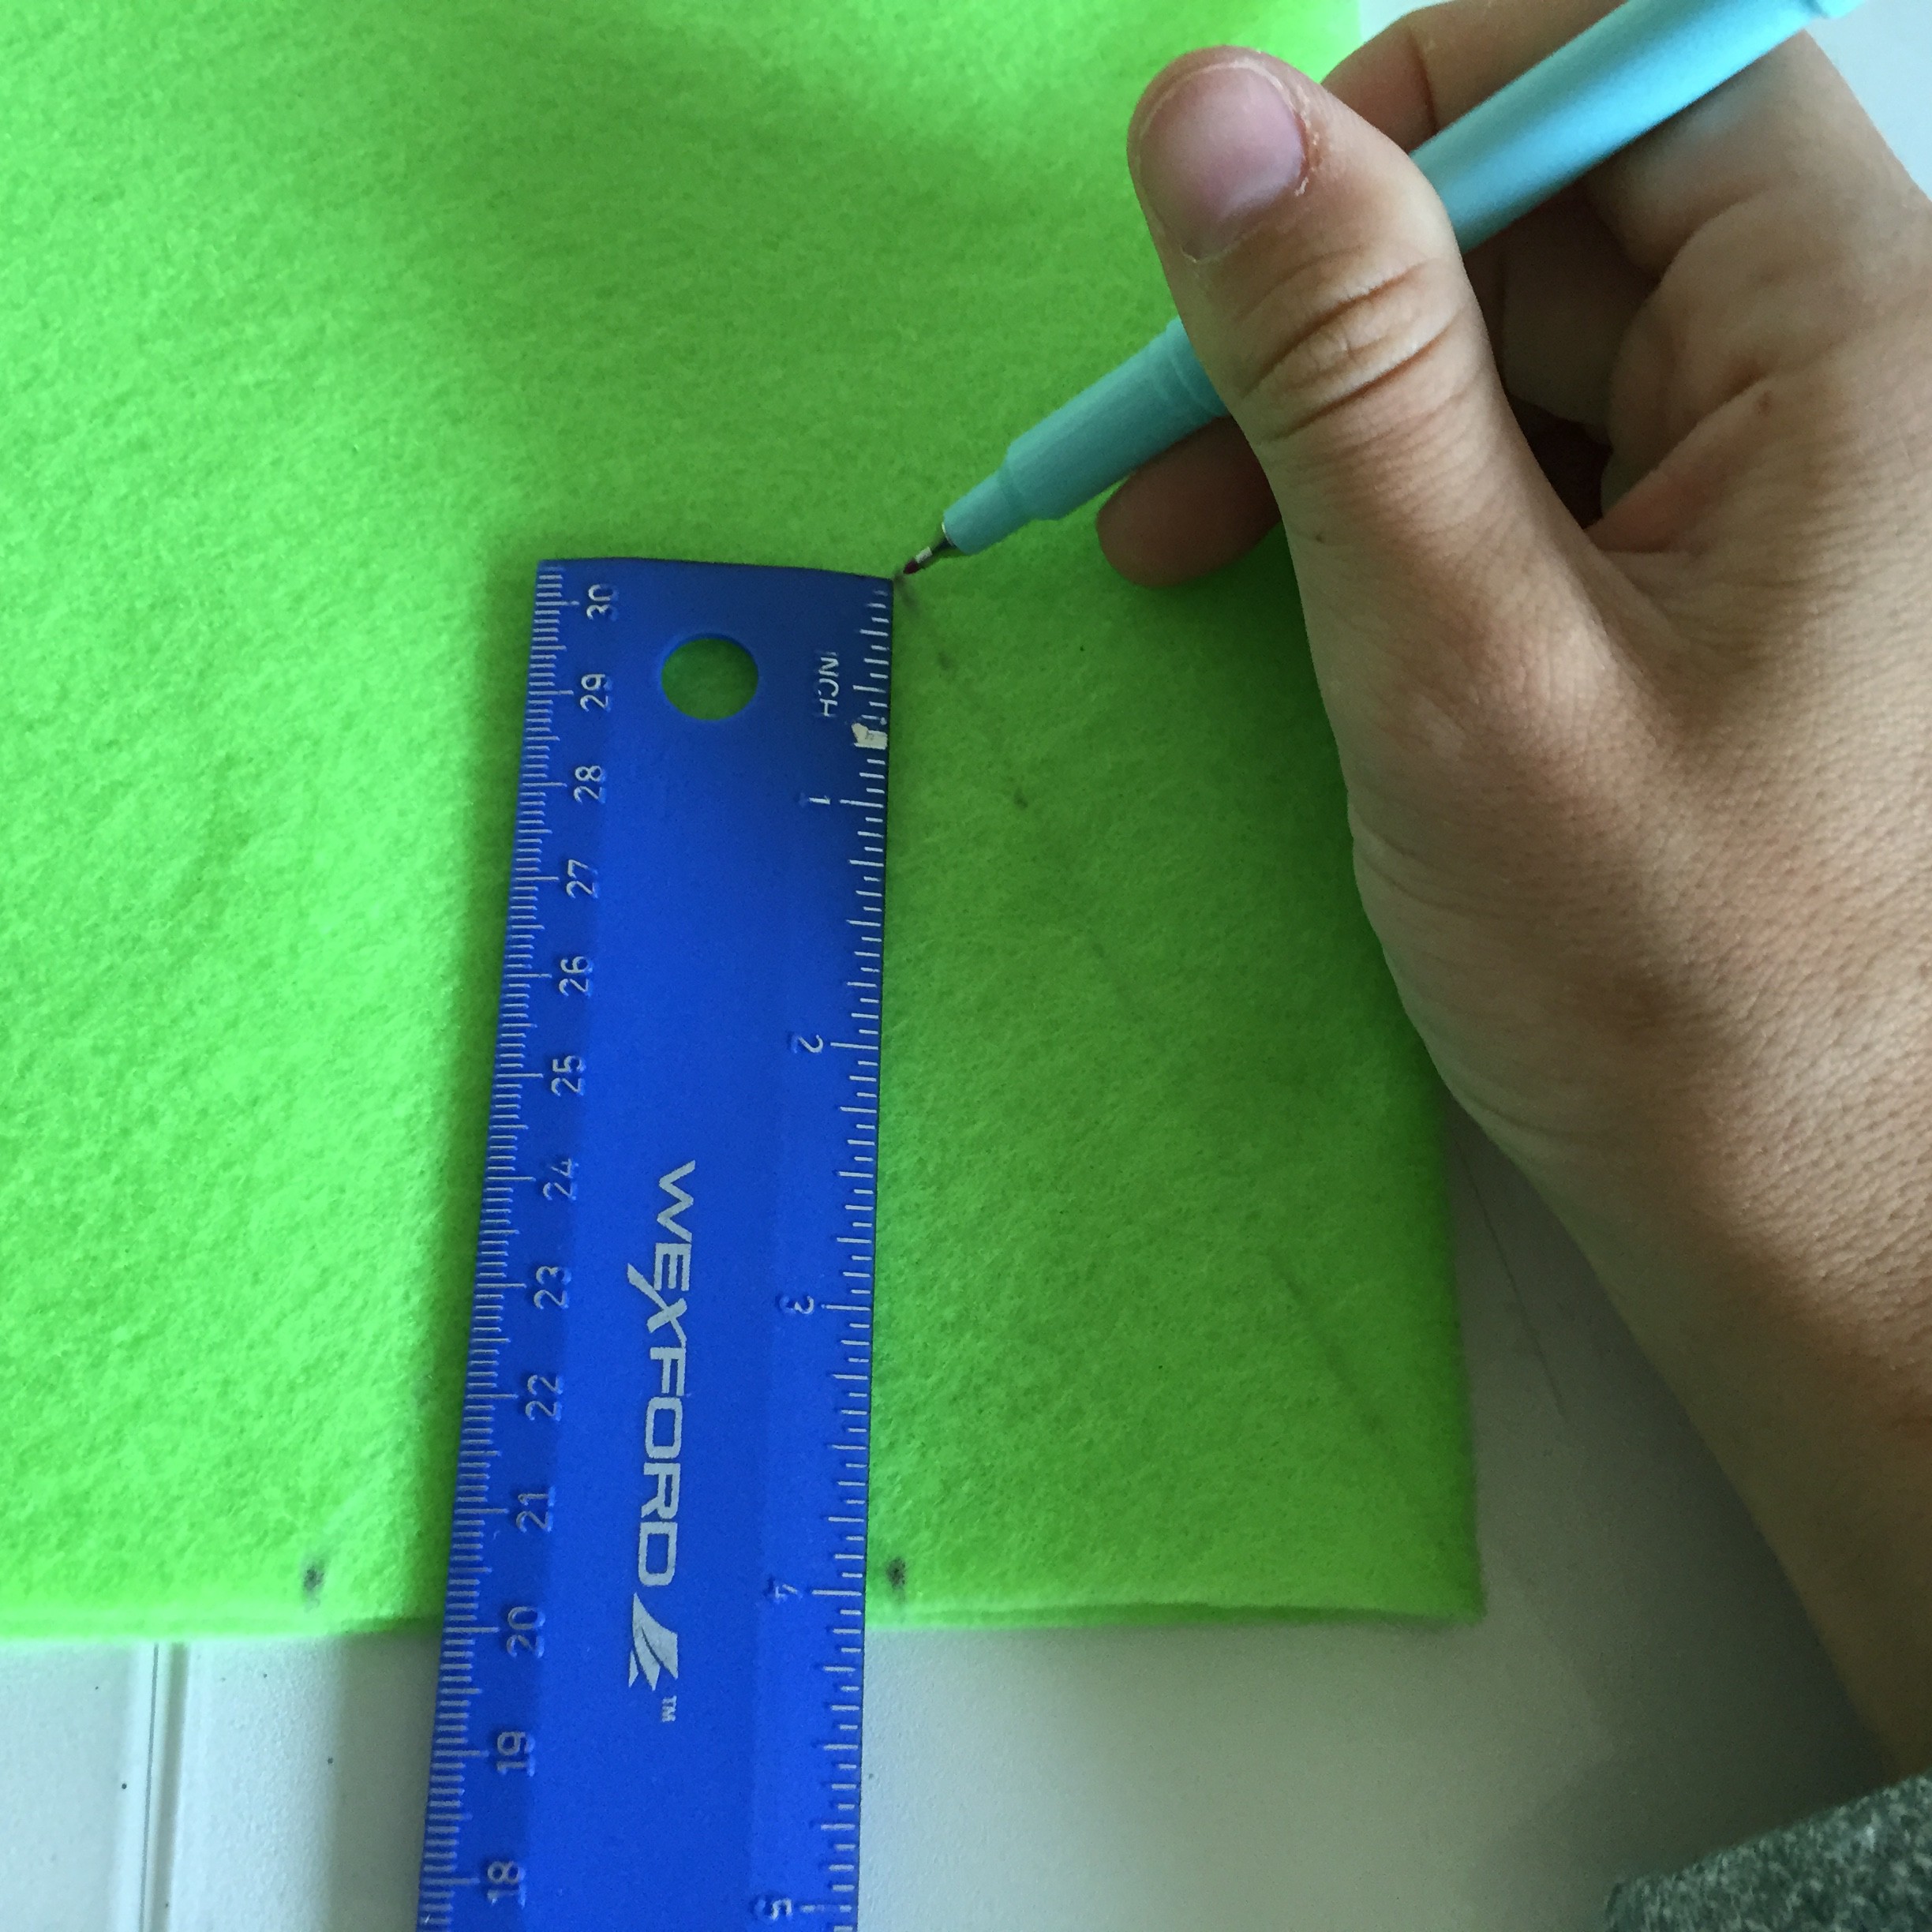
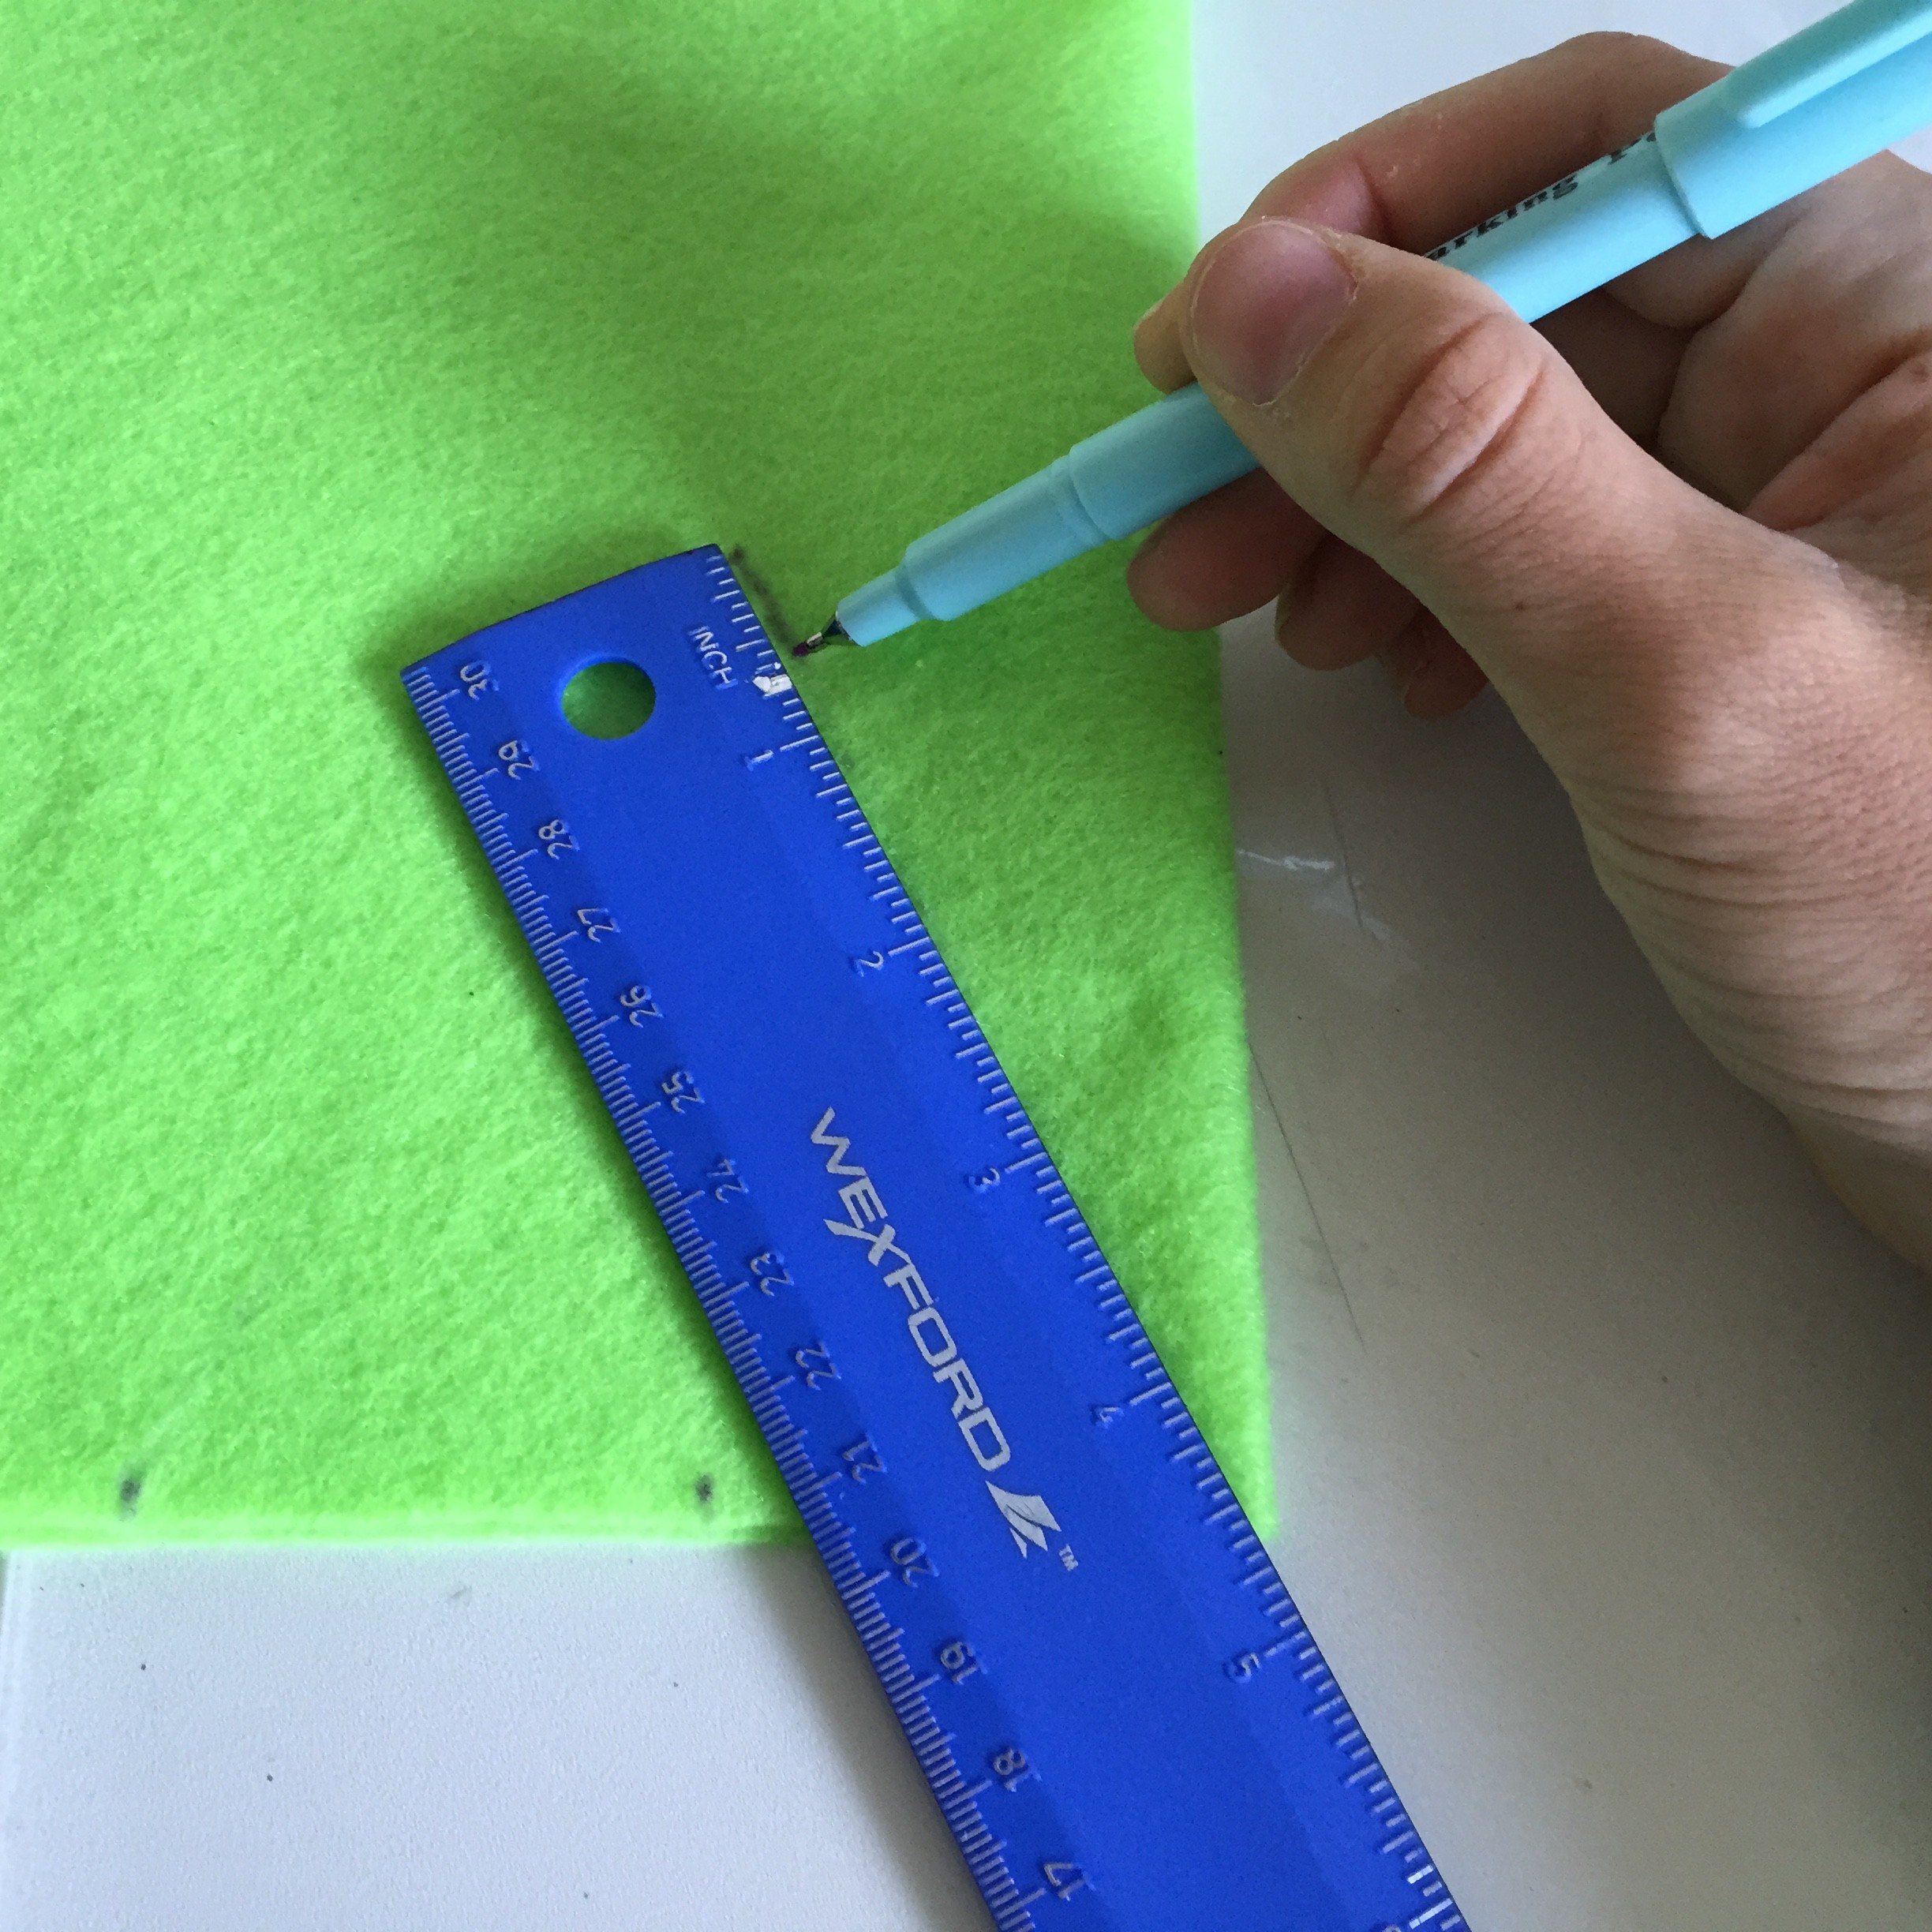
- Fold your felt in half. Measure 4″ along the bottom of the felt and make a mark.
- Then, make a mark in the center of those 4″ (2″ mark). Finally, at the 2″ mark, measure 4″ high, and make another mark.
- These marks are done to measure a PERFECT triangle.
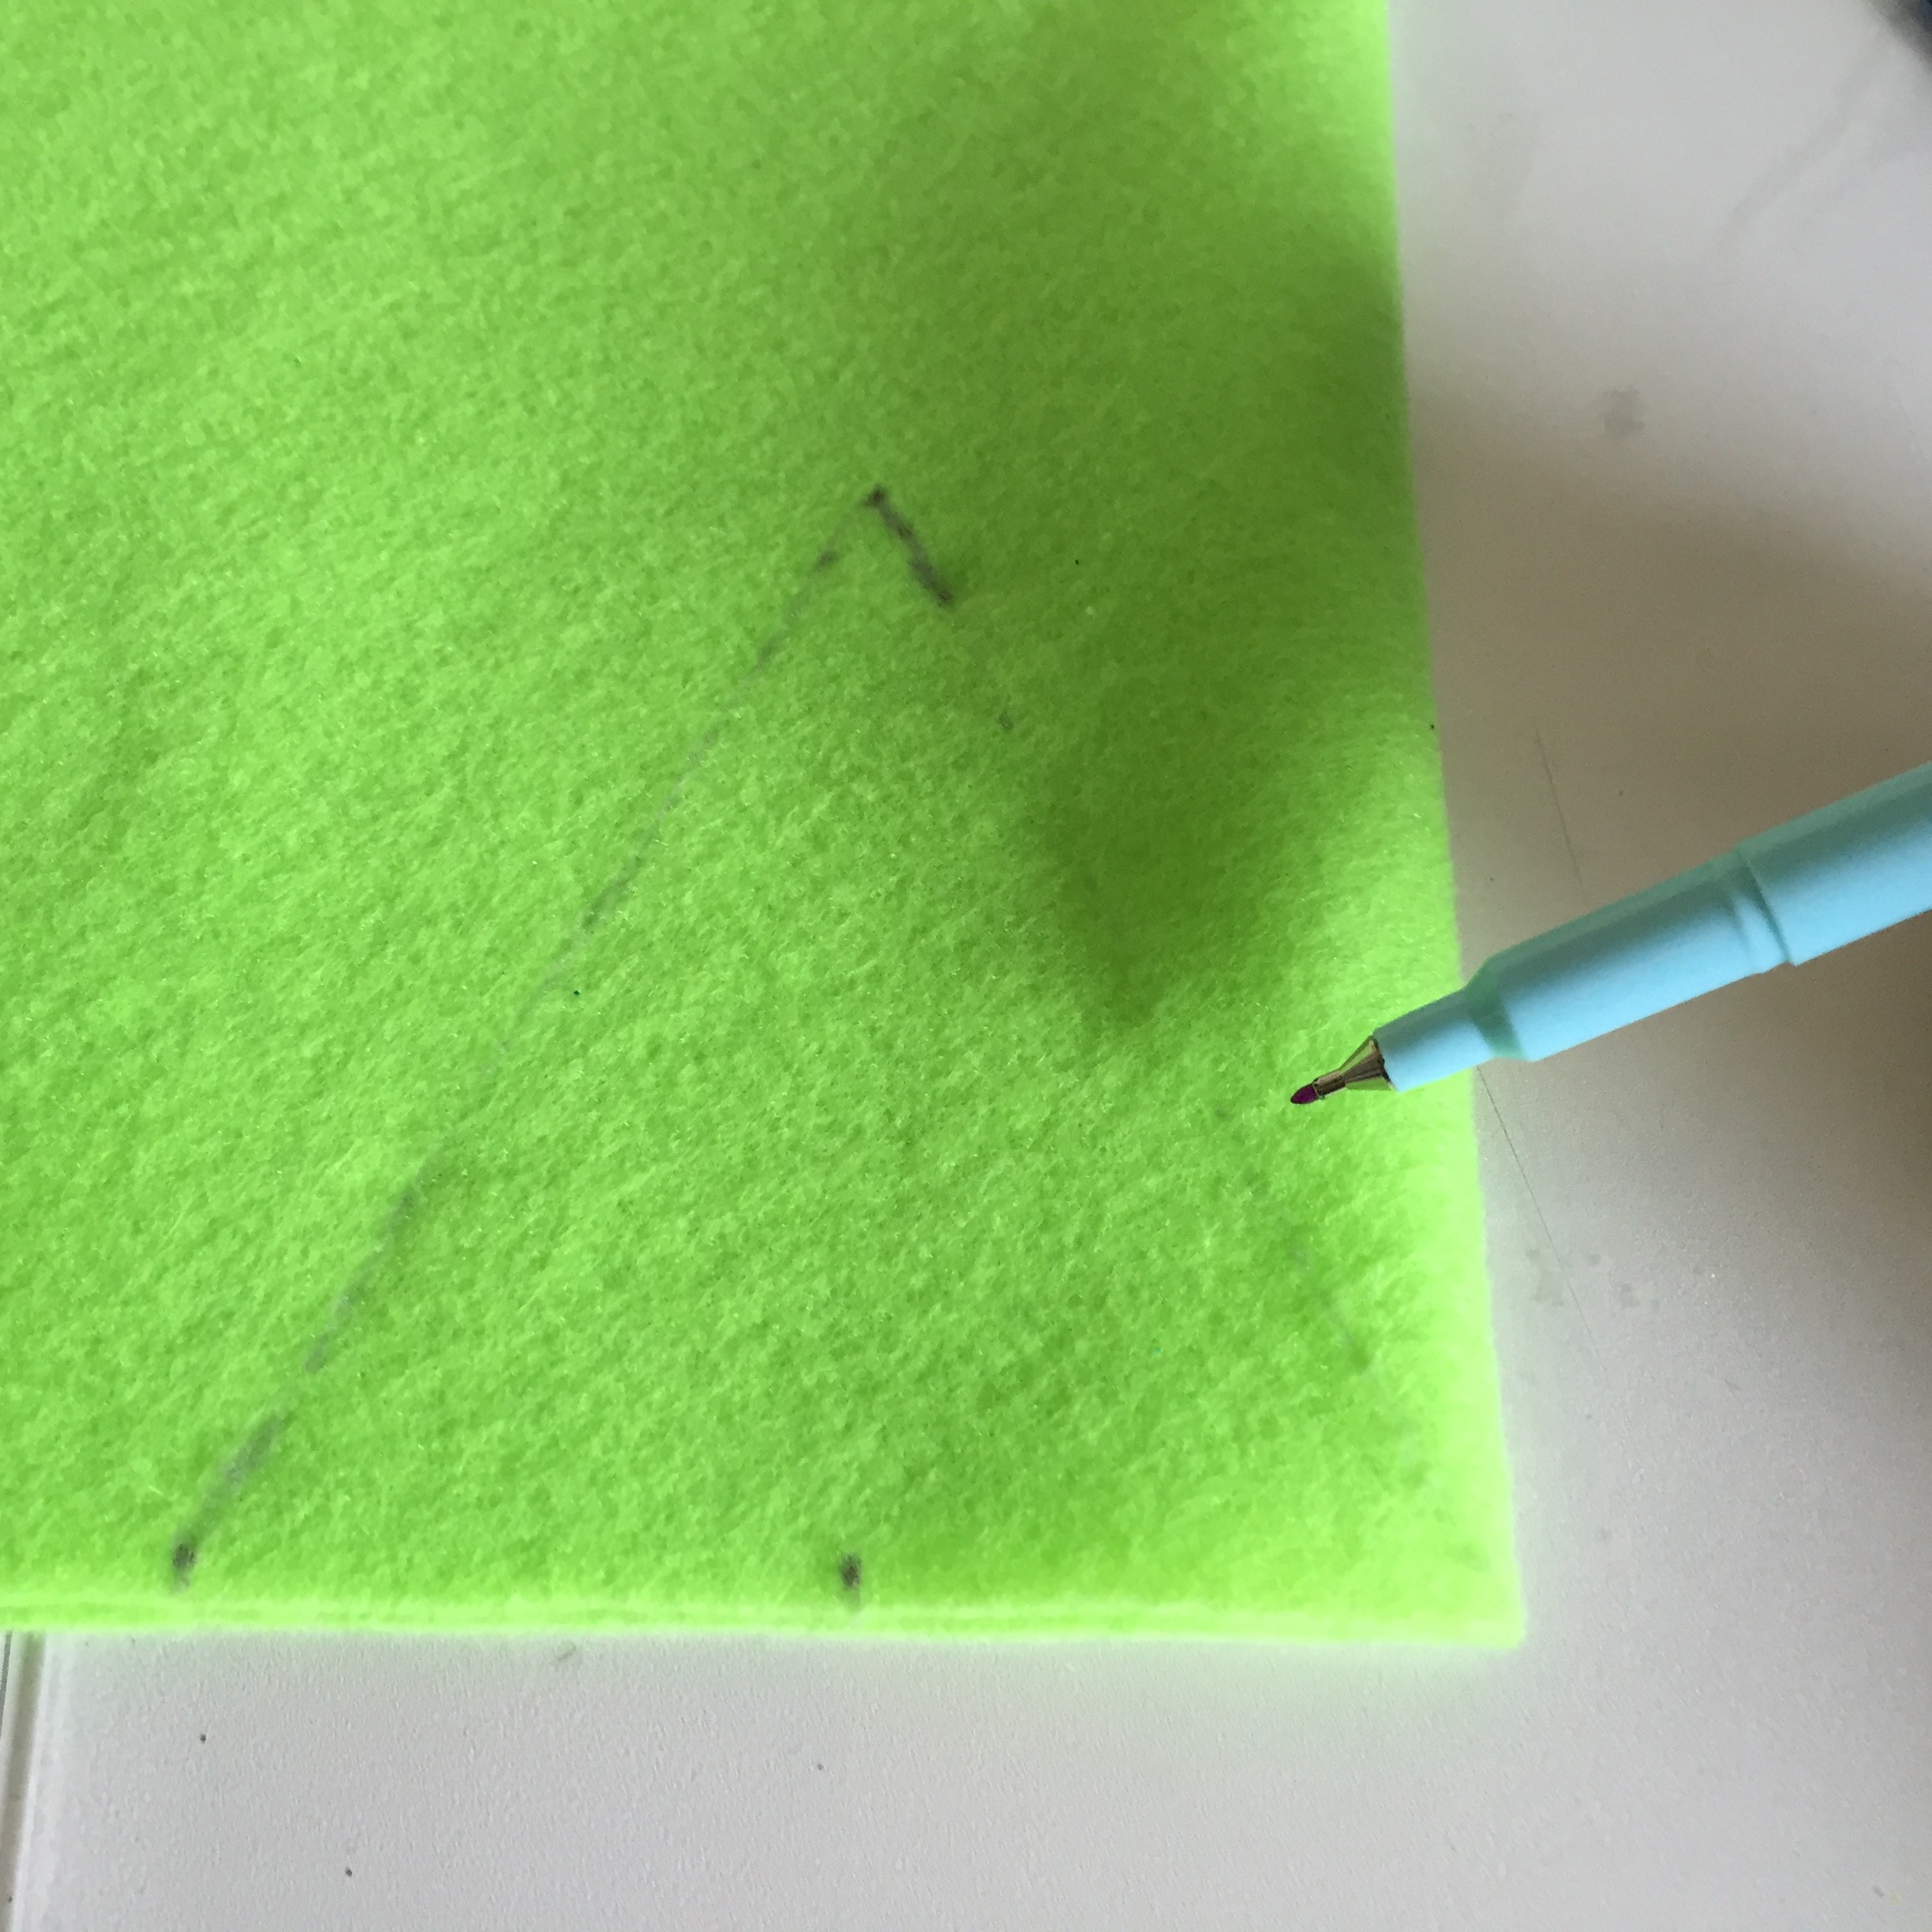
- Now, take your ruler and make a straight line with your pen from the top mark to the bottom of one of the sides. Repeat on the other side to make a perfect triangle.
- Once you have your triangle traced, cut it out of both sides of the felt.
Step 2:
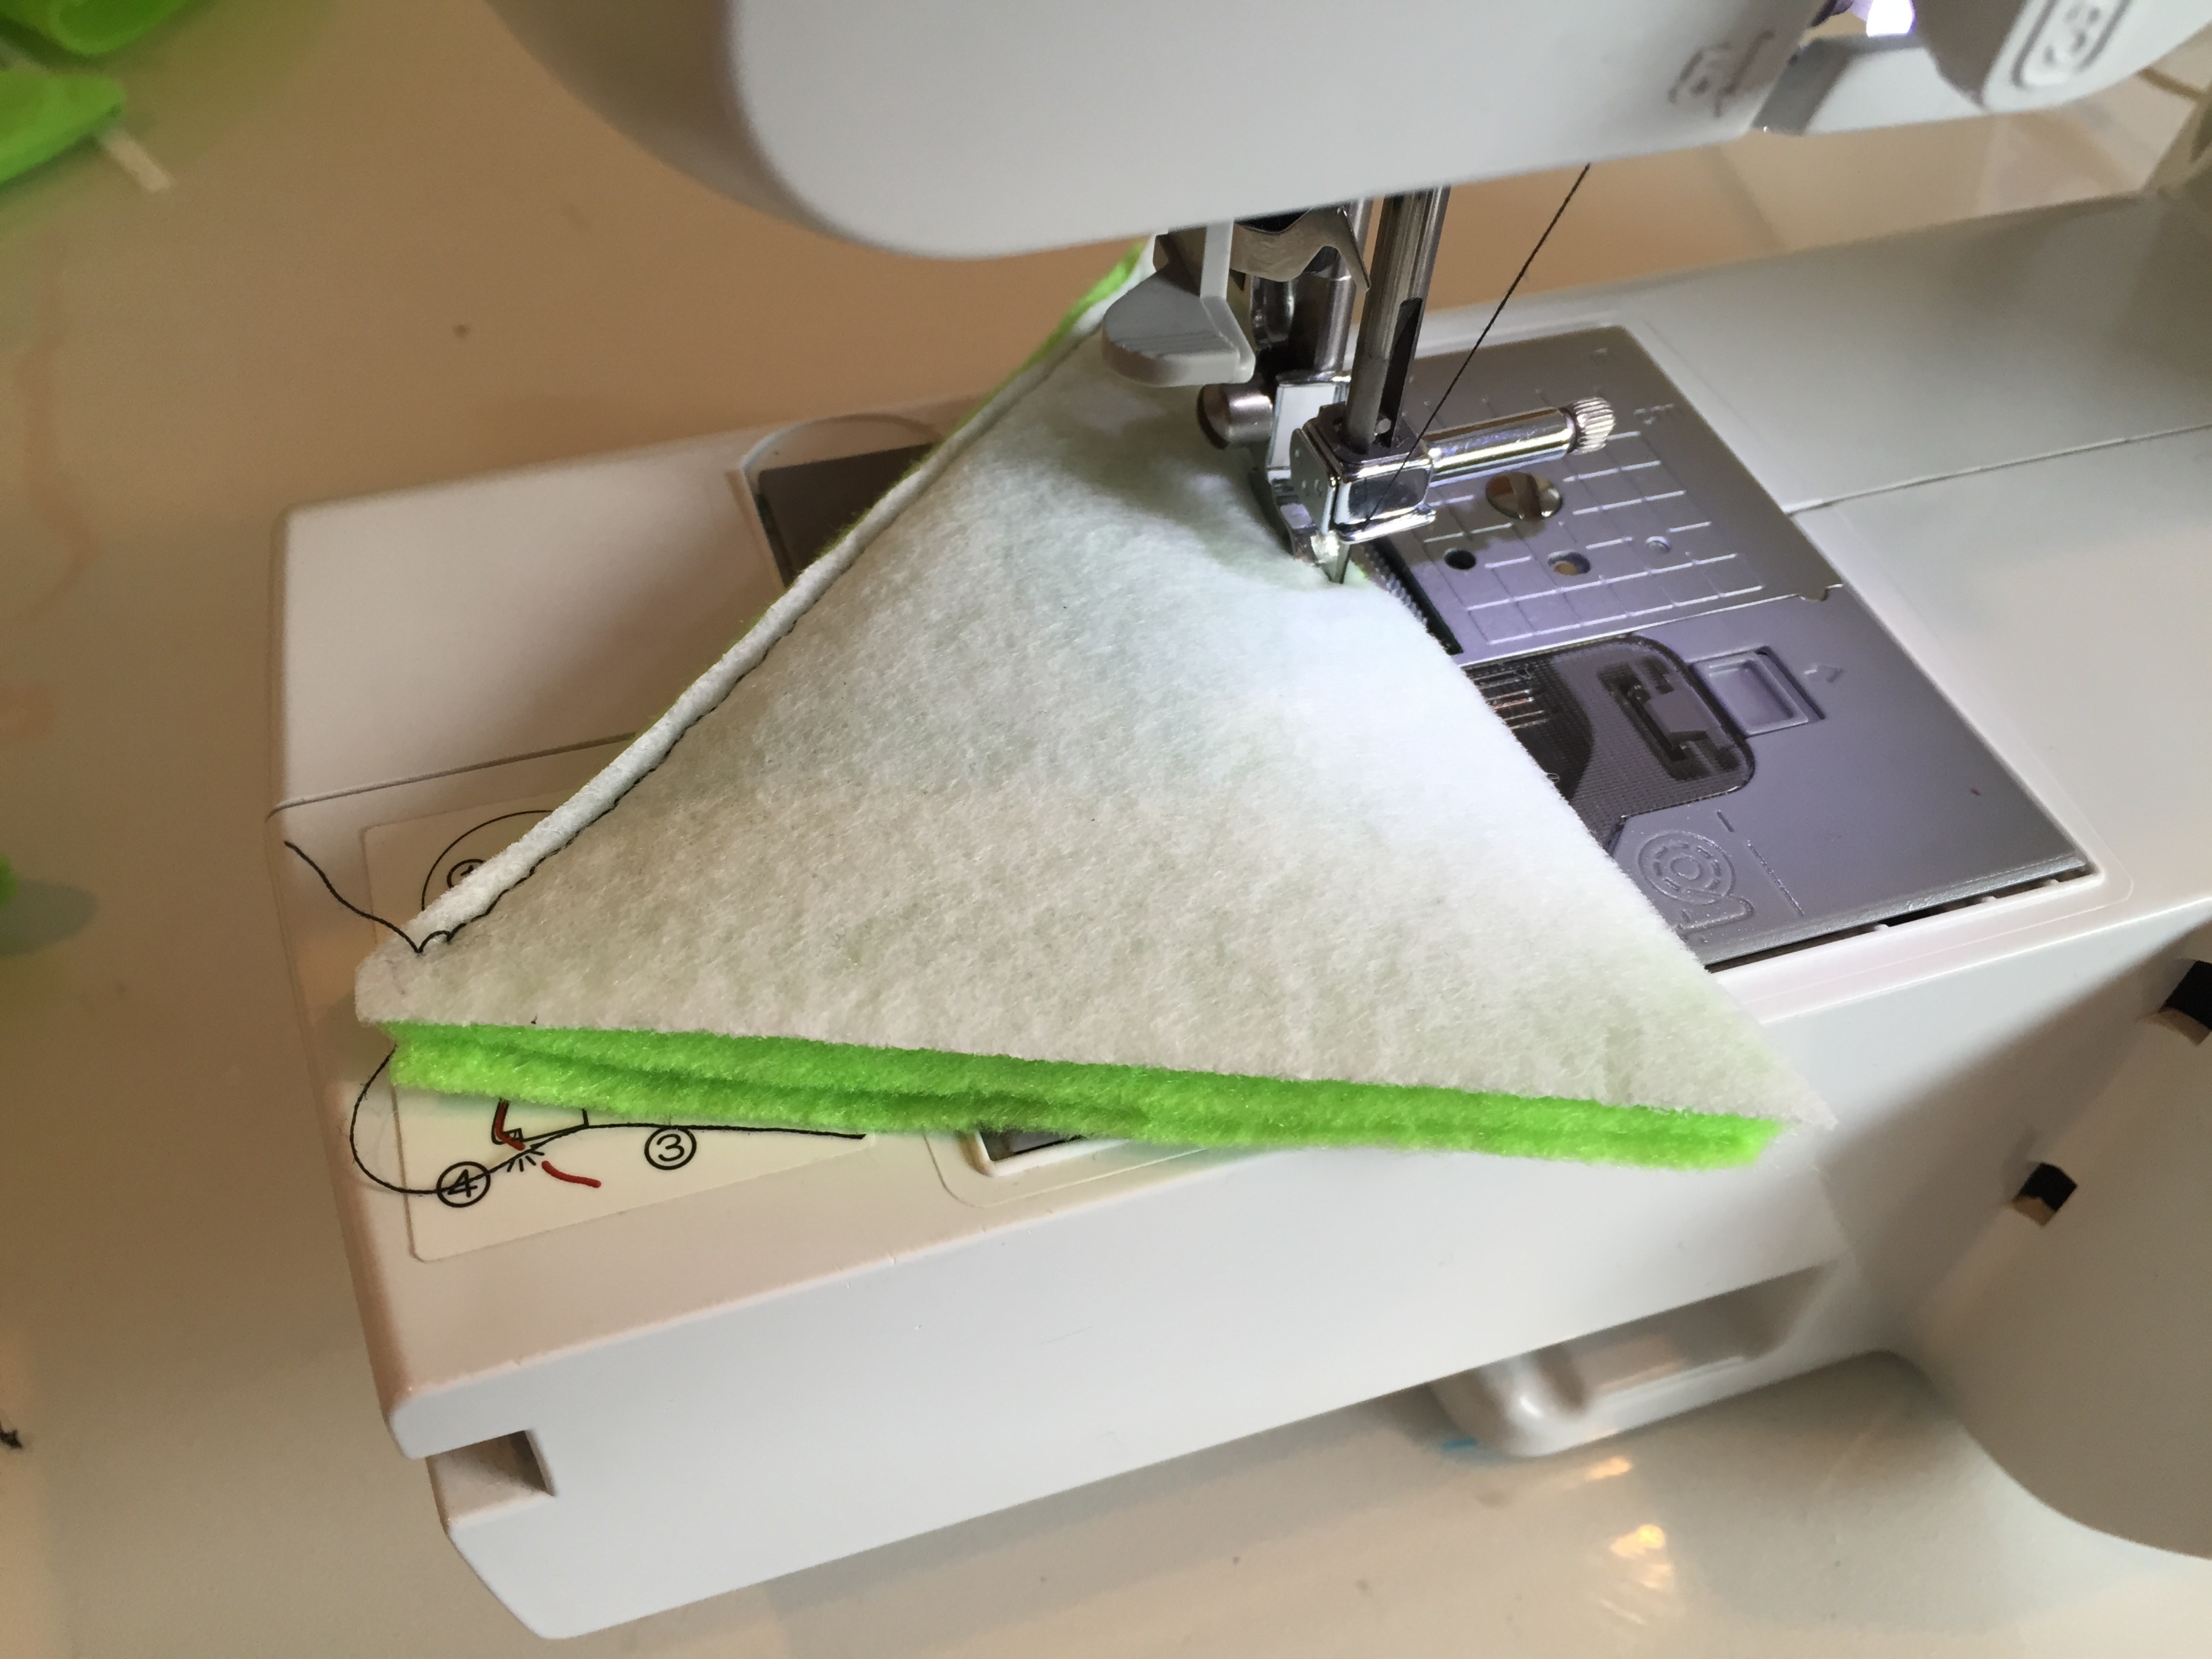
- Now, take your felt triangle and place it on top of the stabilizer fabric. Trace the triangle onto the stabilizer fabric, then cut it out.
- Then, use your sewing machine and sew around the top 2 sides of the triangle – with both felt triangles underneath the stabilizer fabric triangle.
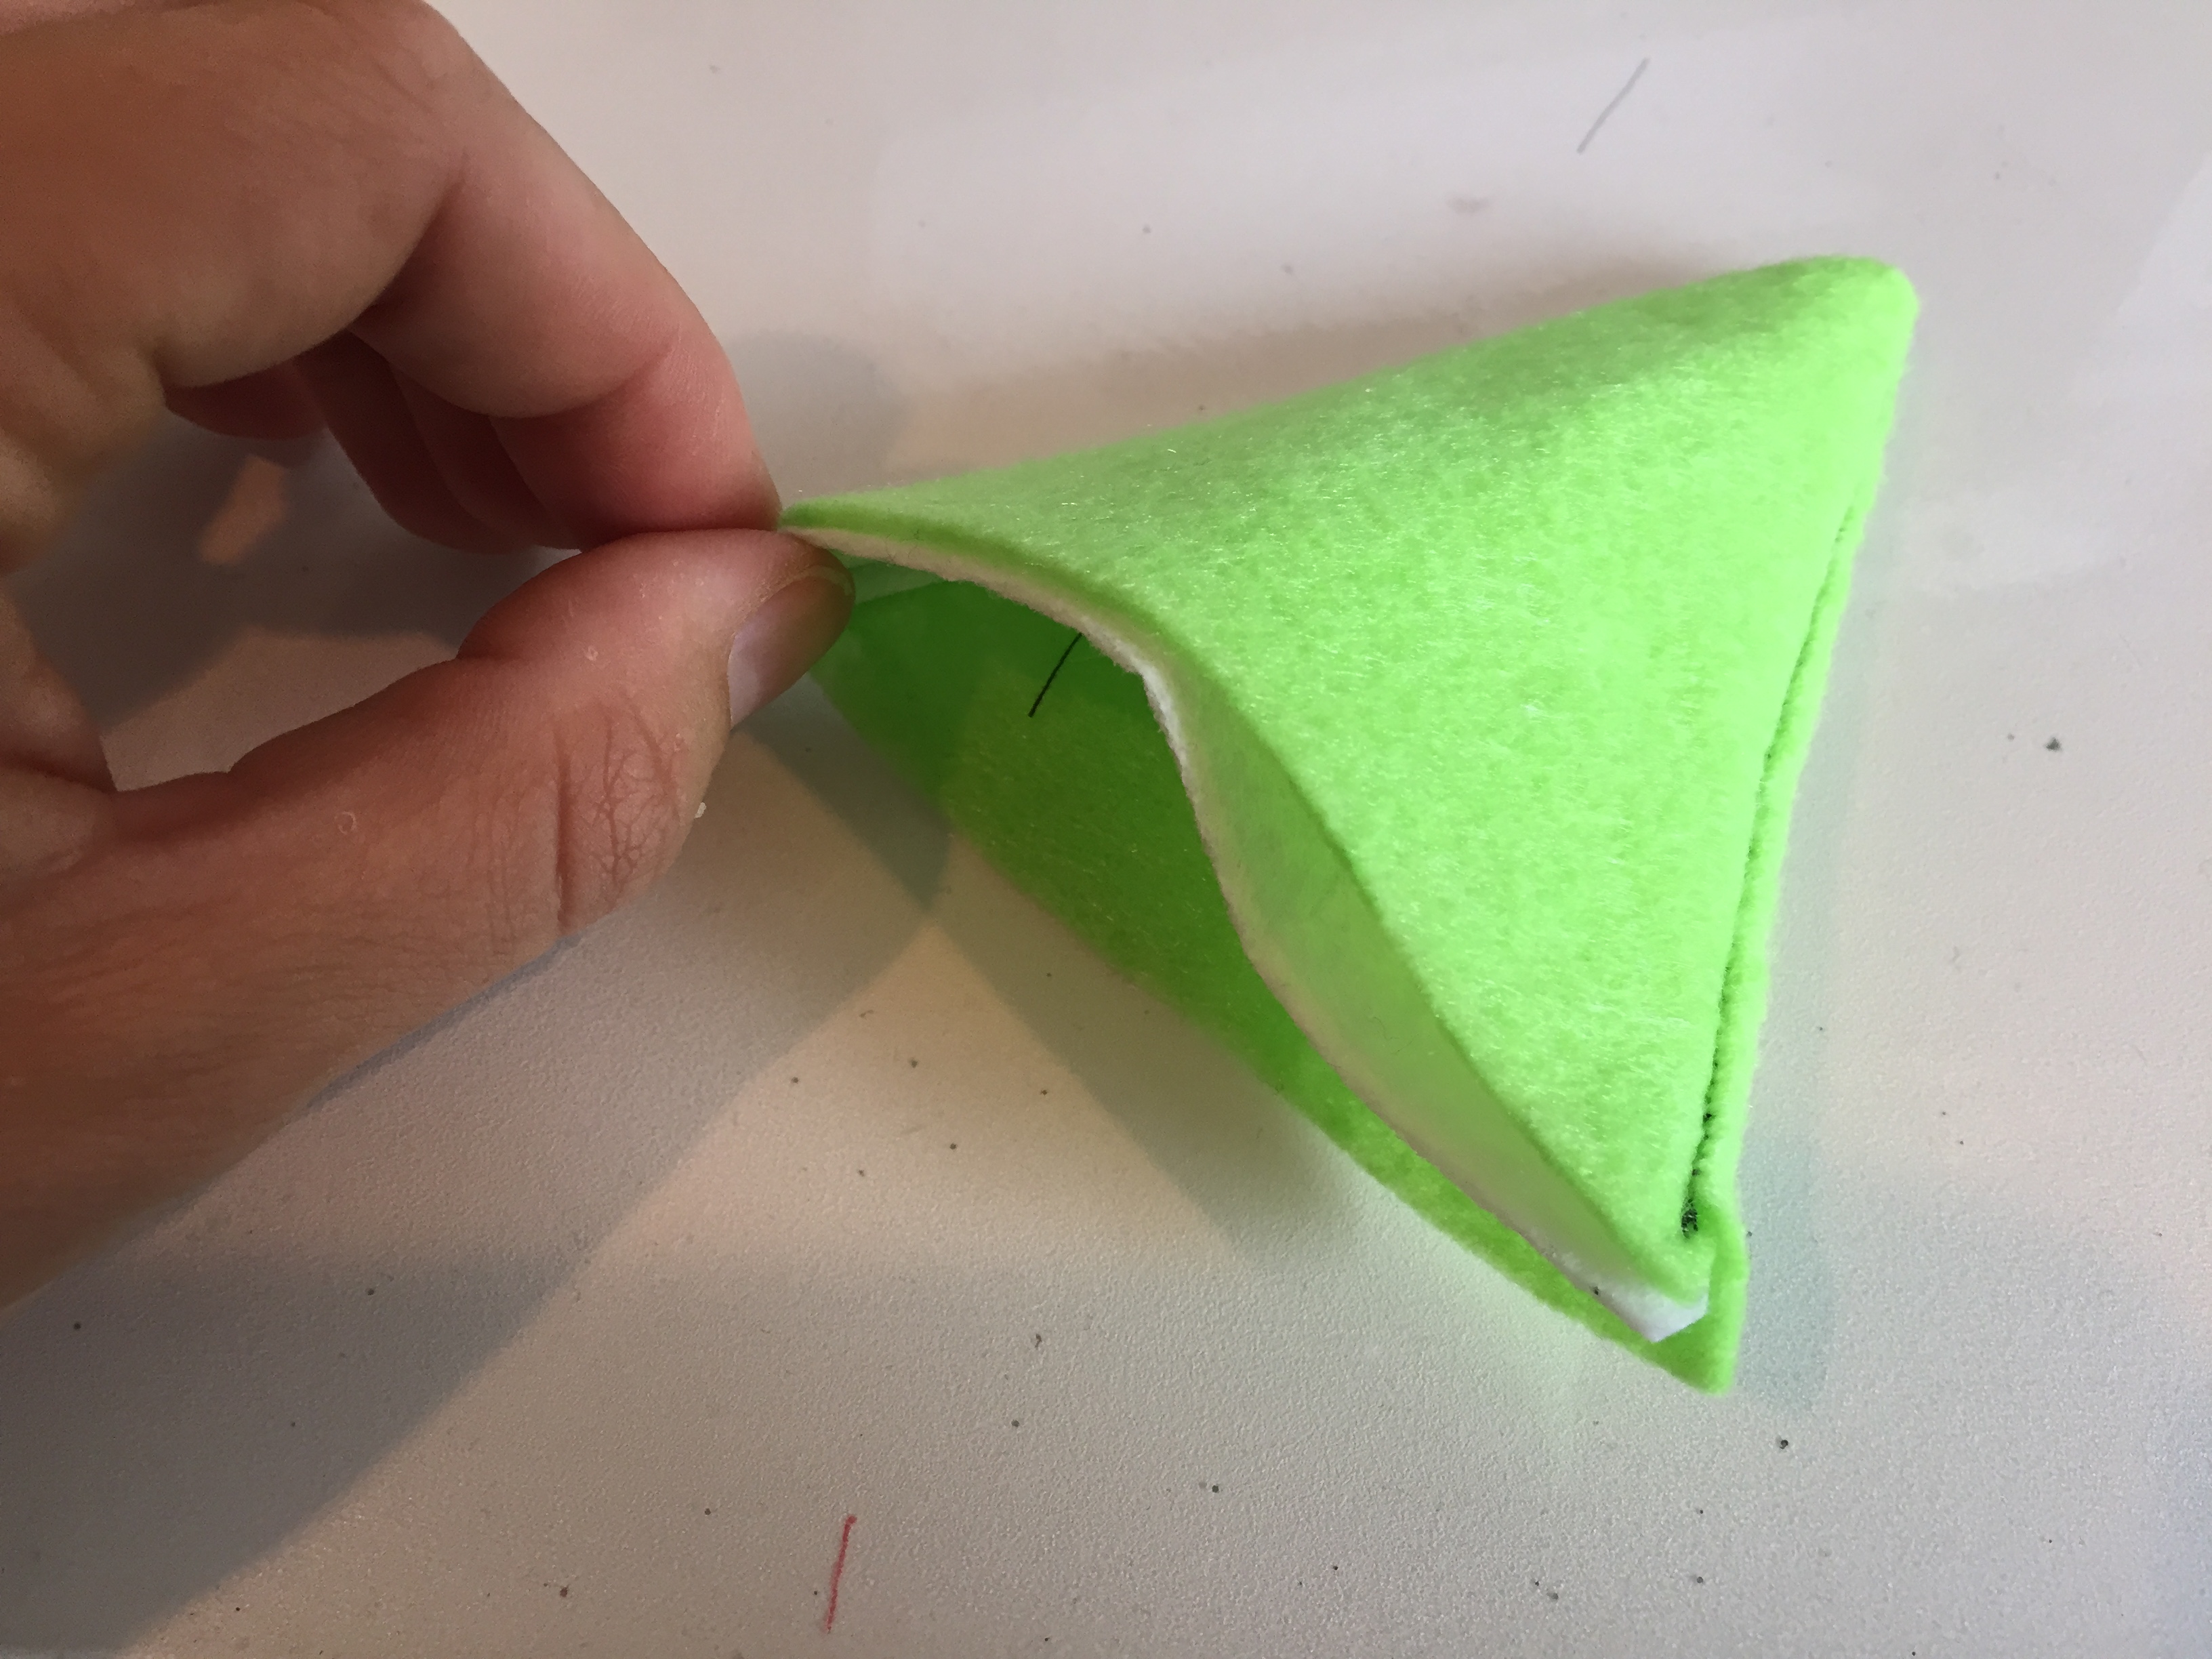
- Once the sides are sewn together, remove from your sewing machine and turn the triangles inside out – so that the seams are now on the inside, as well as the stabilizer fabric.
- The white stabilizer fabric will be surrounded by the 2 other pieces of felt once you flip the triangles inside out.
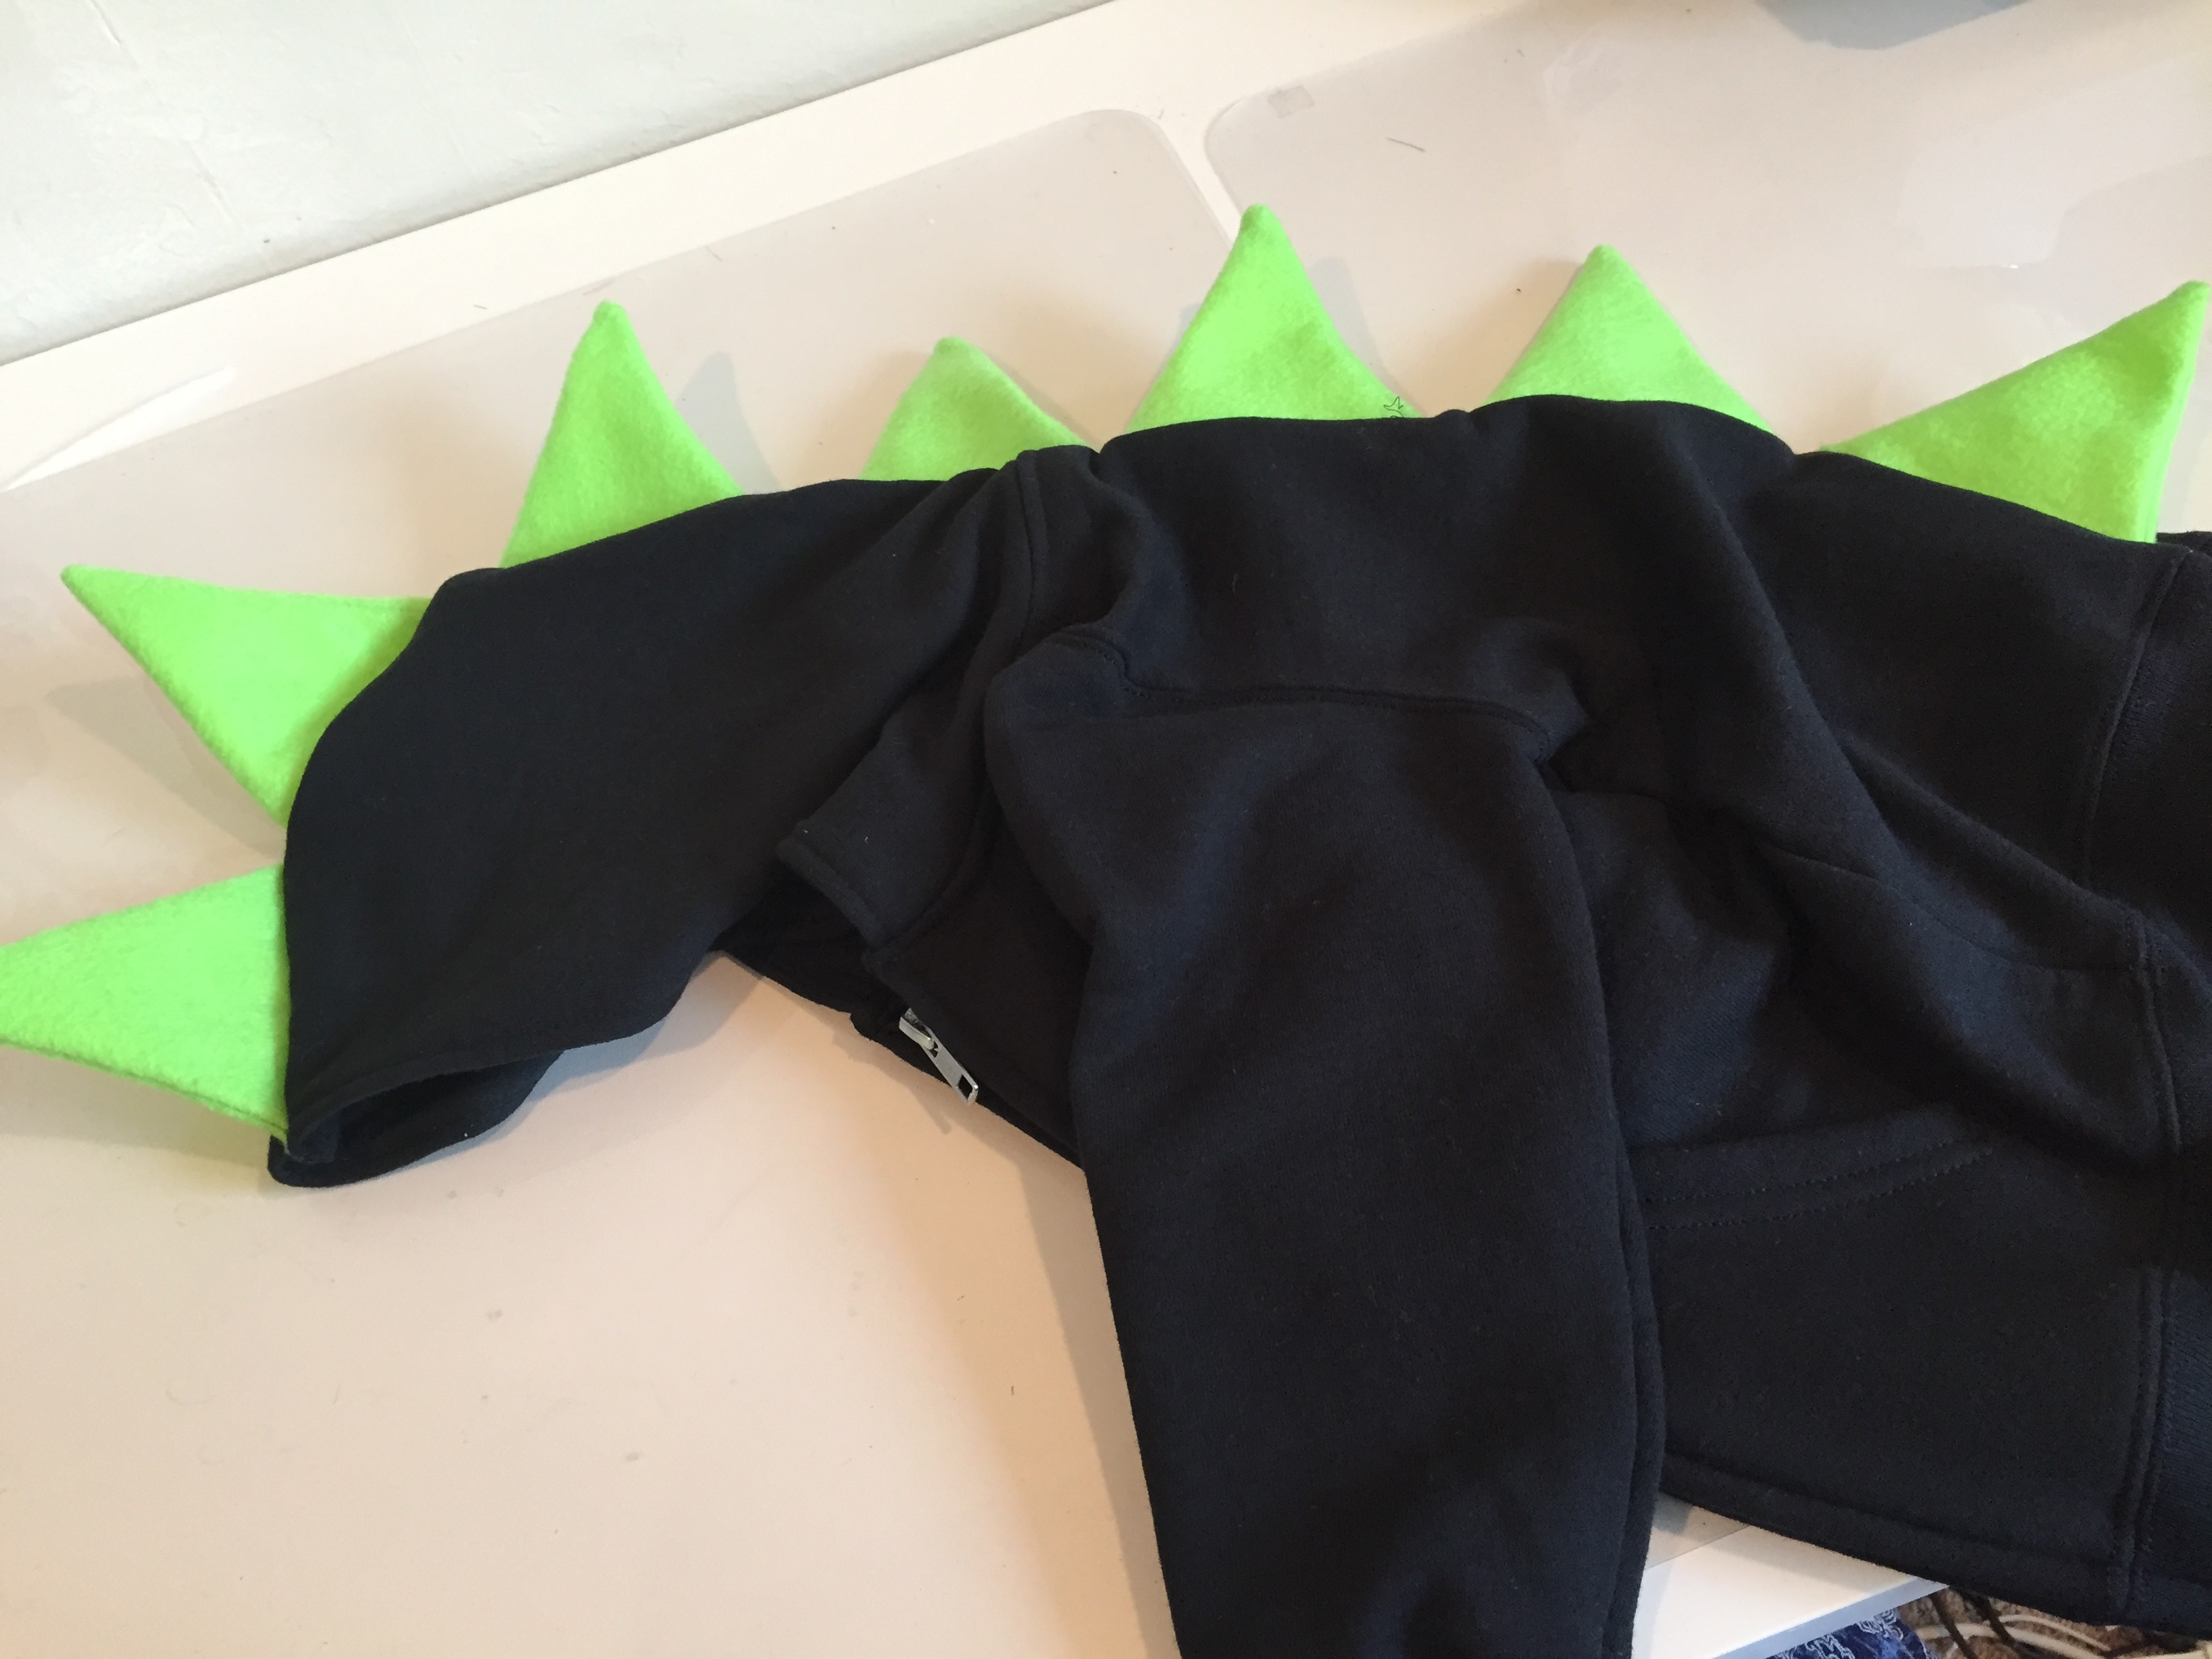
- Repeat for as many triangles as you’ll need to go dow the entire back of the sweatshirt.
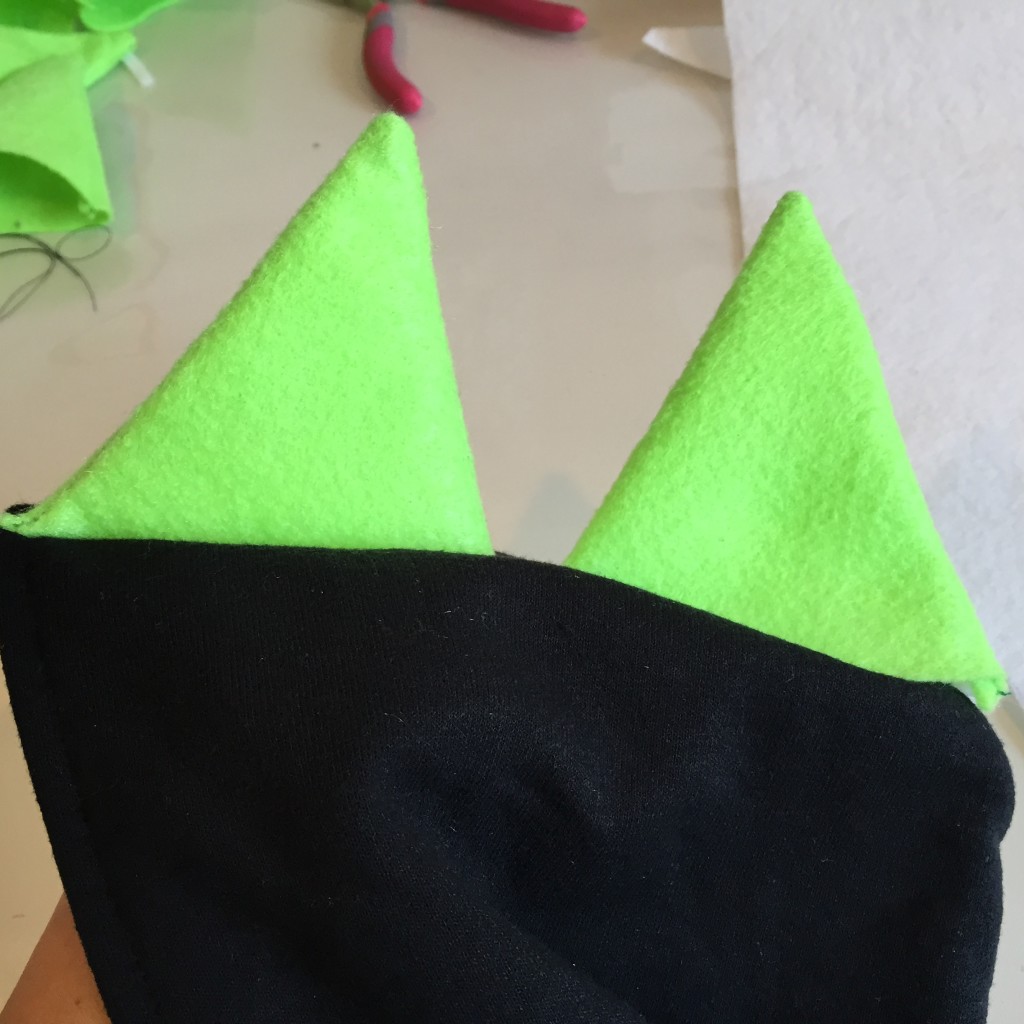
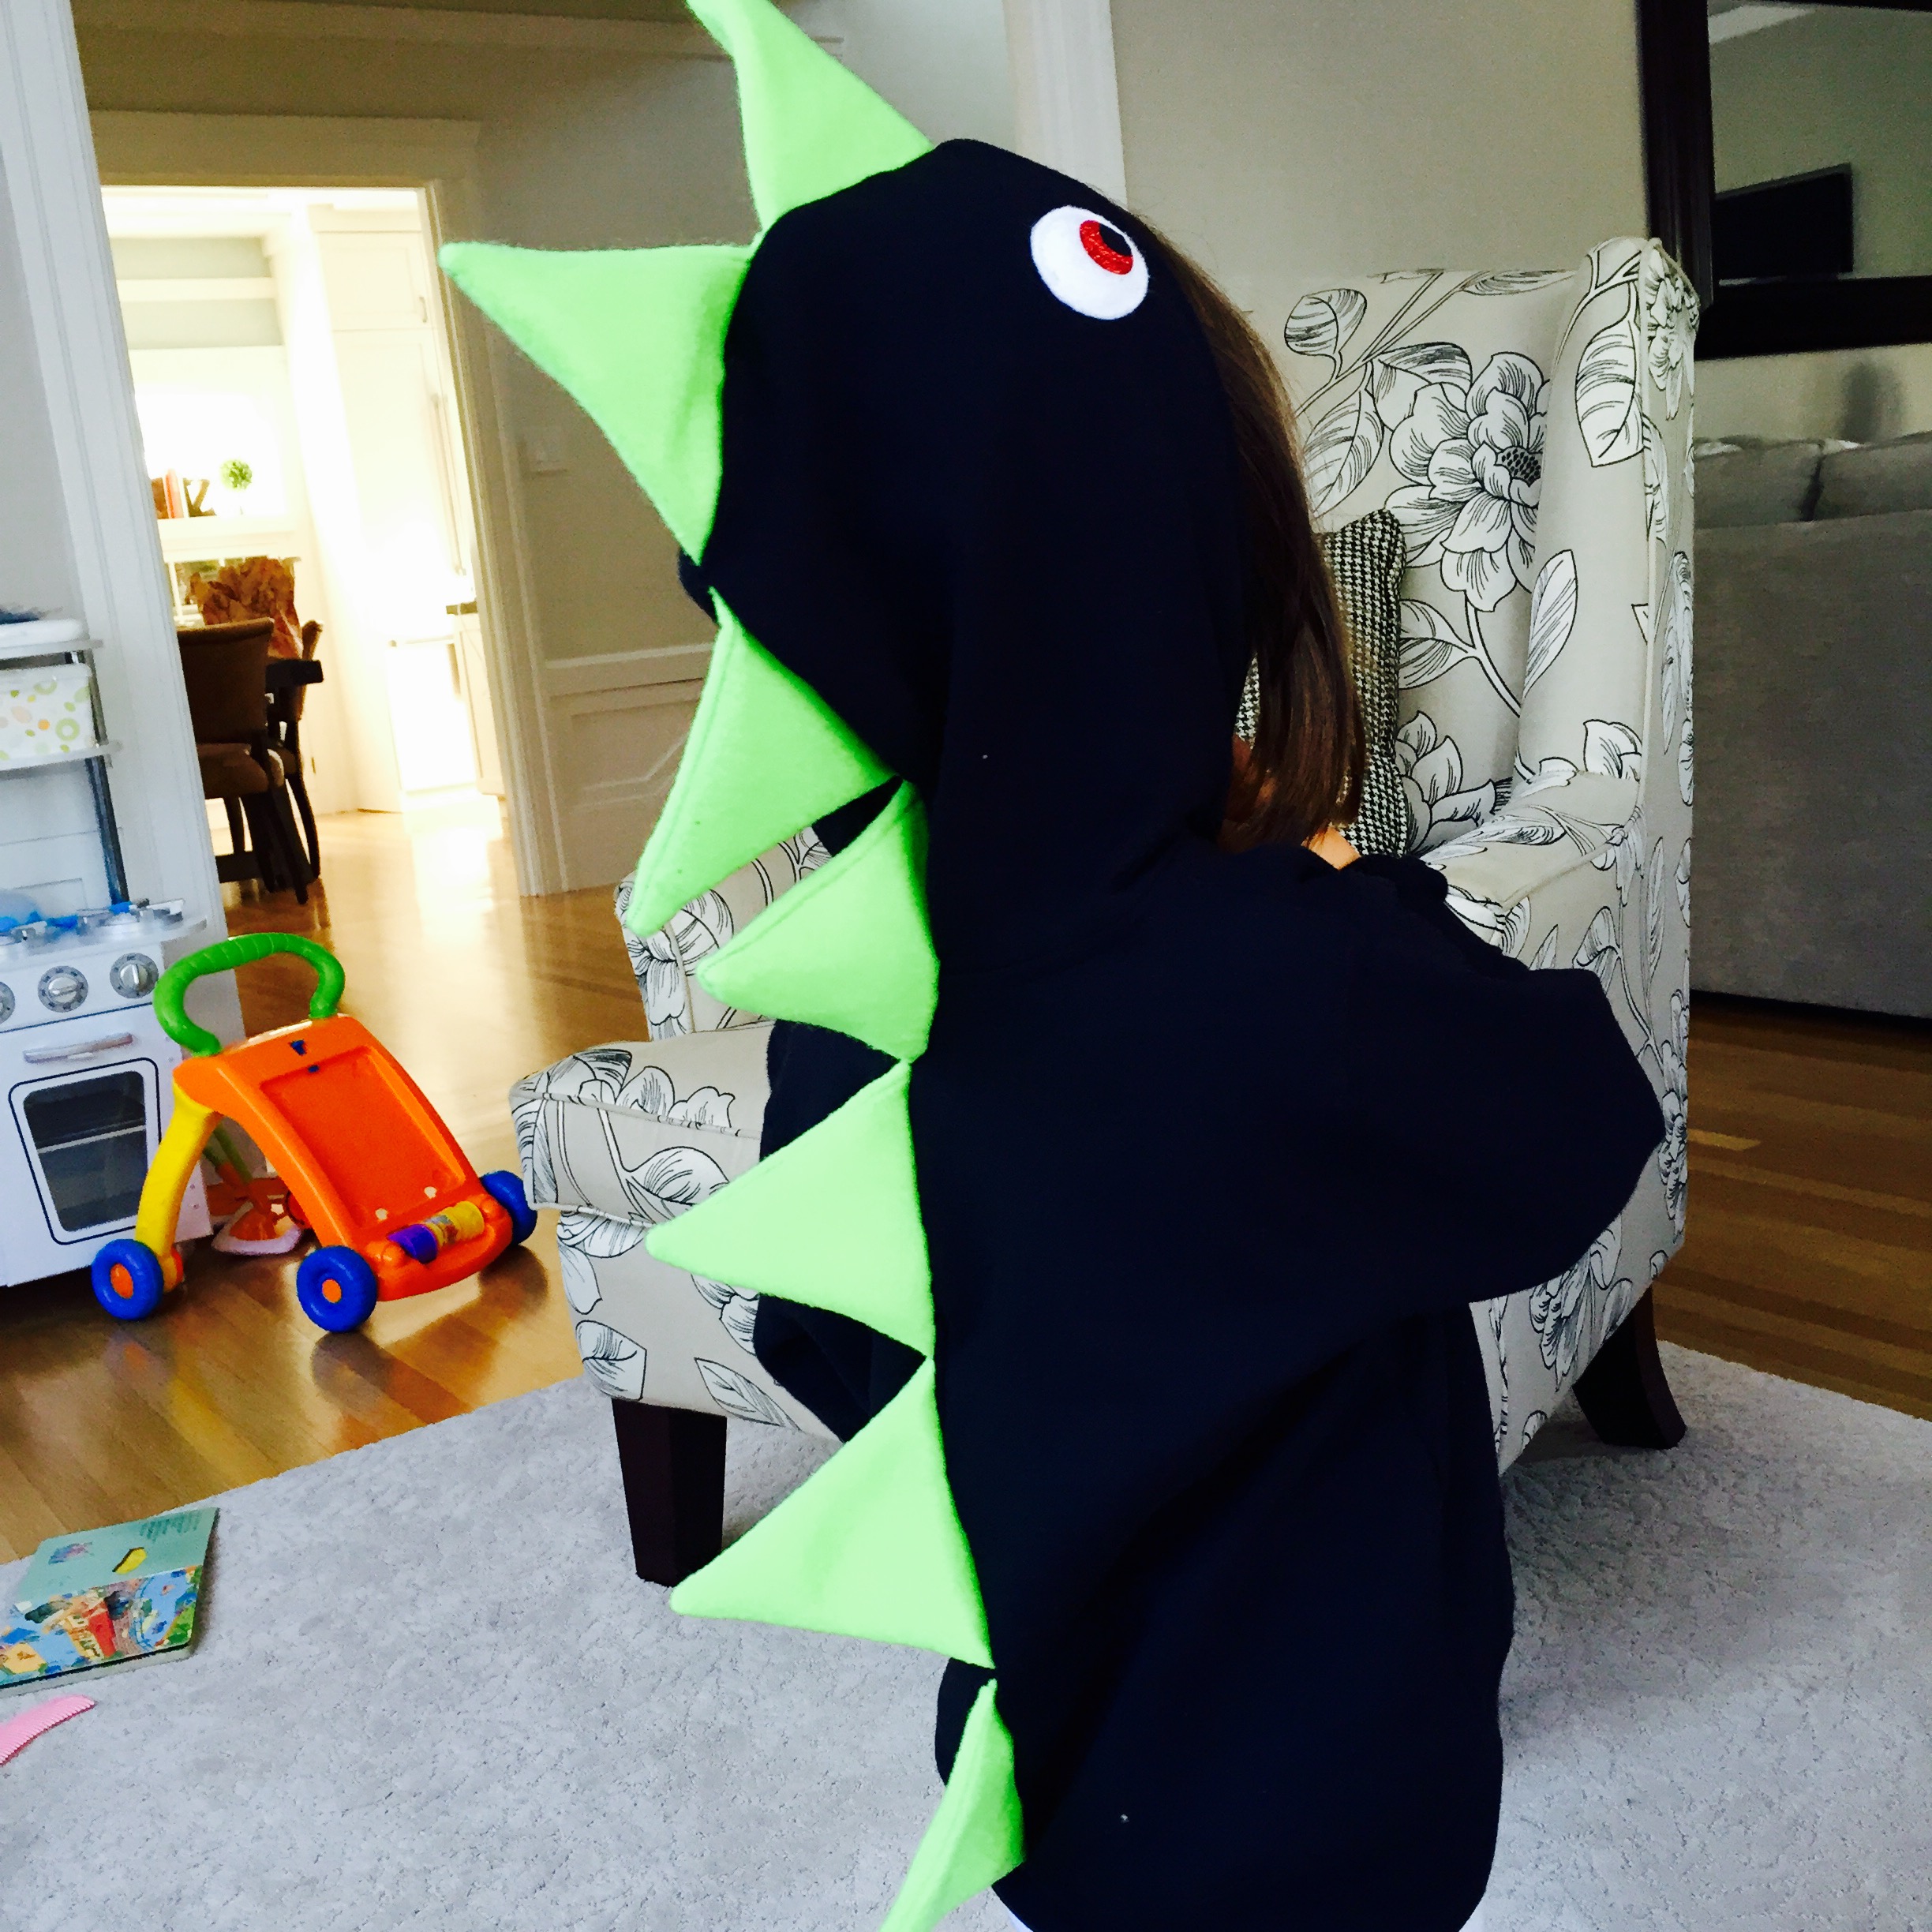
Step 3:
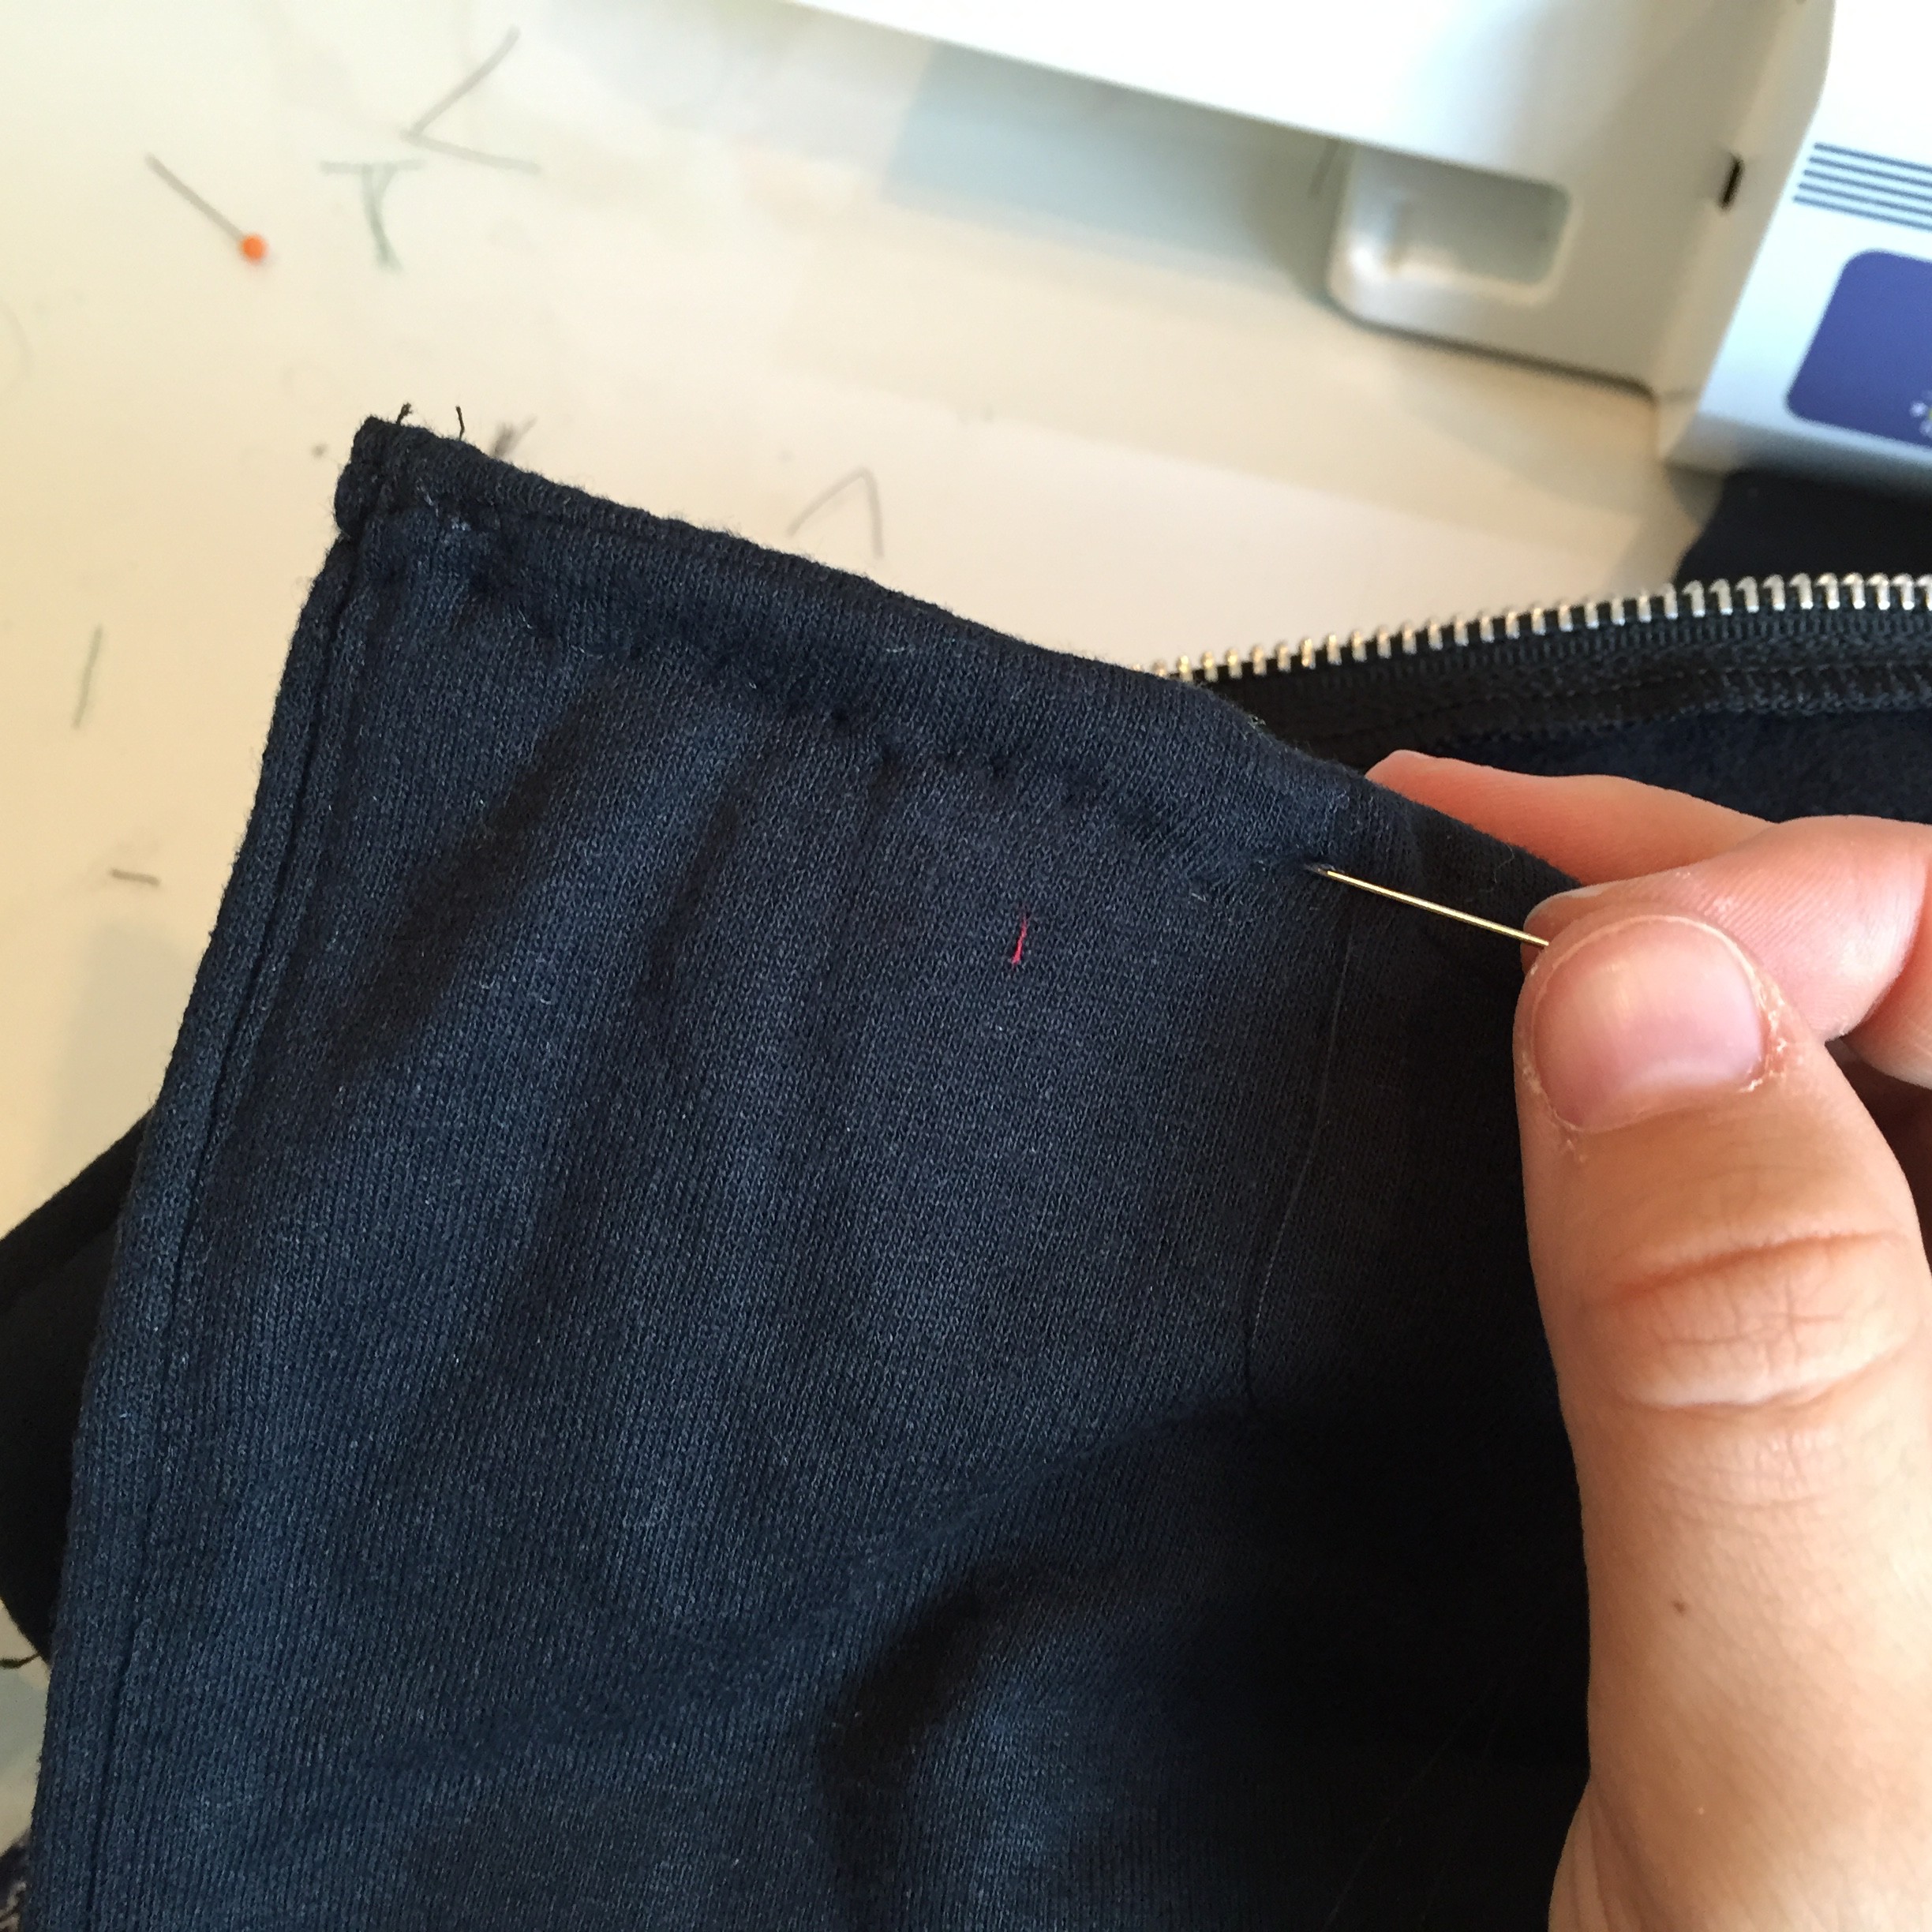
- Start at the front of the hood. Push one of your triangle pieces into the seam.
- Then, on the inside of the hood, pinch the sides of the sweatshirt up against the sides of the triangle – as tightly as you can so that the triangle sits as far into the seam as possible.
- Use a sewing pin to hold the fabric and triangle in place.
- Then, with your needle and thread, sew in a line from one side to the other across the fabrics.
- Here you are sewing the sides of the sweatshirt directly onto the triangle piece, with the triangle nudged into the sweatshirt seam.
- PRO TIP: This is much harder than it seems. When you are sewing, I advise using a needle and thread first and NOT a sewing machine so you can actually feel the thread going through all 5 layers of fabric. When I first attempted this, it took me 4 tries before I could sew the triangle piece into the seam. You need to make sure it’s really wedges in there and that the needle is penetrating ALL layers of fabric on each stitch (it’s easy to feel, not so easy on the sewing machine)
- Here you are sewing the sides of the sweatshirt directly onto the triangle piece, with the triangle nudged into the sweatshirt seam.
Step 4:

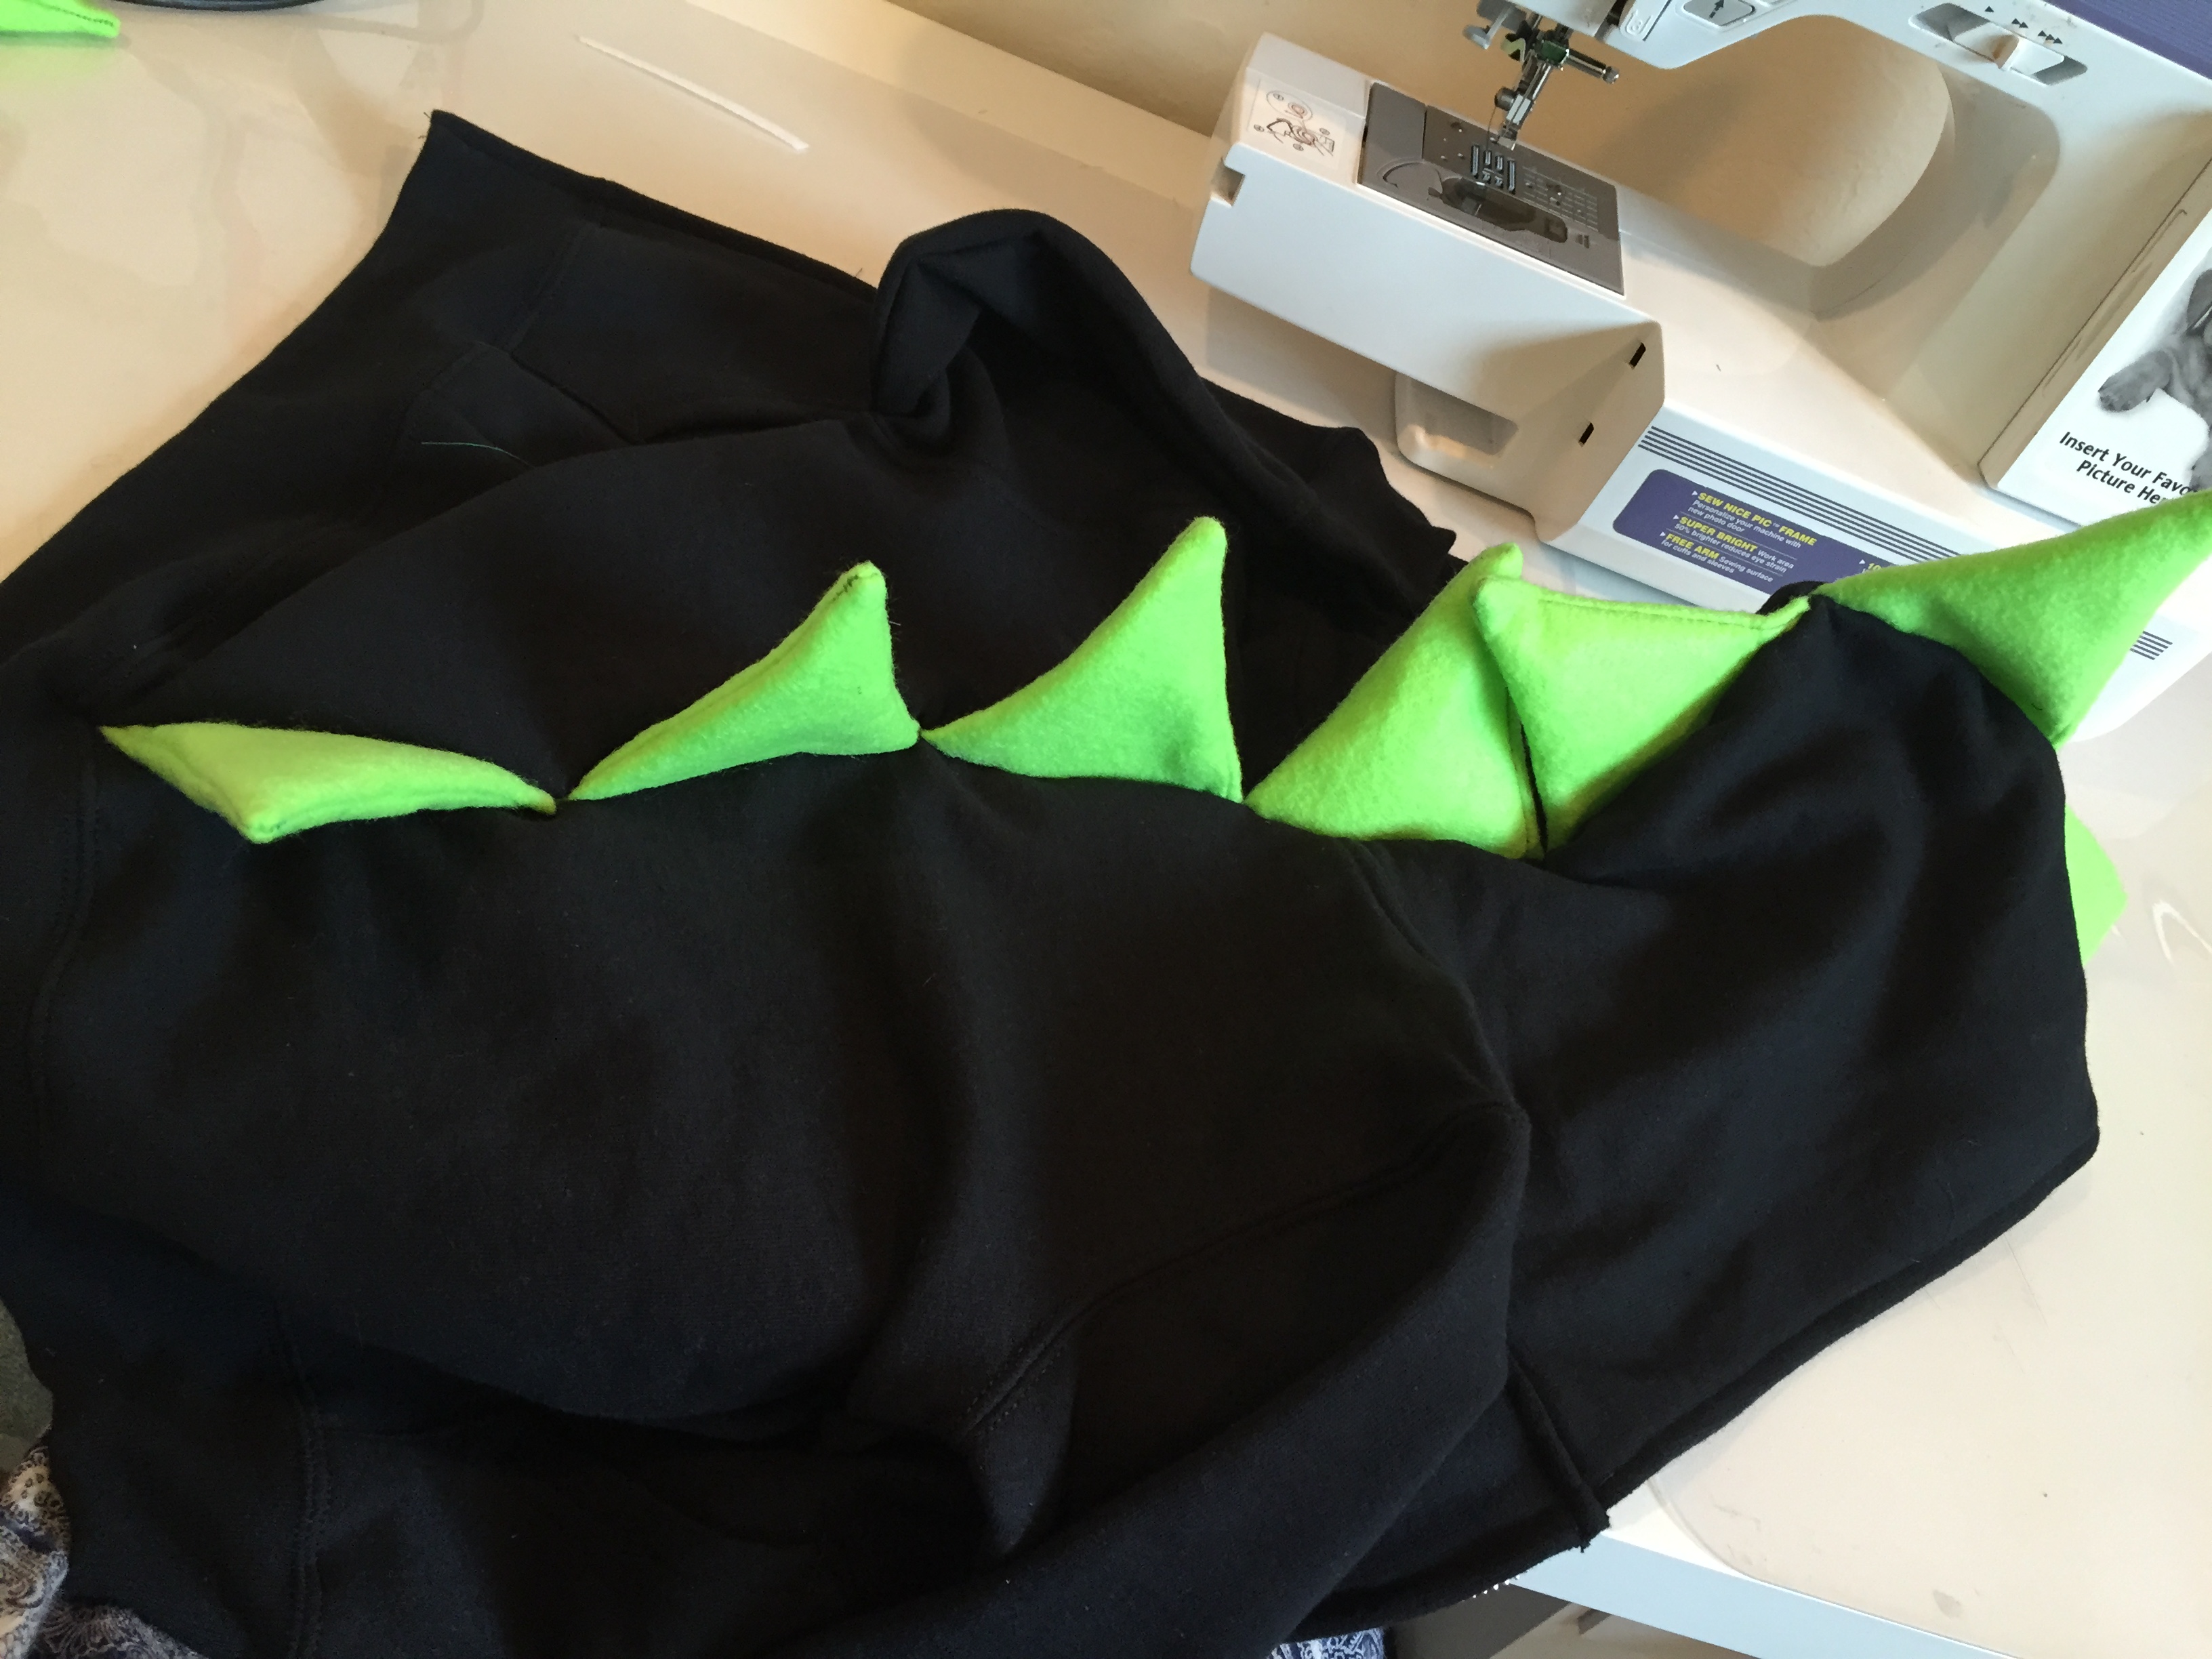
- For the next triangle, line it up next to the first one you have sewn into the sweatshirt seam. Hold and pin in place tightly.
- Then, repeat Step 3 all the way down the sweatshirt.
- Pro Tip: Again, watch your lines. The hood should have a seam so it’s easy to stay in a straight line. The back of the hoodie does not. Either draw a straight line before sewing down the back with an erasable pen, or be careful each time you add a triangle that it is perfectly aligned straight down the sweatshirt.
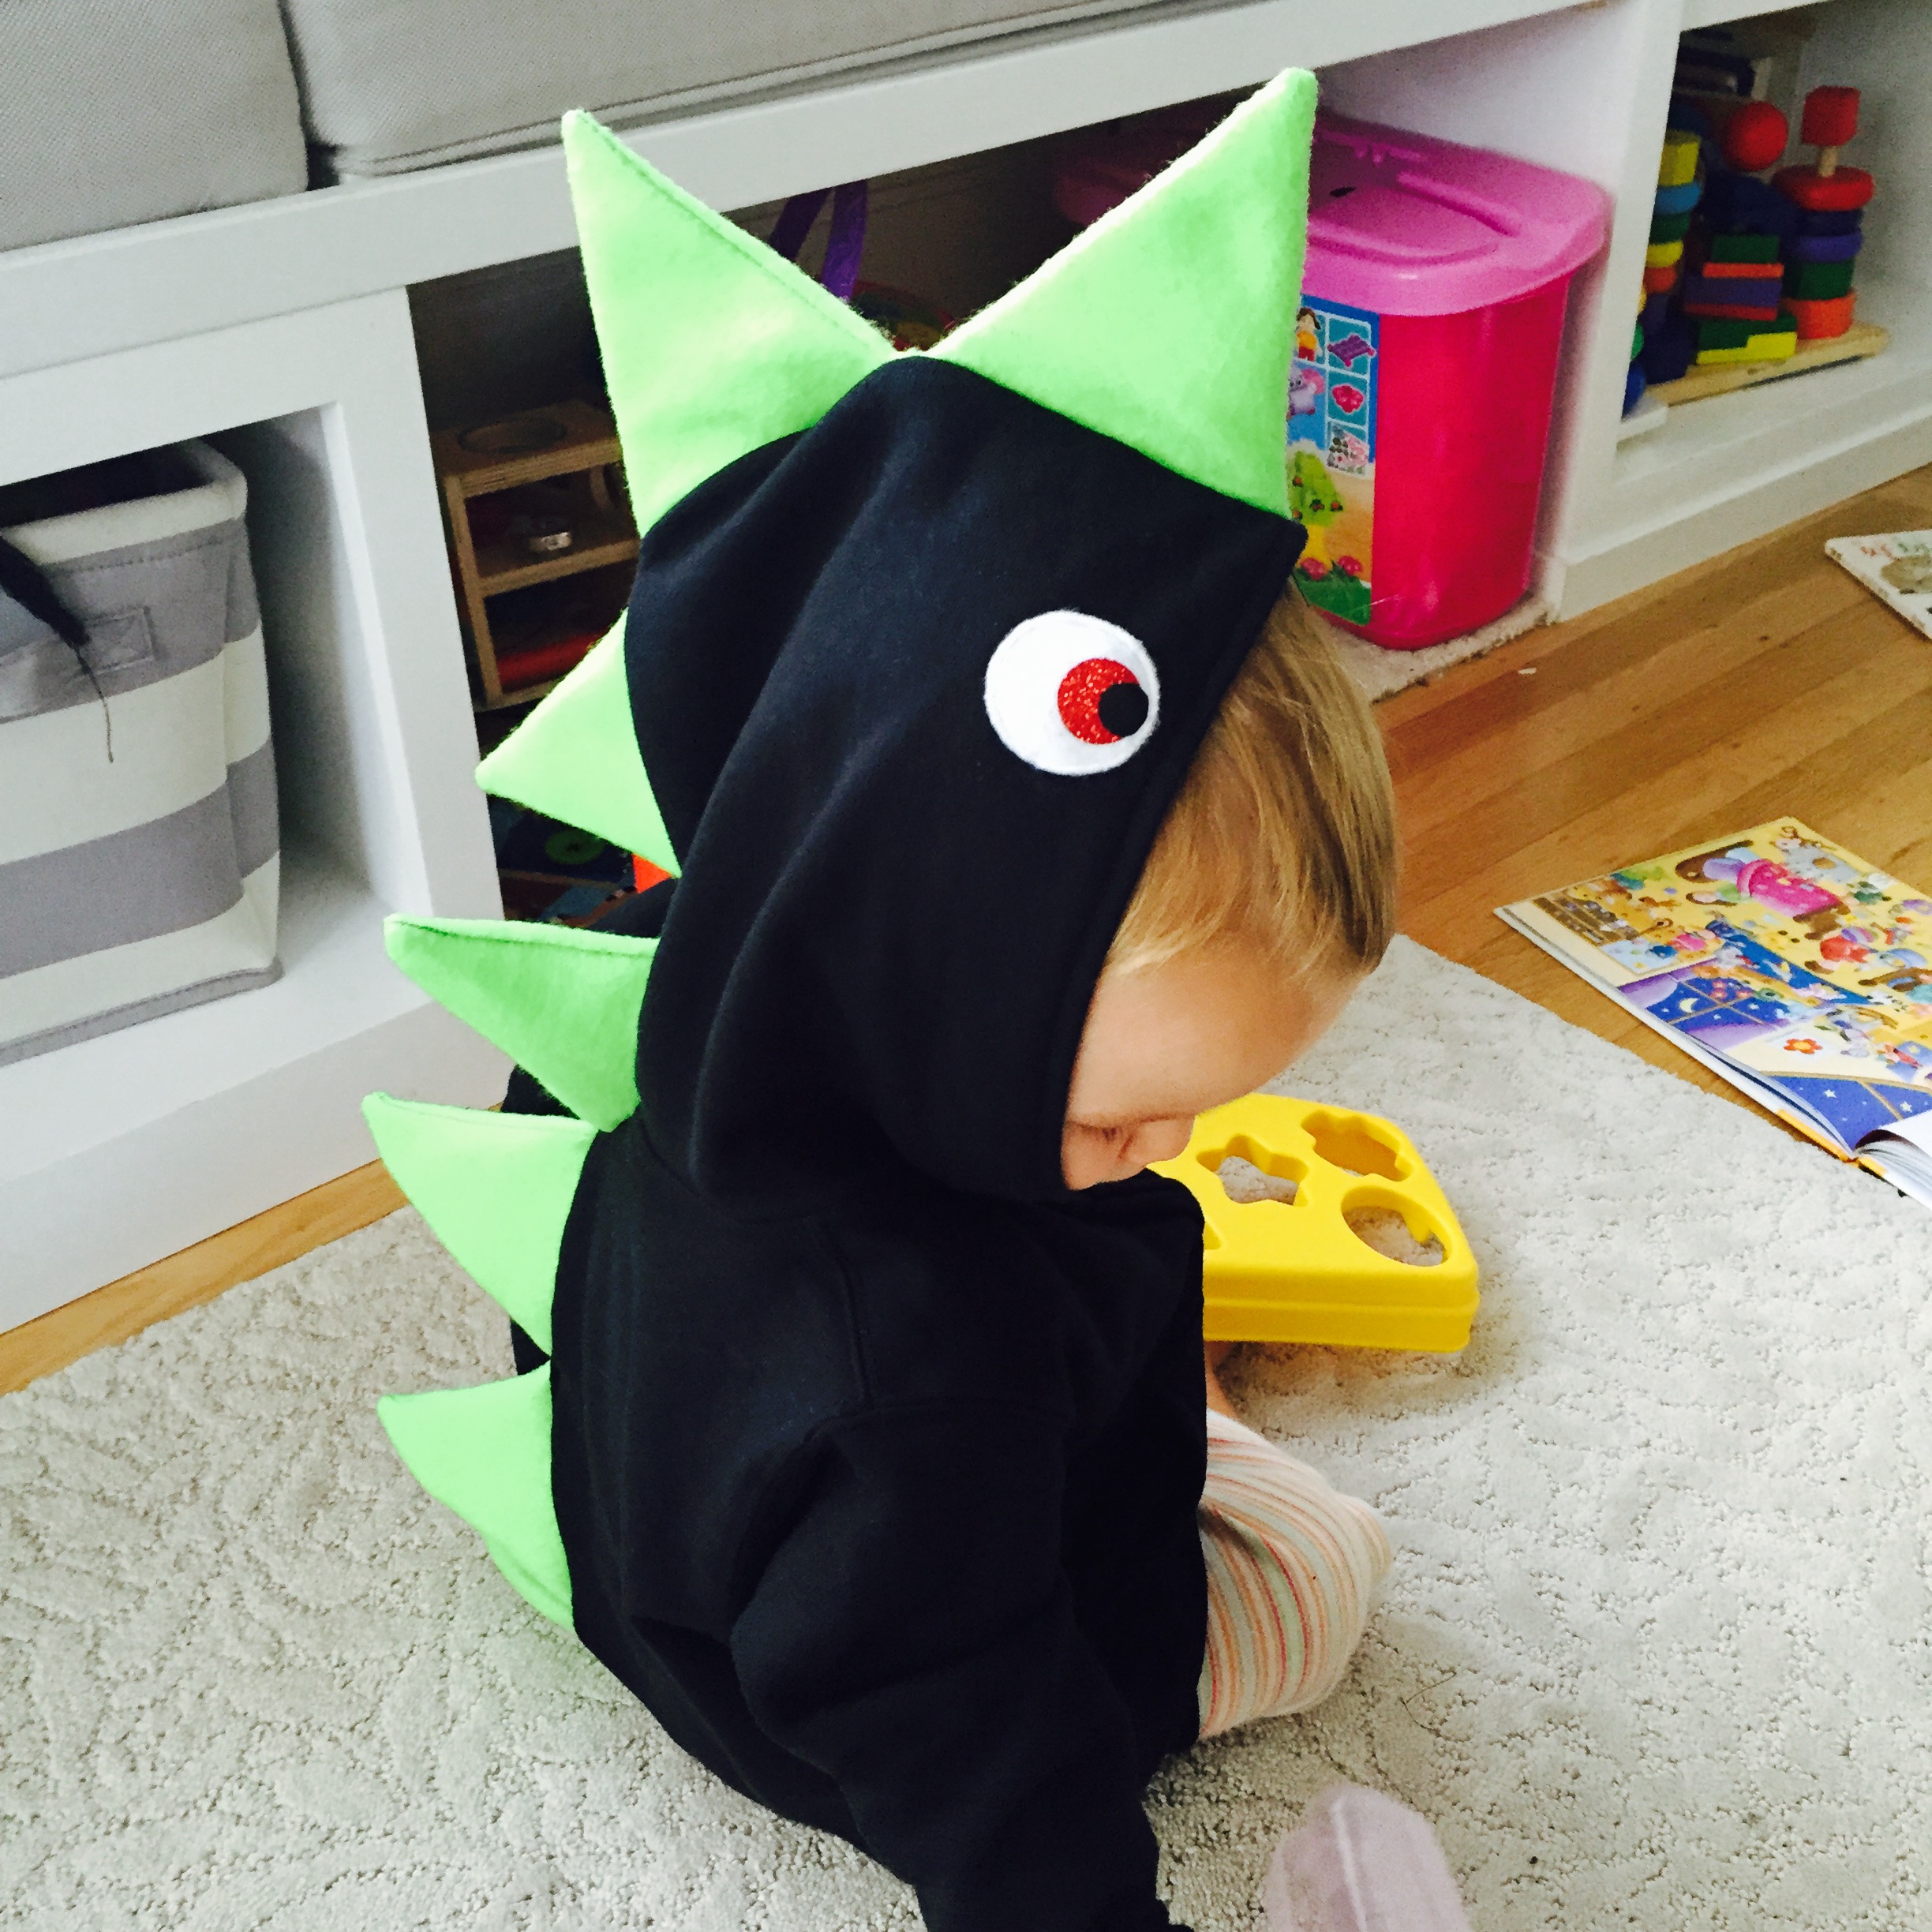
Step 5:
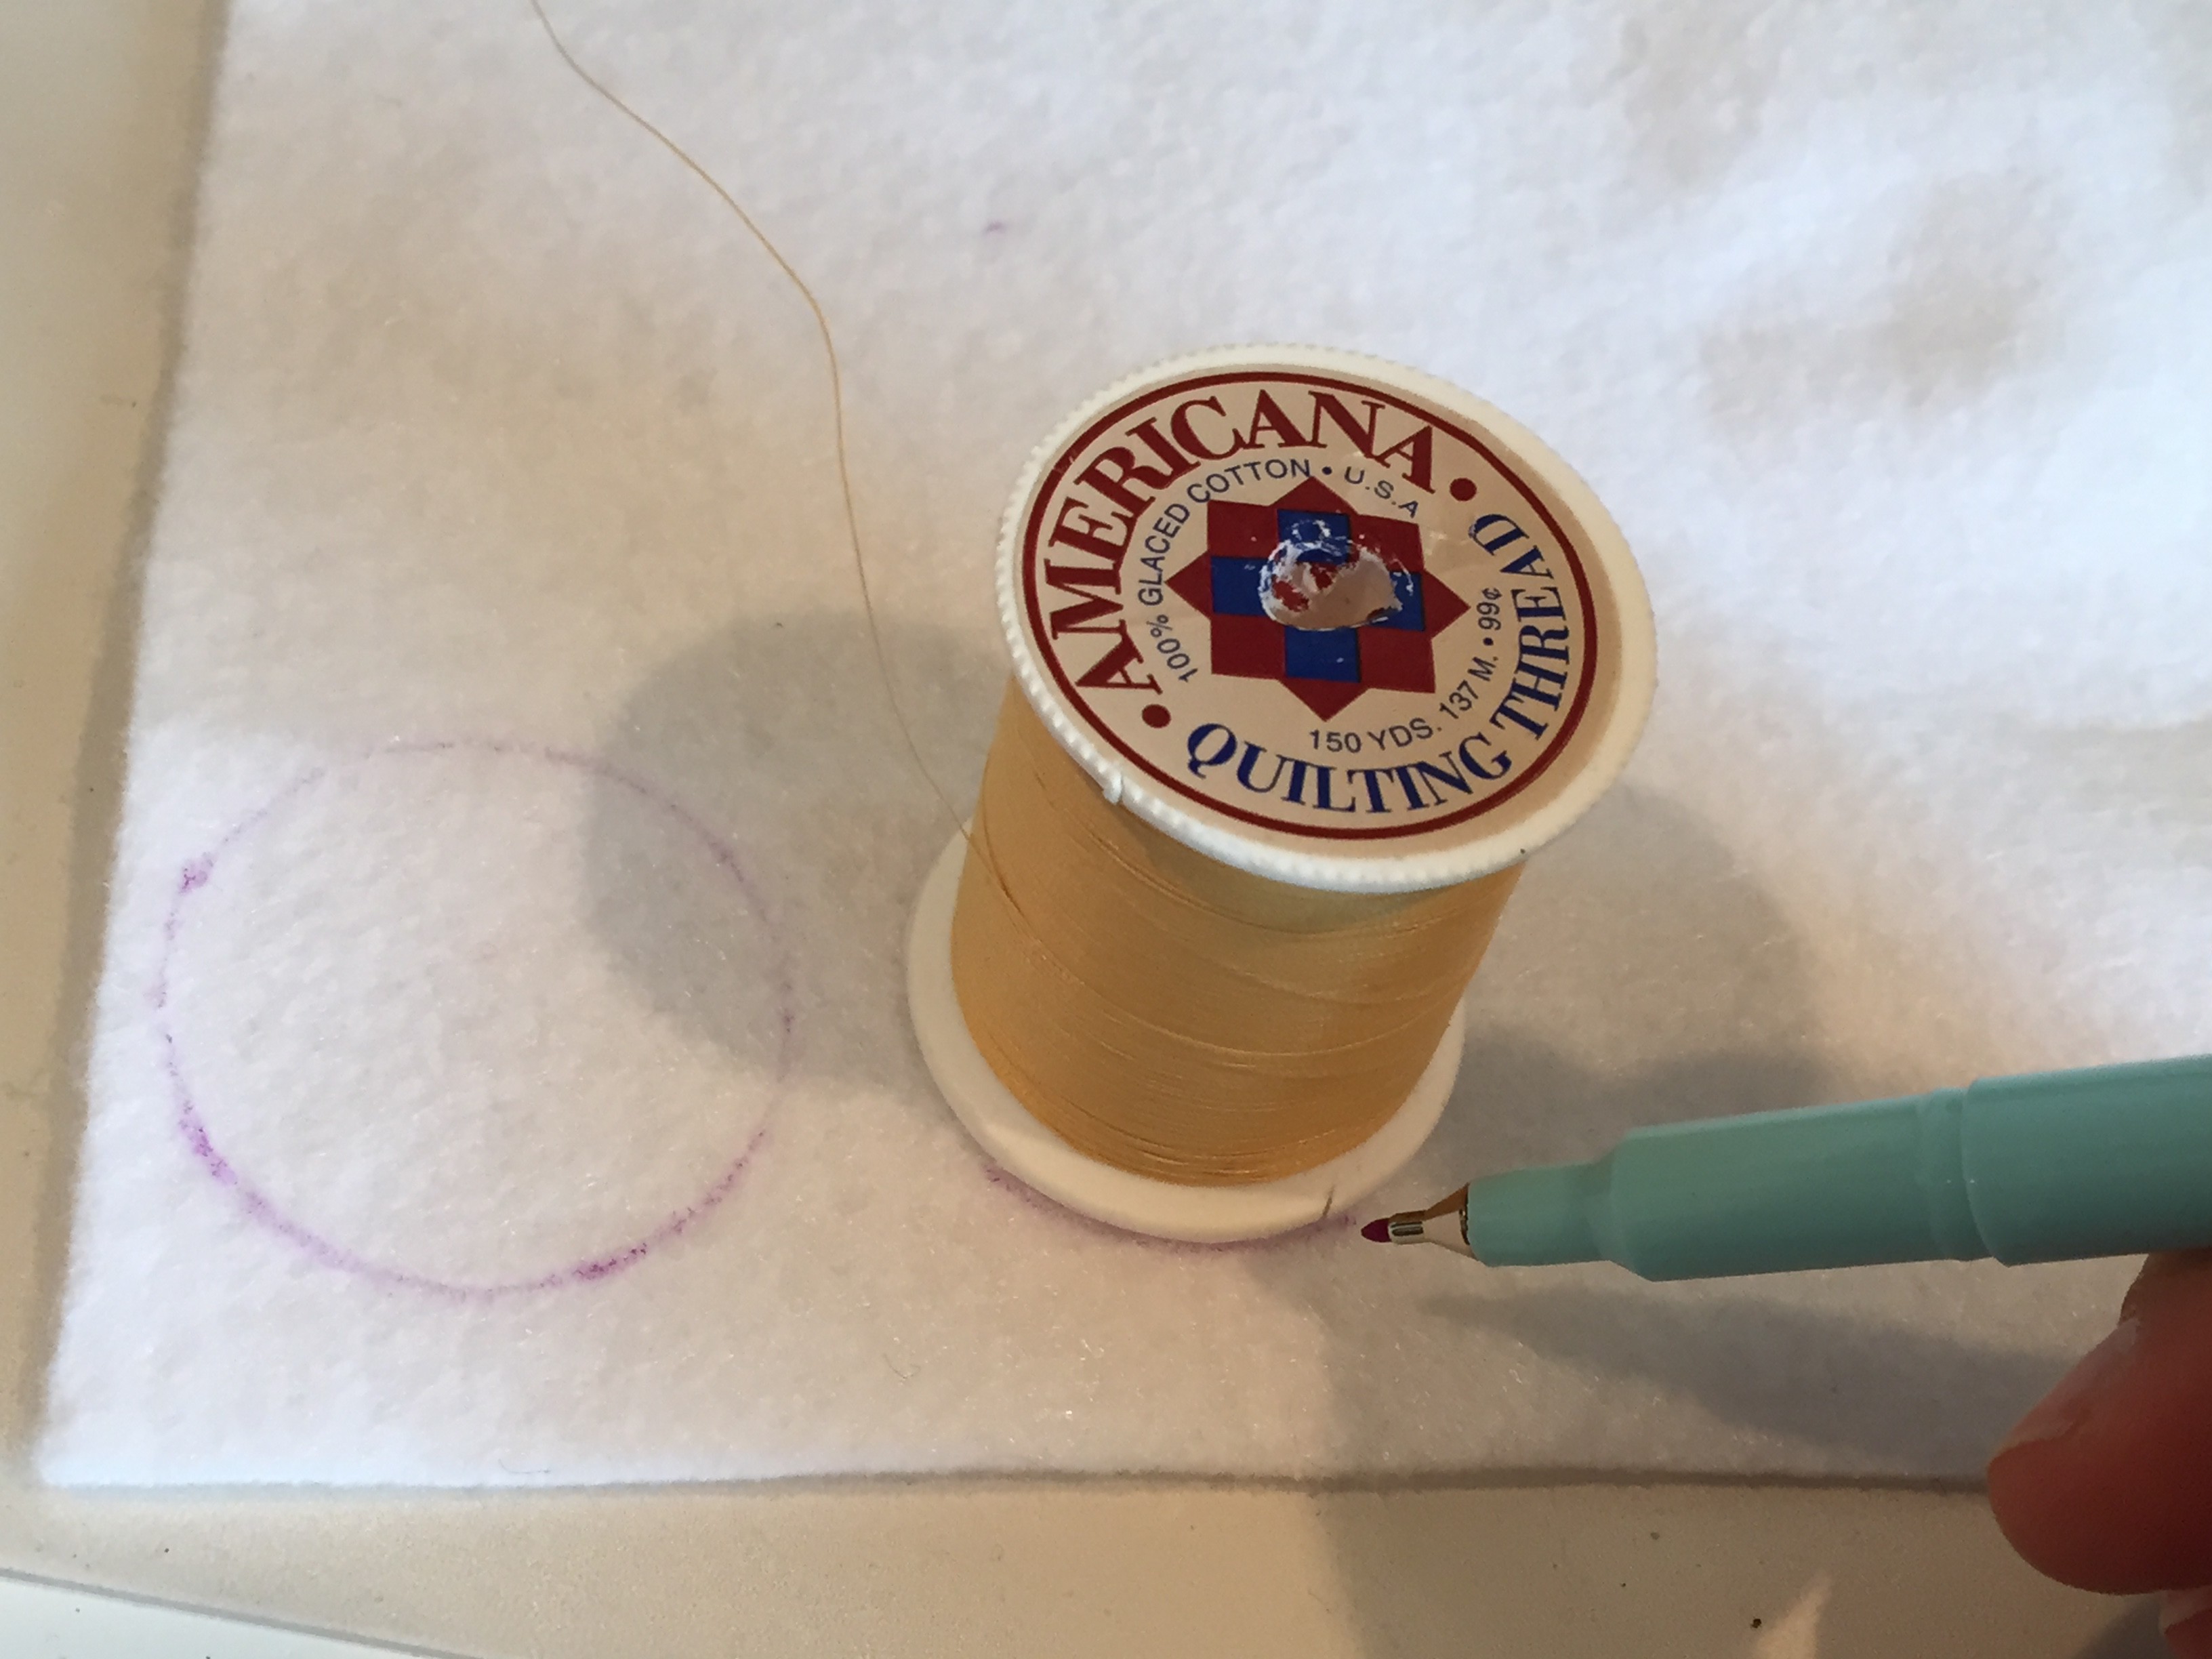

- Last little touch is the eyes. Take one of your thread spools and trace around it on your white felt. So the same on red and black felt, and then cut the circles to make them each smaller and smaller (respectively).
- Take your glue gun and glue the red circle on top of the white circle. And then the black circle on top of the red. Repeat again for a second “eye”.
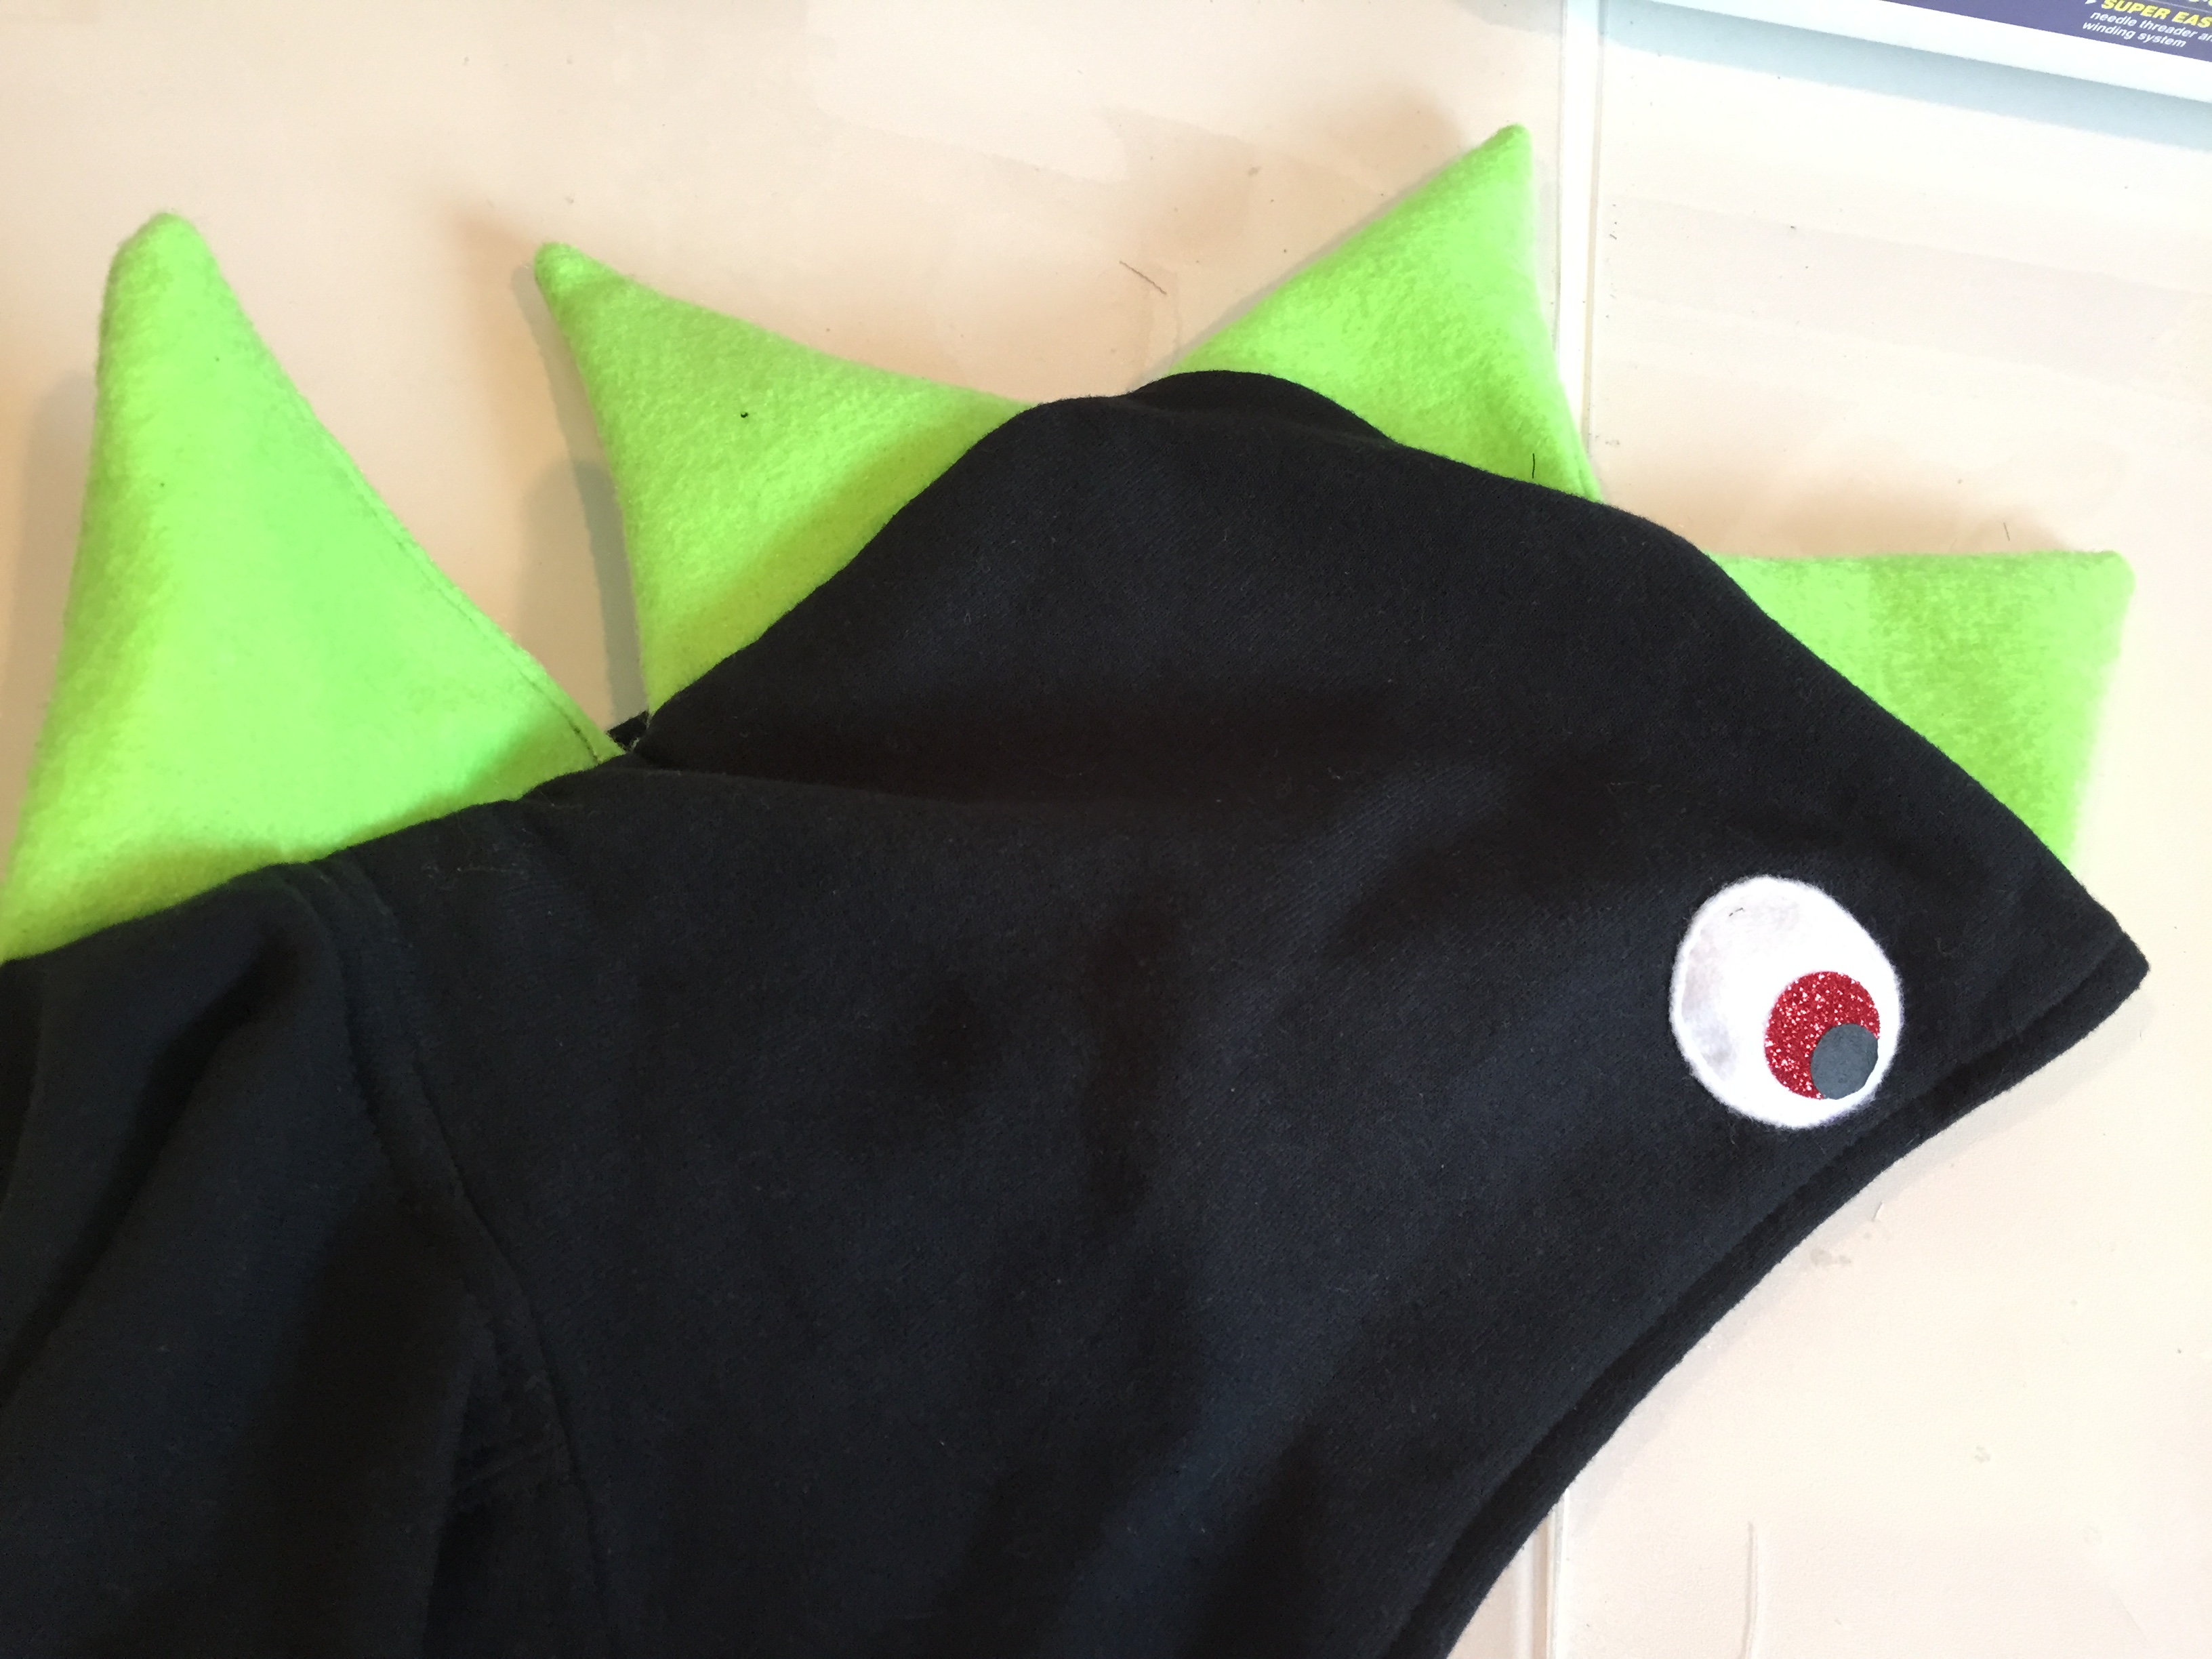
- Finally, take your entire “eye” that you’ve made and sew it onto one side of the hood. Then take your second eye and sew it onto the other side of the hood.
- Option: I used heat transfer material to get the eyes to “glitter” instead of using felt. I cut the circles out of the material and ironed them onto the white circles. Easy peasy!
Step 6 (OPTIONAL):
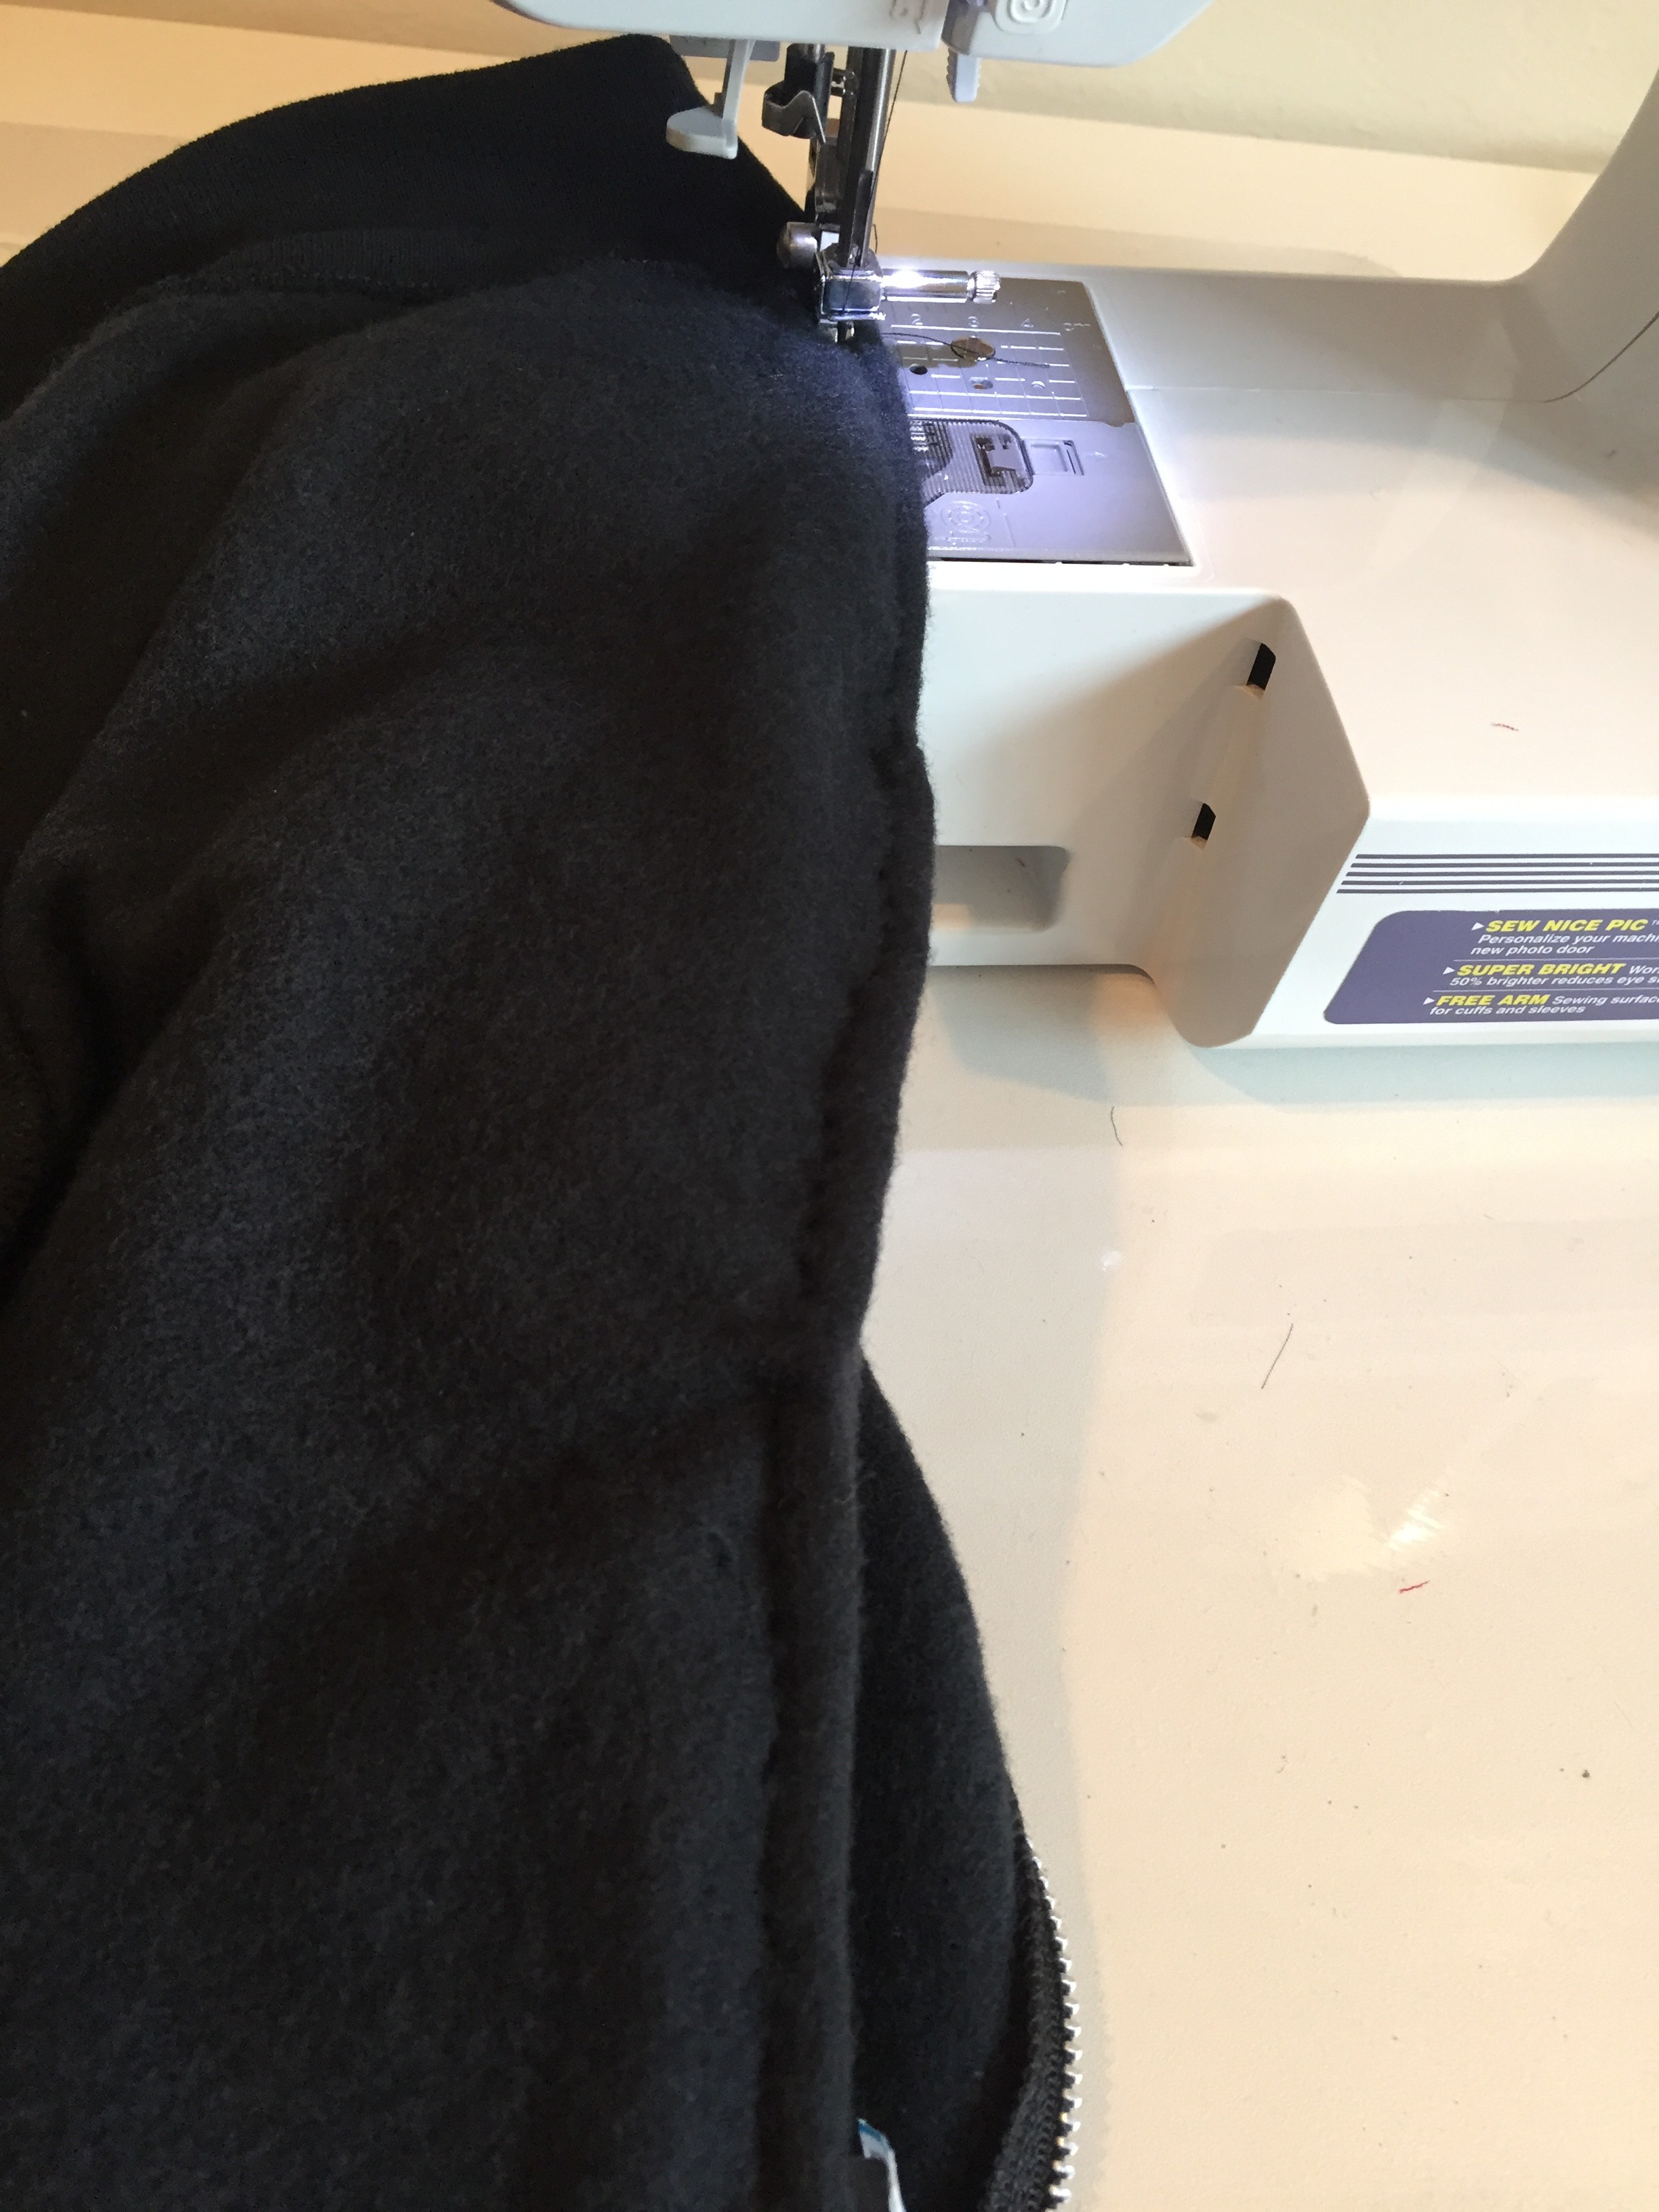
- With everything done, I took the inside seam I had made with my triangle spikes and ran it through my sewing machine. Since I had already found where the sweatshirt material met the triangle fabric, I thought it best to send it through my machine to reinforce the hand sewn seam I had made.
- This just gives the sweatshirt extra durability for multiple wears and washing machine rounds.
Then, Voi La!!!
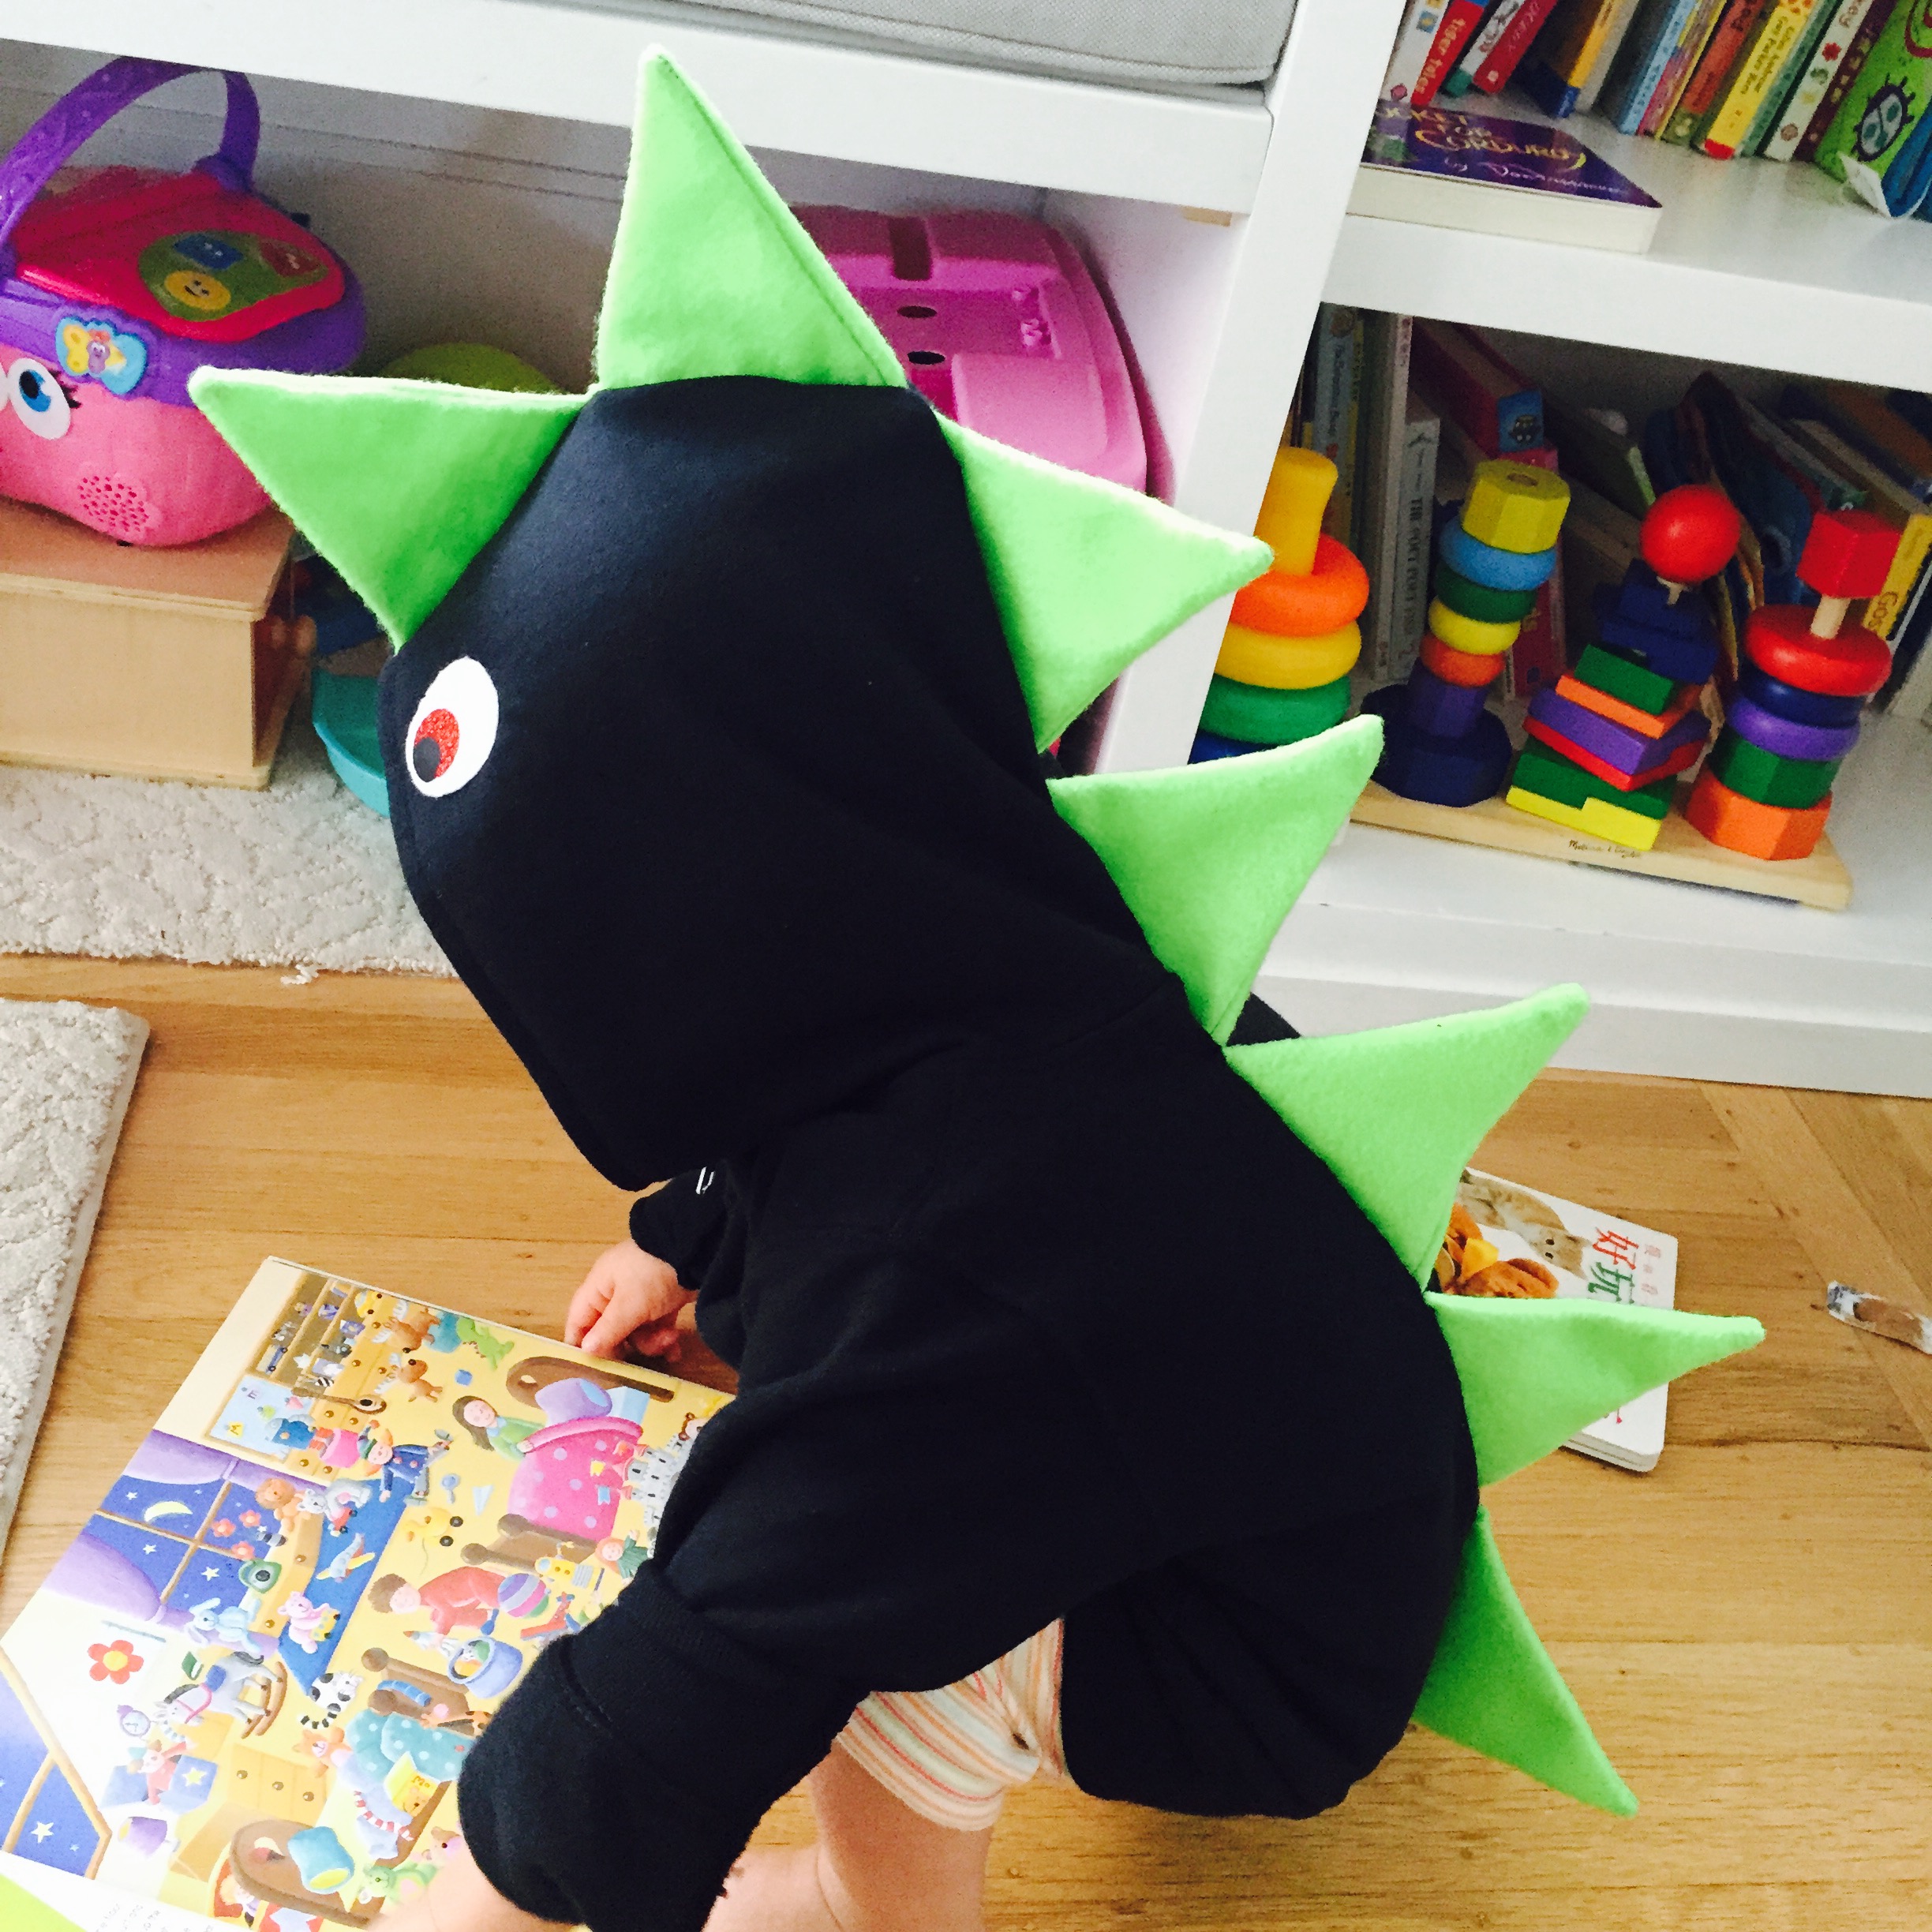
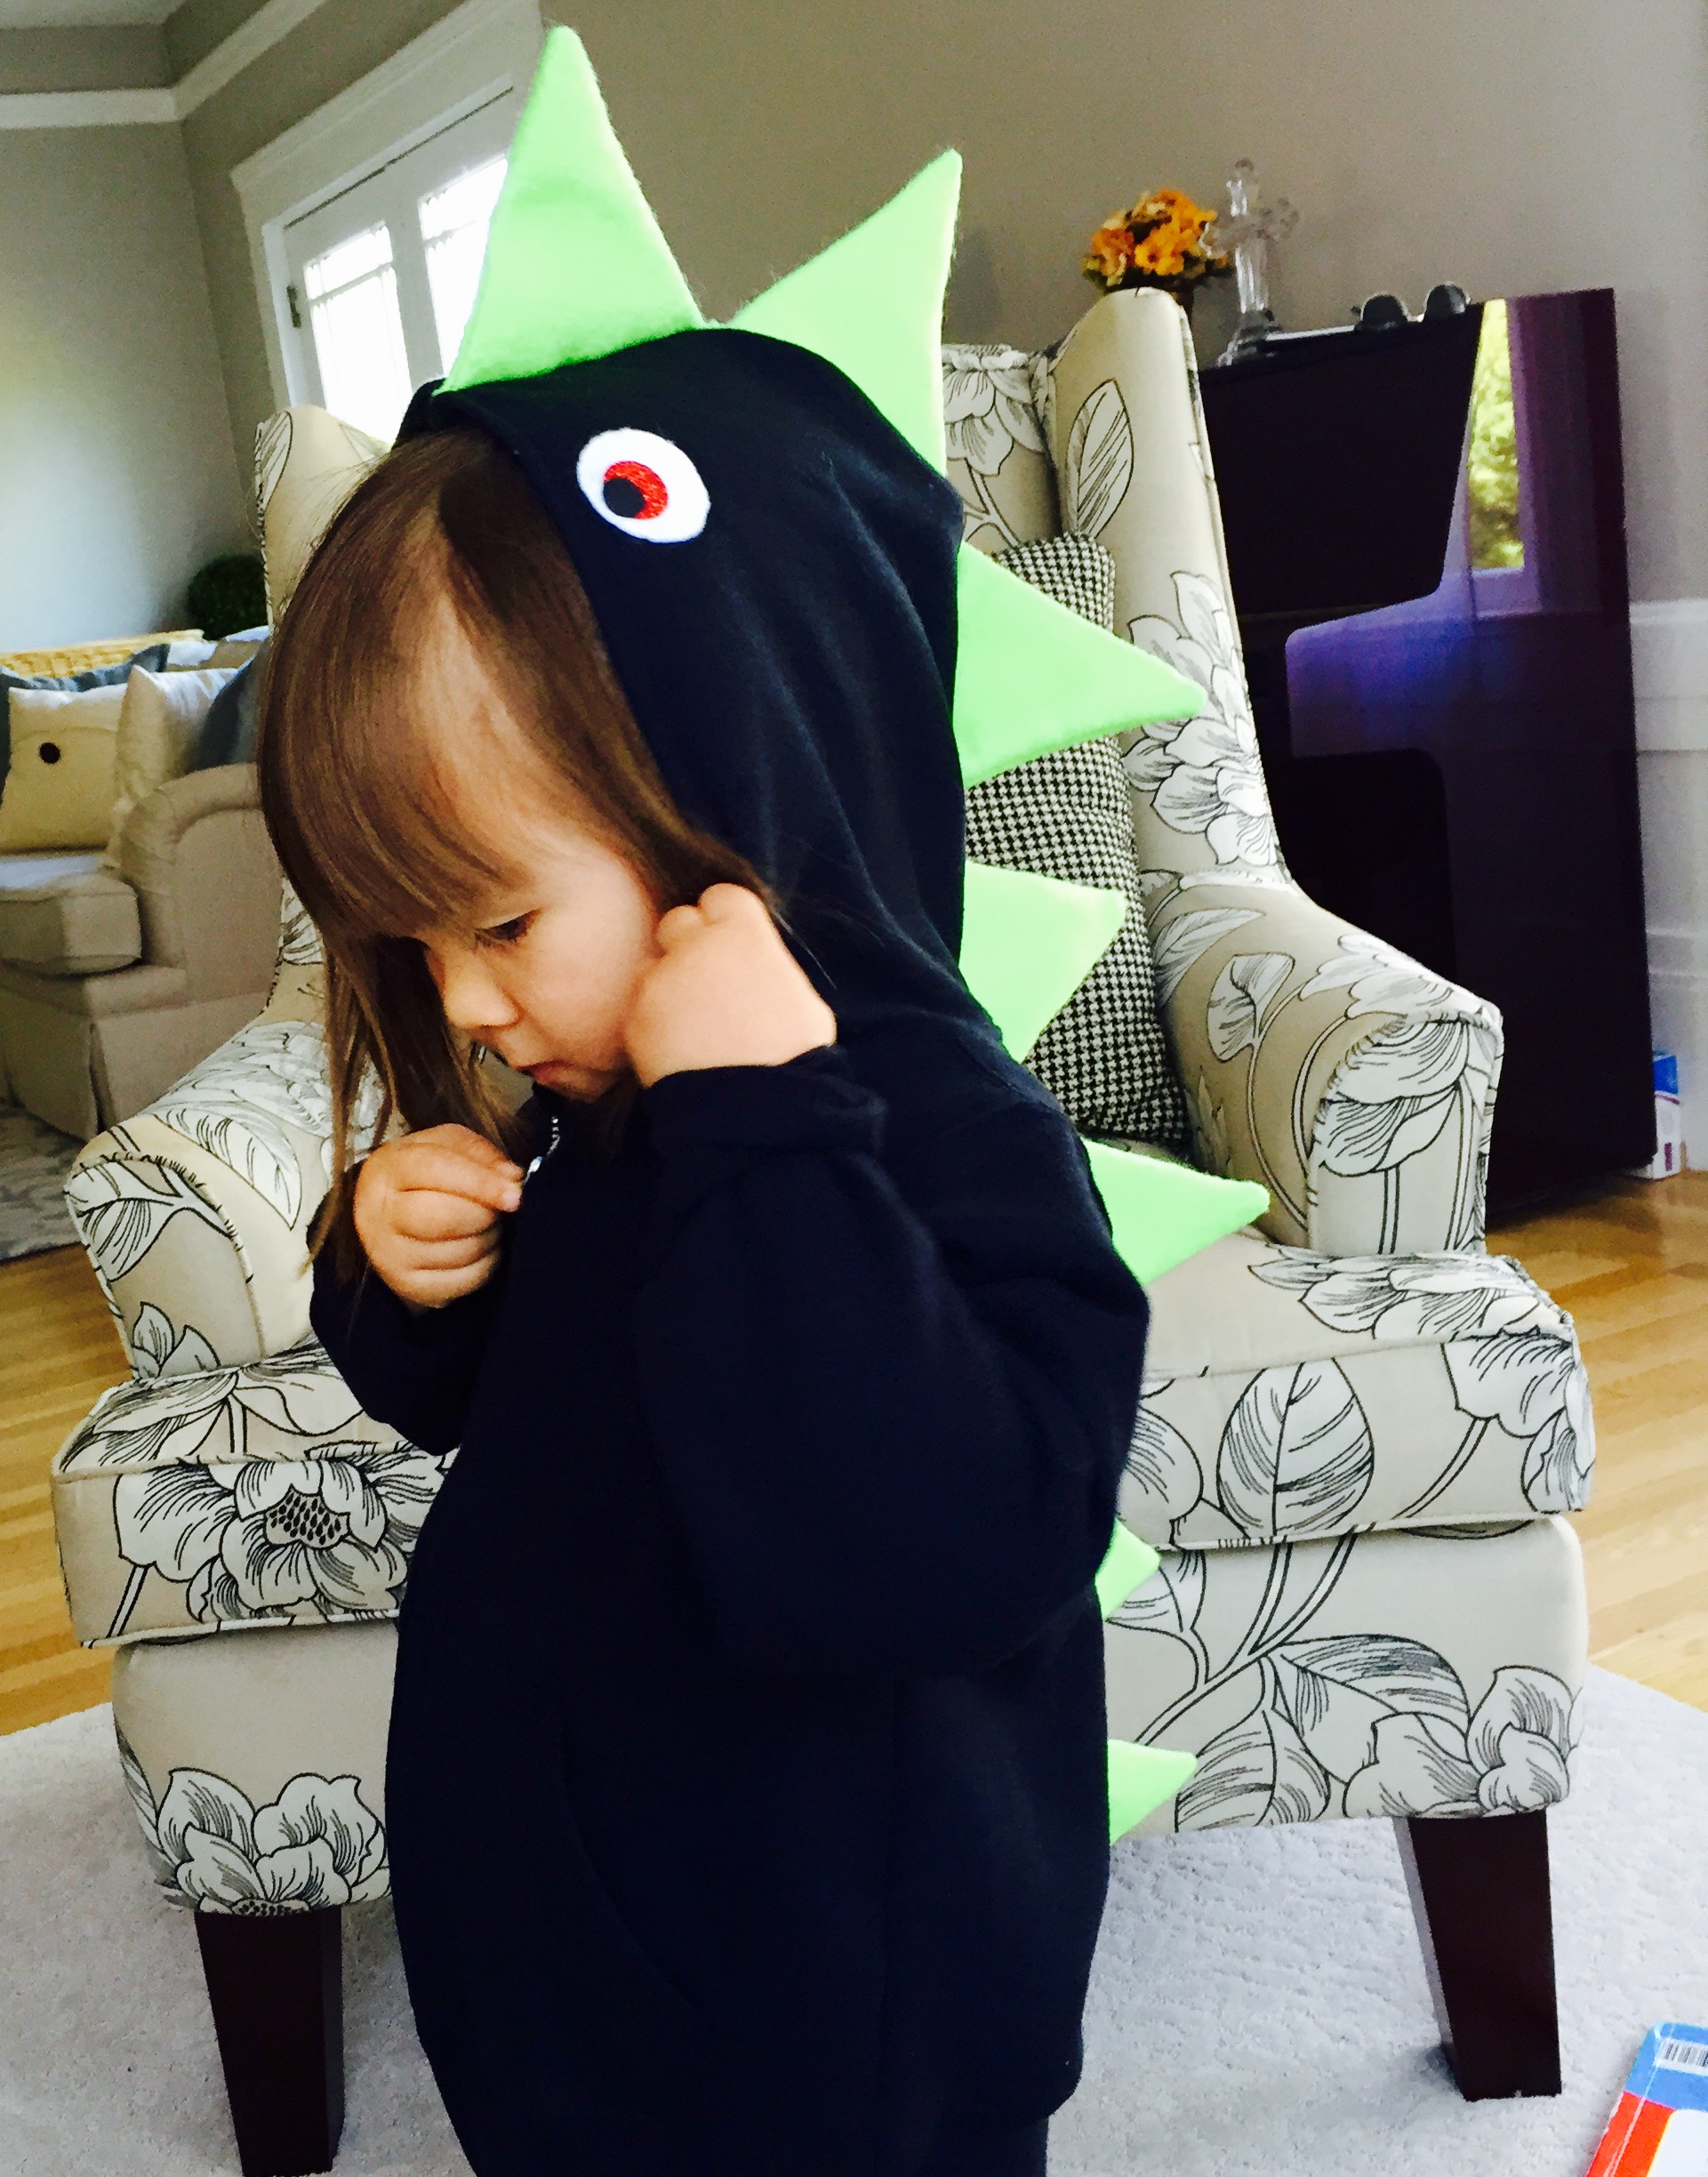
I mean, could these kids BE any cuter?! Just get some fun green colored leggings or striped dinosaur leggings and they’re all set to go!
And the best part of THIS homemade halloween costume is that it’s not just a halloween costume. Your kid can wear it YEAR ROUND (or at least when it’s cold outside). It doubles as a fun fashion accessory. Practical yet fun… now that’s the ind of stuff I like to invest my time in 🙂
So, if you’re ready to get crackin’ on the most adorable costume EVER for your kid, hooray! I’ve rounded up a list of all the supplies you’ll need to DIY.
However, if you just can’t find the time – as always- I have these costumes listed for sale in my Etsy shop. Buyer beware though… while I have PLENTY of dinosaur hoodies I’m willing to make, I will only have 1 parrot costume. When it’s gone, it’s gone. So if you’re even remotely considering making the purchase, do it sooner rather than later and before someone else scoops it up. Or, just be prepared to DIY. Either way, I’ve armed you with the tools for the most precious Halloween with your kiddos.
Enjoy – and don’t forget to take LOTS of pictures 🙂
Supplies Needed for Parrot Costume:
- Child’s Hoodie
- Felt – 1/3 yard of each (just to be safe)
- Double sided heat transfer tape
- Stuffing or craft fiber fill
- Scissors
- Iron
- Ruler
- Marking Pen
Supplies Needed for Dinosaur Costume:
- Child’s Hoodie
- Felt Fabric (about 1/4 Yard)
- Lime Green for the spikes
- Black, White, and Red Felt Fabric squares for the eyes
- Stabilizer fabric (thick/sturdy specialized fabric to keep the spikes sticking up)
- Ruler
- Marking Pen
- Scissors
- Needle and Thread
- Sewing Machine (optional)
You recommend heat transfer tape to adhere the felt feathers. Most places use hot glue, but I was afraid that would add too much weight to already heavy costume. I’ve been sewing them on by hand but it is taking forever. Thoughts on sewing versus heat transfer tape?