Now if you follow my blog, or me on ANY social media channel, you know my husband and I are expecting a baby boy in July. What you probably also know is that in addition to our little human baby, we welcomed a little fur baby into our lives in February. Am I completely nuts for getting puppy and baby almost simultaneously – ABSOLUTELY! Is it hard, you ask? THE HARDEST! Is is worth it? TOTALLY!
As you can see on Instagram and Facebook, I’m completely obsessed with my fur baby. Maybe it’s just because I got her a a month and a half ago, or maybe it’s because she’s so incredibly cute.
Either way, if you have a little fur munchkin, you probably share my obsession. I’m already envisioning our family Halloween costumes for this year… 6 months in advance! And again, if you know me, this should be no surprise 😉
I love a good reason to dress up. Heck, I love any excuse to dress up. And with the new Batman v. Superman movie that’s just come out, I was completely inspired to make my little puppy Pippa into a “Wonder Dog” of her own. No special occasion, just used the movie as a really good excuse 🙂
My DIY Dog Collar Bandana Inspiration
It was partially the movie, and partially my new obsession with fur babies that got my mind racing. Our little Pippa is a Godlendoodle, and beginning in January, I starting looking up pictures of Goldendoodles on Google image search. I couldn’t help myself. They were just too cute!
Well, when looking at these pictures, I saw some of the cutest little doggies wearing bandanas. Not necessarily superhero capes, but bandanas sporting their owner’s favorite sports team, state flag, etc. You name it, these dogs were like little teddy bears you could dress up for for own enjoyment.
Now, that’s not why we got Pippa- but it sure was a fun perk! And knowing that I could make a little dog collar bandana myself – and make it look like a Wonder Woman Cape – I just couldn’t contain myself until Halloween. It needed to be done immediately! C’est la vie!
Not surprisingly, it was a super easy project! However, for this one, I specifically used by Silhouette CAMEO® machine and software, and my tutorial takes you step by step through using this machine.
Now as Travis previously mentioned in his February revenue report, I am now a part of the Silhouette Creative Design team – YAY! What this means for me is that I get a bunch of free product every month to try out new crafts (of my choosing) and share them with you. I am in no way compensated by Silhouette in any other way than free products to try out and share with you. If I like them, I share. If I don’t, you’ll know about it.
What this means for YOU, as a reader, is that the Silhouette brand and products will be more integrated into my tutorials this year. Not every one, but if I used my Silhouette products to create a craft, the tutorial will definitely reflect that. Which is what we have today.
So if you want to make your fur baby a DIY dog collar bandana/cape of their own, just use the supplies I’ve listed, and follow the steps below. She’ll instantly become the superhero you’ve always known she was.
The Necessary Supplies:
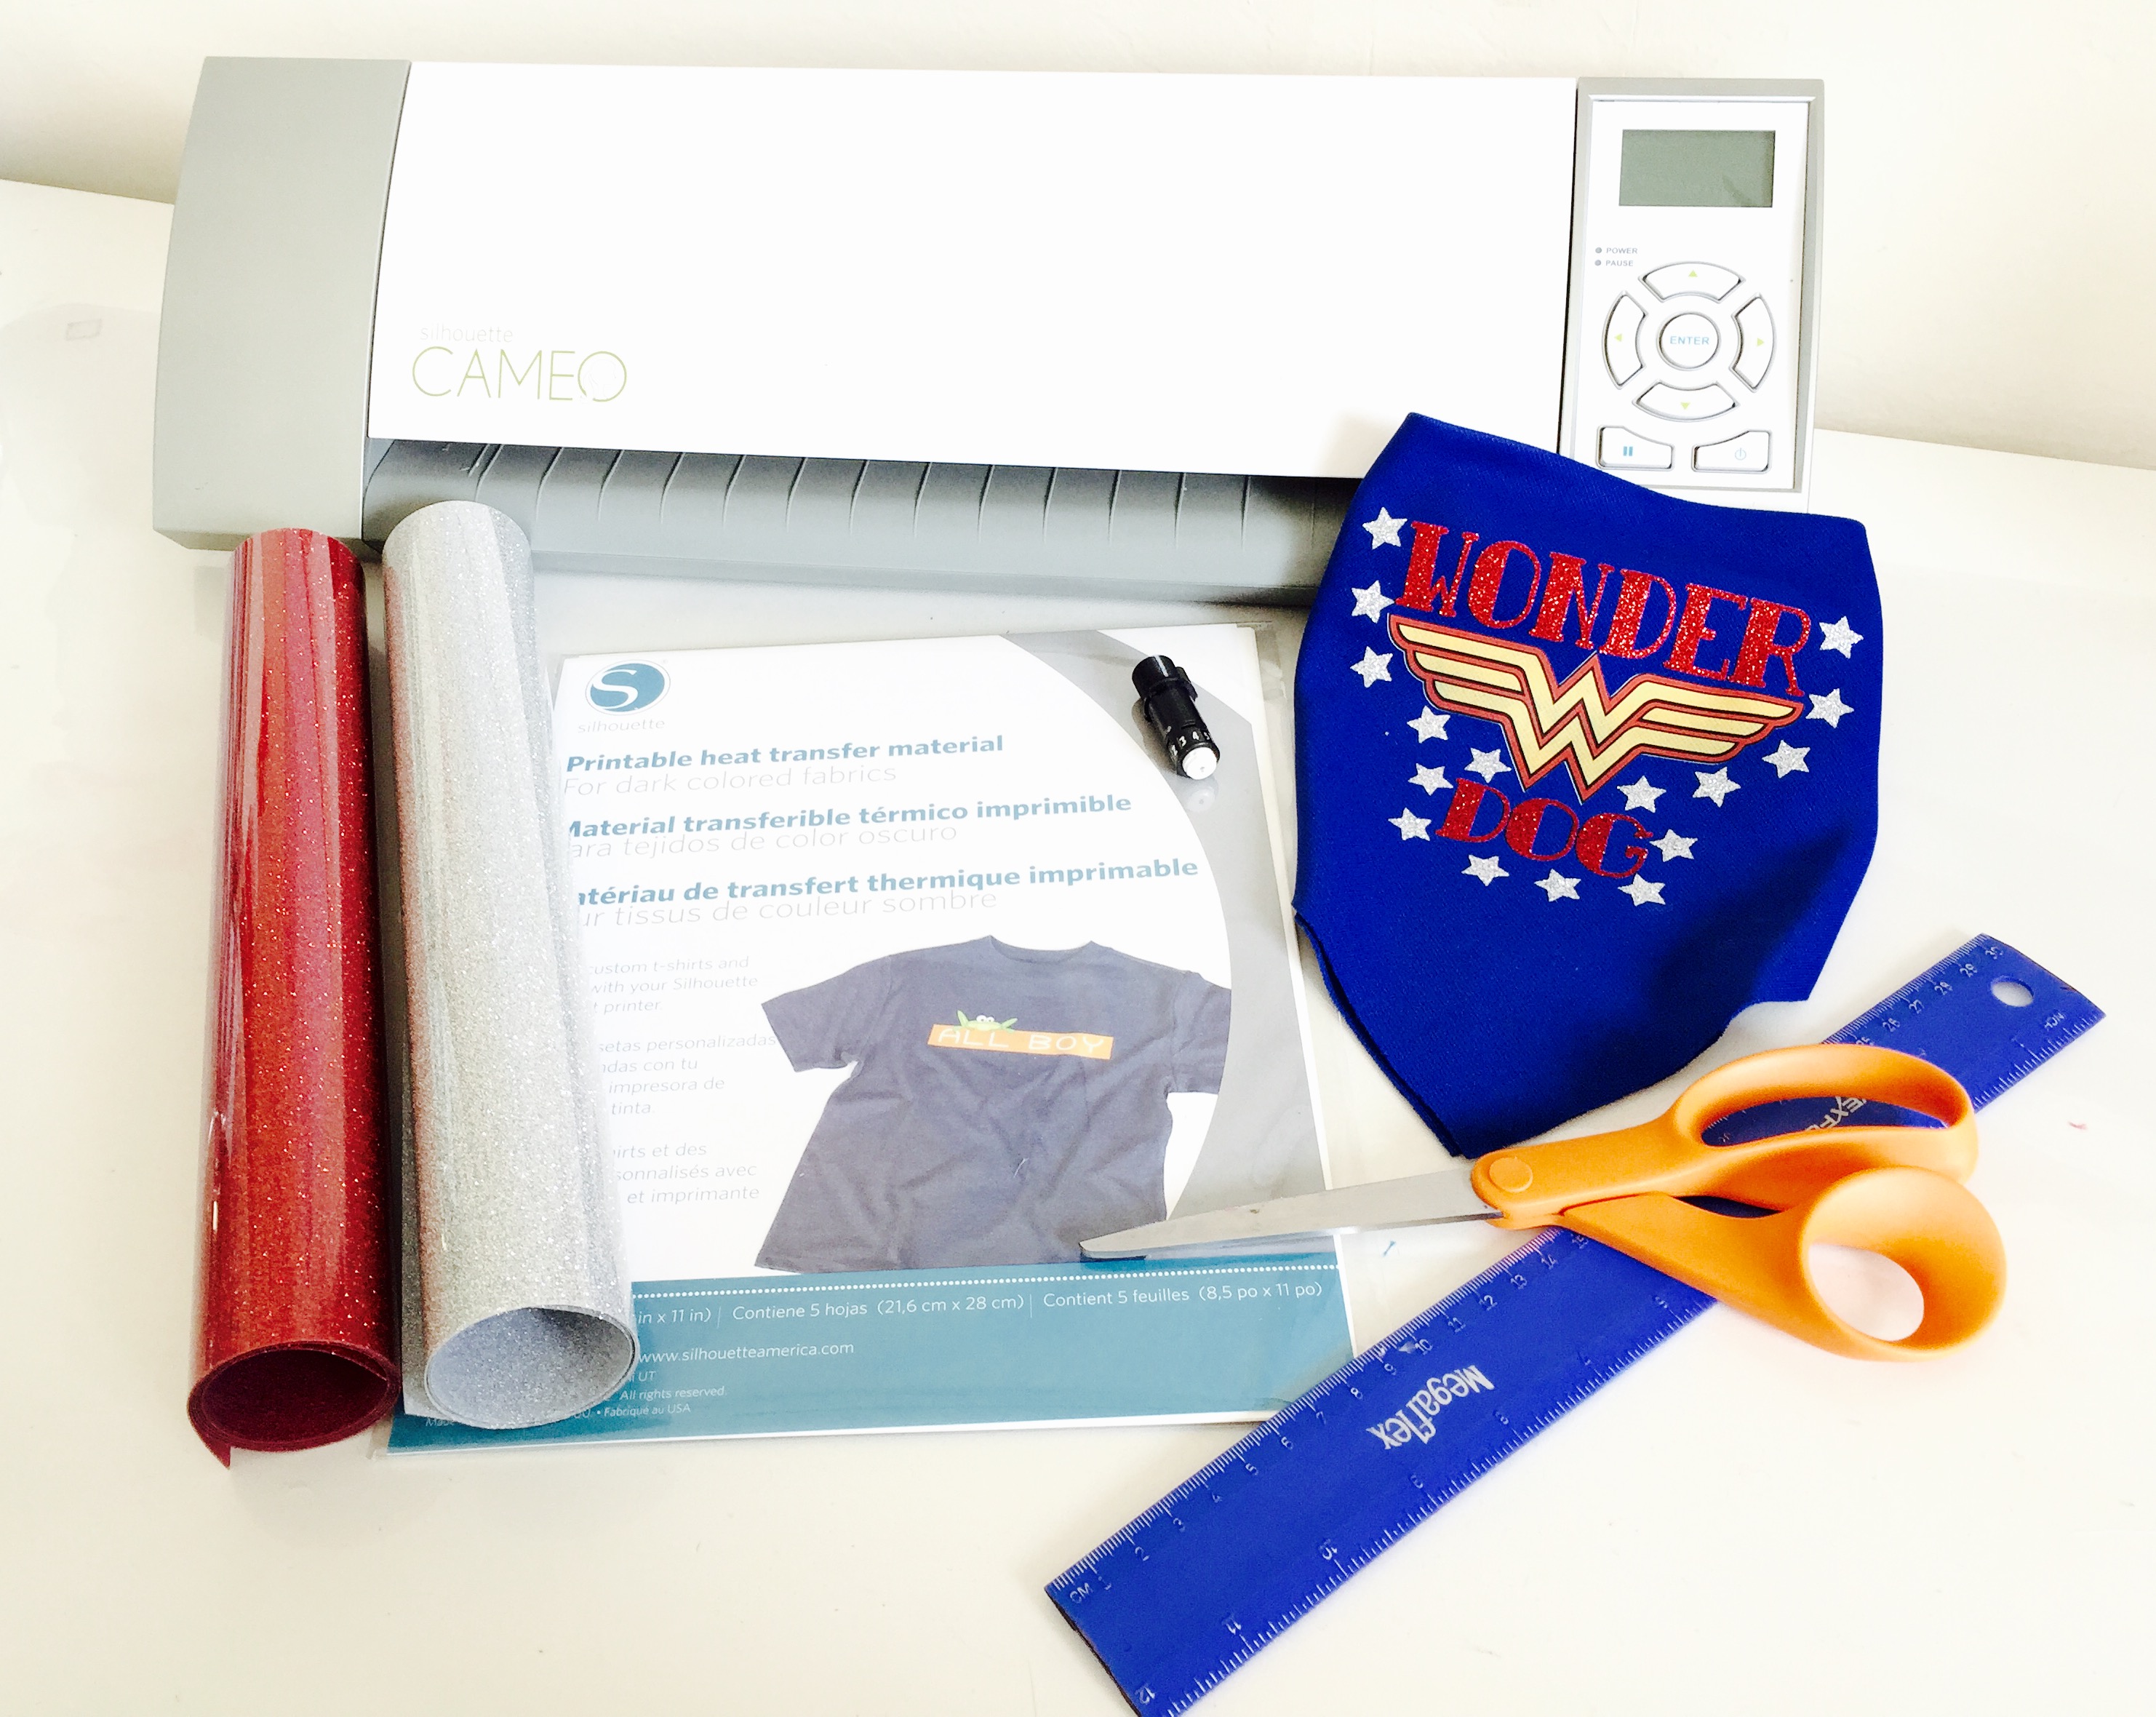
- Silhouette CAMEO®
- With regular cutting blade and cutting mat
- Silhouette printable heat transfer paper – for dark fabrics
- Silhouette 12″ red glitter heat transfer vinyl
- Silhouette 12″ silver glitter heat transfer vinyl
- Home printer
- Plain blue bandana (or 14×14″ square piece of blue fabric)
Shapes Needed From Silhouette Design Store:
- Wonder Woman™ logo ( by DC Wonder Woman™) – Design #77518
- There are a TON of DC comic logos in the Silhouette Design Store to choose from. If you type DC into the search bar (or filter by designer) you can use this tutorial with ANY of the designs (Batman, Superman, etc).
- Deco Font (by Lori Whitlock) – Design #122252
- Star (by Pebbles in my Pocket) – Design #61255
Step 1:
- Start by downloading your DC Wonder Woman™ logo from the Silhouette Design Store. Then import it into your Silhouette Studio®.
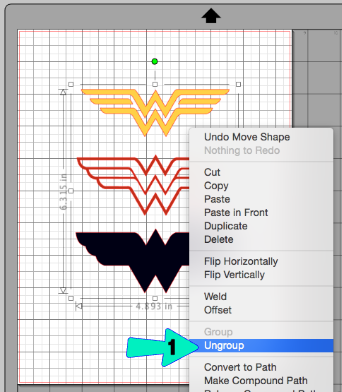
- Once in your Silhouette Studio®, you logo will be in 3 different parts, divided up by color. To merge them together, right click on the entire picture and press “ungroup”.
- Then put each shape on top of the other in order; red over black first and then yellow over red and black second.
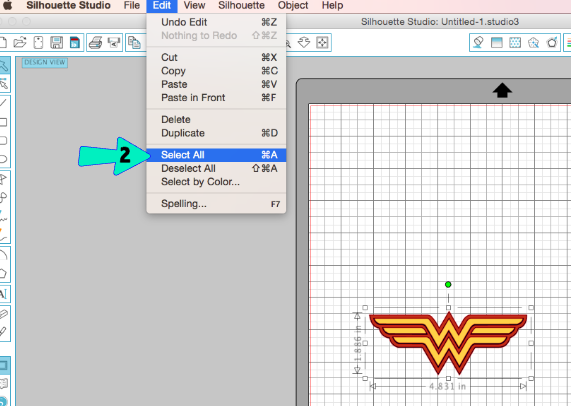
- Now, go up to your edit menu and click on the “select all” button.
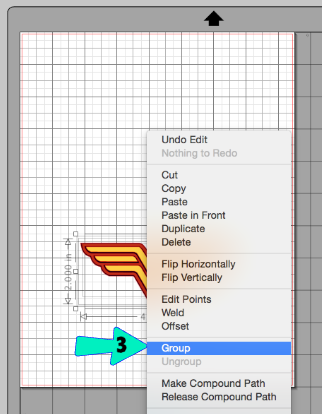
- Once all 3 images are selected, right click on them once and press the “group” button. This will give you 1, solid DC Wonder Woman™ image to print off.
Step 2:
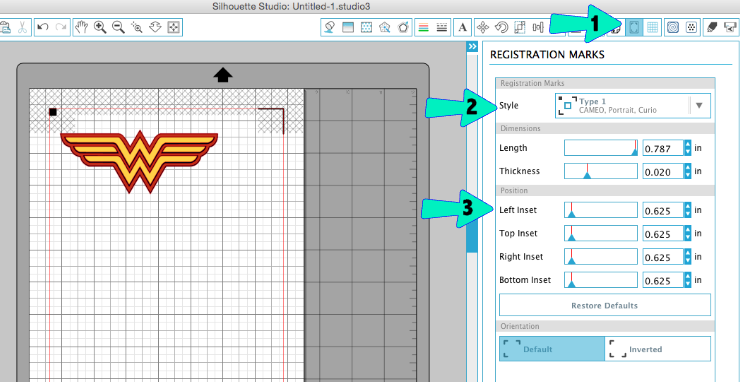
- When working with printable heat transfer material, you need to use your print and cut function of your Silhouette CAMEO® to get the perfect image to iron onto your fabric!
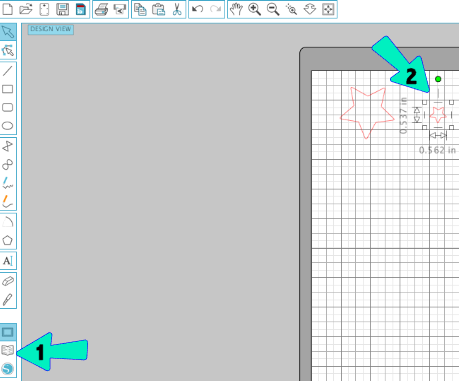
- So here, use your top toolbar and click on the “registration marks” icon (#1 arrow).
- Then, select the machine you’re using (#2 arrow). Today, we’re working with the CAMEO.
- Adjust the margins of your registration marks on all sides so that they fit all the way around your logo, but are small enough that you can reuse the bottom half of your heat transfer paper if you want to, later.
Step 3:

- Now that your registration marks are in place, load your printable heat transfer paper into your printer so that it prints on a blank white side.
- Once your paper is loaded into your printer, go up to the very top toolbar and click on “file”and then “print”.
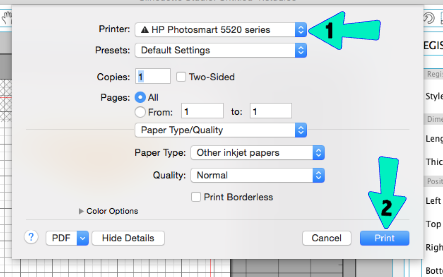
- Finally, your print screen will come up. Make sure to choose the right printer you’re using, and then click to print.
Step 4:
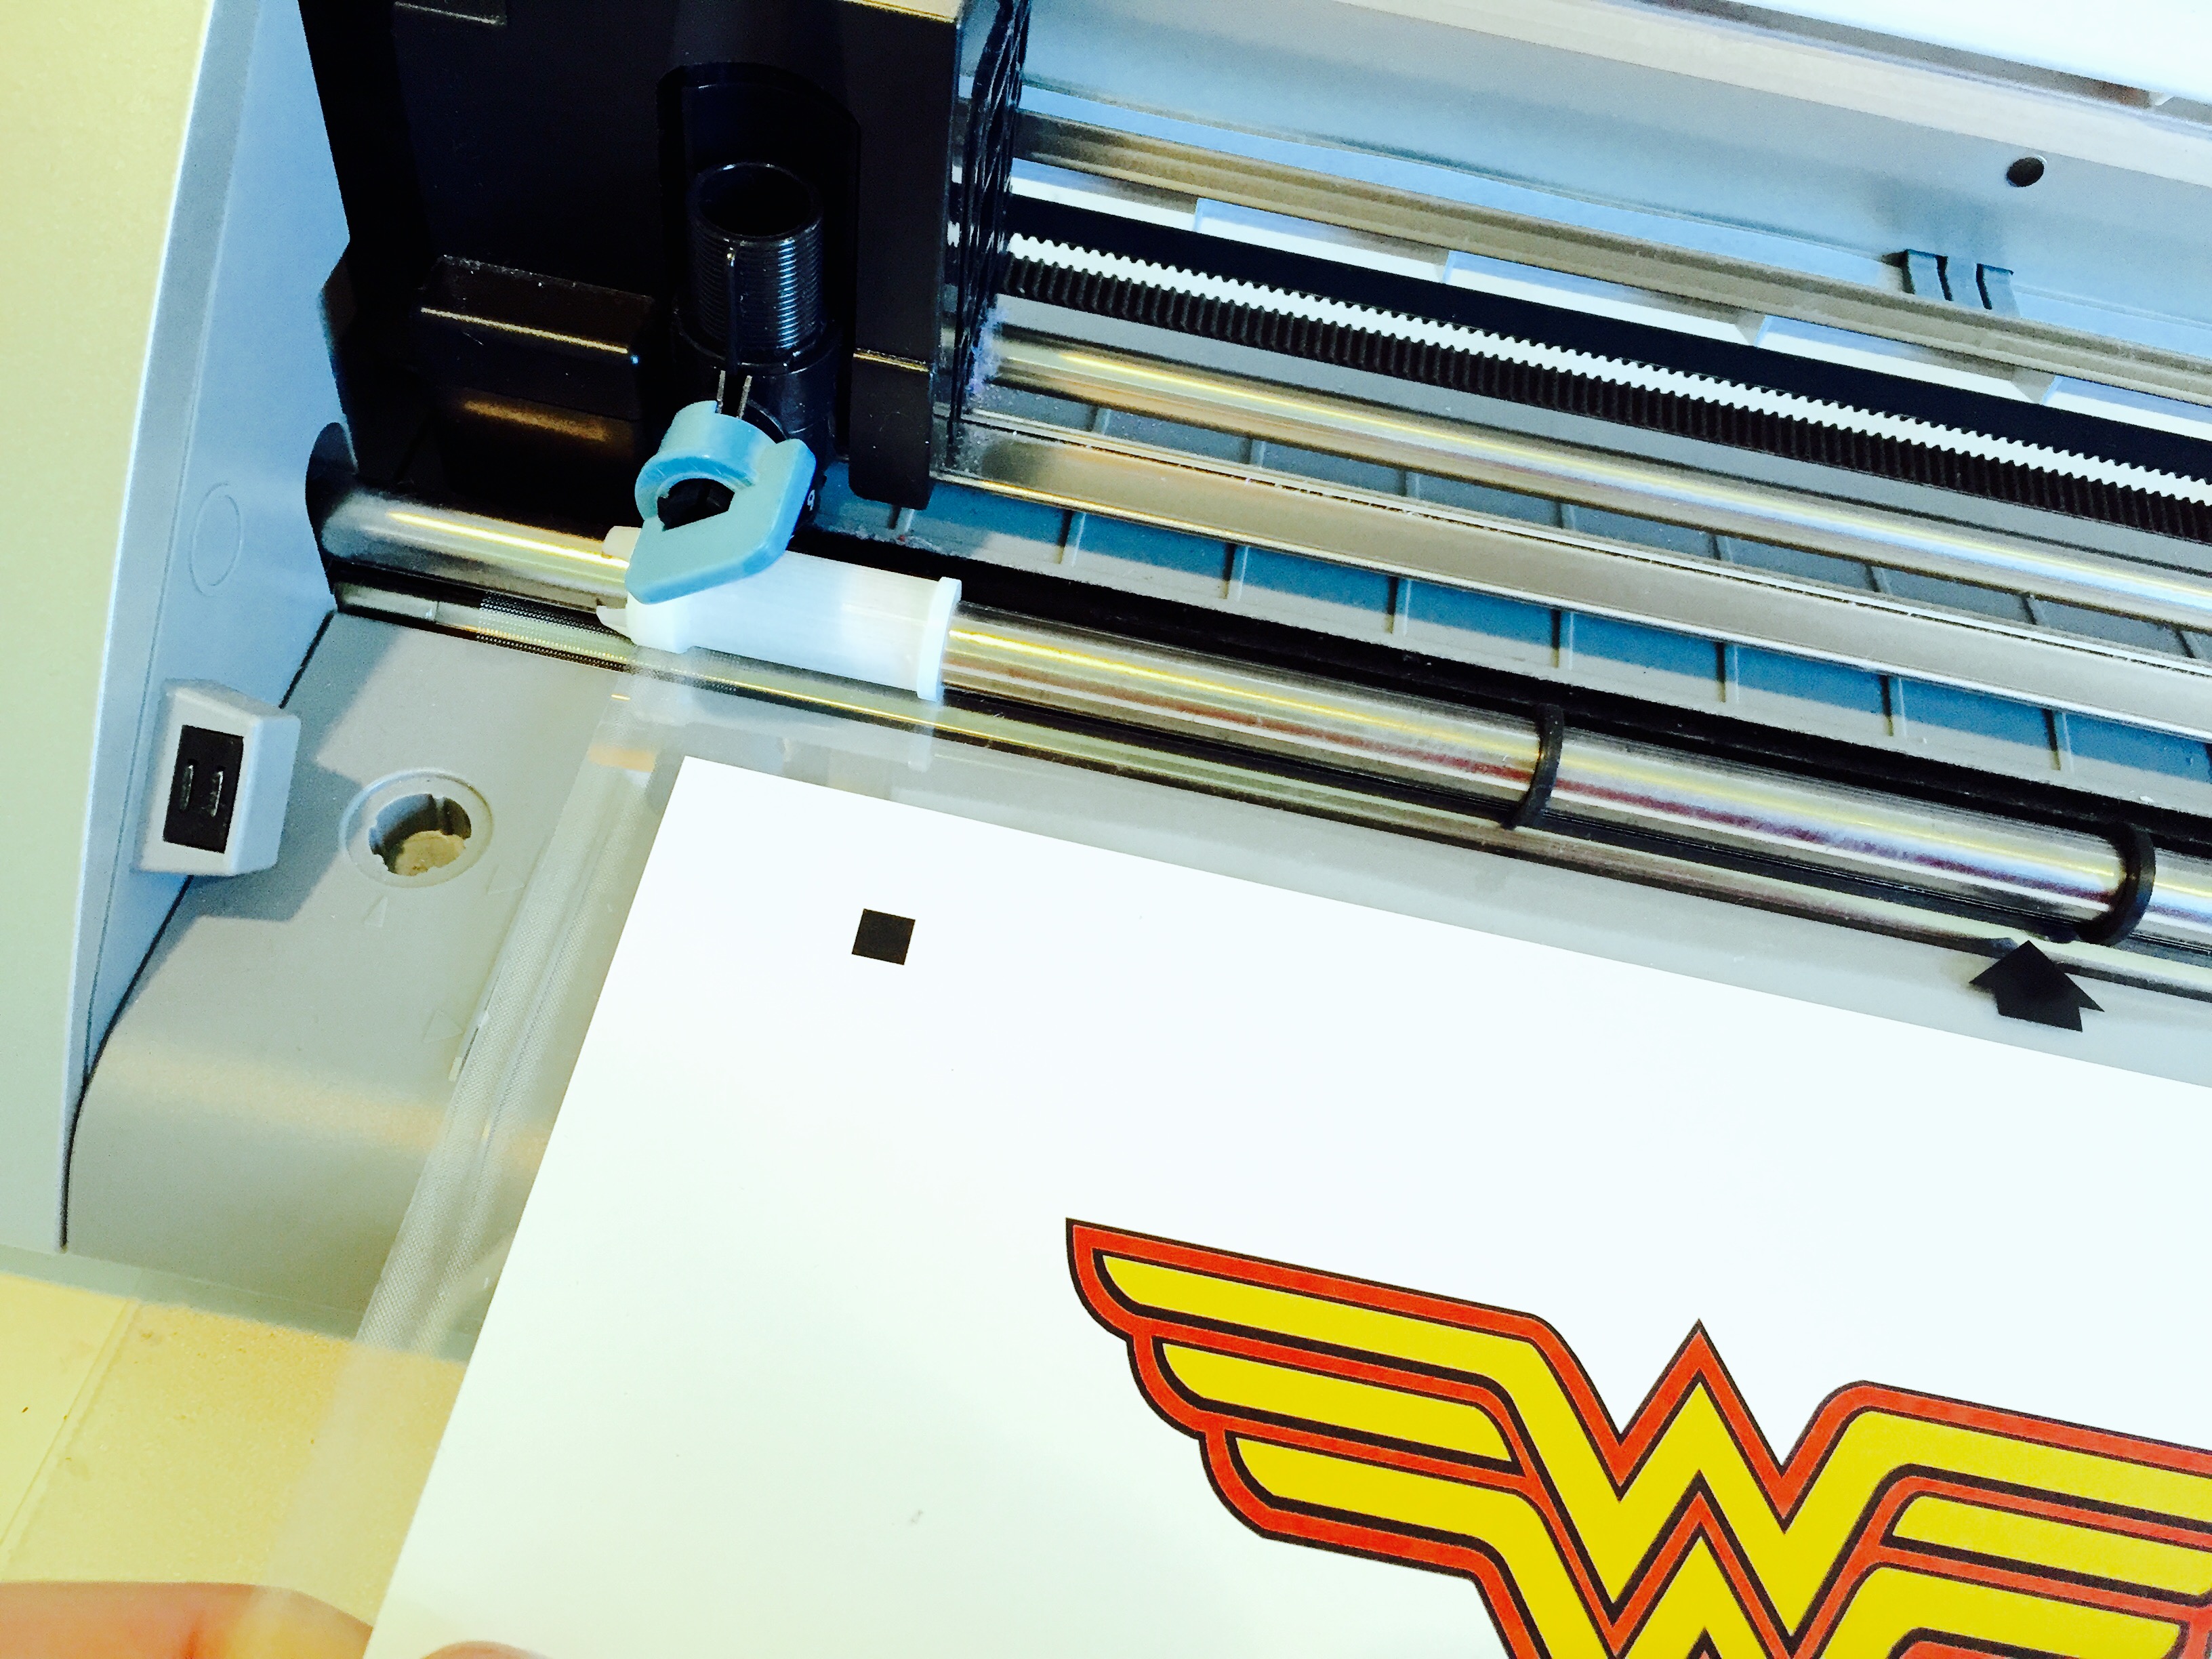
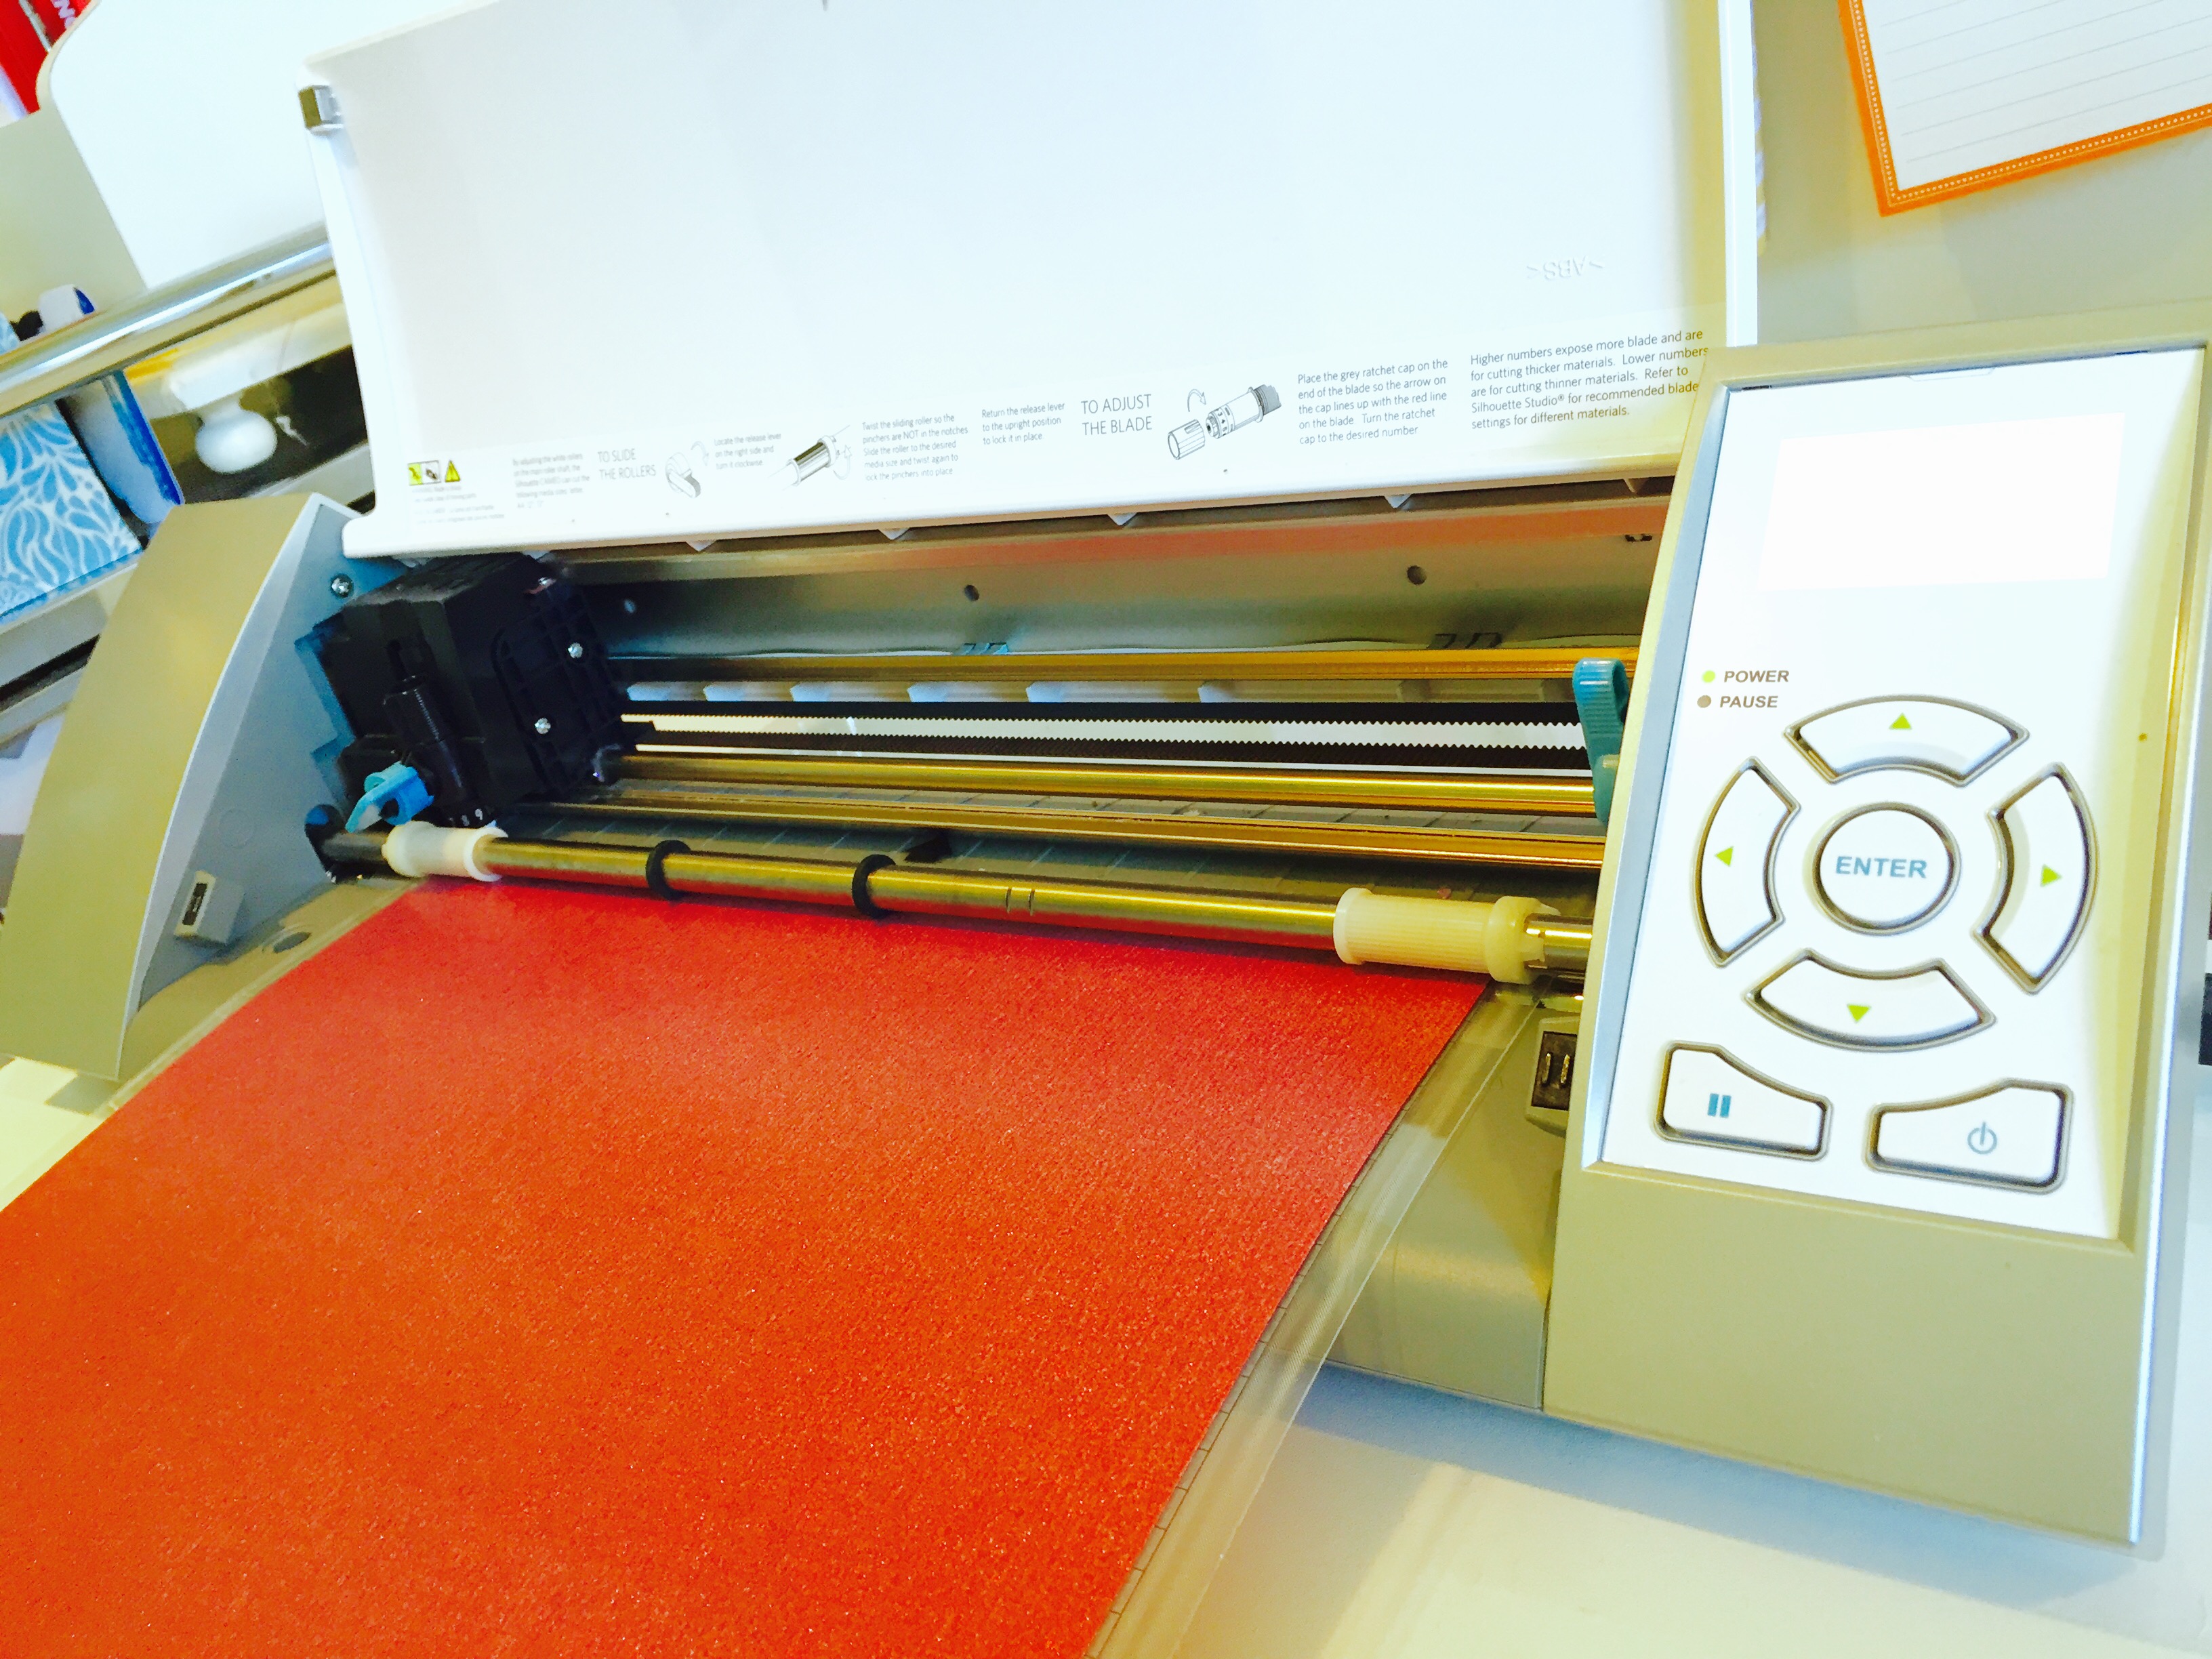
- Yay! Your DC Wonder Woman™ has printed perfectly. Next, place the entire piece of paper with the logo and registration marks on it in the upper left hand corner of the CAMEO 12×12″ mat.
- Load the mat into the CAMEO, lining the mat up with the line and the arrow on the left hand side of the machine.
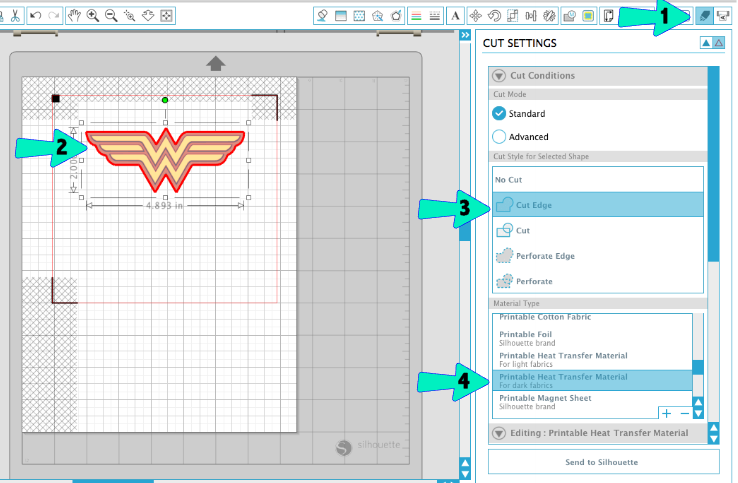
- Now, in your Silhouette Studio®, click on the “cut” icon from the top toolbar.
- Then, make sure to click on your DC Wonder Woman™ logo so it’s highlighted, and then press “cut edge” in the cut style portion of your cutting preferences.
- If you don’t do this, the CAMEO will try to cut around each individual color in your logo instead of the entire shape you so carefully grouped together in Step 1.
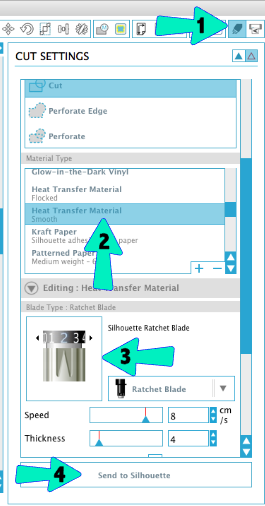
- Once that’s done, make sure to select the material “printable heat transfer material- for dark fabrics” in the material type section.
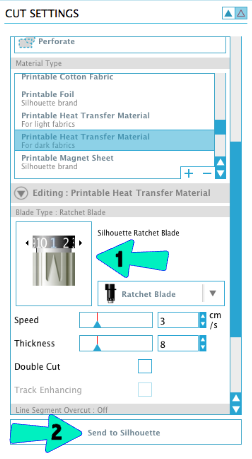
- Finally, adjust your cutting blade in the CAMEO to the settings suggested for you under your blade type settings. Then, press “send to Silhouette” to send the cut job to the CAMEO.
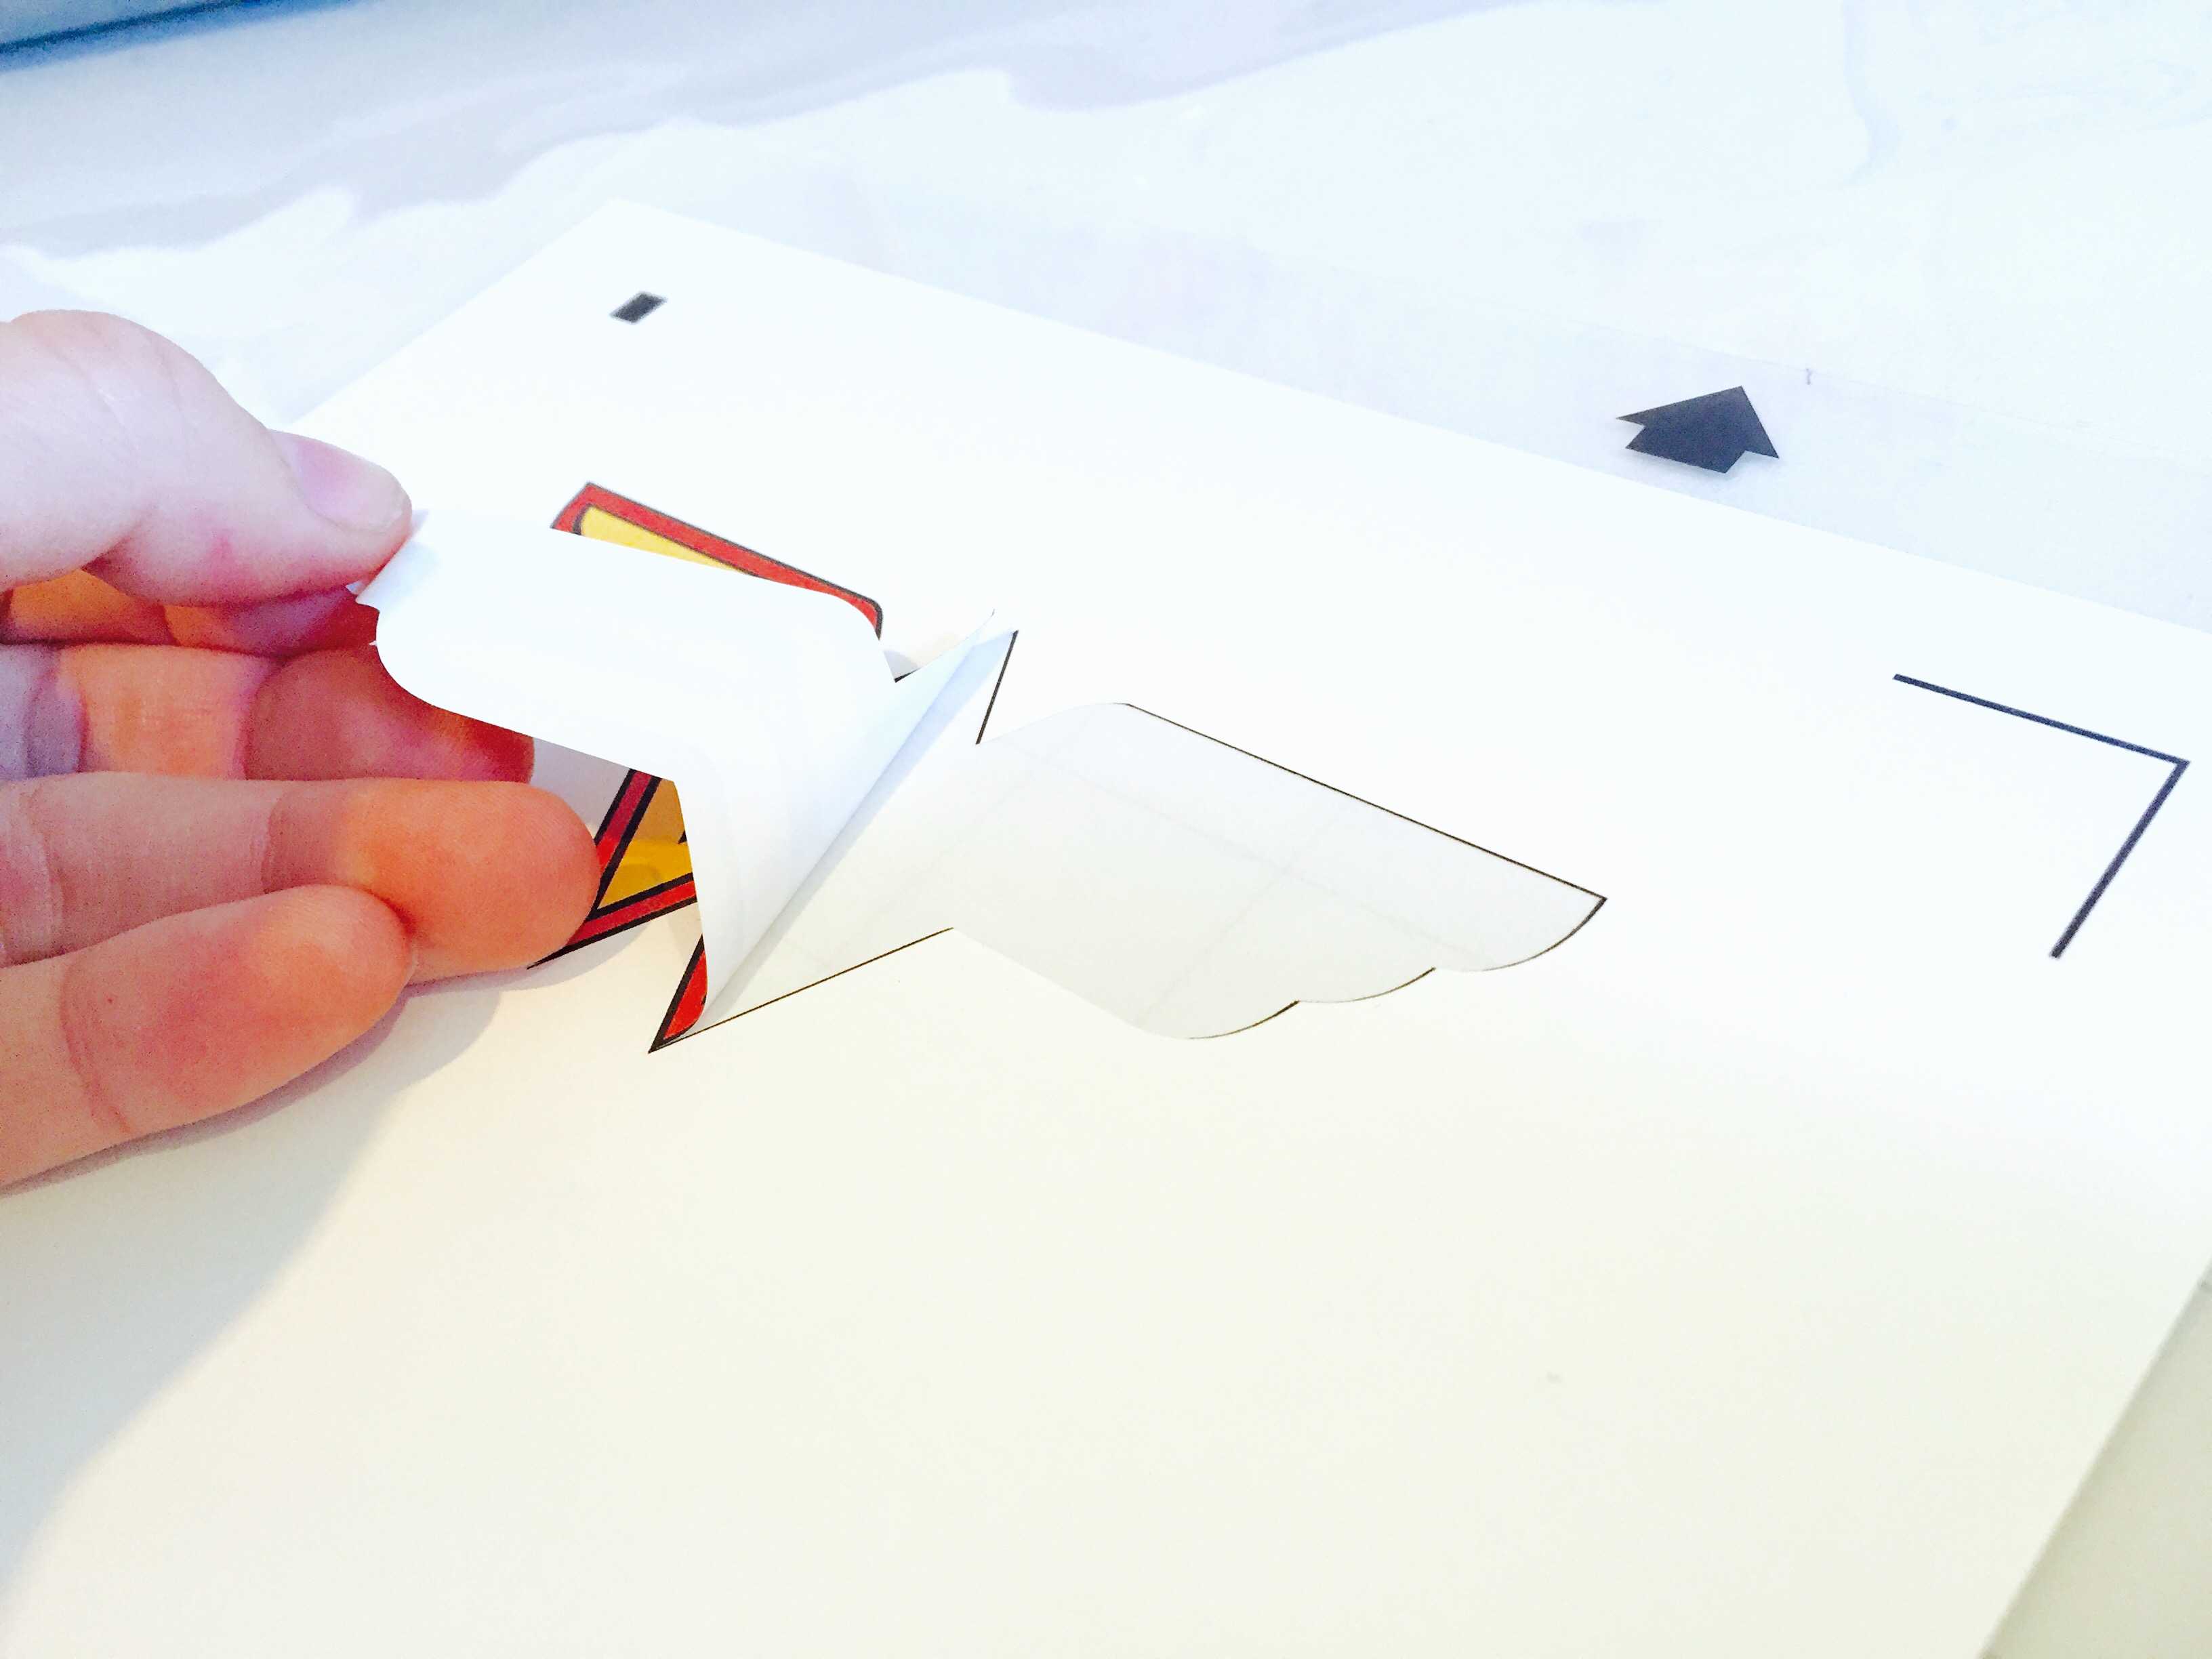
- Woo hoo! You’ve successfully printed and cut out your DC Wonder Woman™ design. Remove it from the backing paper and set aside.
Step 5:
- Now get ready to work with your red glitter heat transfer vinyl! First, put your vinyl (glitter side down) onto the CAMEO mat just as you did for your printable heat transfer paper in Step 4. Load it into the Cameo.
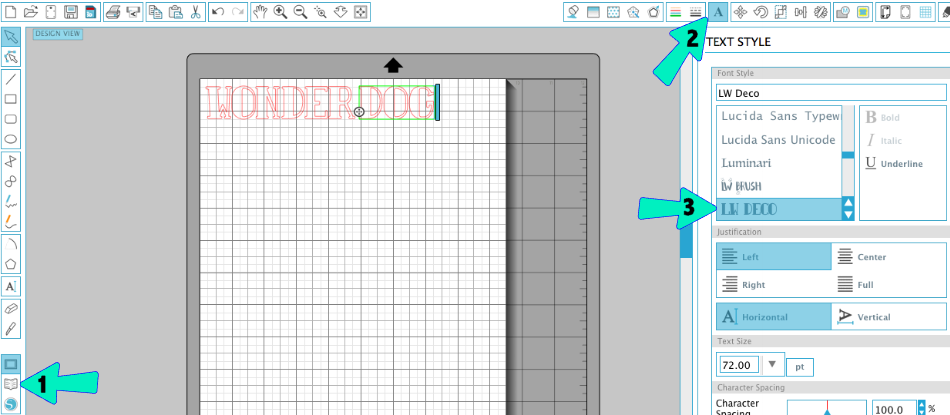
- In your Silhouette Studio®, go into your library and make sure you select your Deco Font (#122252) out of your library.
- Once your font is loaded, click on the text icon in the top toolbar, make sure Deco font is highlighted, and type the text you want to use on your dog bandana. I put “WONDER DOG” on mine.
- But you can use any saying you want that goes with the theme you’re going for!
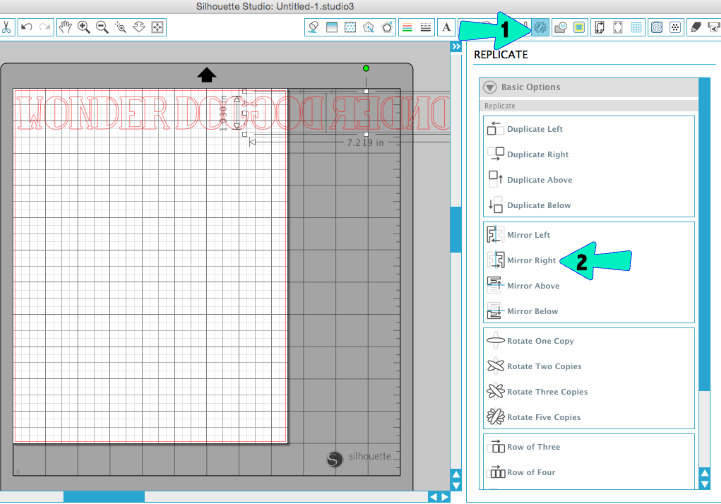
- Then, with your text selected, click on the “Replicate” icon in the top toolbar and choose “Mirror Right”. This will mirror your text.
- Anytime you use heat transfer vinyl, you need to make sure the text is mirrored, because you will flip it over to the glitter side once it’s cut.
- Delete the non-mirrored text, and put the mirrored version inside the mat on your screen.
- Finally, click on the “cut” icon in the top toolbar. And just as you did in Step 4 above, check to make sure you’ve selected the right material type and that your blade in your machine is adjusted to the correct blade setting. Then, send the design to the CAMEO to cut.
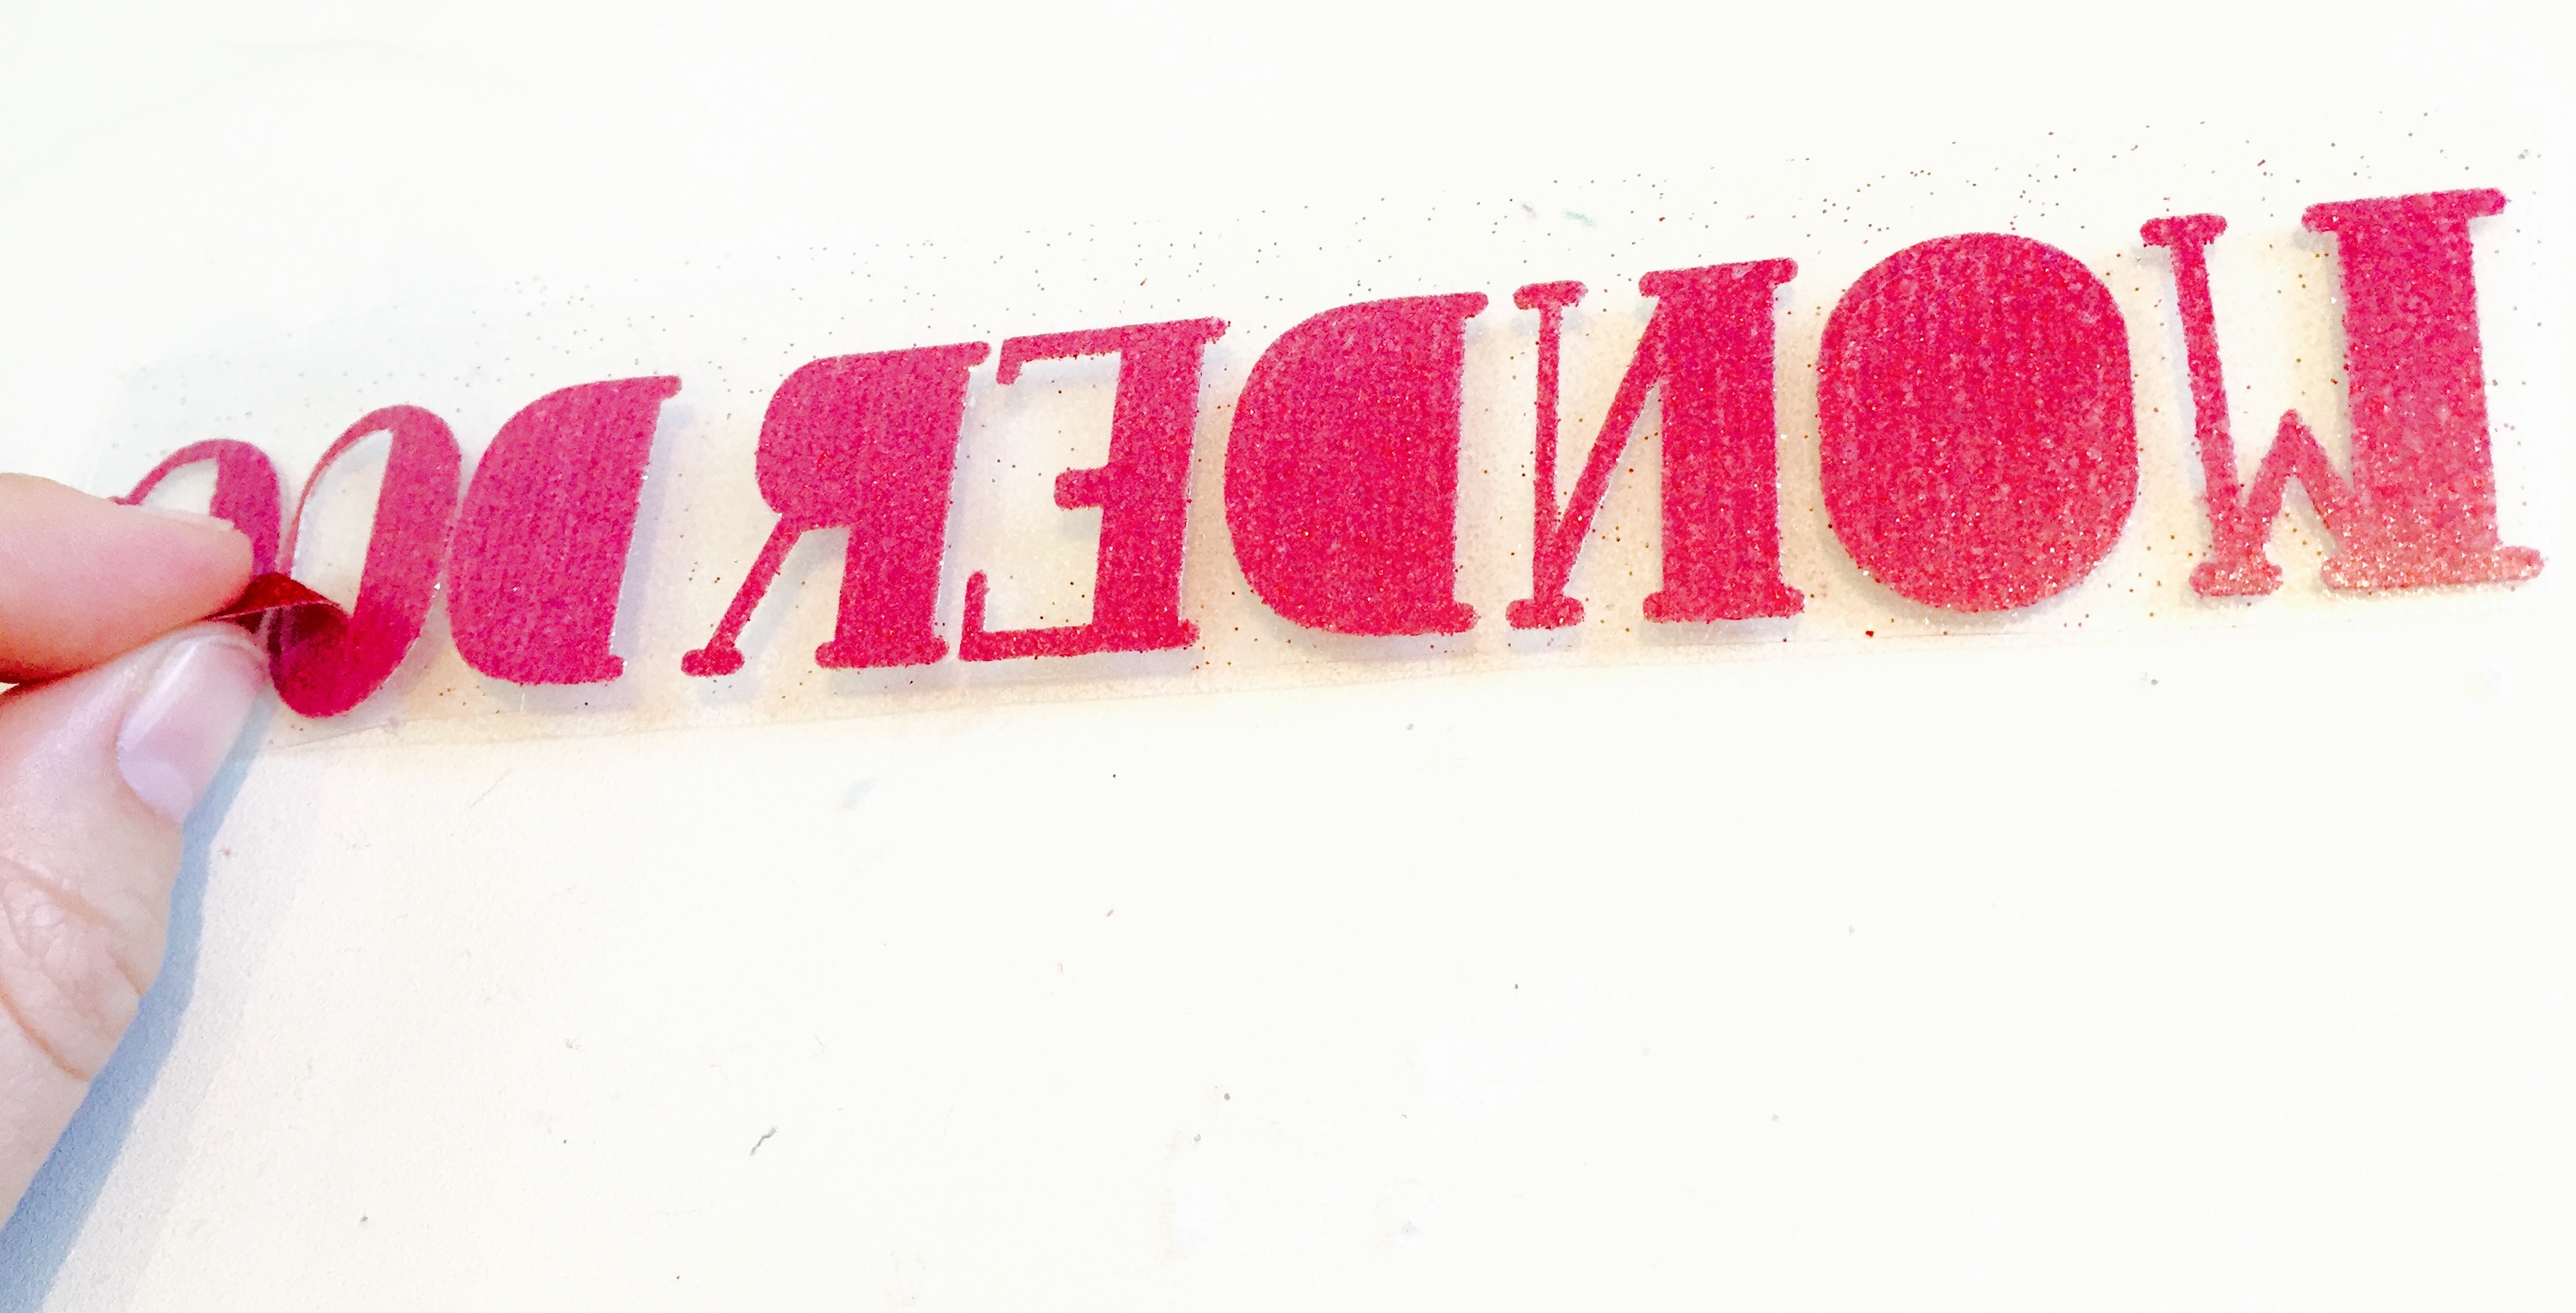
- Once cut, remove the vinyl (including the clear cover sheet) from your cutting mat. Then, remove the excess vinyl from around your wording, leaving only your letters stuck to the clear cover sheet.
Step 6:
- This is almost EXACTLY the same as Step 5! Just using your star design, and silver glitter heat transfer vinyl instead of your red.
- Follow every step from Step 5, except instead of using font, go to your design library and load your star design into your Silhouette Studio® (#61255).
- For mine, I re-sized my star from it’s original size to around .5 x .5″, and replicated it across my Silhouette Studio® cutting mat 16 times (but use as many or as few stars as your heat desires).
- Load your vinyl and cutting mat into the CAMEO, mirror your stars, check your cut settings, and then send your star design to the CAMEO to cut.
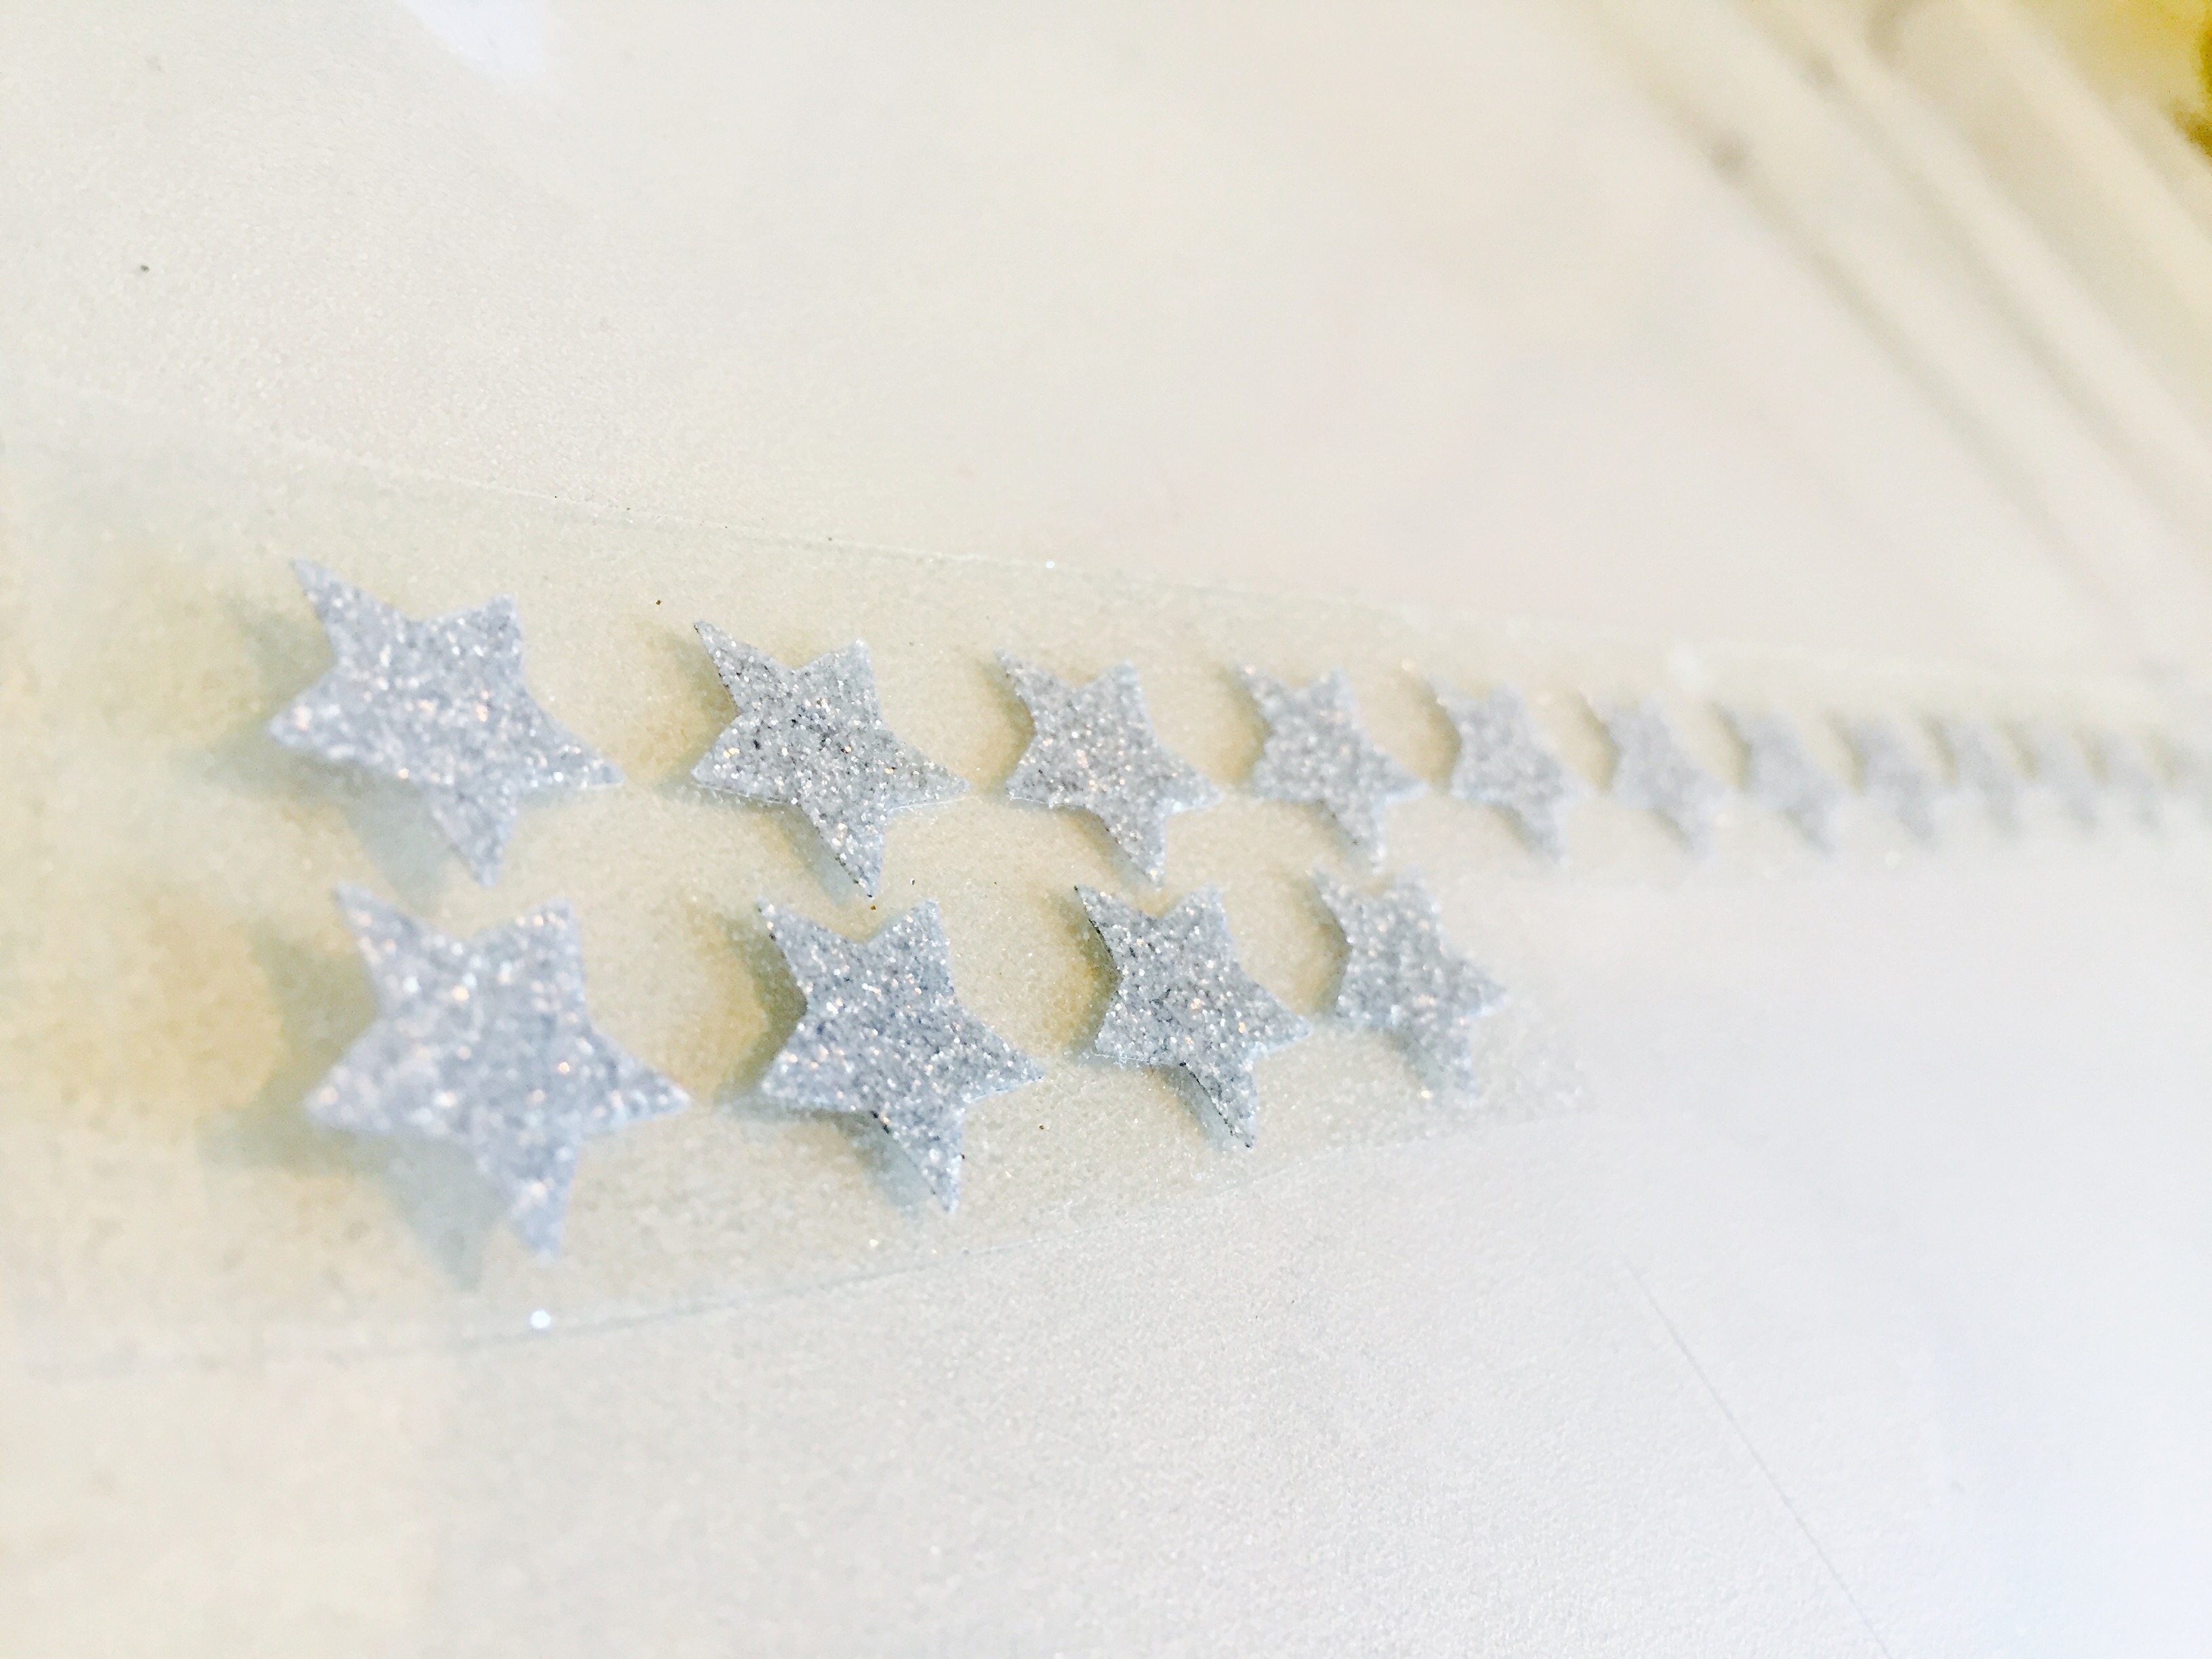
- Again, remove your silver glitter heat transfer vinyl from your cutting mat and take away the excess vinyl from around your stars.
Step 7:
- This should be an easy one for ya. If you already have a plain blue bandana, skip to Step 8.
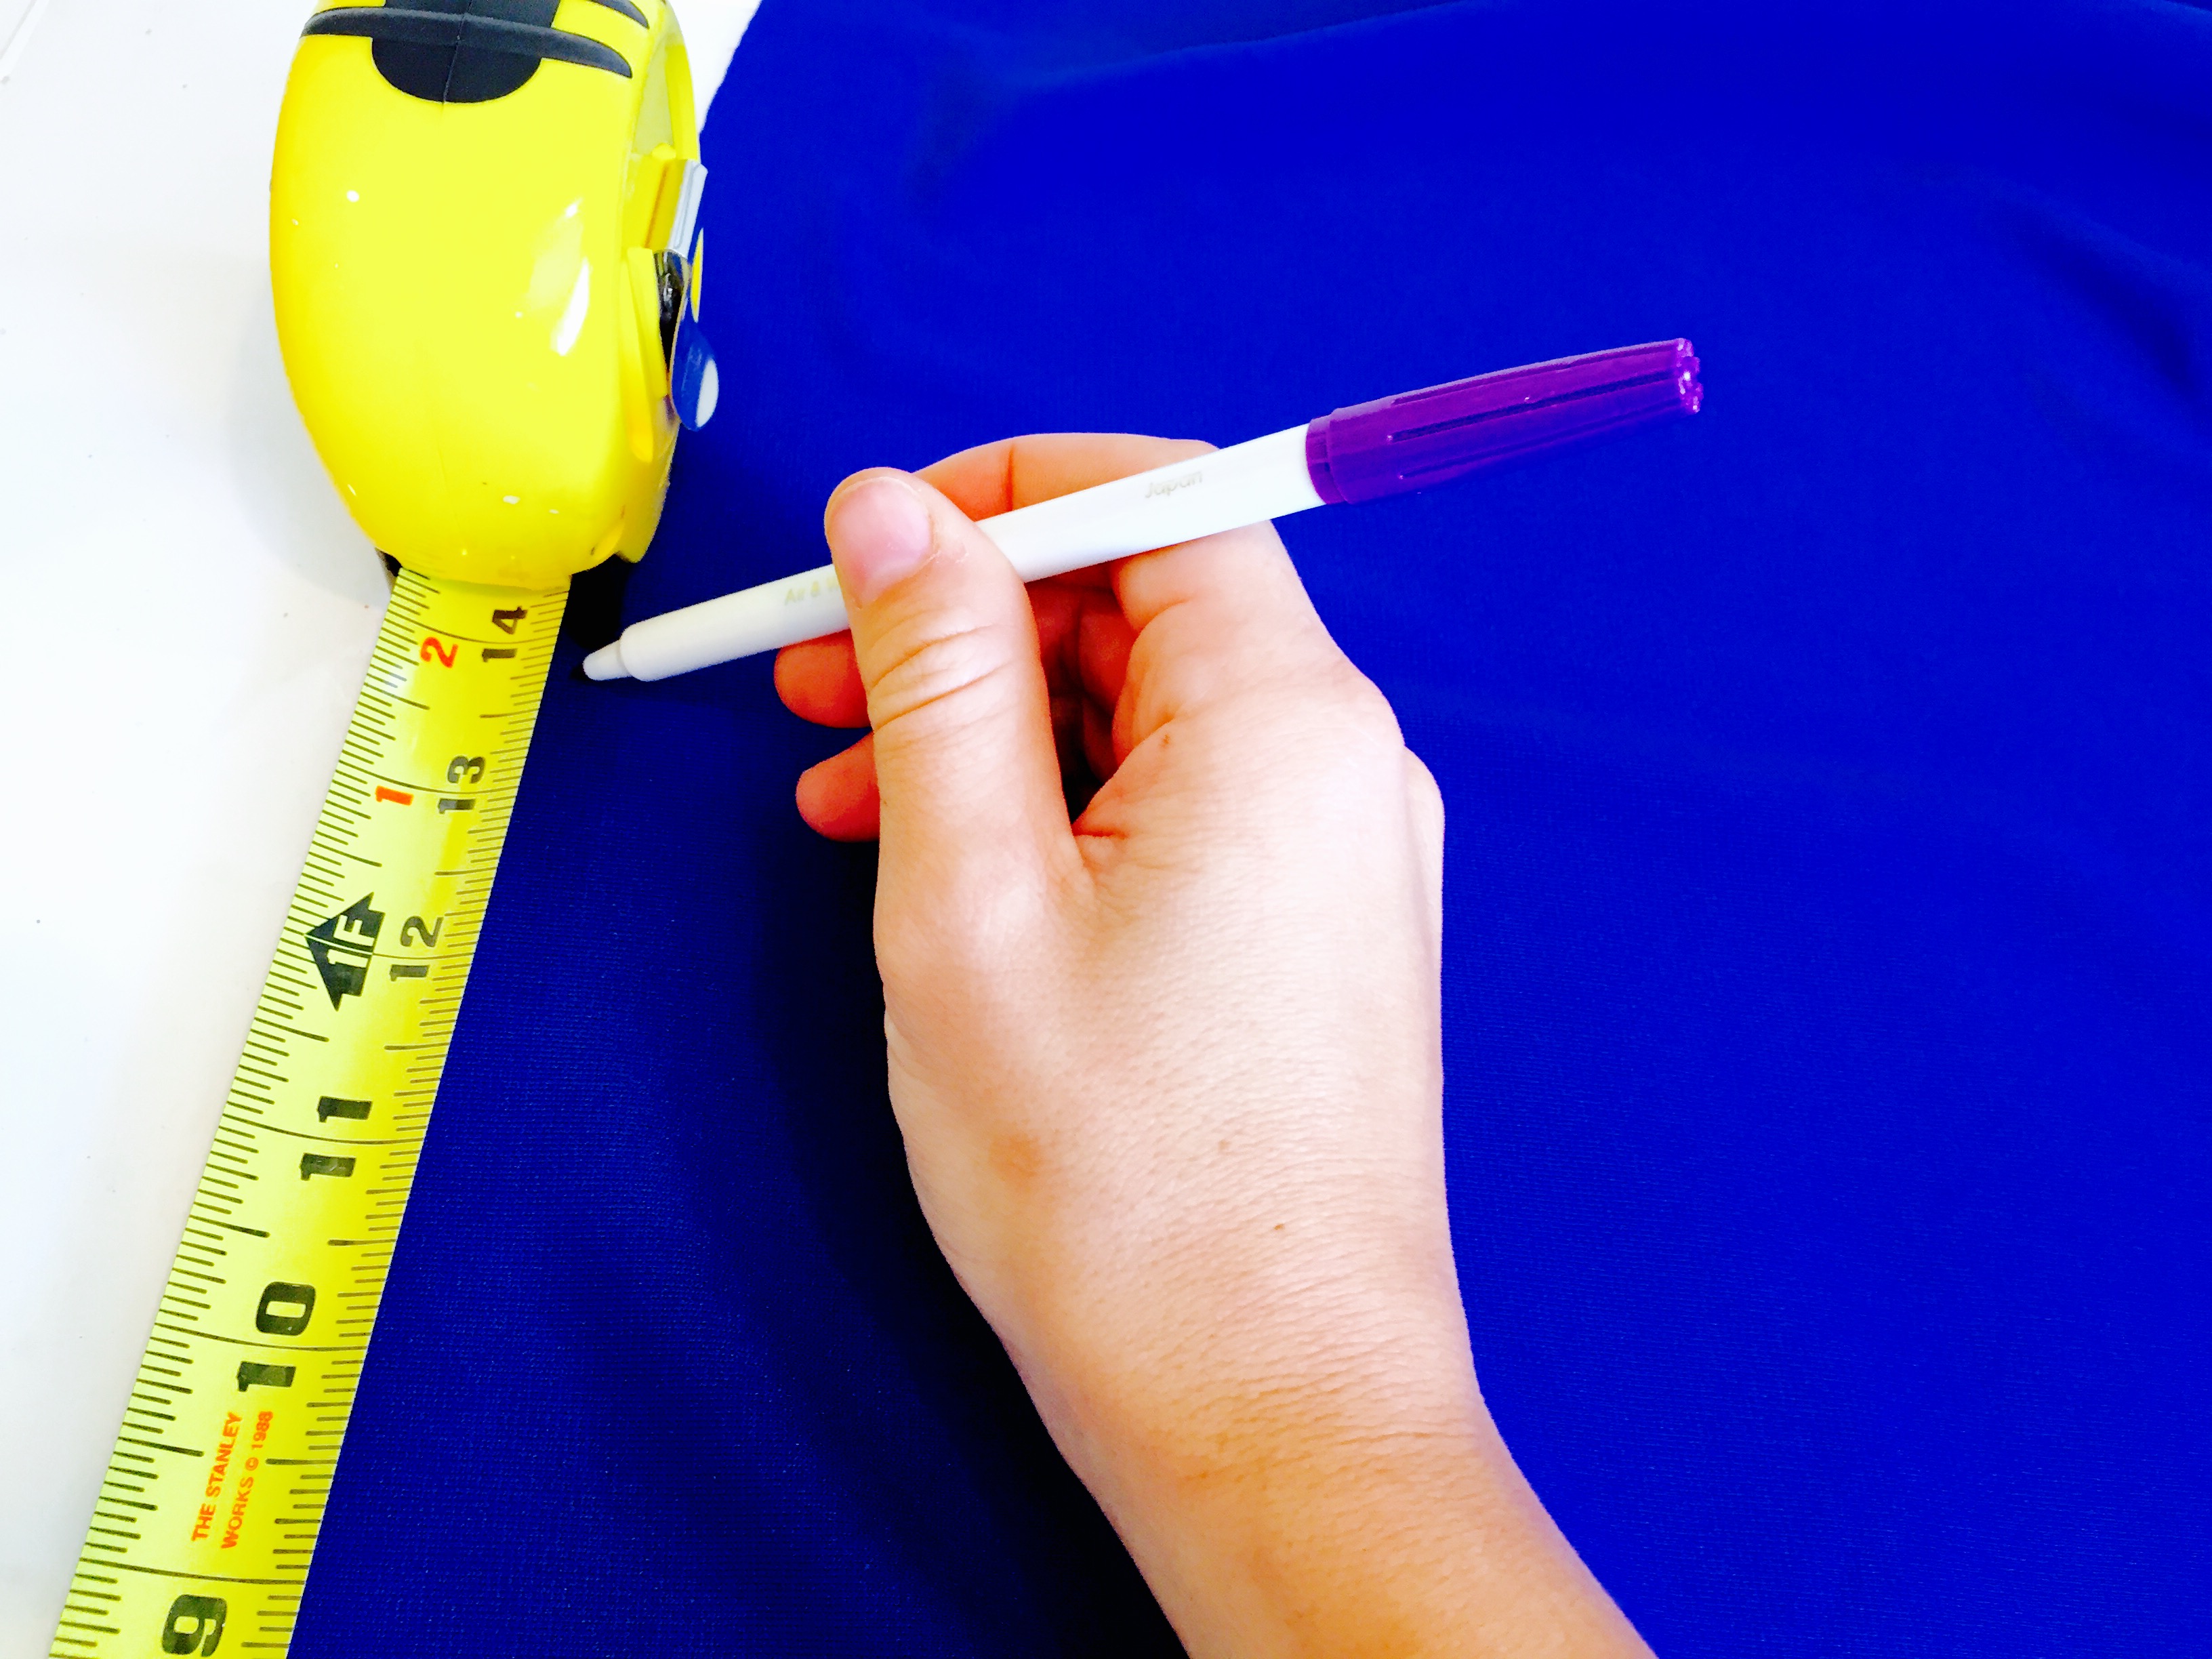
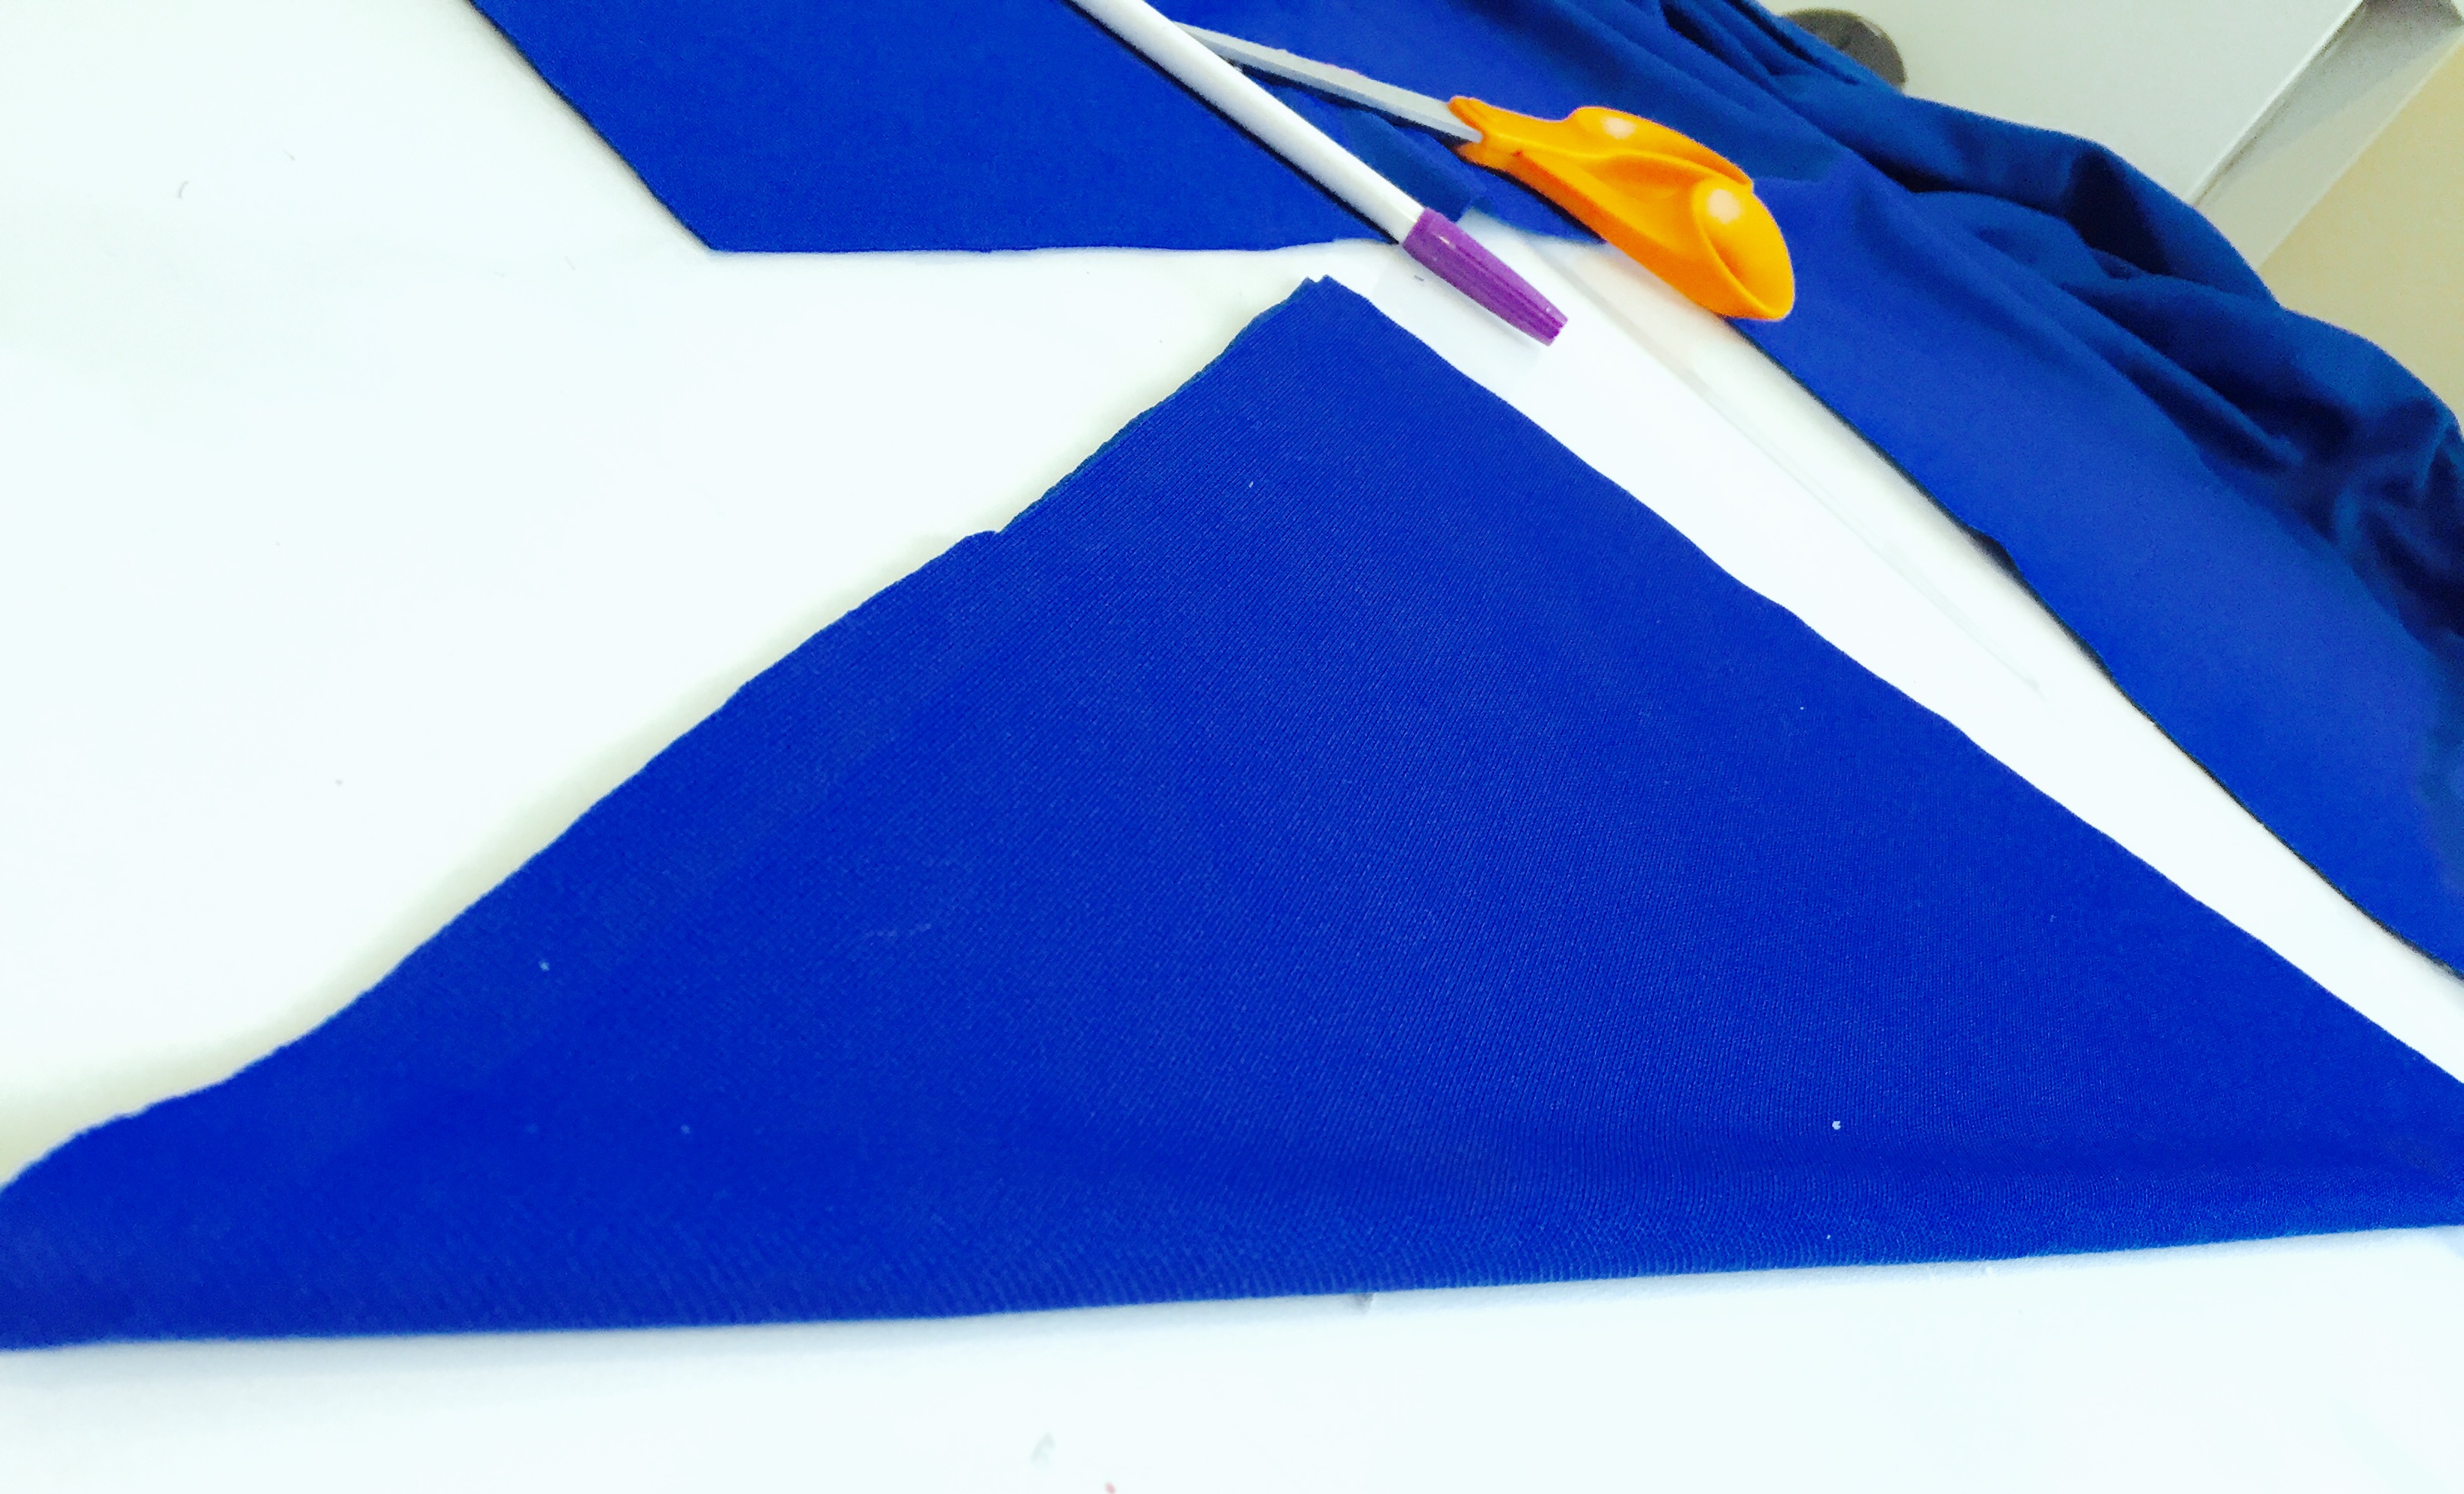
- If you don’t – take a plain blue piece of fabric and measure out a 14 x 14″ square. Cut it out, and fold it in half from corner to corner to make a triangular bandana out of it.
Step 8:
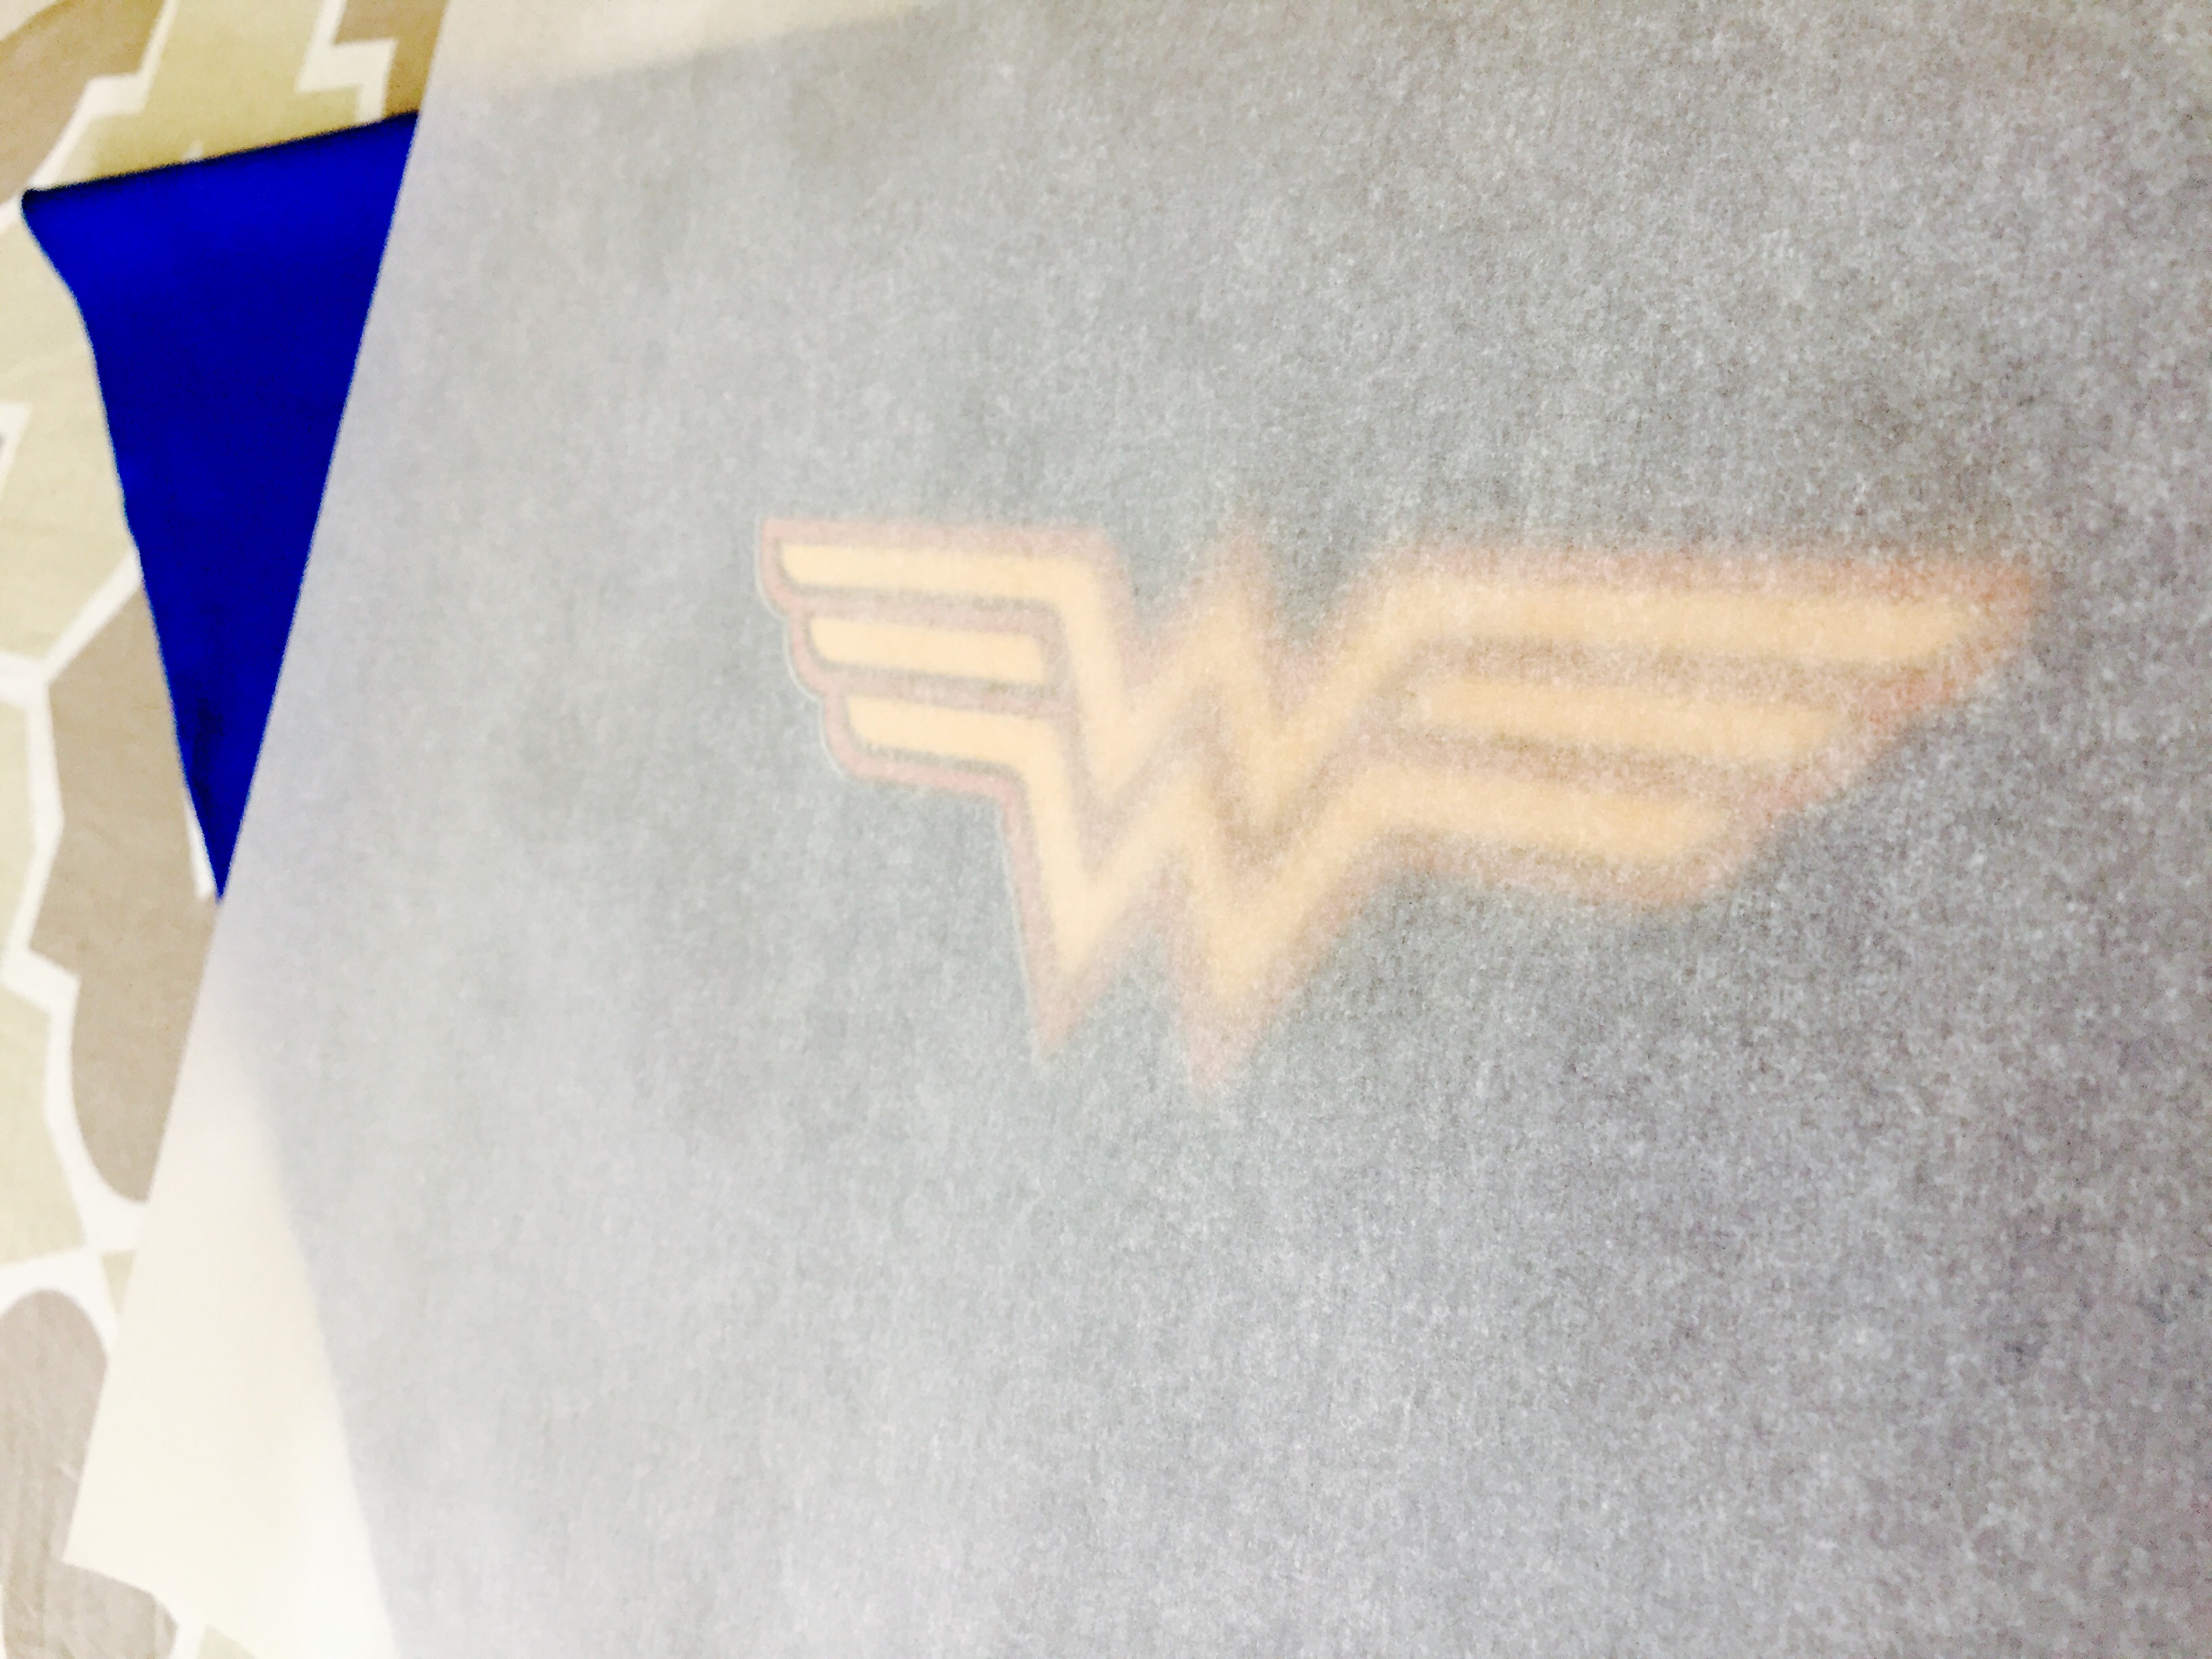
- Now the real fun begins! Take your DC Wonder Woman™ logo and place it down on the front of your bandana.
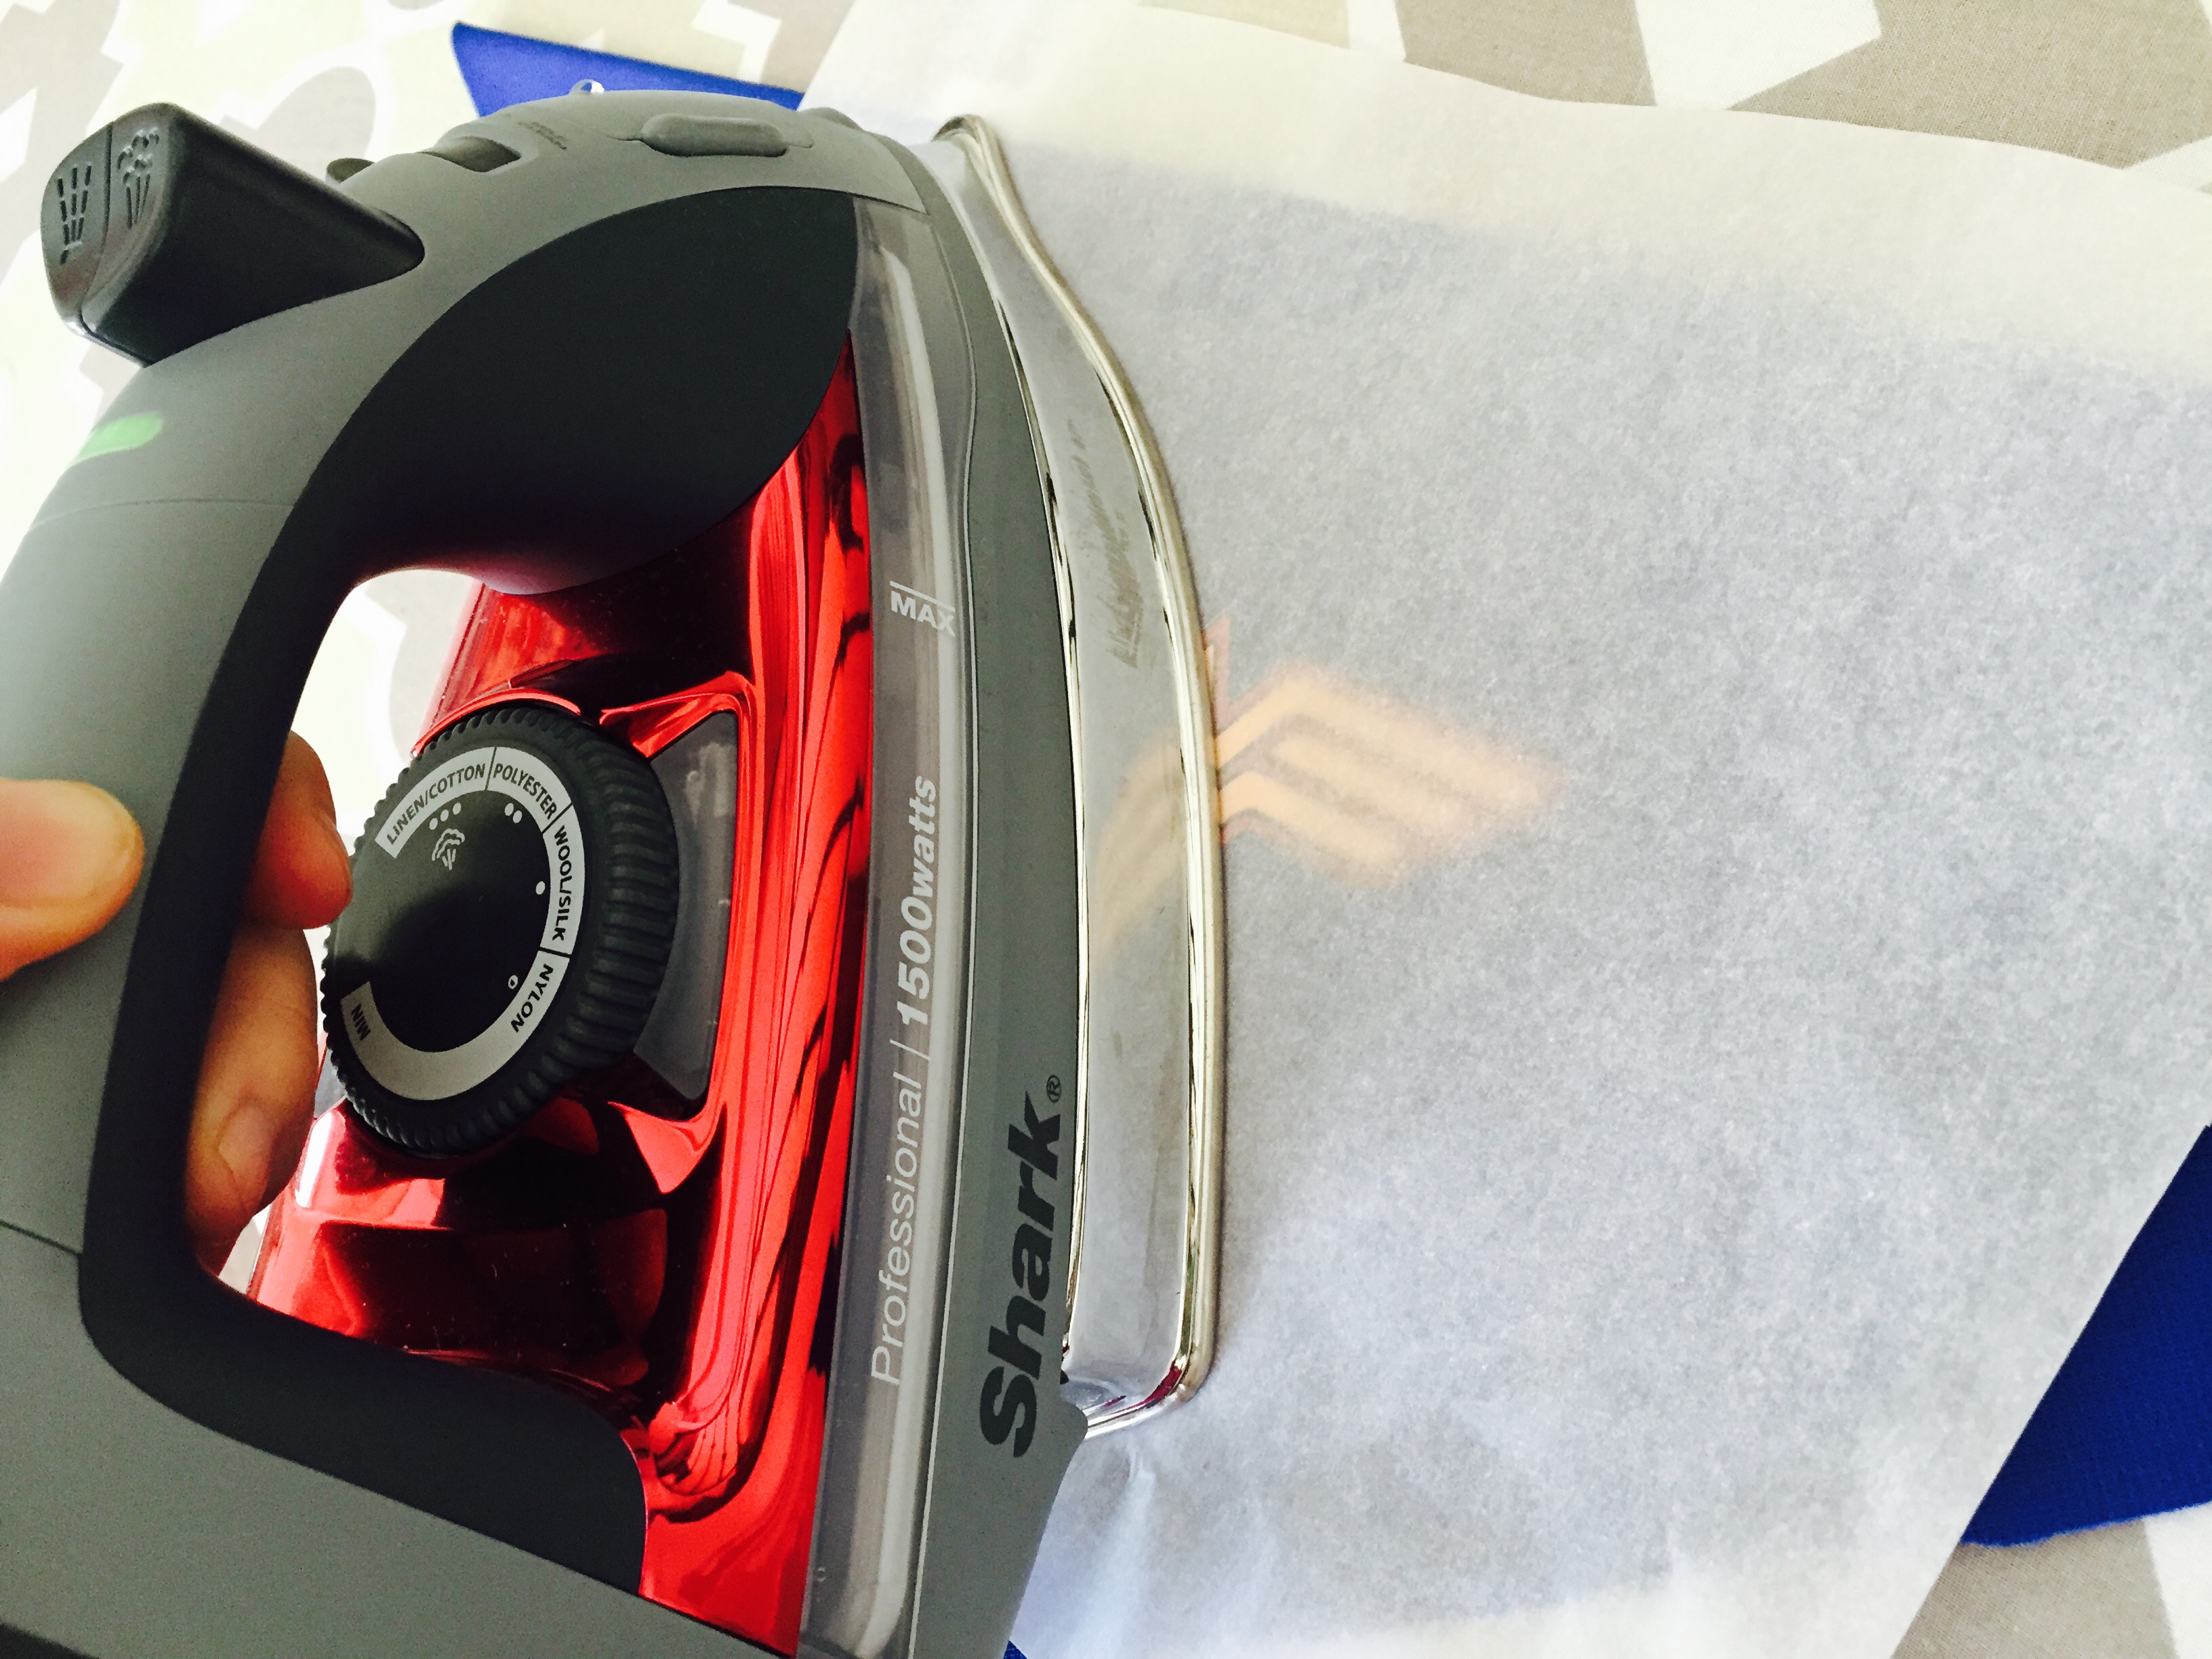
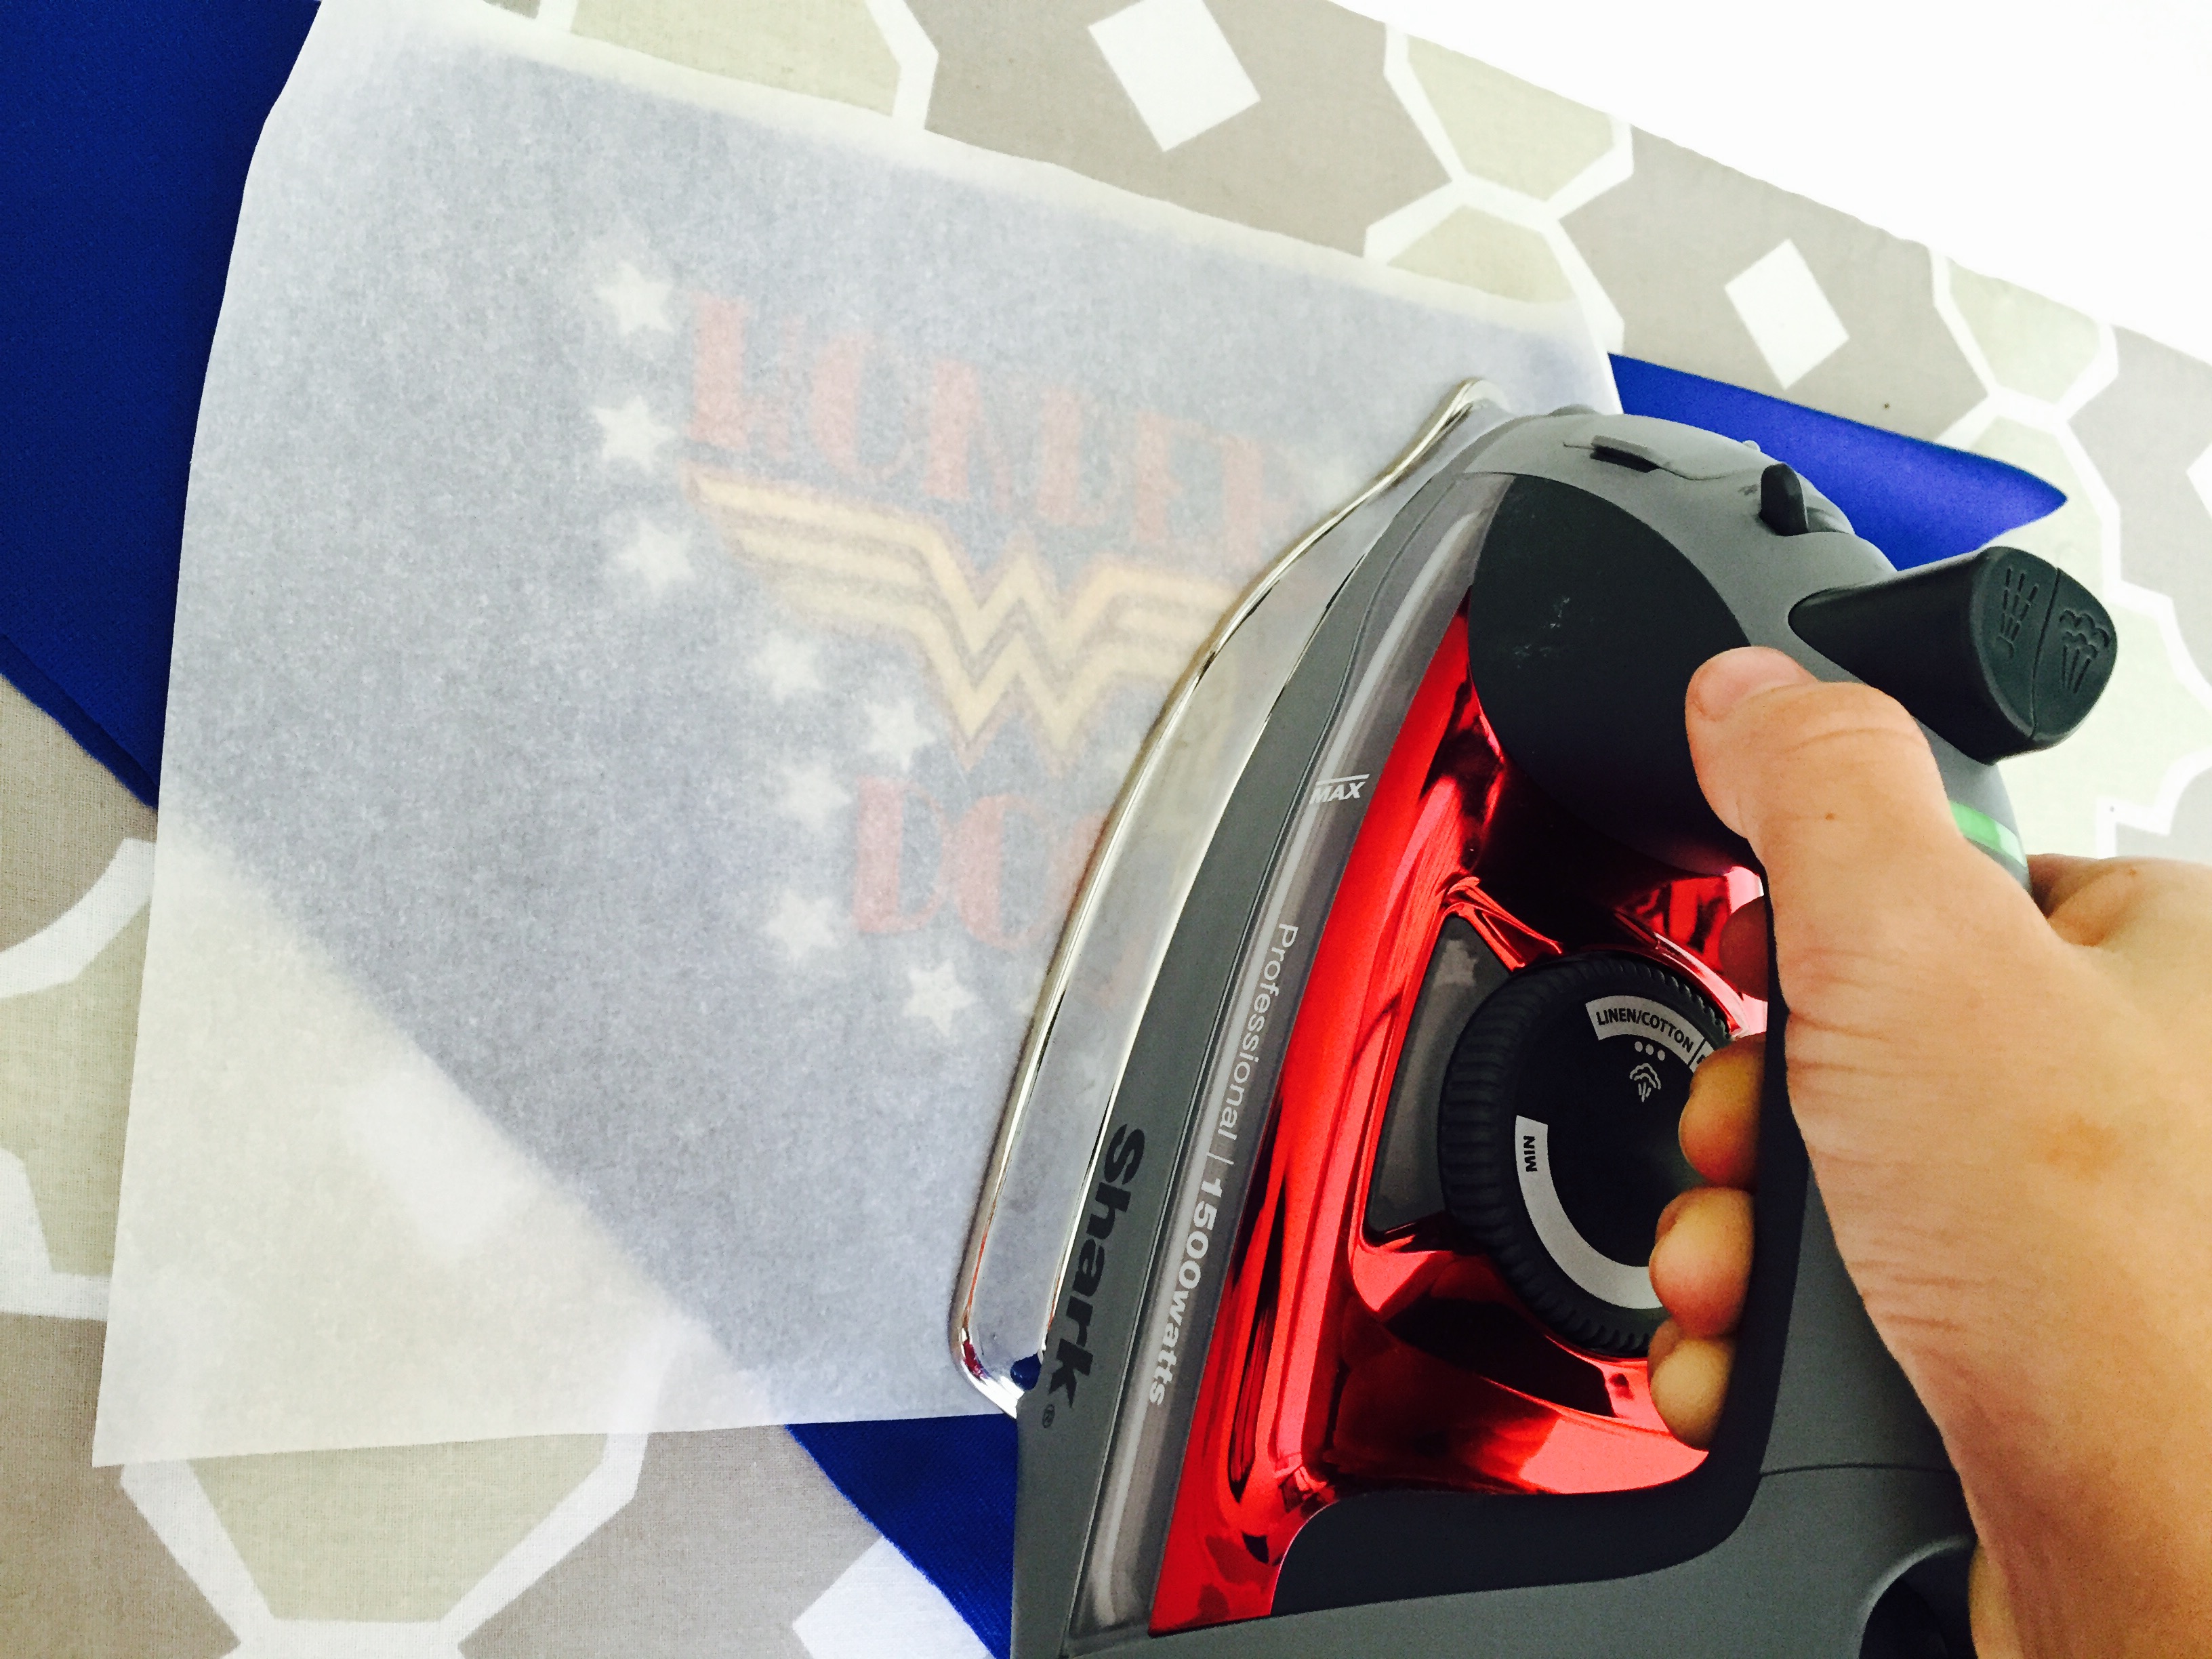
- Your Printable Heat Transfer Material comes with a protective sheet. Place this over your design, and apply heat with your iron.
- Apply pressure and heat for about 10 seconds, then remove the protective sheet.
Step 9:
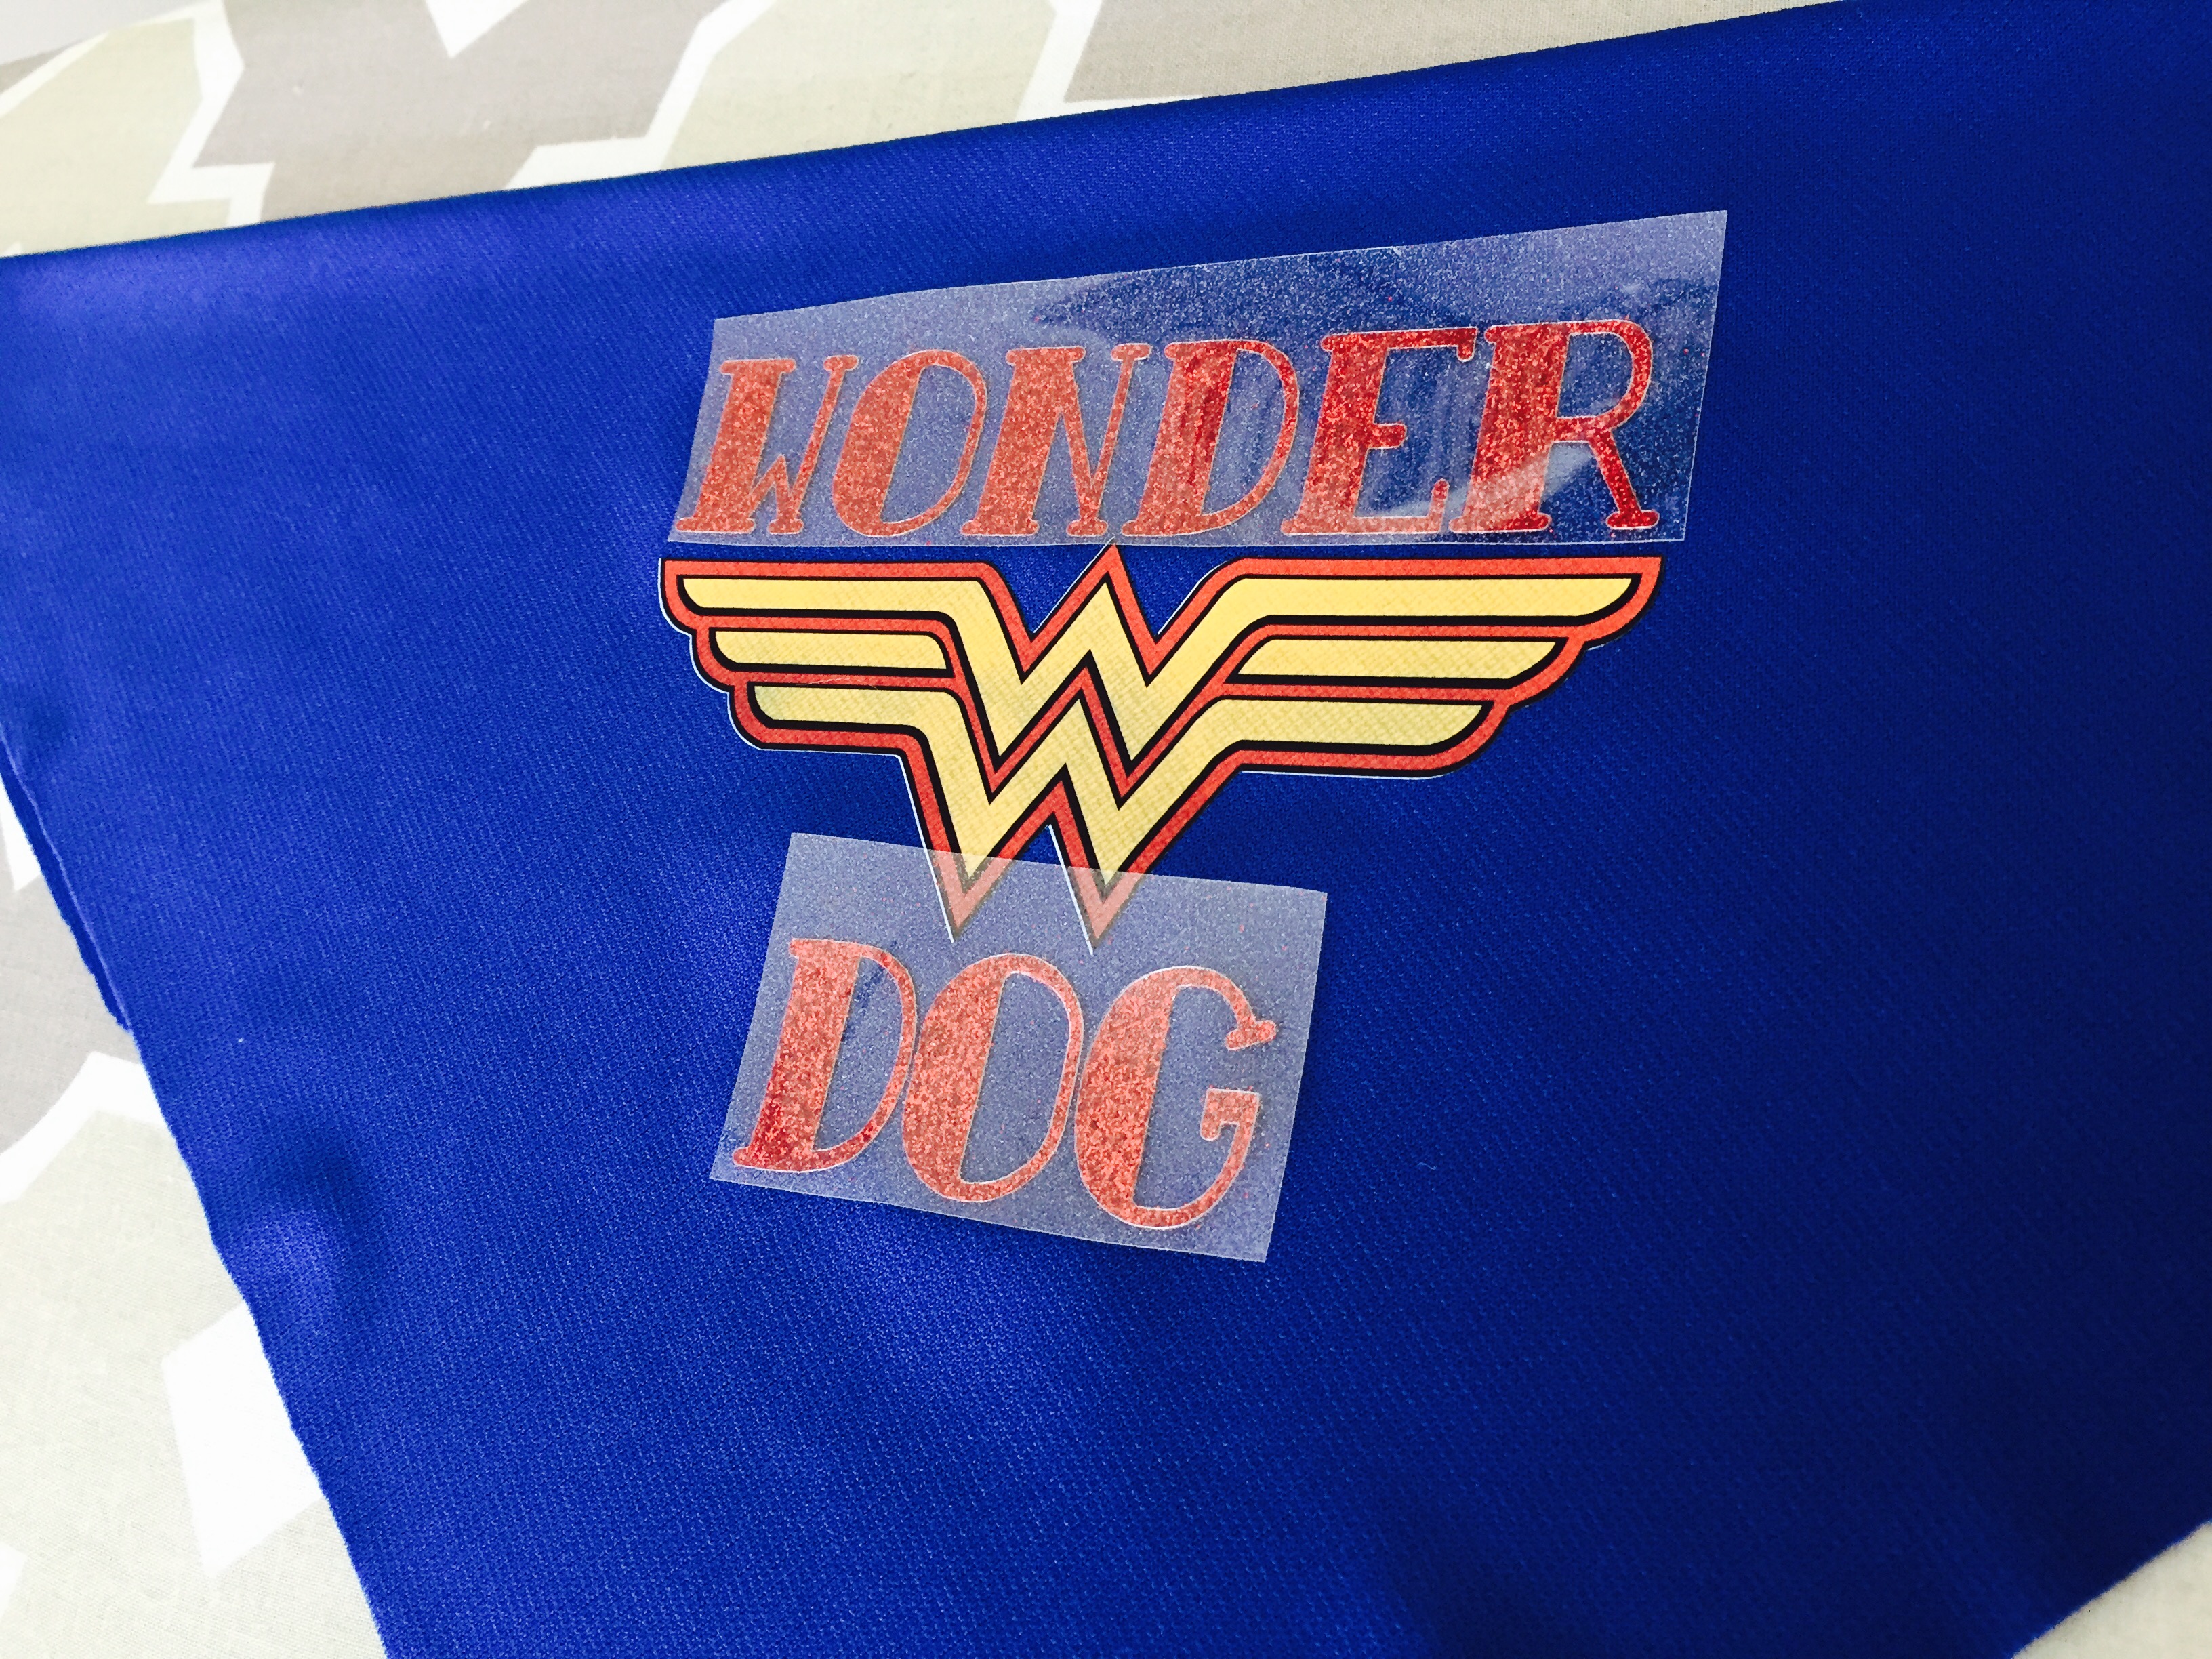
- Time to add some sparkle! Place your red glitter lettering (clear cover side up) where you want your wording on your bandana.
- Place your protect sheet over the design (just to make sure your iron doesn’t actually touch your DC Wonder Woman™ logo) and again, apply heat and pressure with your iron for about 10 seconds over your red glitter heat transfer vinyl.
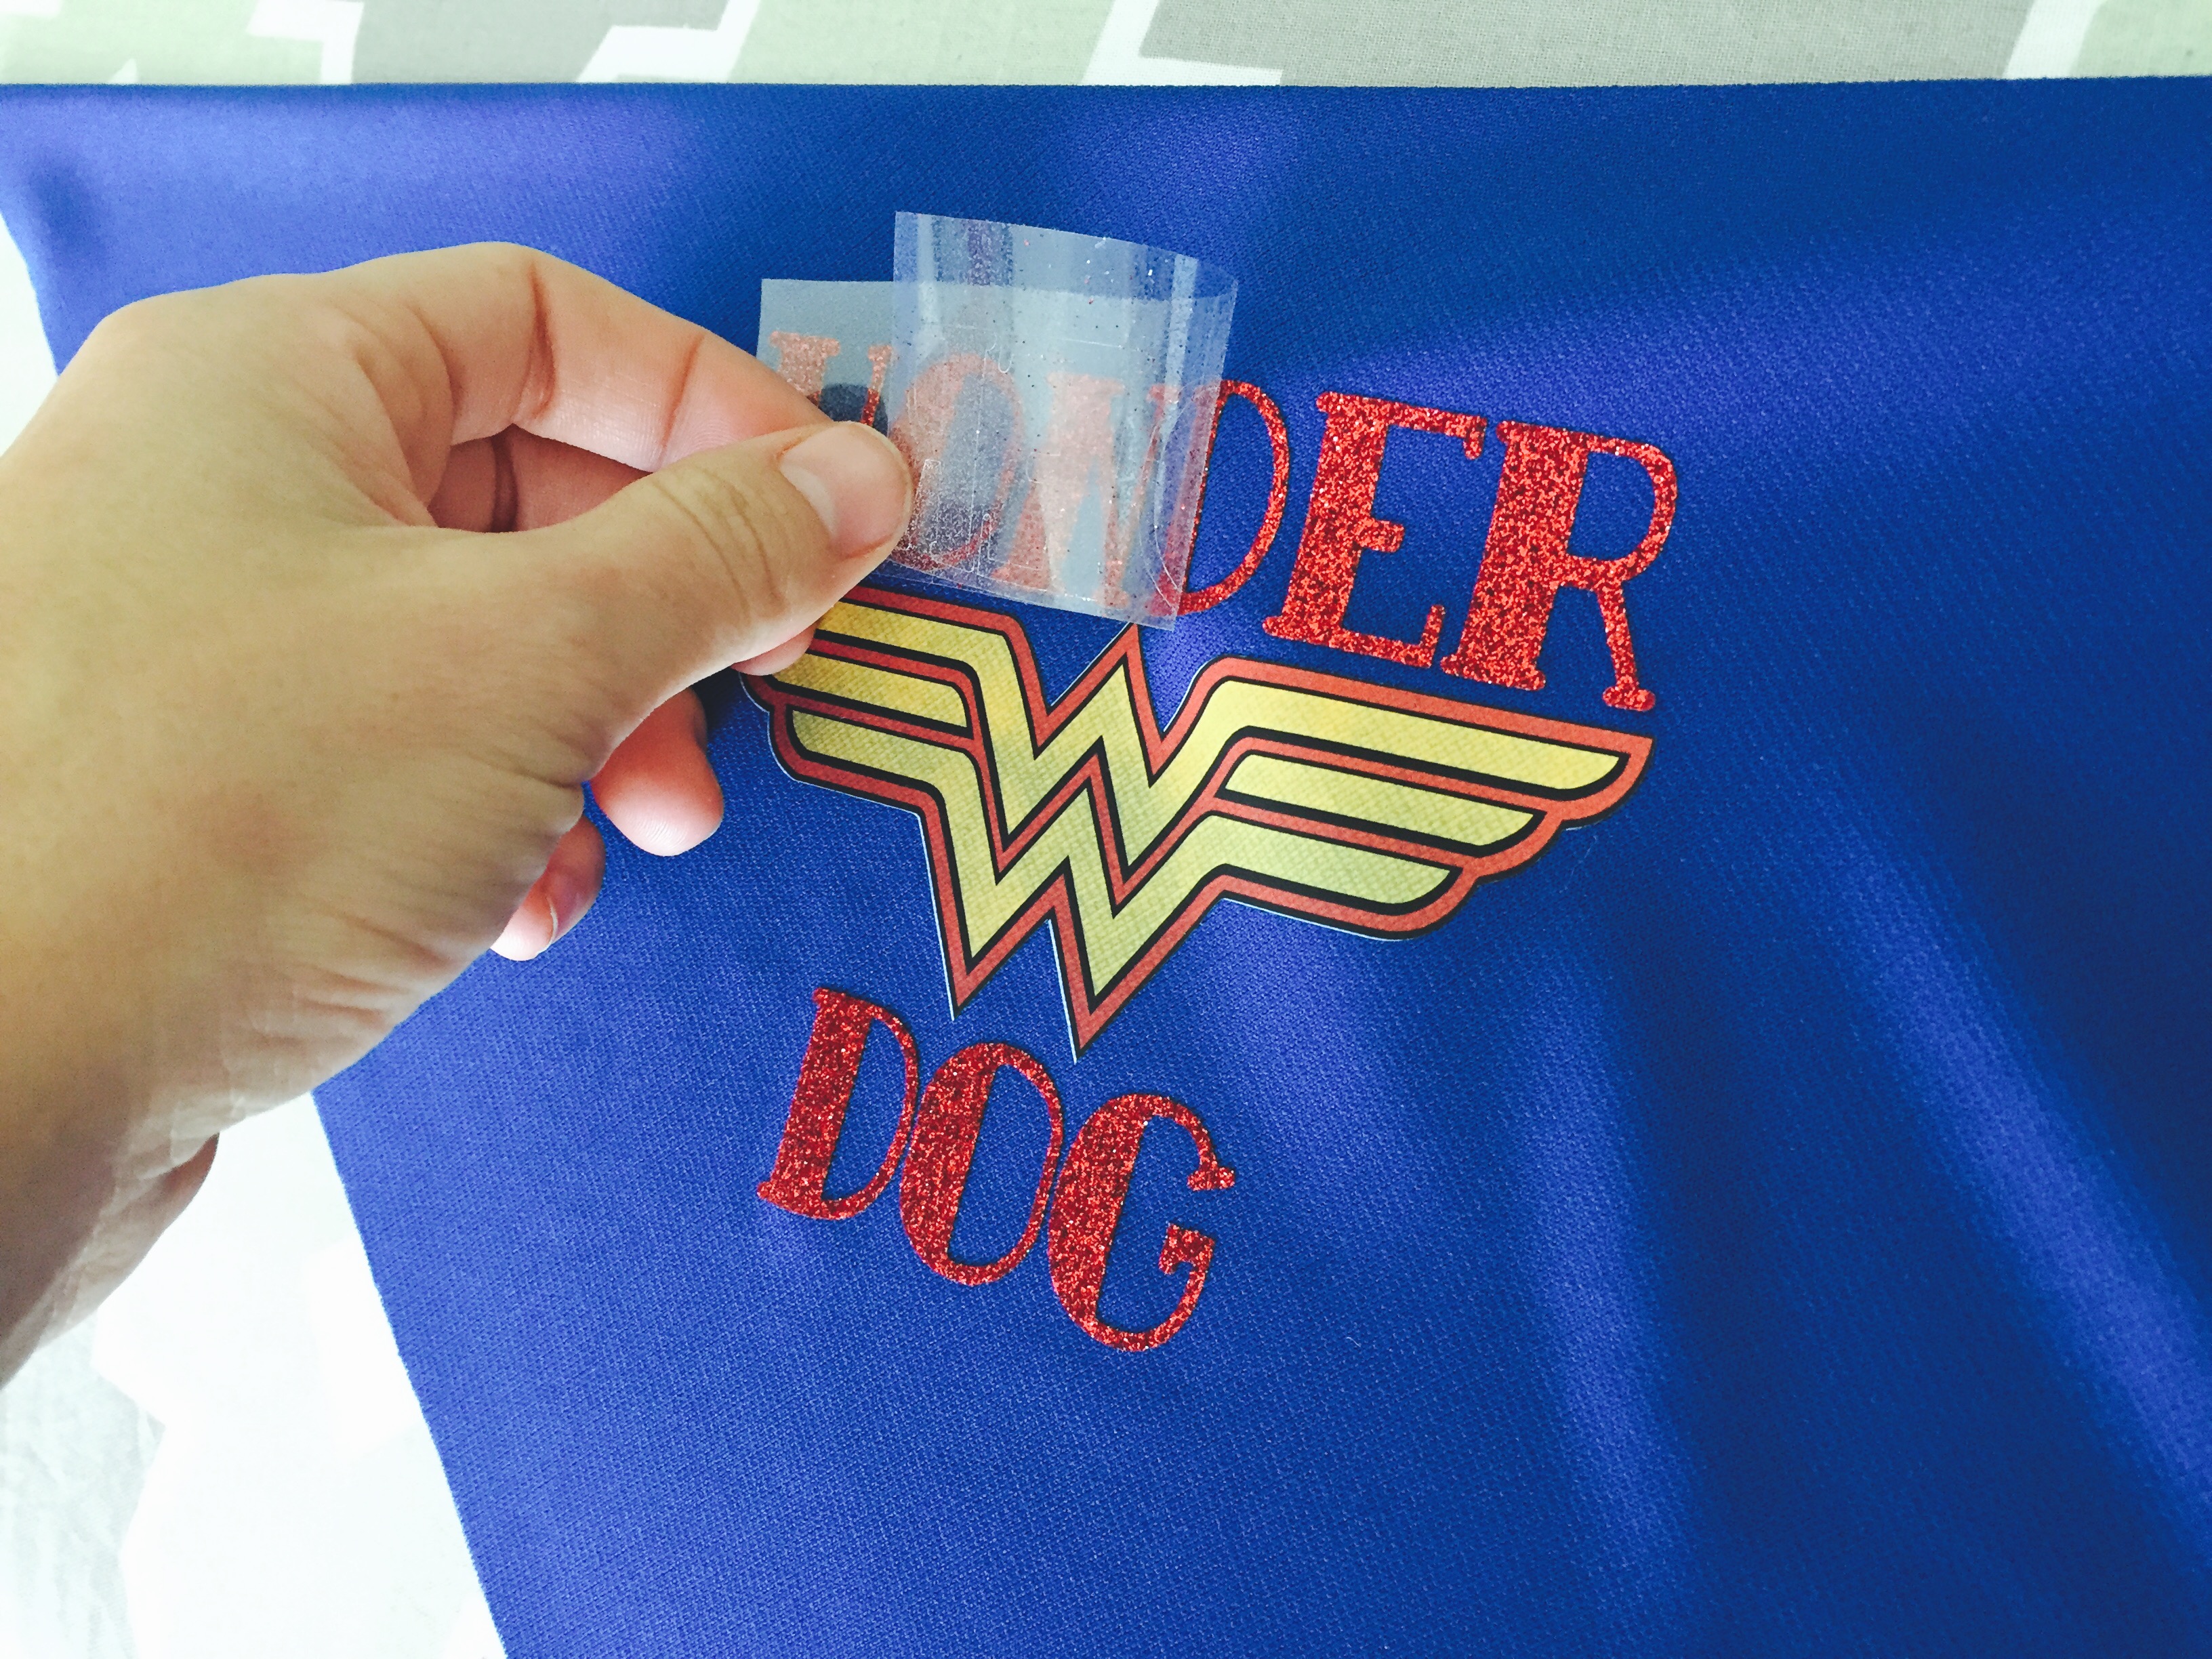
- Then, remove the clear cover off of the red lettering.
Step 10:
- Last step! Are you ready for the grand finale? Cut your silver glitter stars out into individual squares (including the clear cover) and place them individually around your design.
- Again, place your protective sheet over your design, and apply pressure and heat with your iron to adhere your silver glitter stars to your bandana.
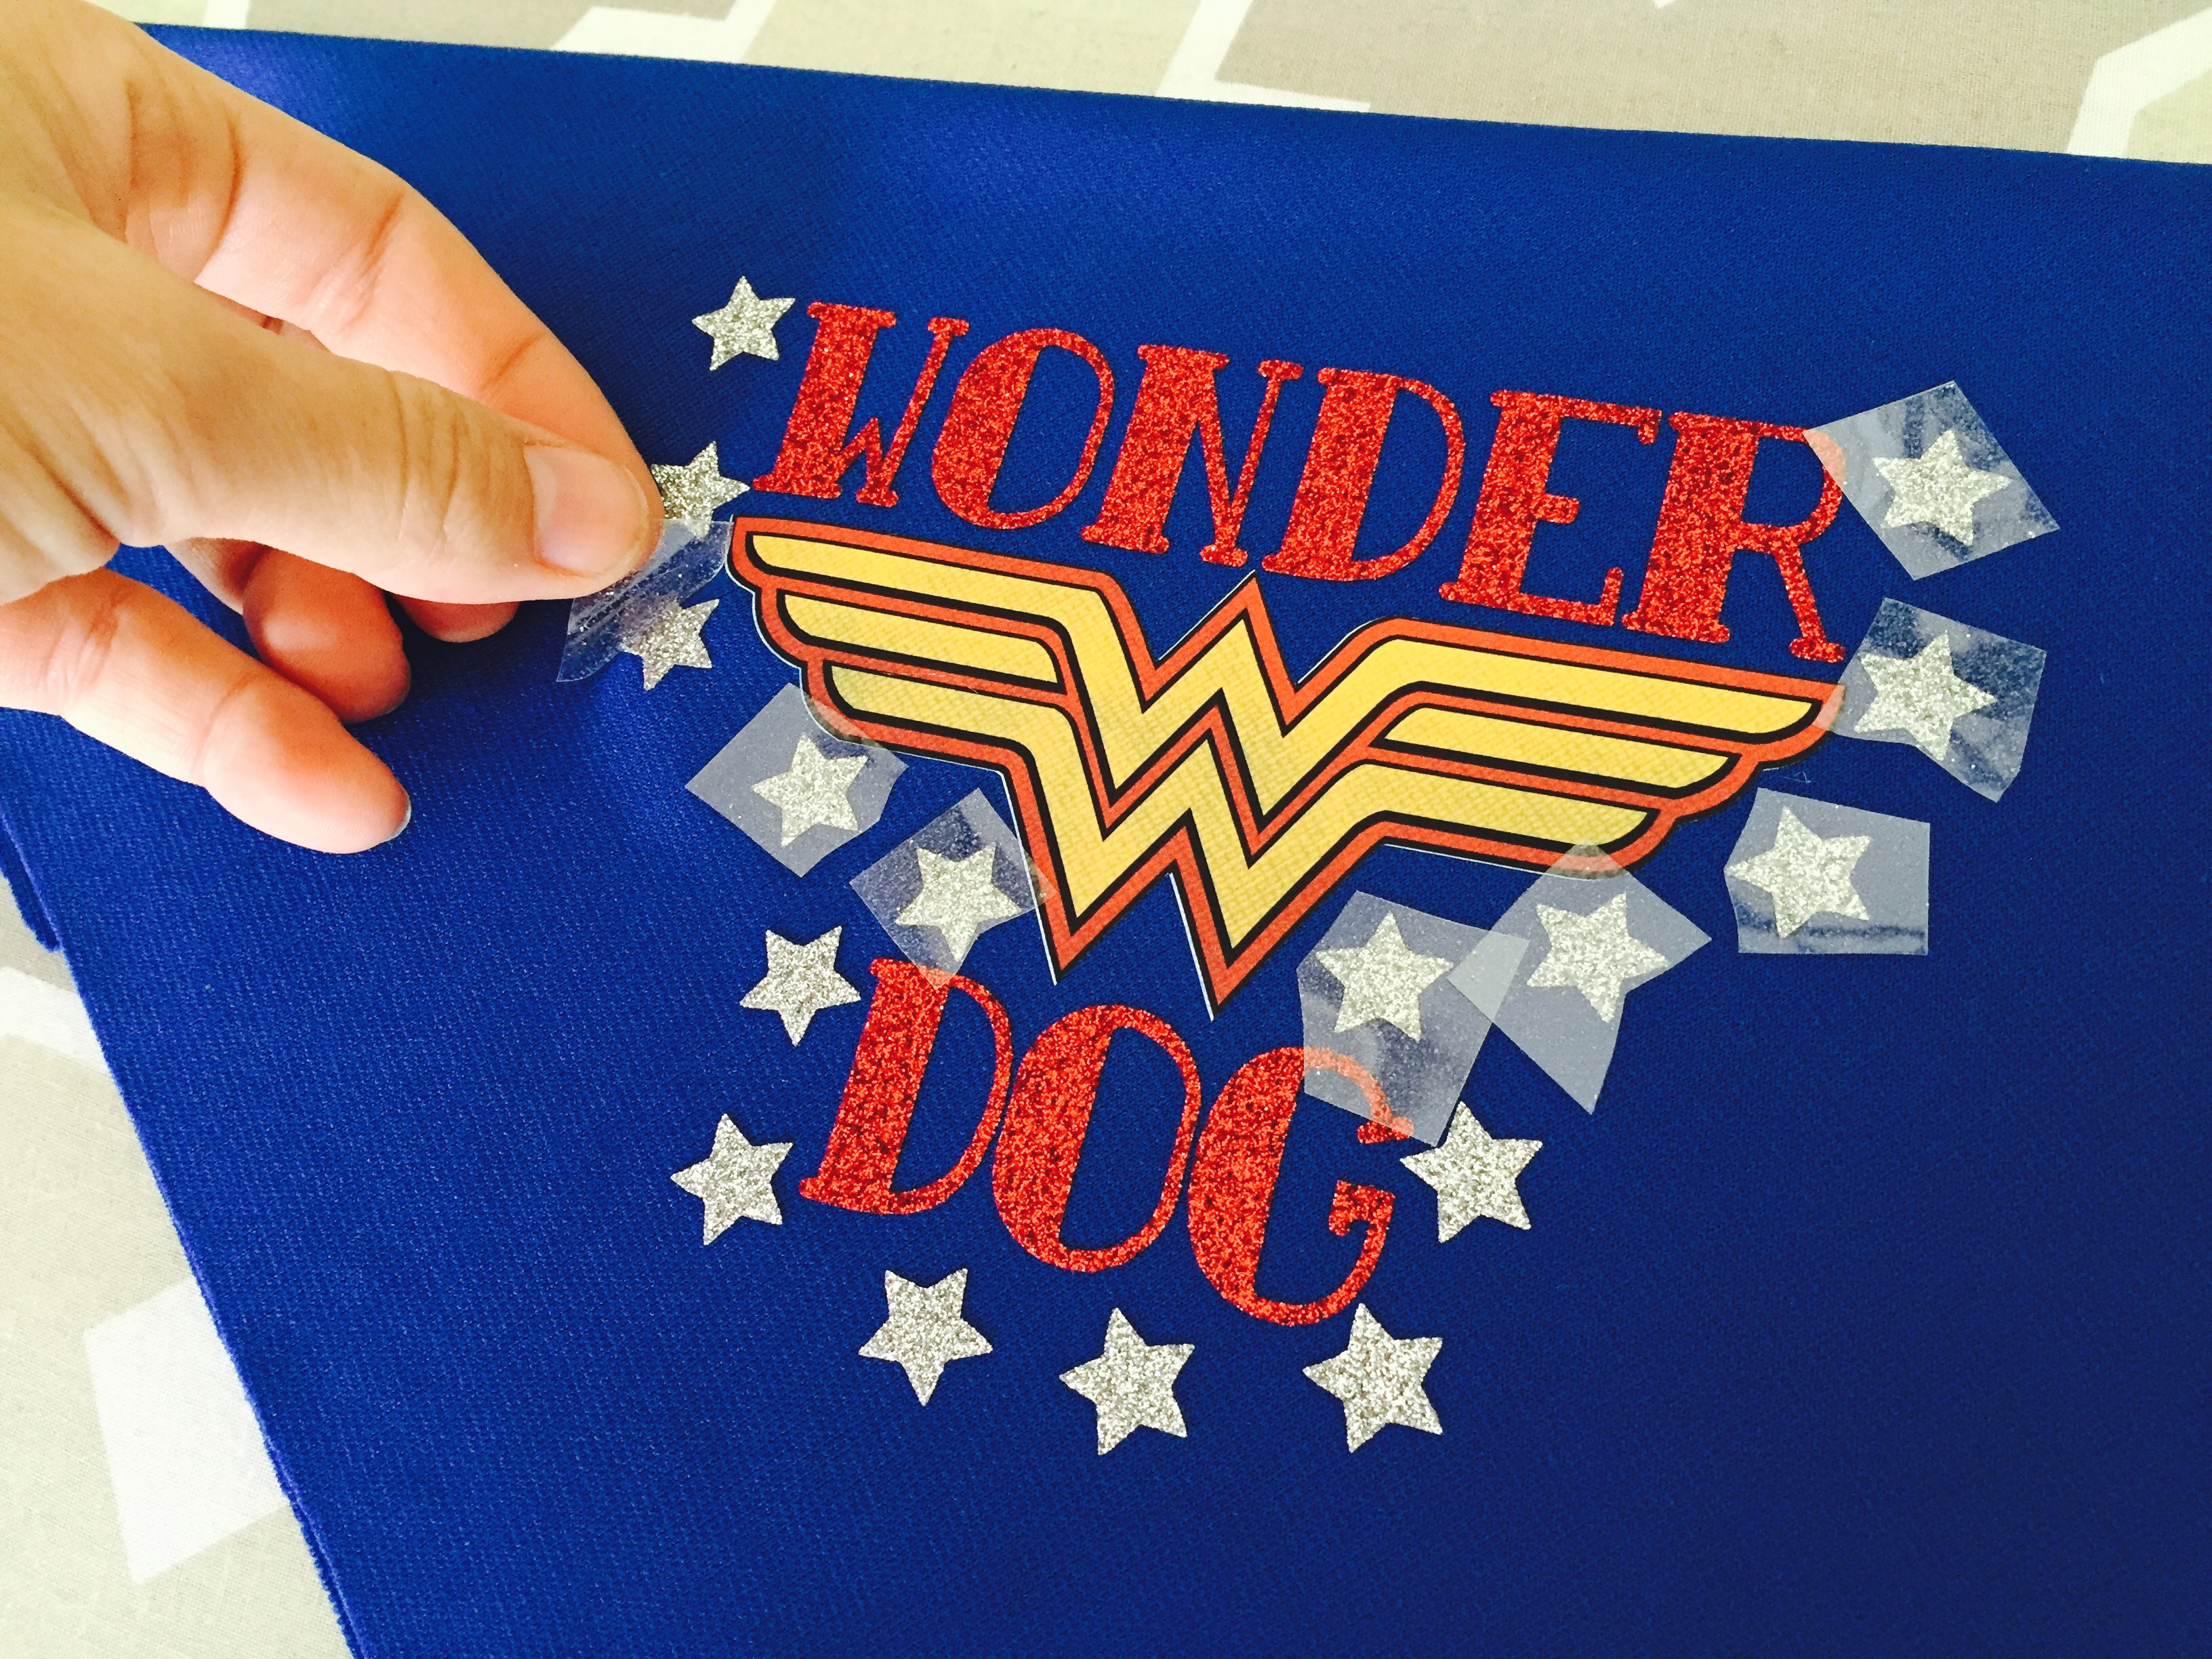
- Finally, remove the clear cover that still remains over each star.
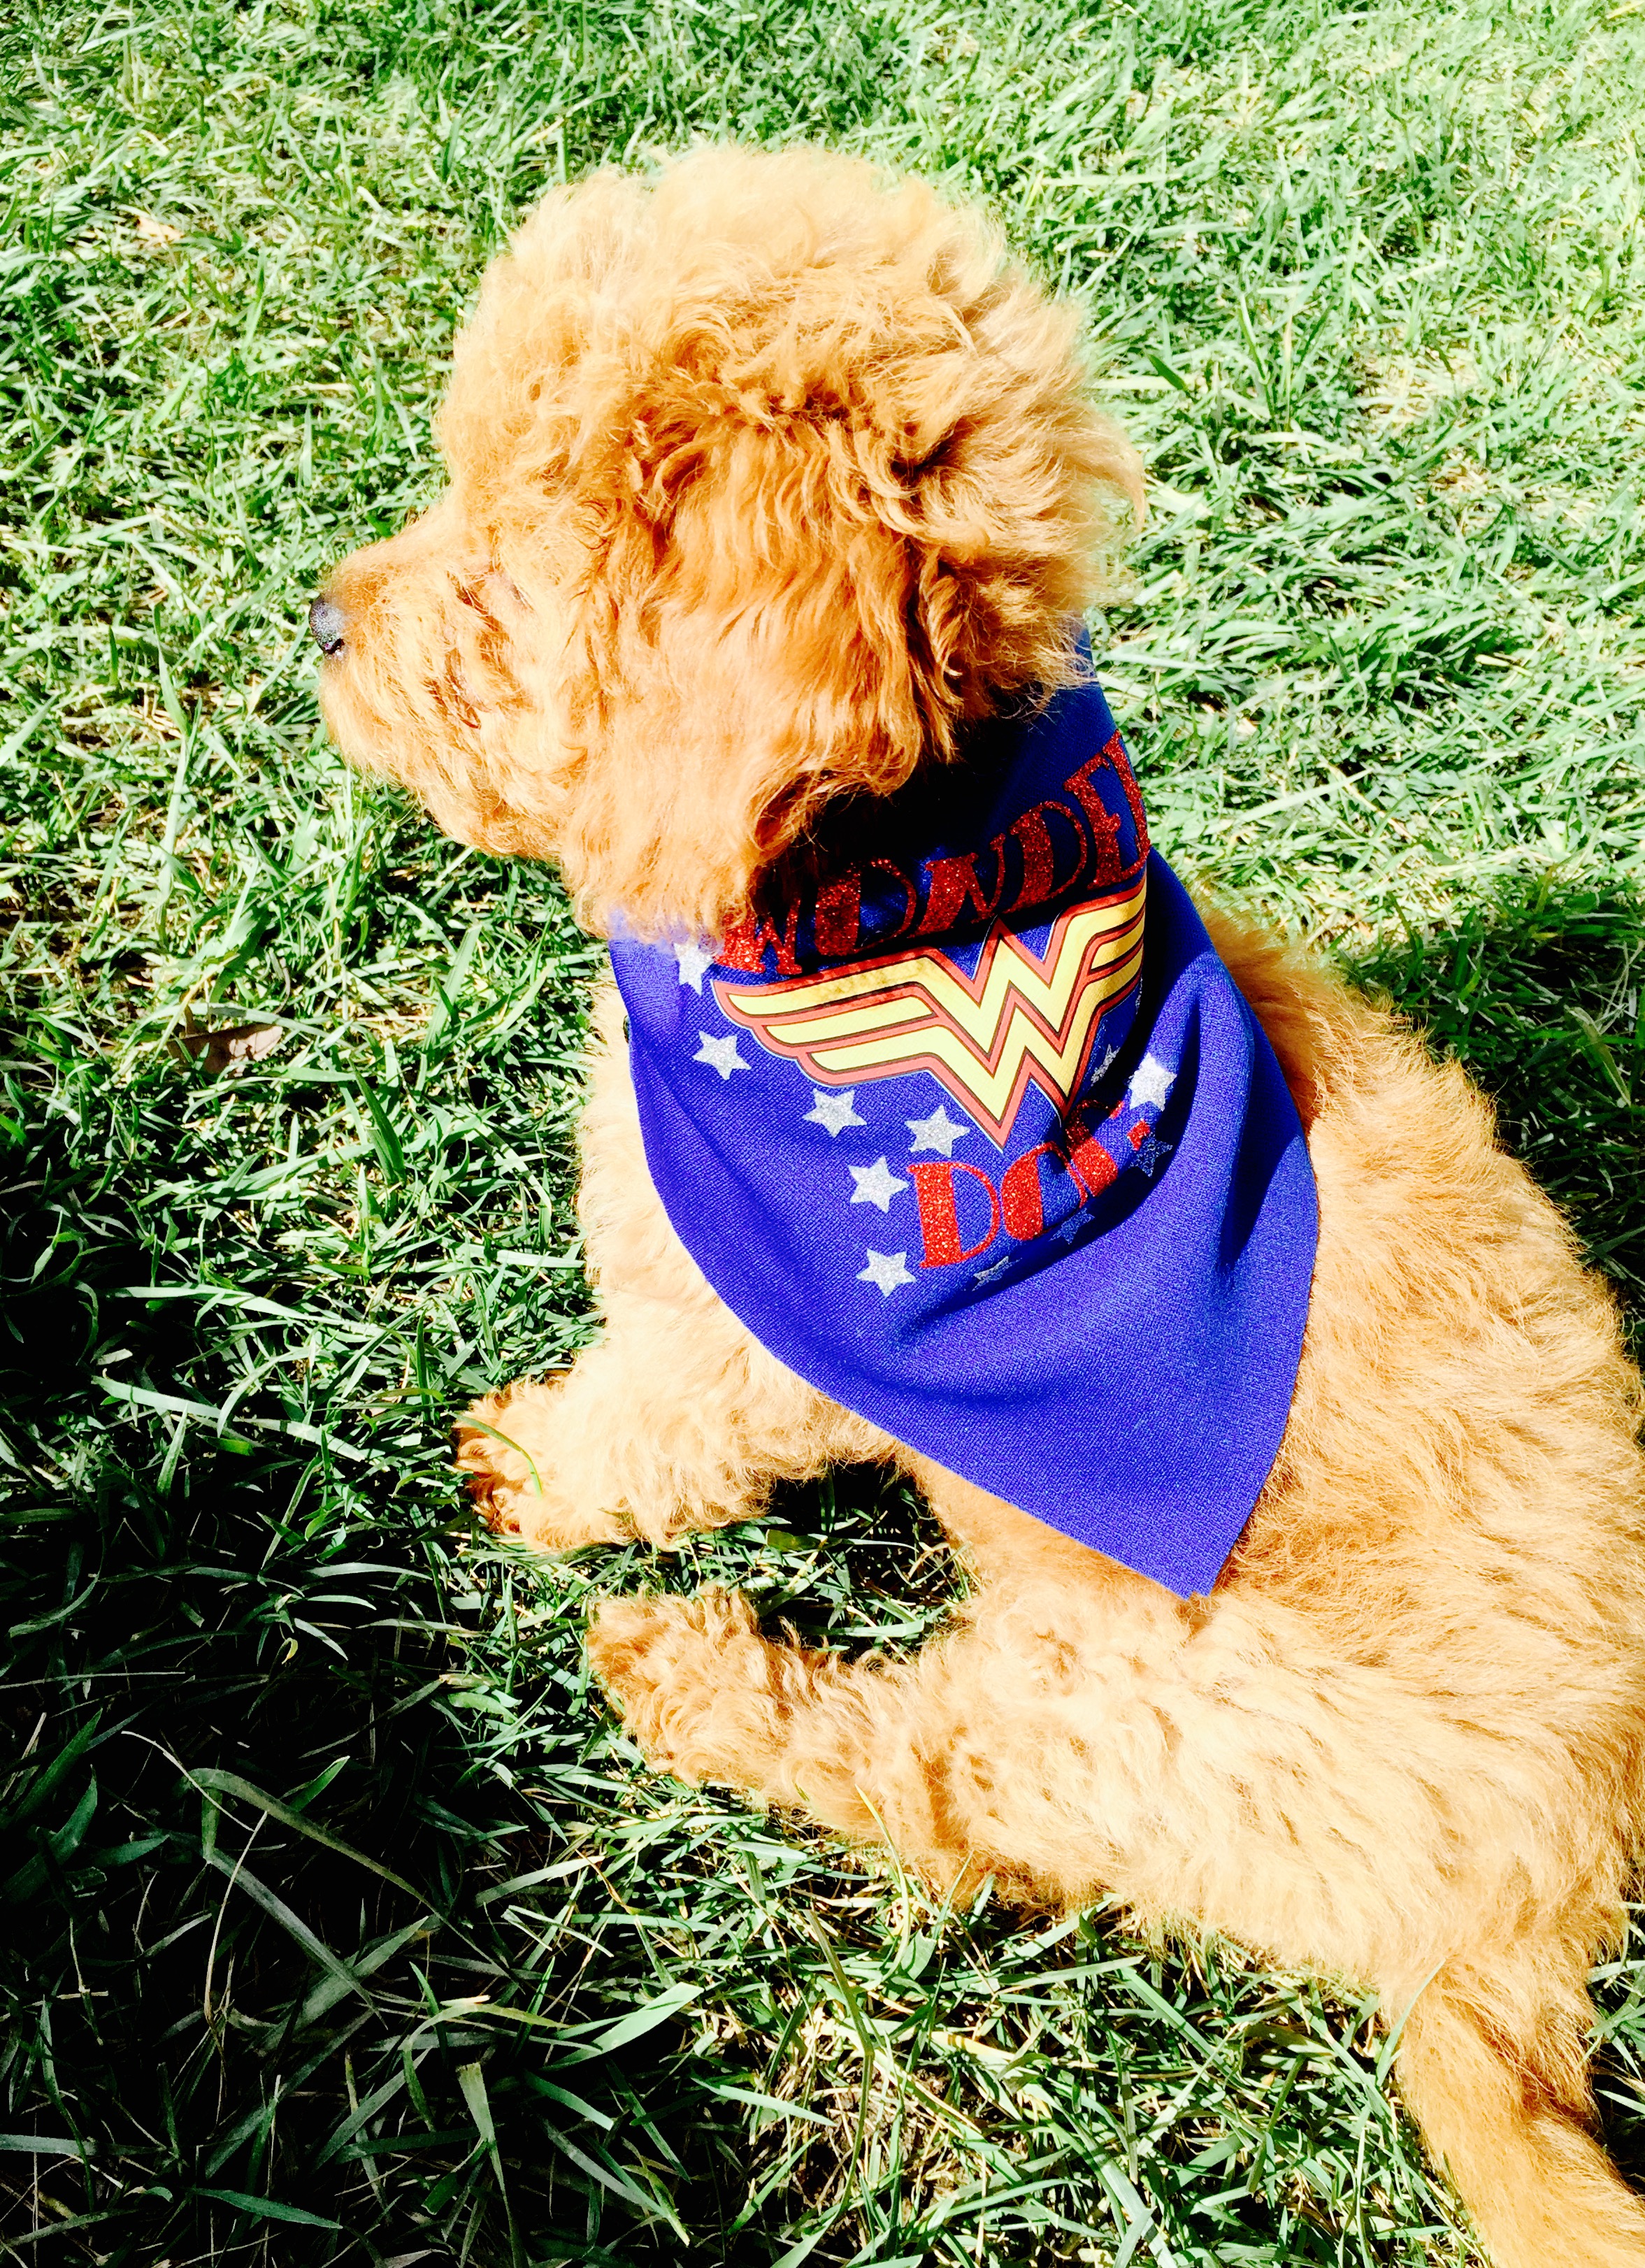
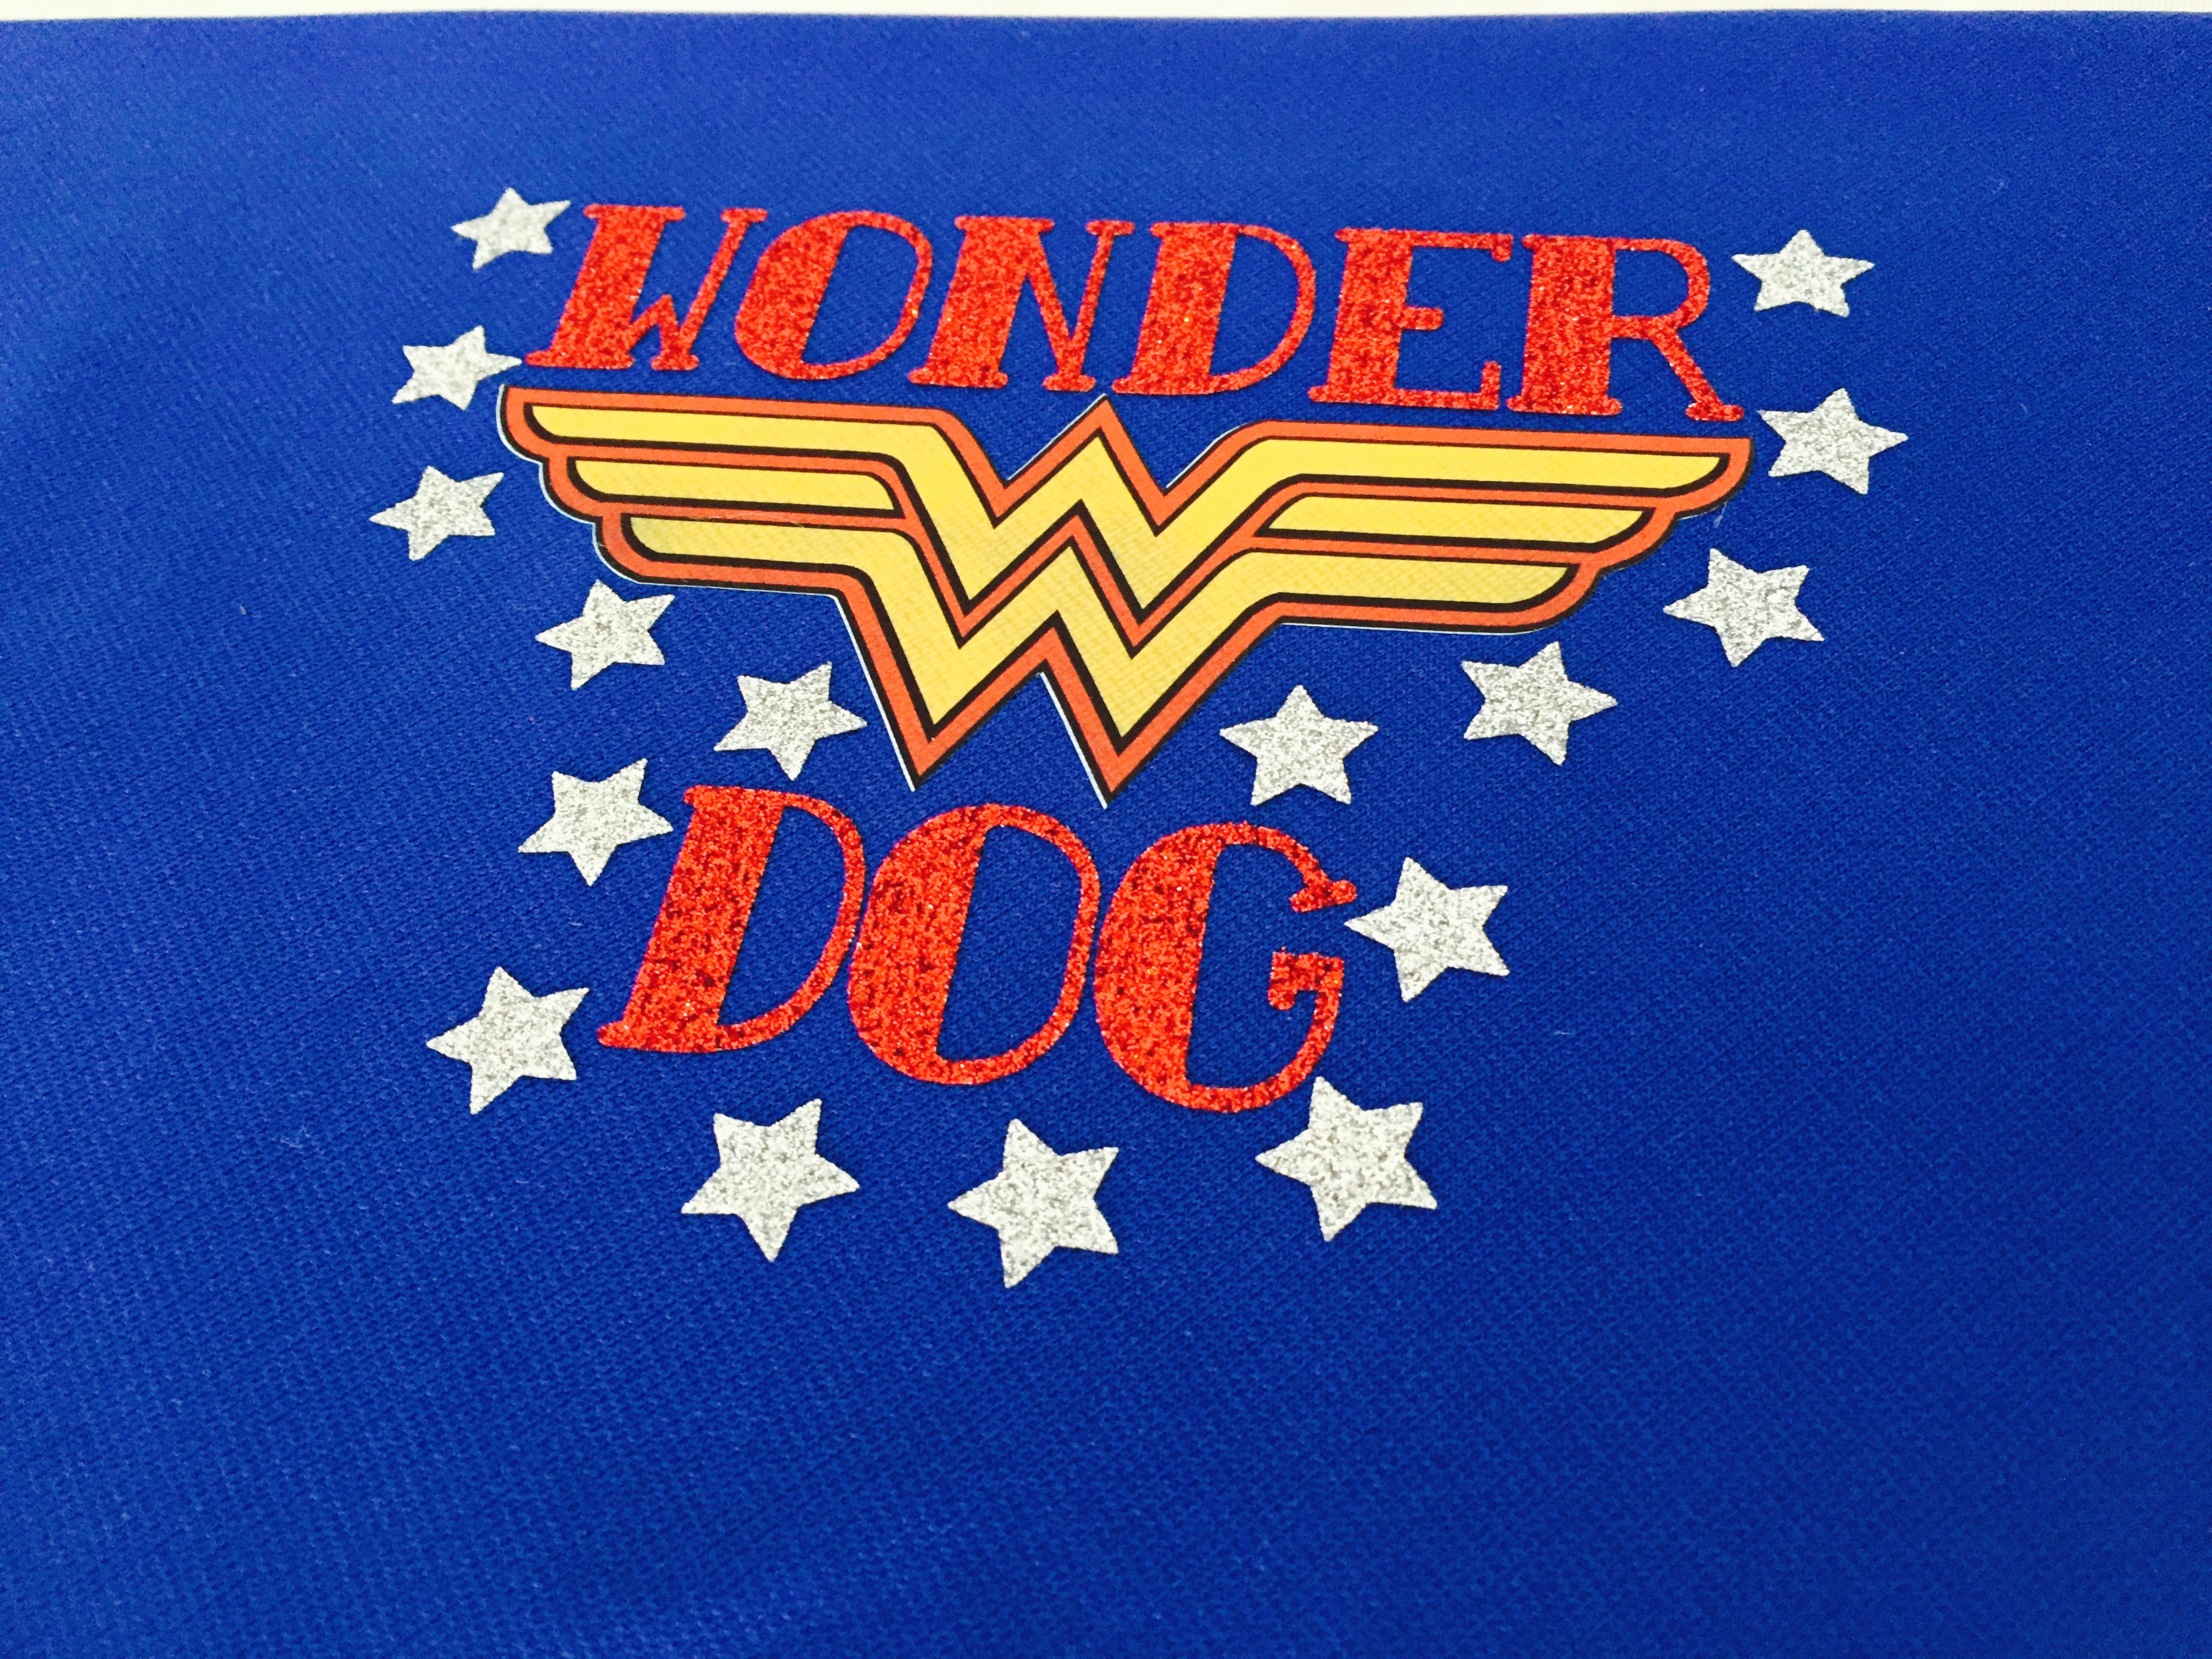
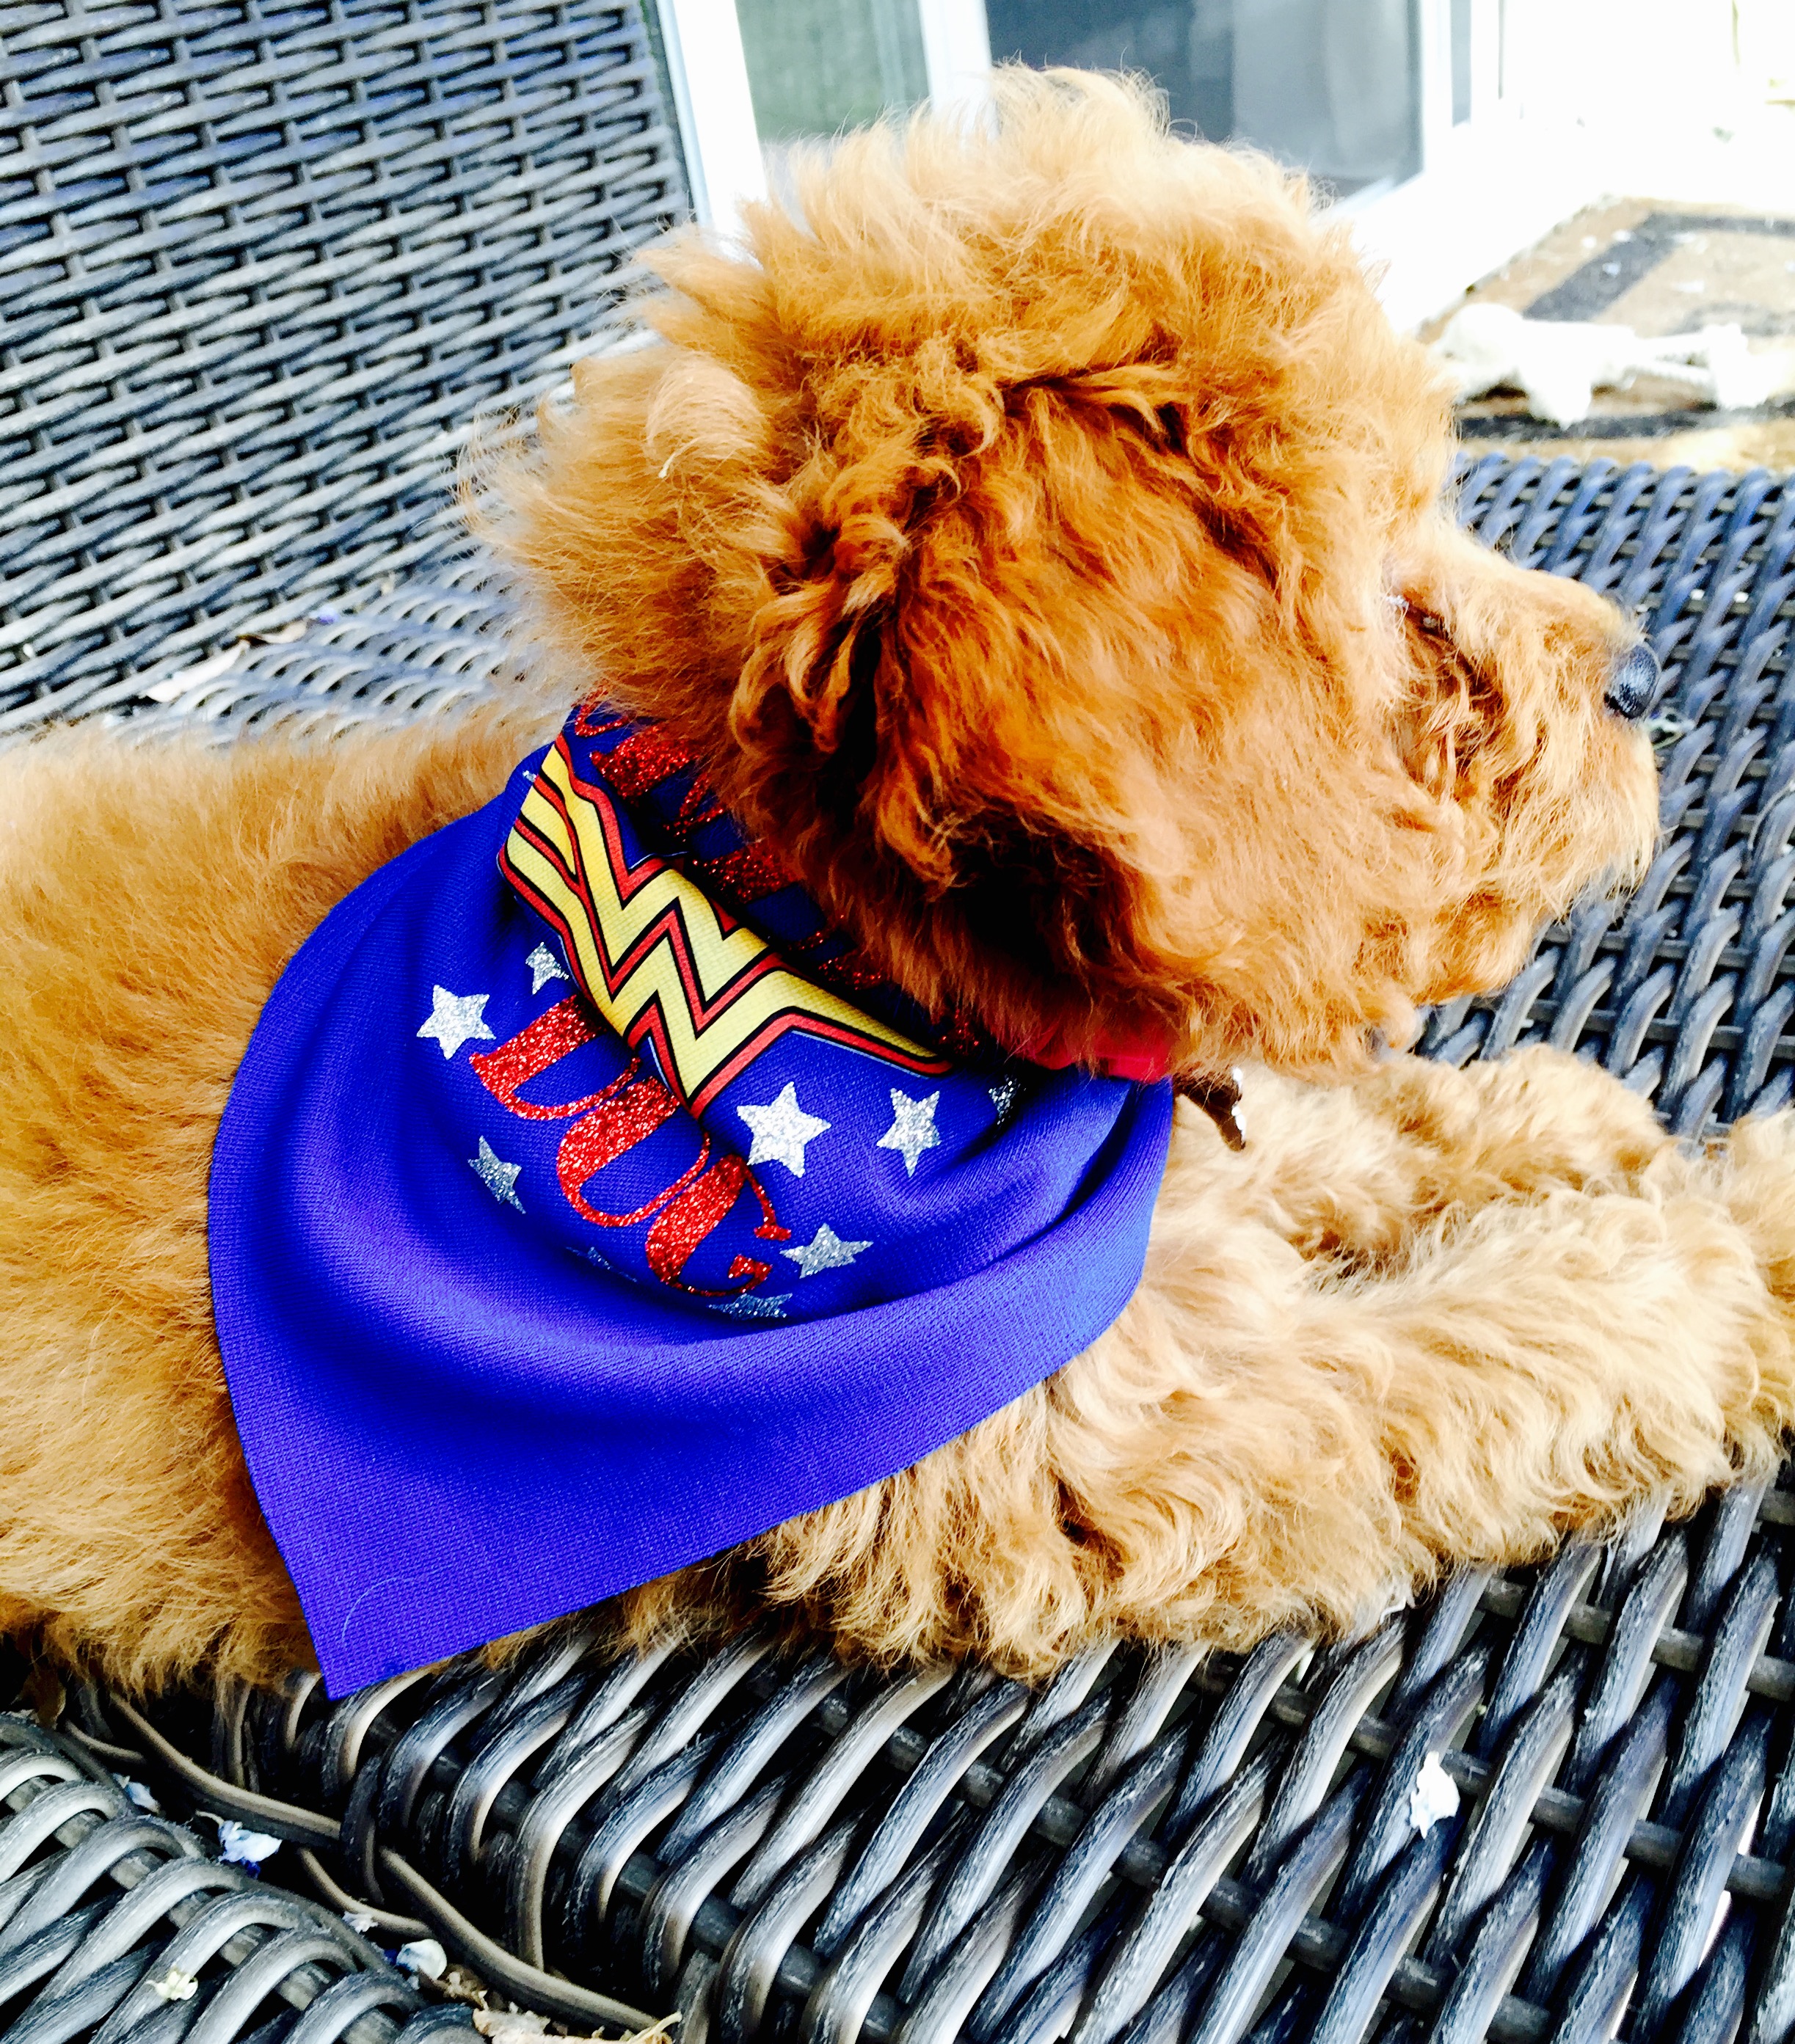
And Ta da! Your fur baby is now the superhero you always knew she was 🙂
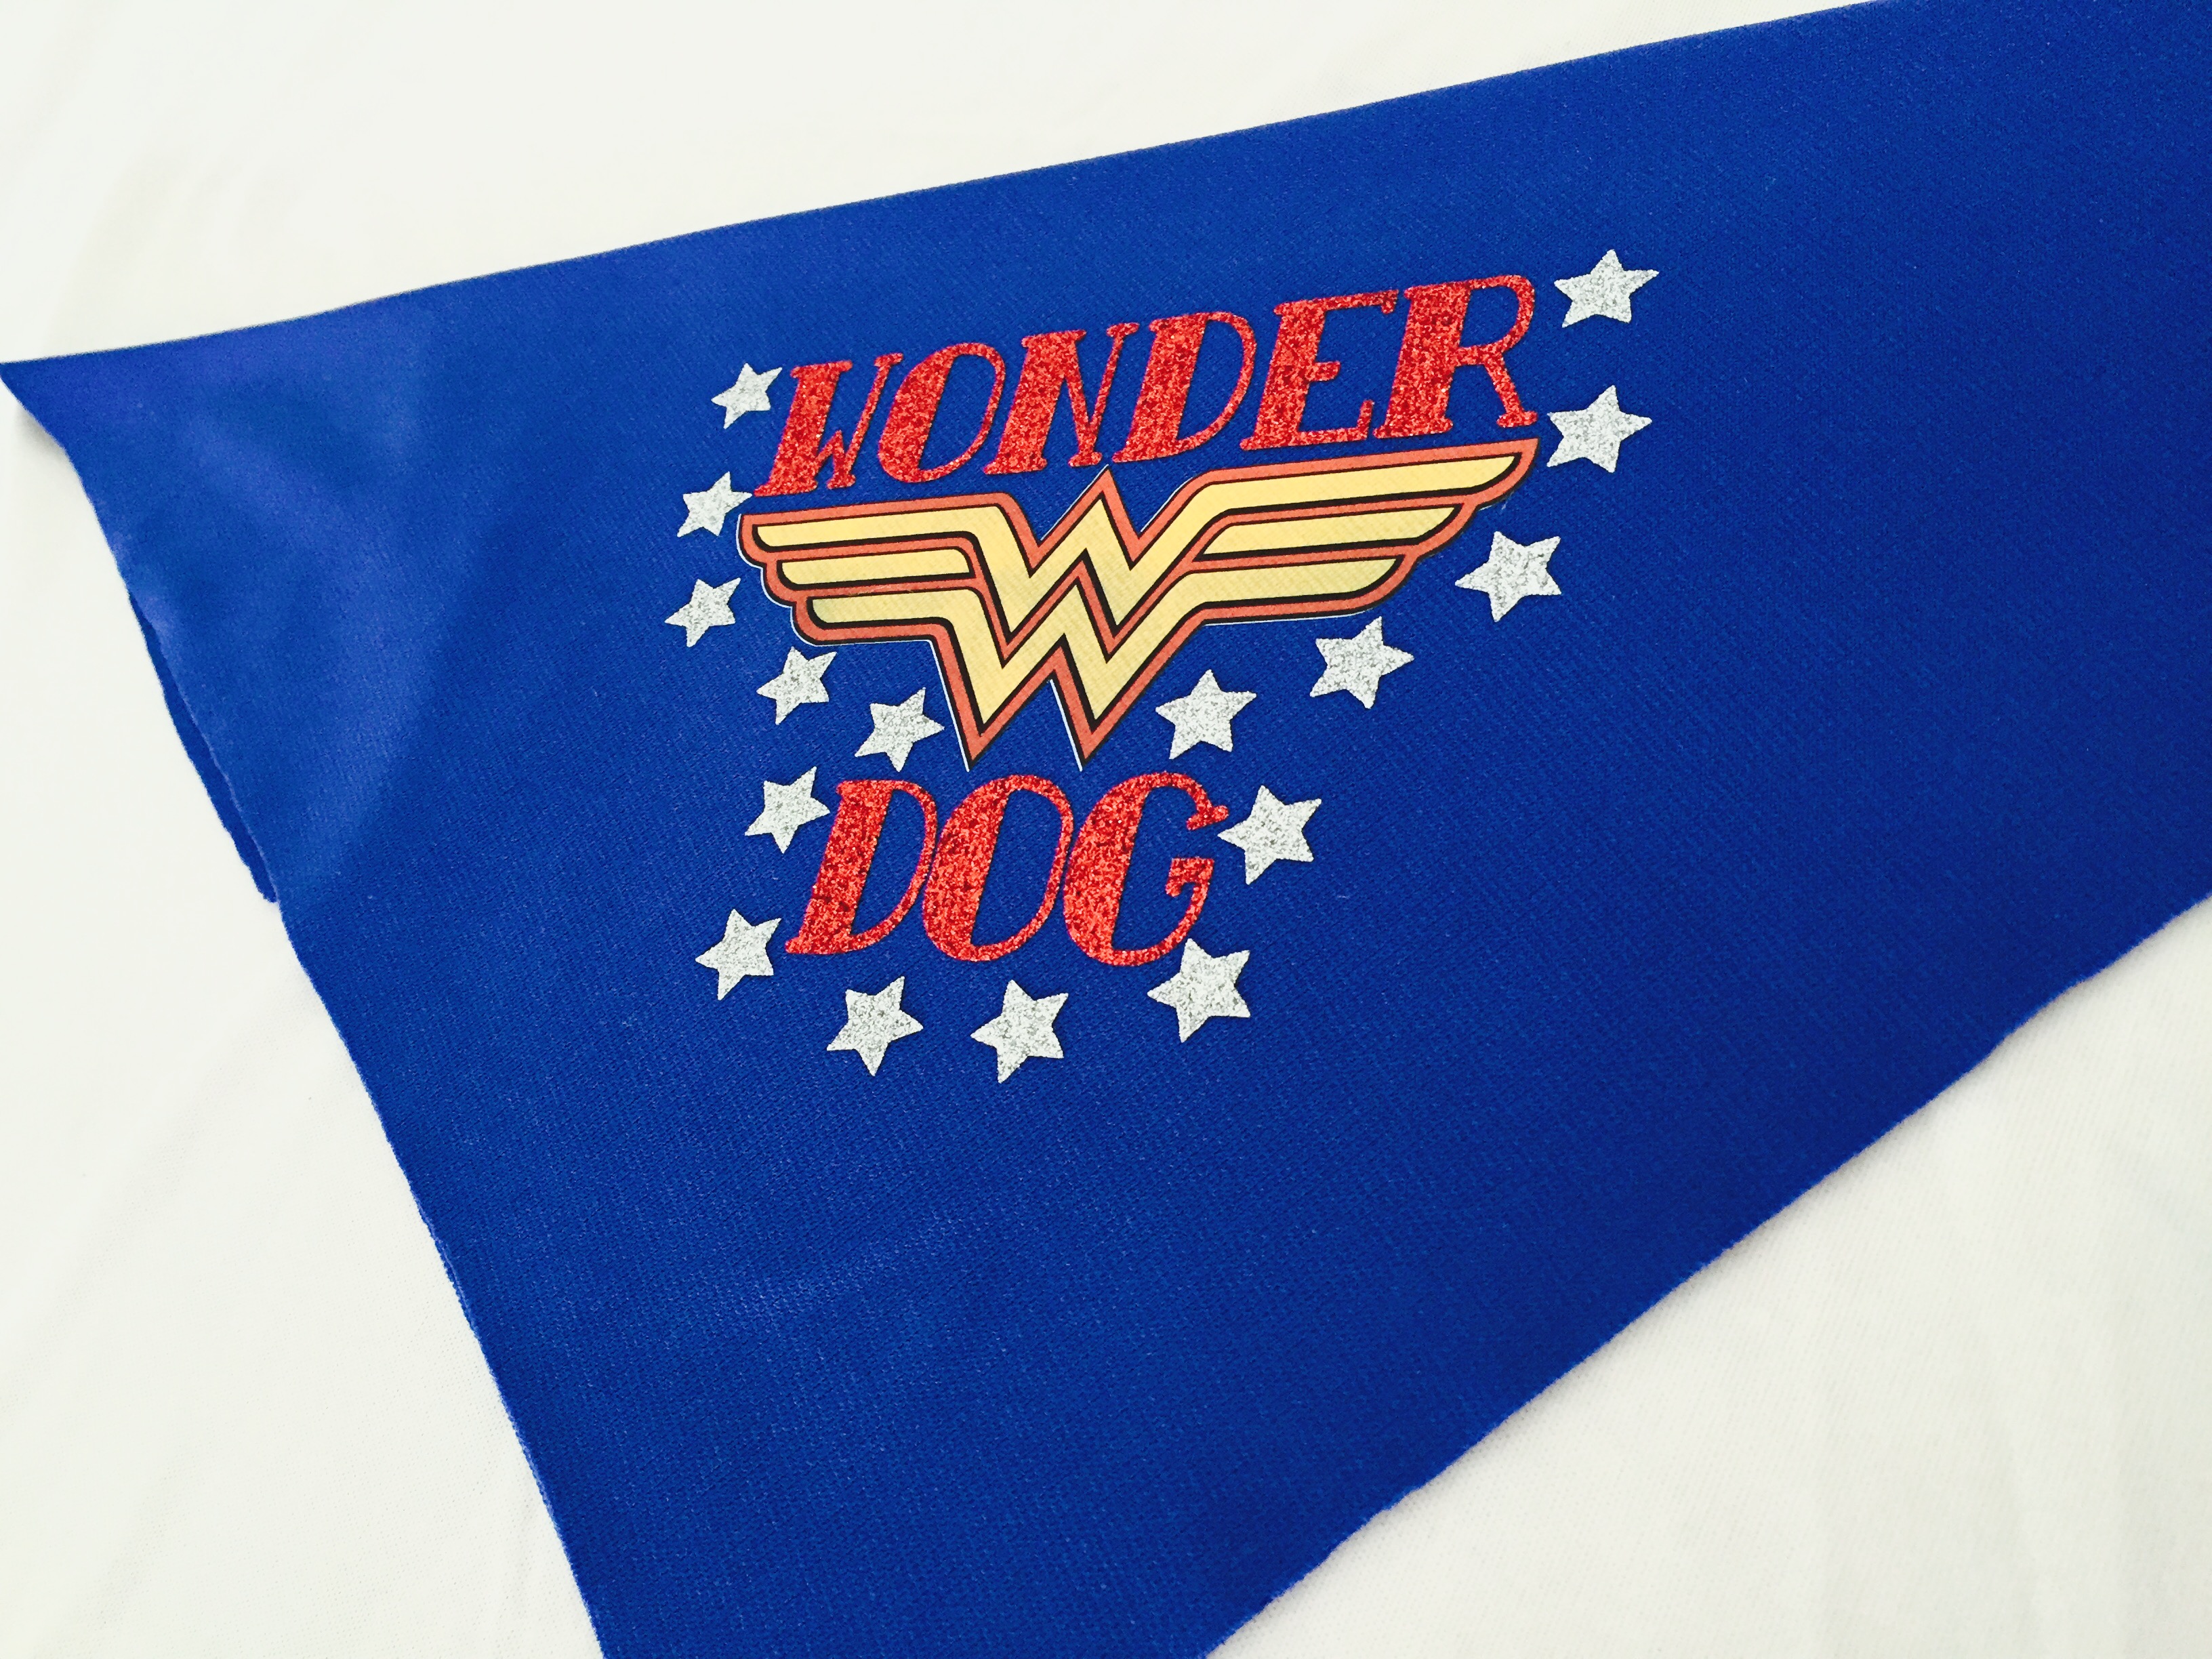
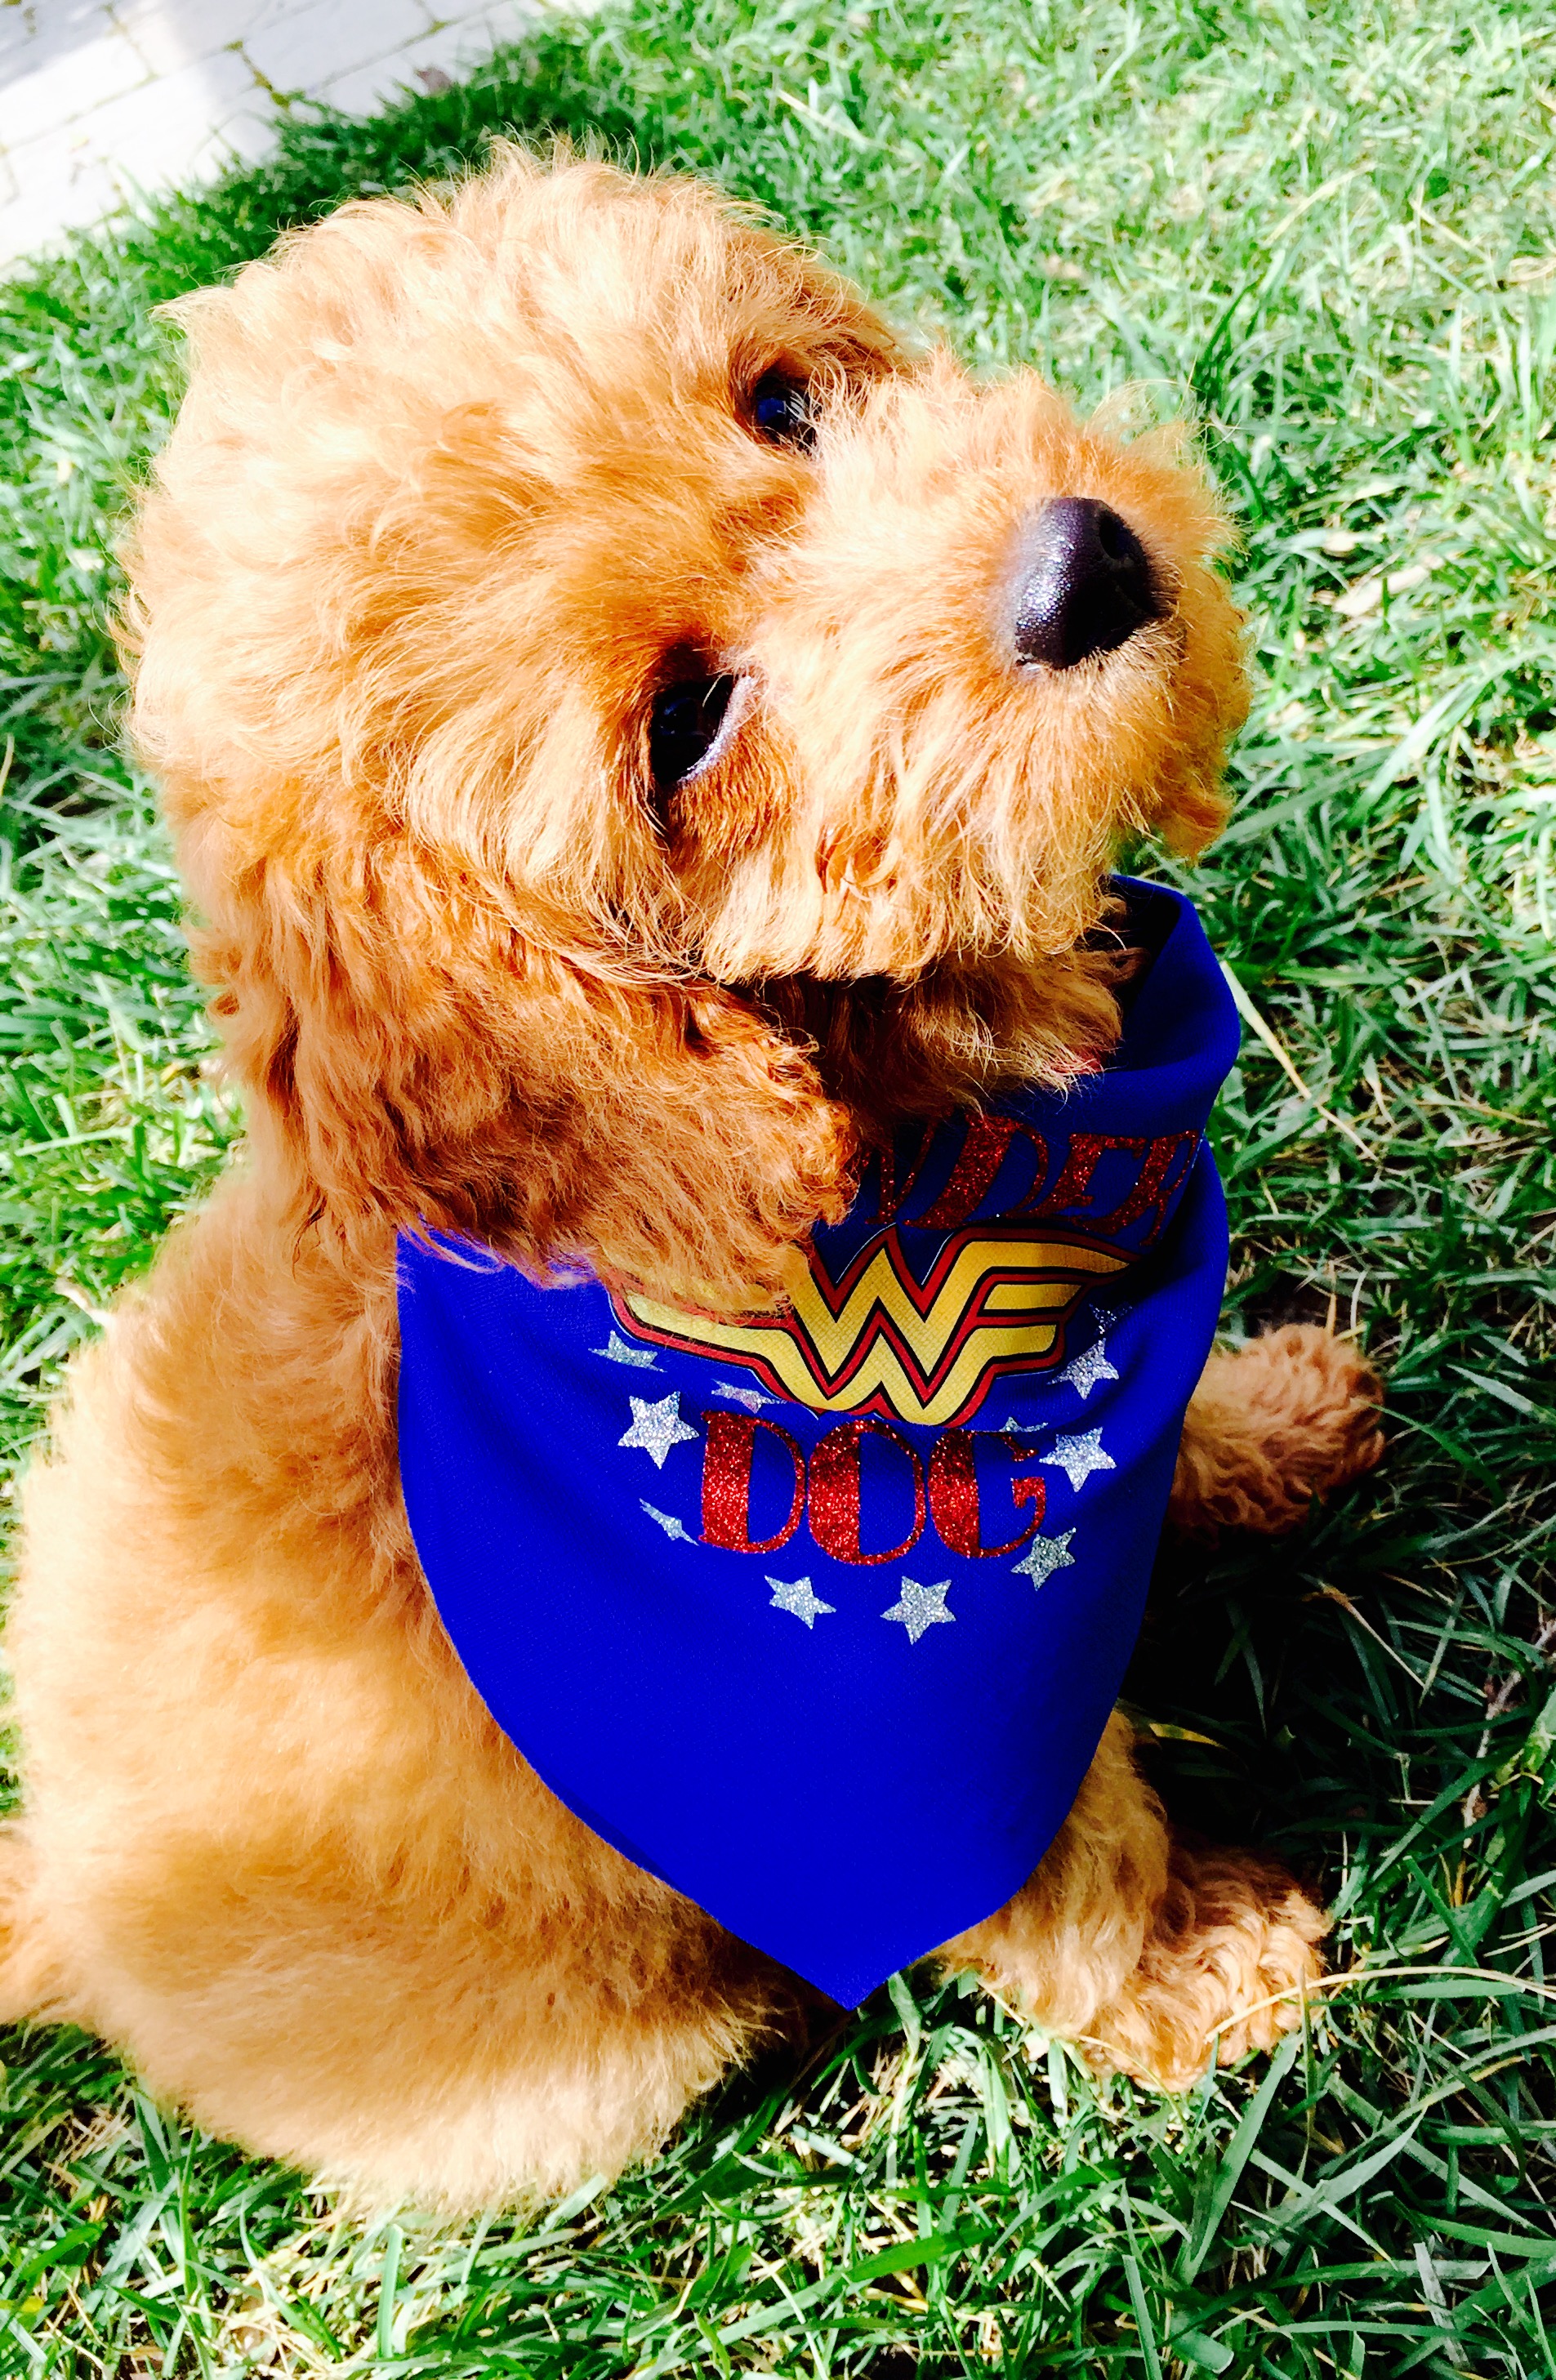
Genius, am I right? An again, if you have your own fur baby, you know they already deserve a cape of their own. I mean, the endless amounts of energy… bounding through the air as they leap for their next toy… and at the end of all the craziness, always having your back and being your best buddy at the end of a hard day. Now if that doesn’t SCREAM superhero, I don’t know what does.
I was pleasantly surprised that when I put this bandana on Pippa, instead of the usual resistance, she greeted this cape with joy. She pranced around our backyard with pride.. it was super funny, I wish I could show you all the outtakes of pictures I took! And when I took it off, she cried for it to be put back on. I absolutely love how much she loved her custom cape.
Now if you’re ready to get crafting for your fur baby, don’t fret. Altogether, this craft only took me 30 minute. Yahoo! An easy one (if you have all the supplies).
And if I haven’t convinced your inner crafter that the Silhouette CAMEO® is the best thing since sliced bread, you can muddle over some future tutorials before you decide. But the price has gone down since I bought it, and even at the price I paid it has WAYYY made up for it’s own cost in the crafts I’ve been able to DIY. So decide for yourself… but can’t rave enough about mine!
Anyway, if you want to DIY, here’s a recap of everything you’ll need:
- Silhouette CAMEO®
- With regular cutting blade and cutting mat
- Silhouette printable heat transfer paper – for dark fabrics
- Silhouette 12″ red glitter heat transfer vinyl
- Silhouette 12″ silver glitter heat transfer vinyl
- Home printer
- Plain blue bandana (or 14×14″ square piece of blue fabric)
HAPPY CRAFTING!!
Could u make this for me!!!!! Please very important reason!!!