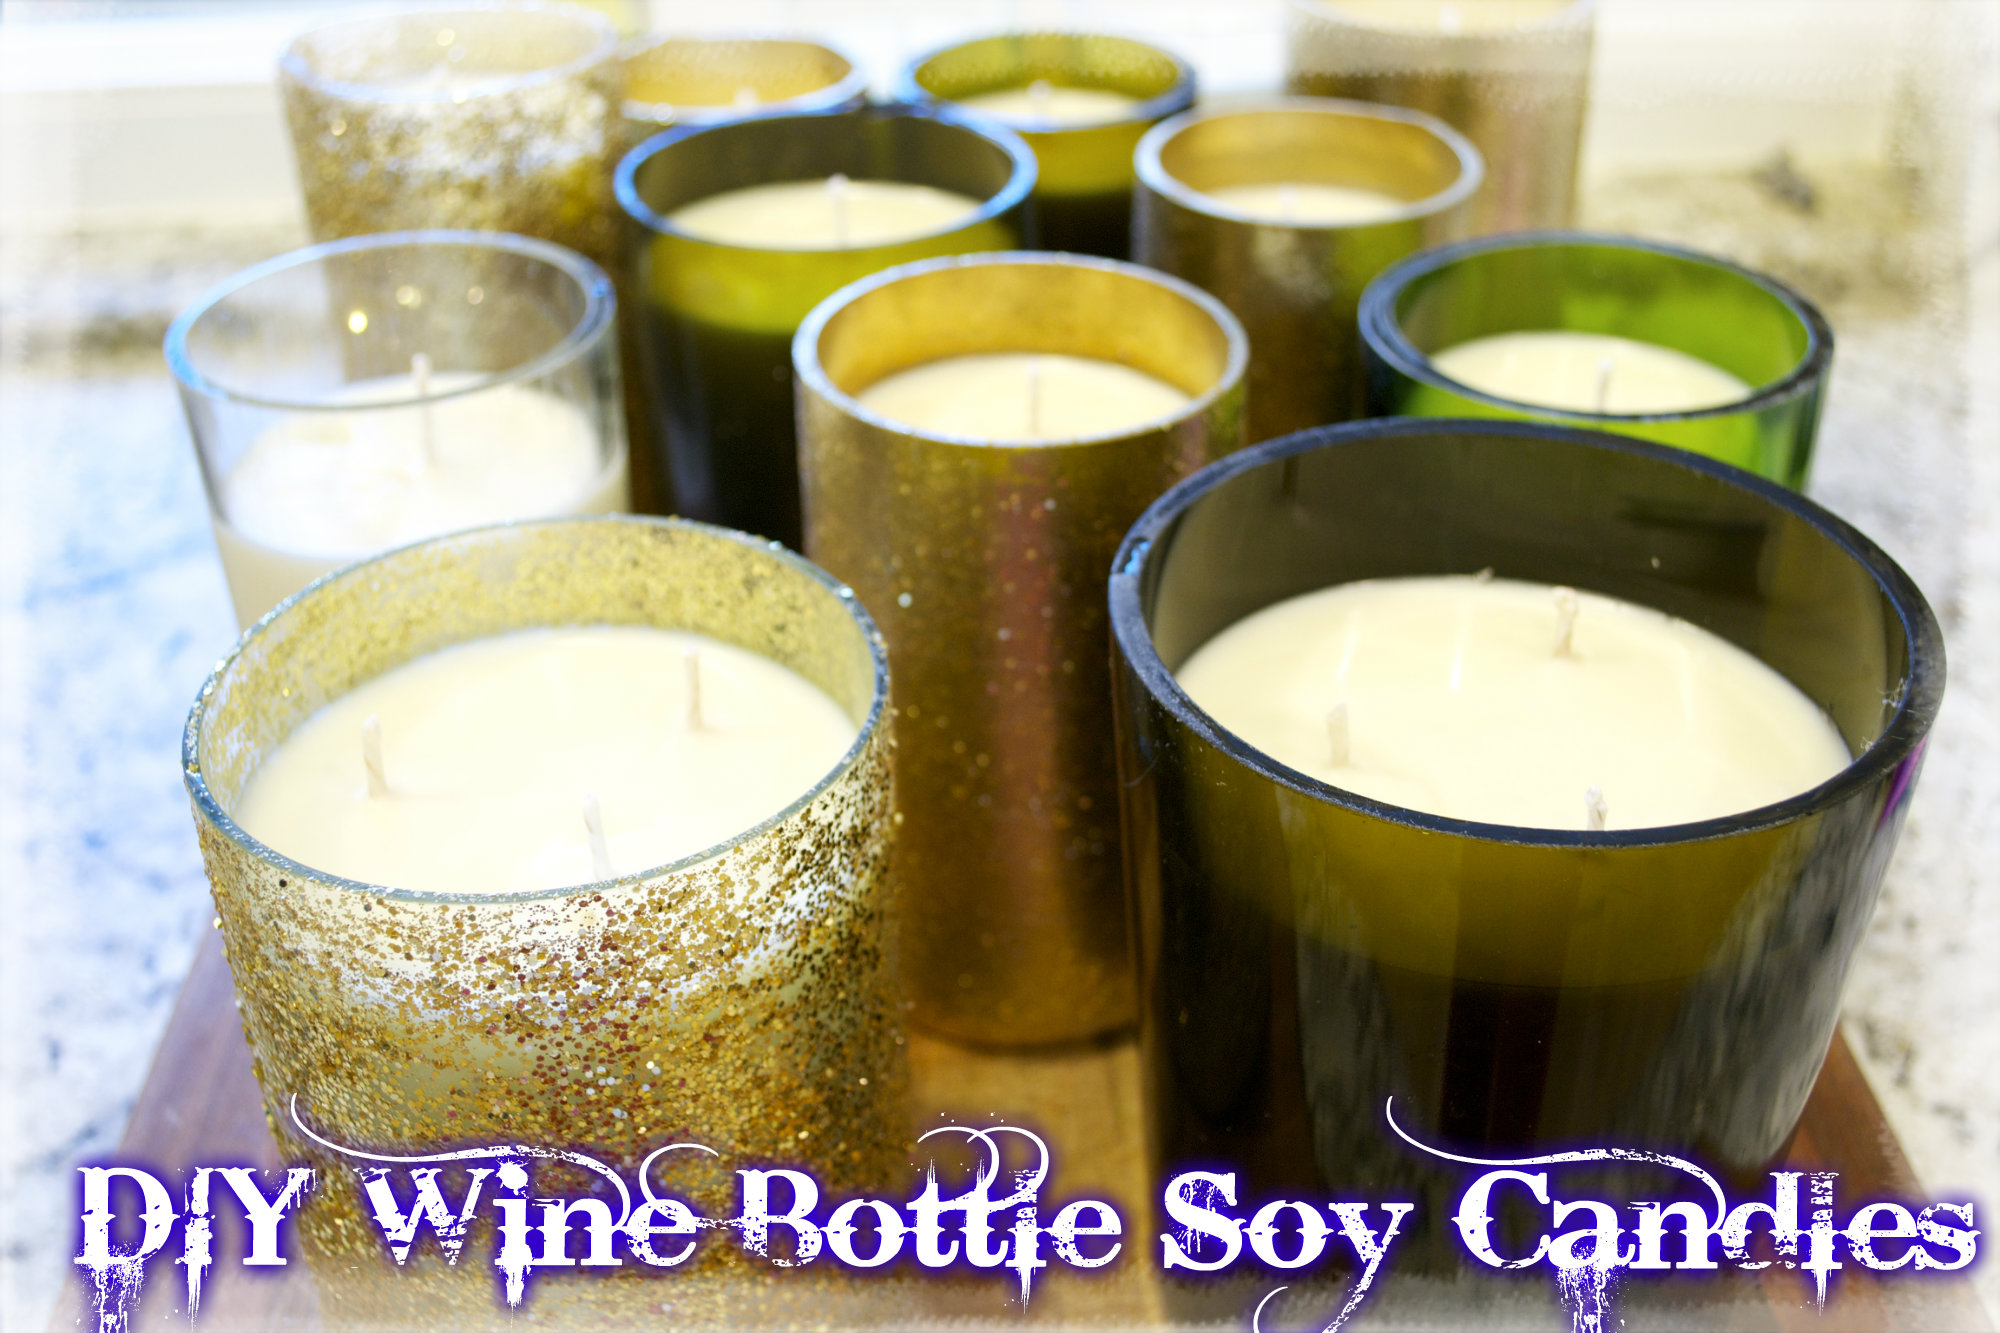
This just may be one of my favorite posts yet! If you’ve been reading along with my posts, by now I’m sure you’re very aware of my love of wine and my love of crafts. I mean, duh, I have an entire BLOG dedicated to crafting, so that’s a pretty obvious one.
But really, I love nothing more then when I get the chance to combine the two. It almost makes me feel less guilty for coming home with “groceries” where half the bill is wine. Now, when my husband asks why, I have an easy answer for him…. “But honey, I NEED the bottles for my next project. They’re for business purposes.” Haha – suuure 😉 But it does make for a fun argument- and an even more exciting wine-filled evening.
My Wine Bottle Crafting Obsession
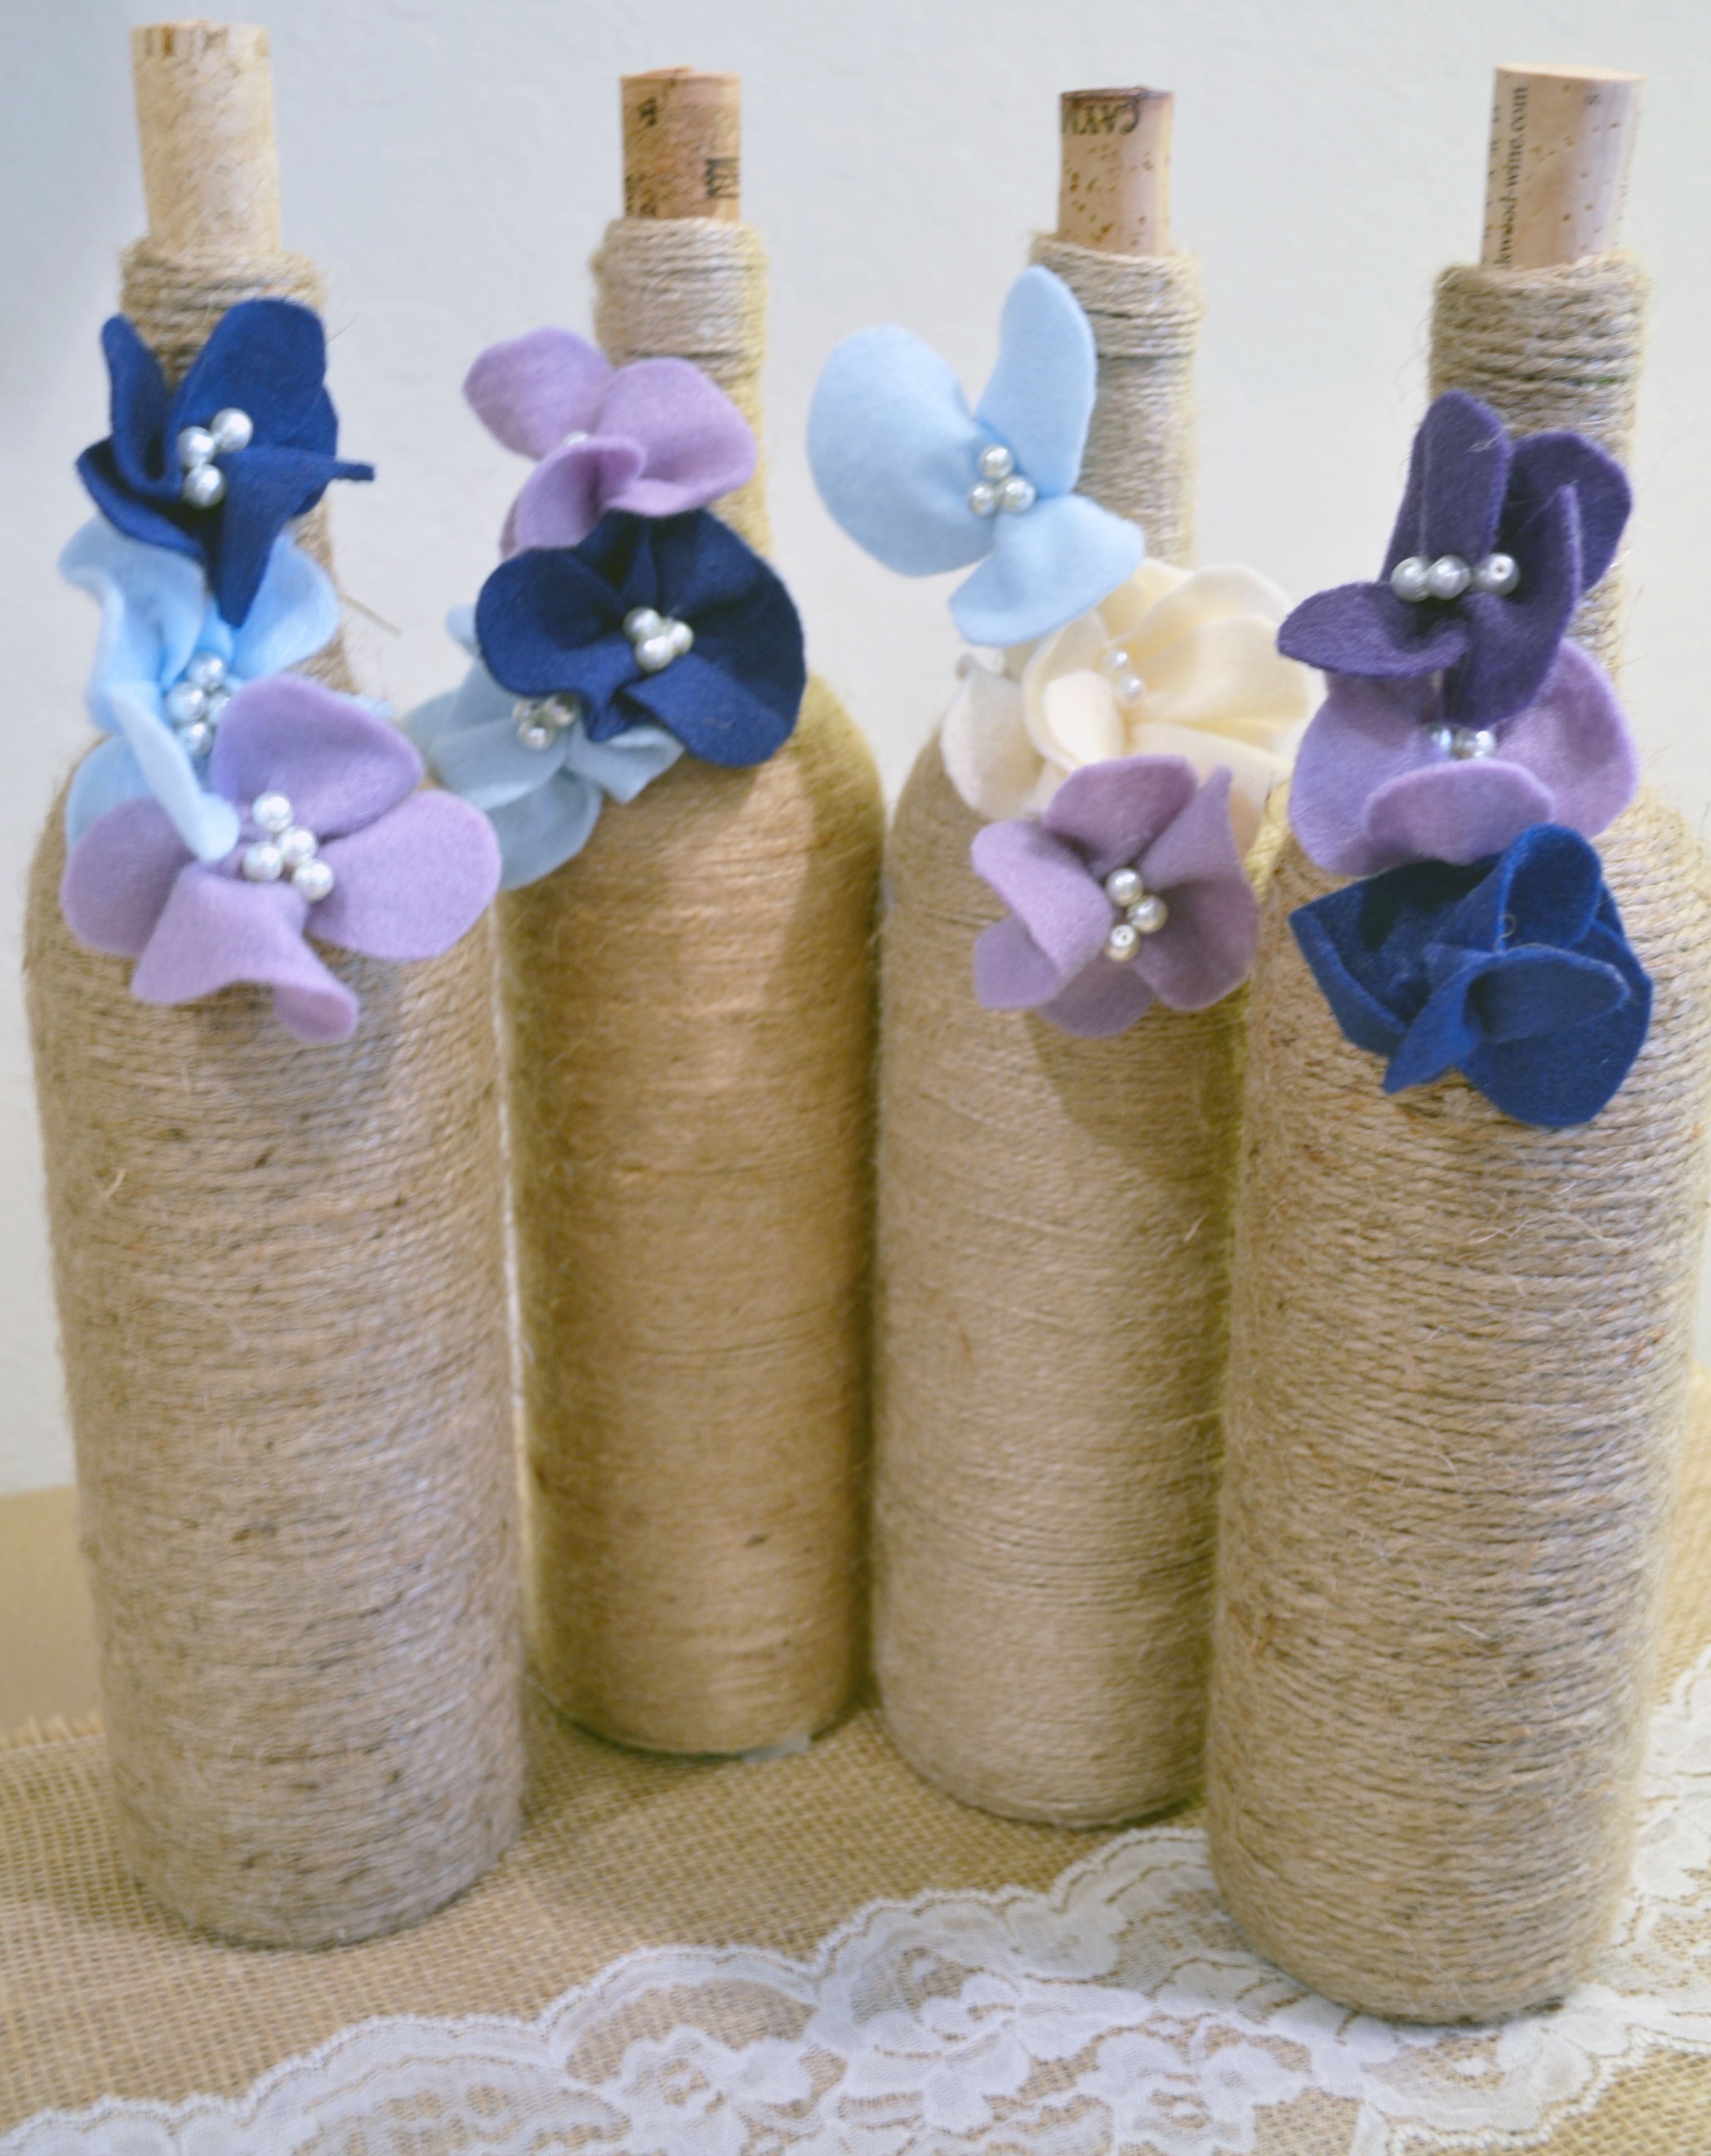
There are so many things I’ve made with my leftover wine bottles. I’ve wrapped them in twine for rustic centerpieces at my wedding:
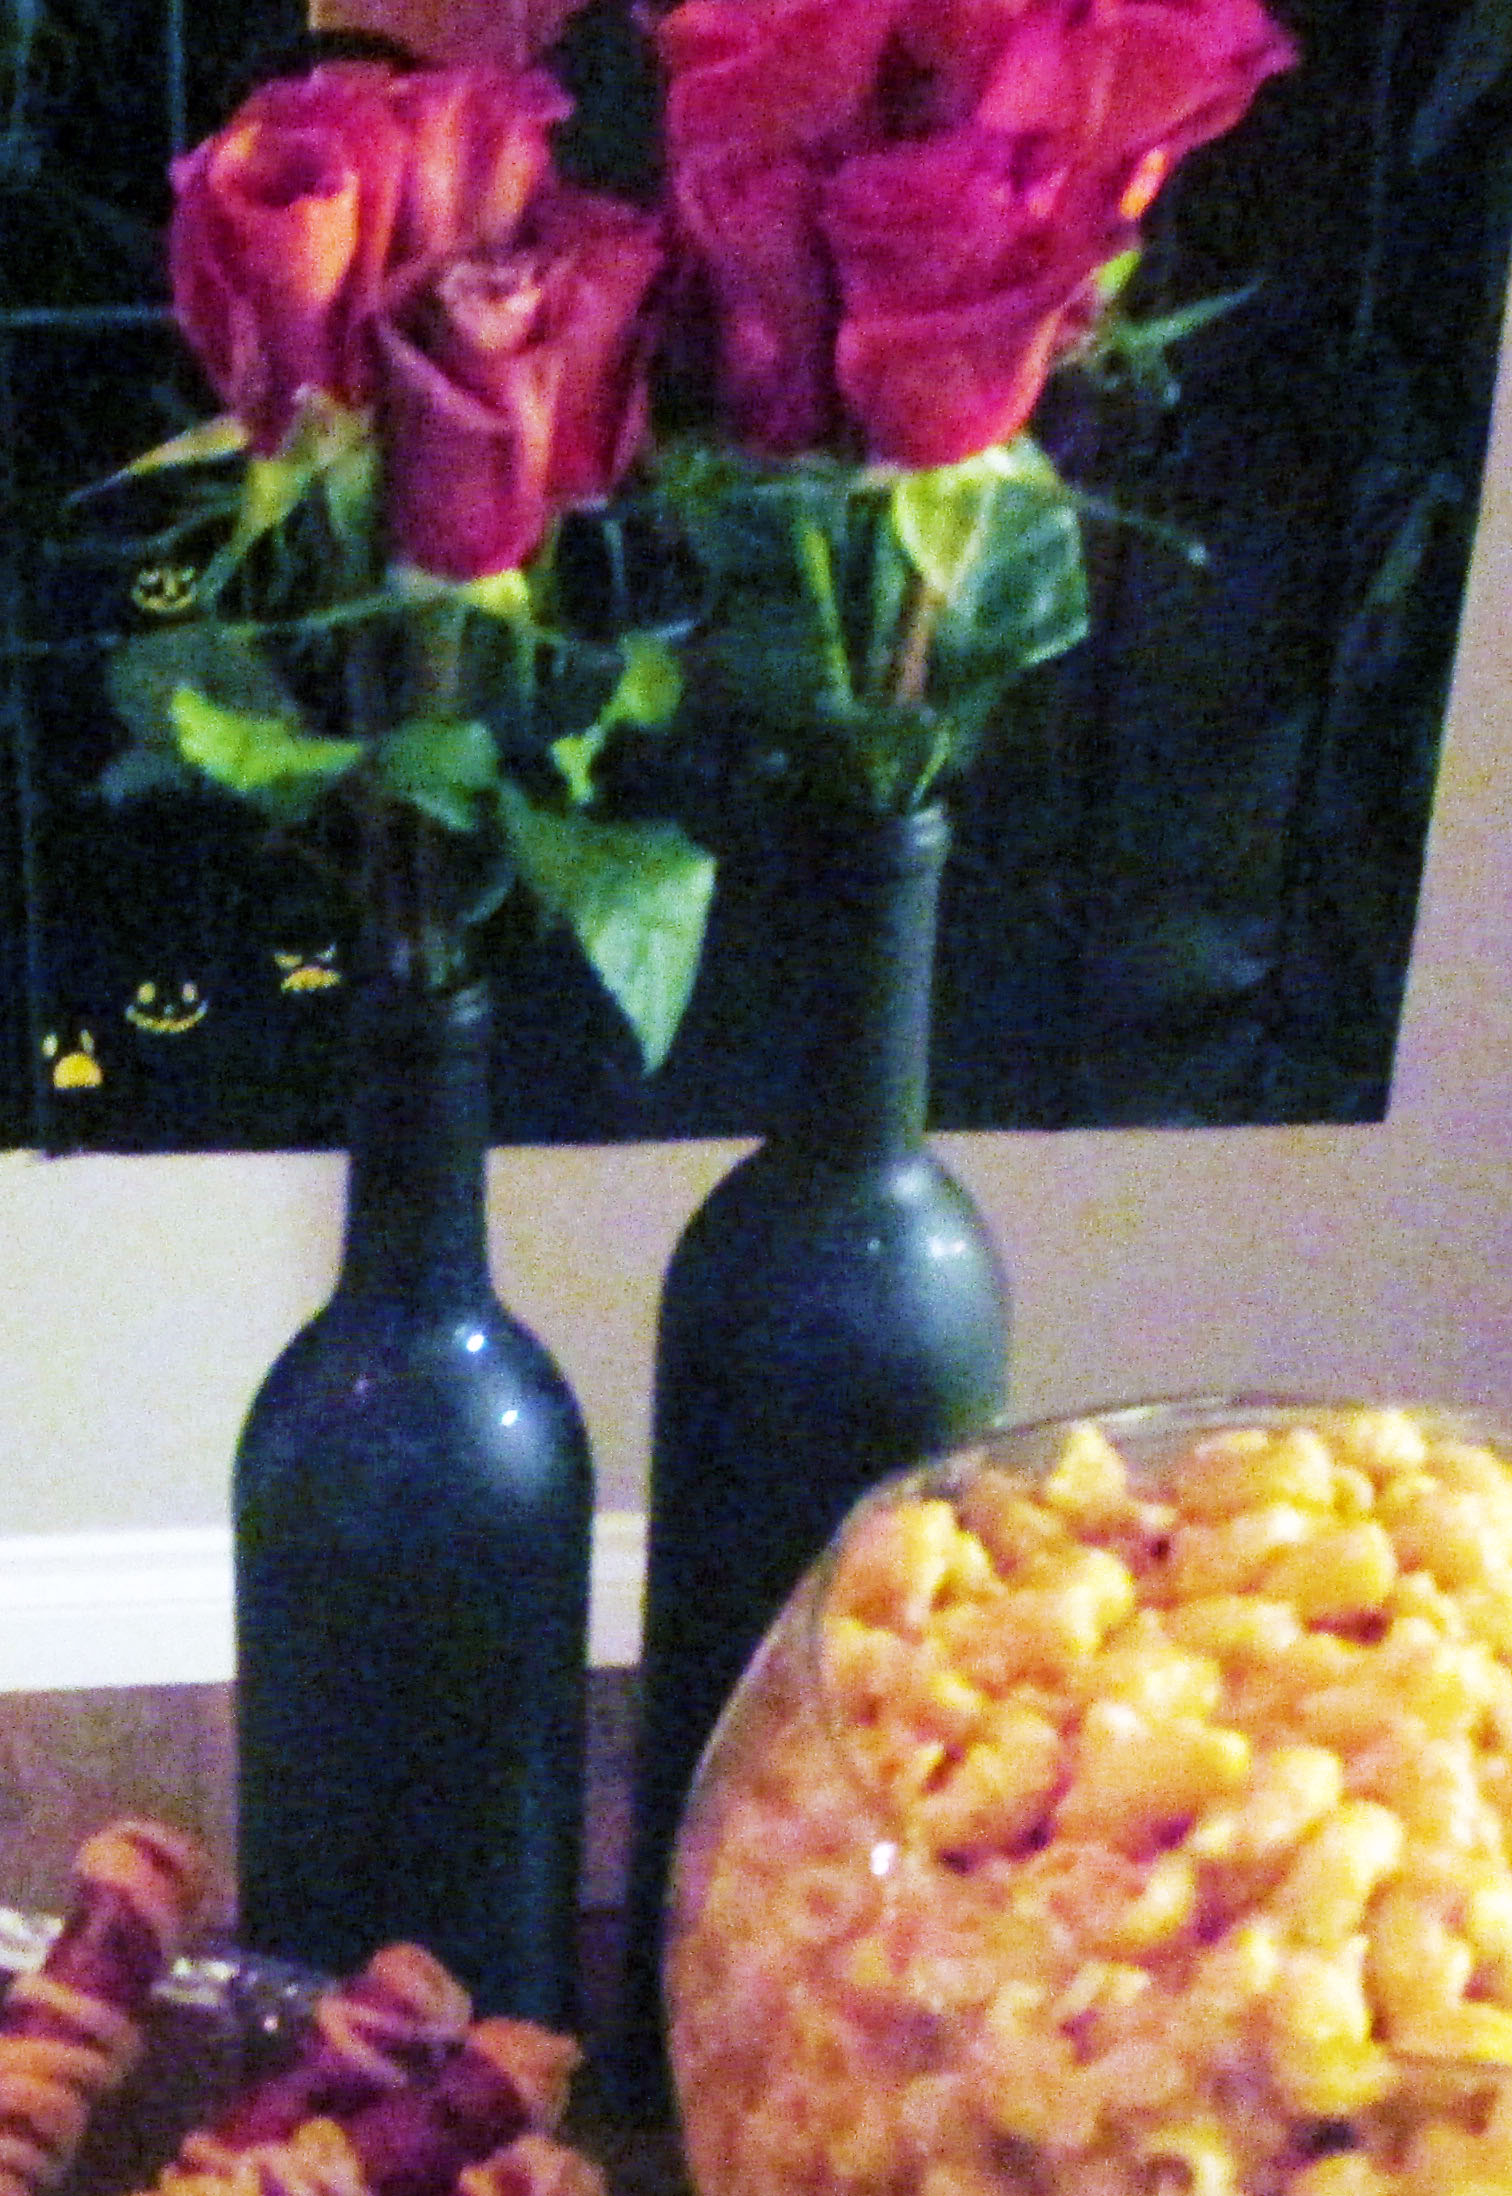
I’ve painted them black for gothic vases at my Halloween party:
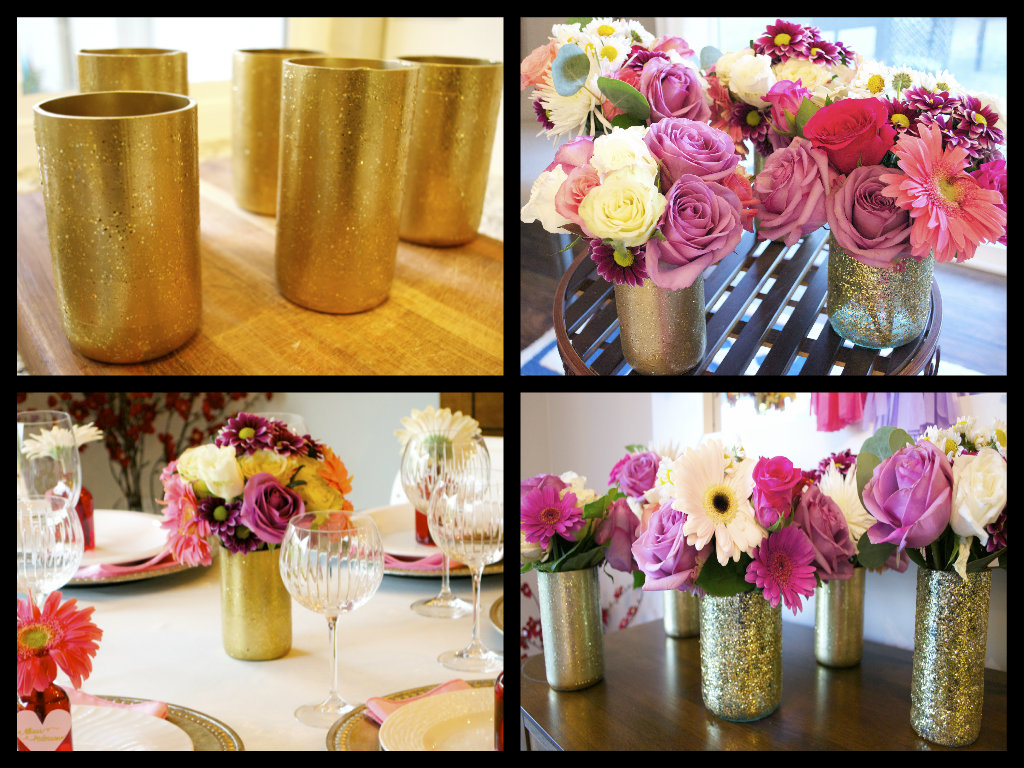
And I’ve cut them down and painted them gold to use as floral vases for a baby shower:
But once my wedding was over, Halloween had passed, and the baby shower was done, I was left with a BUNCH of empty bottles. Granted, they were MUCH prettier than they had started out as, but they were just sitting in my house- taking up much needed space.
Yes, I could recycle them, but I had spent so much time making them so pretty! I’d hate to just get rid of them. And furthermore, what would I do with my future wine bottles? I obviously needed another craft to create with my bottles. I mean, the excuse to purchase wine was just too good! I couldn’t give it up just yet.
And then I realized…SOY CANDLES! Instead of REcycling the bottles, I could UPcycle them into candles. Brilliant! I already had many of my bottles cut from the vases I had made for the baby shower. Now, all I needed to do was get the right tools to turn them into yummy smelling candles.
The Cost Savings of DIY Candles
Of course, I went straight to Amazon to find my supplies. I also went to visit Michaels and Hobby Lobby, just to double check prices and make sure I was getting the best deal (because let’s be honest, everyone’s looking for a good deal). Once again, Amazon won out with the price war.
But in all fairness, making your own candles is ALWAYS going to be much cheaper than buying them. I can easily spend $25 at Bath and Body Works every month on a new 3 wick scented candle. And Yankee Candles run $25 each, for their CHEAPEST ones!
Altogether, not including the cost of the wine (hehe), I spent about $82 to create 15 candles – $42 of which is a 1 time cost (initial equipment you buy once and never have to buy again, no matter how many candles you make). And I had 35 wicks left over for my next batch, which is a $10 cost I won’t have to spend for the next 35 candles.
The most expensive part of making each candle is going to be the scents. But picking out your scent is probably the most important part of the candle, so it’s definitely worth spending the time and money to pick out exactly what you want.
In Tuesday’s post, I gave you the full tutorial on the supplies needed and the steps to take to cut your wine bottles. If you missed it, you can click here to get the full instructions. Below, I give you the second have of the tutorial: how to make soy candles with your wine bottles and mix your scents in properly.
How to Make Soy Candles with Cut Wine Bottles
The Necessary Tools:
- Wine Bottles (upcycled from last night’s drink, or bought new if you don’t drink)
- Wine Bottle Cutter
- Candle Wicks (I used the large size natural wicks- but you can also use stick wicks)
- Natural Soy Wax (the 10lb bag made approximately 15 candles)
- Candle making pitcher (to use as your double boiler to melt your wax)
- Easy Read Thermometer (absolutely necessary when using scents in your candles)
- Candle Scents
- Glue gun and hot glue
Step 1:
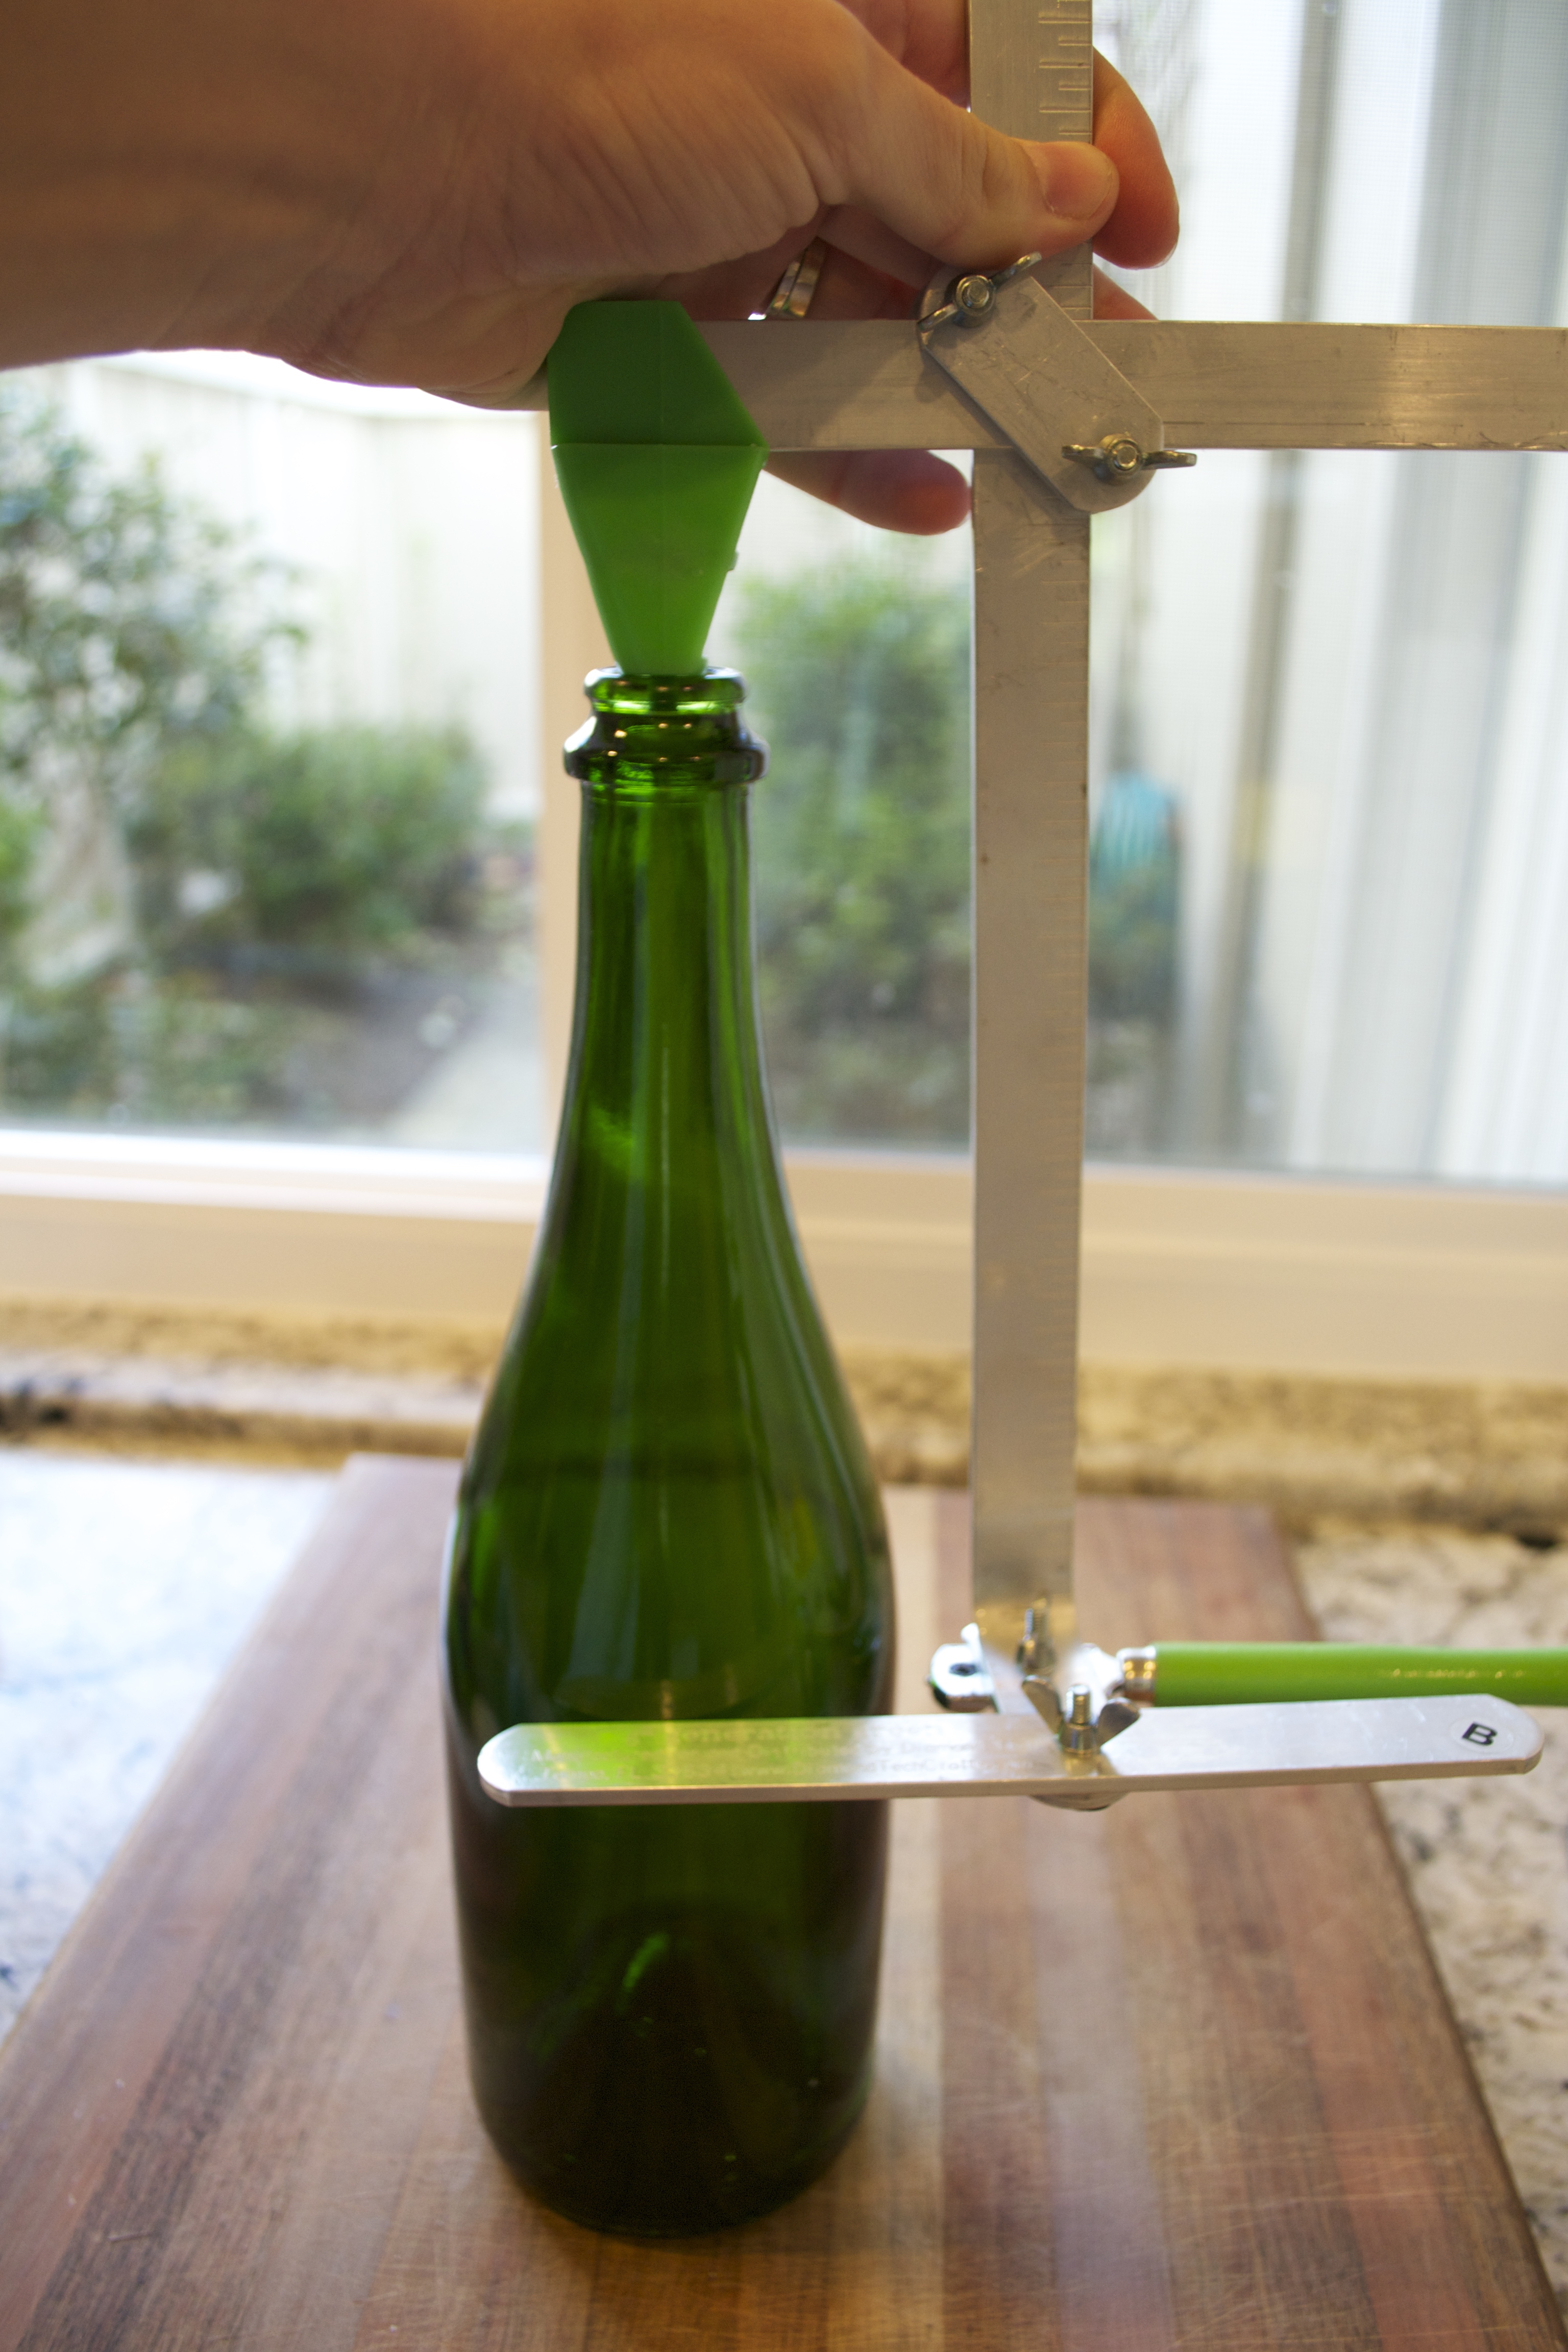
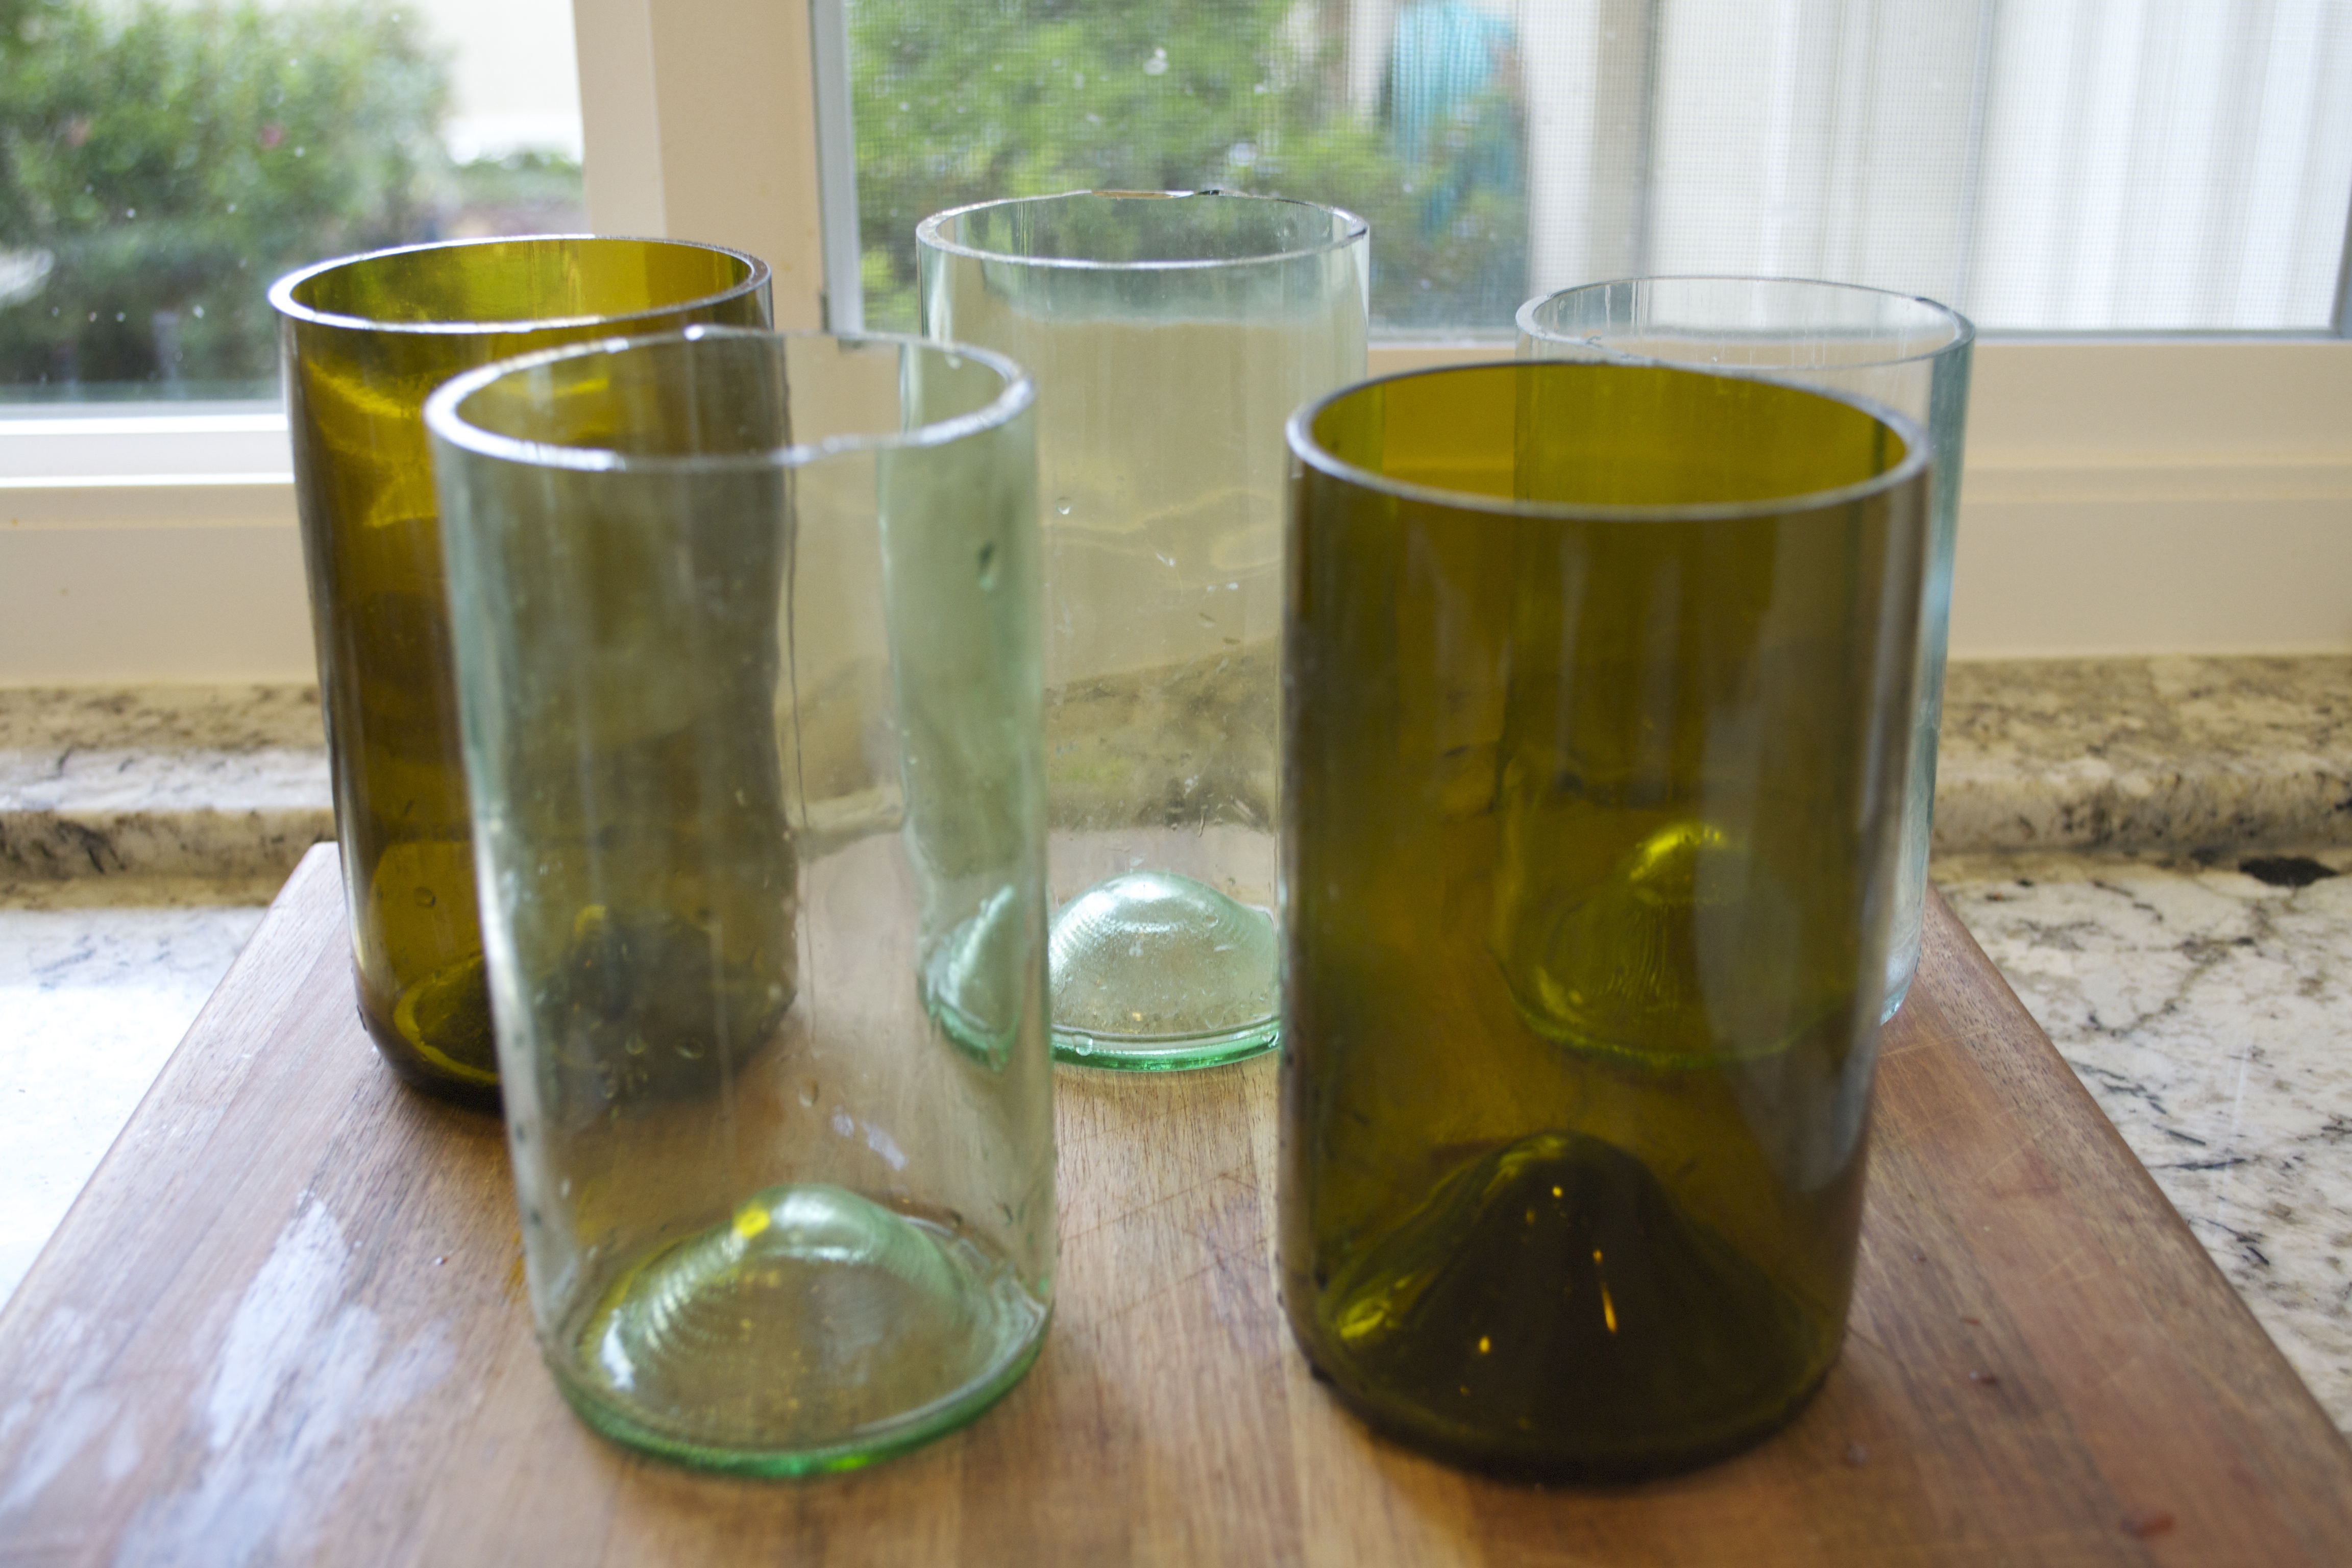
- Cut your wine bottles with your bottle cutter (tutorial found here).
Step 2:
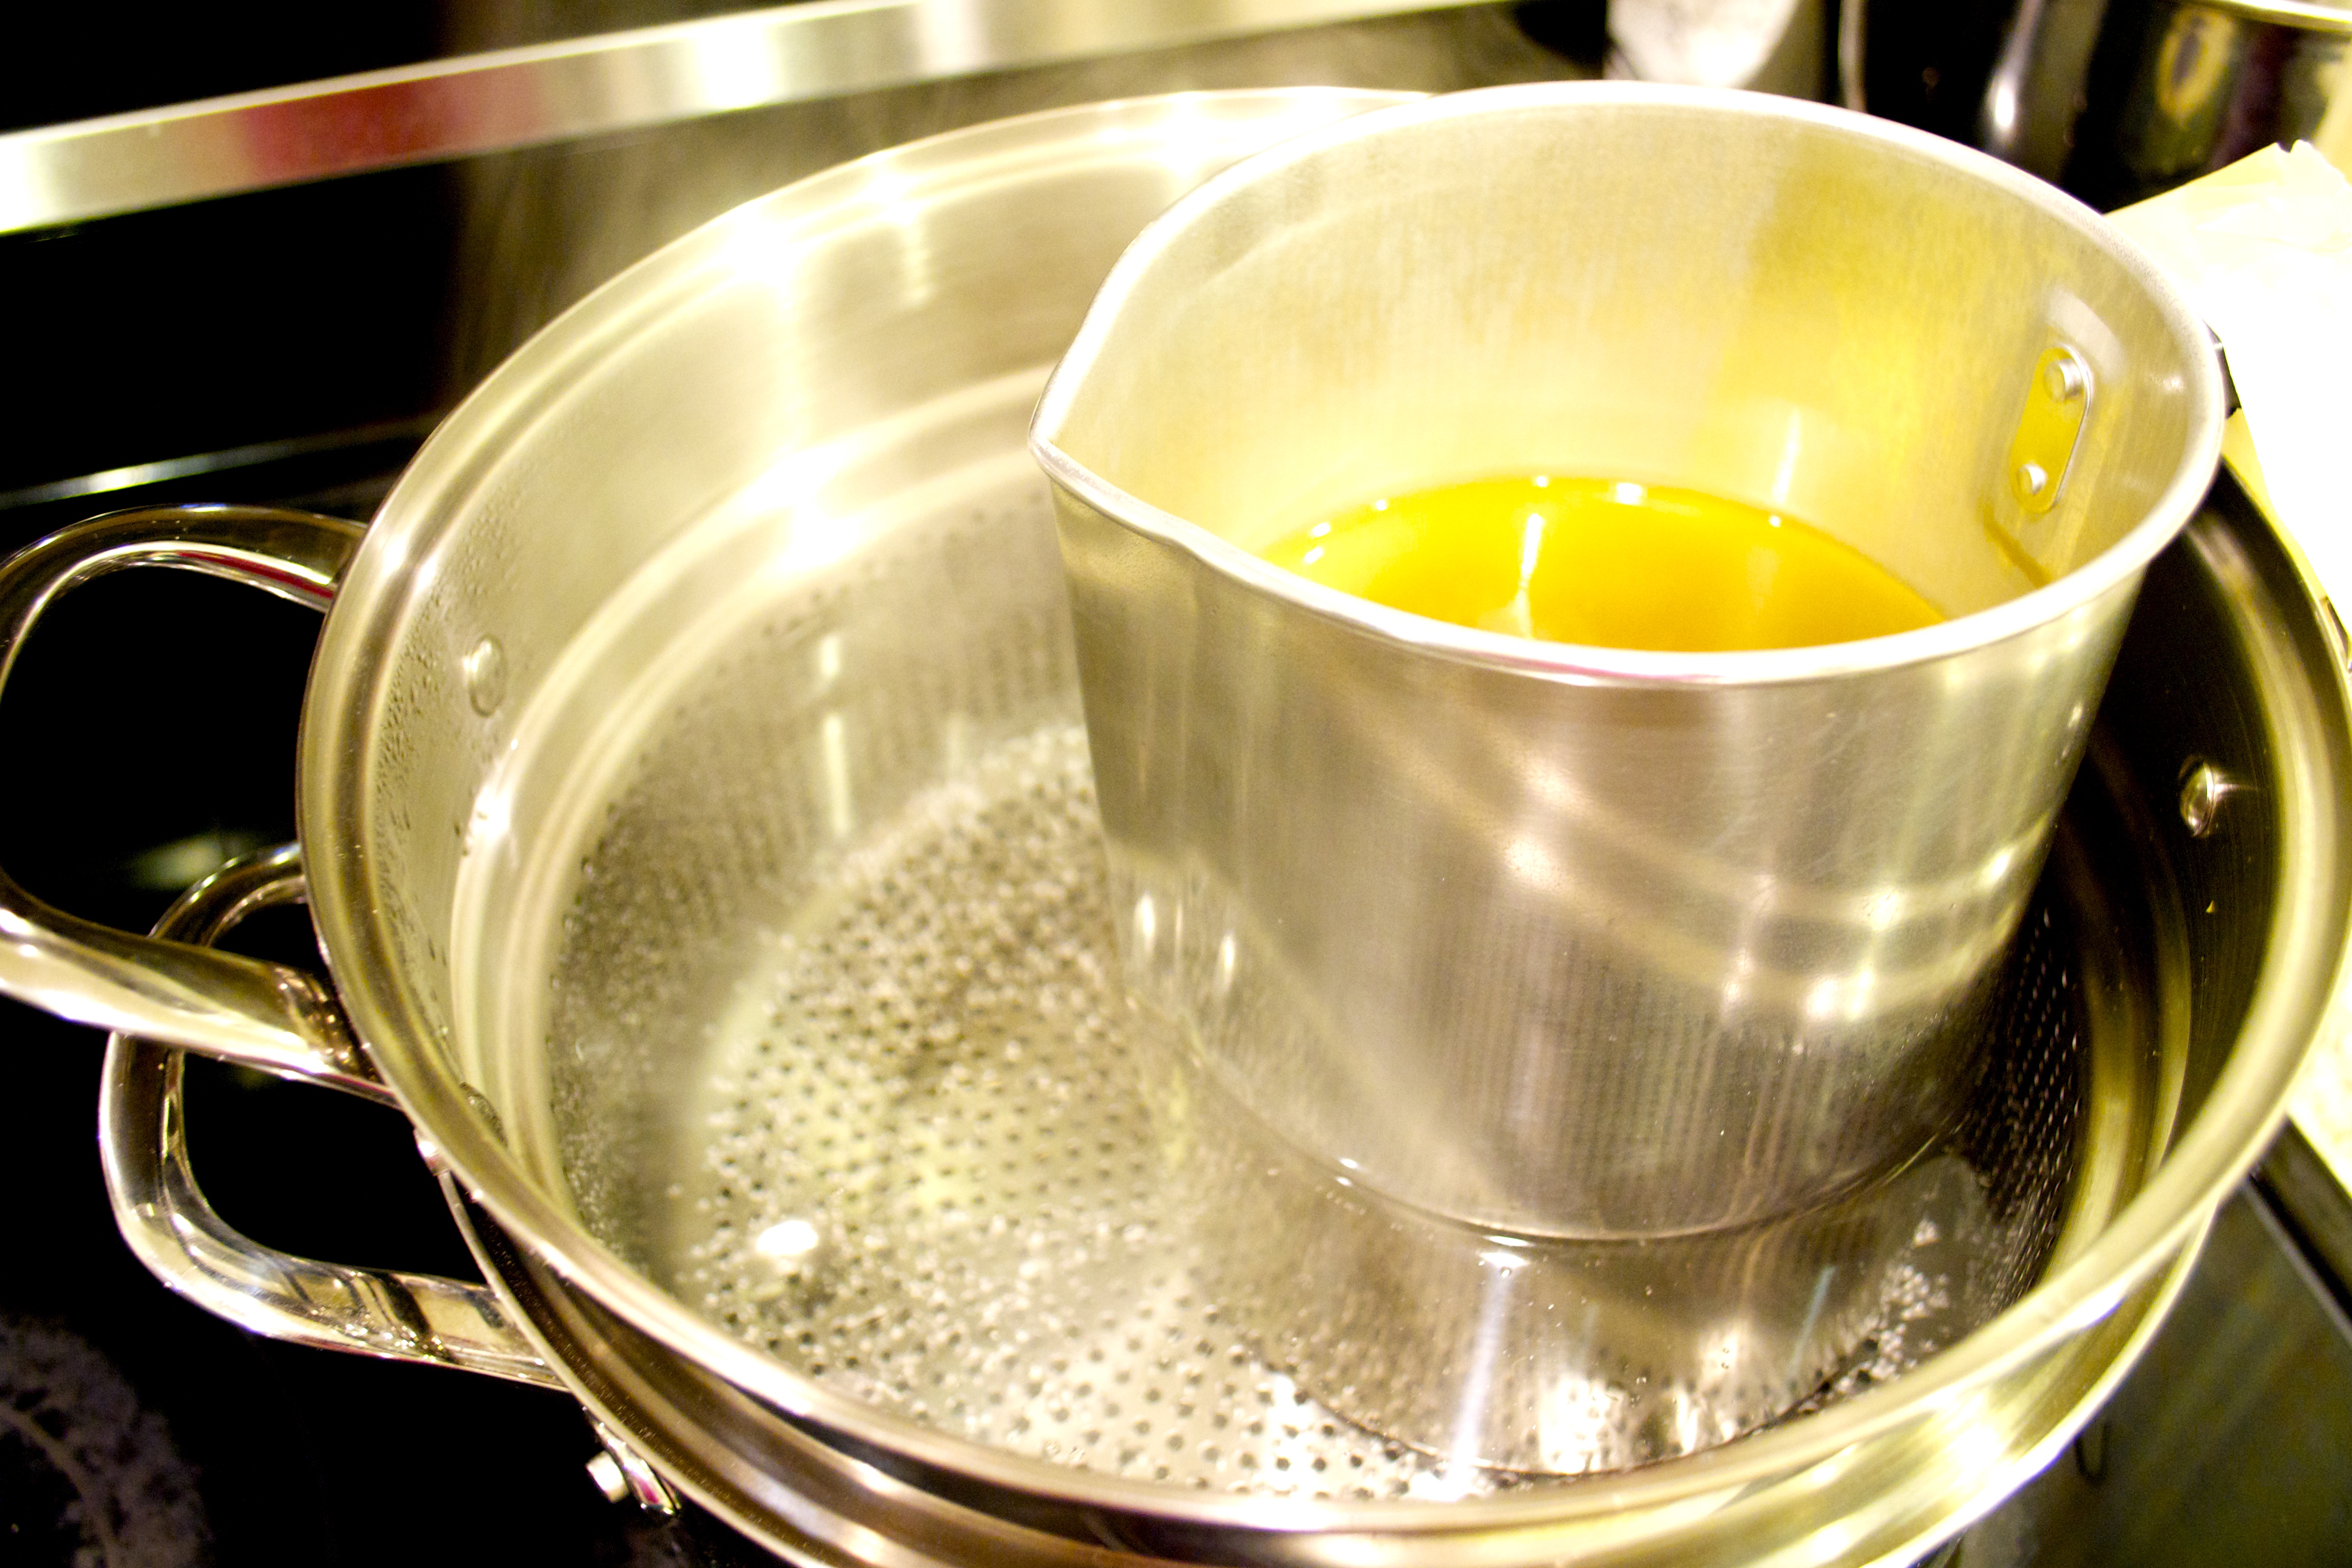
- Keep the large pot of boiling water (you used to help cut your wine bottles) on the stove.
- Fill your candle making pitcher with as much wax as will fit, and place it in the middle of your large pot, to create a double boiler (the heat of the water from the outside of the pitcher helps to melt the wax much more evenly than direct heat).
- Note: Before the wax melts, the pitcher is not heavy enough to sit in your pot and may try to float. I tape the top of the pitcher handle down to the side of the pot to keep it from floating. Once some of the wax melts, you no longer need any tape. The pitcher will sit in the pot on it’s own.
Step 3:
- As the wax melts, you may notice there is more room in your pitcher. Feel free to fill it with more of your wax and let it melt. I wanted my pitcher as full as possible (I fit about 3 lbs of wax in my pitcher each time).
Step 4:
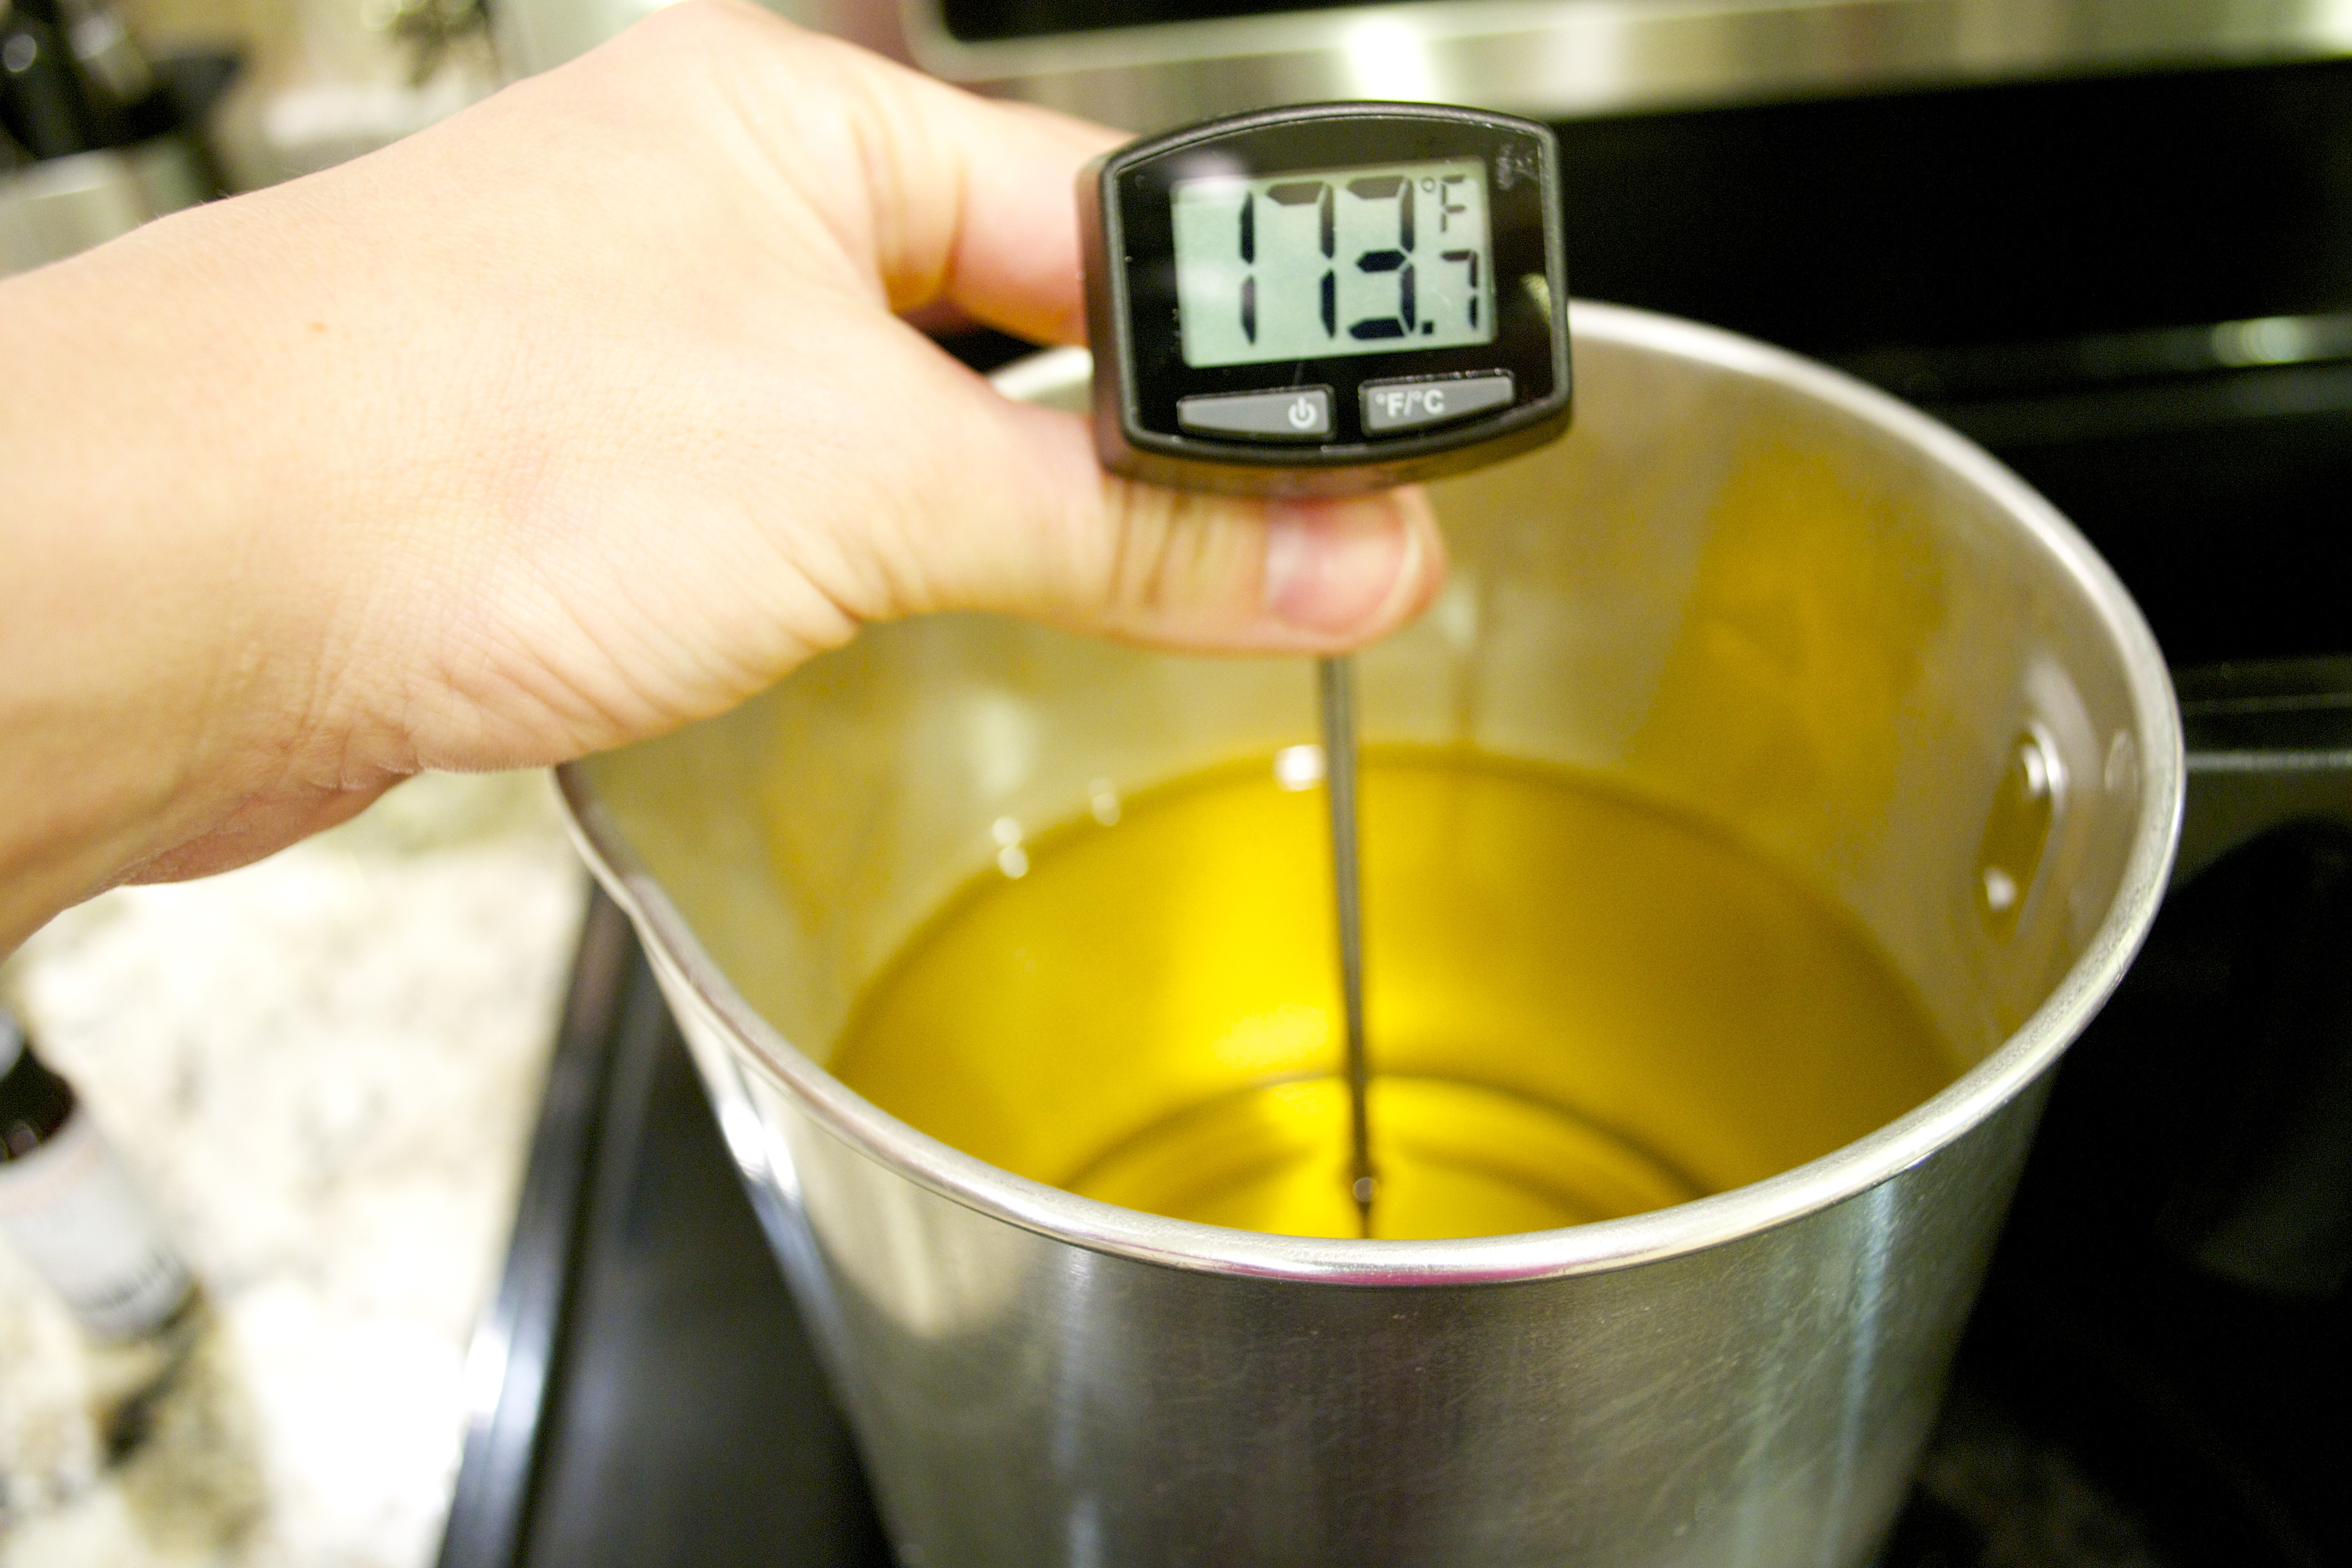
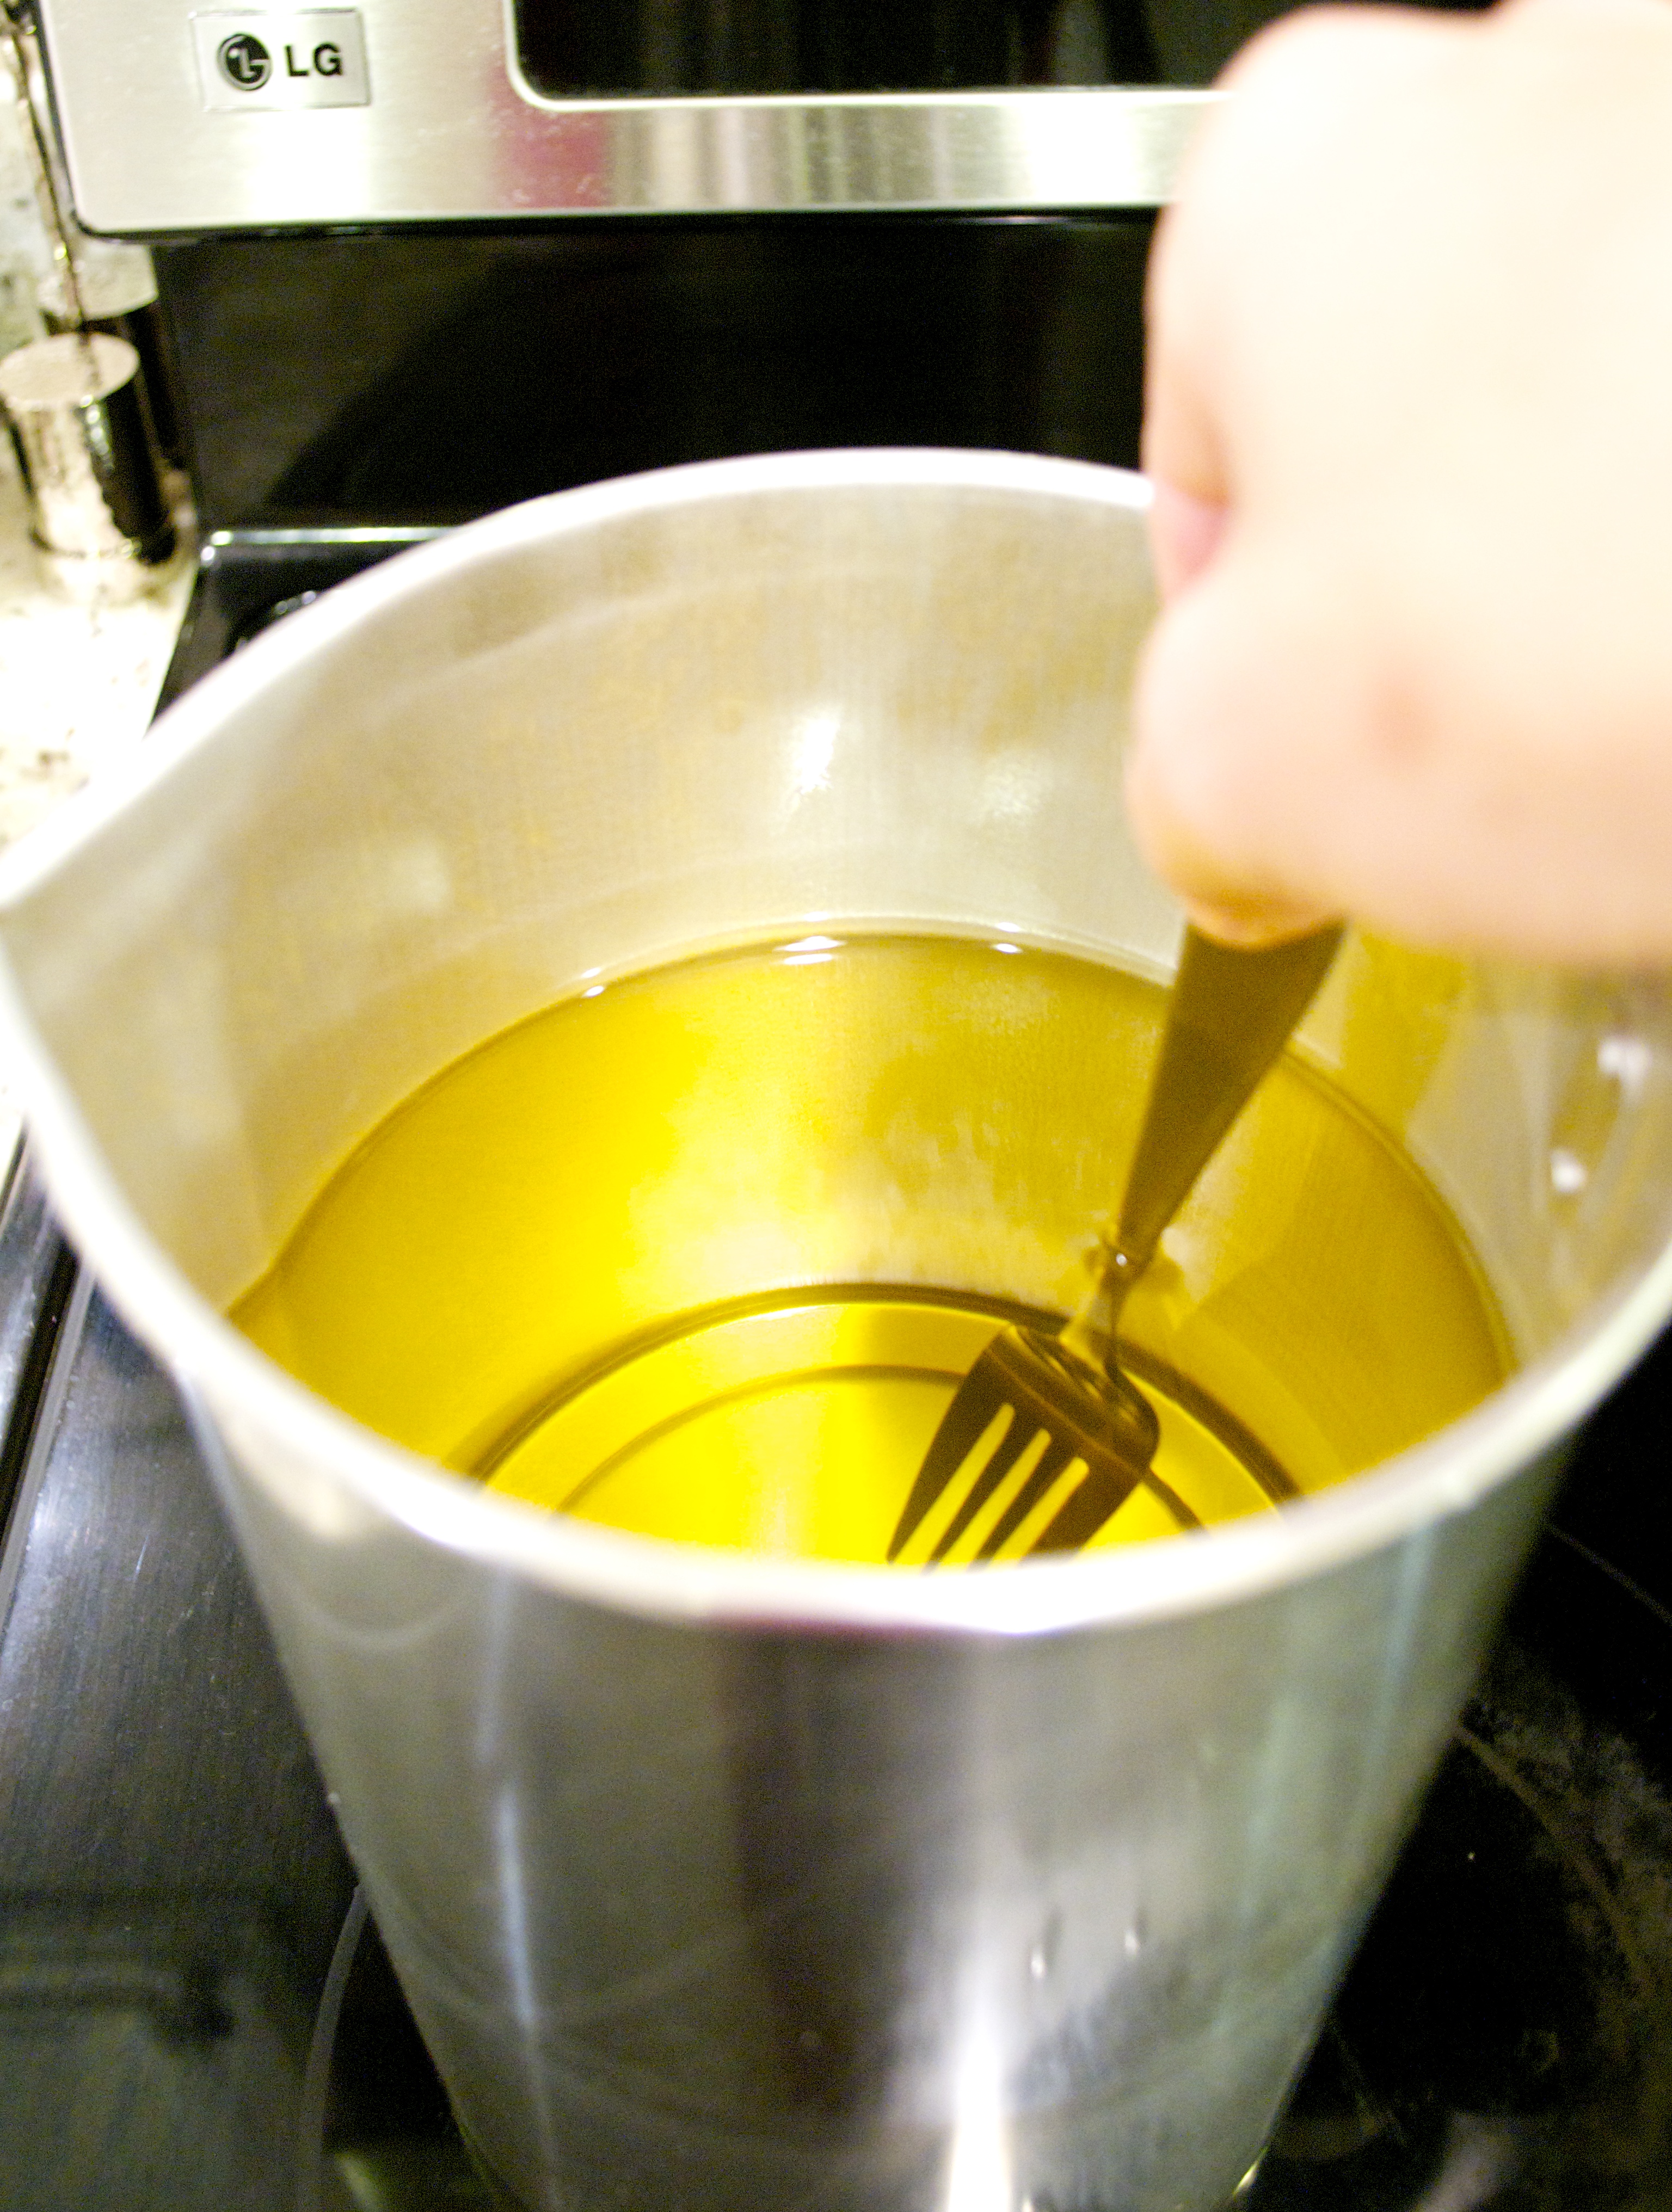
- Once the wax is completely melted, take your pitcher out of your pot and away from any heat.
- You can do this by picking up the pitcher’s handle. The handle IS NOT hot and very easy to handle.
- Use your thermometer to take the temperature of the wax. Let the wax cool to between 150-175 degrees fahrenheit (and don’t let it get below 125 degrees or the scent won’t mix in evenly into the wax).
- The temperature depends on the “flash point” of the fragrance you’re using. If the flash point is 200 degrees, make sure your wax is below 200 degrees. If it says 165 degrees, make sure your wax cools below 165 degrees – and so on. If your wax is hotter than the “flash point” – the scent you mix in will evaporate away and you’ll be left with a scentless candle.
Step 5:
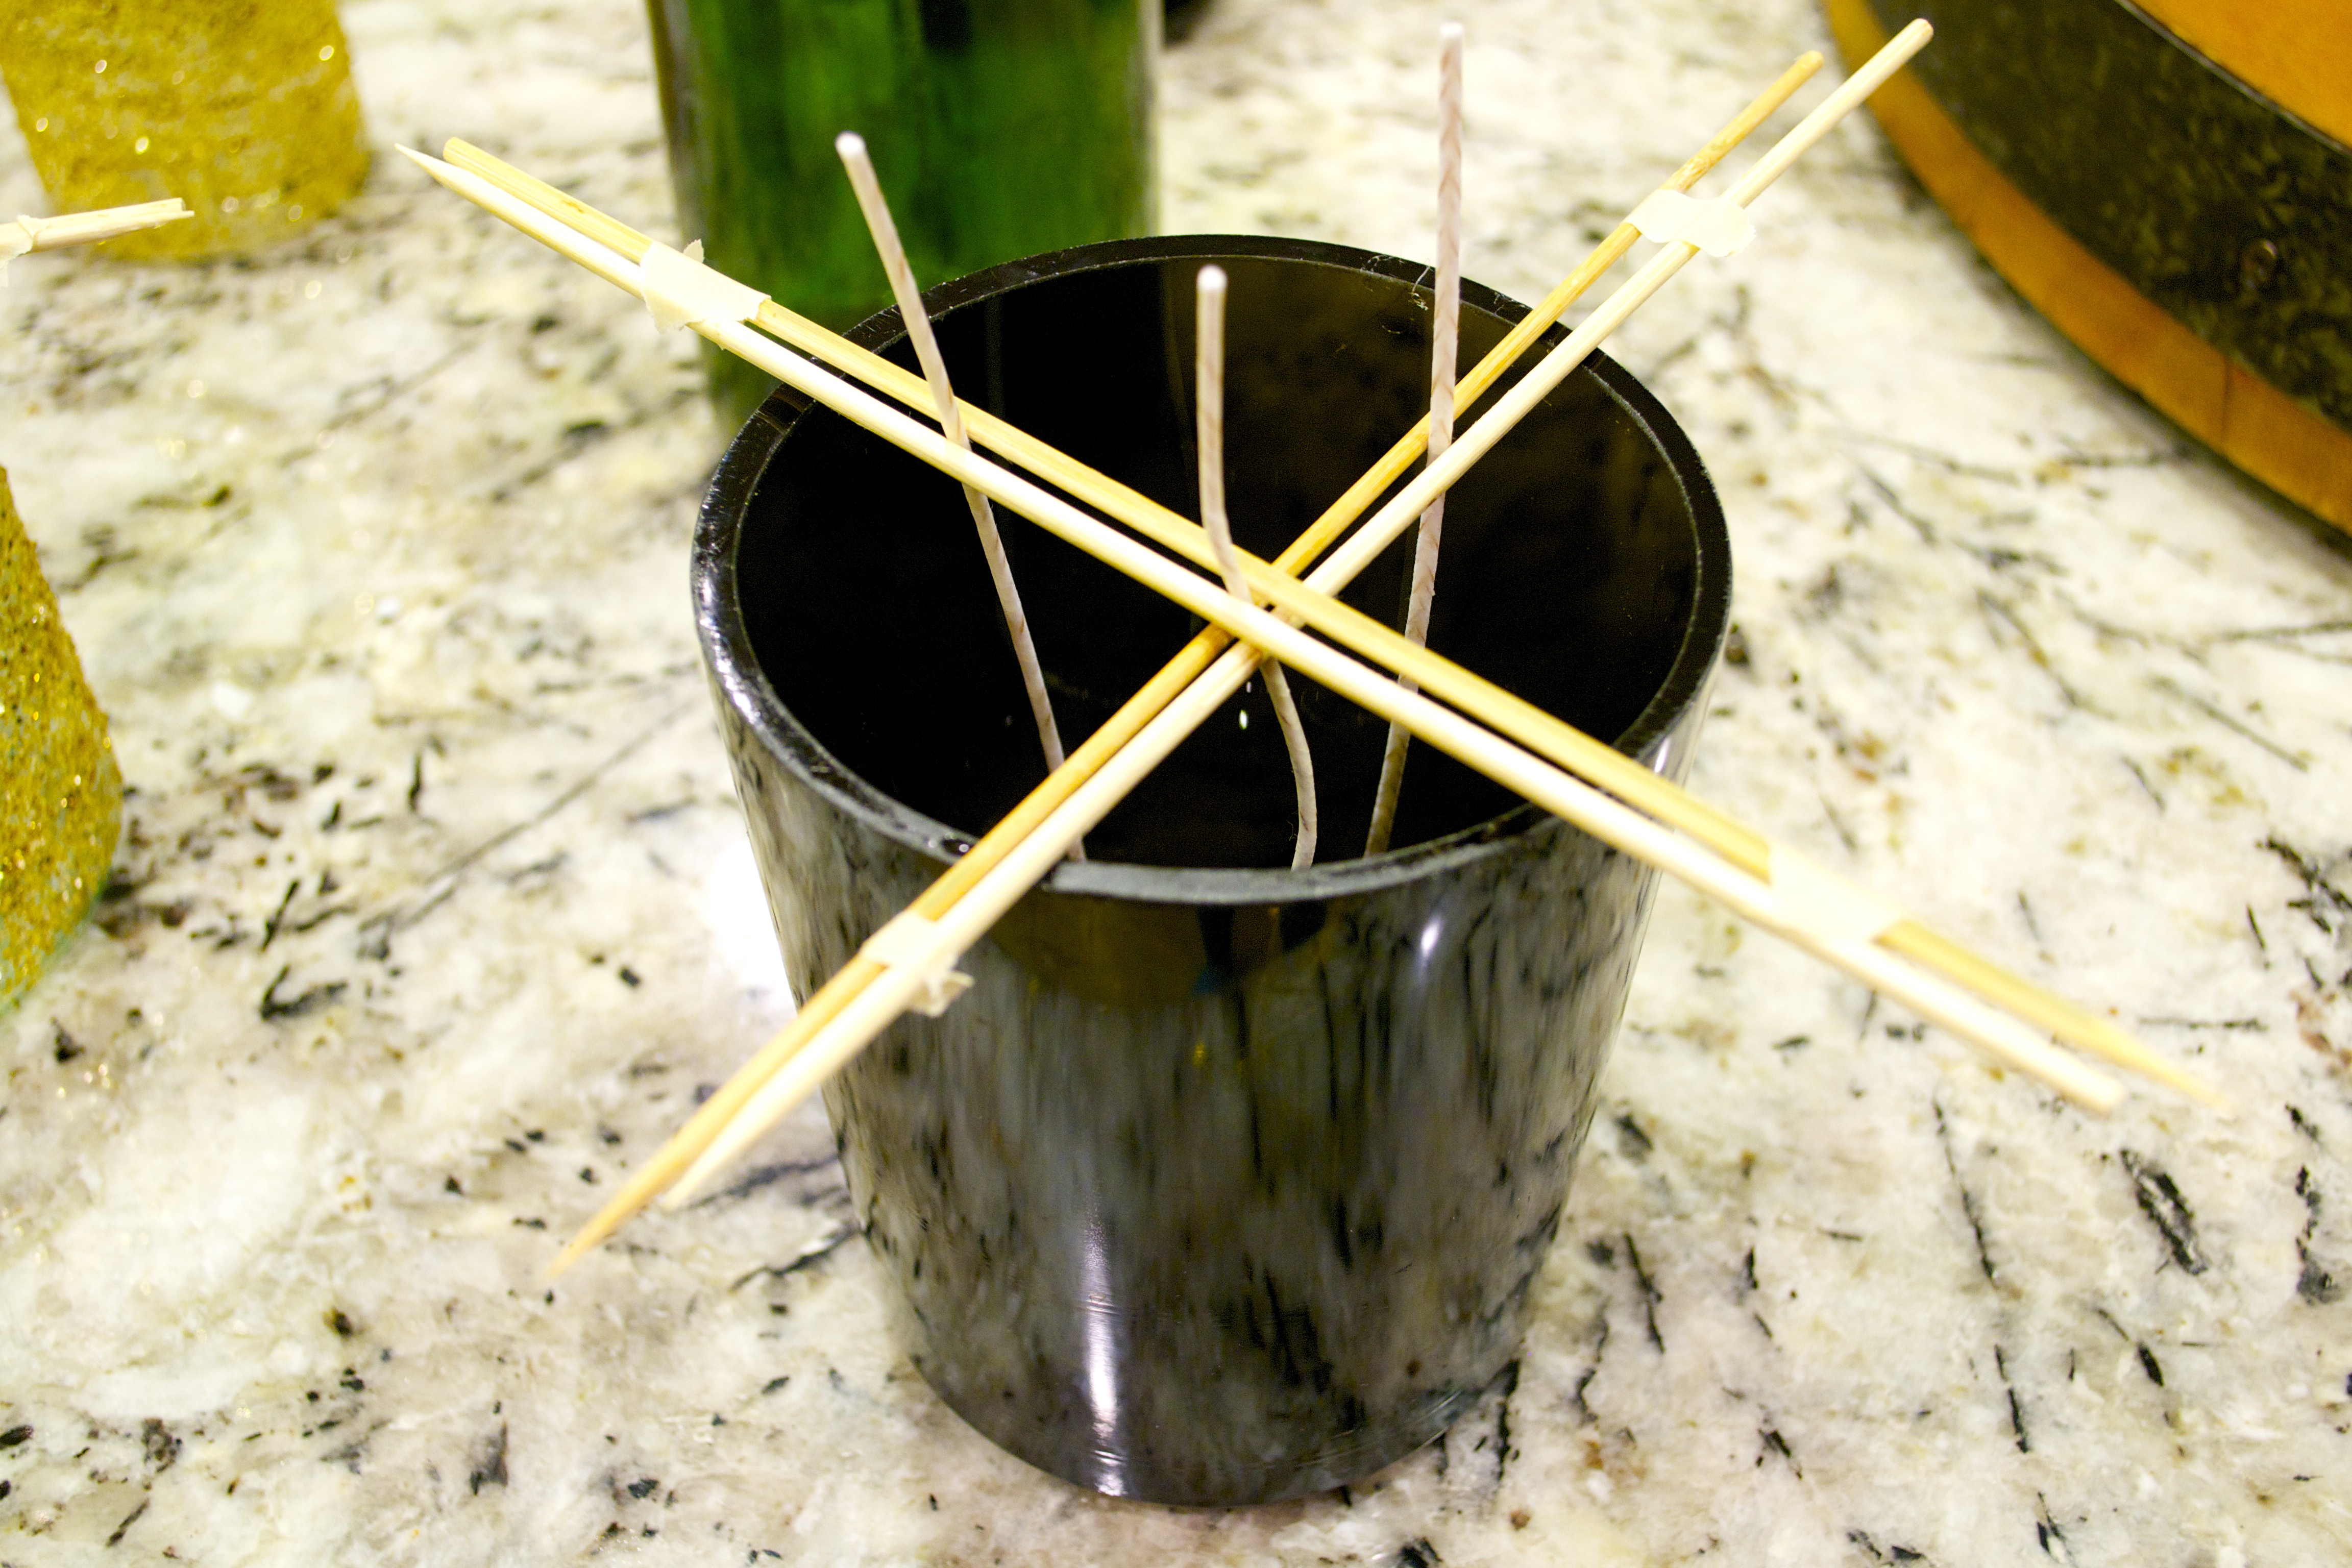
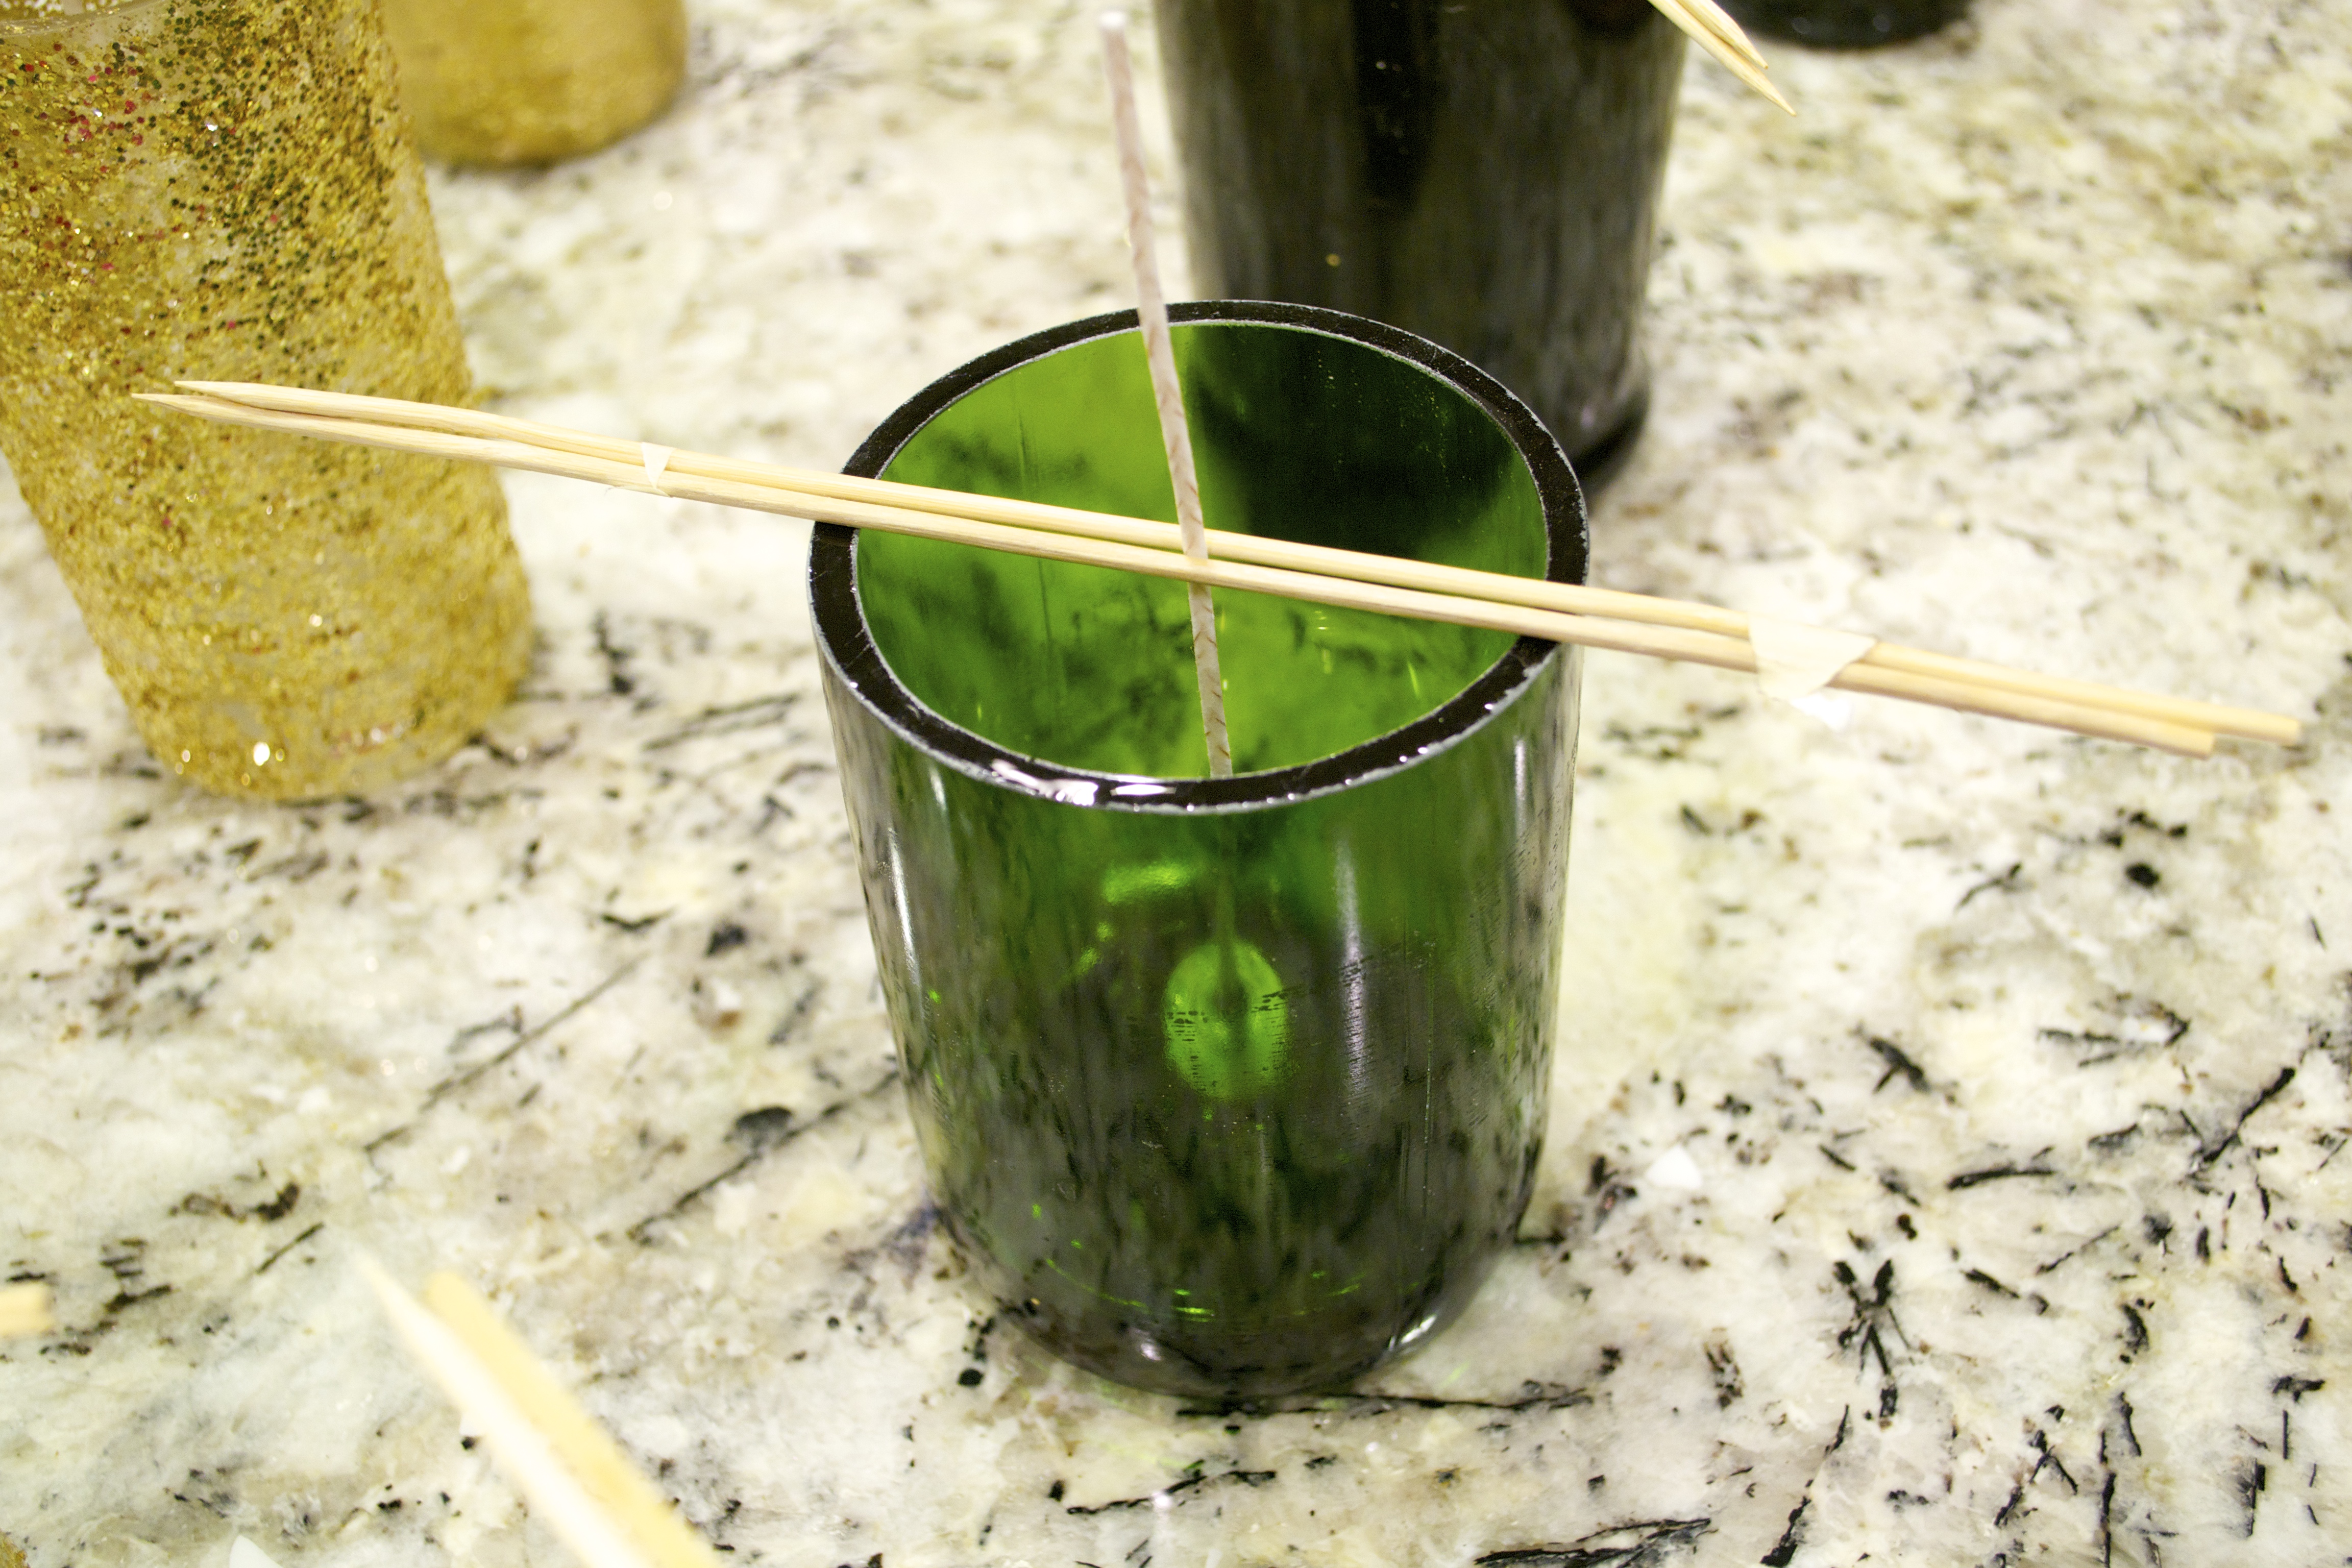
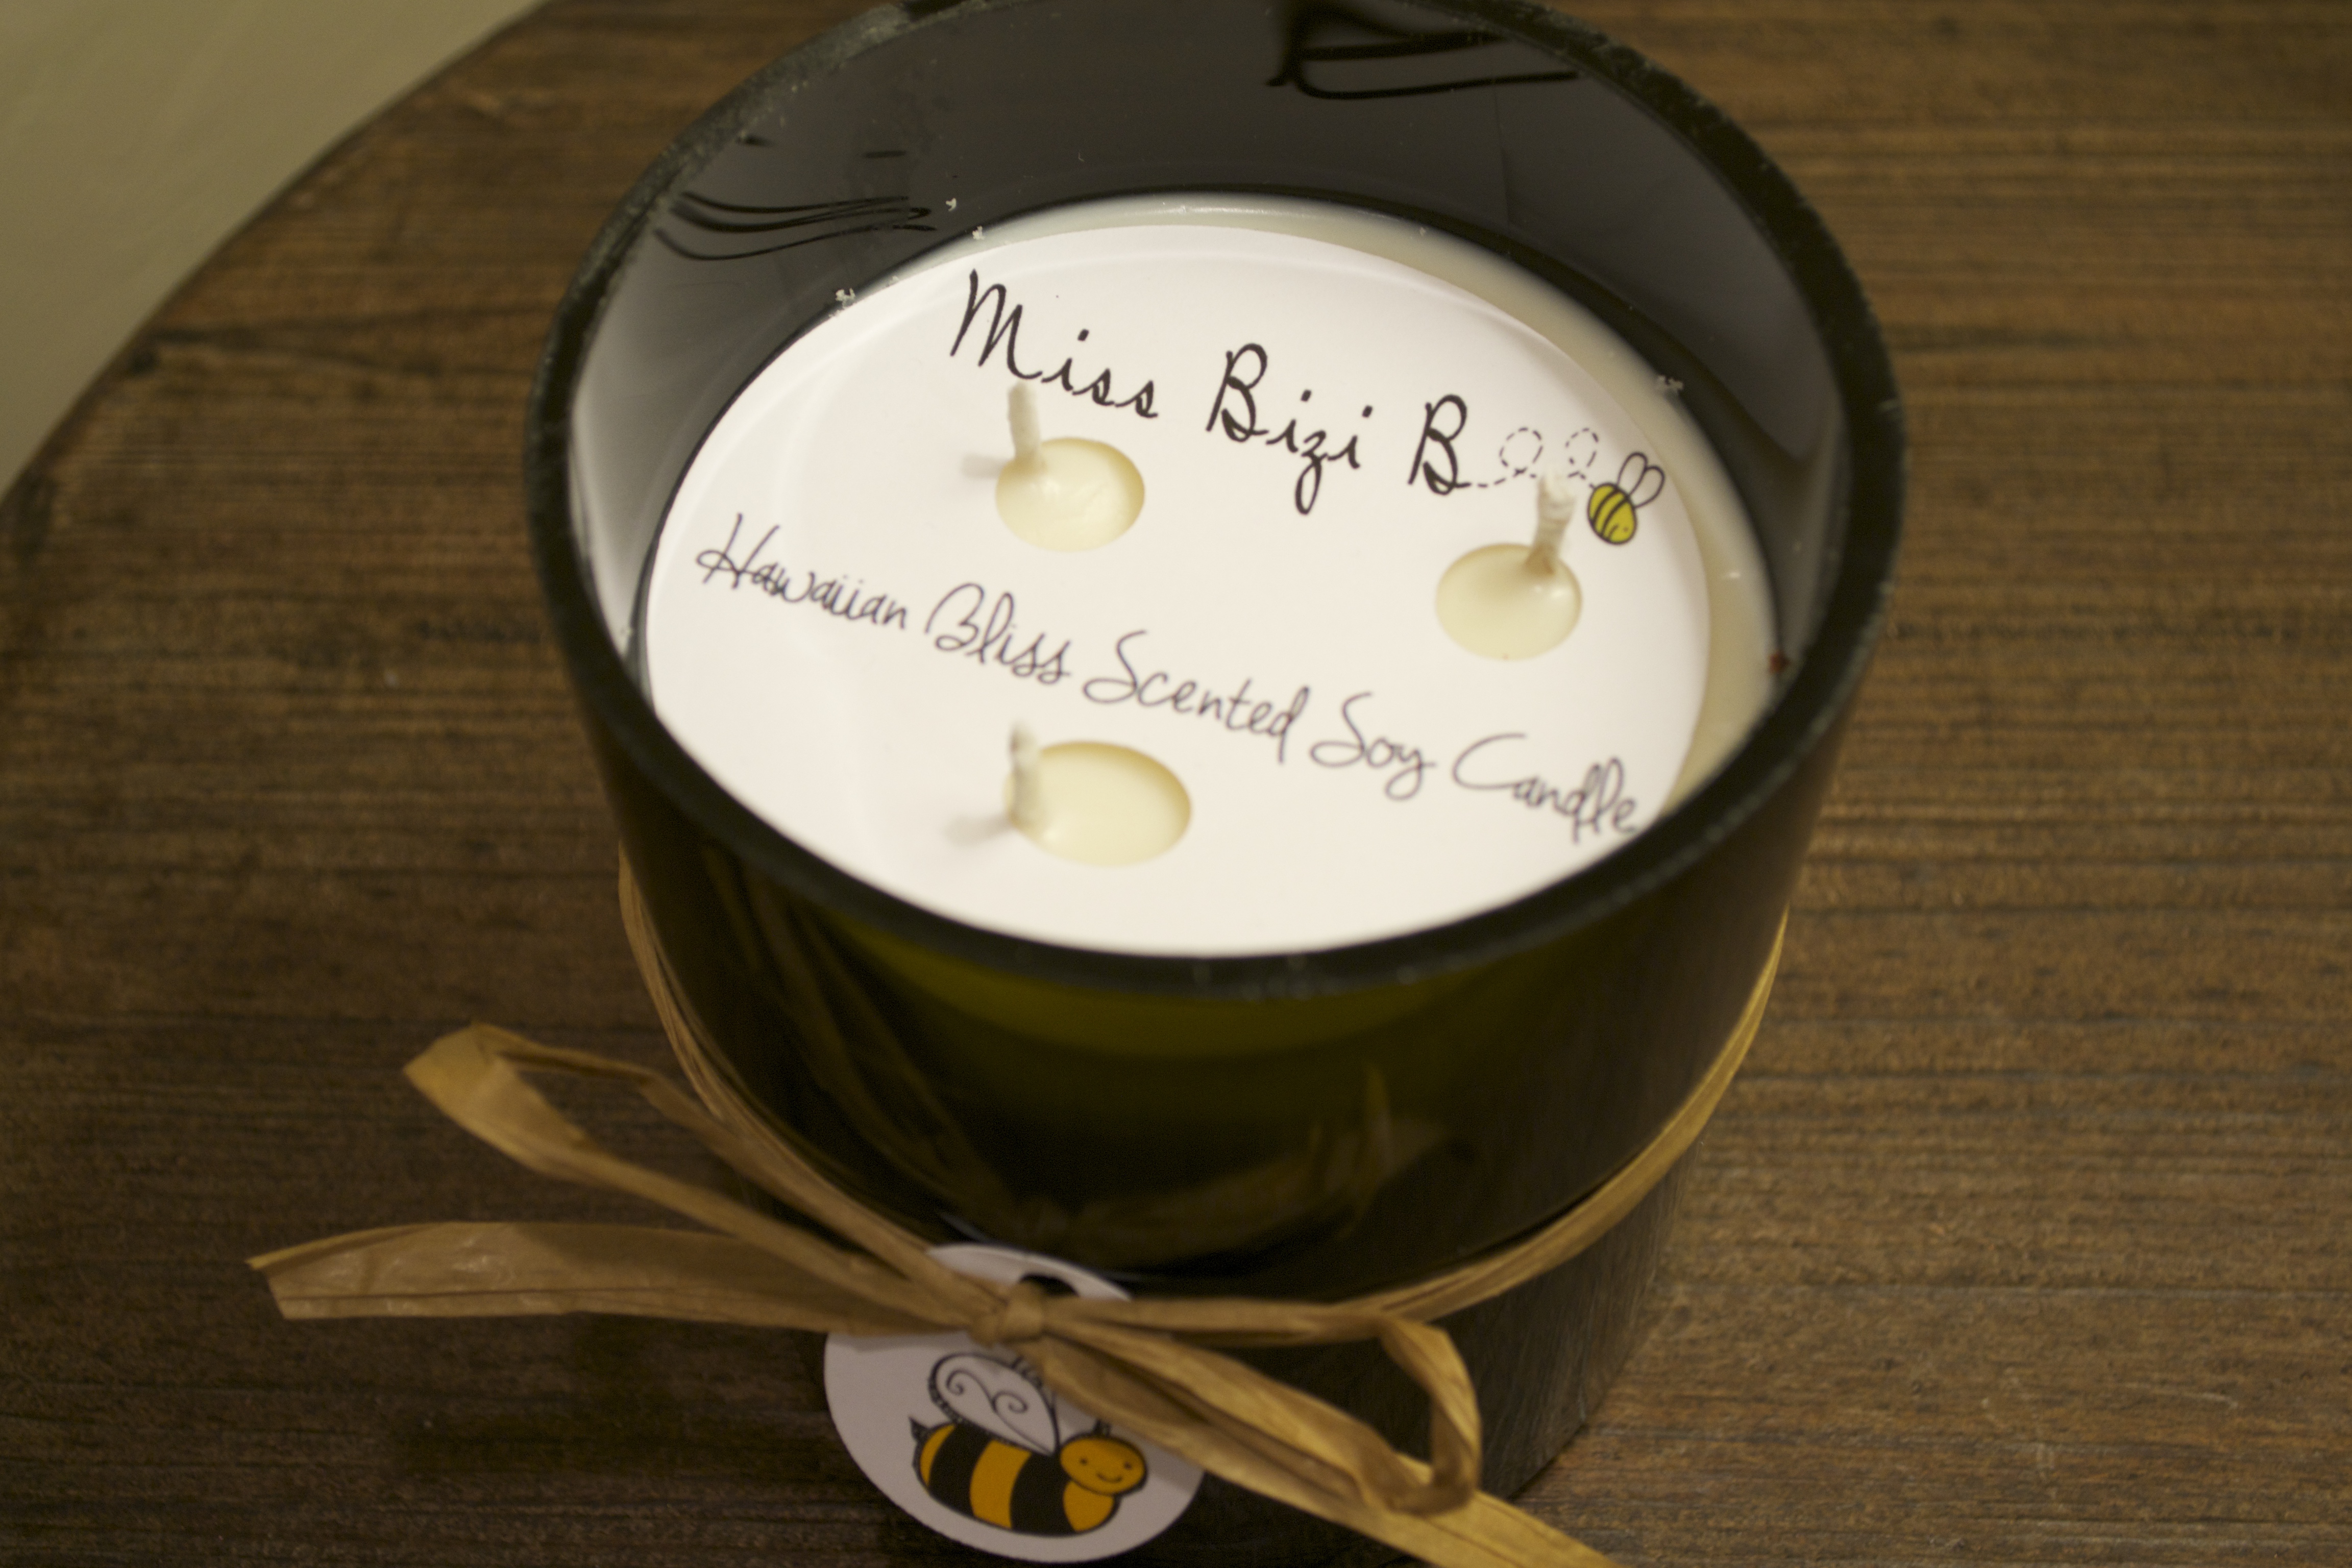
- While you’re waiting for your wax to cool, glue your candle wicks into the bottom of your bottles to secure them down.
- Feel free to use glue dots or double sided tape, if you prefer. I used a dot of hot glue for mine.
- Secure the top of your wicks (if using natural wicks) so that they stand up straight in your bottles. The easiest (and cheapest) way to do this is to use chopsticks from your local Chinese takeout. I used wooden skewers from the grocery store, because I needed so many.
Step 6:
- Once your wax has cooled to an appropriate temperature, mix in your scent(s).
- Use approx 1oz of scent for every 2 lbs of wax you melt.
- Stir thoroughly for about 1 minute to ensure the scent is mixed evenly into the wax.
- I used the summer scents sampler from CandleScience and used all 4, 1oz bottles for my 10lb bag of wax (I melted the wax in 3 separate batches and used 1.5 bottles in each batch).
- My candles smell amazing, and I can’t recommend these scents enough! They blend VERY well together.
Step 7:
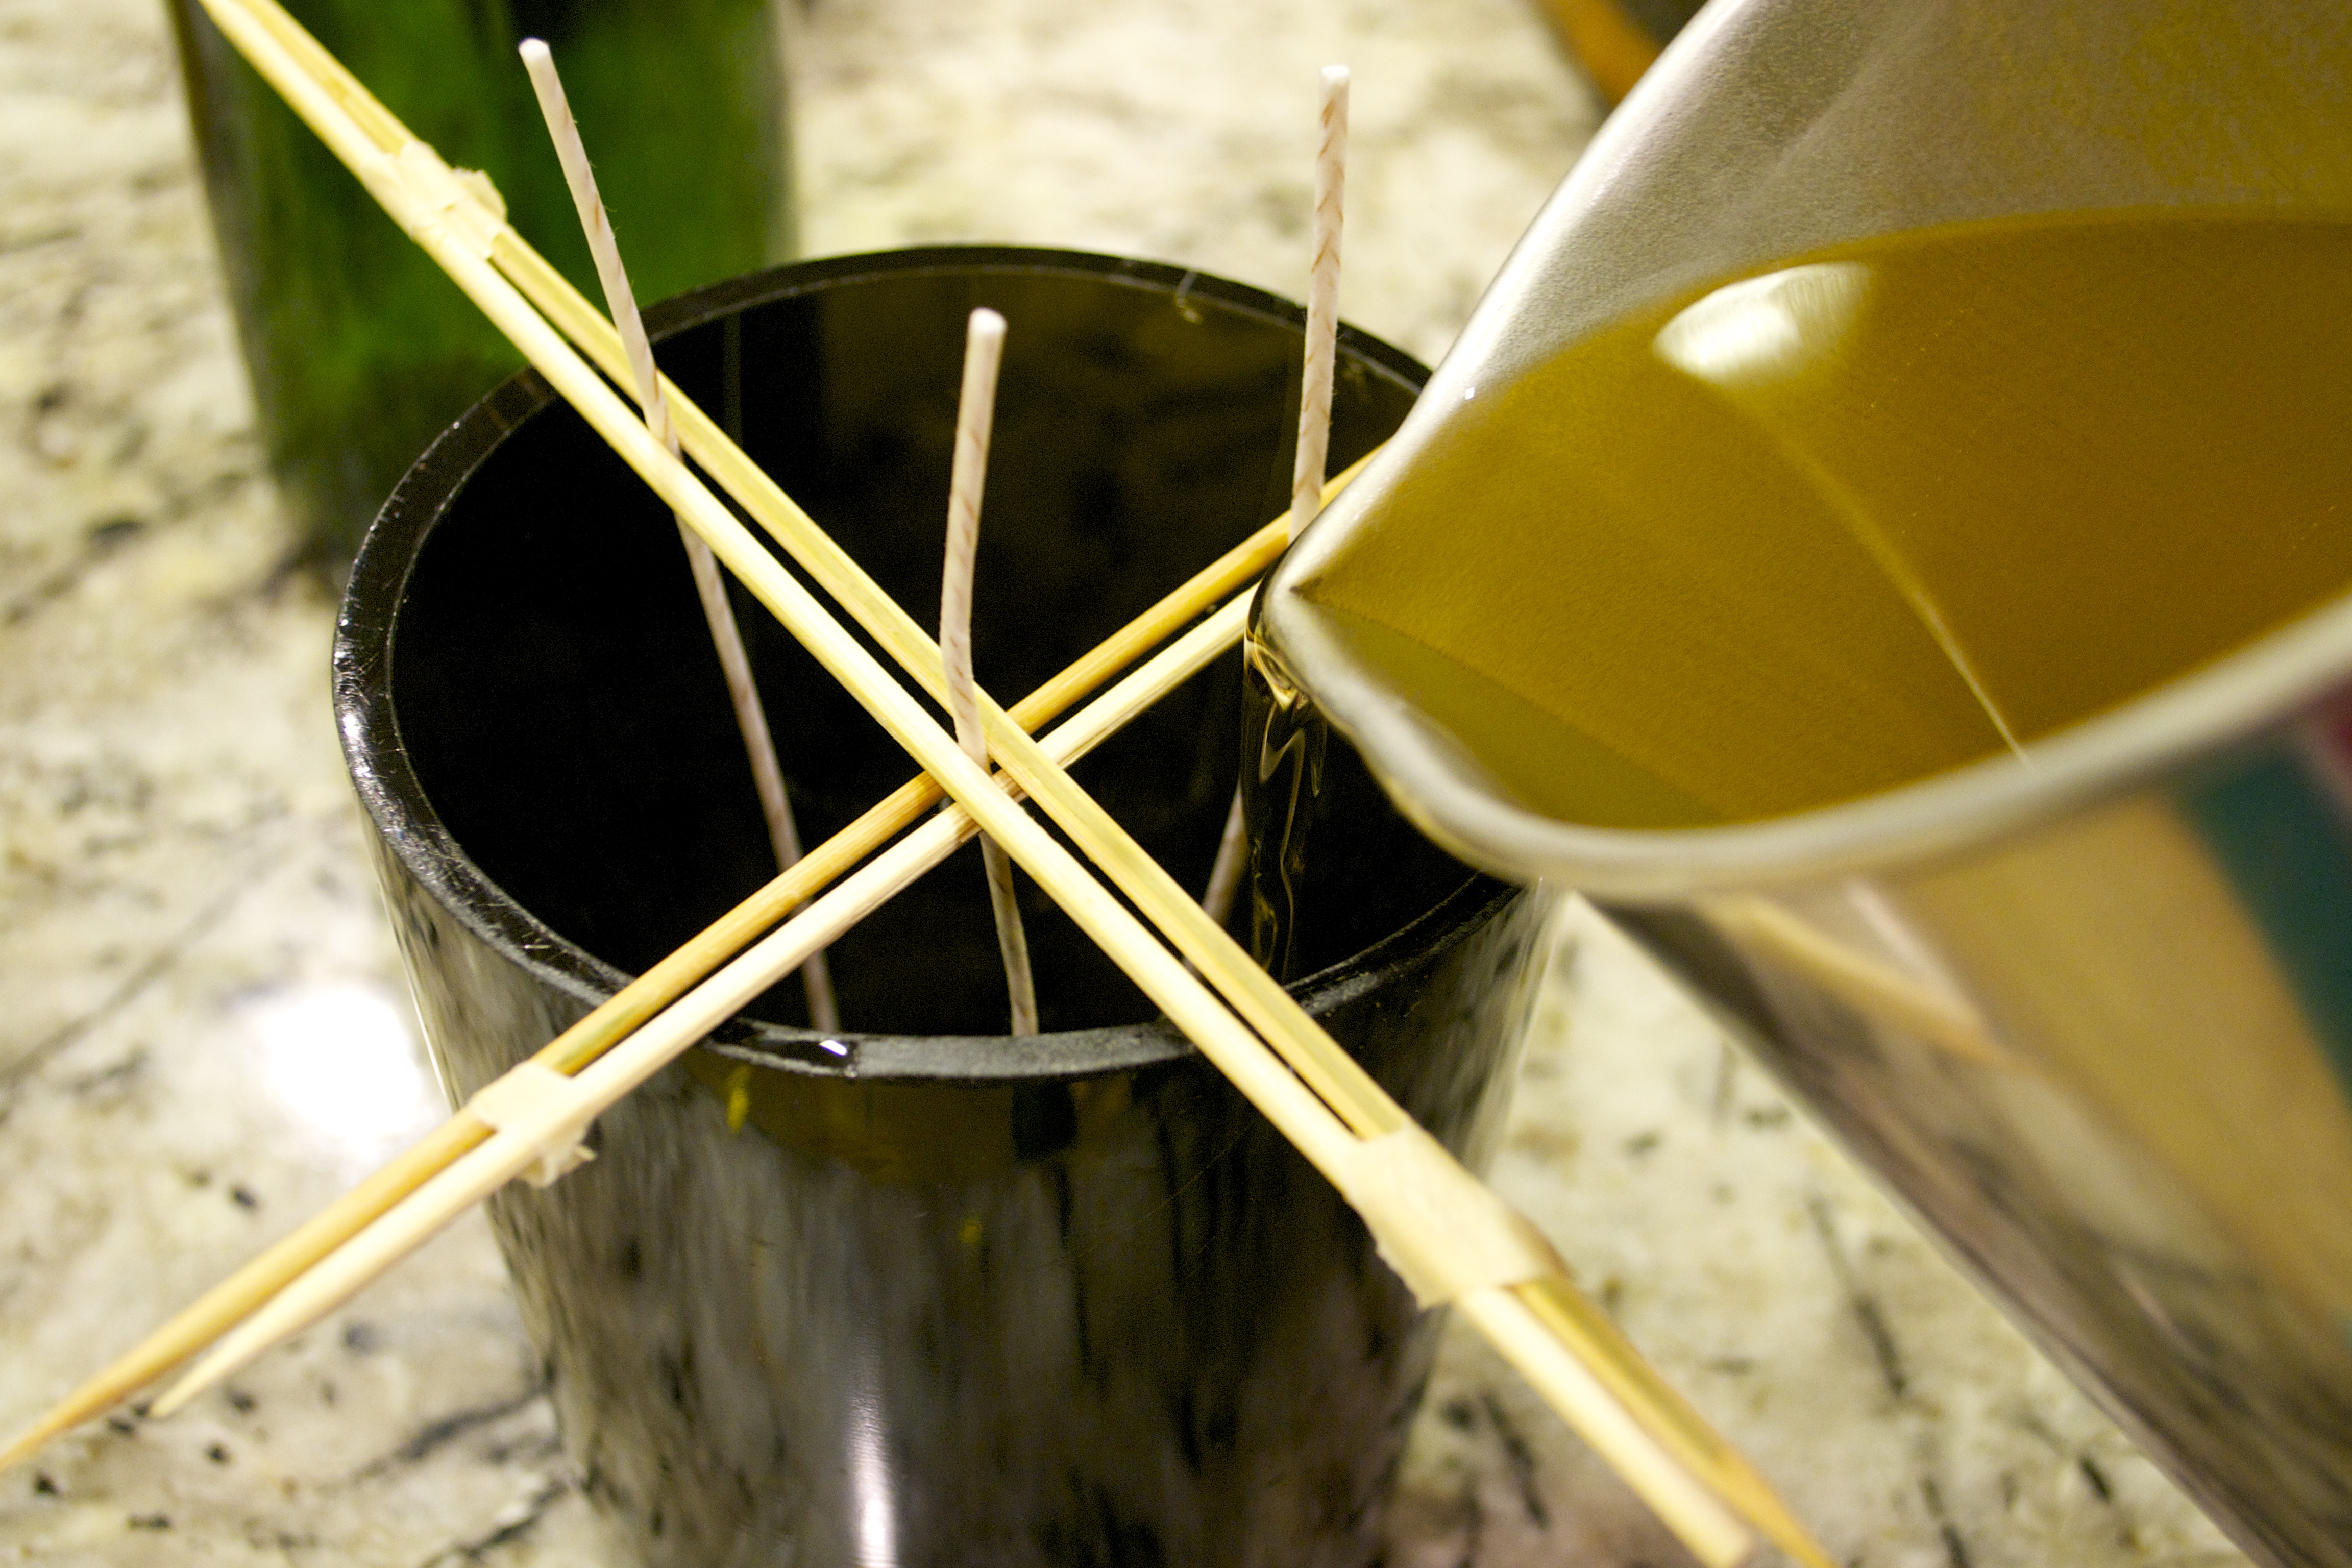
- Once the scent is mixed in properly, take your pitcher and pour your wax into your bottles, stopping about 1-1.5” from the top of the bottles.
- Leave your wax to cool overnight (or about 6 hours).
Step 8:
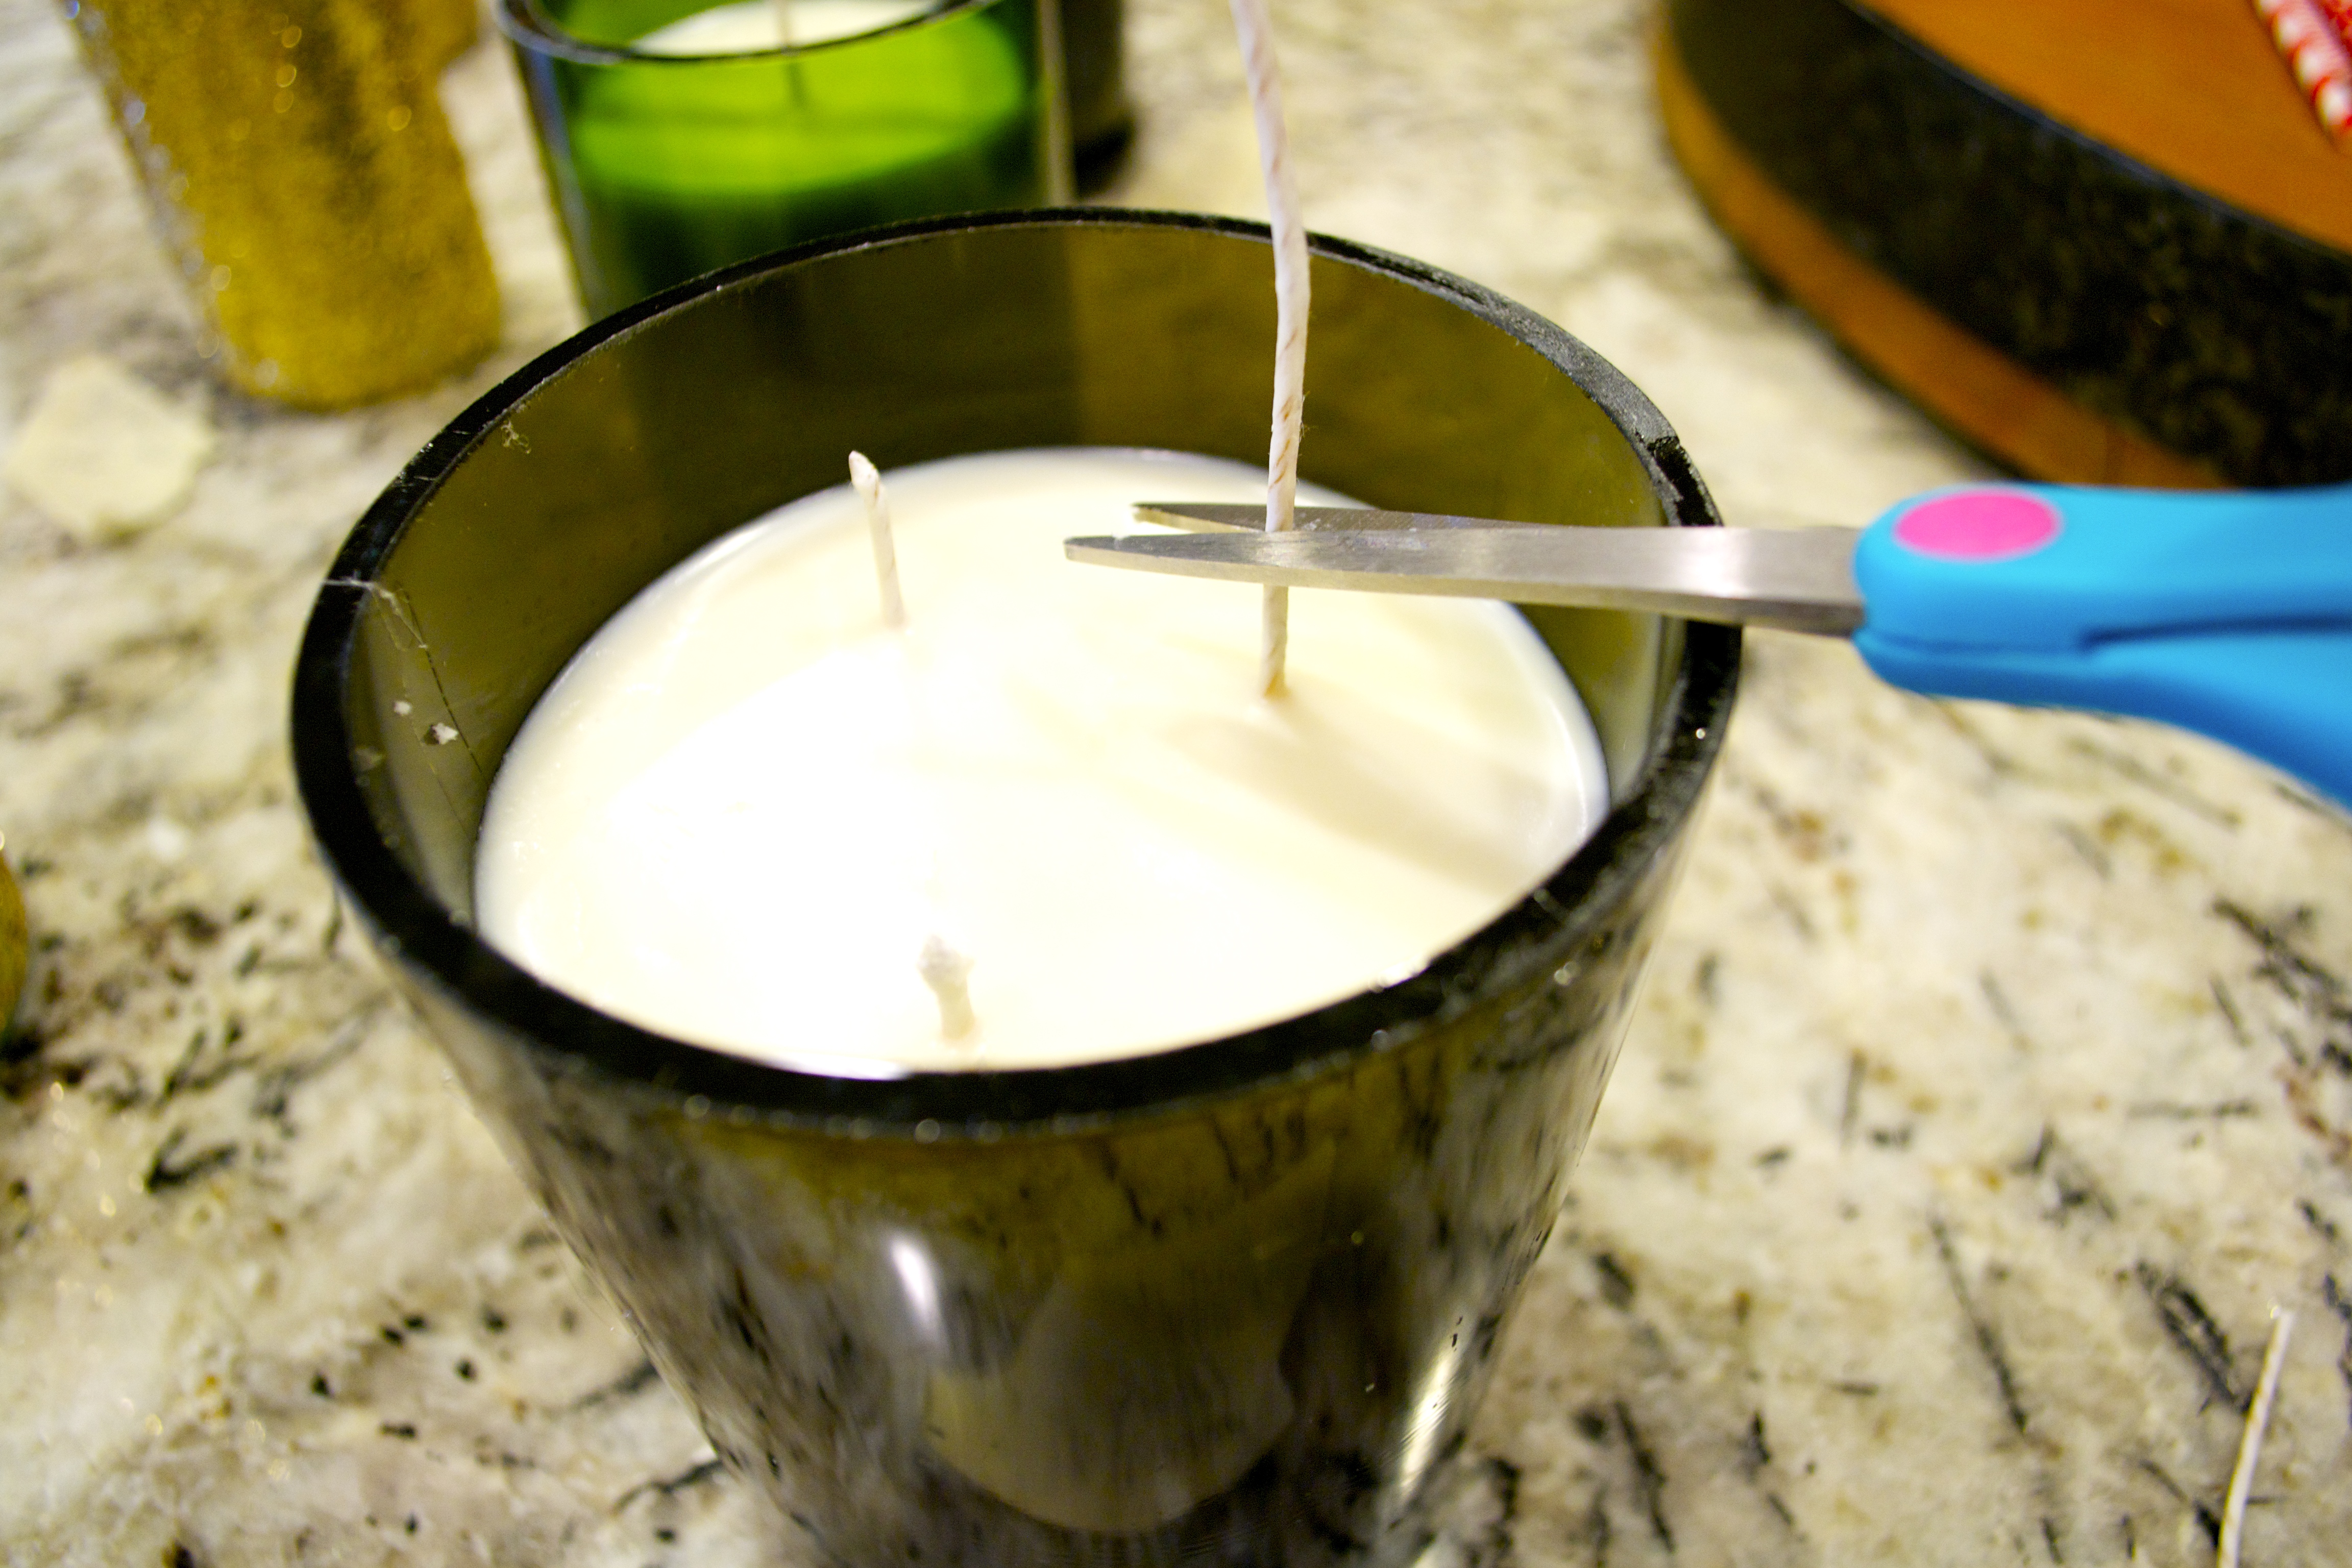
- Cut the excess off the top of your wicks.
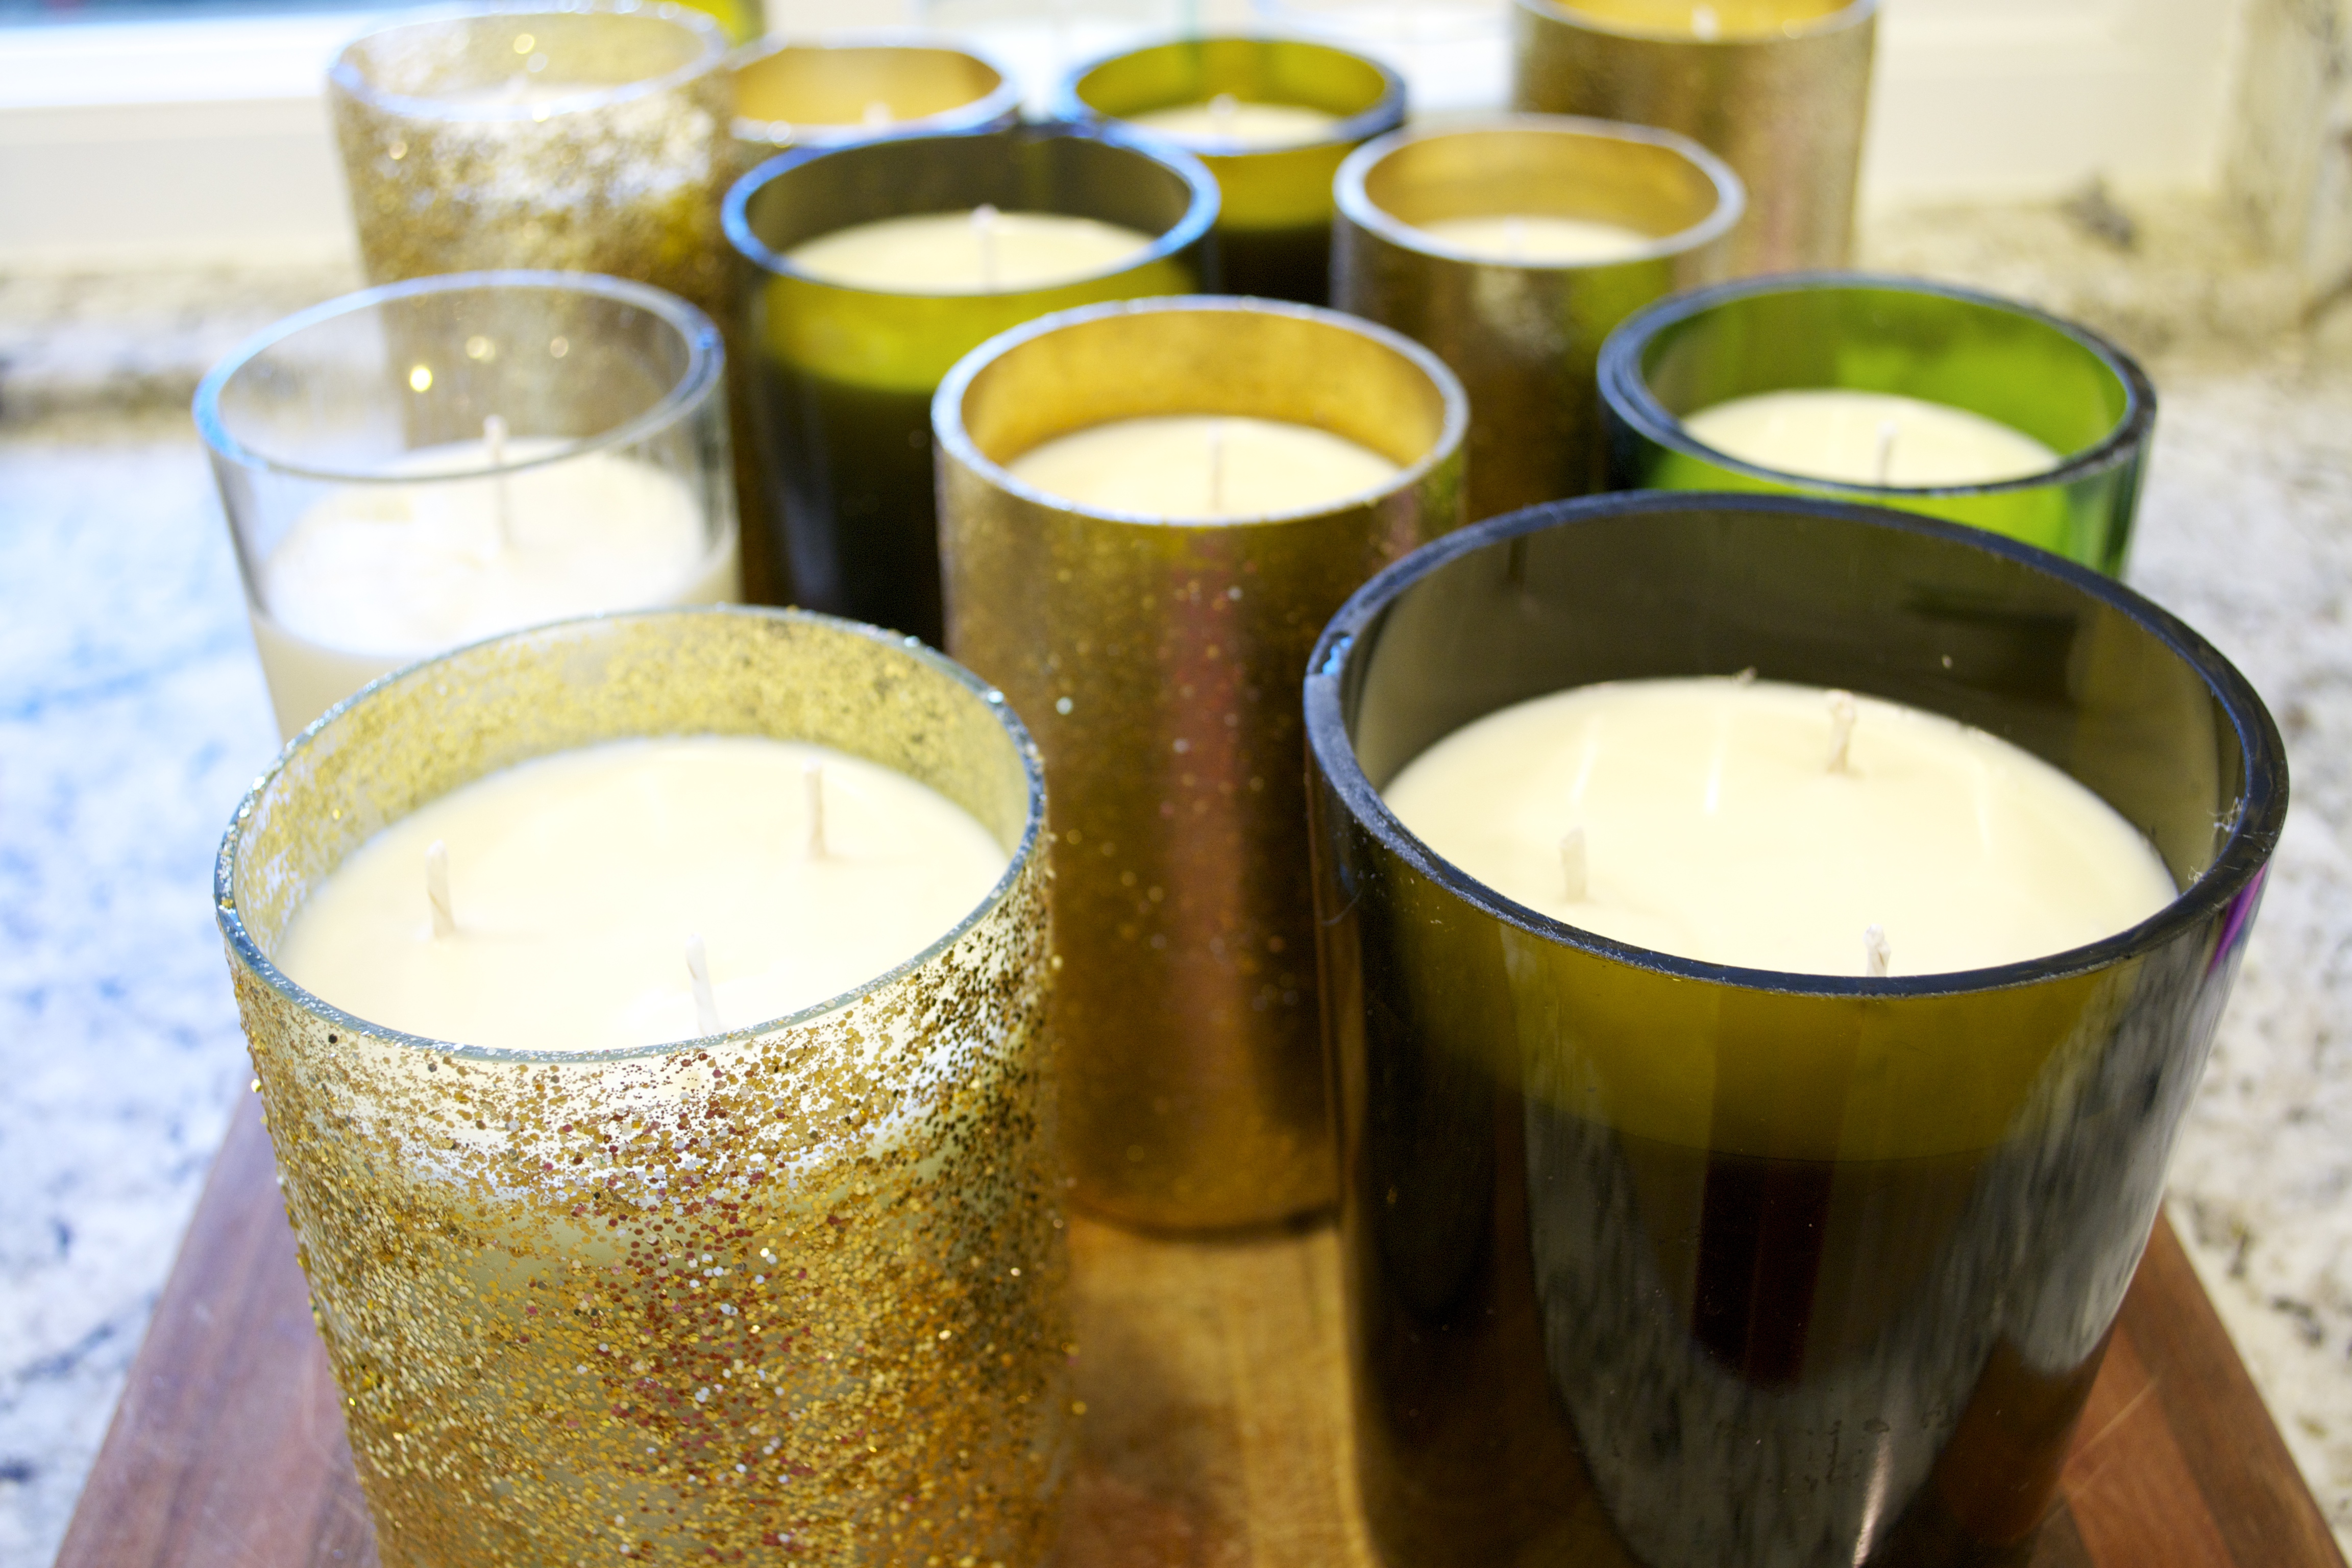
Voi la! Perfect smelling candles in cool upcycled wine bottles. I’m in love!
Making Your DIY Candles Look Professional
There are many things you can do to spruce up the look of your candles. As I explained in my wine bottle to vase tutorial, you can spray paint them or paint them with glitter prior to pouring in the wax.
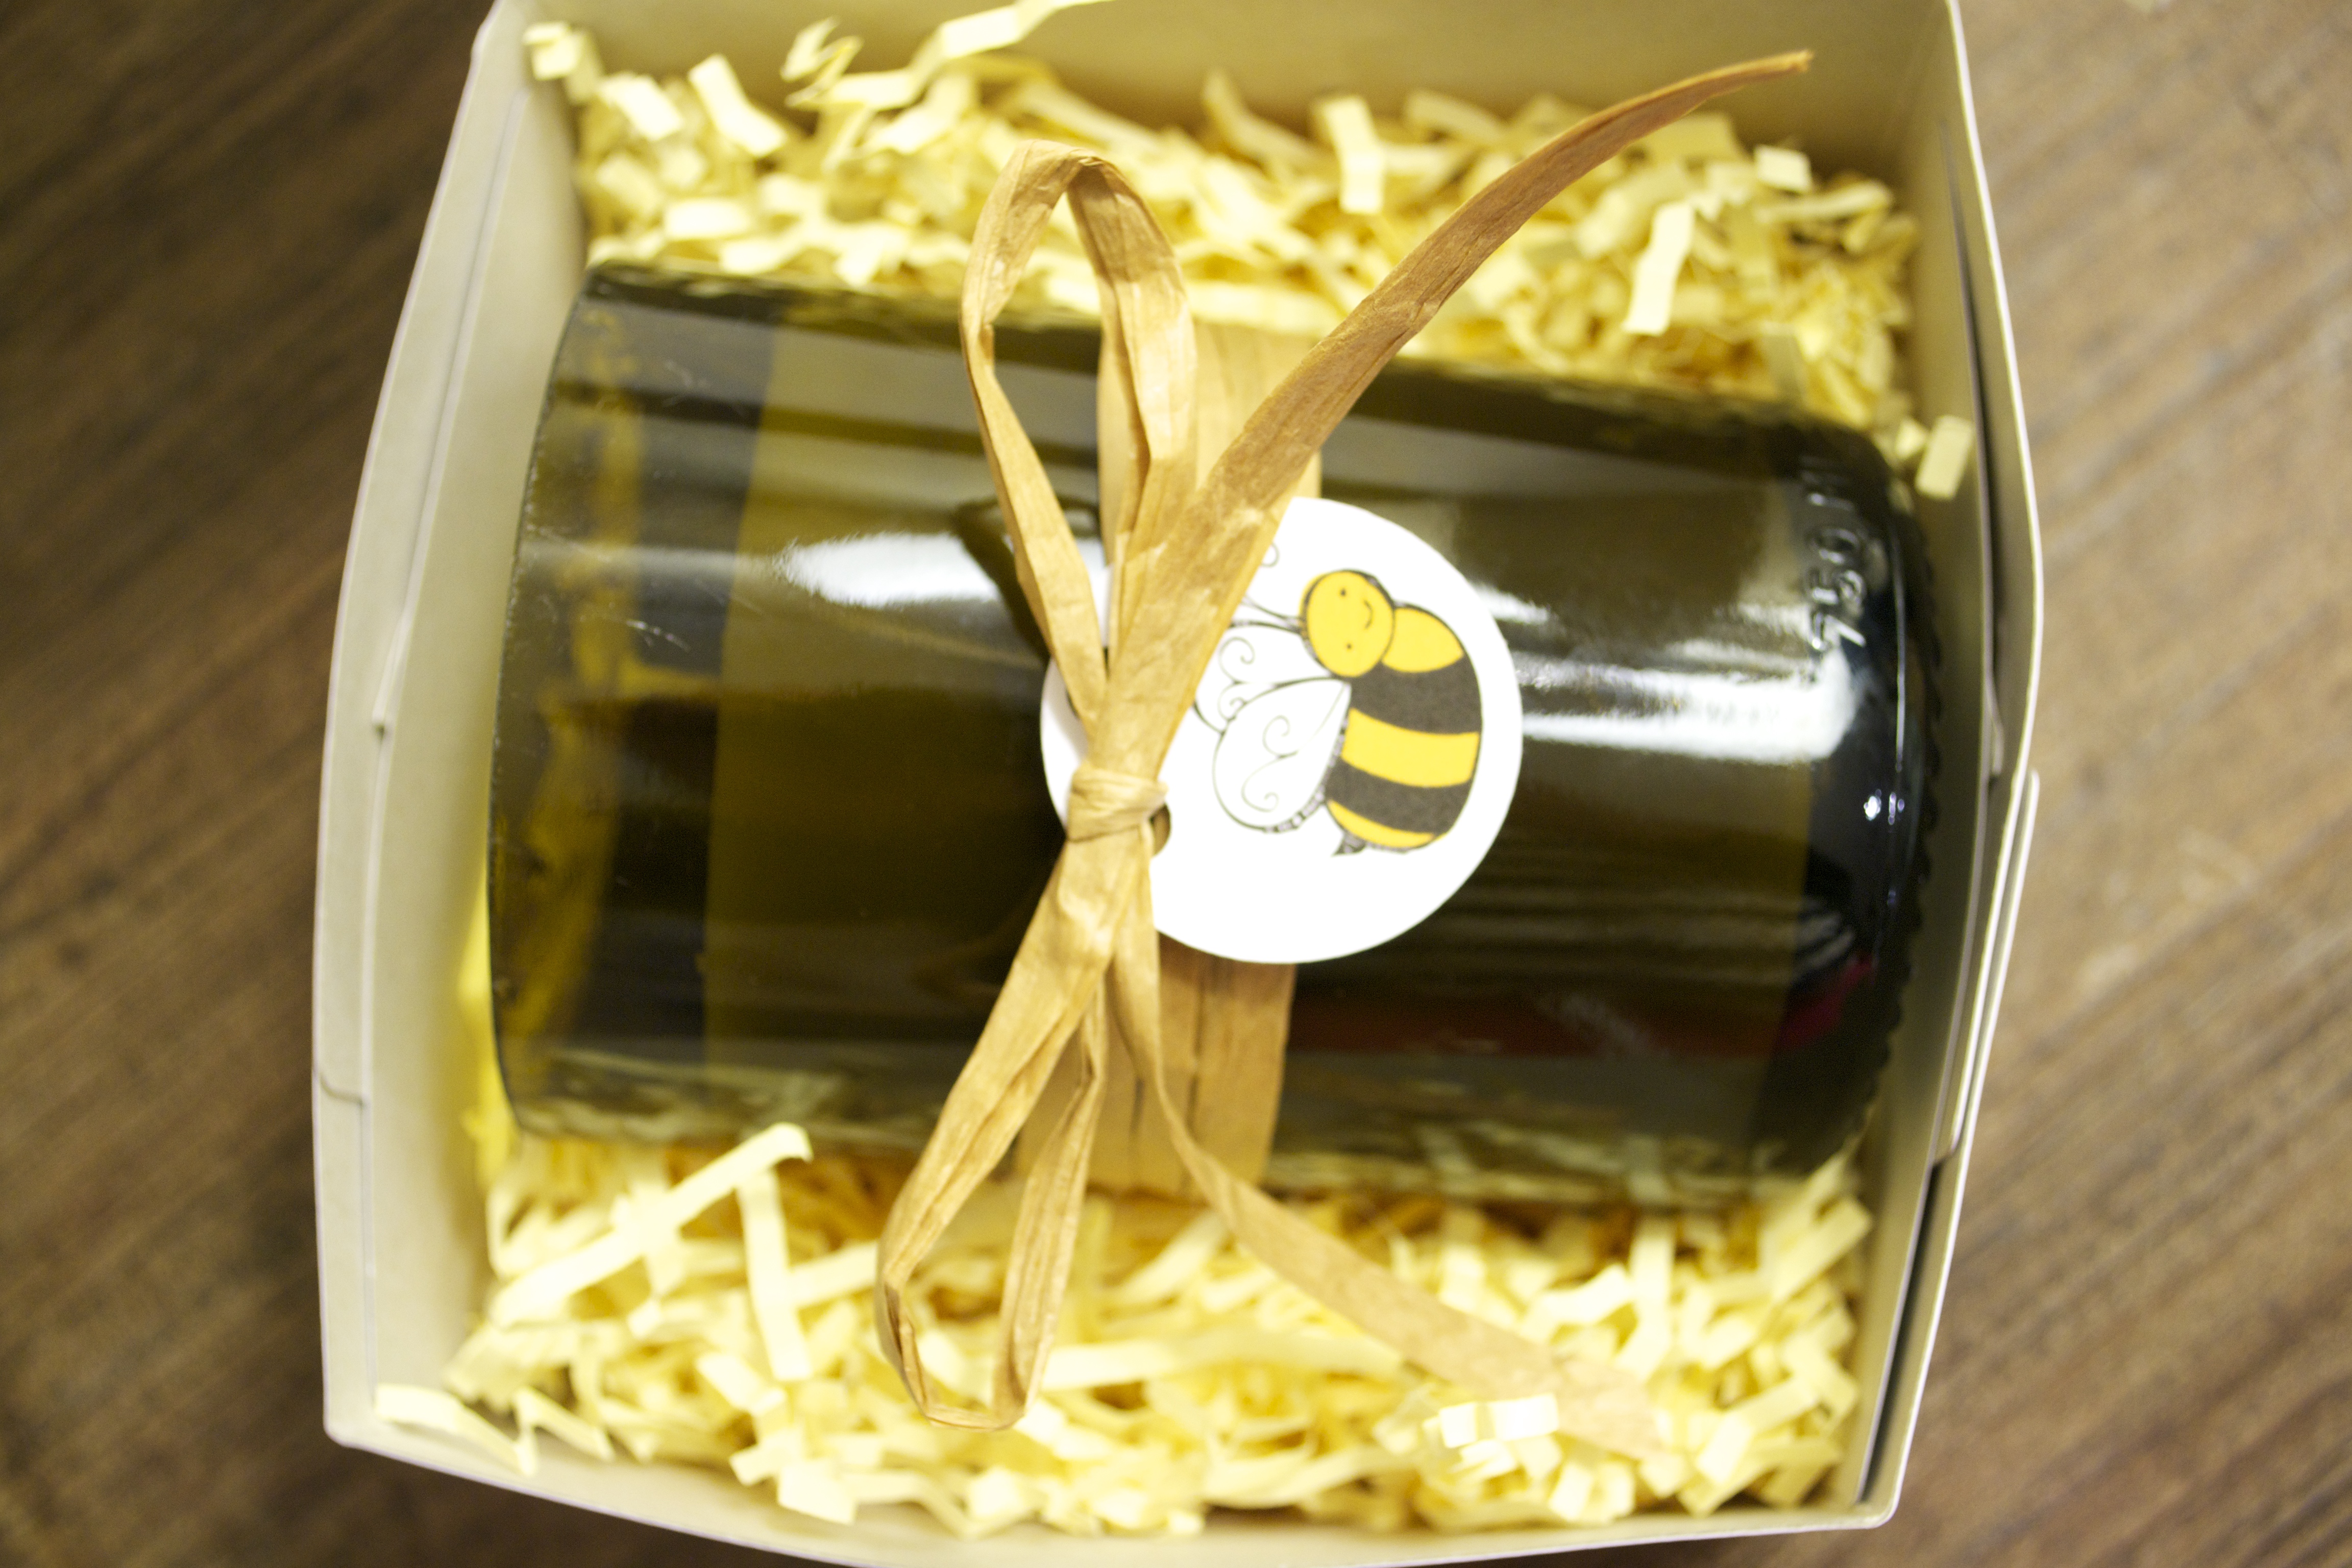
If you like the look of the pure wine bottle, but just want to give it a touch of something extra, wrap a piece of raffia around it into a bow. Place your candle in a cute box, with crinkle cut paper as filler and it becomes the perfect present!
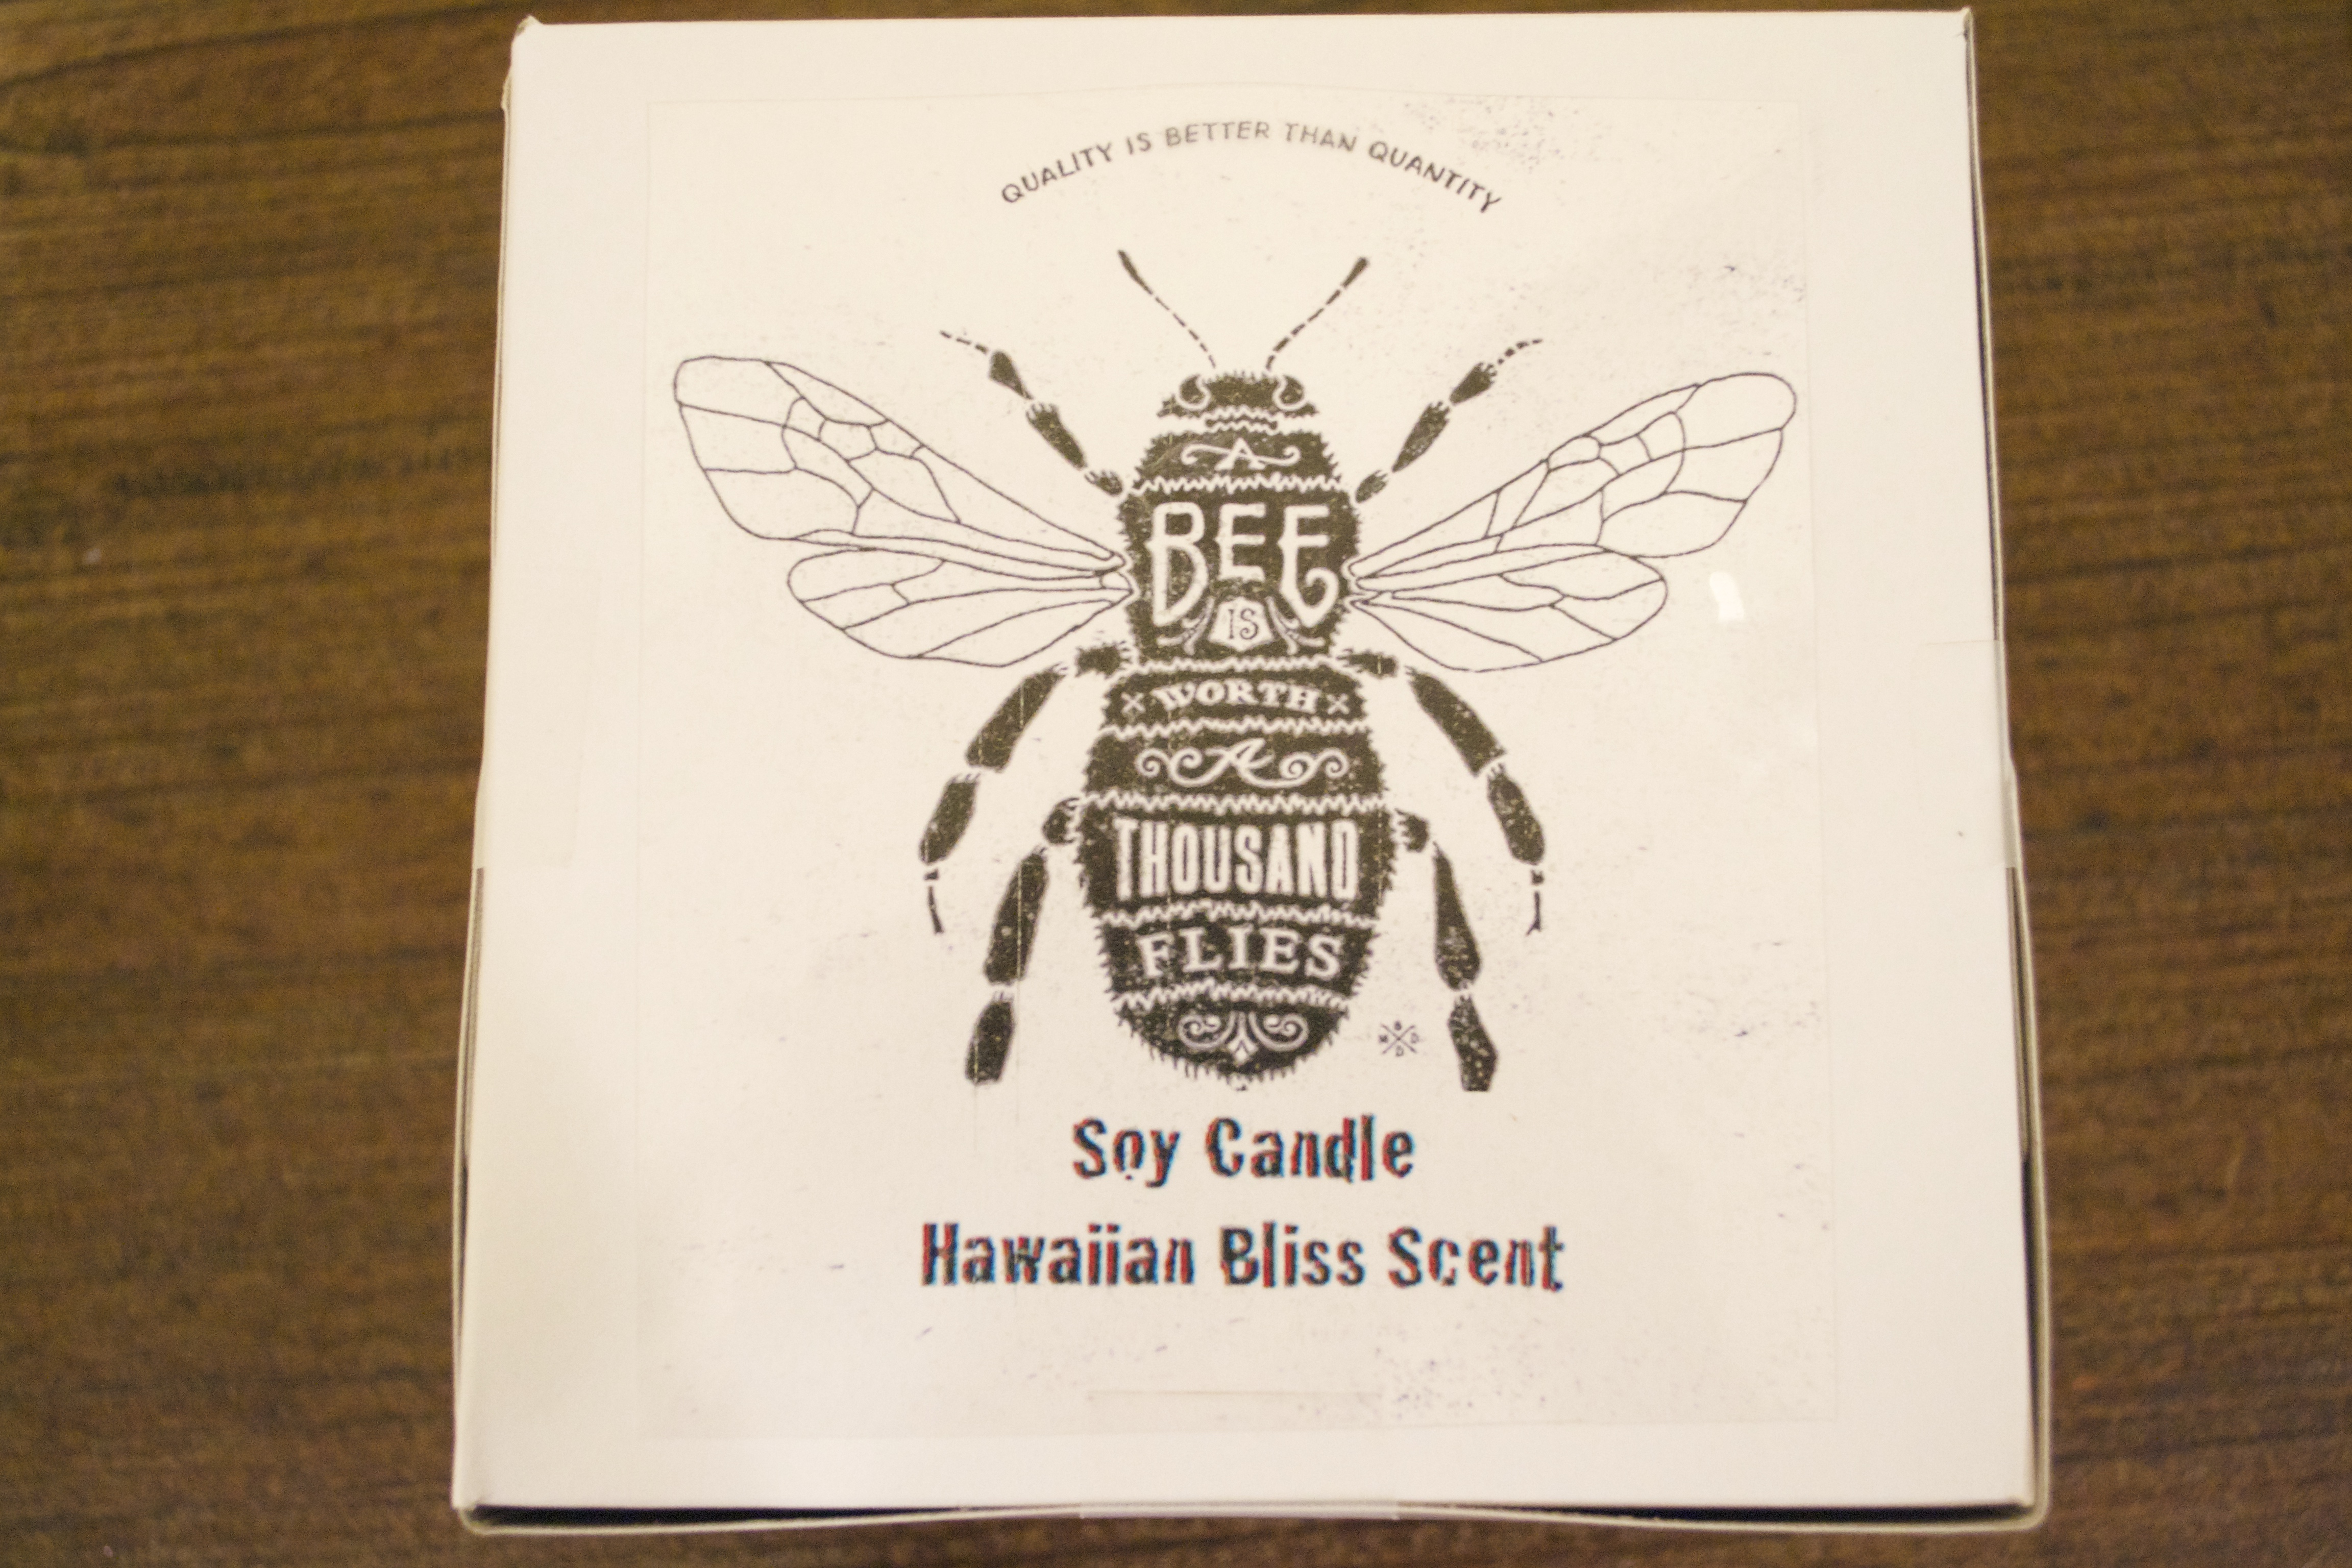
With mine, I also used my Silhouette Cameo to print and cut personalized cardstock candle toppers to protect the tops of the candles. Such a fun touch!
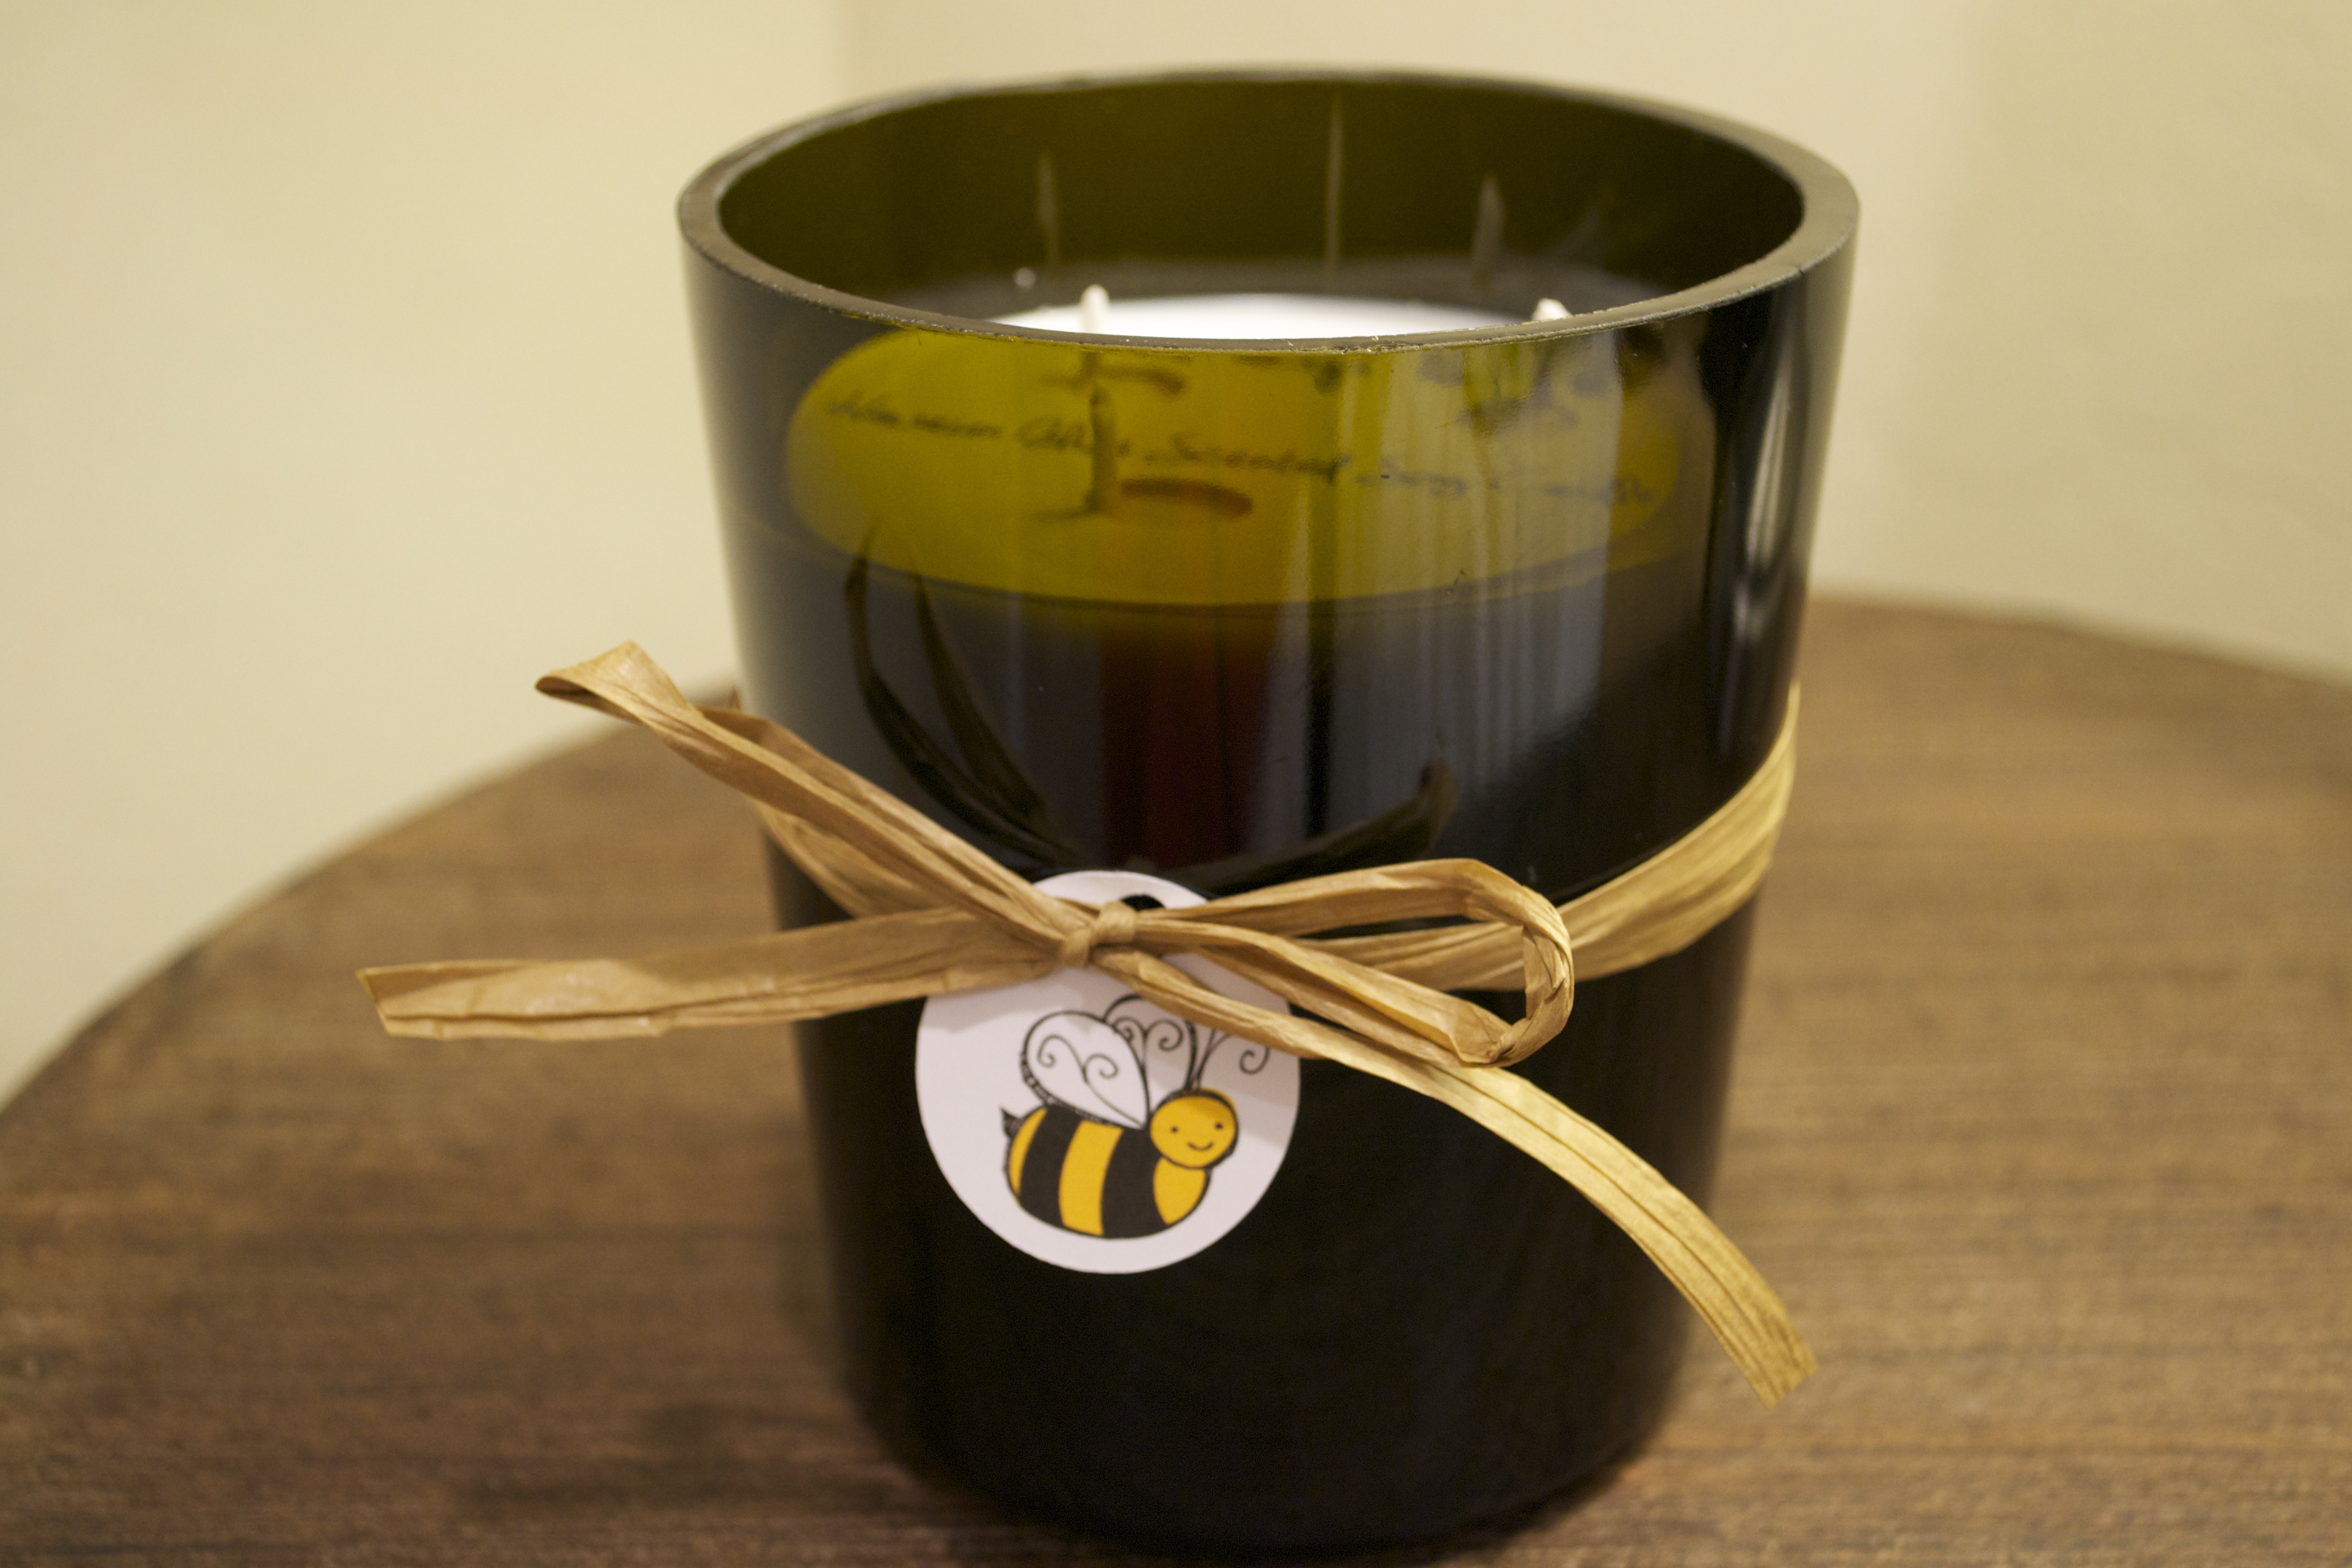
Use them as hostess gifts or holiday presents for your friends. MUCH cheaper than retail, and a thoughtful gift everyone is sure to love. But make sure to keep a few for yourself, they make your house smell absolutely DELICIOUS.
If time is of the essence, or you just don’t want to create candles in bulk, you can always purchase them in my shop. But if you feel inspired, grab your glass of wine, buy your supplies on Amazon, and get ready to craft! Here is a recap of everything you’ll need to get started making DIY soy candles out of wine bottles:
The Necessary Tools:
- Wine Bottles (upcycled from last night’s drink, or bought new if you don’t drink)
- Wine Bottle Cutter
- Candle Wicks (I used the large size natural wicks- but you can also use stick wicks)
- Natural Soy Wax (the 10lb bag made approximately 15 candles)
- Candle making pitcher (to use as your double boiler to melt your wax)
- Easy Read Thermometer (absolutely necessary when using scents in your candles)
- Candle Scents
- Glue gun and hot glue
Hi,
I really like the idea of making your own candles from empty wine bottles, I have one concern though will the glass not brake if you don’t make a really clean and straight cut ?
Not brake ,
I mean can the glass tolerate/stand the heat from the candle ? without breaking?
Hey Lotte-
Nope! The glass will not break. It will only break along the line (whether straight or not). Ans the candles heat does not effect the glass. I’ve burned entire candles (sone with 3 wicks) with no issues!! 🙂
I notice in the photo that you used some bottles with the hump in the bottom. (That’s a very technical term, you see. 😉 ) Is there any problem with having the wick balanced on the top of the hump, or does using three wicks position them so that they are glued to the flatter part of the bottom of the container? I’m trying to plan this out logistically before I get in over my head. Thanks!
I’ve learn some just right stuff here. Definitely price bookmarking for revisiting.
I surprise how so much attempt you plce to make this sort
of fantastic informative website.
Hi I enjoyed reading your post. I am also trying to make candles using cut wine bottles but the surface of the candle is not smooth, any suggestions? I’ve tried warming the glass, placing the cooling candle in a more temperature controlled environment but still have the same results. Thanks !
You used all the oils but they have different flash points? How do you work around that issue? Love your blog!