No matter where you live, if you’re an active woman, Lululemon is everything. I happen to live in the San Francisco Bay area, where it’s a necessary staple in every woman’s closet. If you don’t own a pair of their see through pants (if you don’t know what I’m talking about, Google it), then you’re probably not doing something right.
I have never been one to care about status symbols or trends, especially when they cost more than your average brand. I tend to consider myself a “spendthrift”, which is probably why I love DIY so much.
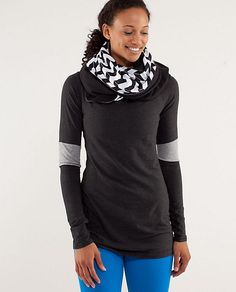
However, about 2 years ago, I became absolutely obsessed – and I mean couldn’t stop thinking about it can’t get it out of my head kind of obsessed – with this Vinyasa scarf from Lululemon.
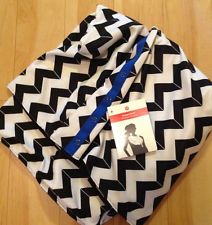
It was the coolest scarf I’d ever seen. It was black on the front, and black and white chevron on the back, with a blue stripe down the side. The material was so thick I knew it would keep me warm, but breathable as not to absorb sweat if I were to put it on after a workout. It also had these snaps at the side, so that I could snap it and wear it as an infinity scarf or unsnap it and wear it 10 different ways. It was the coolest thing I’d ever seen.
The only caveat… it was $48. I had a problem paying $48 for an outfit – let alone and accessory! It seemed a little absurd to me, but then again, all the prices at Lululemon seemed a little absurd to me. I don’t know why I was so shocked, but I was. Being the bargain hunter I am, I went searching for a knockoff.
Now, I have to pat myself on the back for a second. I am usually VERY good with internet searches. If I want something, anything from a cheaper price to information on a person, I can find it 98% of the time. Unfortunately, this scarf fell into the 2% of the time where I was unsuccessful. There were alternative multi-way scarves online, but none as thick or as cute as this one.
In a very unusual move for me, I ended up caving and buying the scarf. The reasons behind it are very silly. First, I didn’t want to wait for the scarf to go on sale. If you know anything about Lululemon, they NEVER have any sales. The scarf, even today, is still $48 in stores and online. Second, I was afraid if I hesitated too long the pattern I wanted wouldn’t be available anymore (which it isn’t). Last, when you like something so much you just can’t get it out of your head, you have to act. The only action I could take to stop the obsession was just to buy it.
And I have to say, I am glad I did. Two years later and I am still in love with my scarf. I wear it almost daily in the winter, and it’s a great warmth accessory for after workouts. However, now that I have been giving in to my DIY side more and more, I decided it was time to dissect this scarf. I want to give all the bargain hunters on the internet the tools that were not available to me at the time I bought my Vinyasa infinity scarf – how make a DIY infinity scarf, EXACTLY like the Vinyasa for a fraction of the cost.
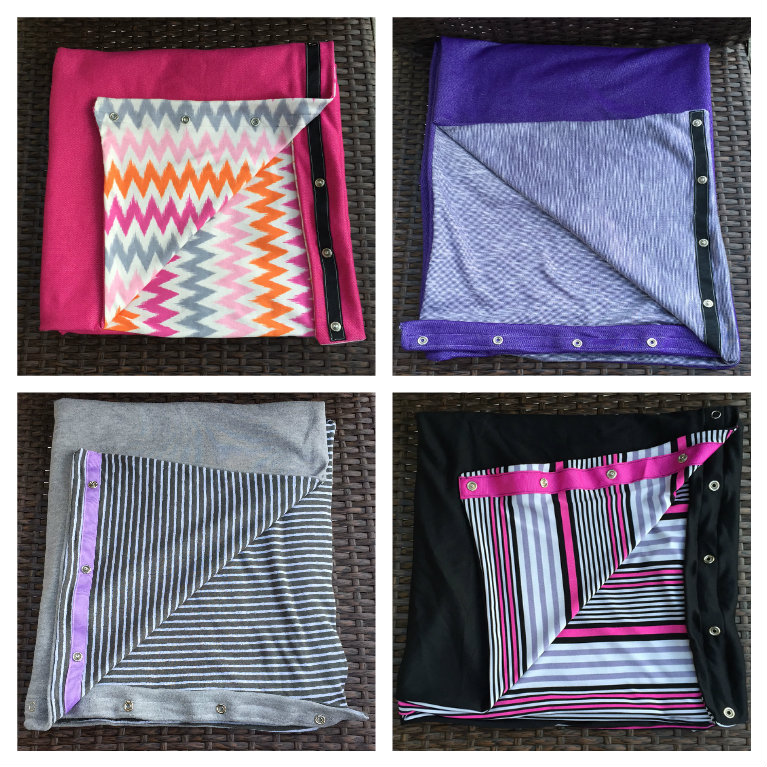
In total, I spent $48 (the same cost as one Vinyasa scarf at Lululemon) to make TWO, DIY infinity scarves. HALF of the cost! When I went back to the store for more fabric, I brought a coupon with me and looked for fabrics on sale. This time, I bought enough fabric for FOUR scarves, and only spent $38 – that’s only $9.50/scarf! You can really save a ton of $$ with this DIY tutorial, if you try! Below, I show you the tools you’ll need and the easy steps to make yourself a DIY infinity scarf.
Steps to Make a DIY Infinity Scarf
The Necessary Tools:
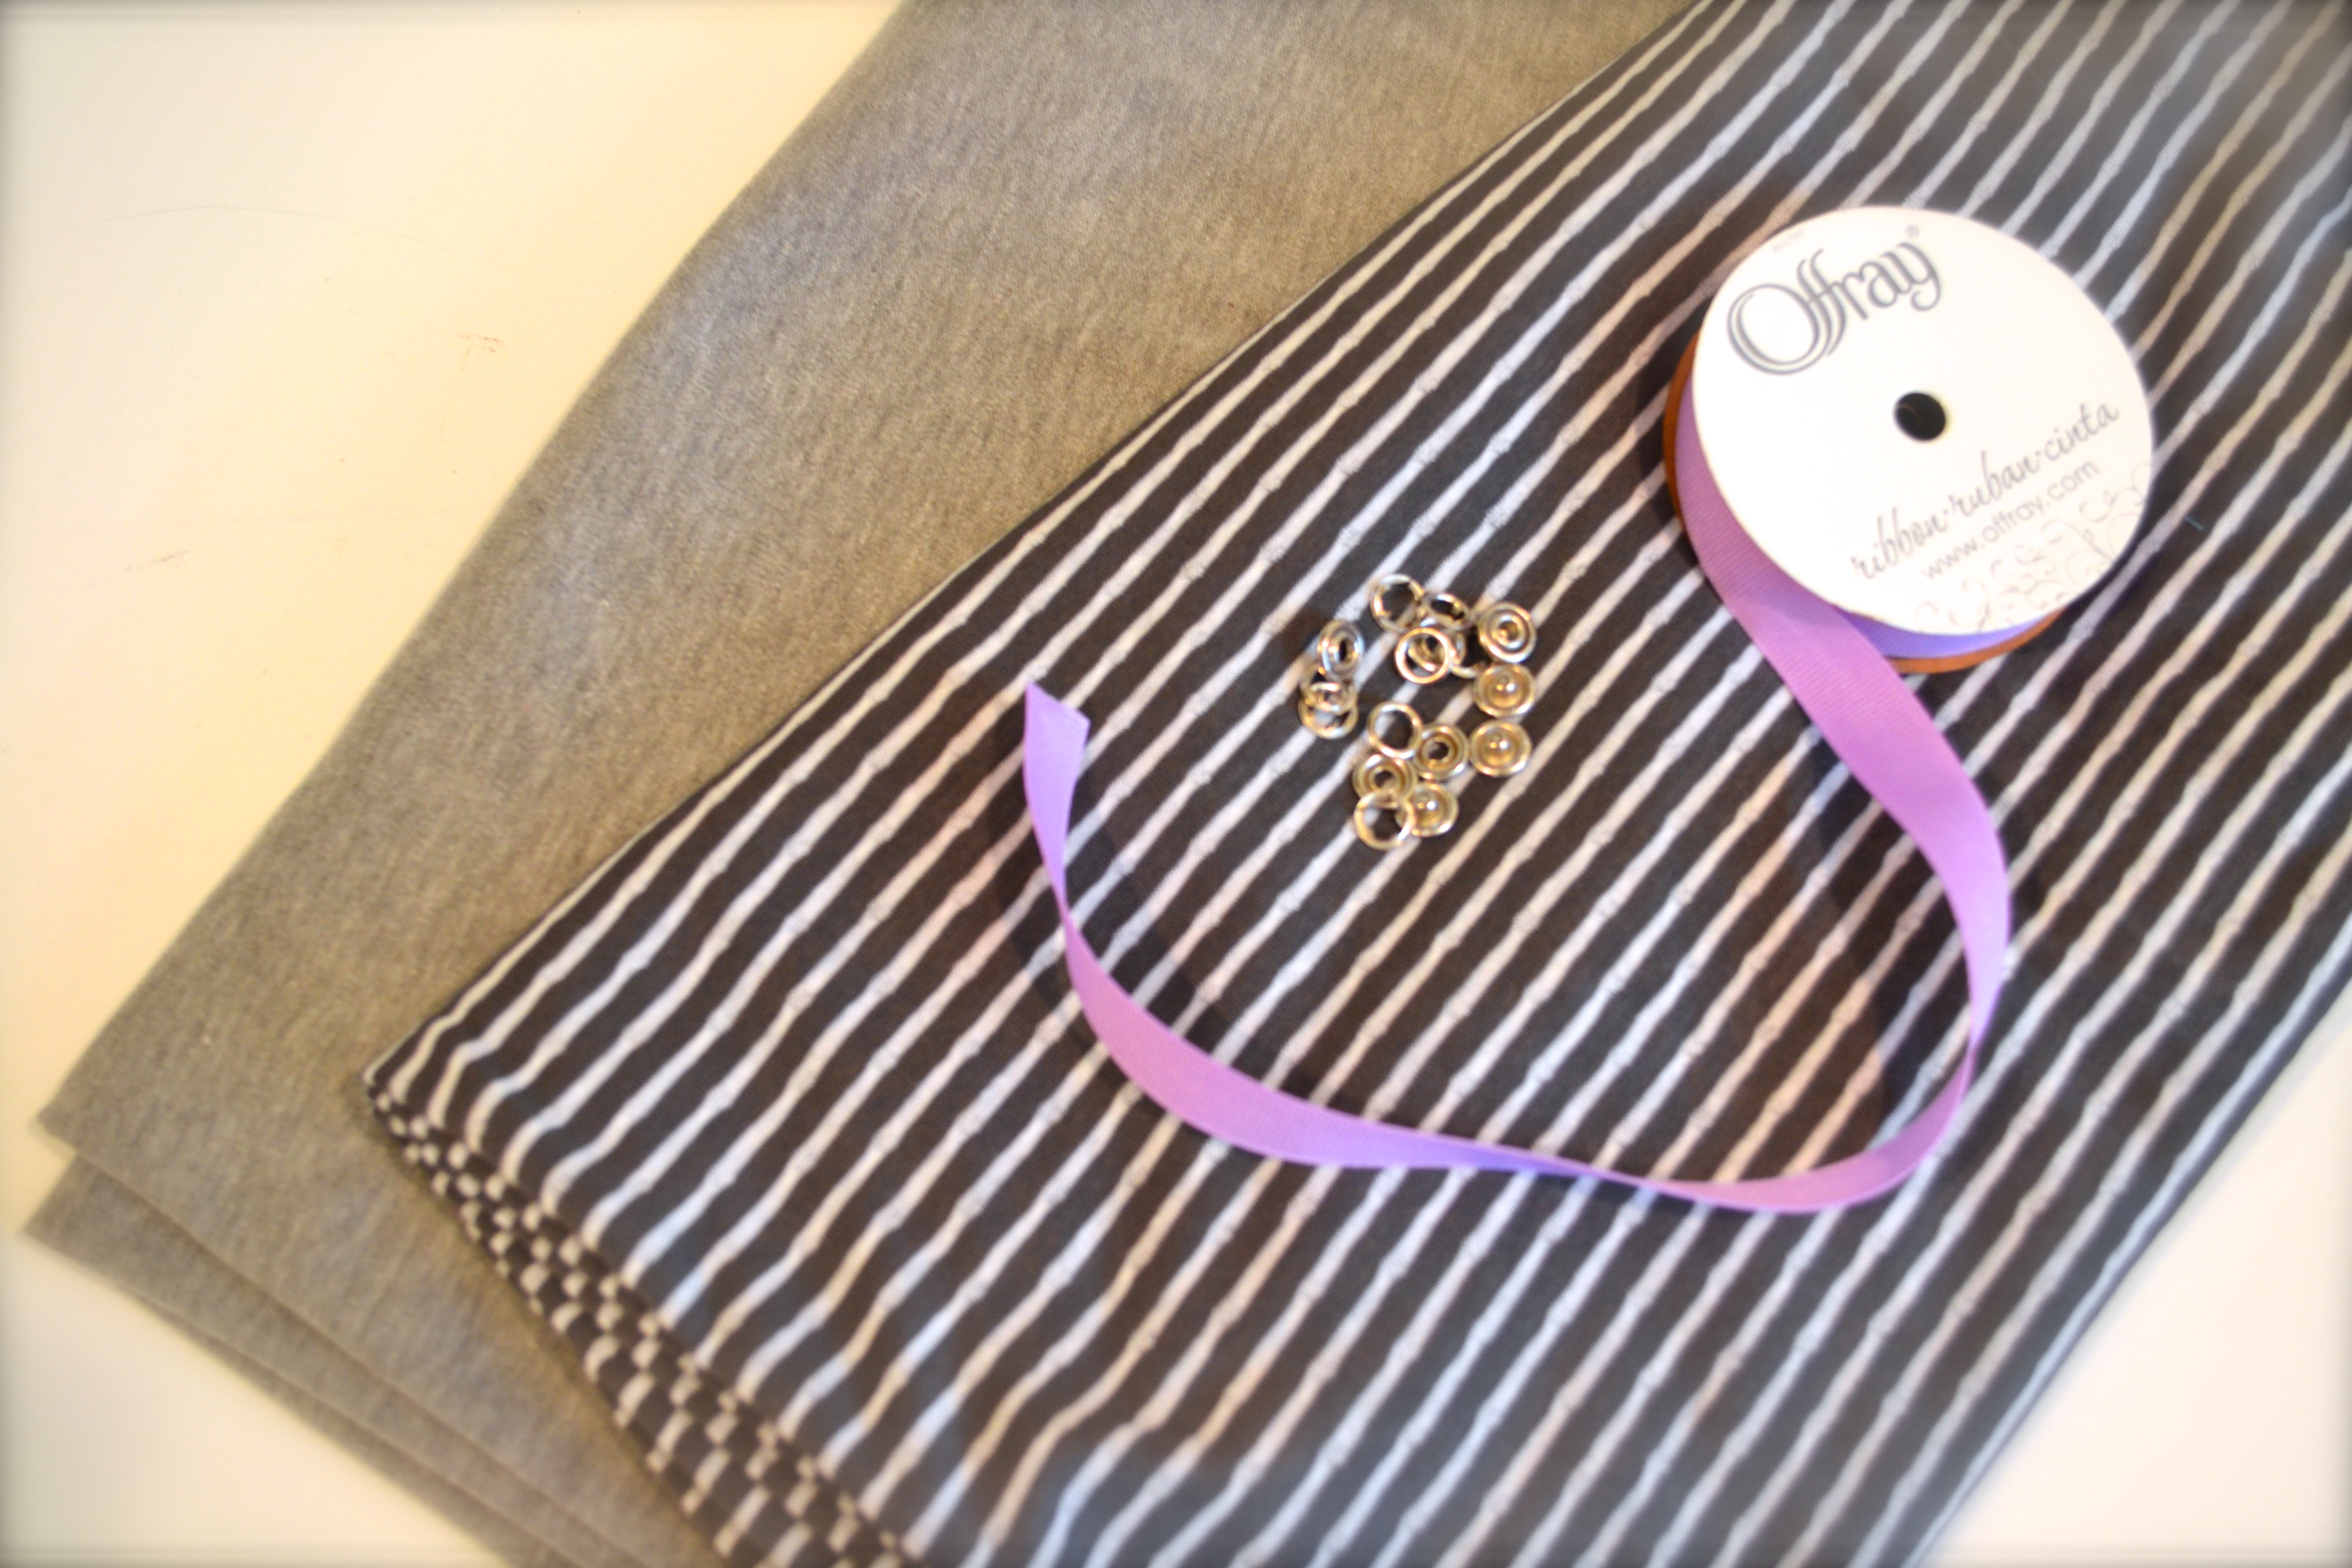
- 1 ⅔ yards of jersey knit fabric (Fabric.com has the best selection for these types of fabrics).
- 1 ⅔ yards of 2 different fabrics if you want different patterns on the front and back (this will make 2 scarves)
- If you want to make the EXACT Lululemon one, here’s Black and Black Chevron patterned fabric.
- 1 ⅔ yards of 2 different fabrics if you want different patterns on the front and back (this will make 2 scarves)
- Spool of ¾” grosgrain ribbon (color of your choice)
- No Sew snap fasteners (total of 9 – Size 16 – 7/16” prong)
- Hammer to adhere snaps
- Thread
- Sewing Machine
Step 1:
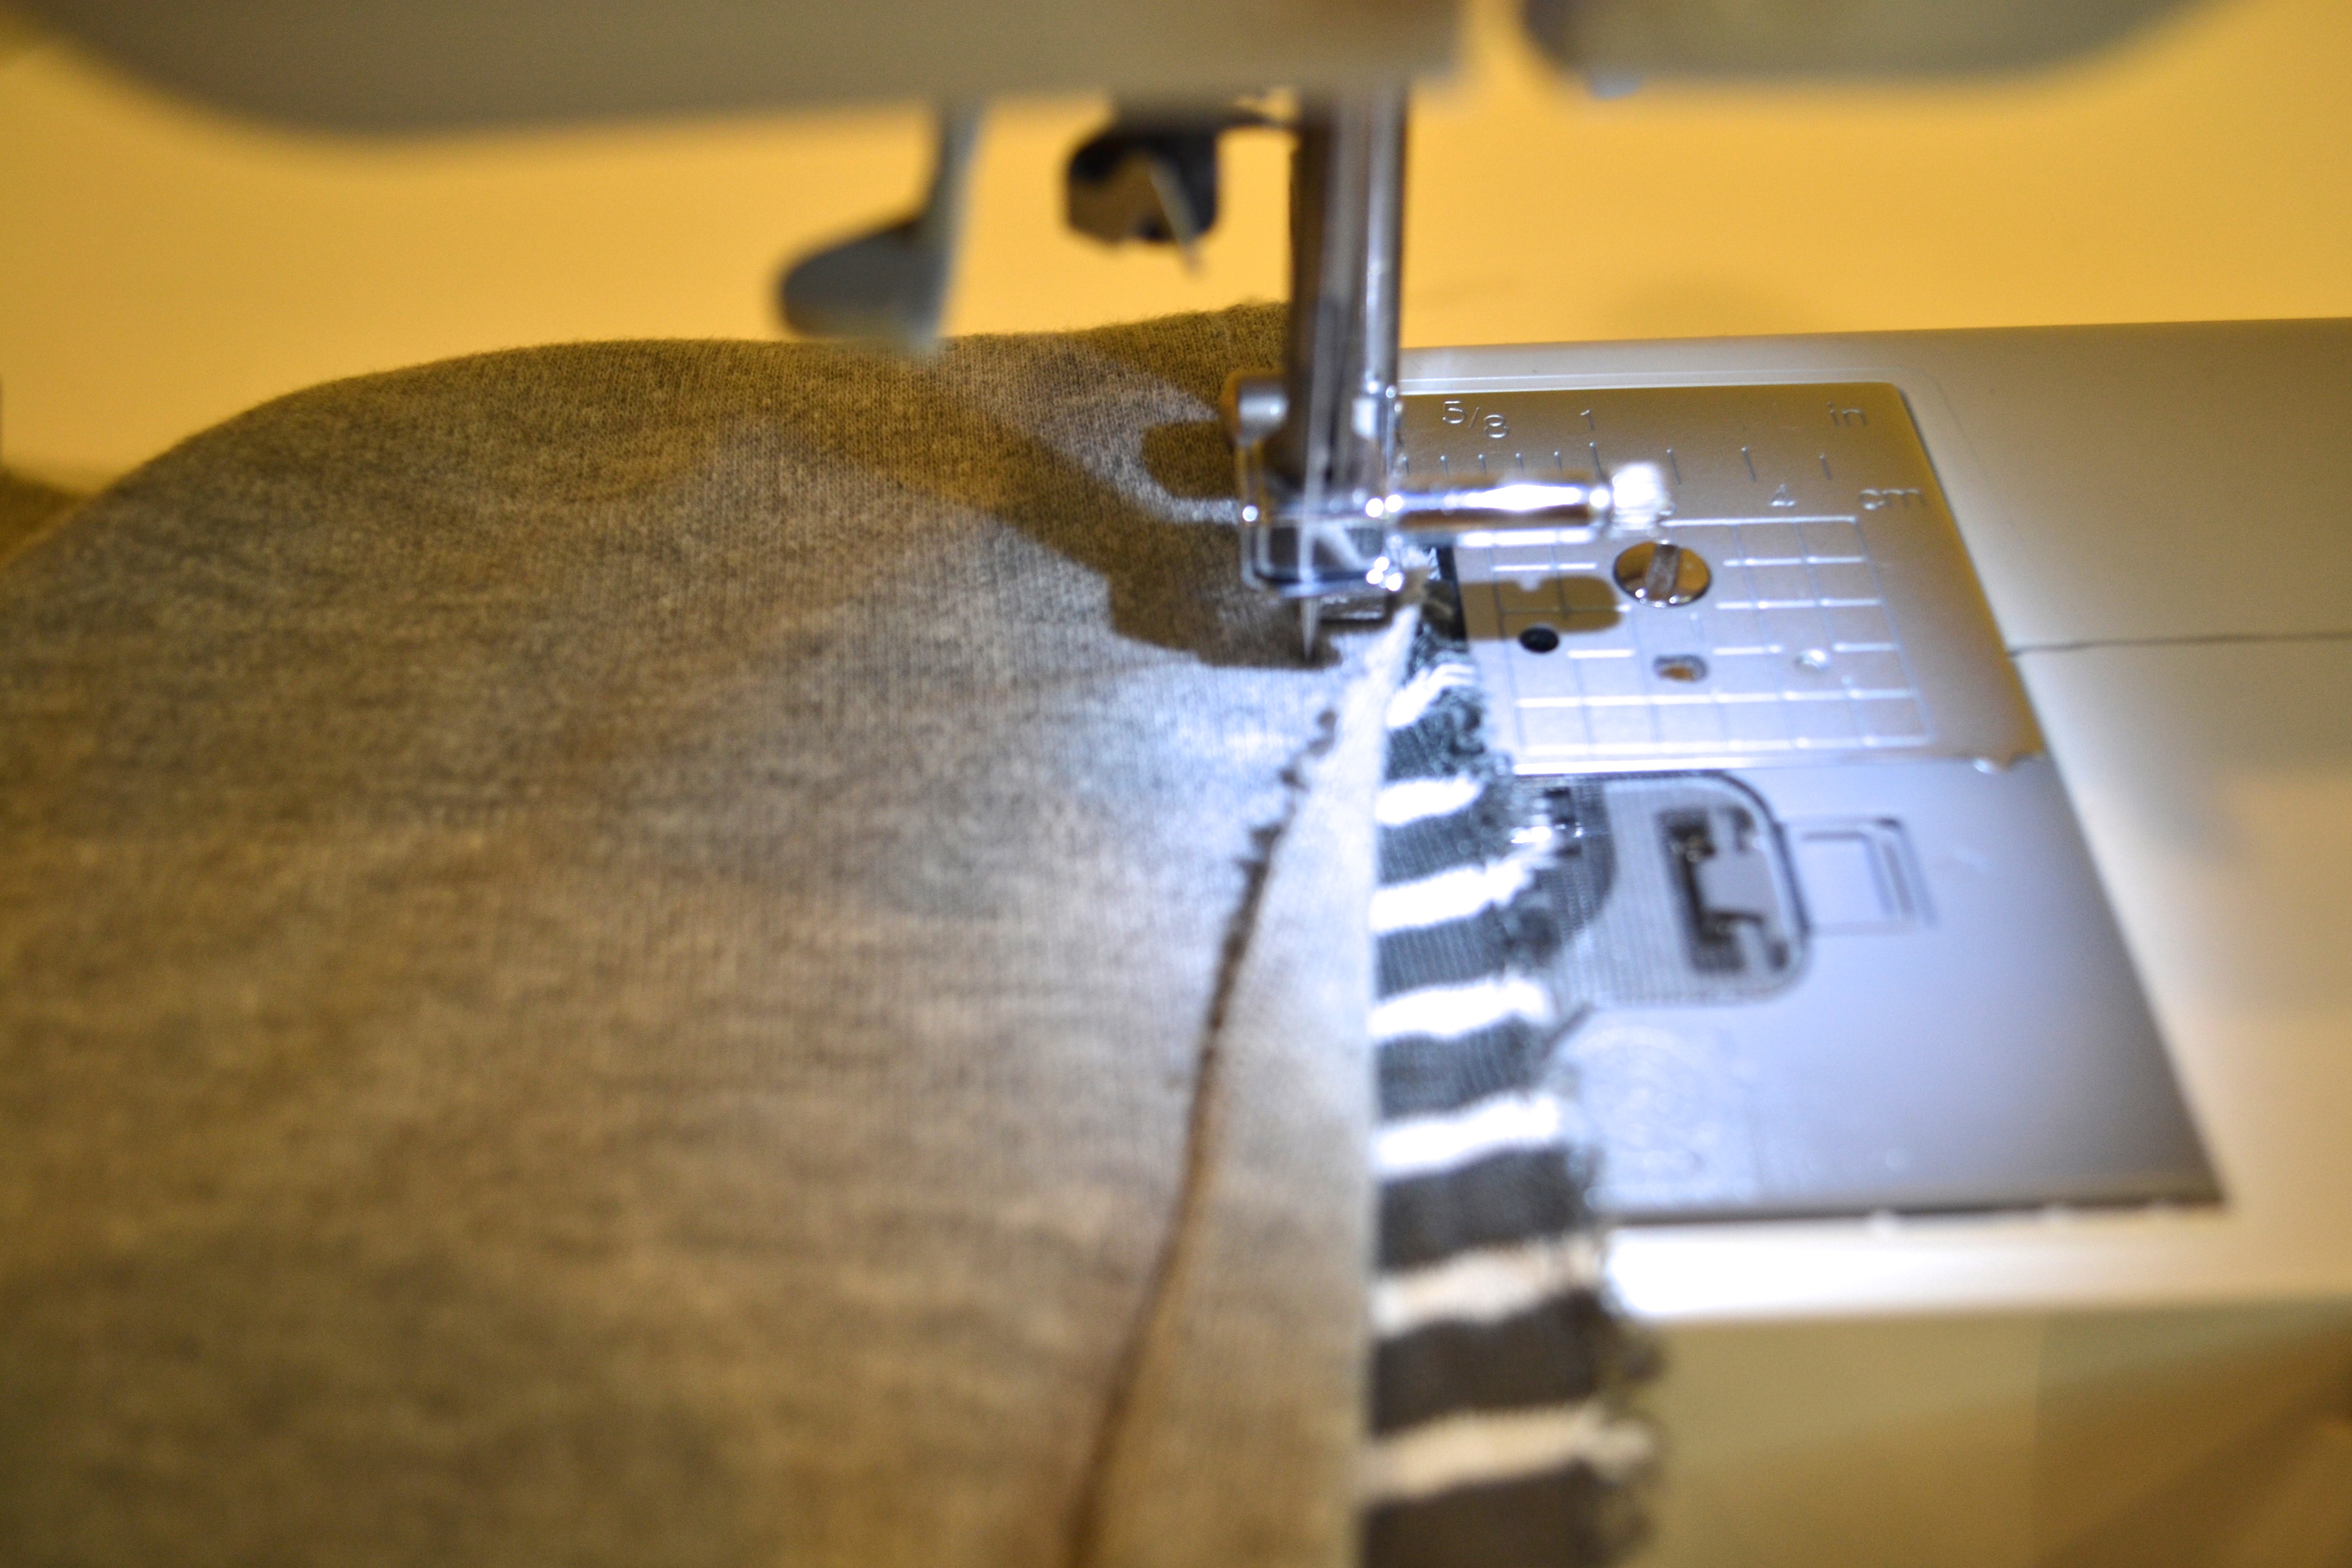
- Take your 2 pieces of fabric (either the 2 pieces from your 1 yard or the 2 different patterns from the 2 yards) and put them facing eachother (back sides up).
- Put them through your sewing machine, with a simple linear stitch, sewing together the pieces of fabric at the edges.
Step 2:
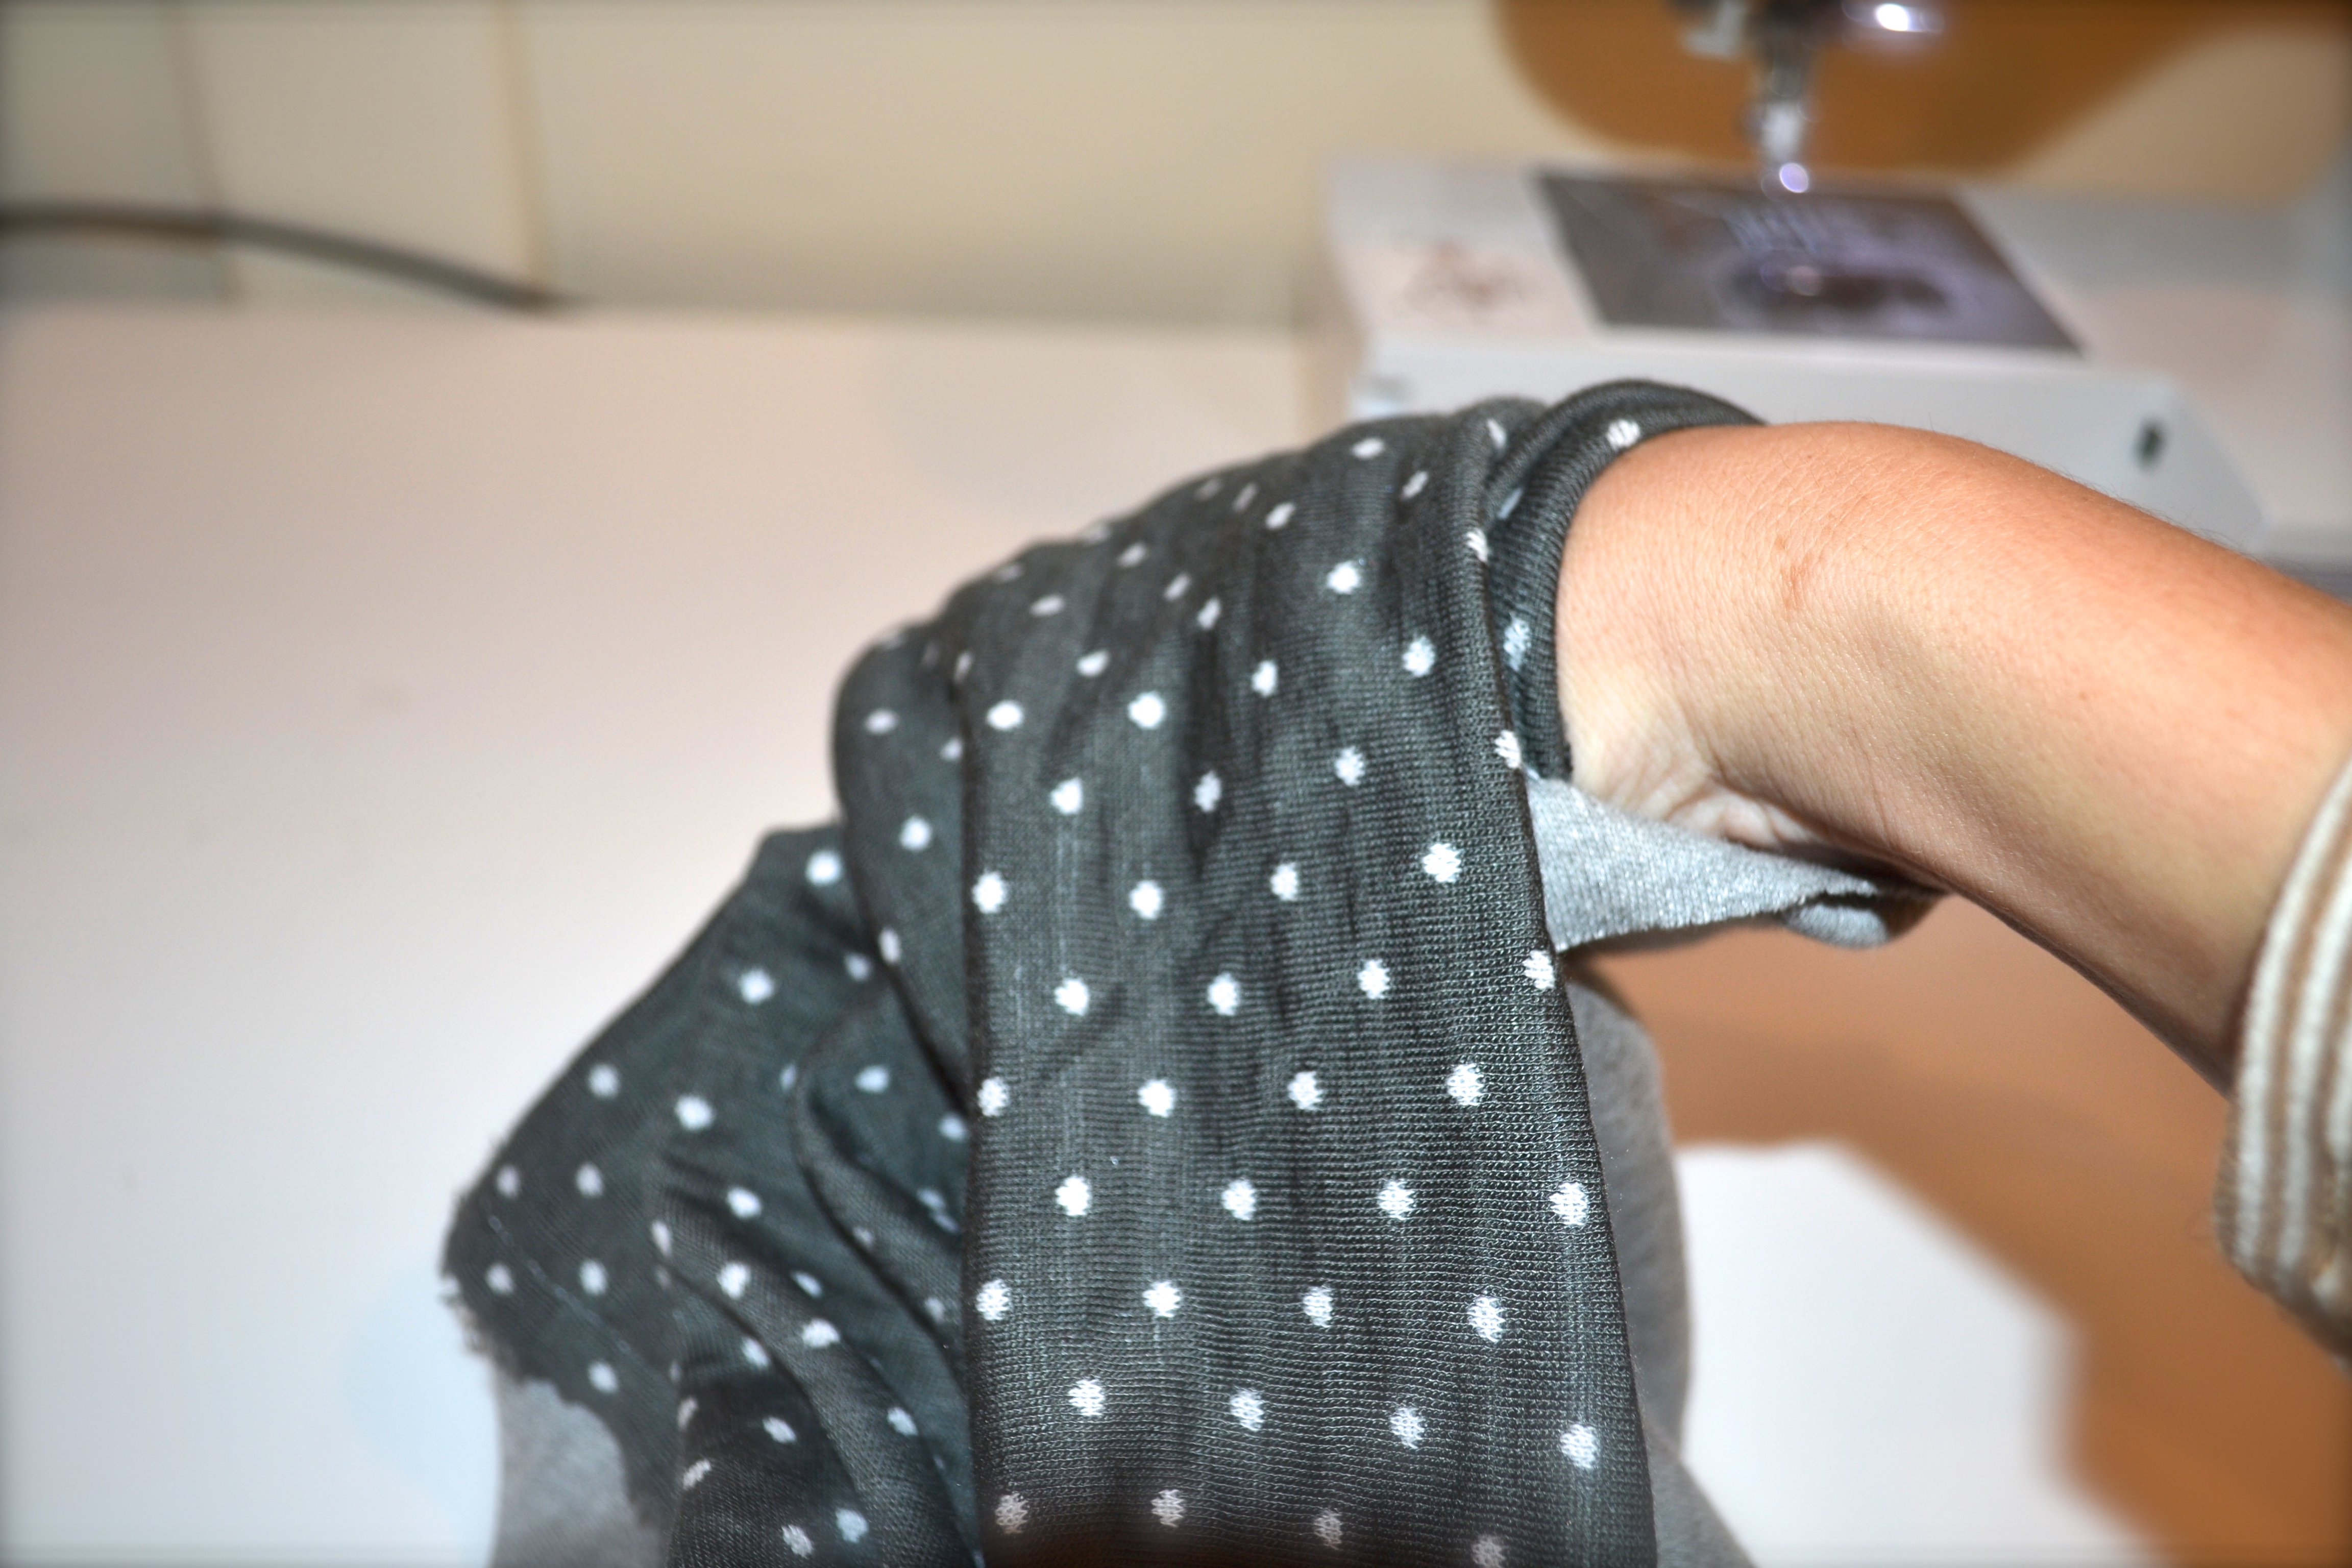
- Once you’re at the last 5 inches, take the fabric out from your sewing machine, reach inside, and turn the fabric right side out.
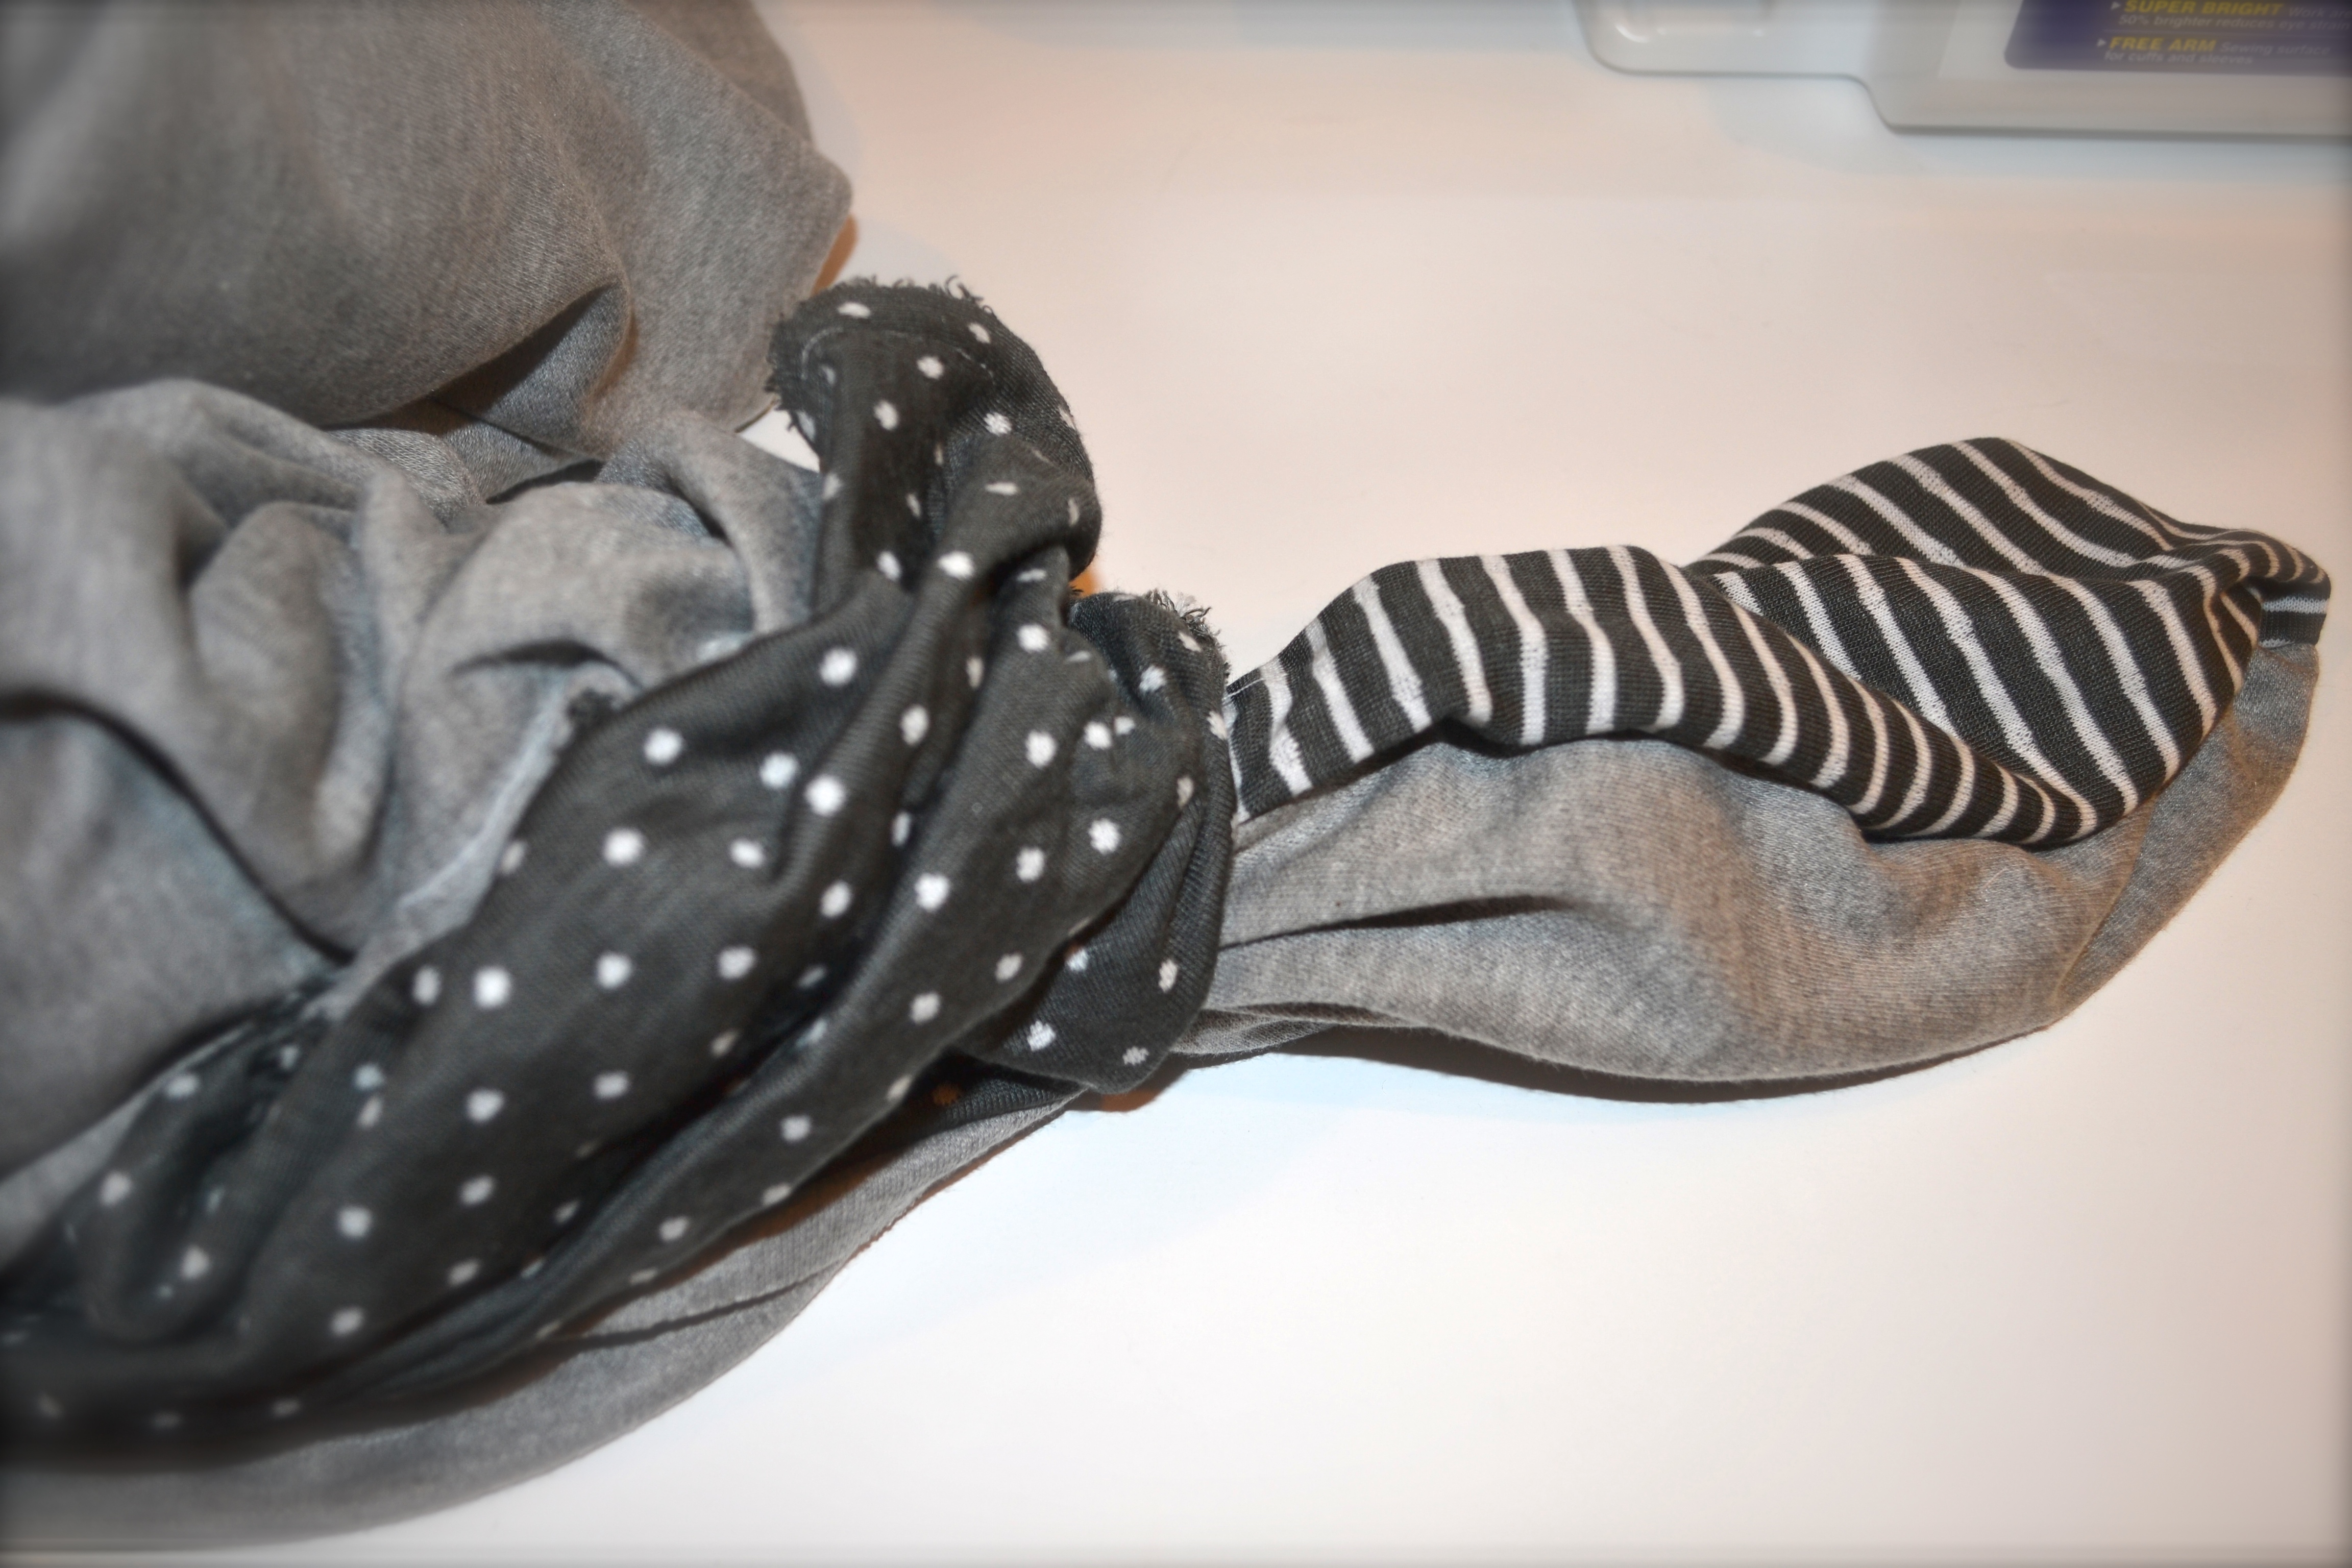
Step 3:
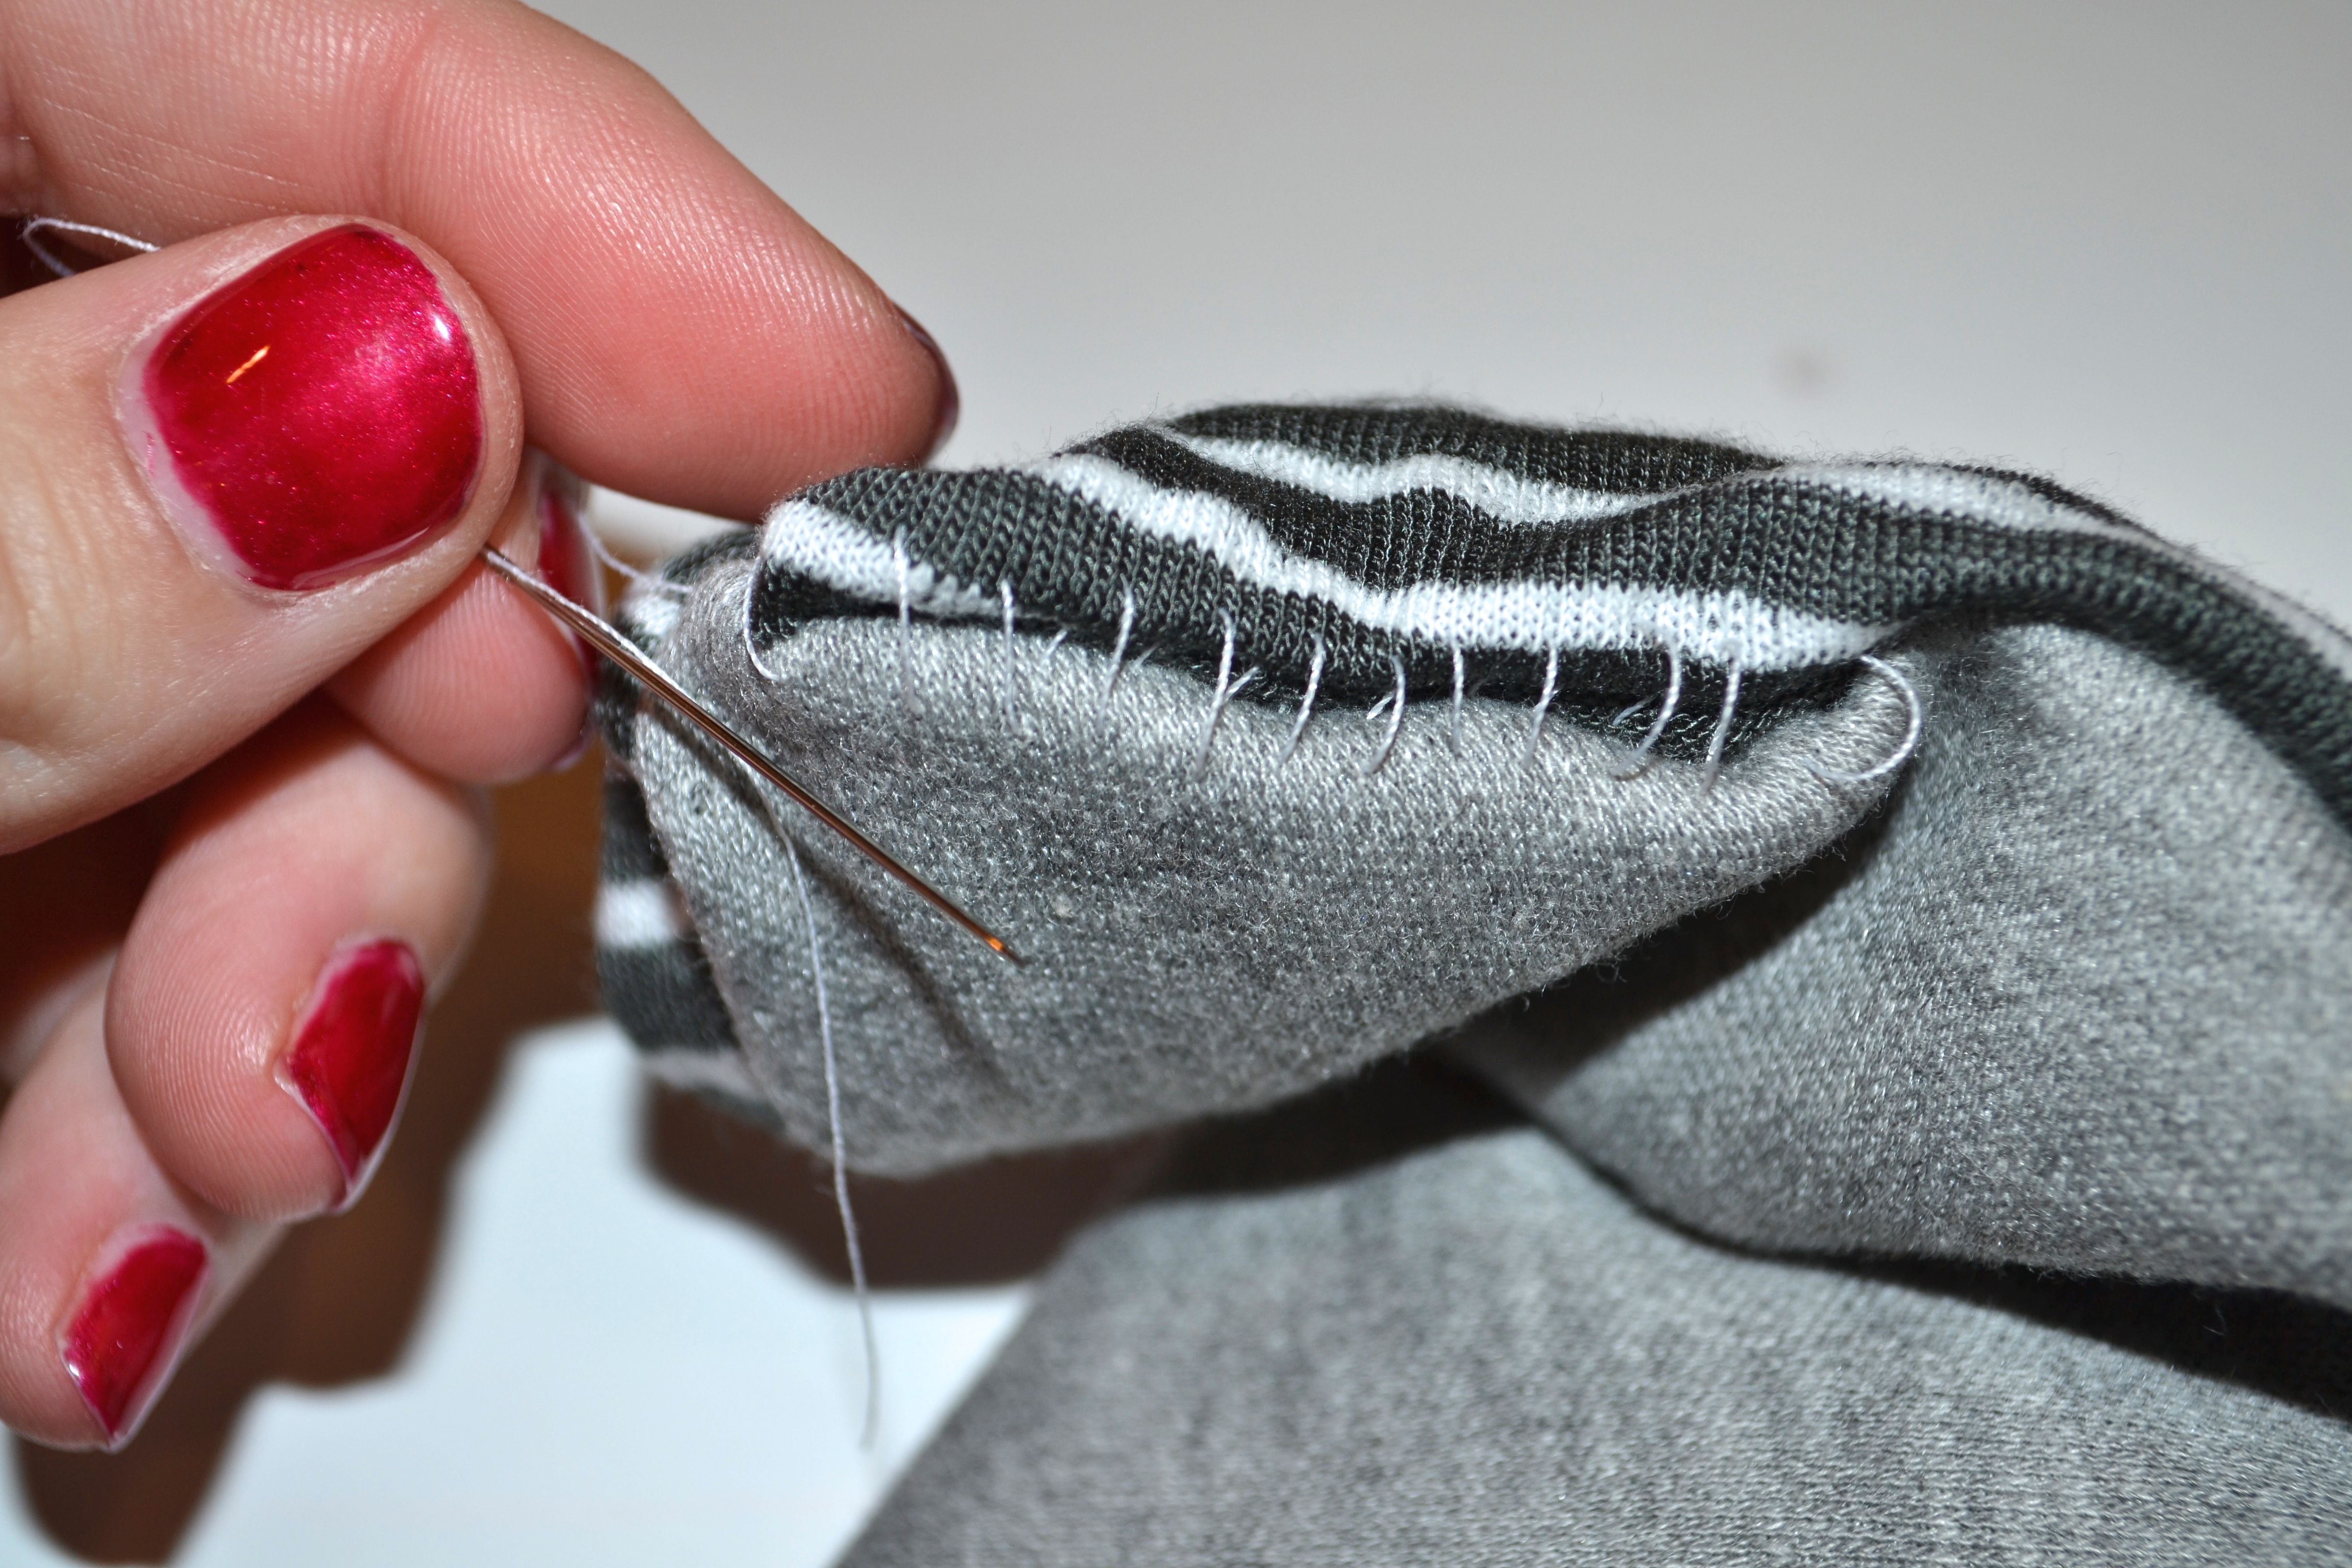
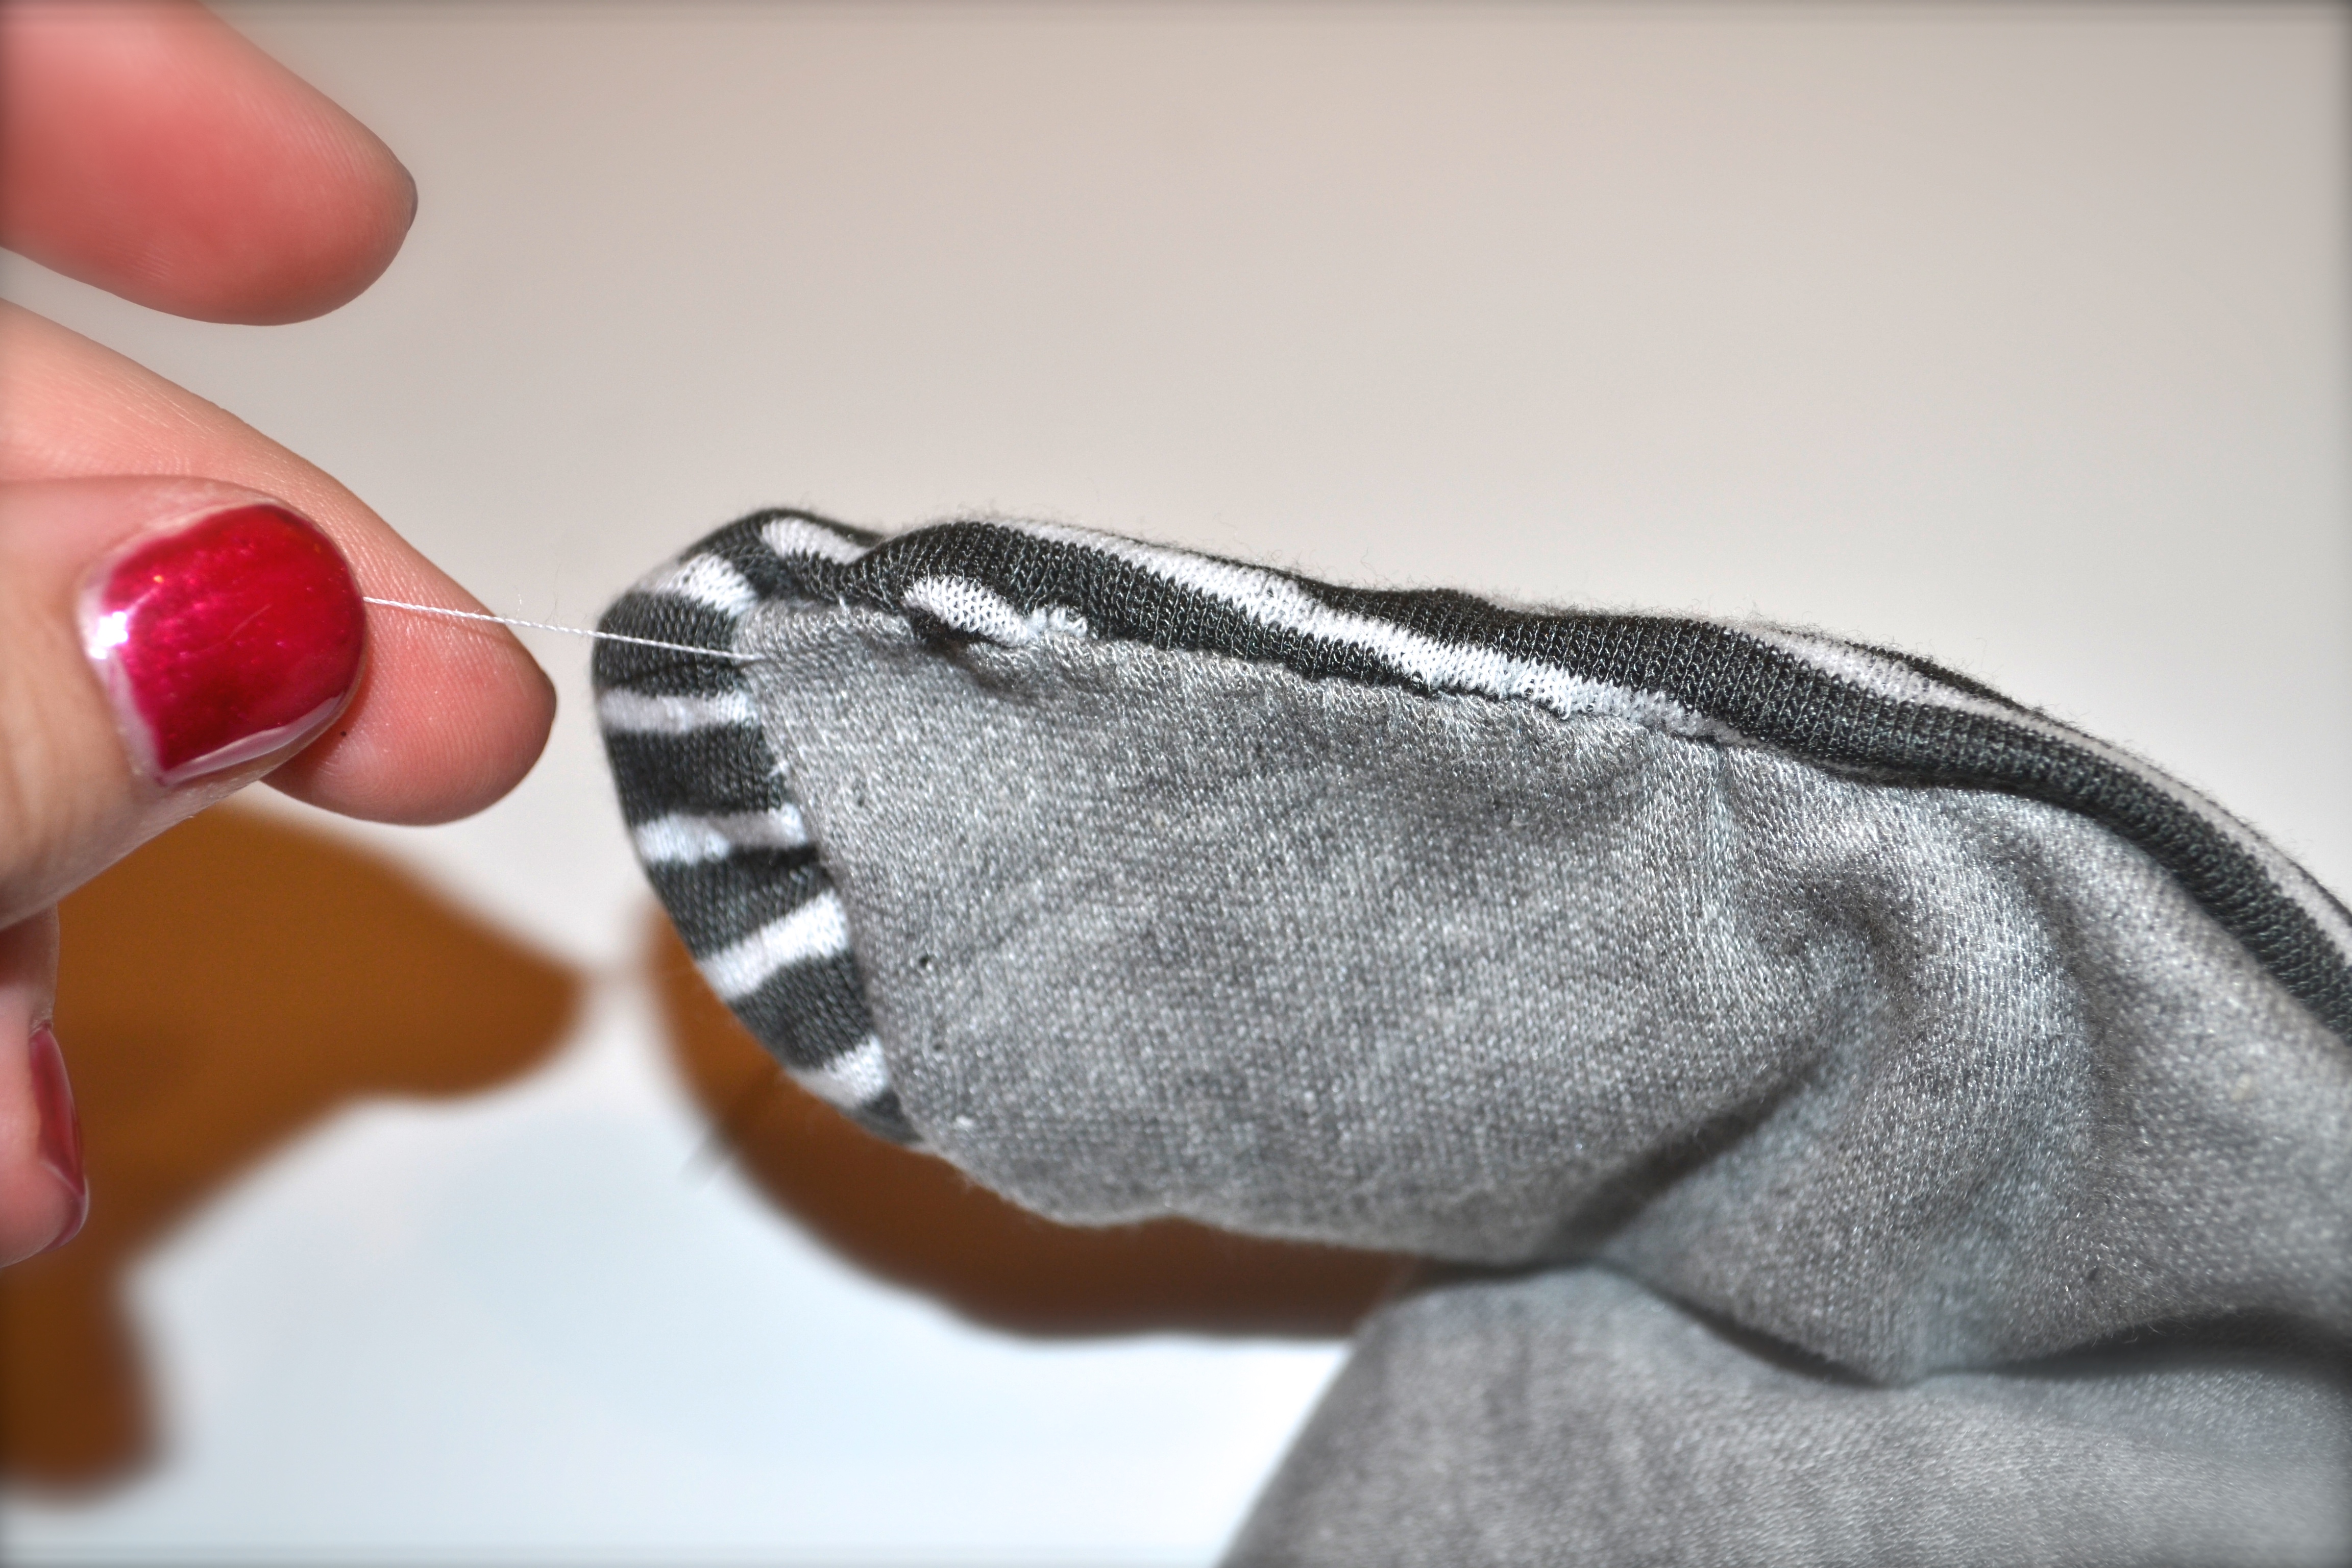
- Once the fabric is right side out, take a needle and some thread and make a ladder stitch on the last 5” of fabric you did not sew with the sewing machine.
- Make sure you do not tighten this stitch until you are at the very end. When you do a ladder stitch like this, and tighten it at the very end, the fabric will invert on itself. This will make sure that the thread nor the seam will be seen on the outside of the scarf.
Step 4:
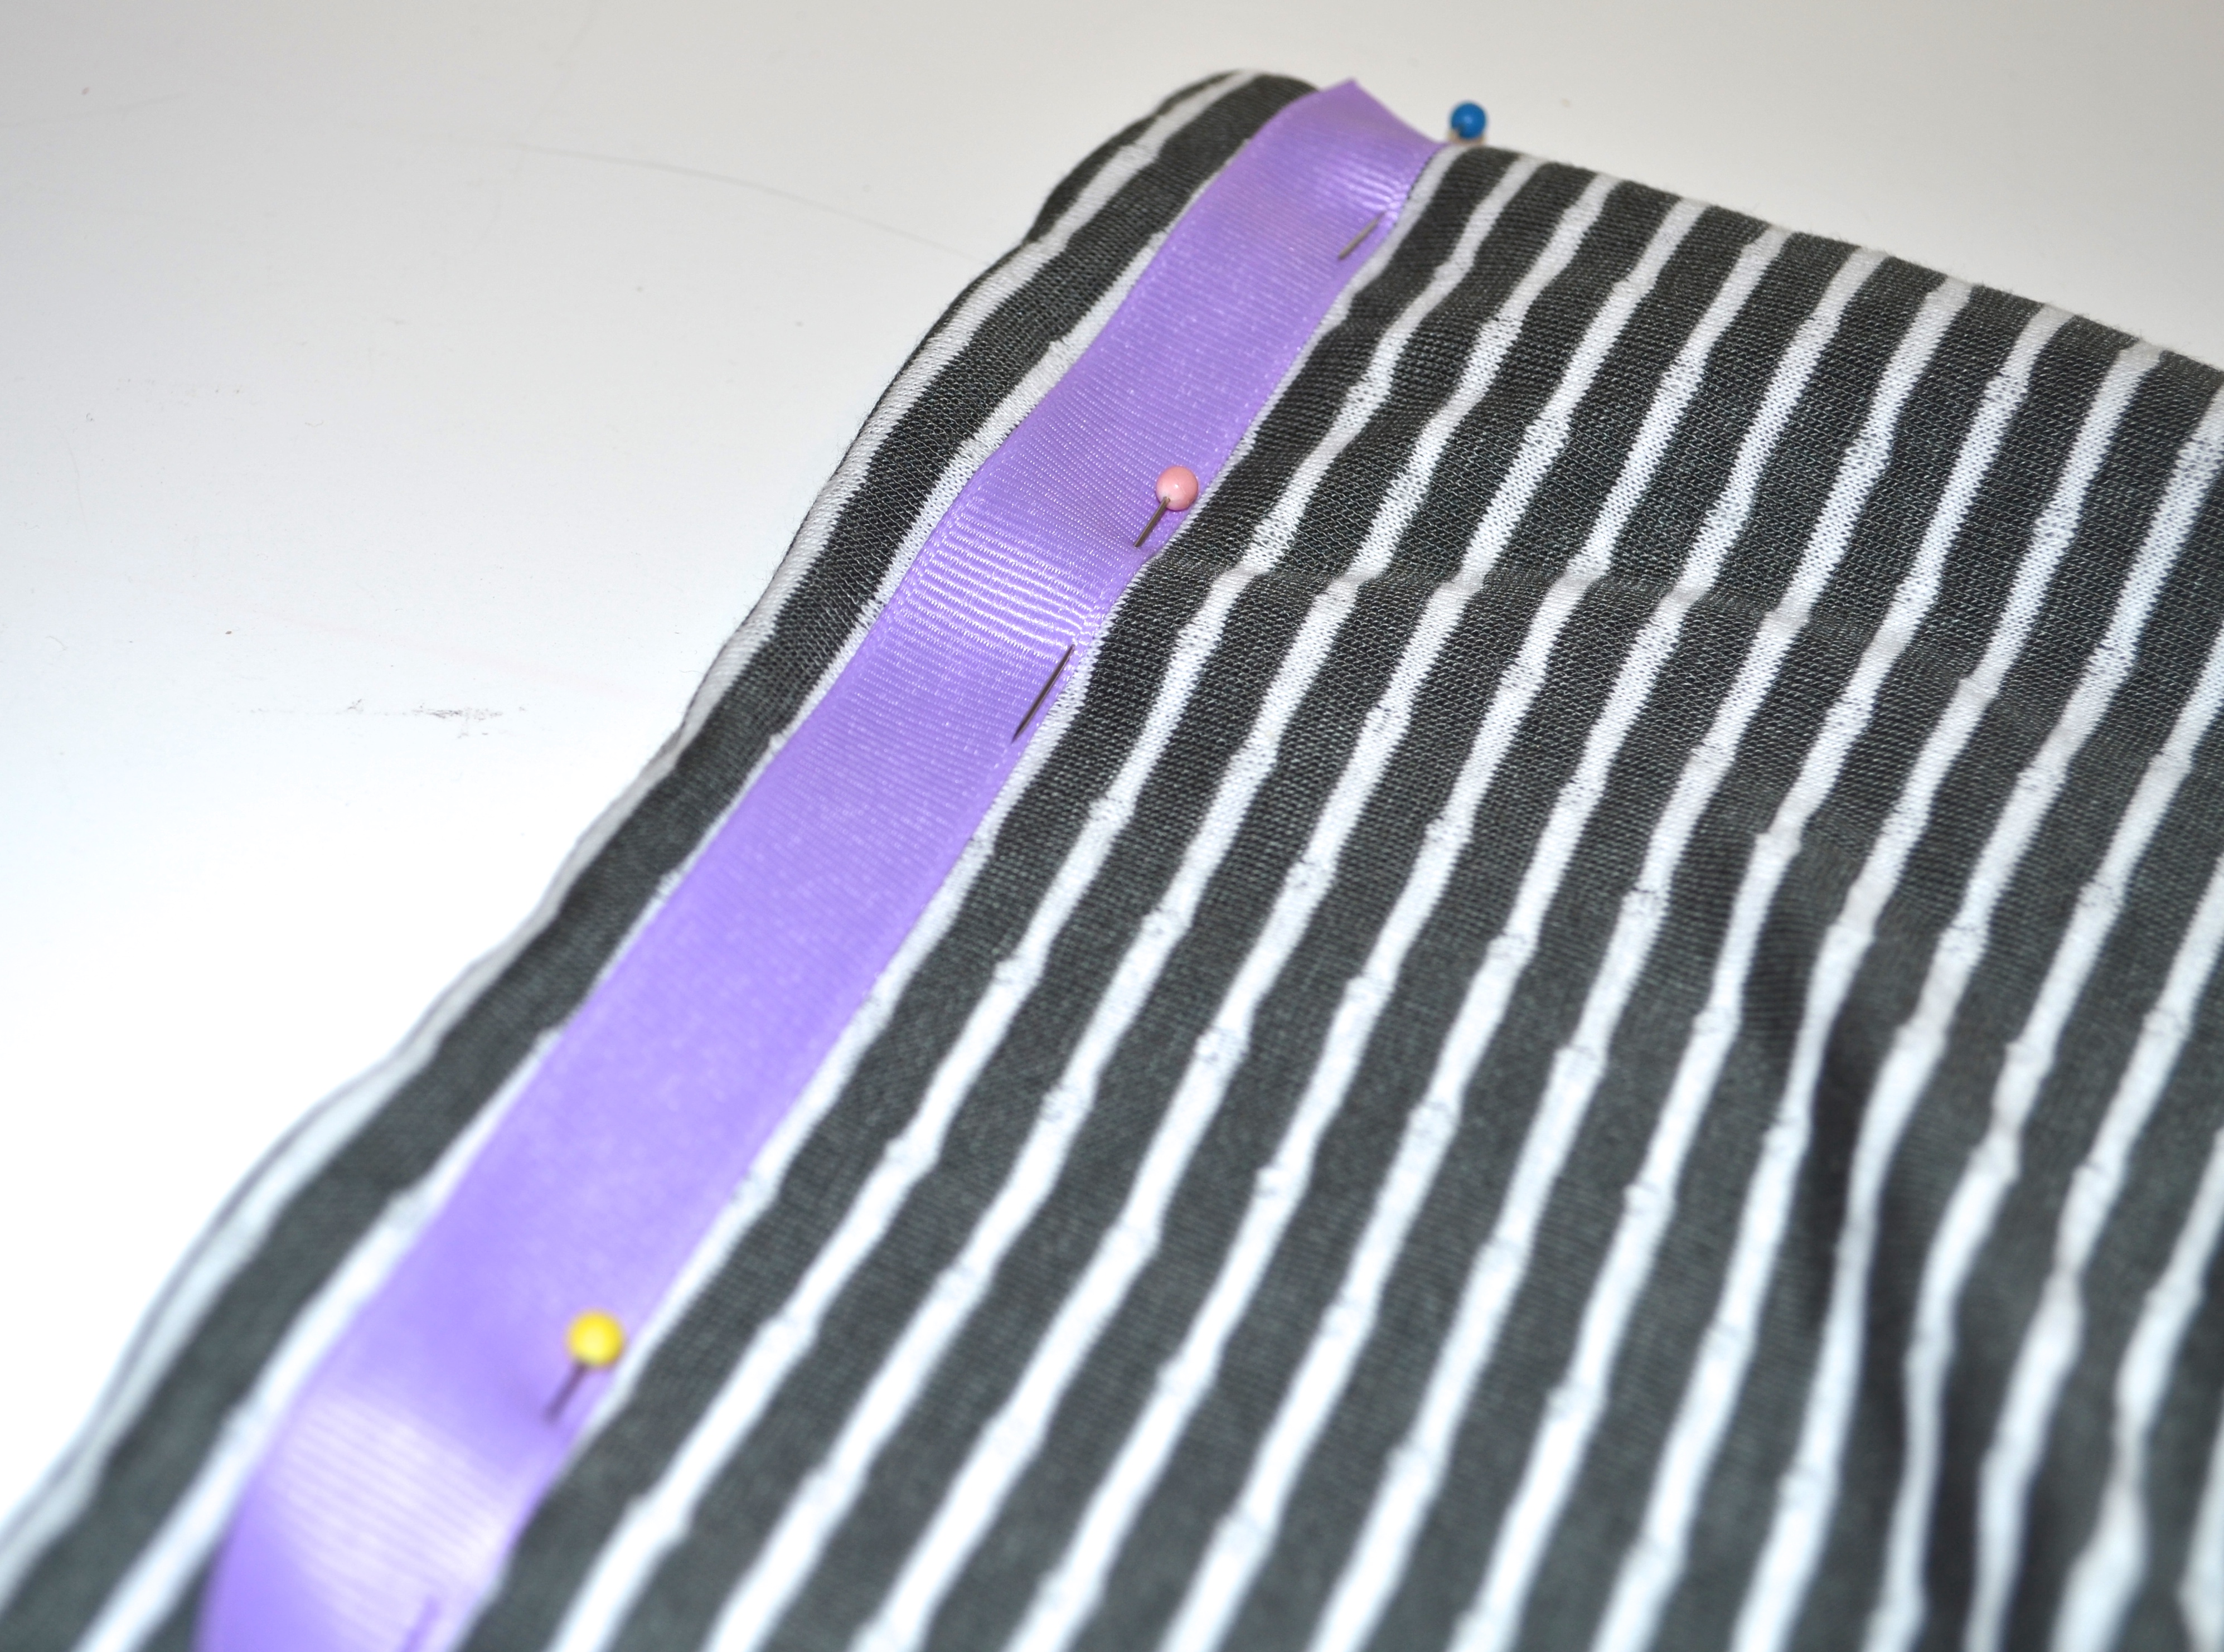
- On the side of fabric of your choosing, gently place the colored ribbon about 1” from the edge of the scarf (on the short edge).
- Pin the ribbon in place to make sure it won’t move, and then feed it through your sewing machine with a simple, linear stitch.
- Sew all the sides of the ribbon down.
Step 5:
- Repeat all the steps in step 4 on the other small end of the scarf, so that the colored ribbon is lining both ends. Make sure that if you put the ribbon on the patterned side of fabric, that is is on the patterned side of fabric on both edges (and visa versa).
Step 6:
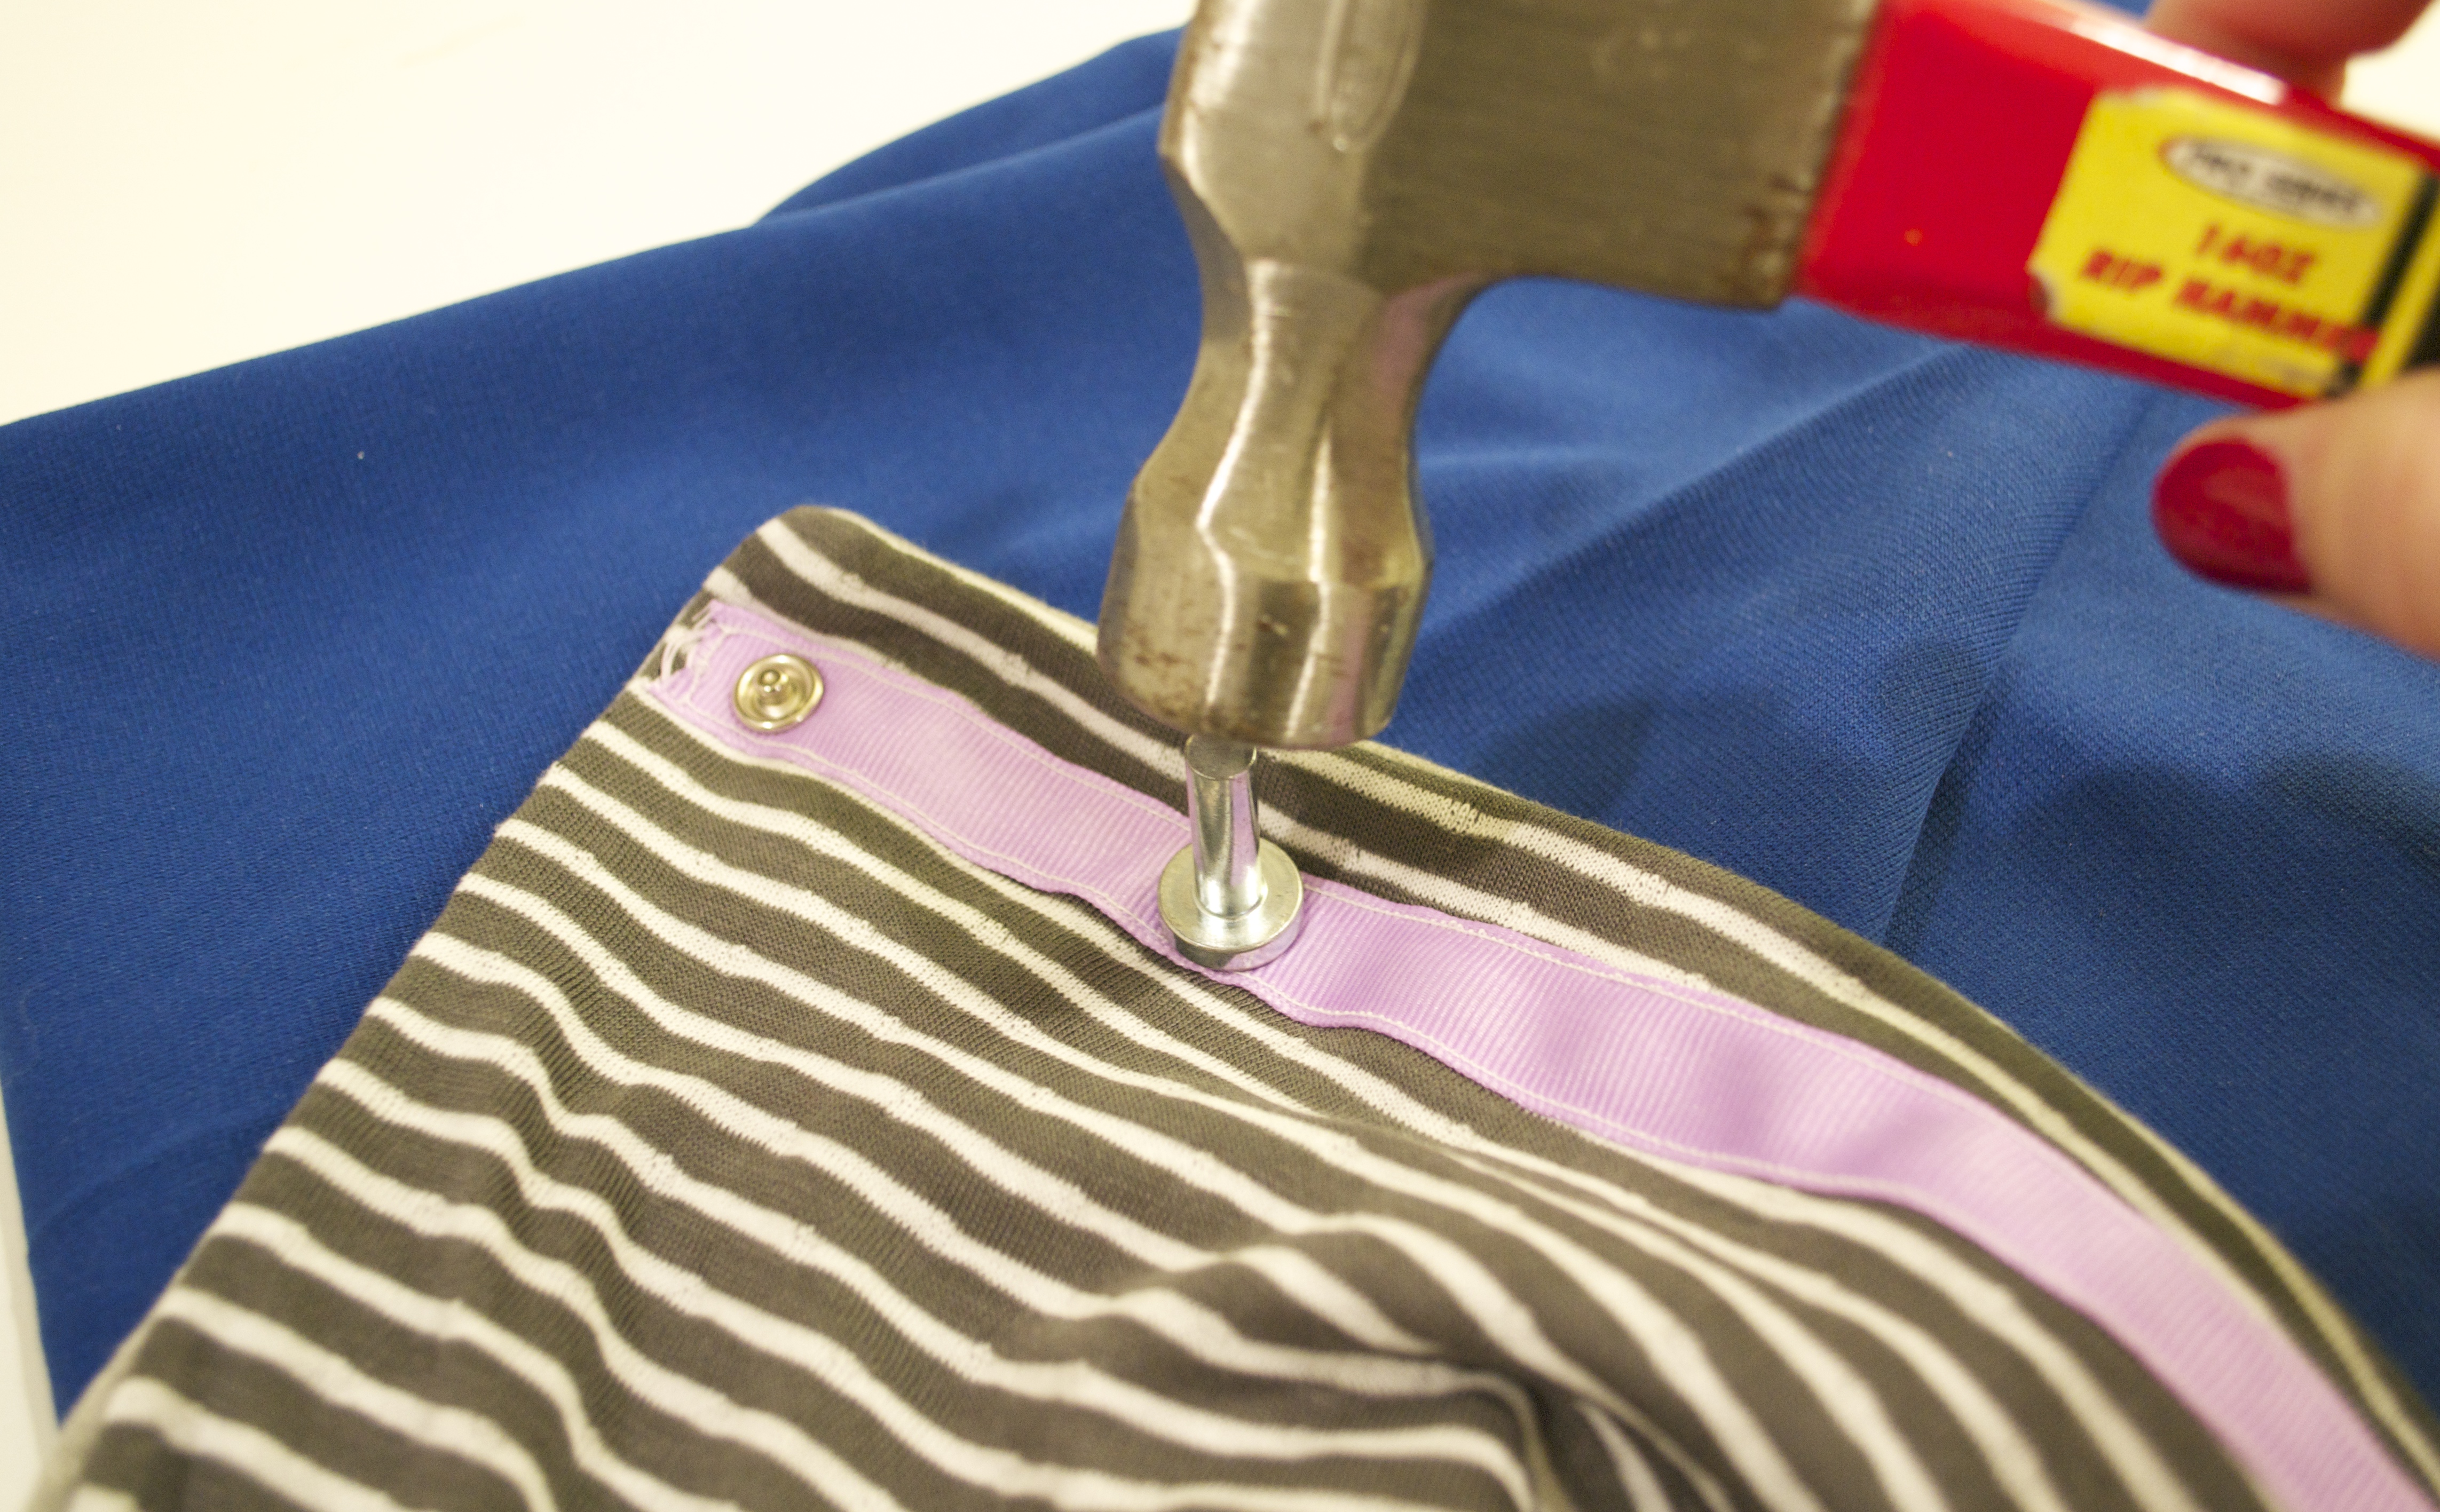
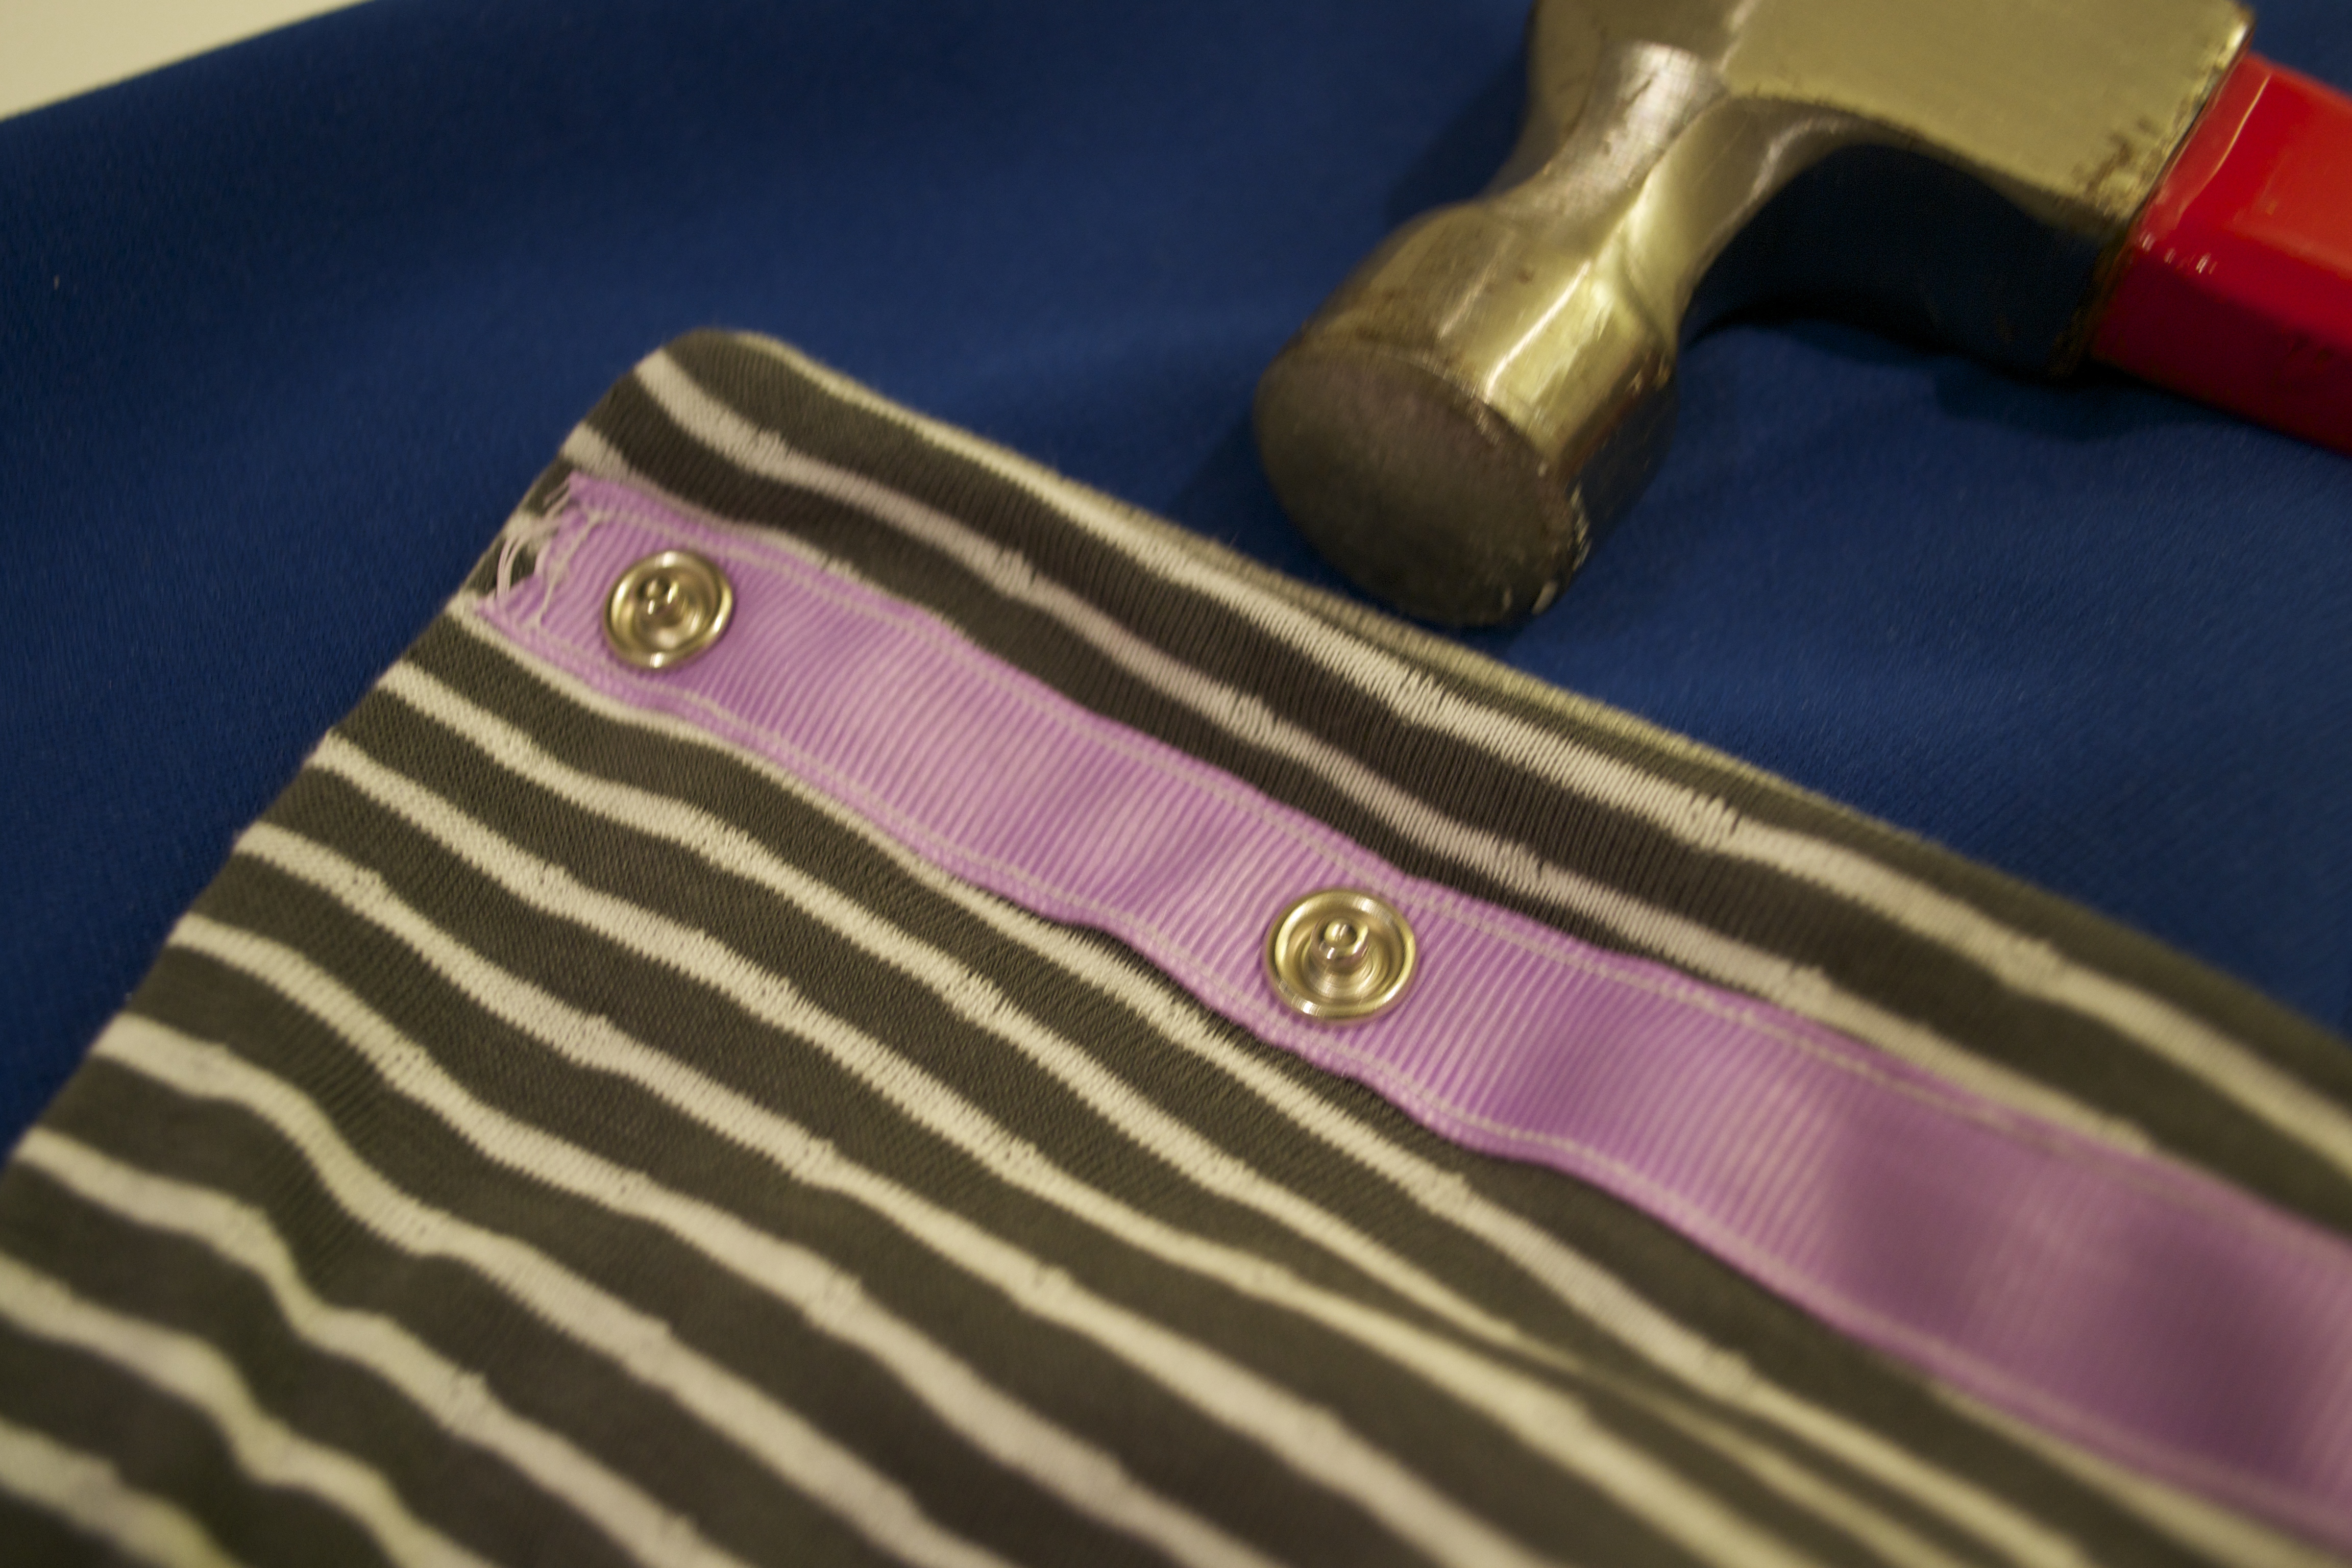
- This is the fun part! Take your snaps and place them evenly along the ribbon, then mark their places.
- Remove the snaps, and one by one, put them where you marked. First, place the pronged part through the back of the fabric.
- Then, put the top part of the snap on top of the prongs.
- Next, put your connecting tool (or spool of thread) over the top of the snap, and HAMMER AWAY (making sure that the back pronged part is securely fastened to the snap on the front).
- Make sure to hammer hard. If not, the snaps will unclasp.
- Do this for all the snaps on the one side of the ribbon.
Step 7:
- Repeat everything in step 6, for the ribbon on the other edge of the scarf.
- When doing this, make sure you are connecting the snaps so that they are facing in the correct direction to snap into the snaps on the other side of the scarf.
- Again, make sure you HAMMER HARD! You want those snaps to stay in place!
Voi la! Once all the snaps are hammered on, your scarf is complete. If you ended up getting 2 different types of fabric so you could have a different pattern on each side (like I did), repeat the steps to make your second scarf. Use this as a gift for a friend, or sell it online to make your money back. Either way, you’re using your skills to save money all while looking fashionable. Kudos to you!
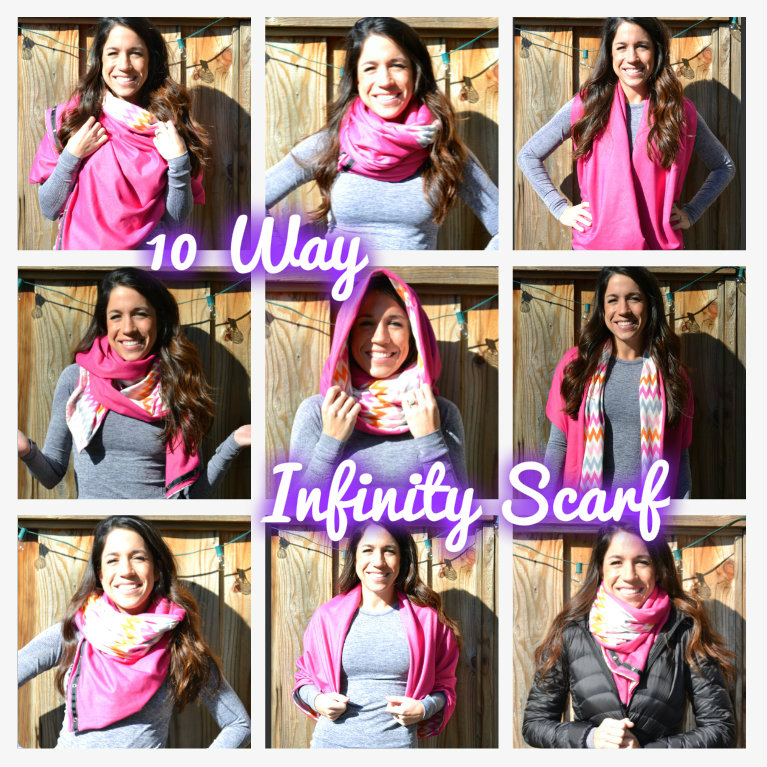
Different Ways to Wear Your DIY Infinity Scarf (aka Vinyasa Scarf)
It’s a cute scarf on it’s own, but with the snaps and the bulk of it, there are so many different things you can do with this scarf. I mean, it costs $48 retail for a reason. Below, I show you the 16 different ways you can wear this scarf.
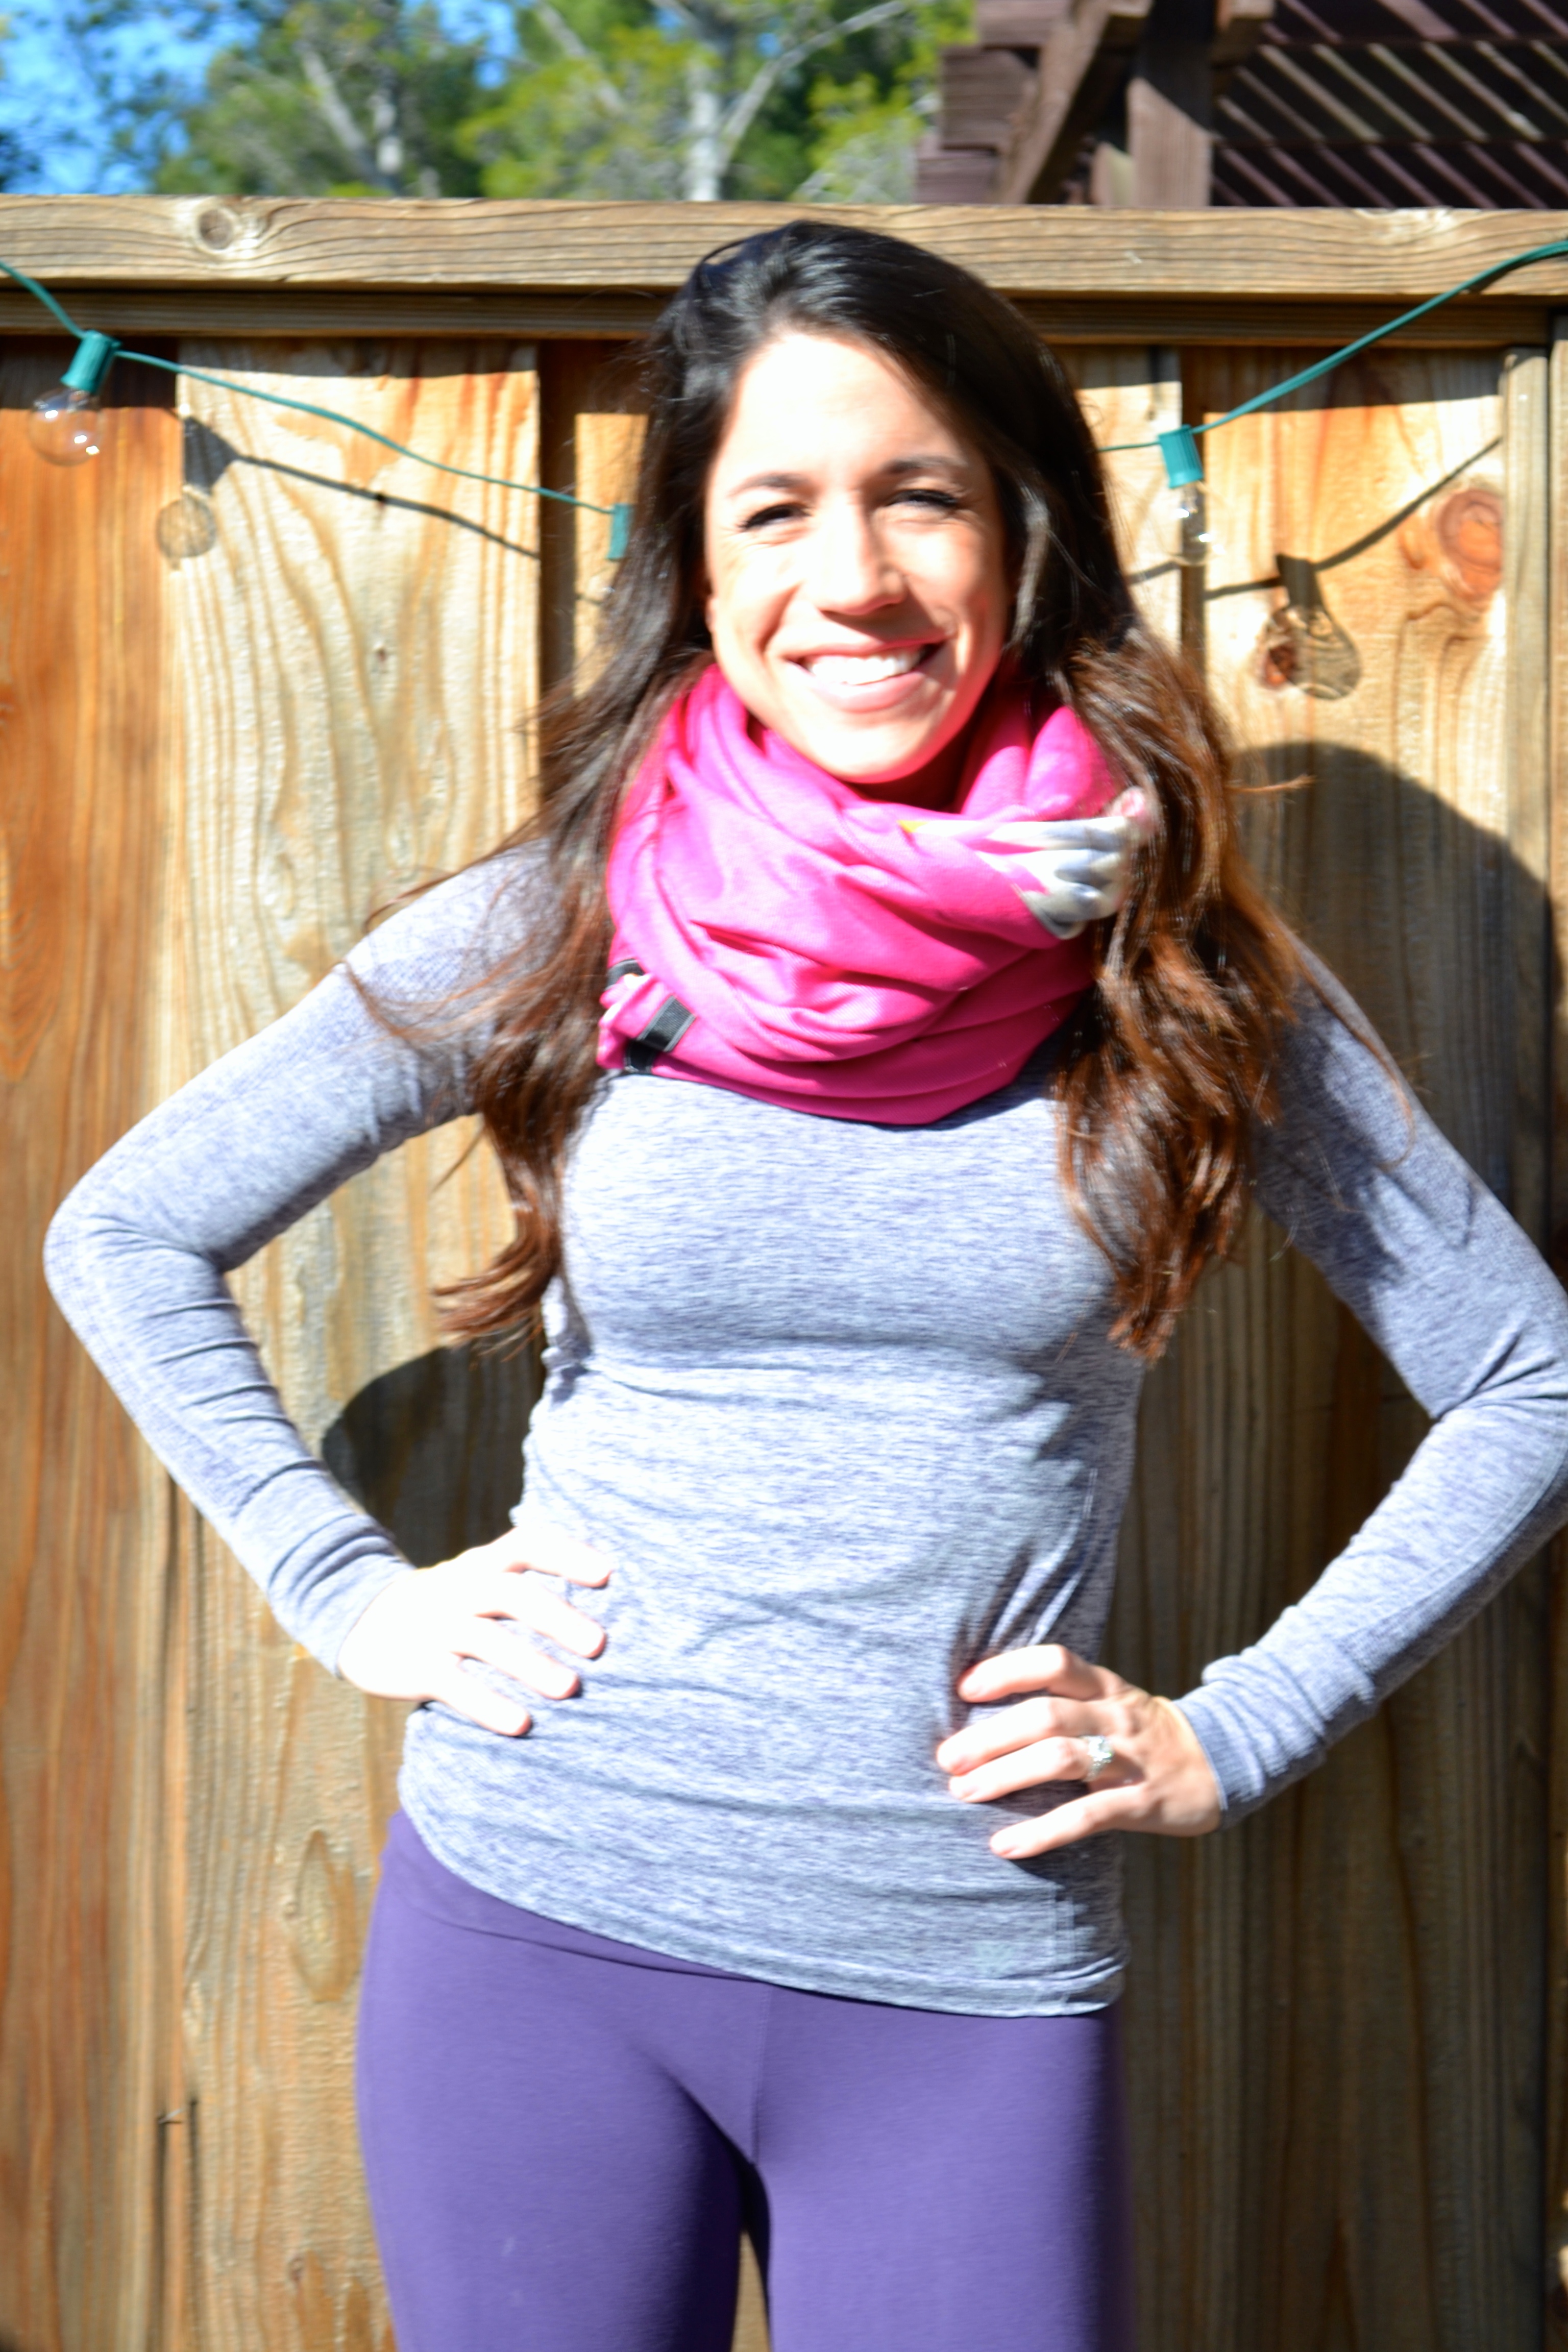
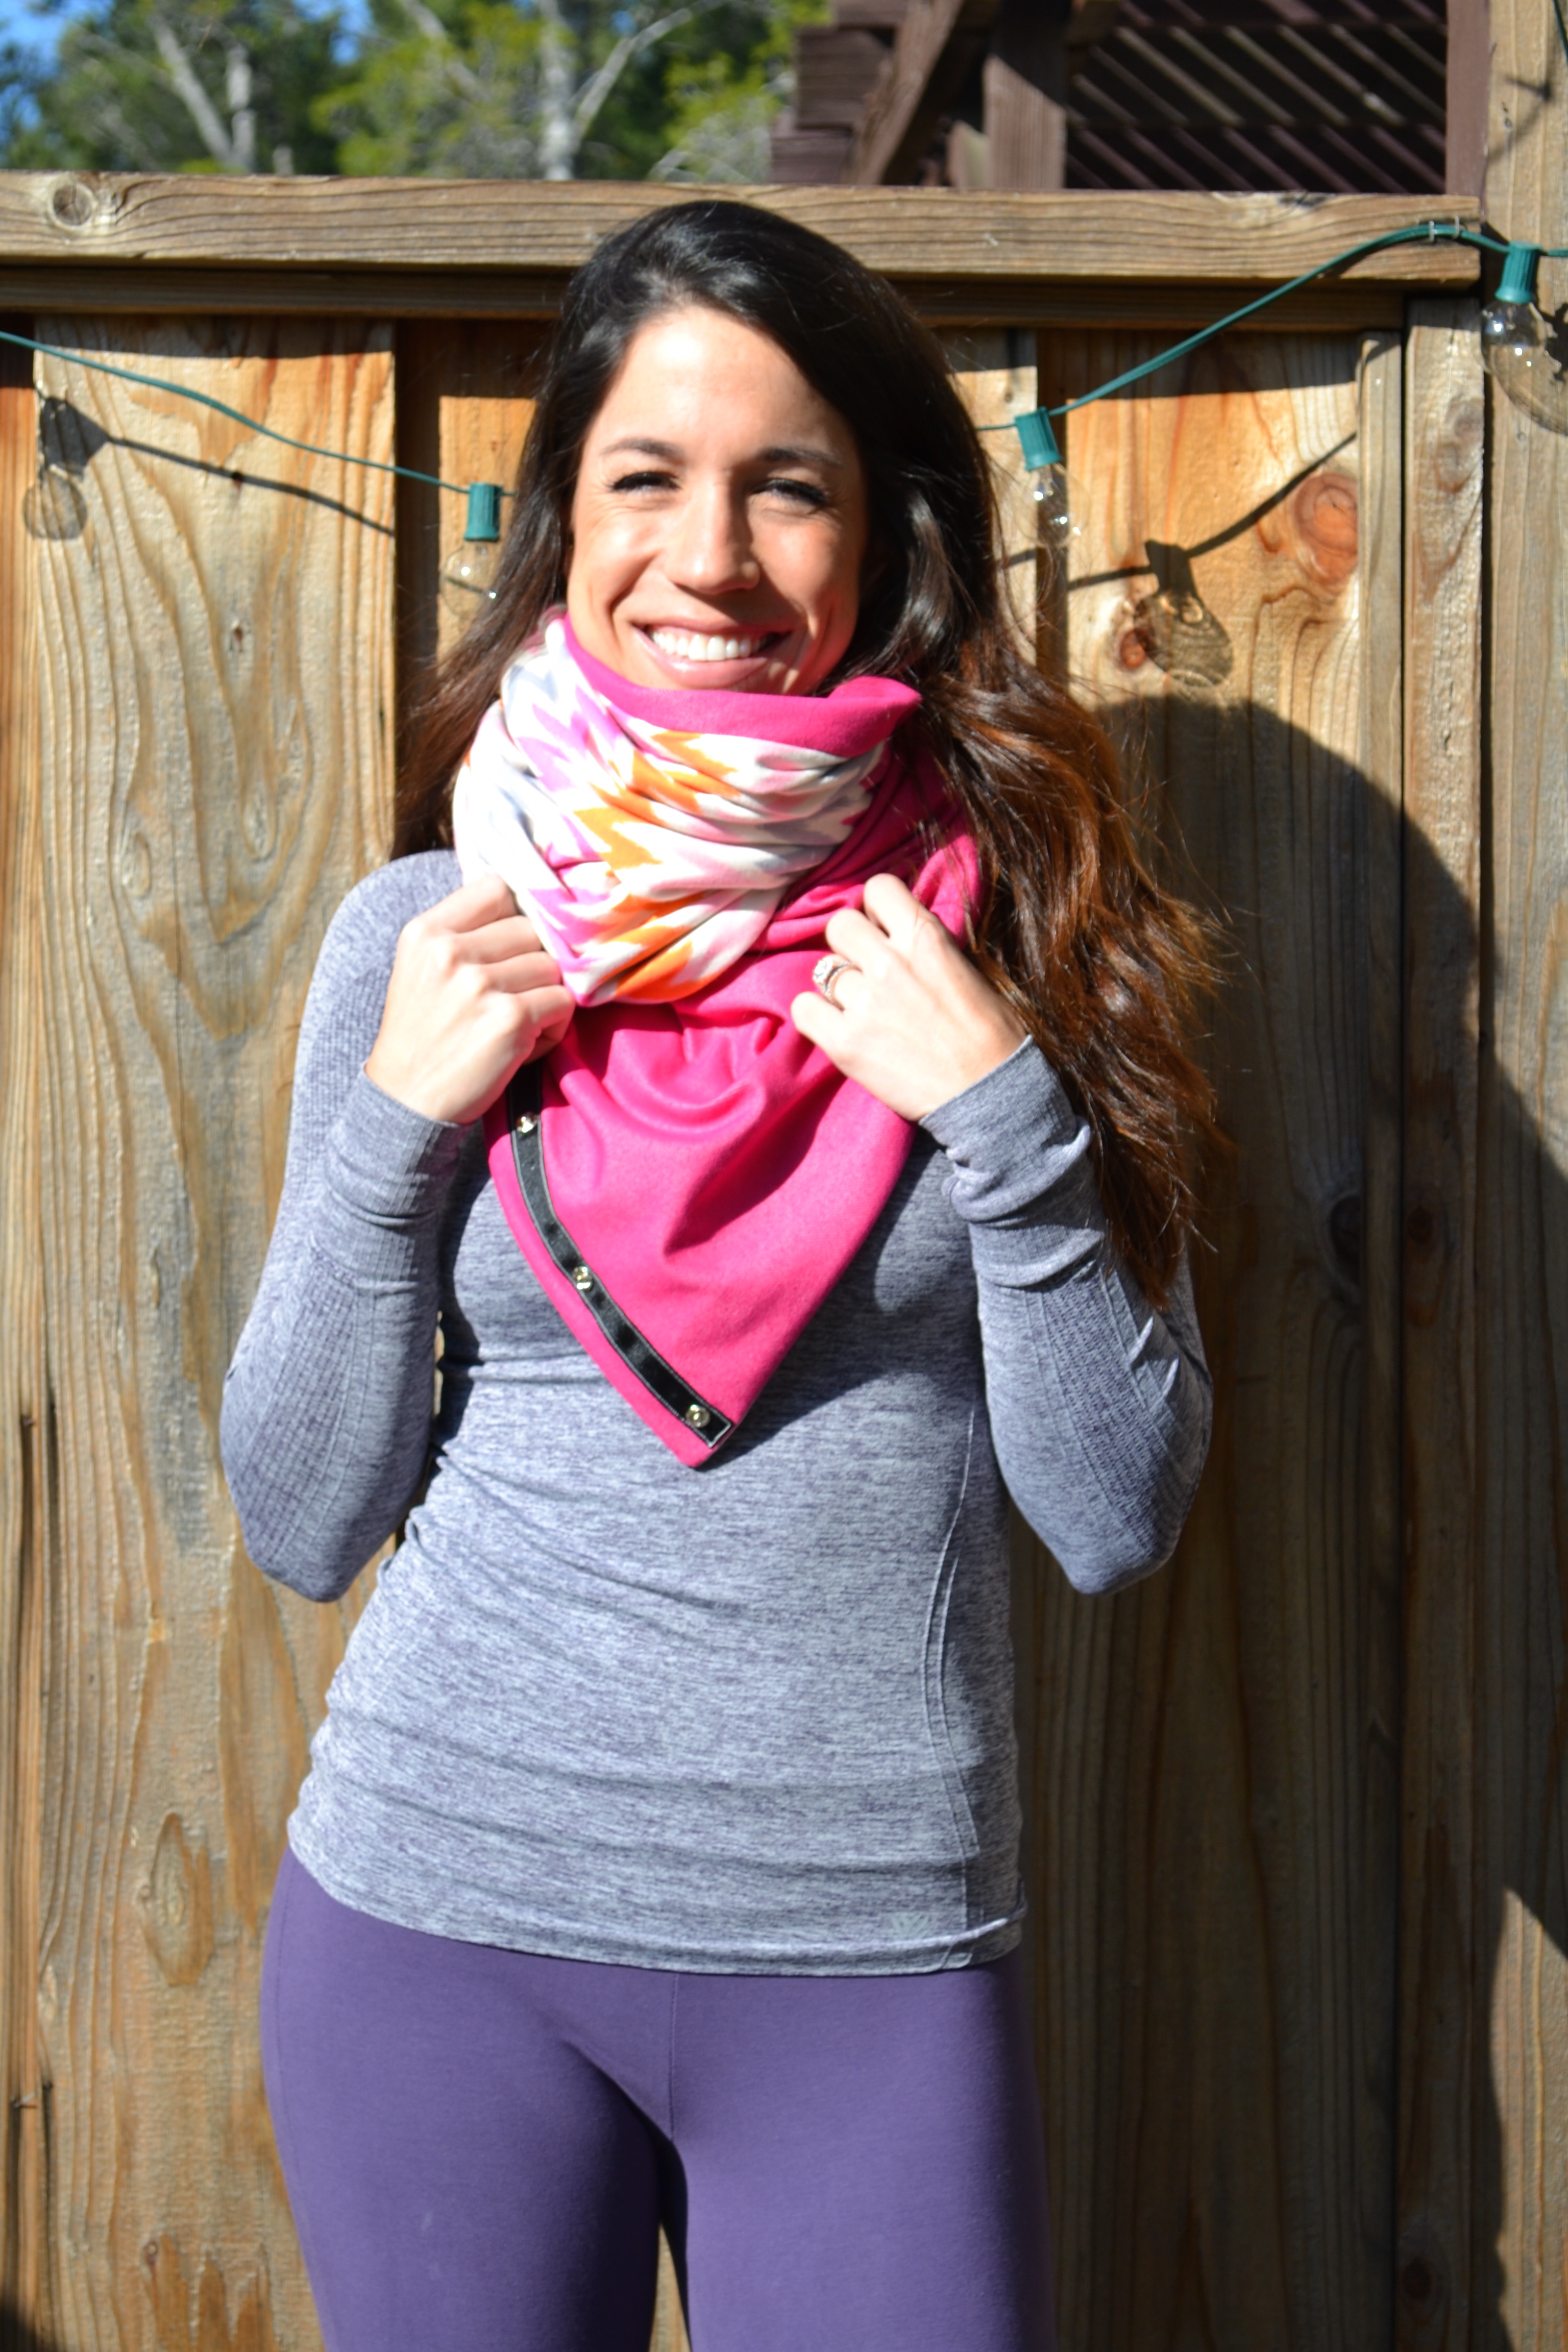
Way #1 – THE CLASSIC
This infinity scarf is so big, you can wrap it around your neck twice for some extra warmth, and it won’t drape way down like a flimsy scarf.
Way #2 – THE CLASSIC REDUX
Wrap it around your neck twice like the classic look, but unsnap a couple of the snaps at the bottom of the second wrap. It gives the bottom layer a more surface area and adds more of a fashion statement than just plain warmth.
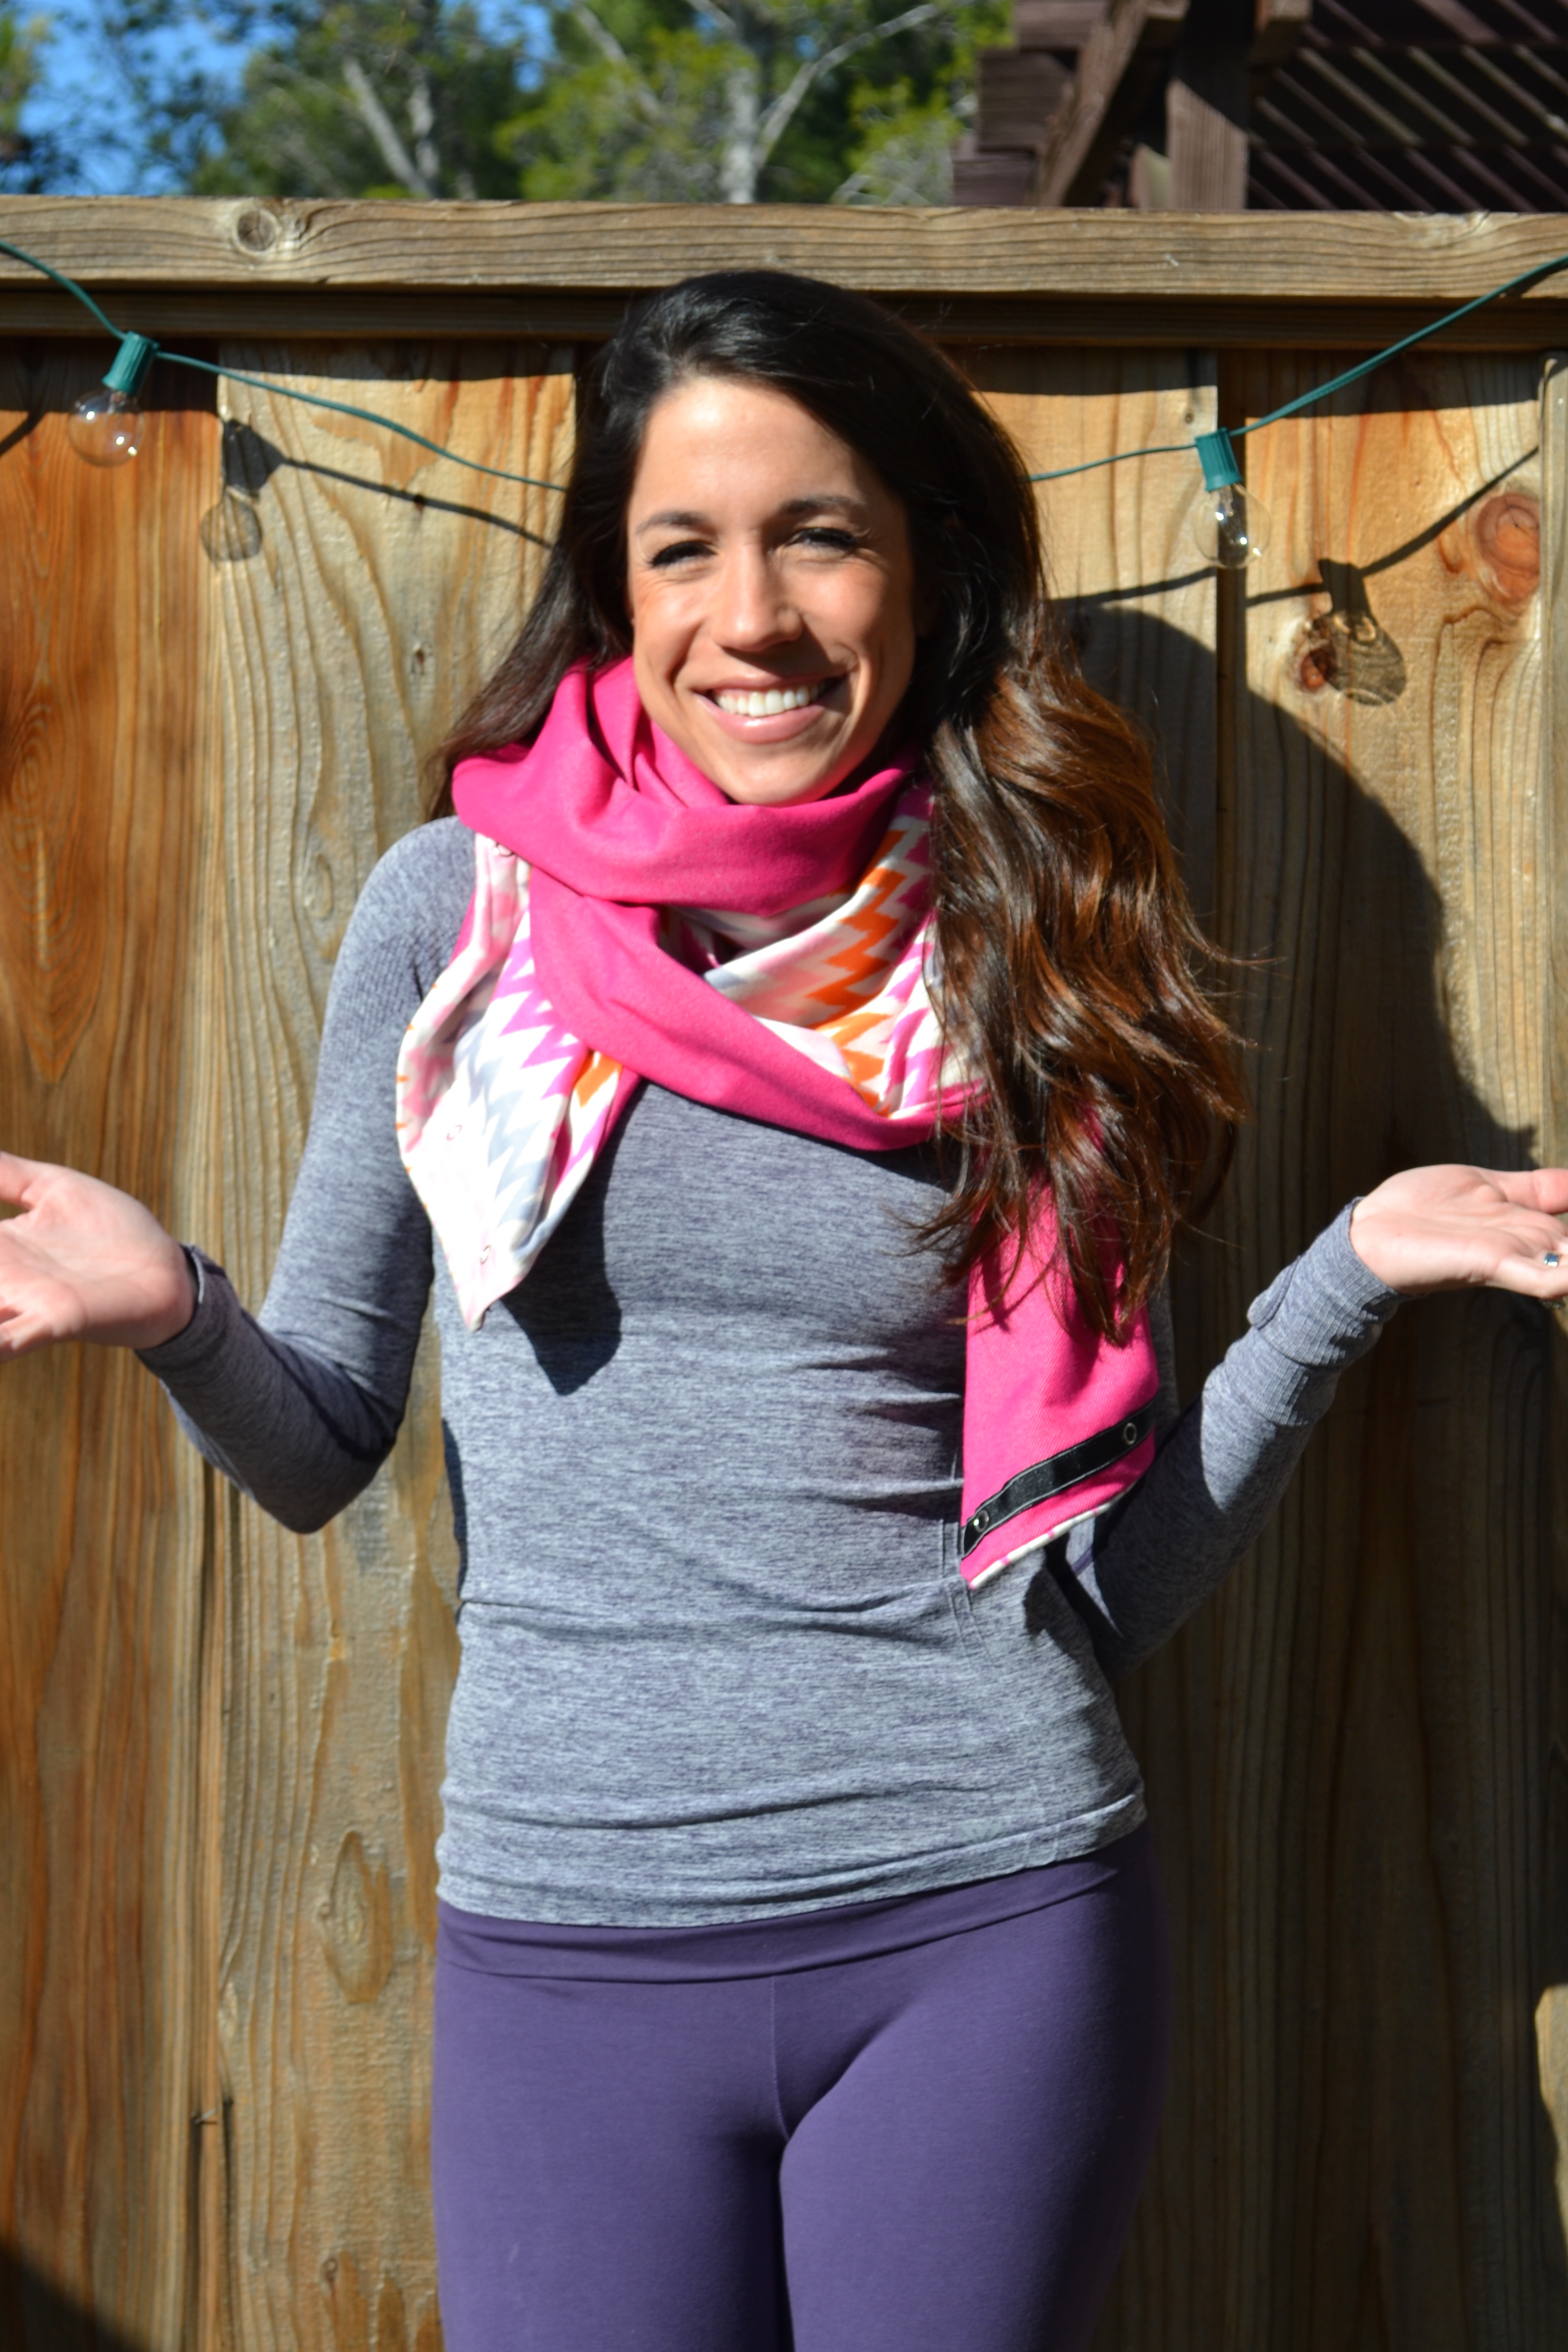
Way #3 – THE TWIST
Unsnap the entire scarf, and wrap it around your neck from the front, twisting it in the back, and then leaving it open in the front. The large top layer will keep the bottom layer from untwisting around your neck.
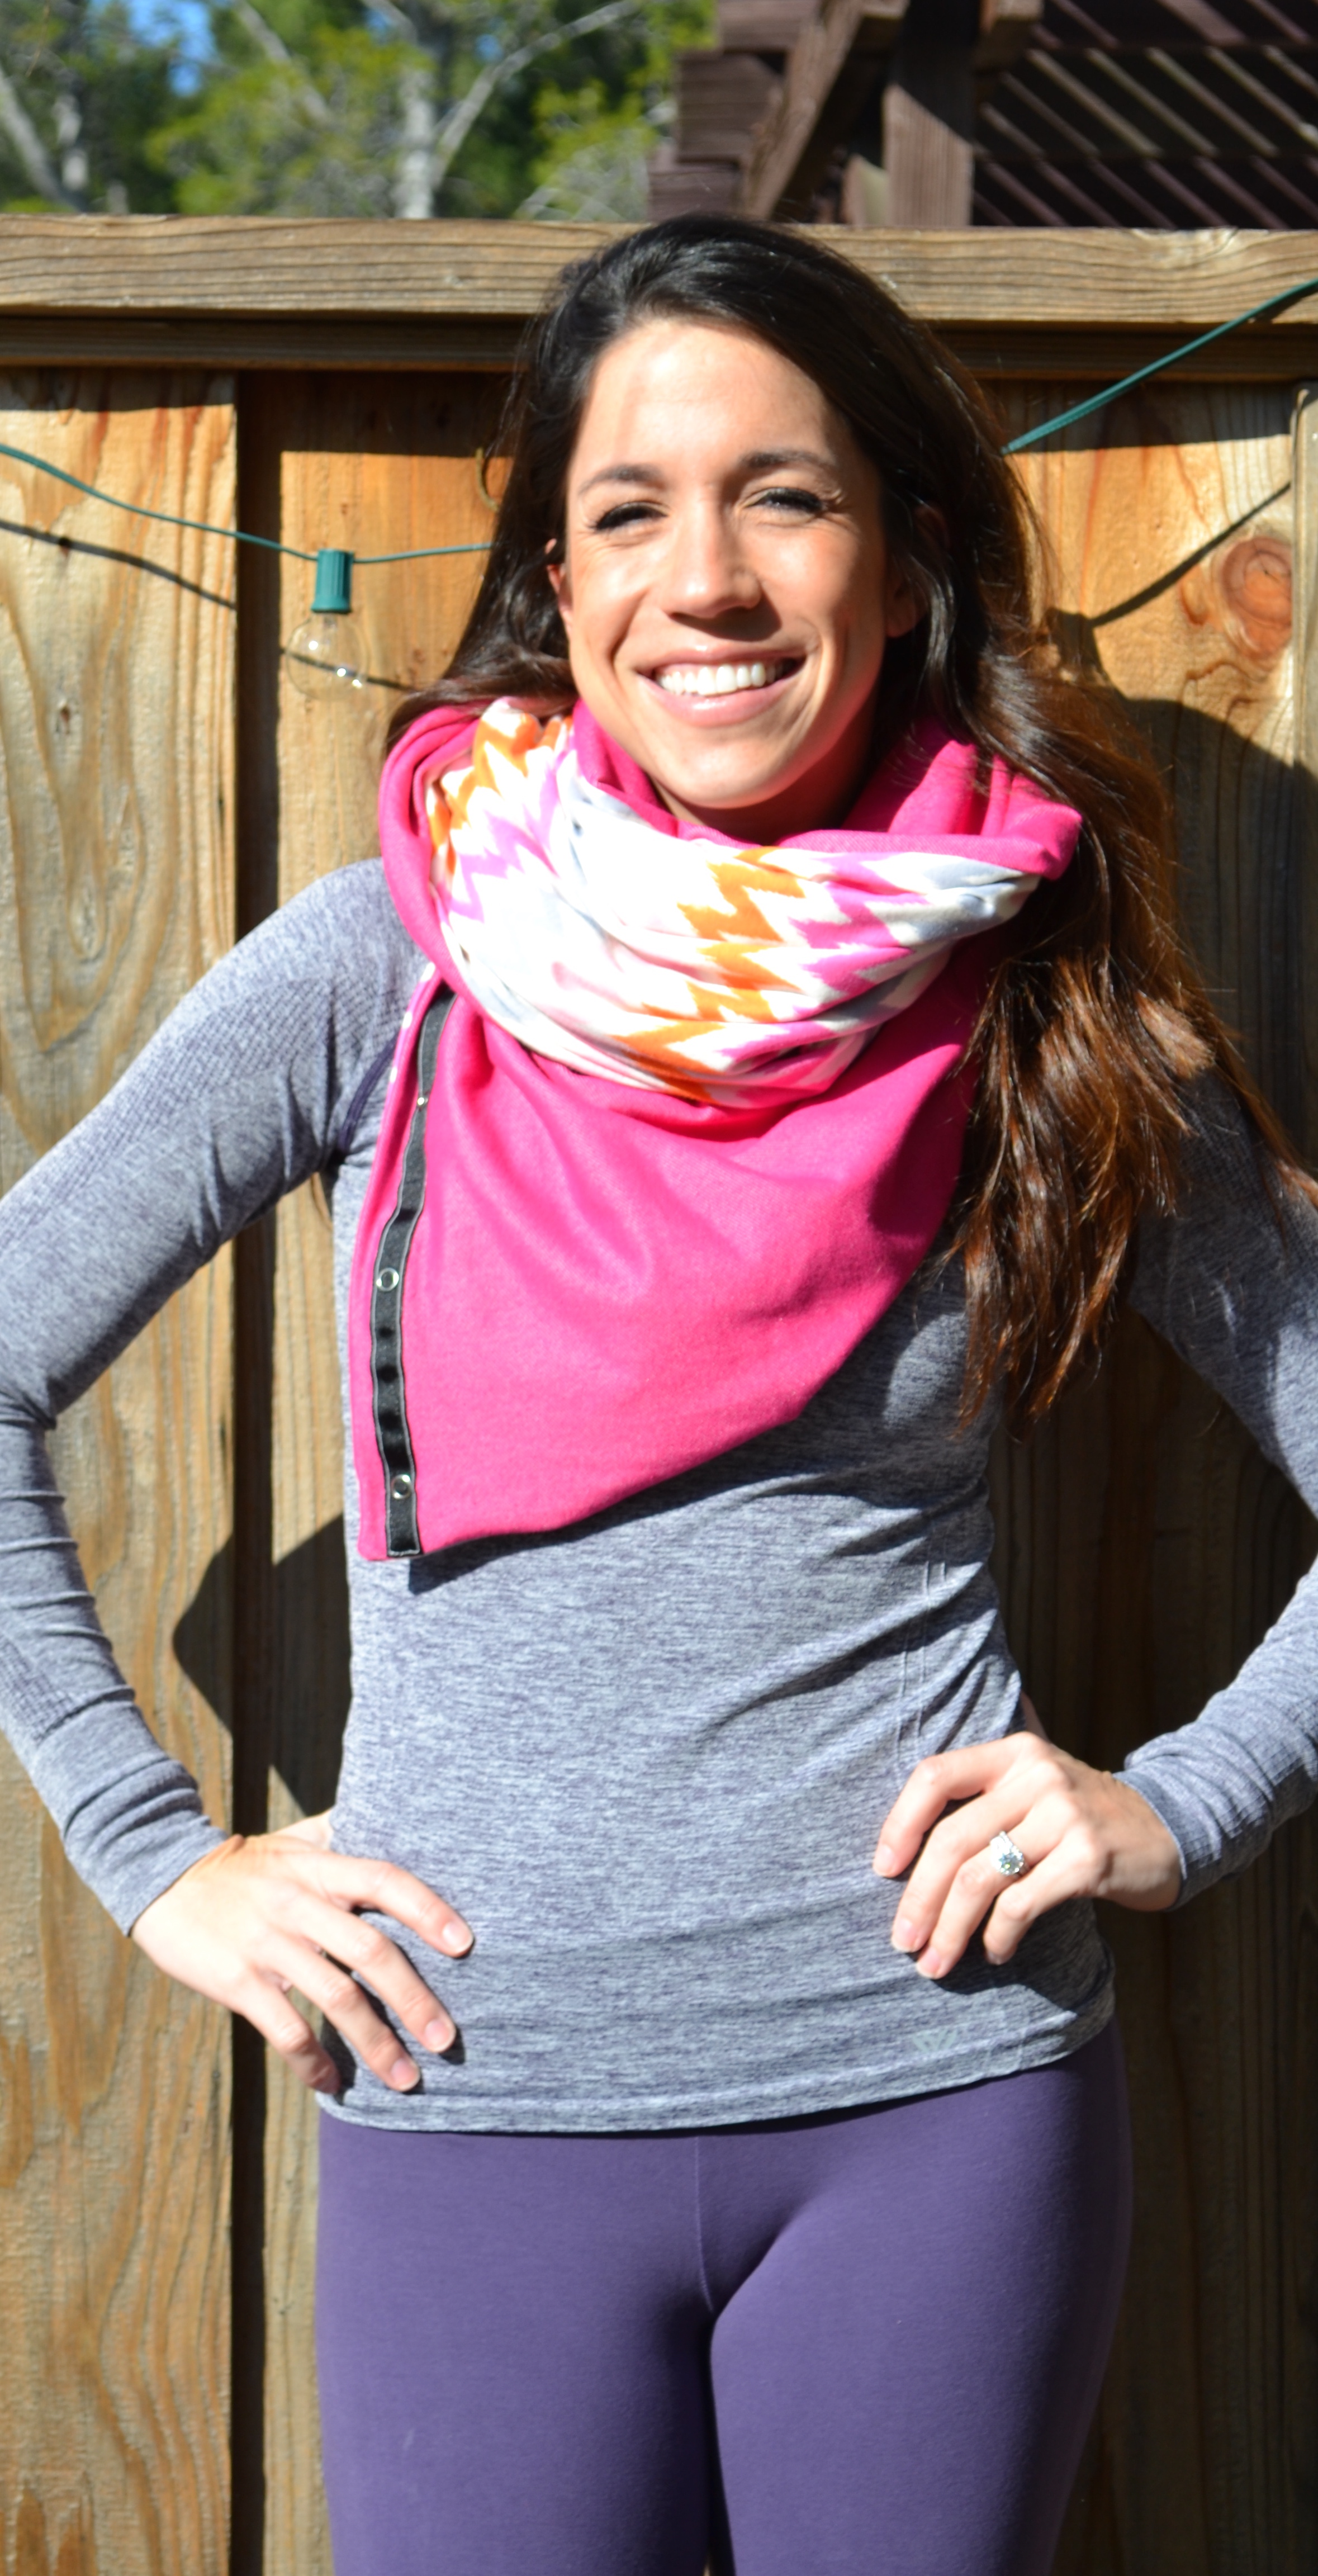
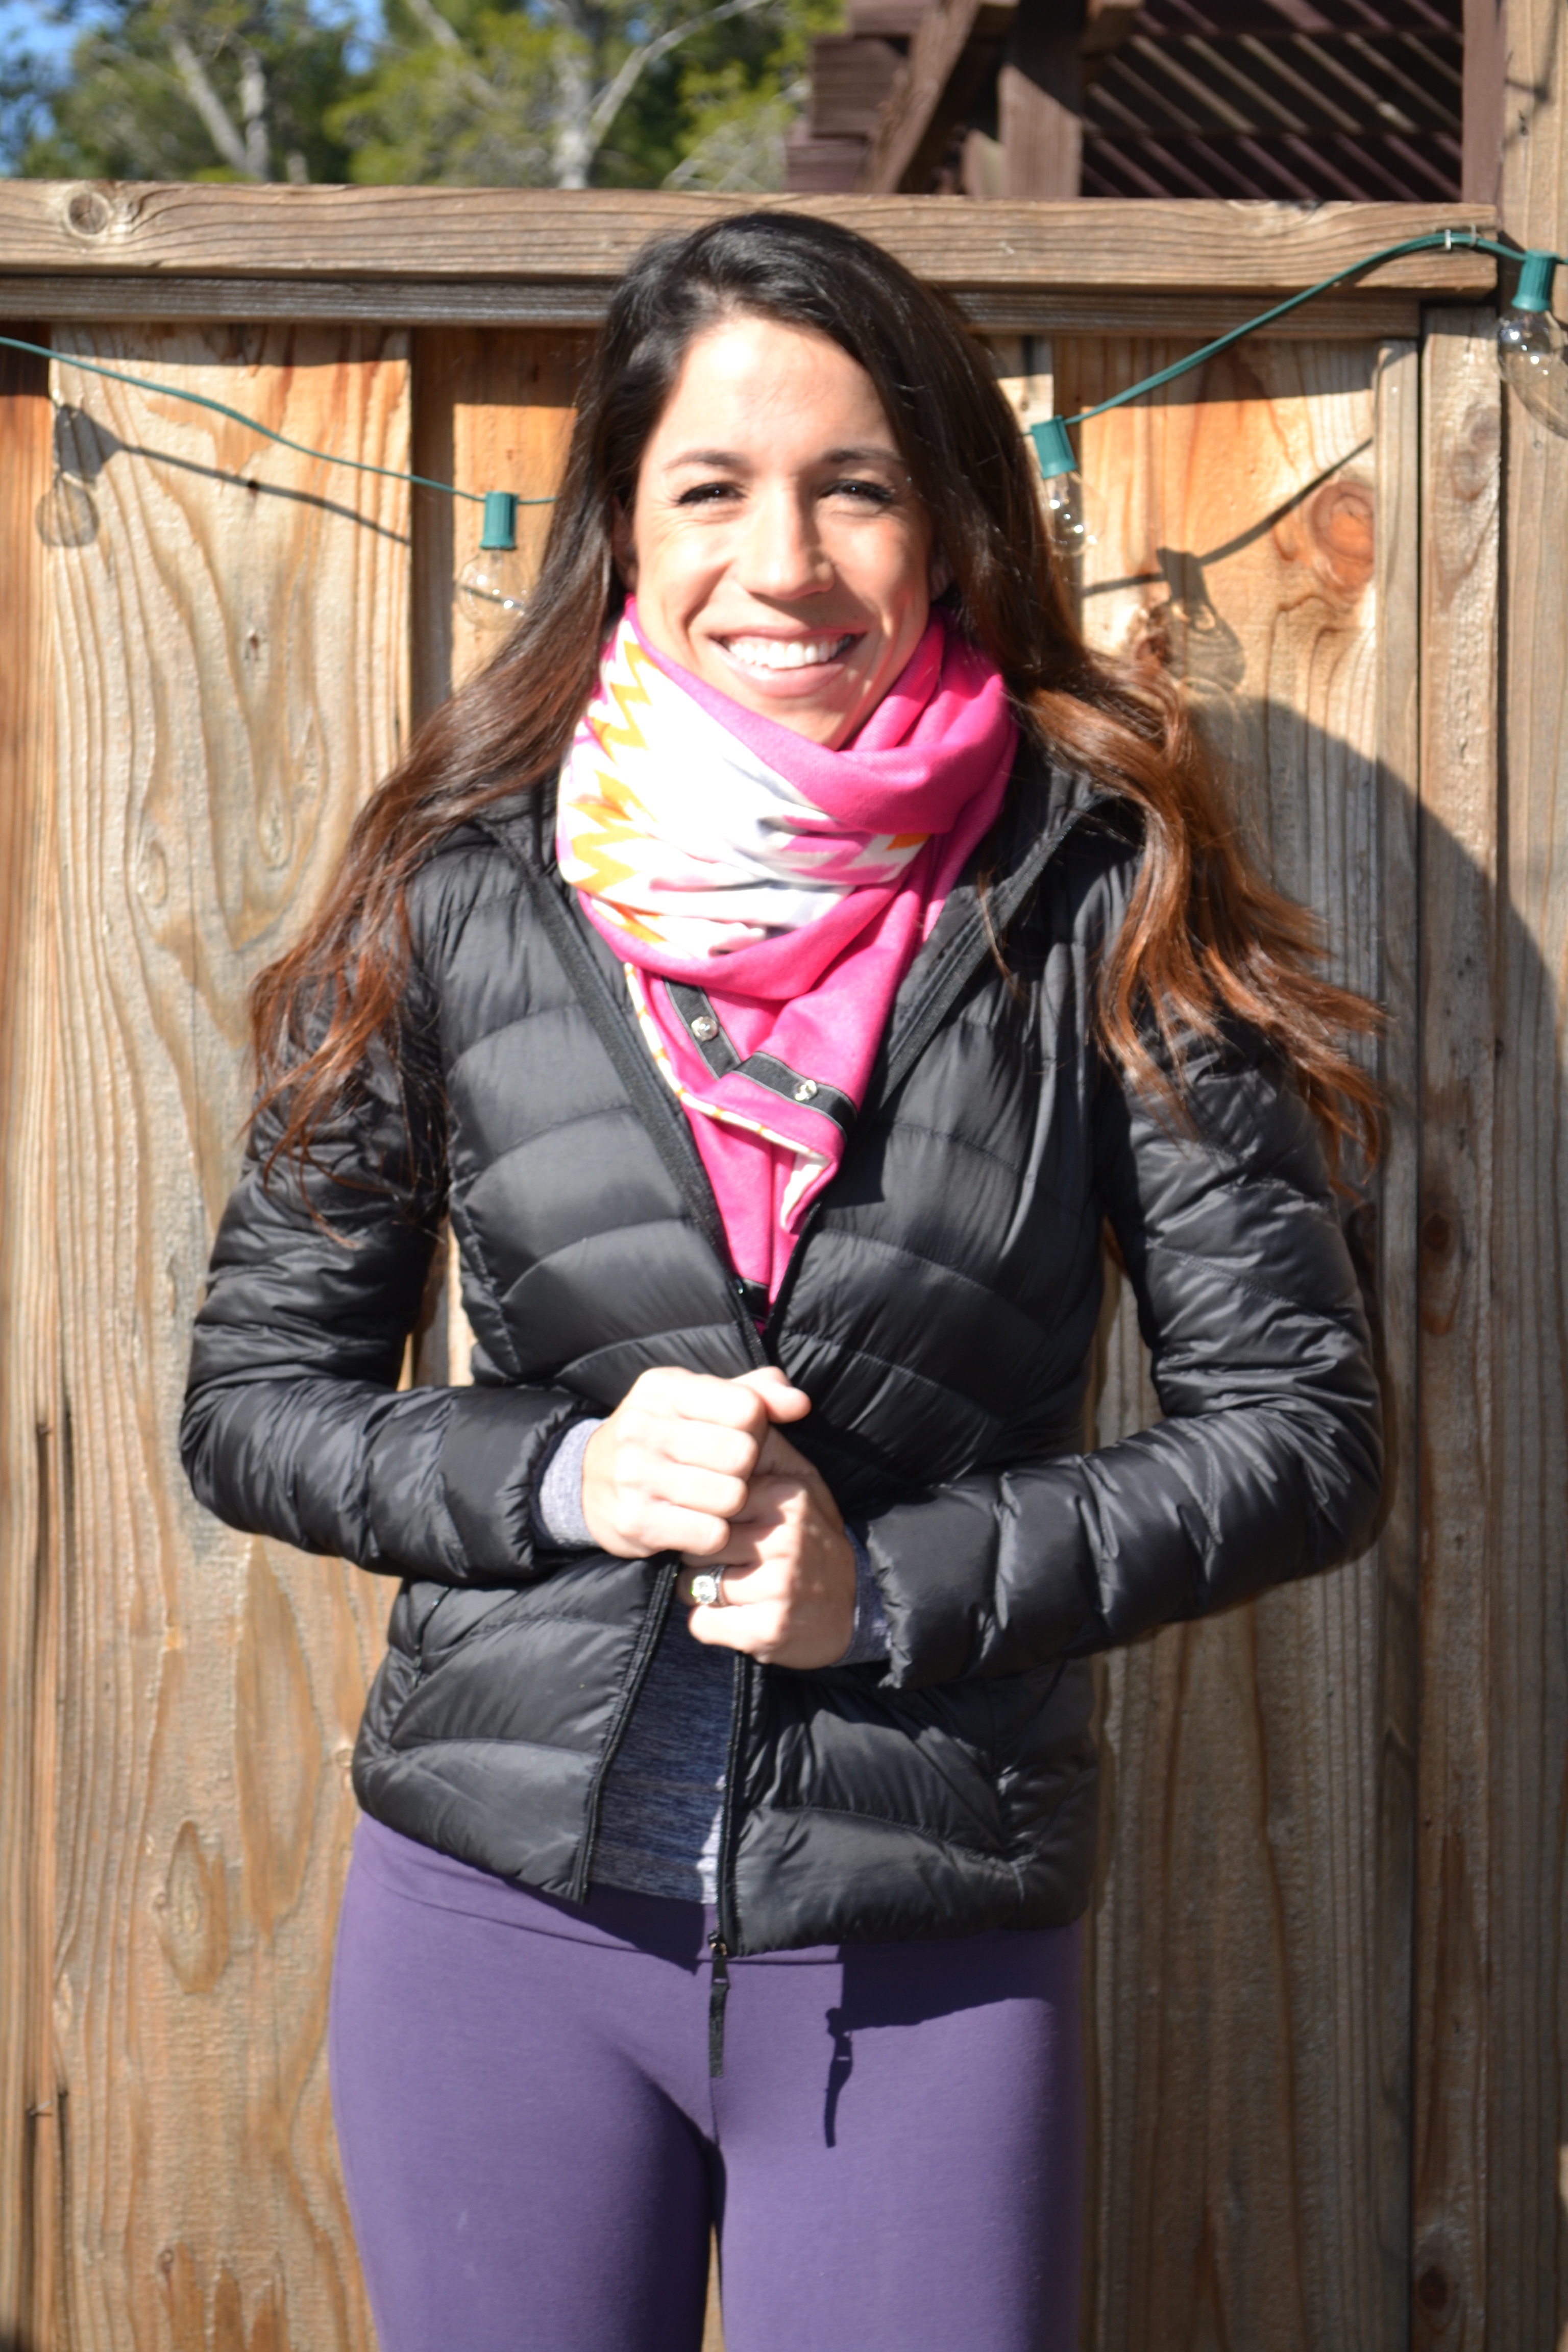
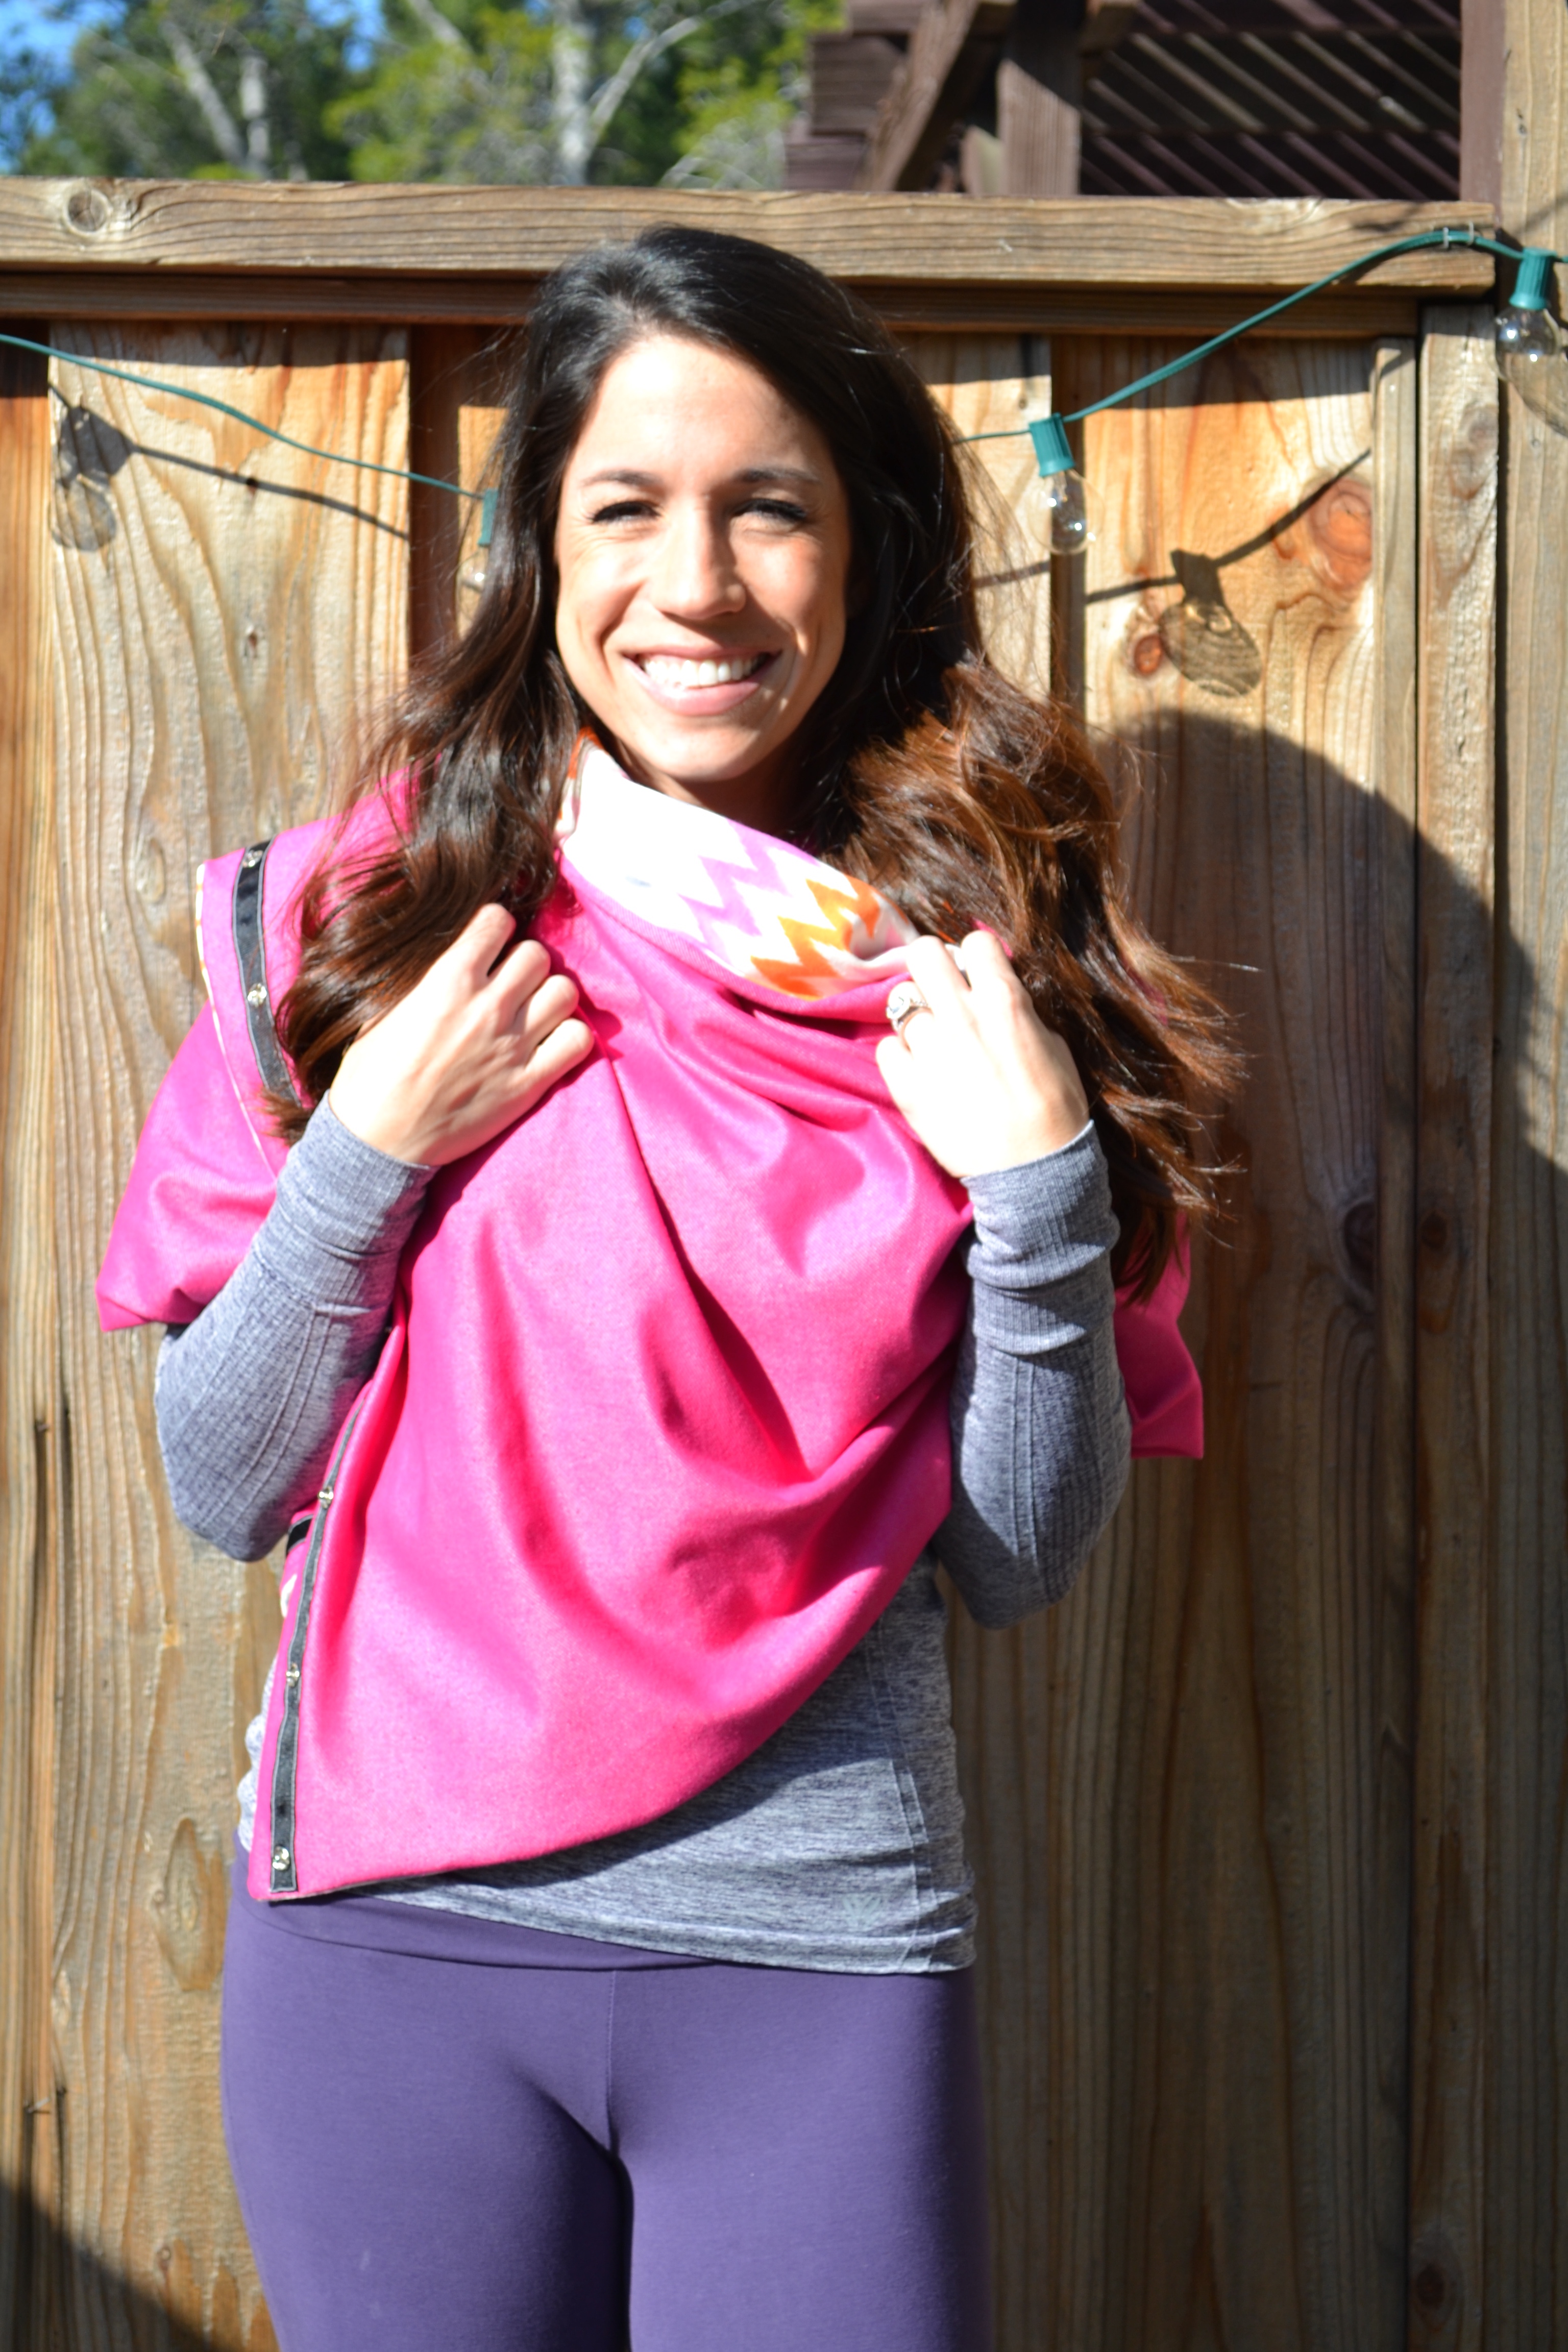
Way #4 – THE GET COZY
Unsnap the entire scarf and again, wrap it around your neck starting from the front and going around the back of your neck. Make it a bit tighter than with THE TWIST look, but leave the ends unsnapped in the front. Lay the ends flat across your chest and zip up your jacket to cover them, This gives you an extra added layer of warmth over the front of your body.
Way #5 – THE DOUBLE TUCK
Again, unsnap the scarf all the way, wrapping it around your neck the same way you did for the GET COZY . Instead of letting the ends lay flat across your chest, tuck one edge of each end them into the top layer of the scarf that’s wrapped around your neck, leaving t the bottom edges to hang down.
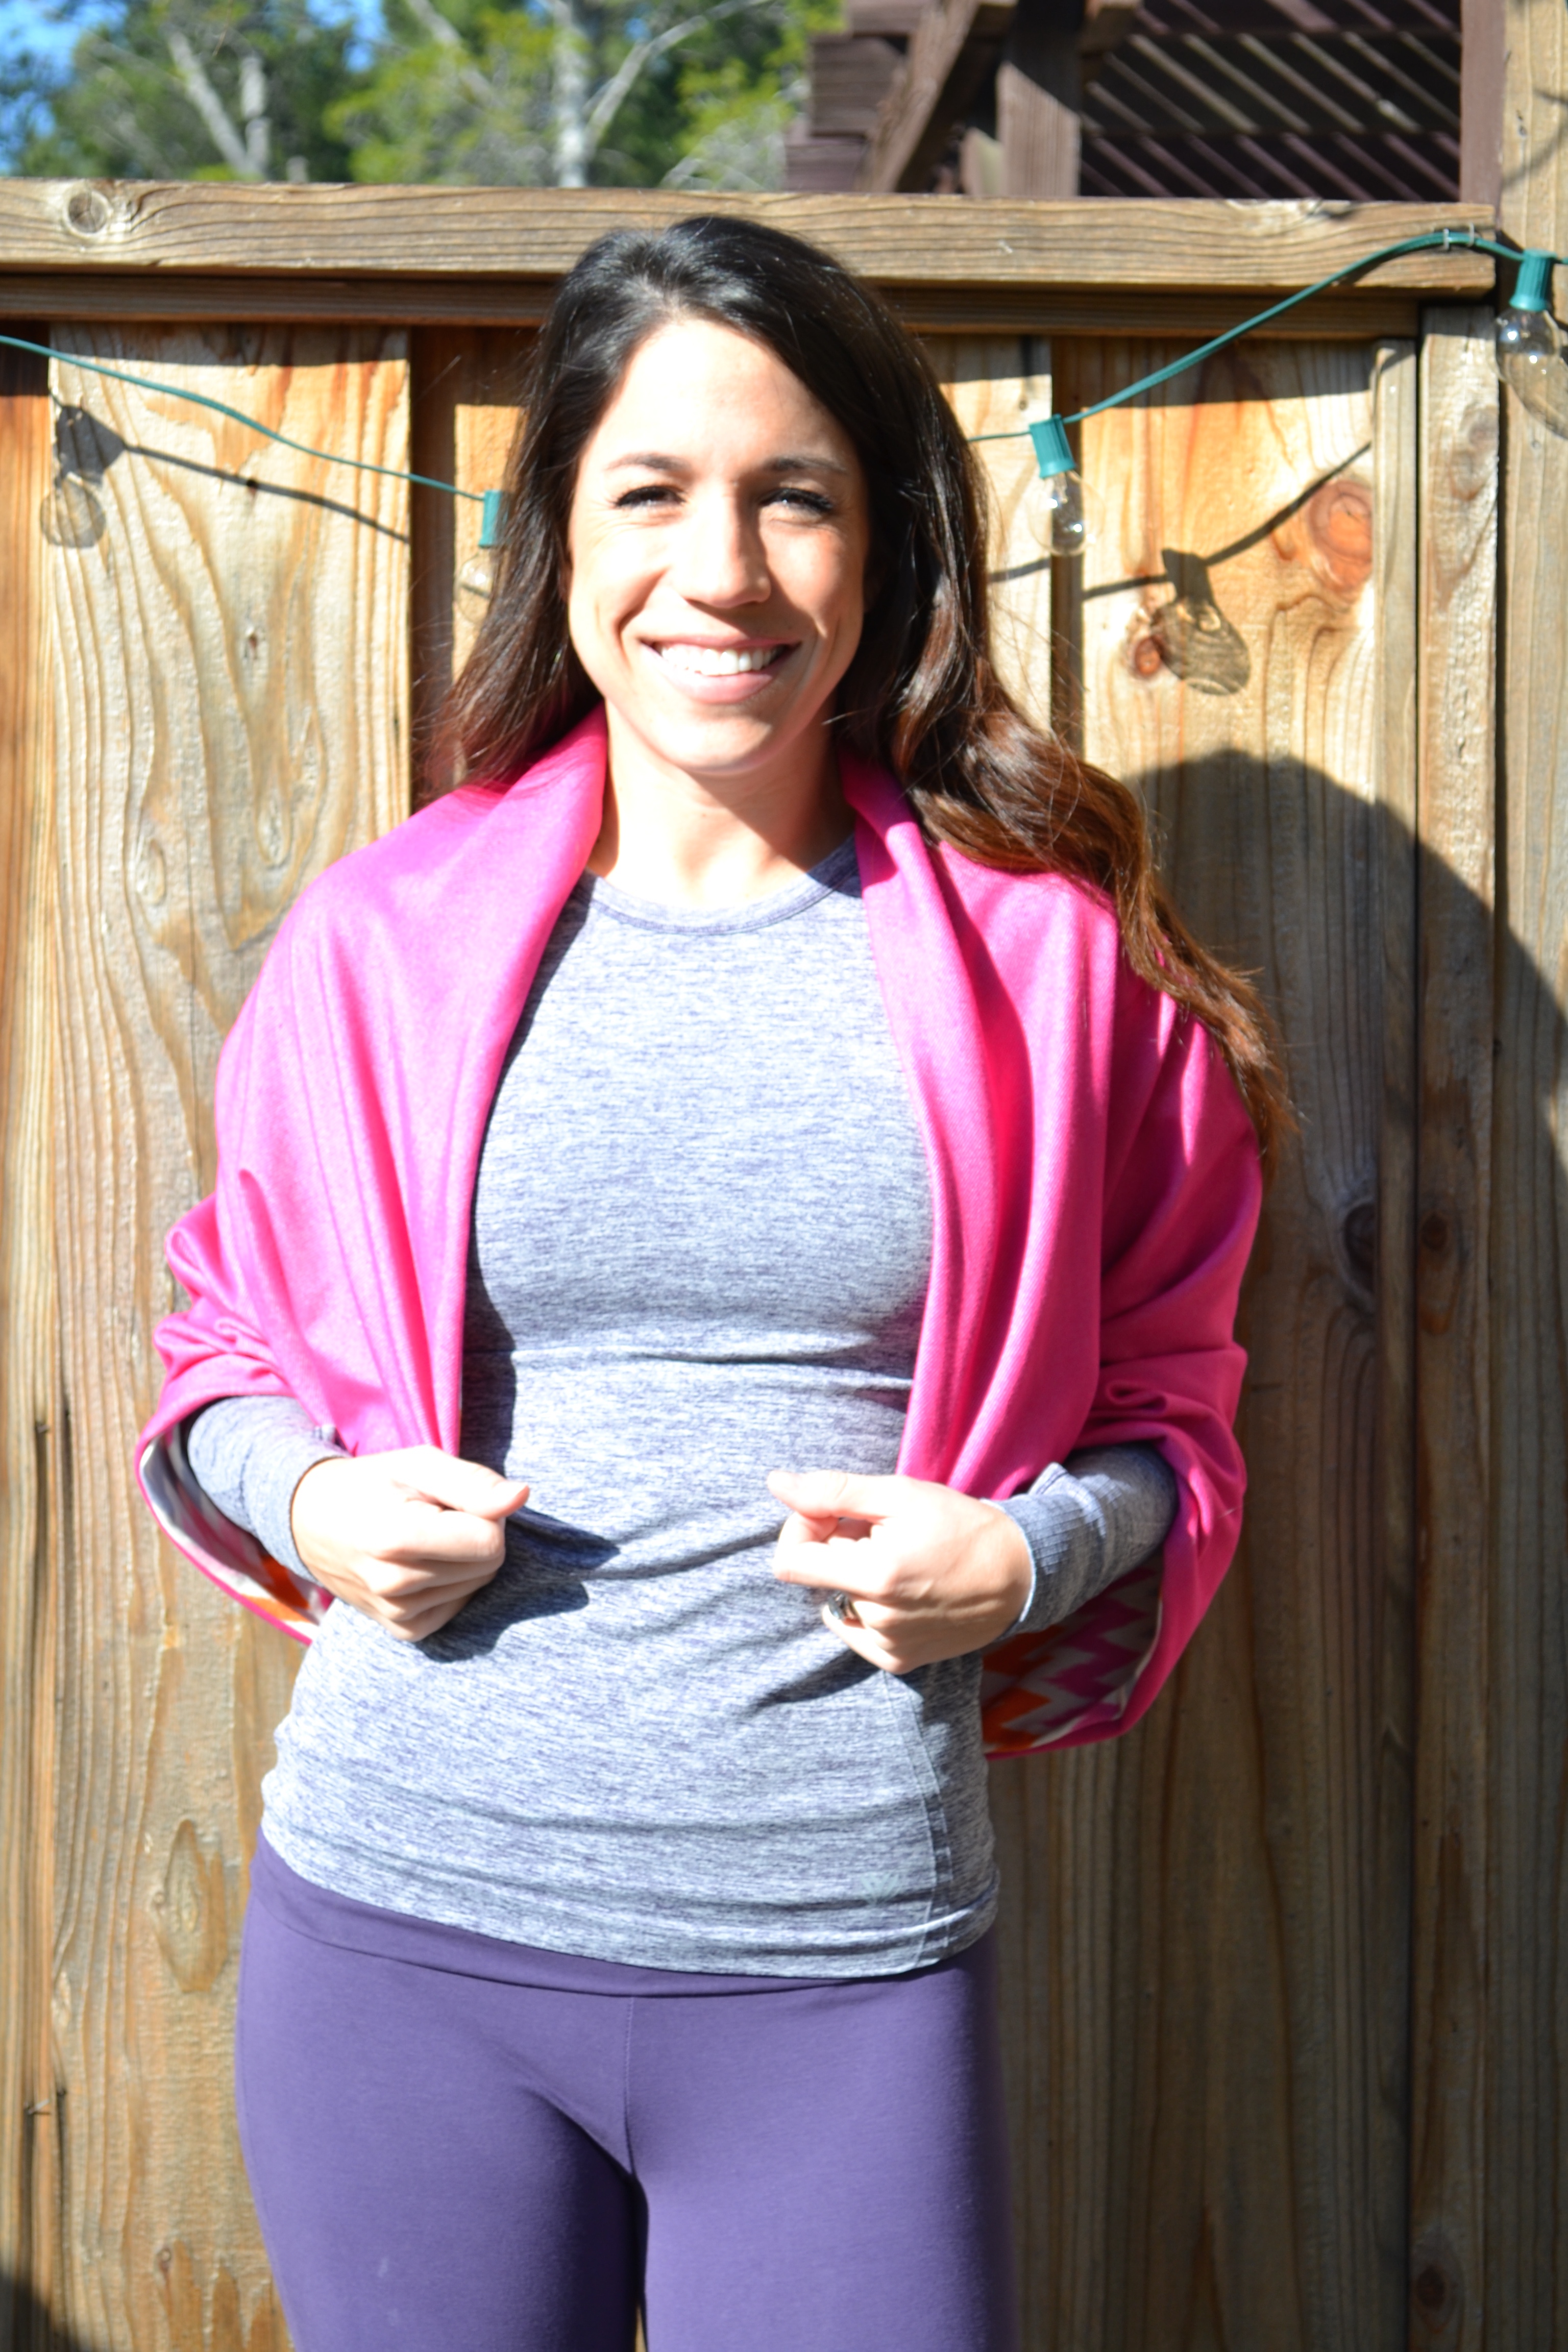
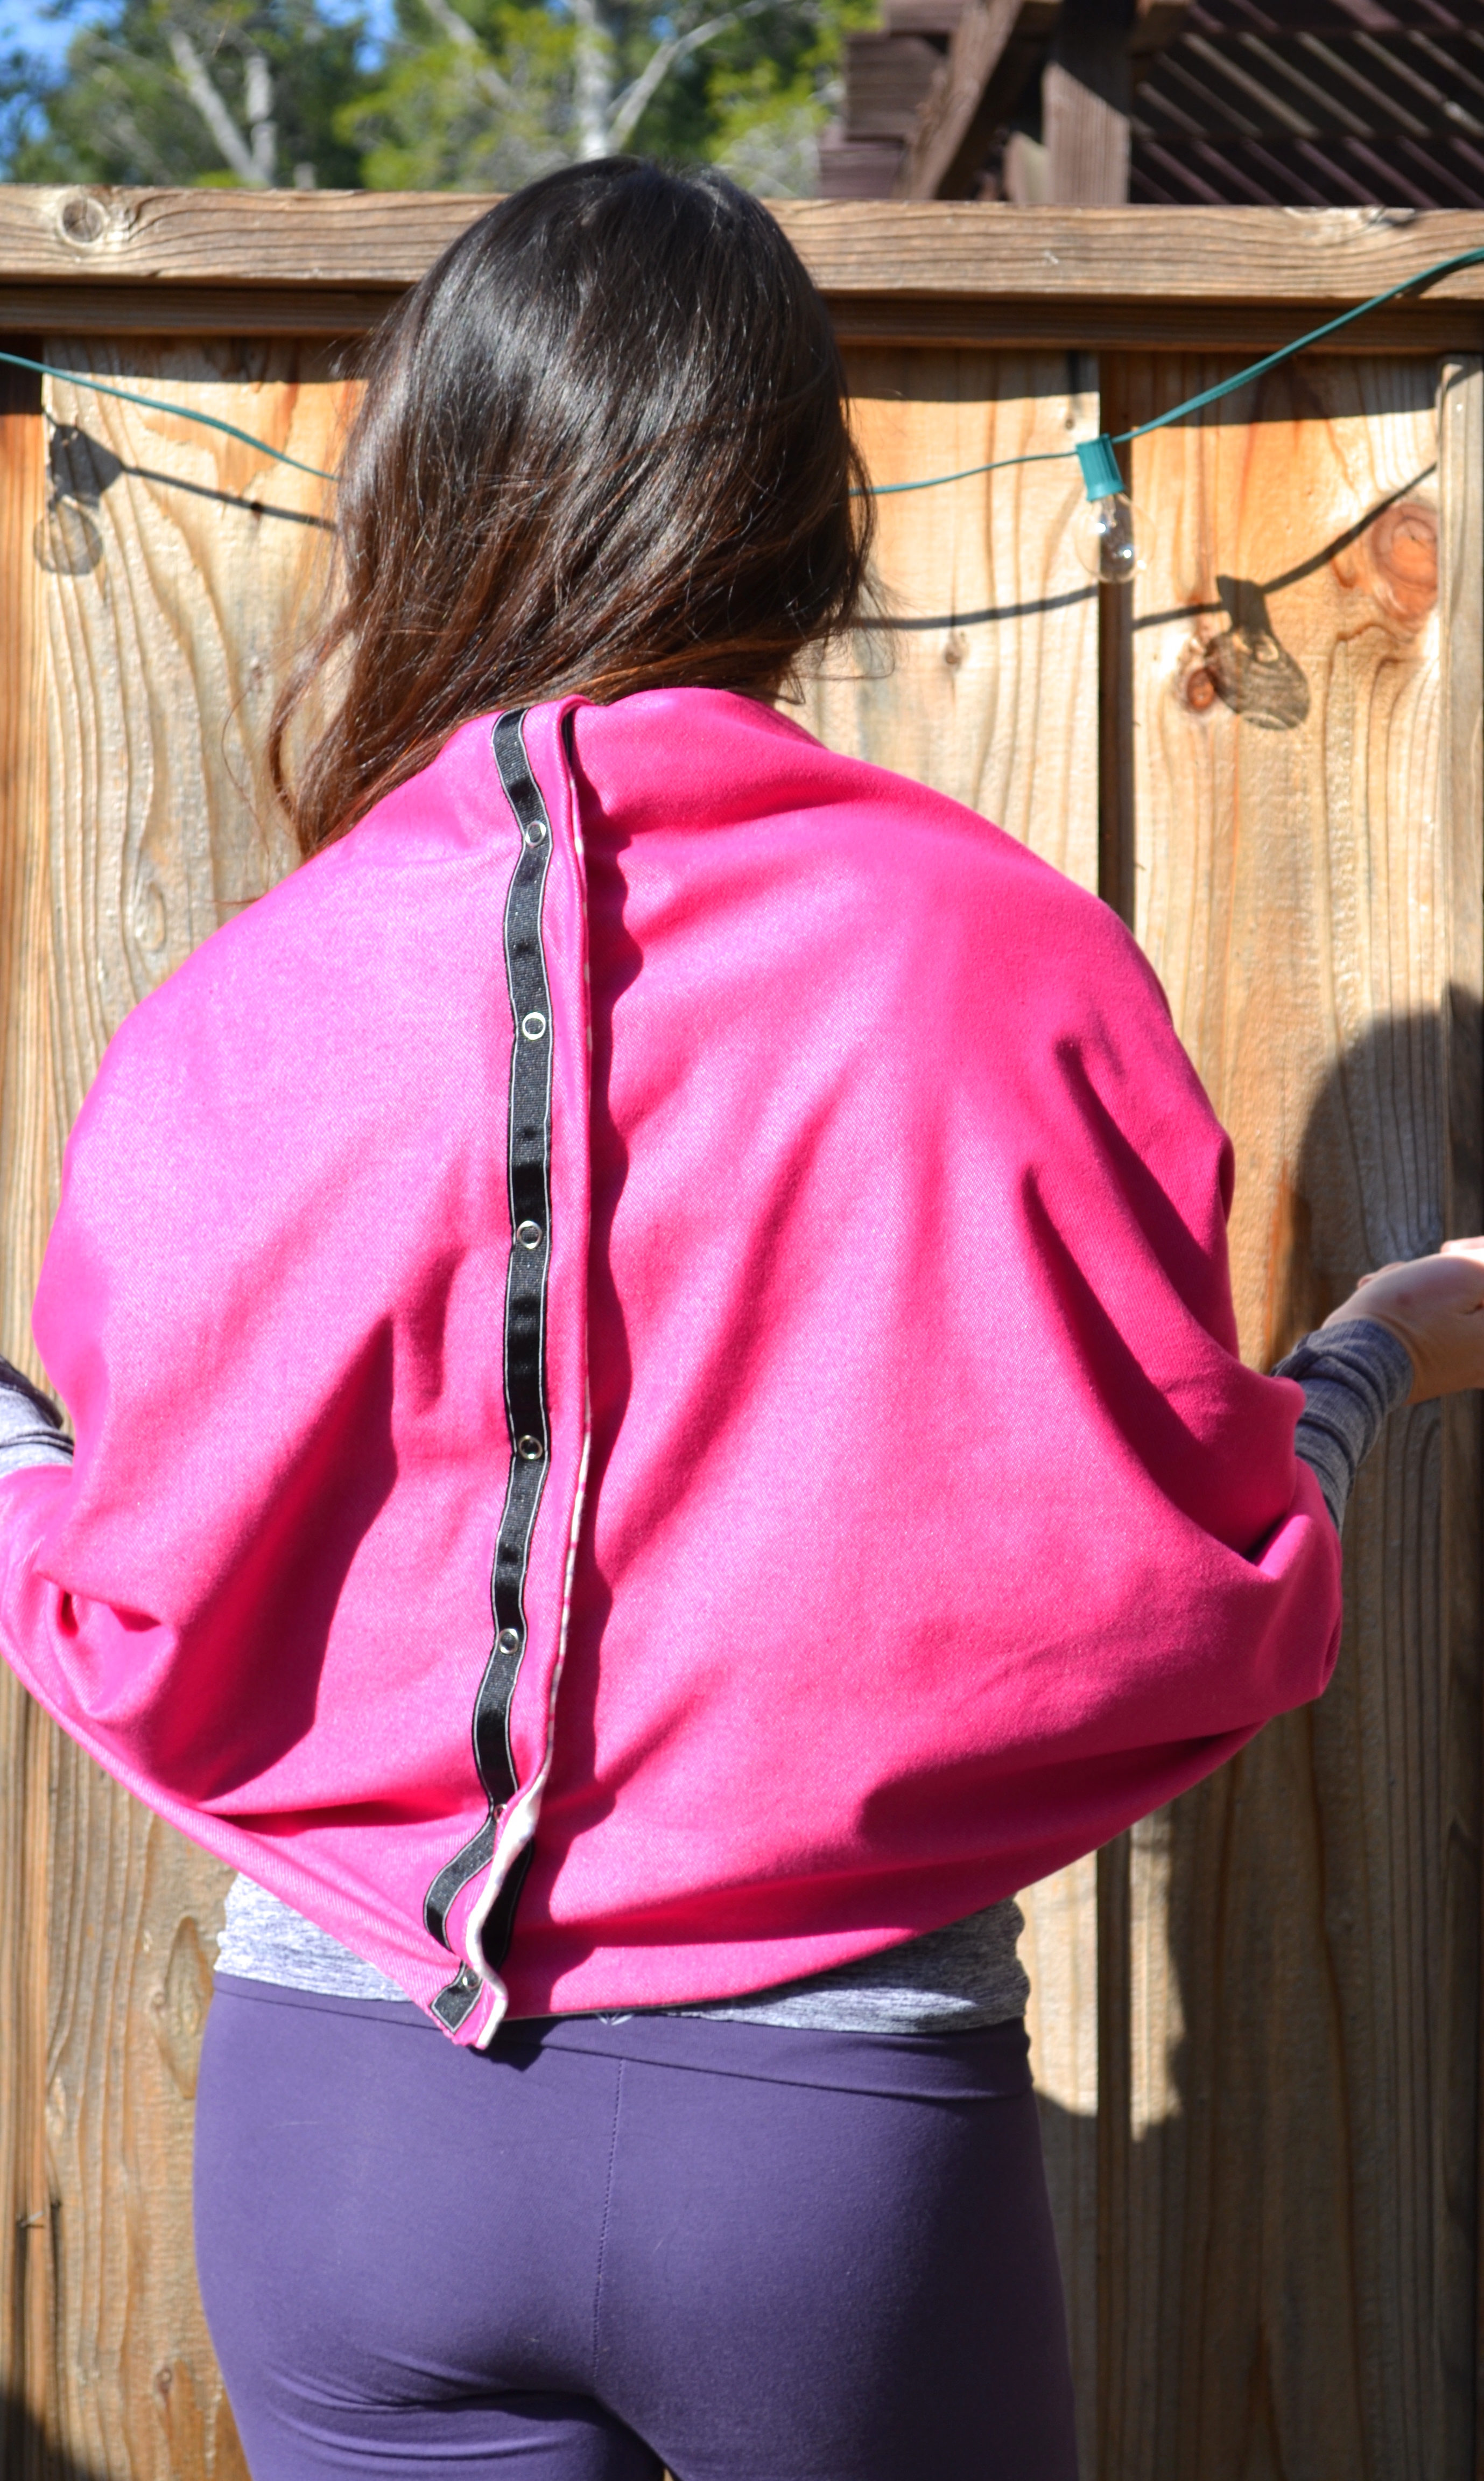
Way #6 – THE SHRUG
Keep the scarf snapped closed, and put your arm through each side, wrapping it around your back and over your shoulders.
Way #7 – THE SHIRT
Unsnap the scarf all the way. Wrap it over your shoulders and arms, and snap the first 2 snaps on the edges closest to each other in the front of your body. Then, bring edges that are not attached and bring them around your backside. Again, snap 2 snaps together around on your backside.
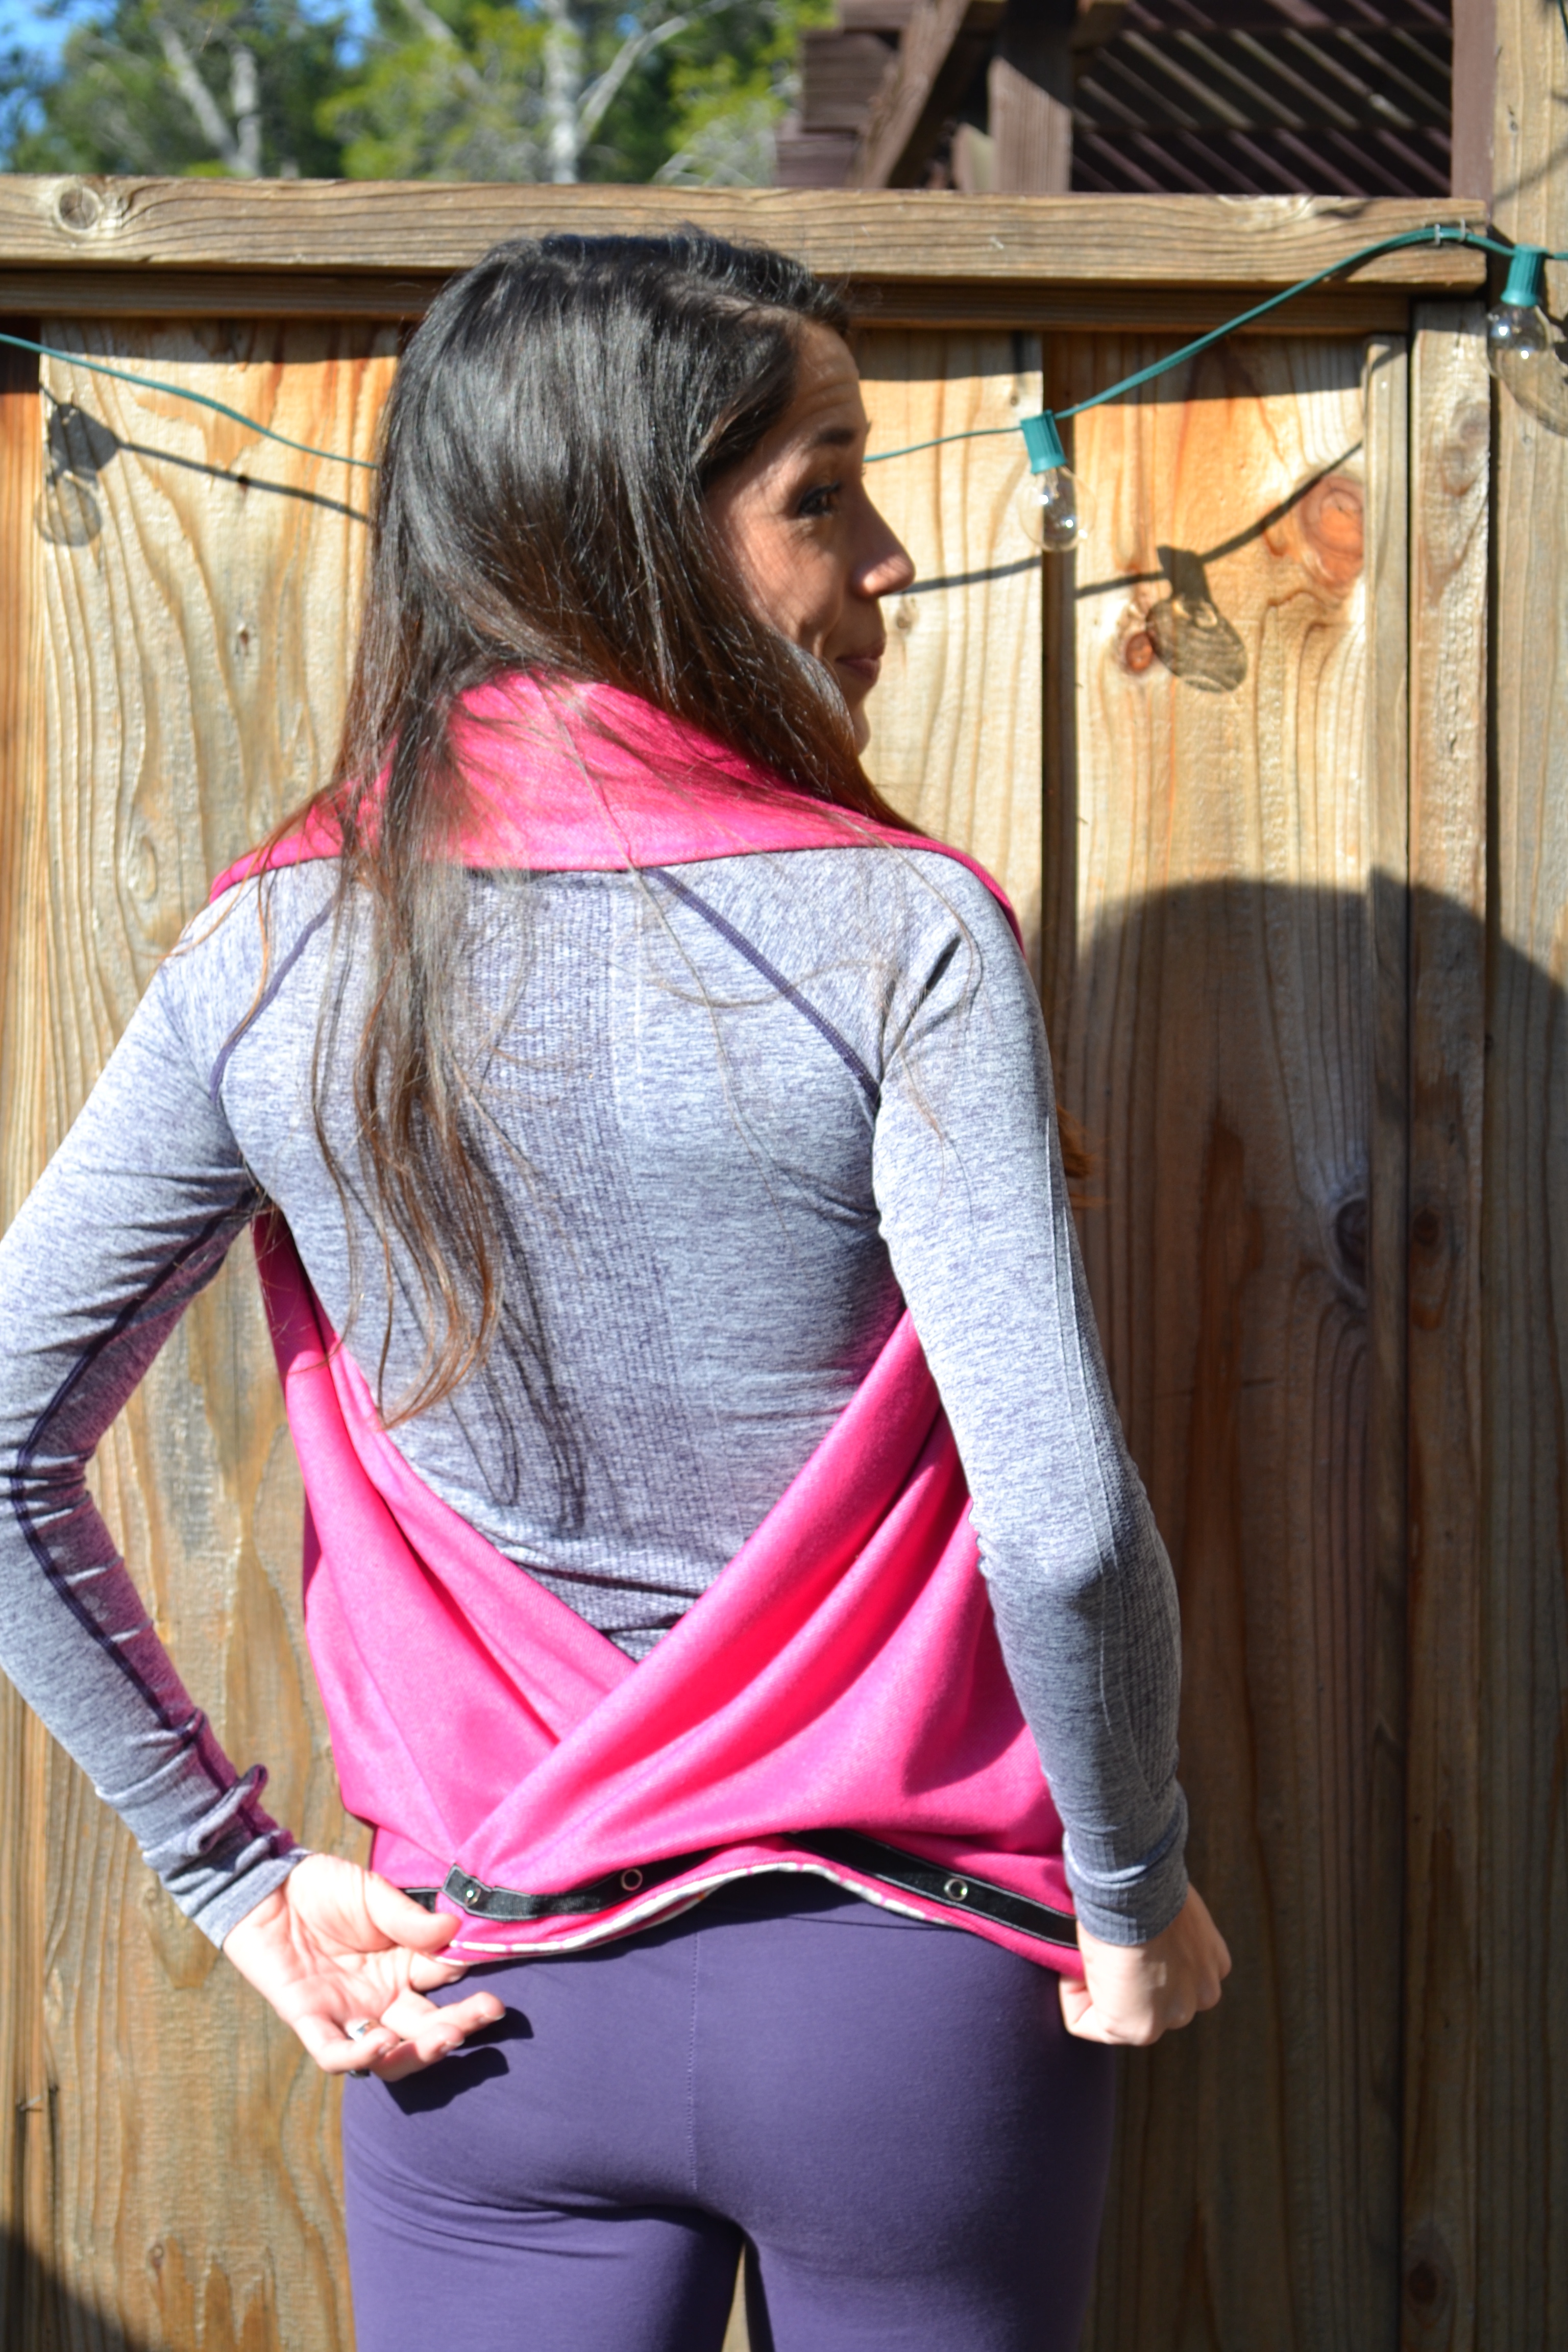
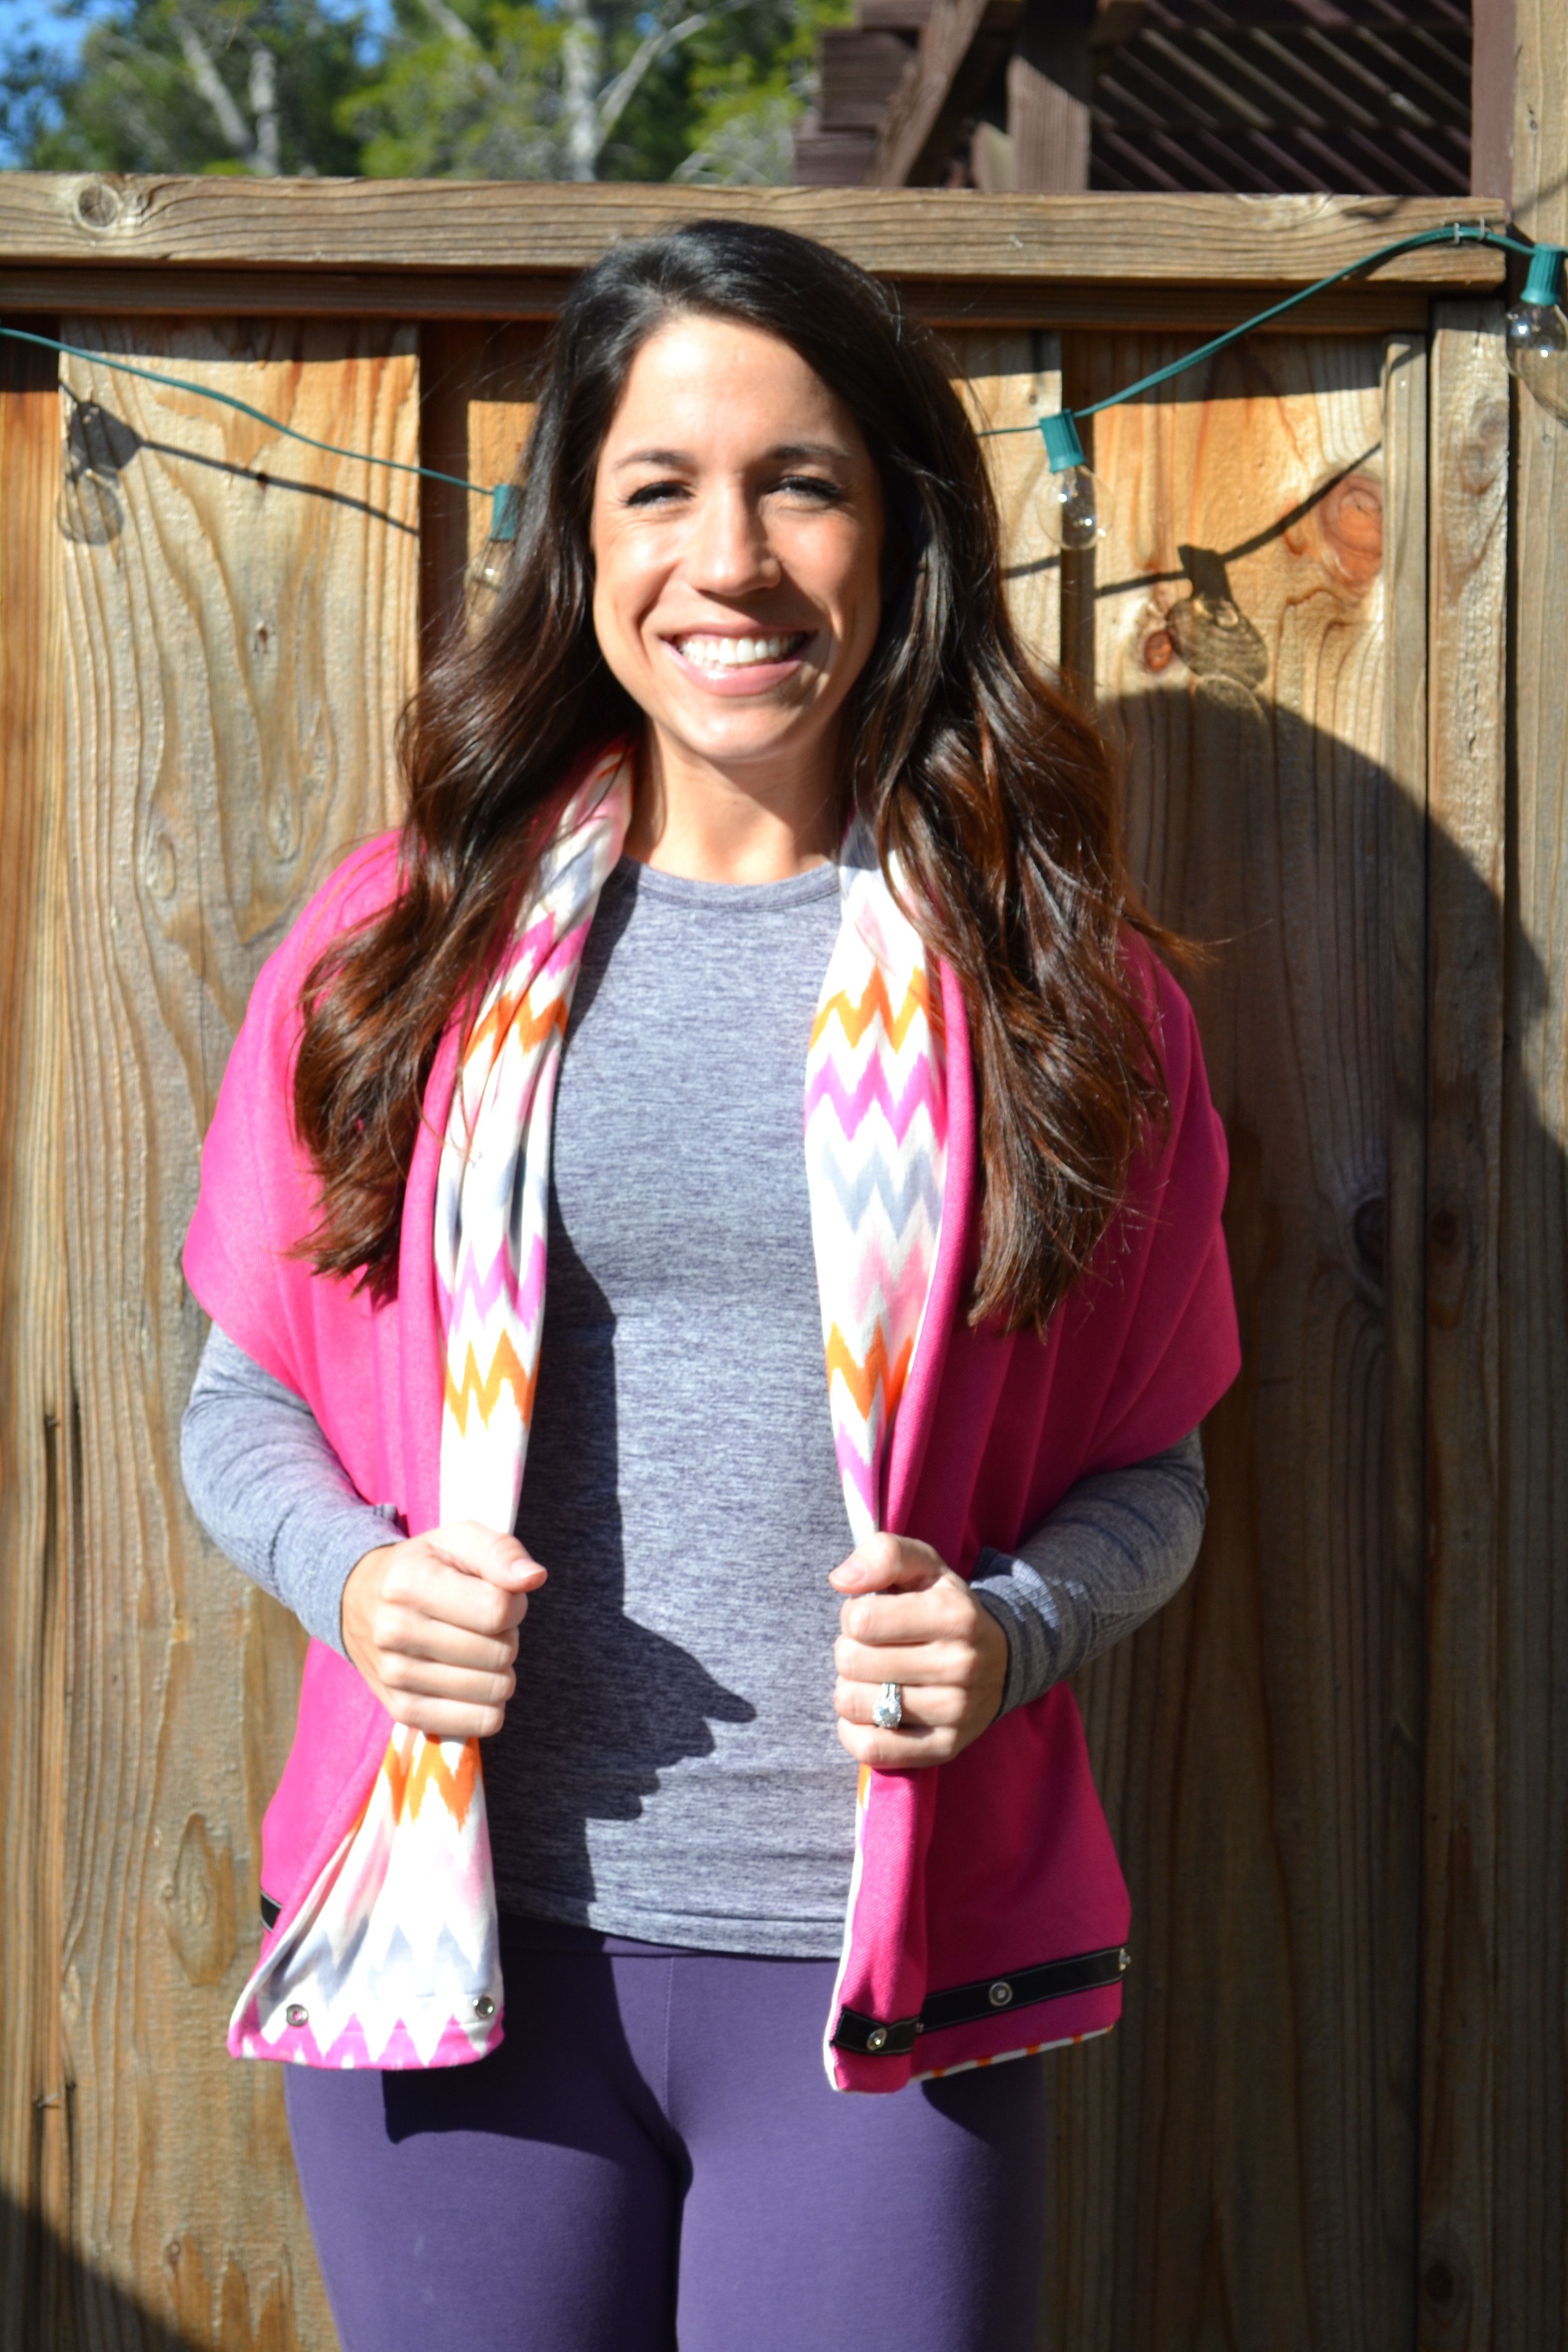
Way #8 – THE CARDIGAN
Do EVERYTHING you did for THE SHIRT, and then just unsnap the snaps in the front. Keep backside snapped, but let the front size hang, just like a cardigan.
Way #9 – THE TRAVELER
Unsnap the scarf all the way. Wrap it over your arms and shoulders. Then take the top edge of one of the ends of fabric and tuck it behind the scarf on the opposite shoulder. Do the same thing with the other edge of fabric on the other shoulder. Then, you have a nice, cute drape for those cold journeys.
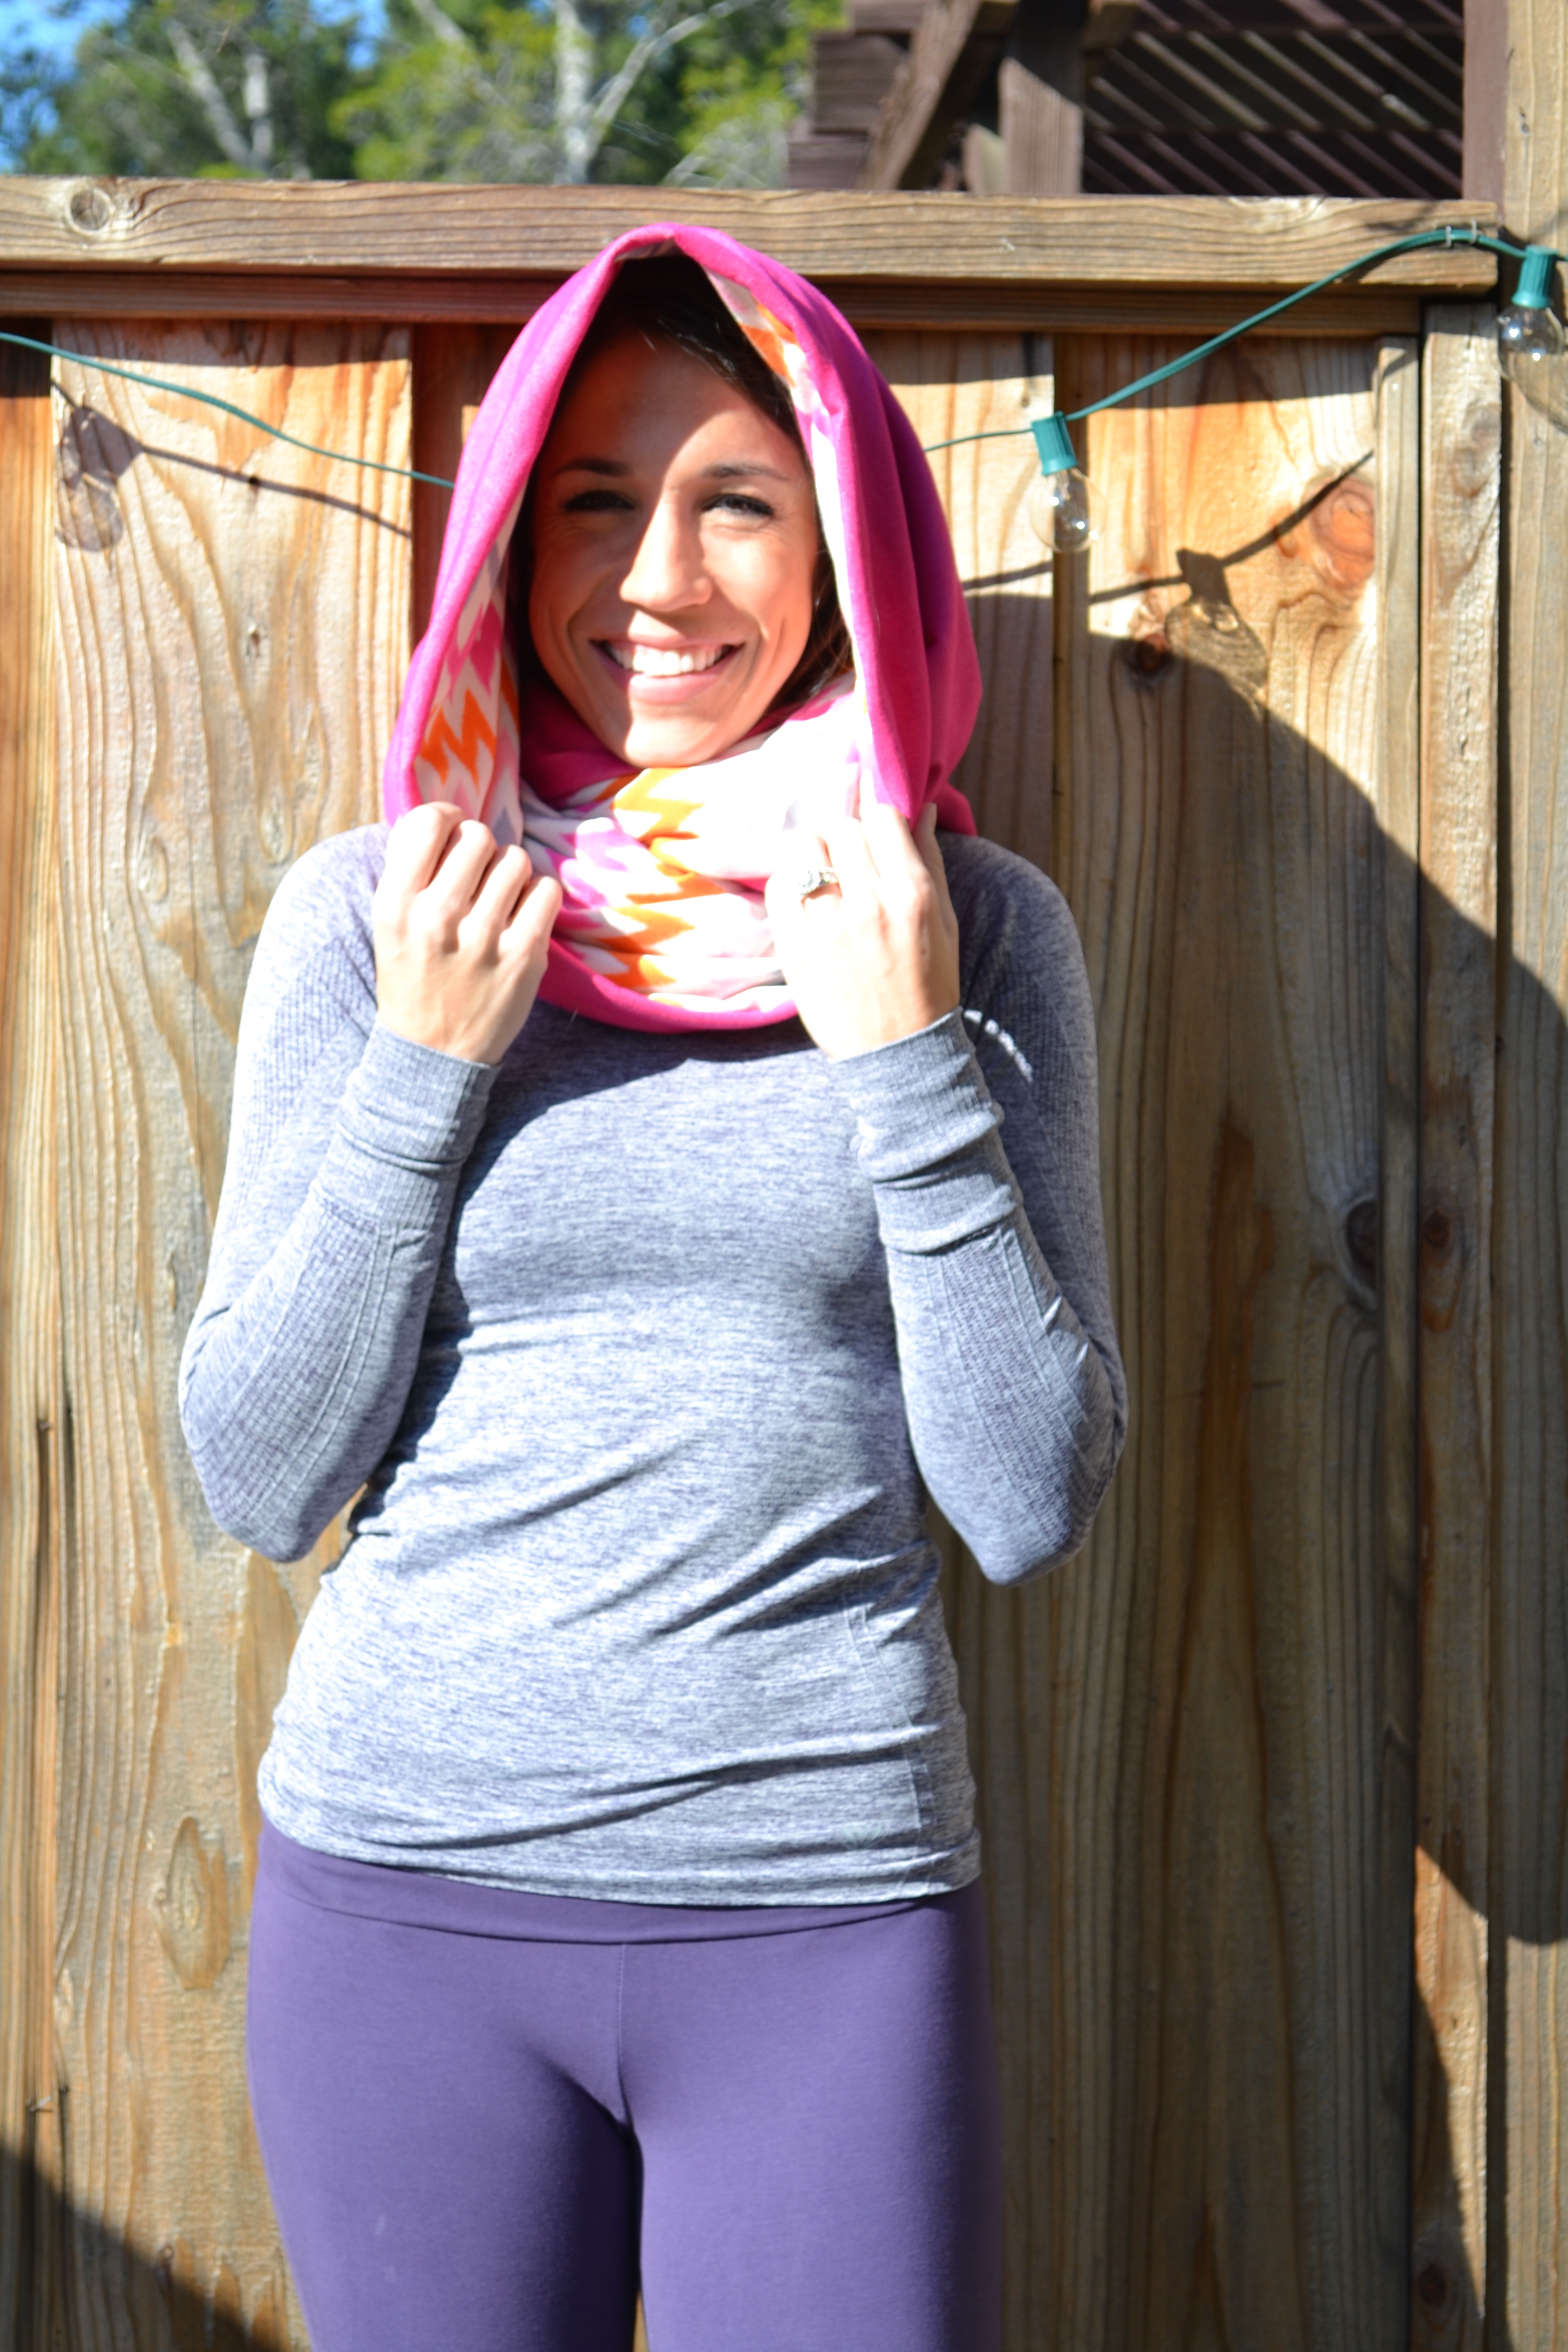
Way #10 – THE HOODIE
If your coat doesn’t have a hood, you don’t like or have an umbrella, or you just like the fashion statement, you can wrap the scarf around your neck once, then around your head for the second look. This infinity scarf can double as a scarf AND a hood, all in one 🙂
If you want to see these all in action, check it out here:
If this seems like too much work for you, but you still want this look for less, I do sell these in my shop. Just search for the “10 Way Infinity Scarf”. They are my FAVORITE things, and you still get them at a discount compared to other retailers. I’m constantly coming out with more colors, so keep checking back or make a custom request if you want something specific!
But again, if you want to do this yourself, here are all the supplies you’ll need to make your own DIY infinity scarf:
- 1 ⅔ yards of jersey knit fabric (Fabric.com has the best selection for these types of fabrics).
- 1 ⅔ yards of 2 different fabrics if you want different patterns on the front and back (this will make 2 scarves)
- If you want to make the EXACT Lululemon one, here’s Black and Black Chevron patterned fabric.
- 1 ⅔ yards of 2 different fabrics if you want different patterns on the front and back (this will make 2 scarves)
- Spool of ¾” grosgrain ribbon (color of your choice)
- No Sew snap fasteners (total of 9 – Size 16 – 7/16” prong)
- Hammer to adhere snaps
- Thread
- Sewing Machine
I had to laugh and also stopped reading your blog within the first sentence because you claimed lululemon is “see through”. Yes, there was a “sheermageddon”! But if you actually DID your research as you encouraged your readers, you would have found there was a bad batch of pants that had simply gone out. Also, as unfortunate as it is many people tend to ignore the size they should be and go for the smaller size, when in fact, the reason it might be “sheer” is because they squeeze in a size 4 instead of the size 10 that they need to wear. I’ve seen this numerous times and I actually listen to the amazing staff at lululemon when they say “mmm ya know dear, that particular pant shows your chonies, why don’t you try the next size”. Just saying. I admire you wanting to diy but do not knock a product that is actually one of the most amazing companies to work for ( google it!) but they stand by their product. ( there’s a 5 year guarantee, doll) boom
Totally had to chime in on this one! So im not sure how lulu being a great company to work for has anything to do with the quality of products…but anyways! I have to 100% agree with their vinyasa scarf definitely not being worth 48$. I just started making my own as well and I can certainly can produce way better quality scarfs than them.
And as for their pants issue…I have completely rerestrained my self from shopping there because of their lack of quality in their pants. Sure they are not completely see through any more, but the quality of the fabric is not what it used to be…at all!! I used to buy leggings from there at least once a month (6ish years back) and they are all still kickin. over the last 4ish years I have been sooo disappointed with every pair I have baught and will not waste my money on them anymore. Im sure they are a great company to work for as they treat thier ememployees very well…but just because they do one thing right doesn’t mean someone cant talk badly about a product they dont like…hands down, their leggings are garbage now. Lululemon is a huge name and yes some of their products are still very nice (cant hate on the Scooba hoody) but I guess some people care more about following the herd, rather than the quality thats they get…
Oh my goodness I couldn’t agree more! I nearly choked when I saw the price of the vinyasa scarf I had fallen in love with, but took a leap of faith and I LOVE it!!! For months now I’ve been stalking the scarves on ebay but they sell for at least as much, if not MORE! So like you, I have searched for a cheaper knockoff version (why are there none?!). I am thrilled to have found this tutorial–bought some fabric already and can’t wait for it to arrive. As for Lulu, I 150% agree. I have yoga pants that were less than $20 at Old Navy that have held up WAAAAAAAY better than my newer Lulu ones. Some of their stuff is awesome, but I think their pants are sub-par compared to others. Anyway, great tutorial, thanks so much!!!
Dalal! I am so glad to hear it! Let me know how it turns out for you. This has seriously saved me SO much money (and given me so many more color options for my scarves). Now, just trying to figure out what’s next to try and replicate…
I have never liked the results that I’ve gotten with hammered snaps and/or grommets and was thinking about making one of these with sew on snap tape. Have you tried this method? Also, do you have exact dimensions for this?
Hey Anita,
I’ve never worked with the sew on snap tape, but I’ve read other tutorials that love them – so might as well make a go at it! If you’re not happy with snaps, try hammering them on a hard surface, like outside on the concrete. And make sure you hammer them well. I find that with a few REALLY HARD hits, they stay quite well 🙂 And the dimensions are 60″ wide by 30″ long (when unsnapped and layed out flat). I usually get each fabric cut at a yard and 2/3. When folded in half, it’s PERFECT! Hope this helps 🙂
How far are the snapes from each other?
So im trying to make this but im a little confused on the size of the fabric. I have two different types of fabric, what size do I cut each piece?
Hey Lisa- So sorry for the late reply!! The size of the scarf is 60″ wide (when unsnapped and layed out flat) and 30″ long. Hope this helps!!
Great tutorial! I can’t wait to make some. 🙂
Thanks, Chanel!! Good luck – hope it turns out FAB!
I just had to chime in…I for one find so many things outrageously priced and of poor quality. I sew a lot and have had several people comment that it’s expensive to sew rather than just buy it. Obviously they are not very good shoppers at the fabric stores and they are willing to go with poor quality products. I can and have many times made great little skirts – tailored to actually fit me and fully lined for under $10.00. I shop for ready made to get ideas to make my own… I’m planning on making one of these scarves for myself…maybe this weekend…and maybe more than one…so easy. Thank you for the dimensions…saves me a trip to Lululemon!
Thank you so much for this! I am making 4 of these for Christmas presents. I’ve made 2 so far. Let me just say that I’m a complete sewing novice and with the help of a ballpoint needle and a walking foot, this was so easy! I’m excited to gift these.
Yay! I hope they all turned out wonderful for the holidays! I did the exact same thing for presents. They were a total hit 🙂 XO- K
My sister and I are headed to the fabric store in one hour (not open yet).
She left her’s on the tennis court yesterday. Before that, I had told her I would make them for her in any color she wants. Thank you for doing the hard part, and including fabric amounts and notions needed!
-Julie
YAY! Love this! Hope it turned out wonderful for her 🙂 XO- K
thanks for the tutorial. I can’t wait to try. One thing I need to ask is what “type” of jersey fabric should I be buying? I notice on fabric.com there are some with stretch, some with rayon, slub knit etc. I would like to mimic the softness feel f the vinyasa for the most part and a, not sure exactly what fabric to look for.
Hey Janet-
So as far as Jersey, just make sure it’s a knit – with a little stretch. Not TOO much or it won’t hold up like the Vinyasa (it’ll slouch more than you want it to). The kind with 20-40% stretch 2 or 4 ways is totally fine (I usually use Jersey knit with a little stretch – rayon is ok too). I haven’t used the slub, but it sounds like “slouch” to me so that’s why 😉 If you’re really worried, I’d suggest going into your local fabric store and feeling the fabrics in their jersey knit section. Find which kind you like and then go online and get it in the exact print you like! Online always has more choices, but it’s nice to see what they feel like in person, too. Hope this helps! XO-K
PLEASE tell me you are making these for sale…. your combinations are so adoarable – much cuter than what you can get at LuLu….I would love to purchase!!
Hey Alison – You’re so sweet! I do sell them online 🙂 Just click the SHOP tab in the upper right hand corner of my site and it’ll take you directly to my Etsy shop. I sell a bunch of different color combos on there. XO- K
Super cute! My local fabric store has polyester knit on sale this week. Is it ok to use this fabric ?
Thanks!
Hey Meghan! Sorry so late! Any fabric works as long as YOU like the texture. Just follow my measurements and you can make the scarf out of any material you choose 🙂 xo
What is the finished size (unsnapped)?
Thank you!
I am definitely going to try this! Thank you for the instructions 🙂 I was actually looking for instructions for DIY convertable wrap dress, when I found your blog . Any chance you have figured that out too?? 😉
I finally found an online site with the copycat of that pricey lululemon vinyasa scarf ! It doesn’t look so complicated to make but of course buyers are paying for the brand name mainly. However, I don’t have much time to do a DIY project and was looking around Amazon, eBay, and other websites that may sell a copycat of this vinyasa scarf for a more affordable price than lululemon but no such luck. I’m so glad I stumbled on your site here. Hopefully I’ll find a design I like from your etsy shop and just purchase from you.
P.S. I don’t intend to sound mean/arrogant, but you may have used the word “spendthrift” the wrong way. It means wasteful spending. I think you meant to say something like “thrifty” or money savvy.
Hi and thanks so much for the tutorial. I am a sewer who has been shopping discounted jersey knits at Joann Fabrics (not for really good fabrics but for jersey knit, it is fine). I went to an upscale fabric store when I saw your tutorial and picked up some drapey knit jersey for 2.67 per yard on the discount table! At that price, I picked up 2 yards just in case…..I will be going with snap tape for sure. Discounted sewing supply stores make this an easy choice rather than pounding in snaps and maybe being a little off when meeting the two sides. You did not mention it but the Lulumelon scarf has a little tab sewn in halfway on one side. This makes for additional tying options and it’s really easy to put into the scarf. Cut a piece of stiffer fabric 6″ by 4″. Fold on long sides 1/4 inch and another 1/4 inch. Press and stitch. Turn tab so right sides are together and sandwhich between wrong sides of the jersey halfway on the long sides of the jersey when stitching the long sides together. When you turn to right side, the tab should be showing on its right side.
BTW, I no longer buy any leggings/yoga pants preferring to make mine for under $10 from a variety of discounted jersey knits. No sheer fabrics allowed. I test the fabric by pulling it hard over my fist and seeing if it becomes sheer.
Great tutorial and a real nice thing to do. Lulumelon is waaaayyyy overpriced and considering this is a non-tailored product, it is shameful. You can’t convince me their yoga pants are any better than others for that price. Anyway, happy sewing and thanks again.
Thank you for this tutorial. I’m a novice when it comes to sewing. I attempted making two of these and kind of failed both times. I’m finding that the jersey knit fabric is very hard to to work with because the ends curl and it stretches. It was impossible to lay both pieces flat on each other, the curled ends made it a challenge to get a straight edge. The fabric under the seam stretched as it was pulled through the machine resulting in a bulky middle that won’t lay flat. Same with the ribbon. Any tips for this novice working with jersey fabric? I know this should be a super simple project…