Lately, I’ve been seeing these tassel like garlands popping up everywhere! At first I thought. “Why are these SO exciting, and why does everyone like them so much?”. It took me a good year to understand, but I’ve finally got it.
It wasn’t until I started channeling my crafty side, doing more DIY projects, and throwing a few parties did I realize that these garlands are the EASIEST way to give your party or home a pop of color and flair. If you’re looking for some easy DIY decorations for your next party, or even just for your bedroom wall, this tutorial is for you.
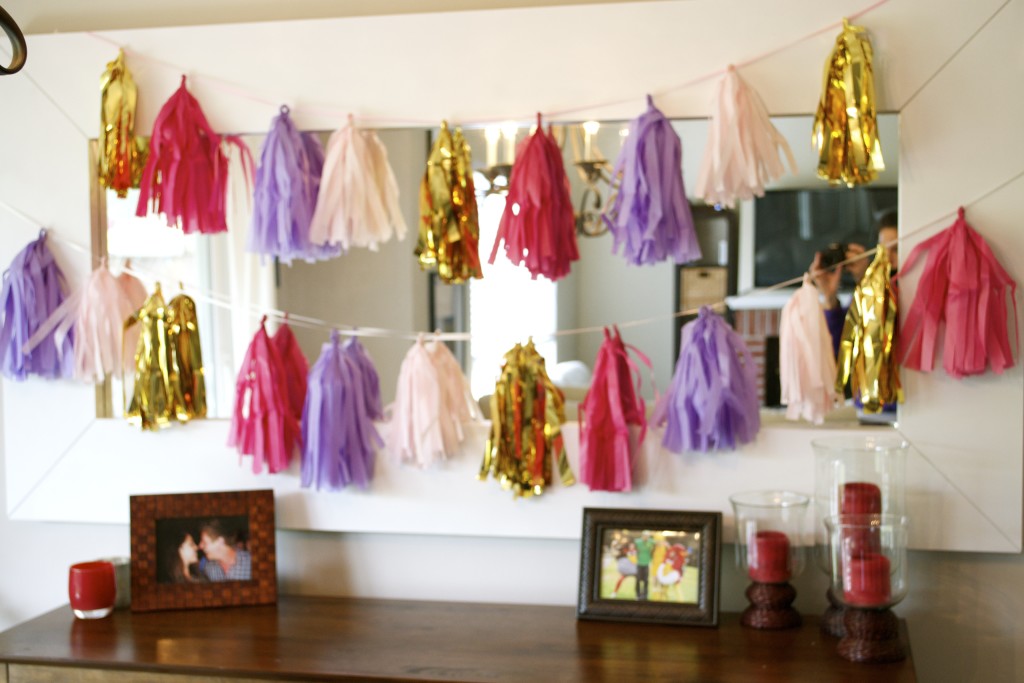
I made these simple tissue paper garlands for a baby shower I threw a couple weeks ago. I had never made a tassel garland before, or even ATTEMPTED to make one, so I was going into this project as blind as a bat.
I knew I wanted some extra color in the room, but at almost 30 years old, streamers were a bit tacky (and oh so ‘90s). I had already made my 3-D heart garlands, and a custom sparkle banner, but I wanted a bit more without having to do a ton of work. I really wanted to play up the color and fun of the Valentine theme, so I needed something a bit whimsical.
Then, these tassel garlands popped back in my mind. Perfect! Tissue paper is relatively inexpensive, and I already had the ribbon from the sparkle banner I made. These would go perfectly with the decor and the theme.
I quickly ran to Target to get some tissue paper from their gift wrap aisle. Unfortunately, it was $5 for a pack of 20 sheets. I thought that was a little pricey, and being the bargain hunter that I am, I passed on purchasing and went straight home and onto Amazon.
Bingo! I found the exact colors I needed, in larger bulk, for the same price ($5 for 100 sheets). Although I probably wouldn’t go through 100 sheets of tissue paper, it was the principle of the thing. I was paying the same for MORE, and surely I could use the excess tissue for my next party or gift I needed to wrap.
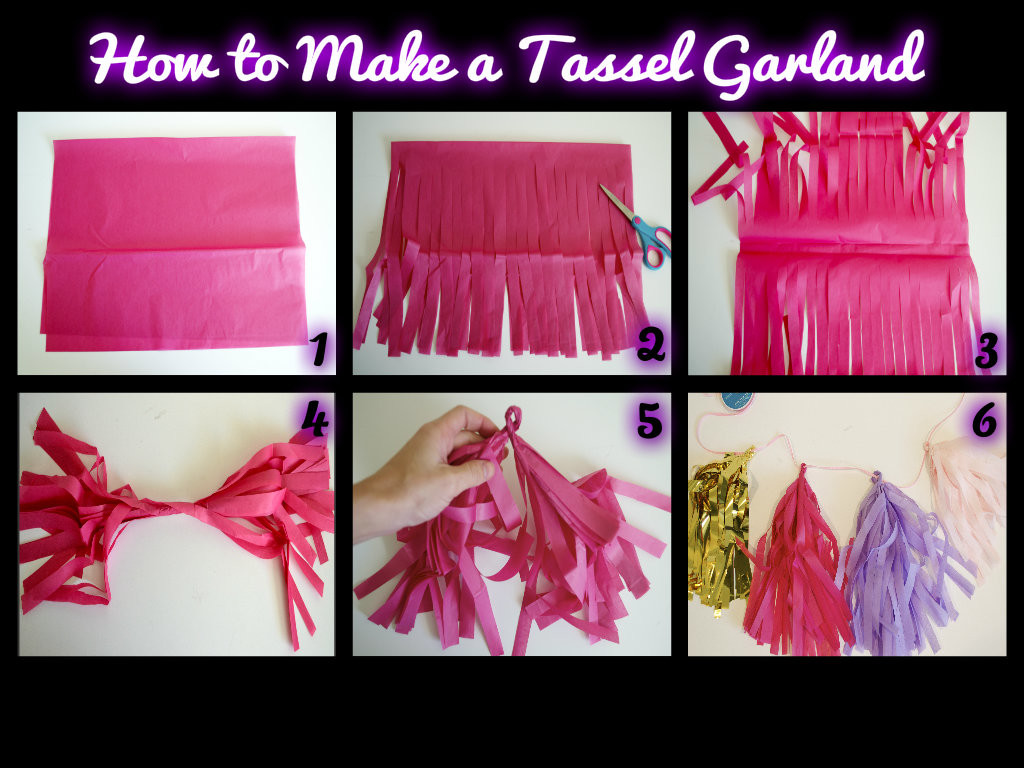
When the tissue arrived 2 days later (thank you, Amazon Prime), I quickly got to work. Below are the steps I took to make my garland. They are VERY easy to follow.
Steps to Make a Tassel Garland
The Necessary Tools:
- 4 colors of tissue paper. I used:
- Scissors
- Thin ⅛” Ribbon
- Hot Glue and Glue Gun
Step 1:
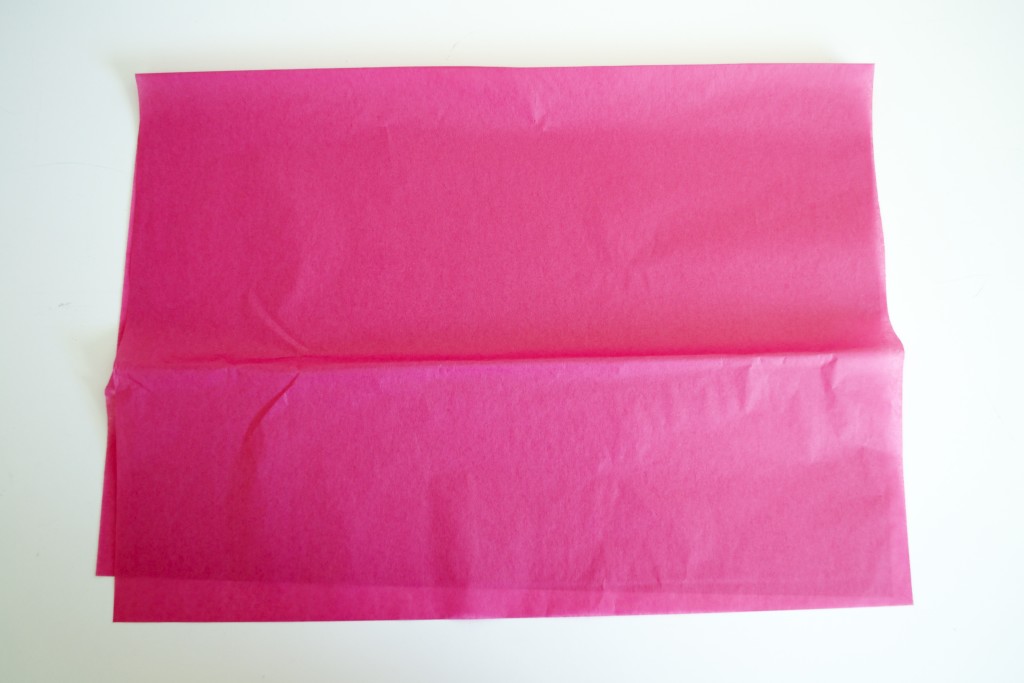
- Take 1 piece of tissue paper and fold it in half.
Step 2:
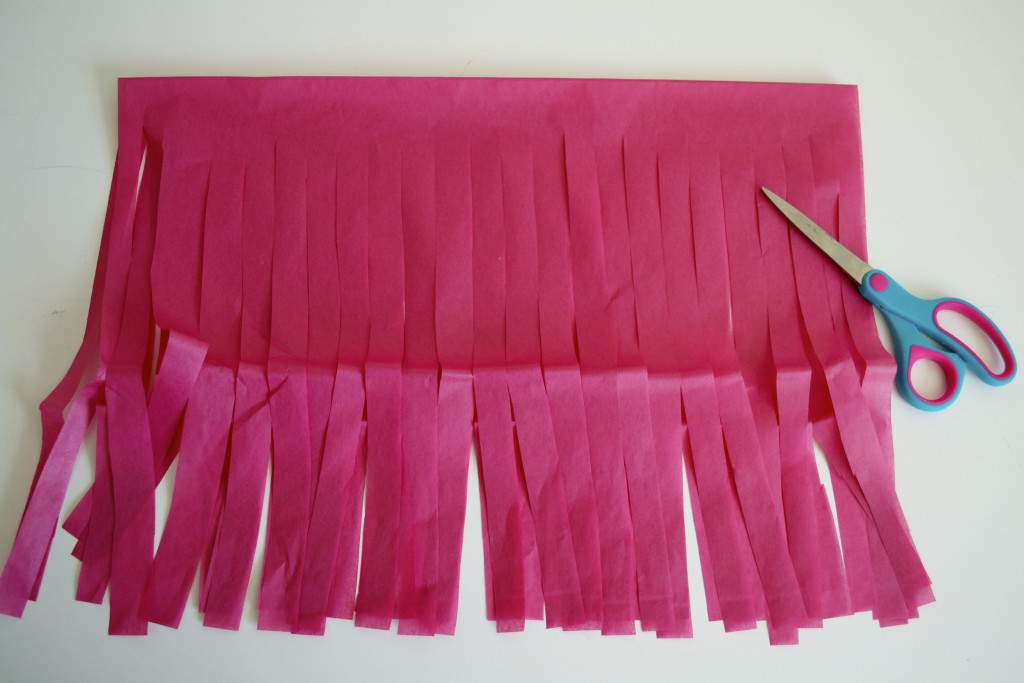
- Take your scissors and cut the tissue into ½” strips, starting away from the fold and cutting up towards the fold.
- Stop cutting at the top, leaving about 1.5” uncut at the fold.
Step 3:
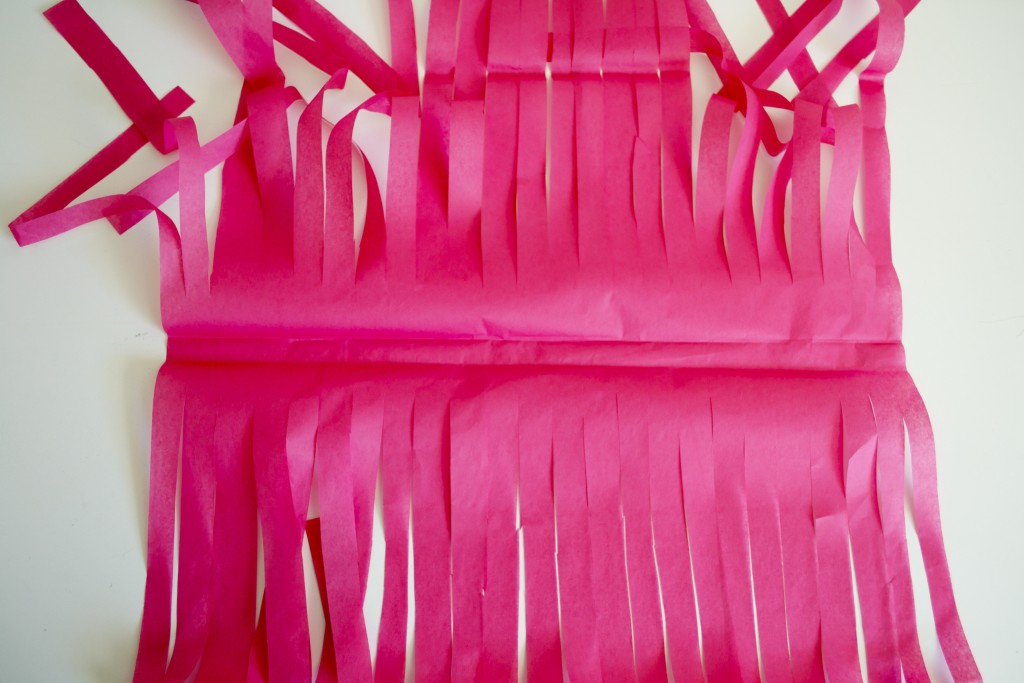
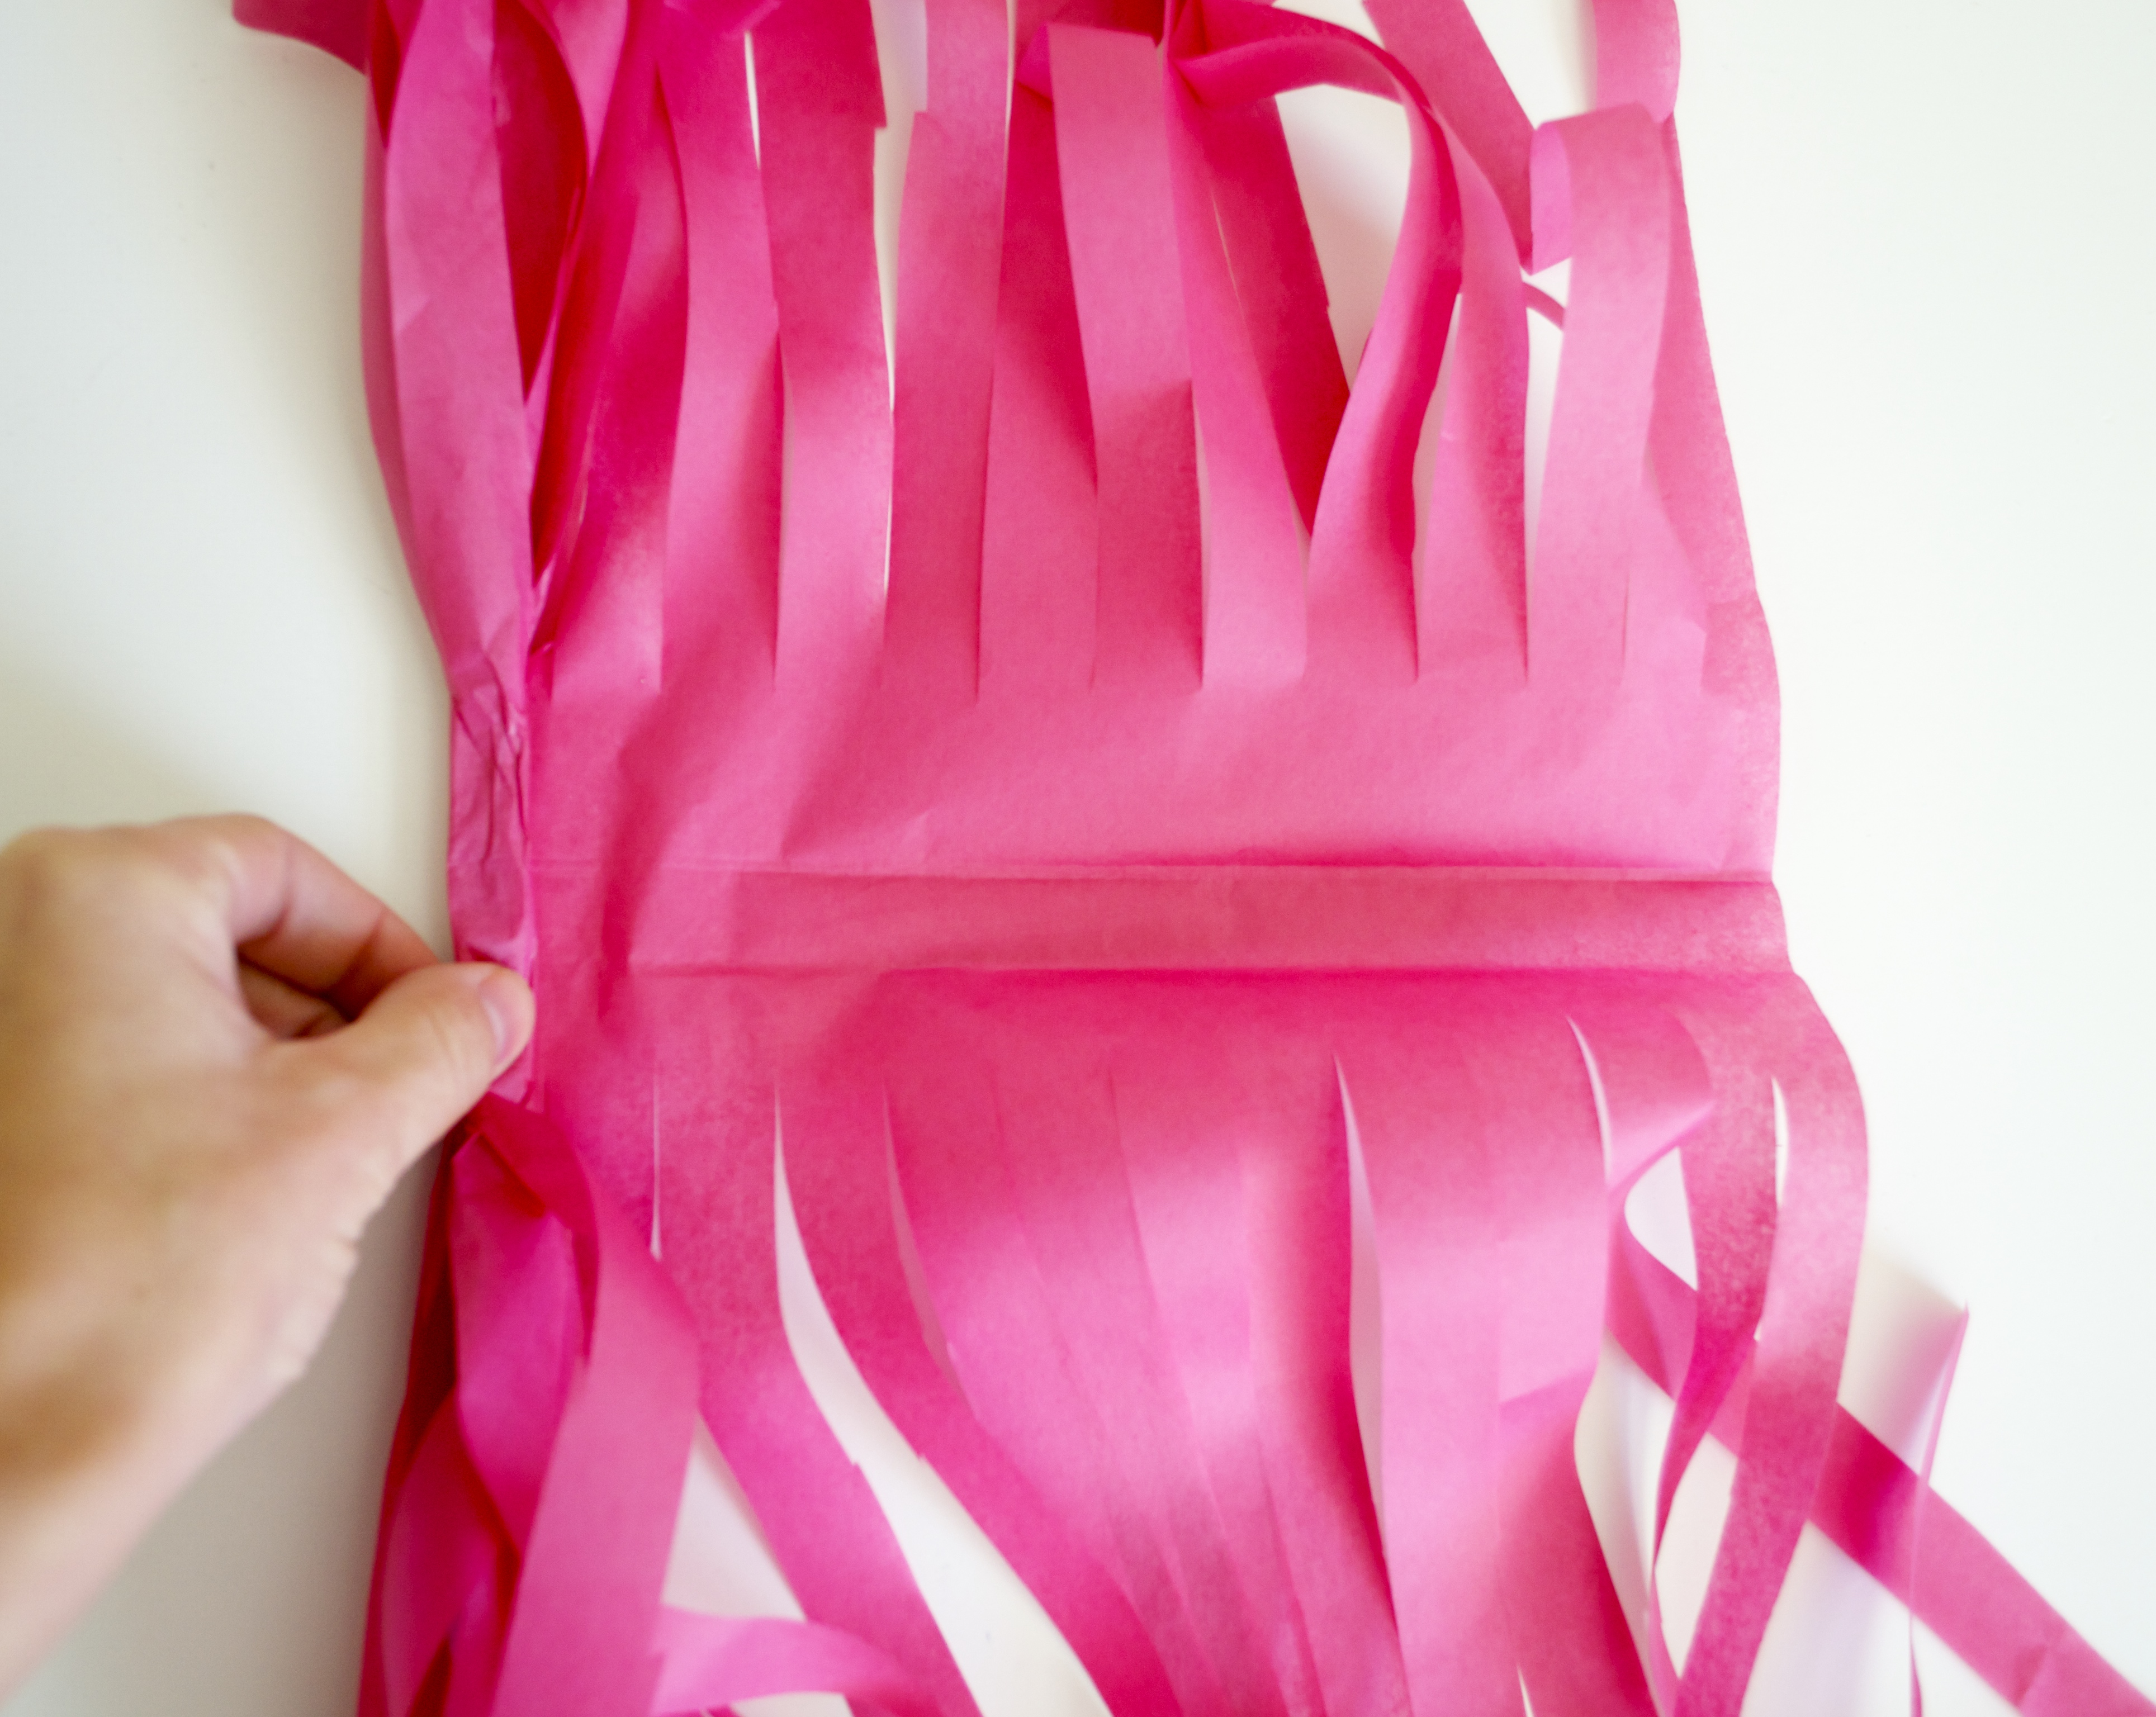
- Unfold your tissue paper.
- Start rolling the paper (like a burrito) from one end to the other, while still unfolded.
Step 4:
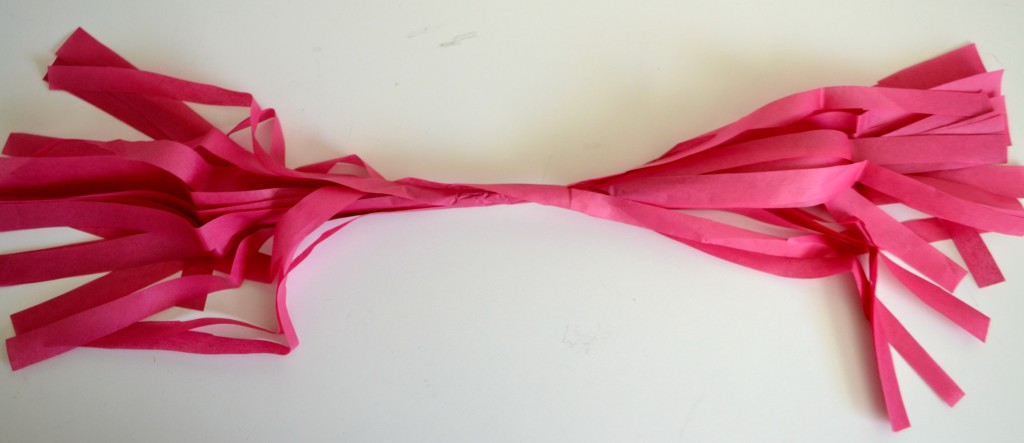
- Twist the center of the tissue (the part that had not been cut).
Step 5:
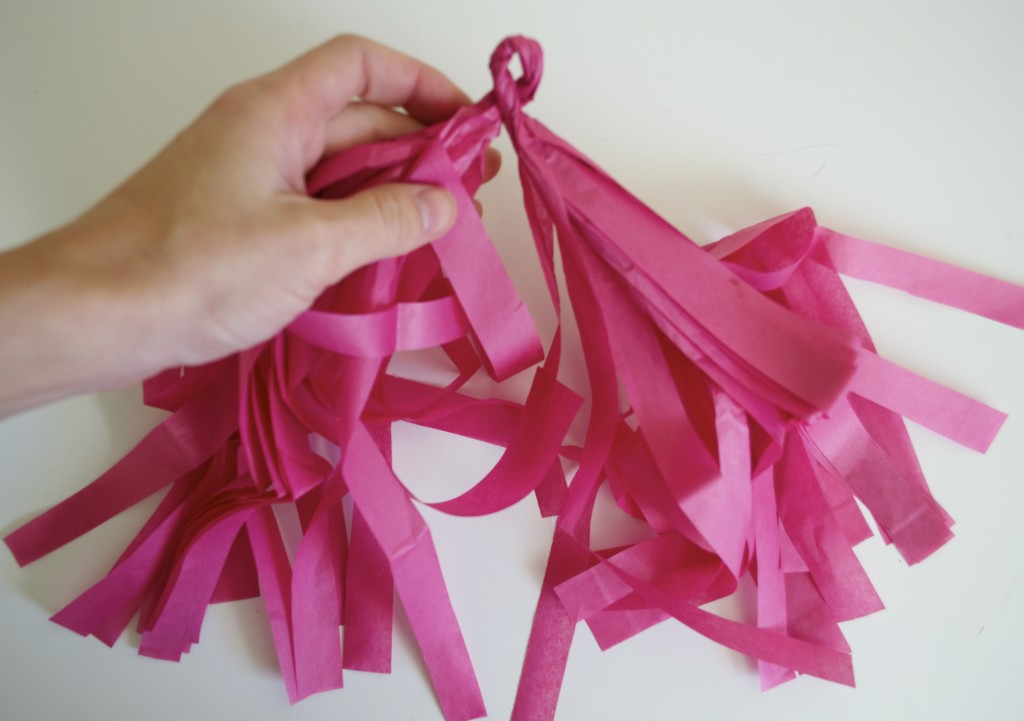

- Make the twisted part of the tissue into a loop, by twisting it around itself like a twist tie.
- When using metallic tissue paper, the paper doesn’t easily twist. If you want to ensure your paper tassels will hold in a loop (and stay) place a dot of hot glue in between the two sections at the base of the loop, to ensure the tassel won’t unravel.
Step 6:
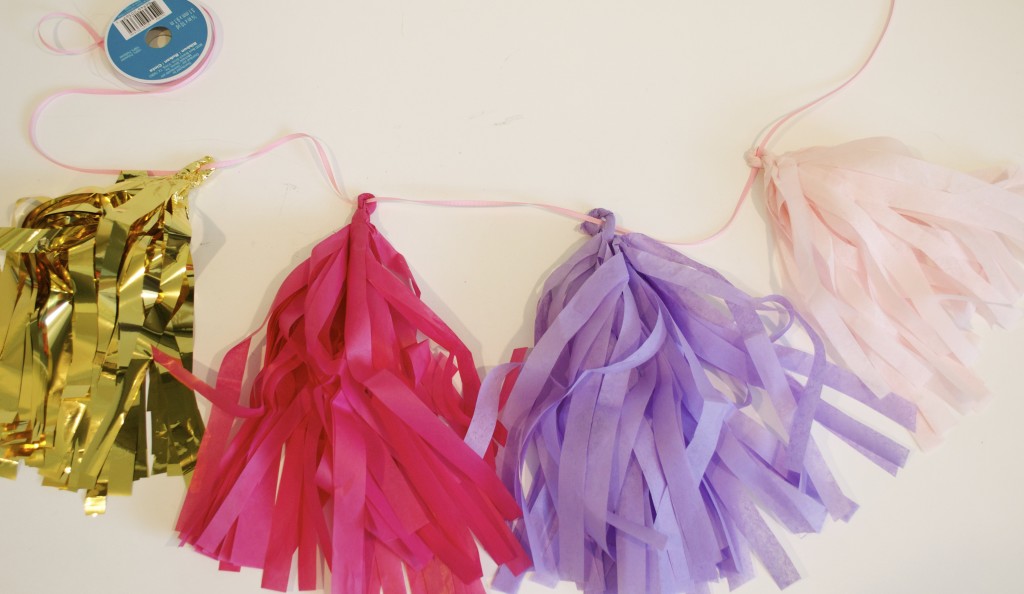
- Put your tassels on your ribbon, 1 by 1, to make your garland.
Easy enough, right?
Options for Your Tassel Garland
I paired by garland with my custom sparkly banner to make a backdrop for my drink/dessert table. It went perfectly with the decor, and gave the dessert table a fun touch.
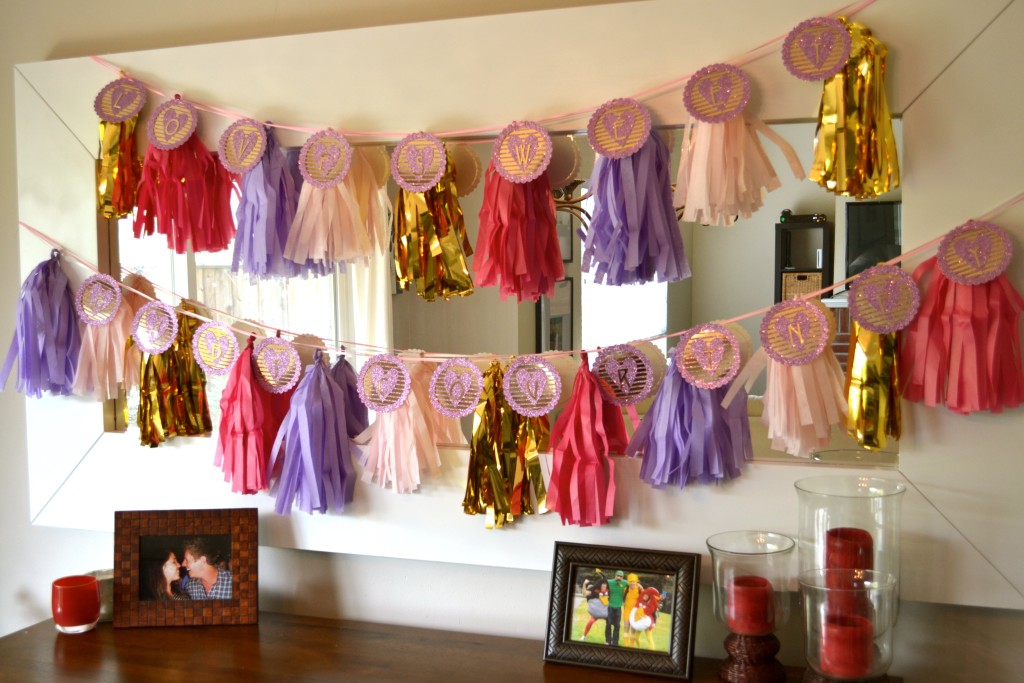
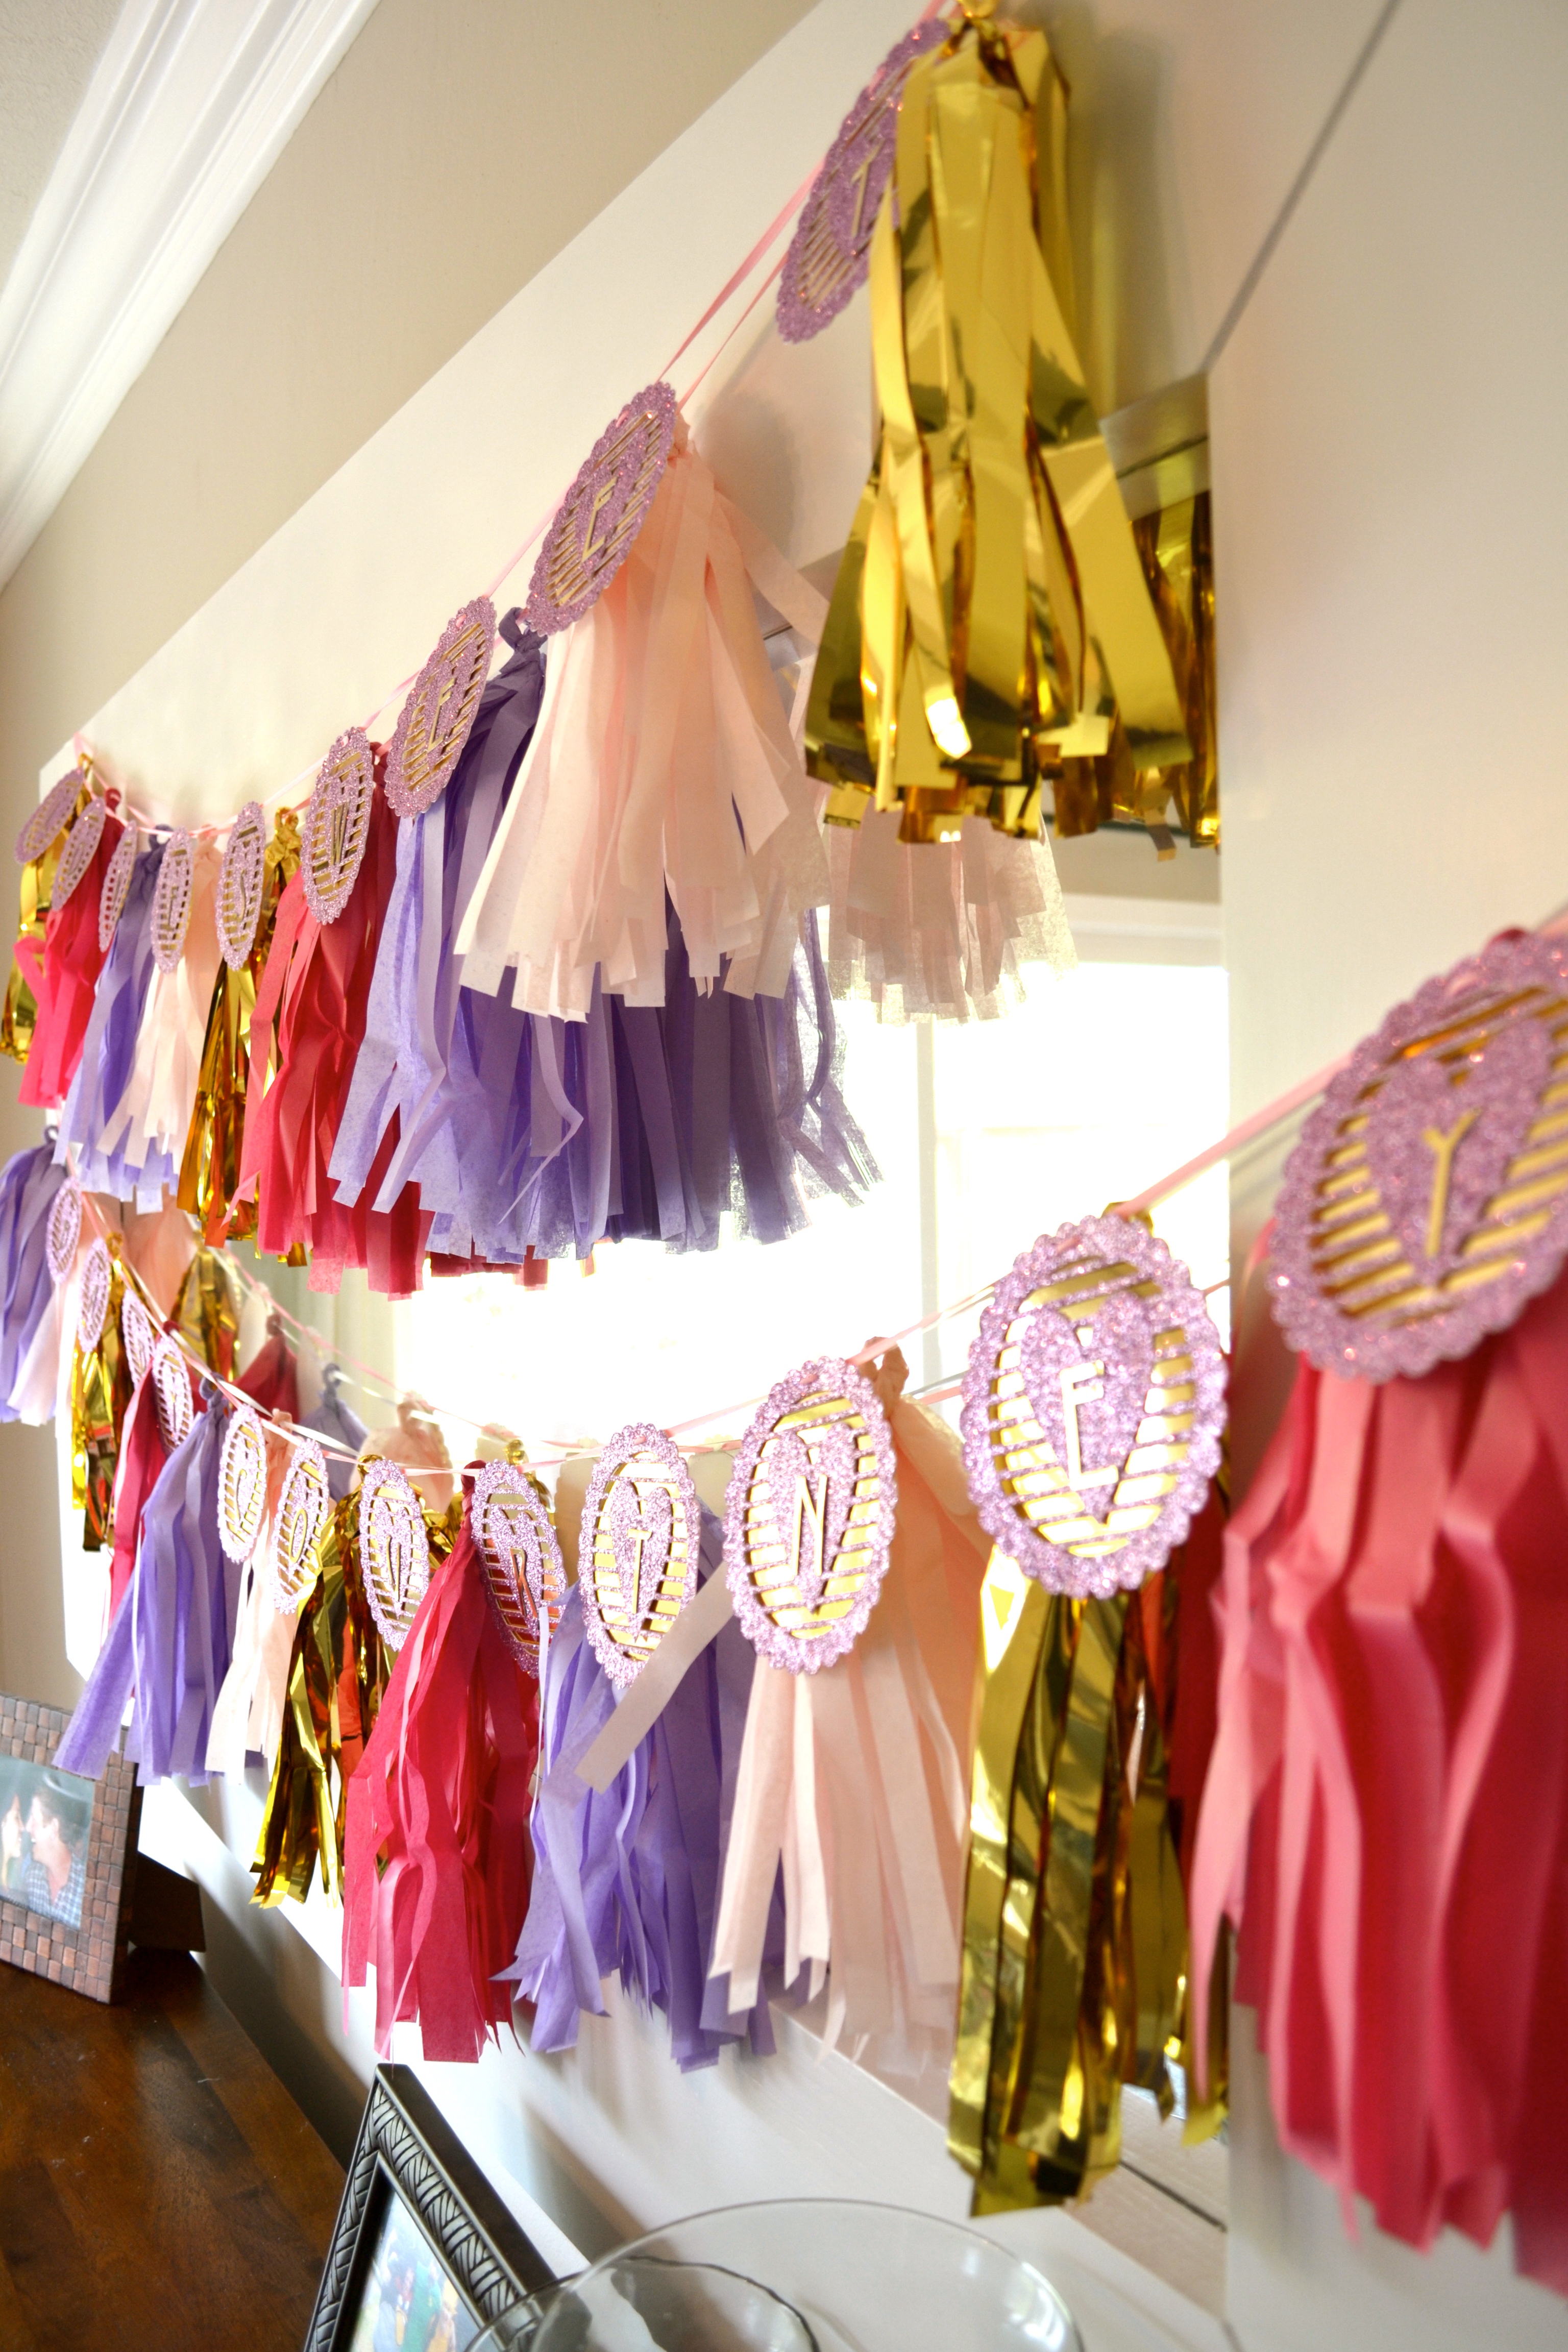
But this can be used for so many things! Customize the colors according to the event you’re throwing. Drape it over a mantle or above a door for extra color during the holidays.
You can also use fabric instead of tissue paper to make a more sturdy version of the tassel garland. These require a BIT more glue (and possibly a stitch or two with some needle and thread) to hold together, but they last MUCH longer. And they can be used as permanent decor for your house. Have a little girl’s room you’re redoing? Or a space above your headboard you have no idea what to do with? Now that I’ve shown you how to make a tassel garland, you can run wild with it. They make a great decoration for any space.
Hopefully, you find this a simple and easy tutorial on how to make your own tassel garlands. If you’re now inspired to make one of these for your next event, here are the supplies you’ll need to DIY:
- 4 colors of tissue paper. I used:
- Scissors
- Thin ⅛” Ribbon
- Hot Glue and Glue Gun
Happy crafting!
Just attempted this and it looks great! Thanks for the photos and easy instructions. Love the idea of fabric too