Ah, headbands! I’m semi-obsessed. As you can tell from all my wedding pictures and my tutorial on flower crowns, I’m kind of obsessed with all things that go around my head. And although the flower crown phenomenon just popped up in the last year or two, the headband craze has been around for decades.
I mean, who doesn’t have a cool picture of themselves back in the day with a sweet headband and a side ponytail? I know I do – ah, the memories!
But back in the 80’s and 90’s, if you weren’t working out, you were wearing a headband that looked like you were about to go on a run or had just gone to the gym. Extremely unflattering. And although some celebrities (with professional stylists, mind you) had figured out how to make larger headbands to make the grubby look appear somewhat chic – your average joe (ie: ME) just looked disheveled. See the evidence:
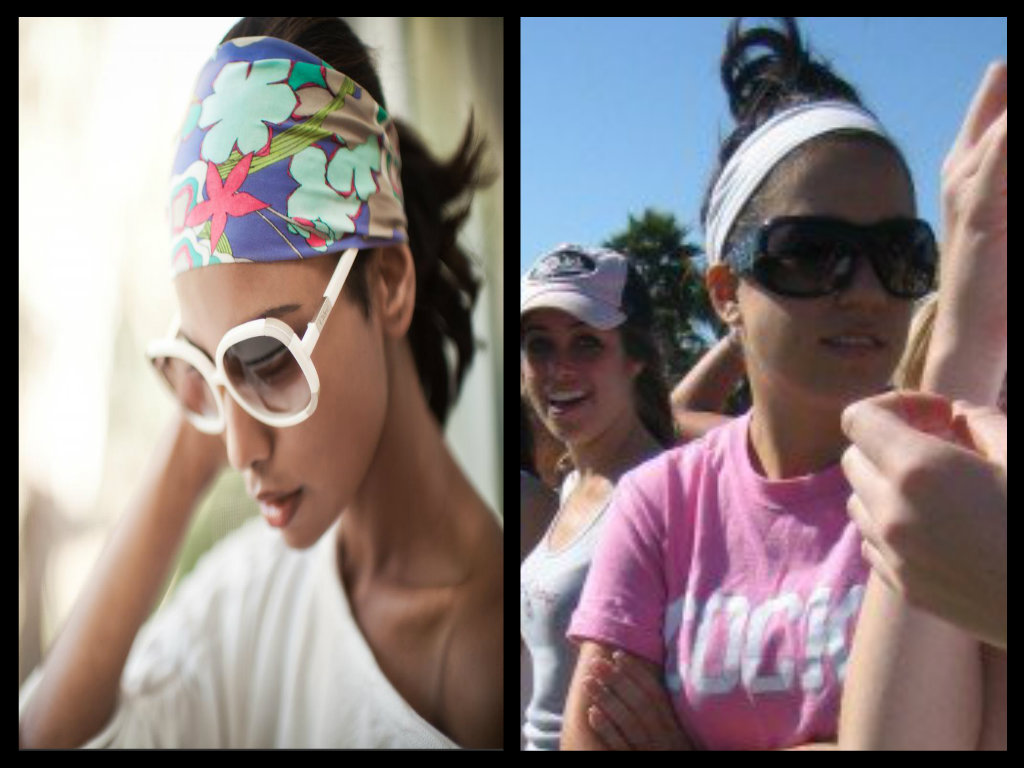
Yep, pretty embarrassing, huh? Yet, this never dis-swayed me from throwing my hair into a messy bun, and keeping it off my face with a plain headband. Up until about a year and a half ago, I would wear the same headbands to the gym, as I would wear out shopping. And I’m sure you do too – whether you’ll admit to it or not… I KNOW WHO YOU ARE! Just put your face into the picture of me above and come to the realization that, frankly, we’re all kind of a little gross for doing it.
I don’t consider myself to be a mess, whatsoever! In fact, I’d say I clean up pretty nicely. But let’s face it, a headband wasn’t doing me any favors. I LOVED them, but I needed to figure out a different way to wear them. Yet, still make them easy to throw on. Just a cuter, cleaner version.
My Twisted Headband Inspiration
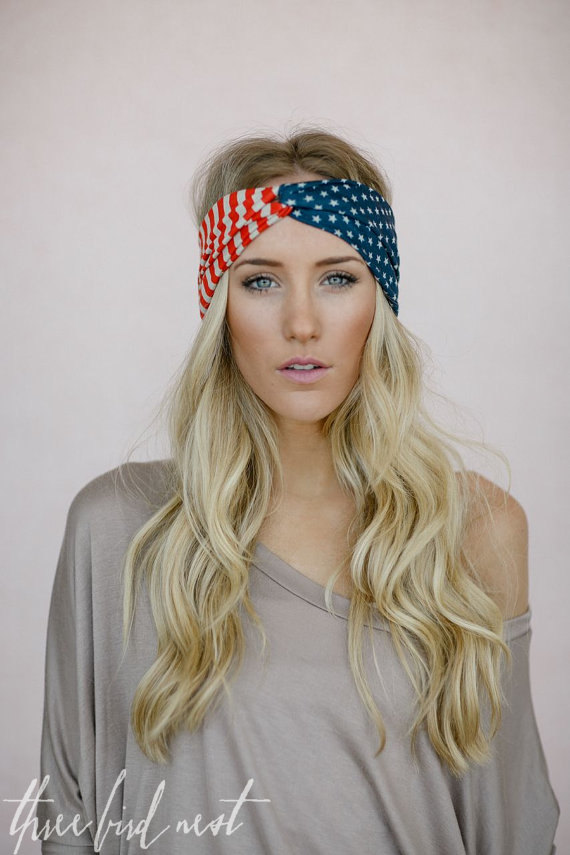
Well, about 2 years ago, I found the cutest twisted headband at Forever 21 (yes, I still shop there. Please don’t judge). Anyway it was like my normal gym headbands. Stretchy and light. Yet, it was twisted in the middle of the headband, which made it thinner at the twist, and much thicker on the sides. The twist added a whole new dimension to the headband that I would have never gotten from a normal gym sweat band.
A couple months after buying my new twisty headband, I began to see them popping up everywhere! But while mine was a cheap knockoff from Forever 21, others I were seeing were thicker and brighter. And women were wearing them really cool ways. Not just like a normal headband, but almost like a turban, too. They were functional when needed, yet stylish when functionality wasn’t the main purpose. Genius! If I tried to wear a gym headband like a turban, I would just look like Olivia Newton John in her “Let’s Get Physical” video. Geez!
Now, while these were adorable, I was aghast when looking at how much people were paying for them. $24!! FOR ONE!! My normal headbands were 6 for $8 – a third of the cost for 5 times as many. And my knockoff from Forever 21 was only $5. WHY ARE THE CUTEST THINGS ALWAYS SO EXPENSIVE?!?! I wanted one, but I didn’t want to pay for one.
I know you’ve faced the same dilemma. Why do I know this? Well, as I was writing this post a friend of mine reached out to me to ask me to do a tutorial on these exact headbands because (and I quote), “They wanted $24 and that’s a rip off.” Yes, I agree with you. RIP OFF.
So today, I’ll show you how to easily make the twisty turban head wraps at home, for both yourself and your children, for a FRACTION of what they retail. And the beauty of it is that you can choose your own colors and patterns, and make them to match any outfit you can dream up.
How to Make Headbands: Twisted and Chic Turban Style
The Necessary Tools
- Measuring Tape
- 1/3 yard of Stretchy fabric (I suggest a jersey 4 way stretch)
- Sewing machine (needle and thread will work if you don’t have a machine)
- Iron on double sided seam tape (for a “no sew” option if you don’t want to sew anything)
- If you’re doing these “no sew” a quick reminder: Whenever I give you an instruction to sew, place the double sided seam tape in between the fabrics you’re supposed to sew together. Then, use your iron and press down on the fabric, with the tape in between. This will fuse the fabrics together where you want them “sewn”.
Step 1:
- Measure the circumference of your head or your child’s head with a measuring tape. If you don’t have a measuring tape, you can use this size chart as a guide:

Step 2:

- Cut 2 strips out of your fabric. Each strip’s length should be what the circumference of your head is, and about 4-5″ wide (depending on how wide you want your headband to be).
- Mine were 4.5″ wide for the adult headbands, and 3″ wide for the baby headbands.
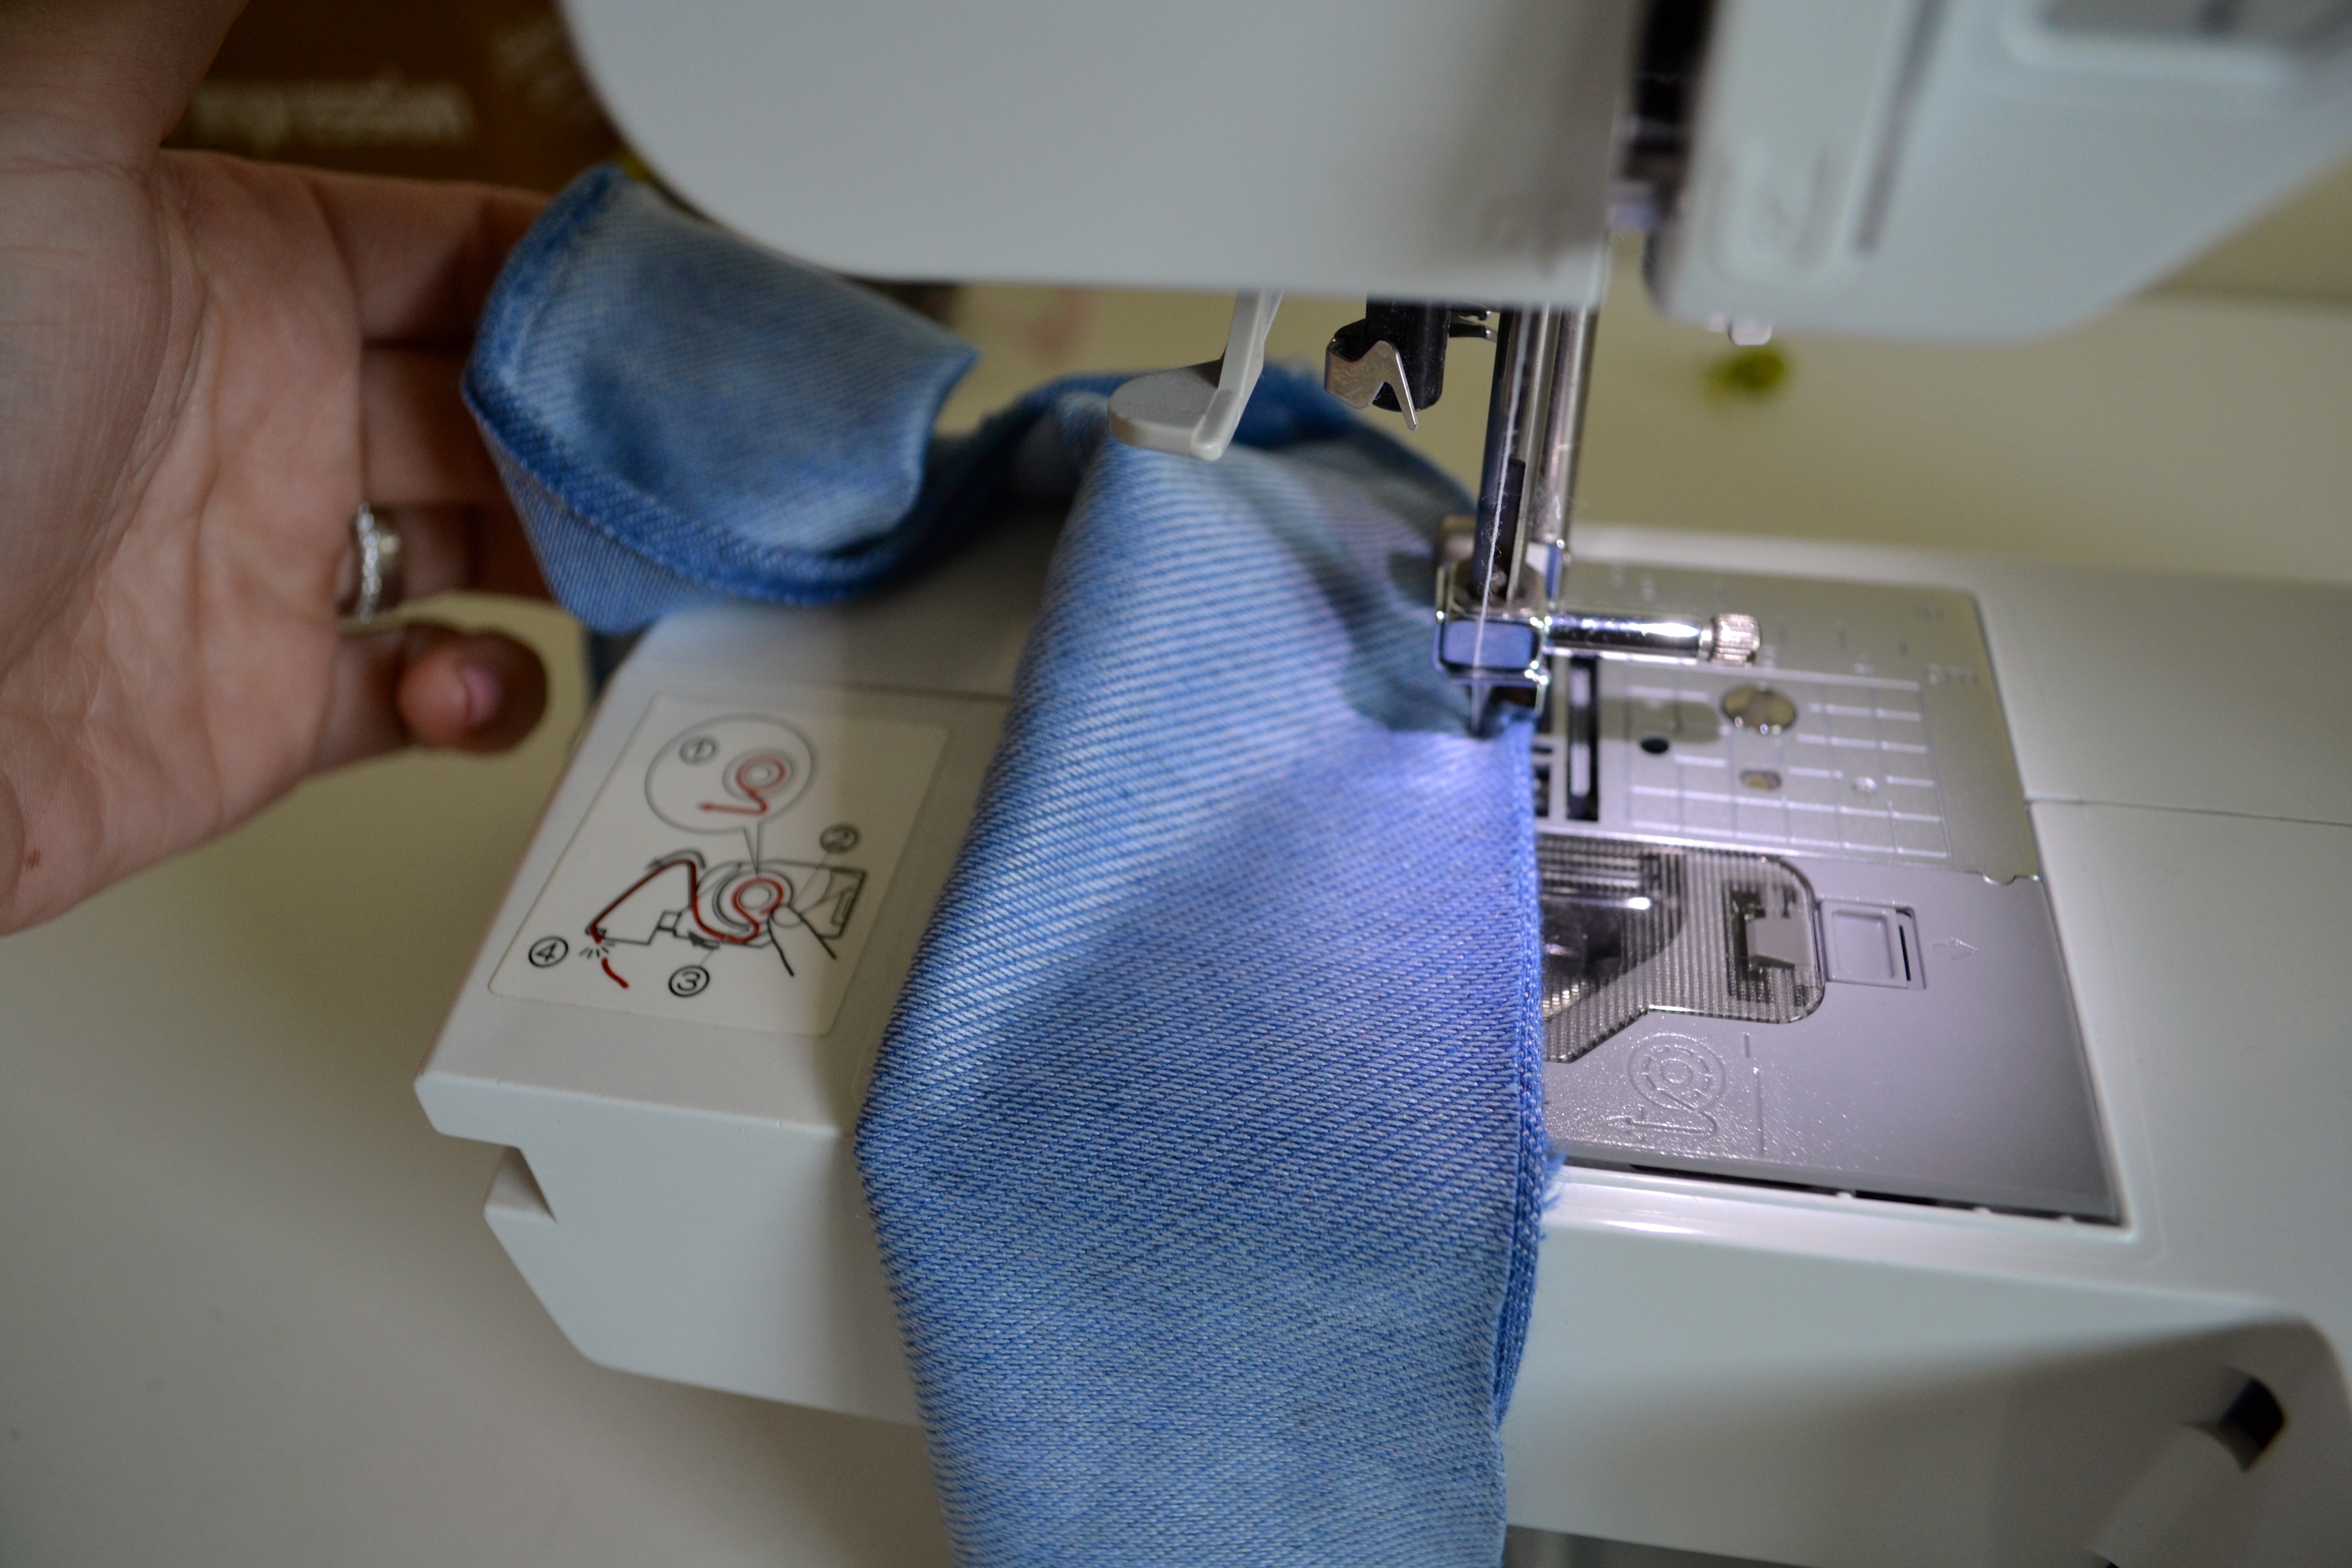
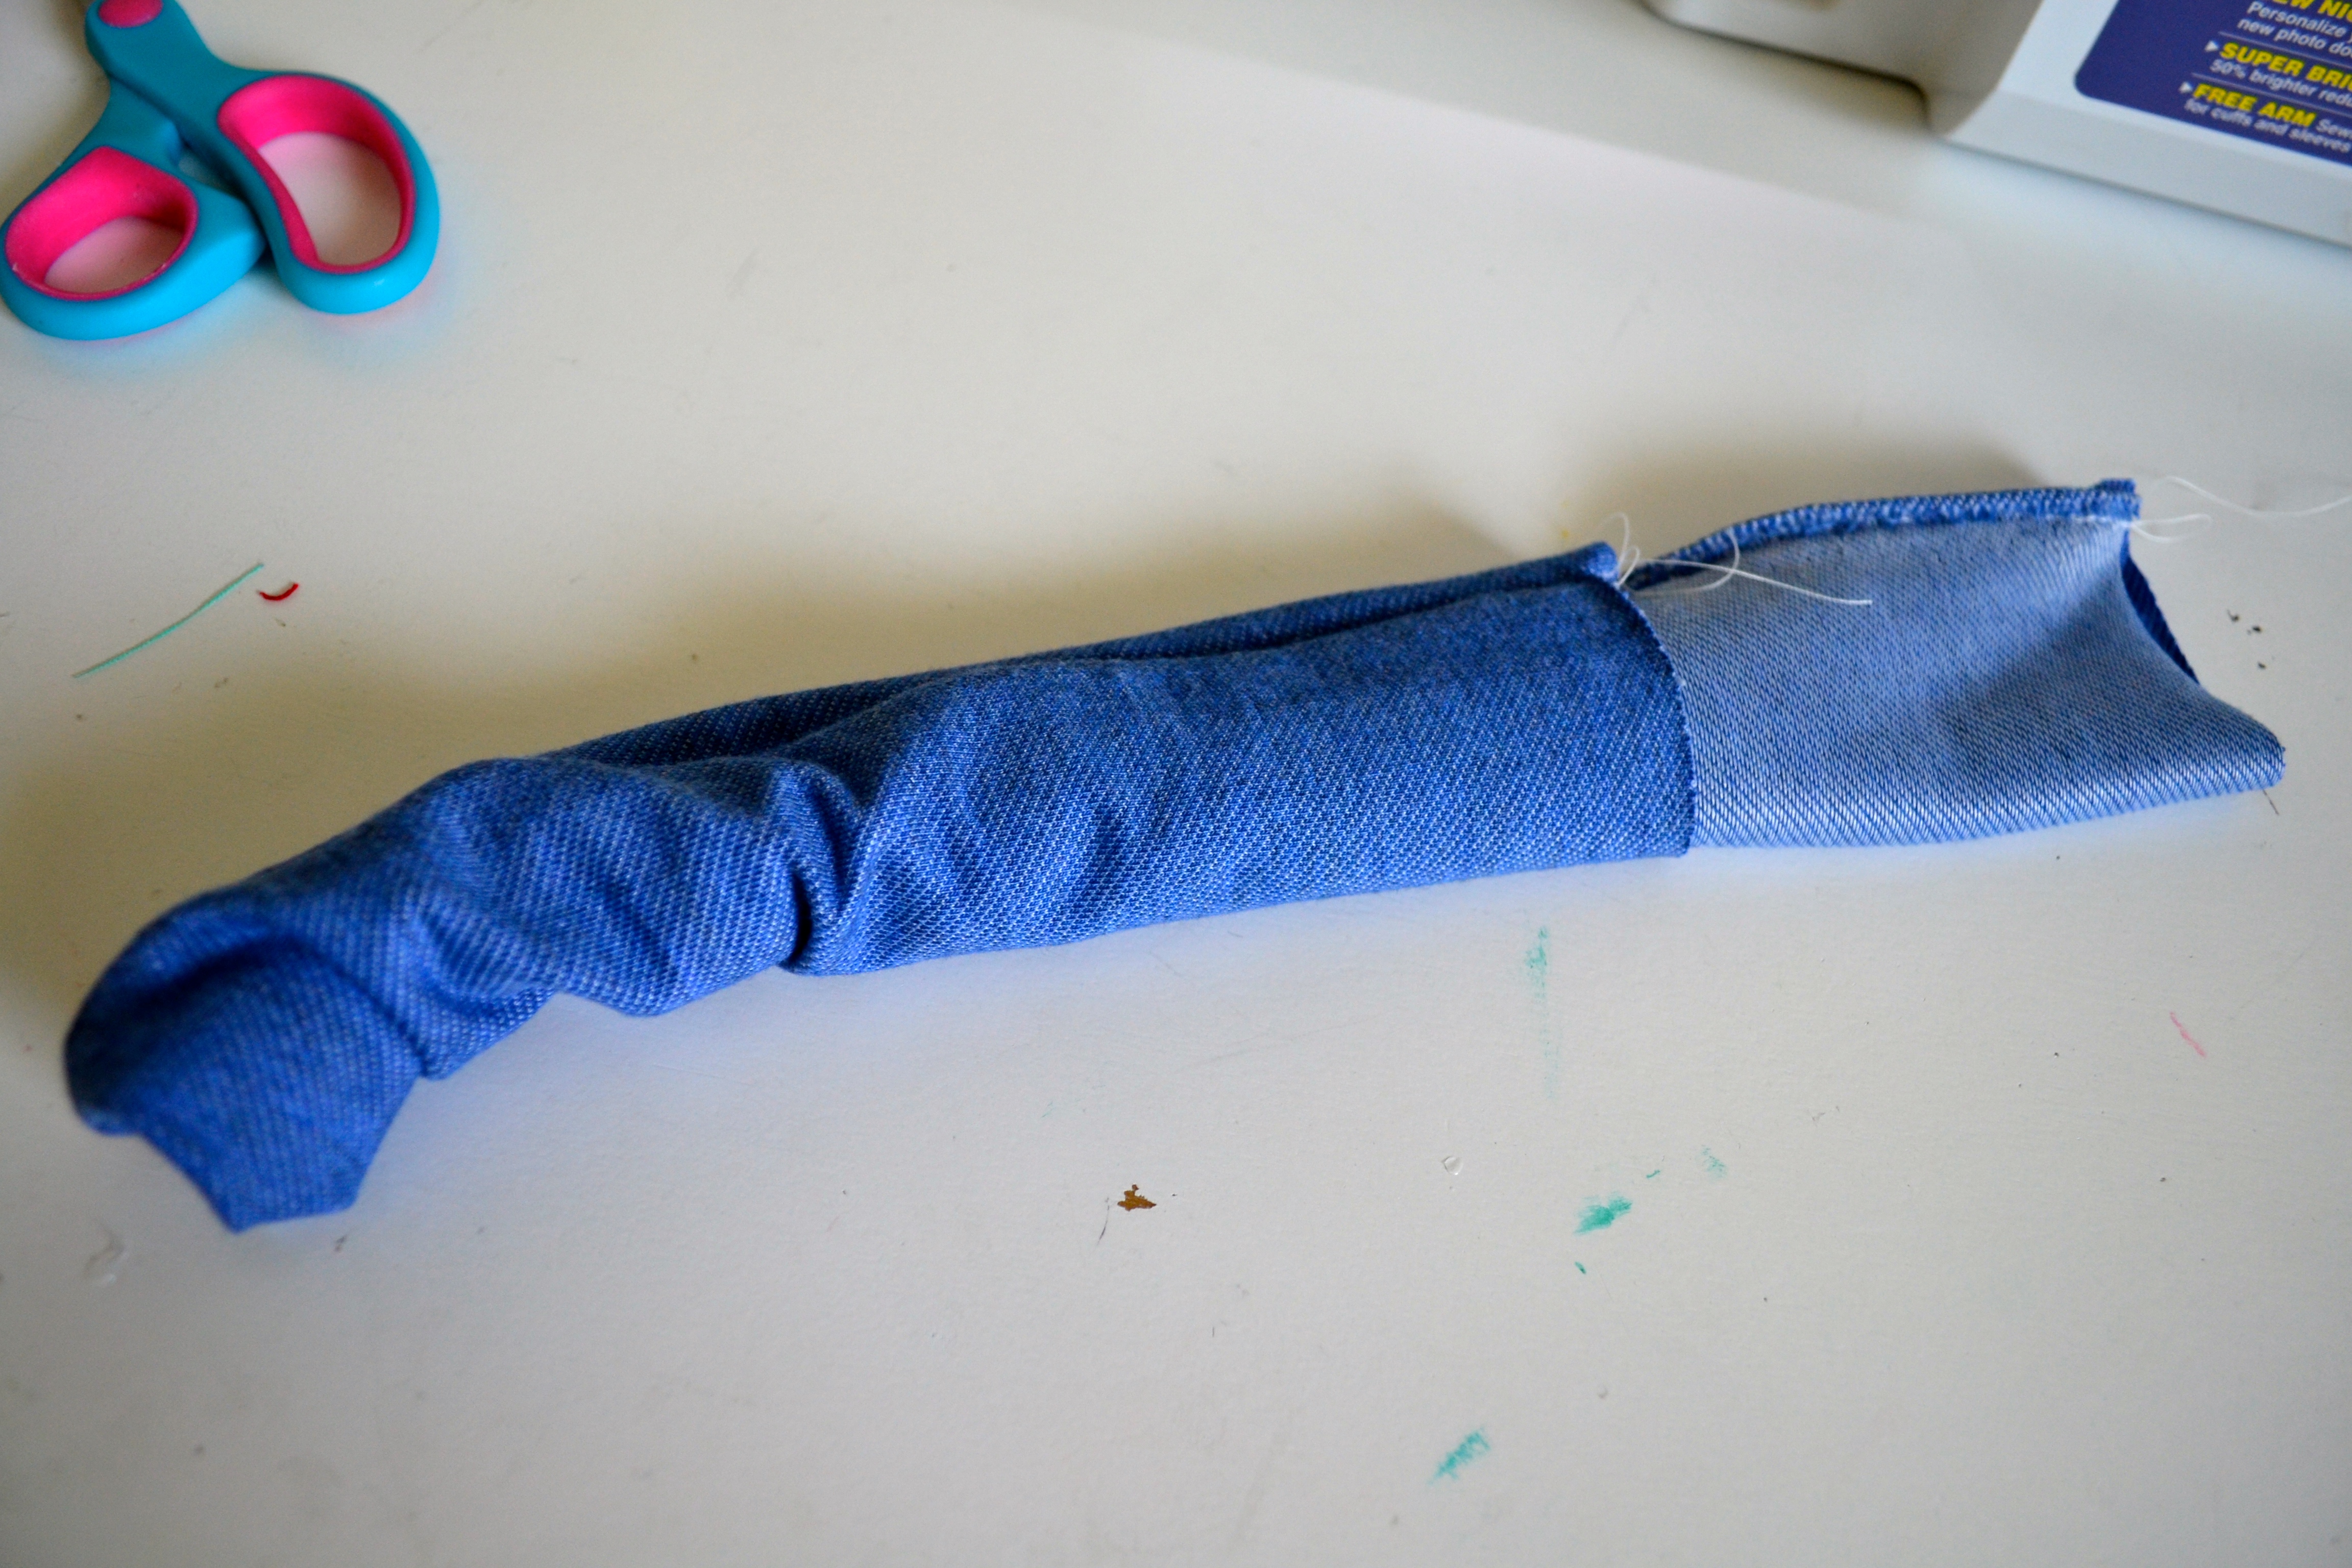
- Take both strips and fold them in half, lengthwise, and with the right sides facing each other (the wrong side is out facing YOU). Then, run each strip through your sewing machine, sewing a seam along the long side of the strips (so you form an enclosed “tube” with your fabric).
- If you’re not sewing, place the seam tape in between the pieces of fabric where you’d be sewing. Press it all together with your iron (apply heat for at least 30 seconds on each spot to seal the seam).
- Then, turn each strip right side out.
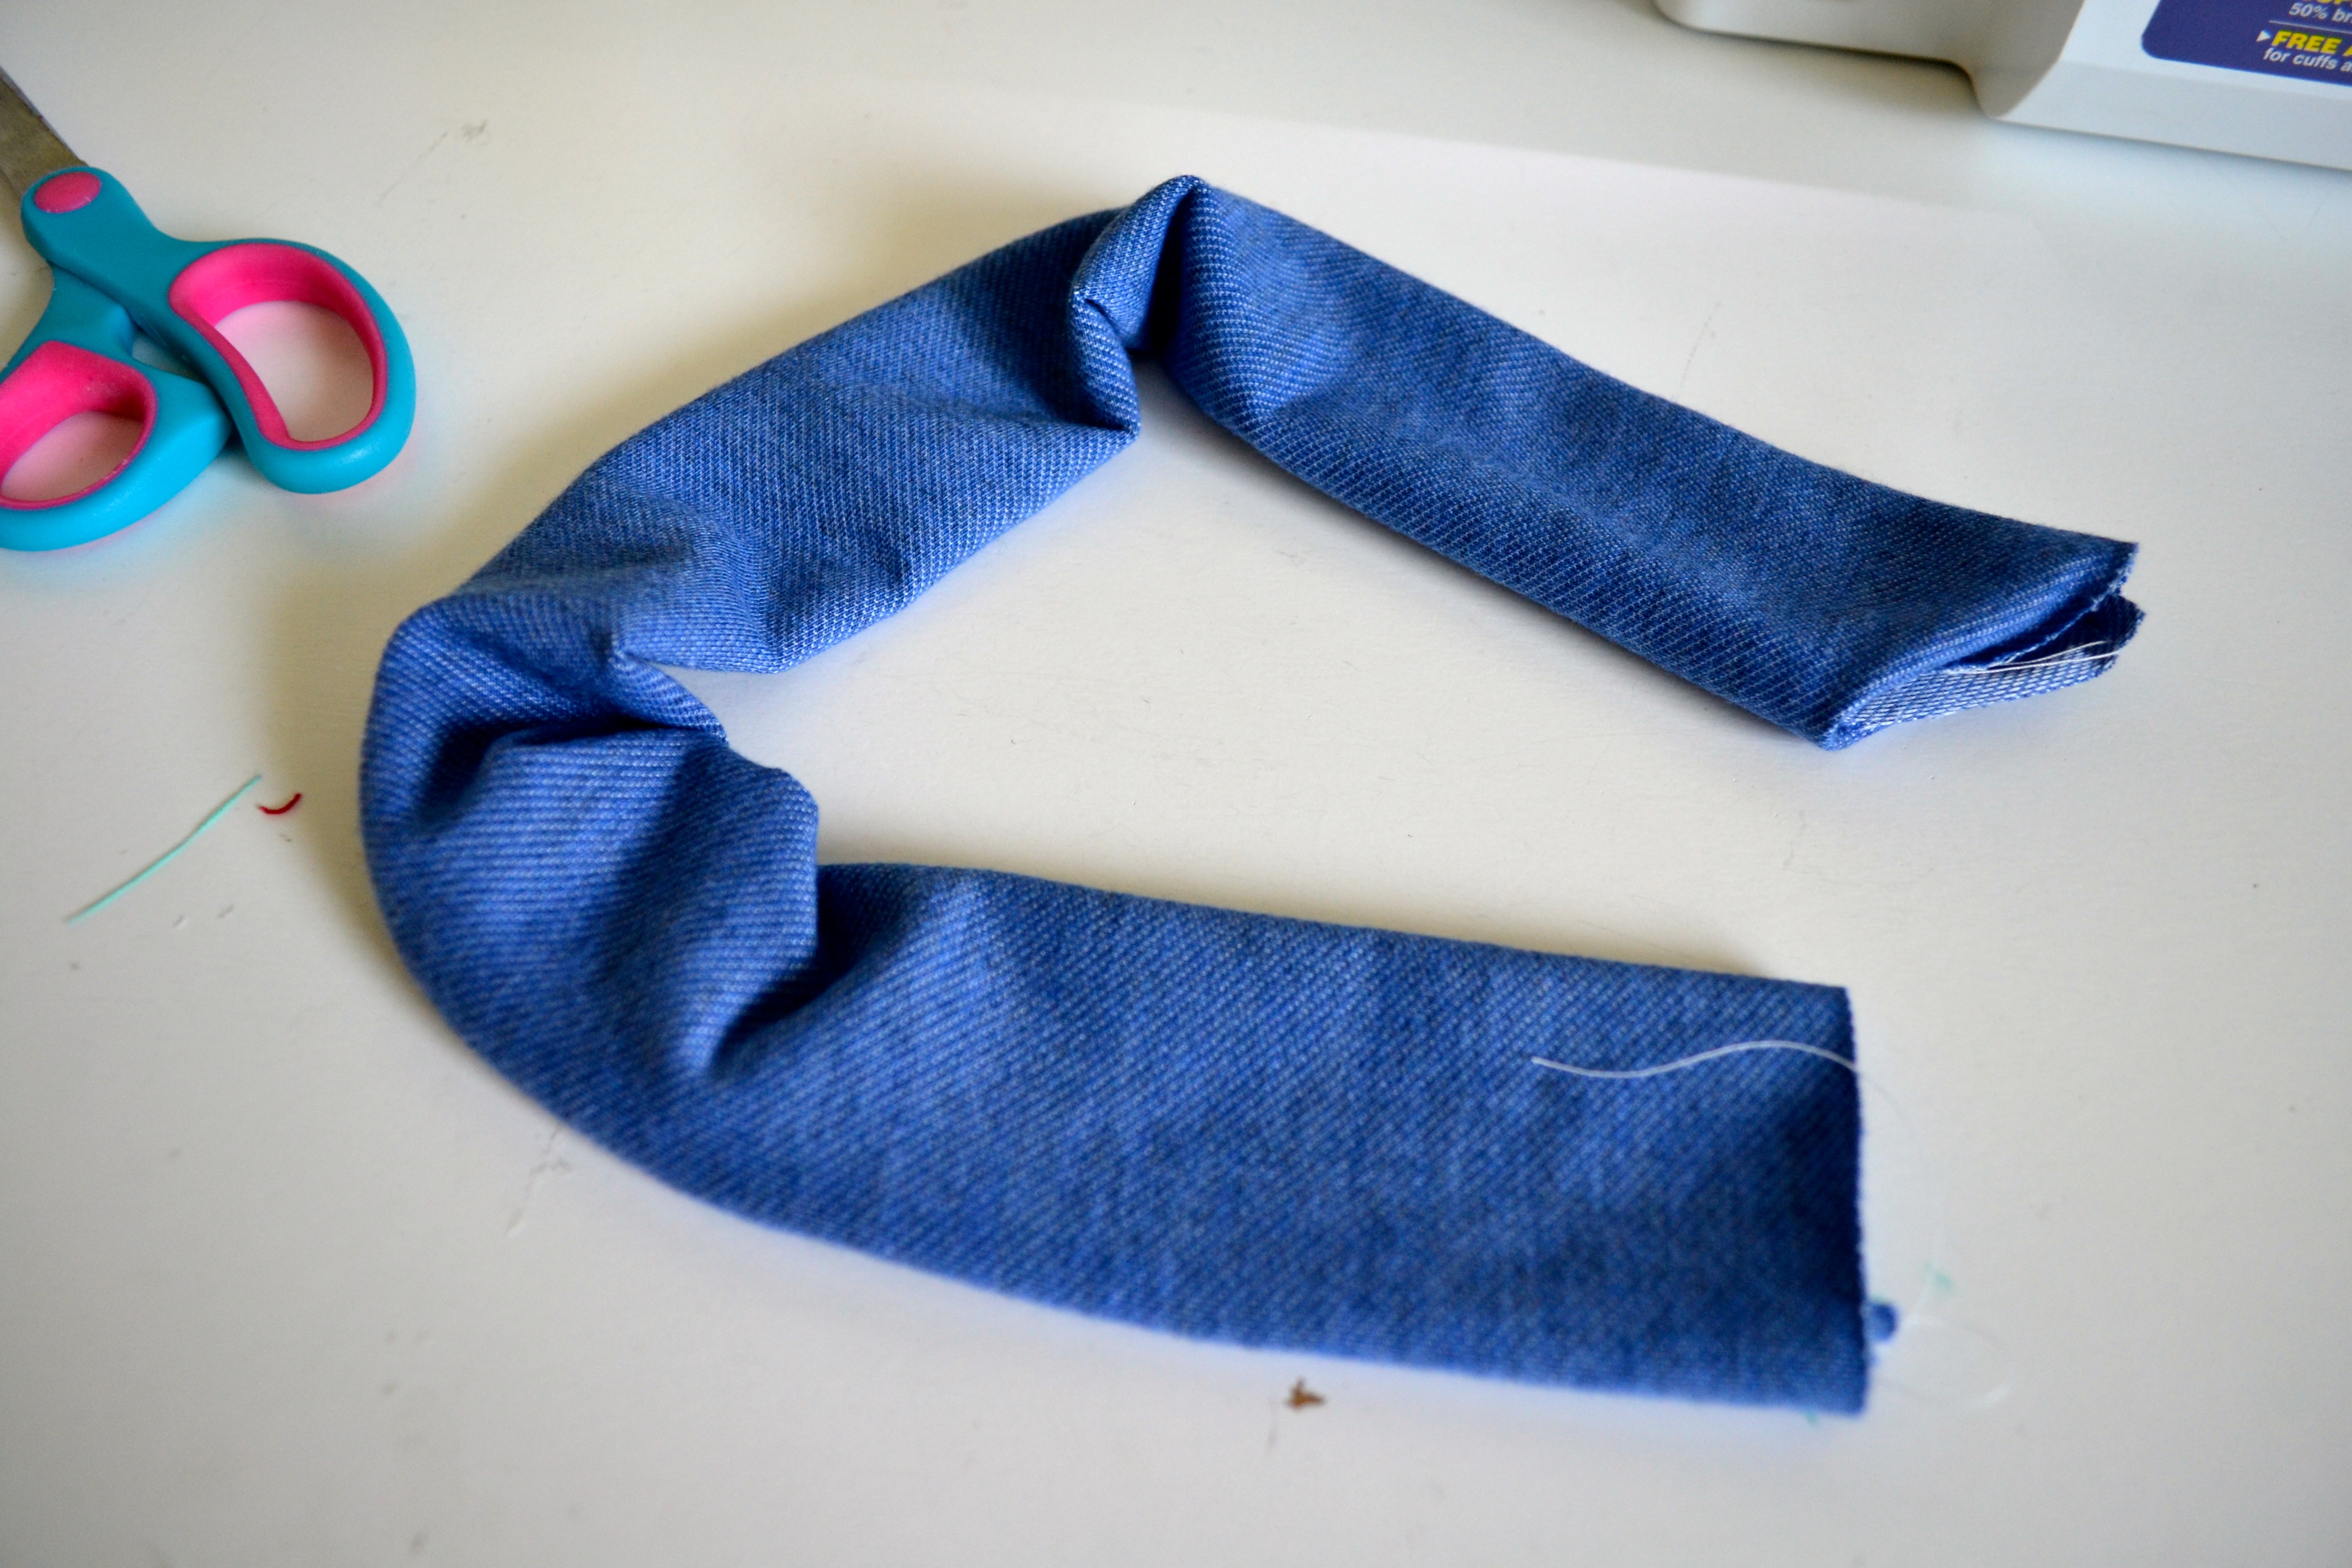
Step 3:
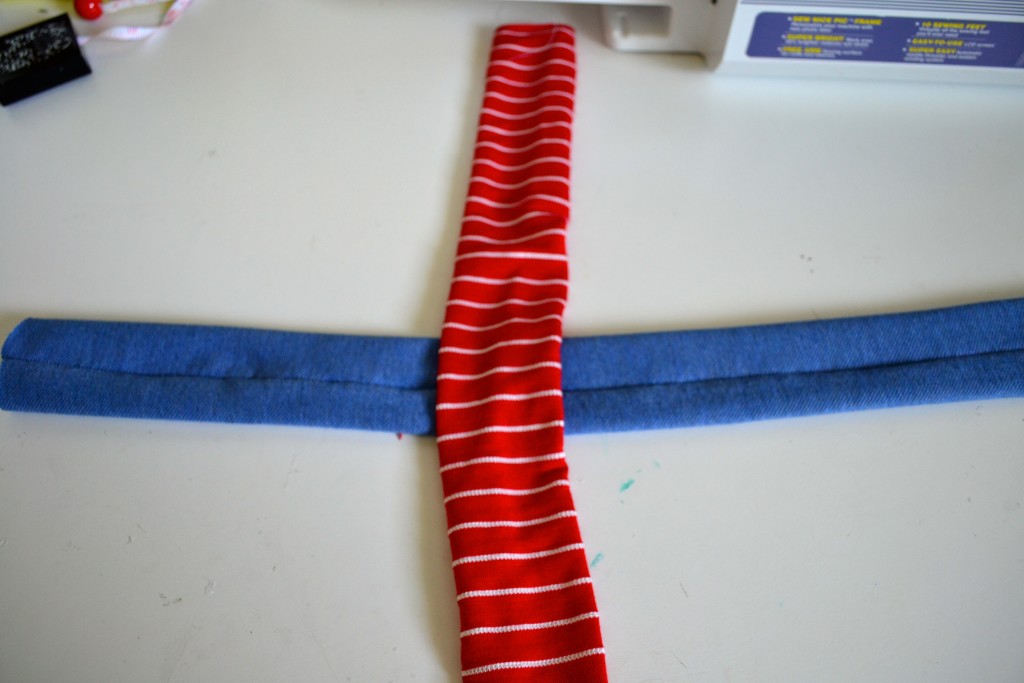
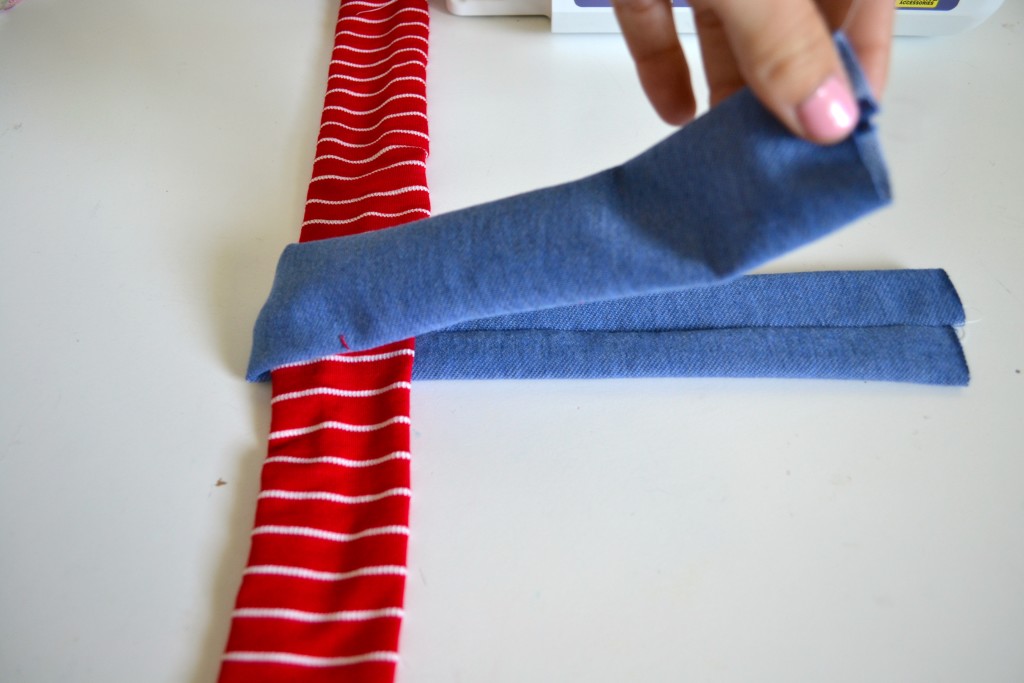
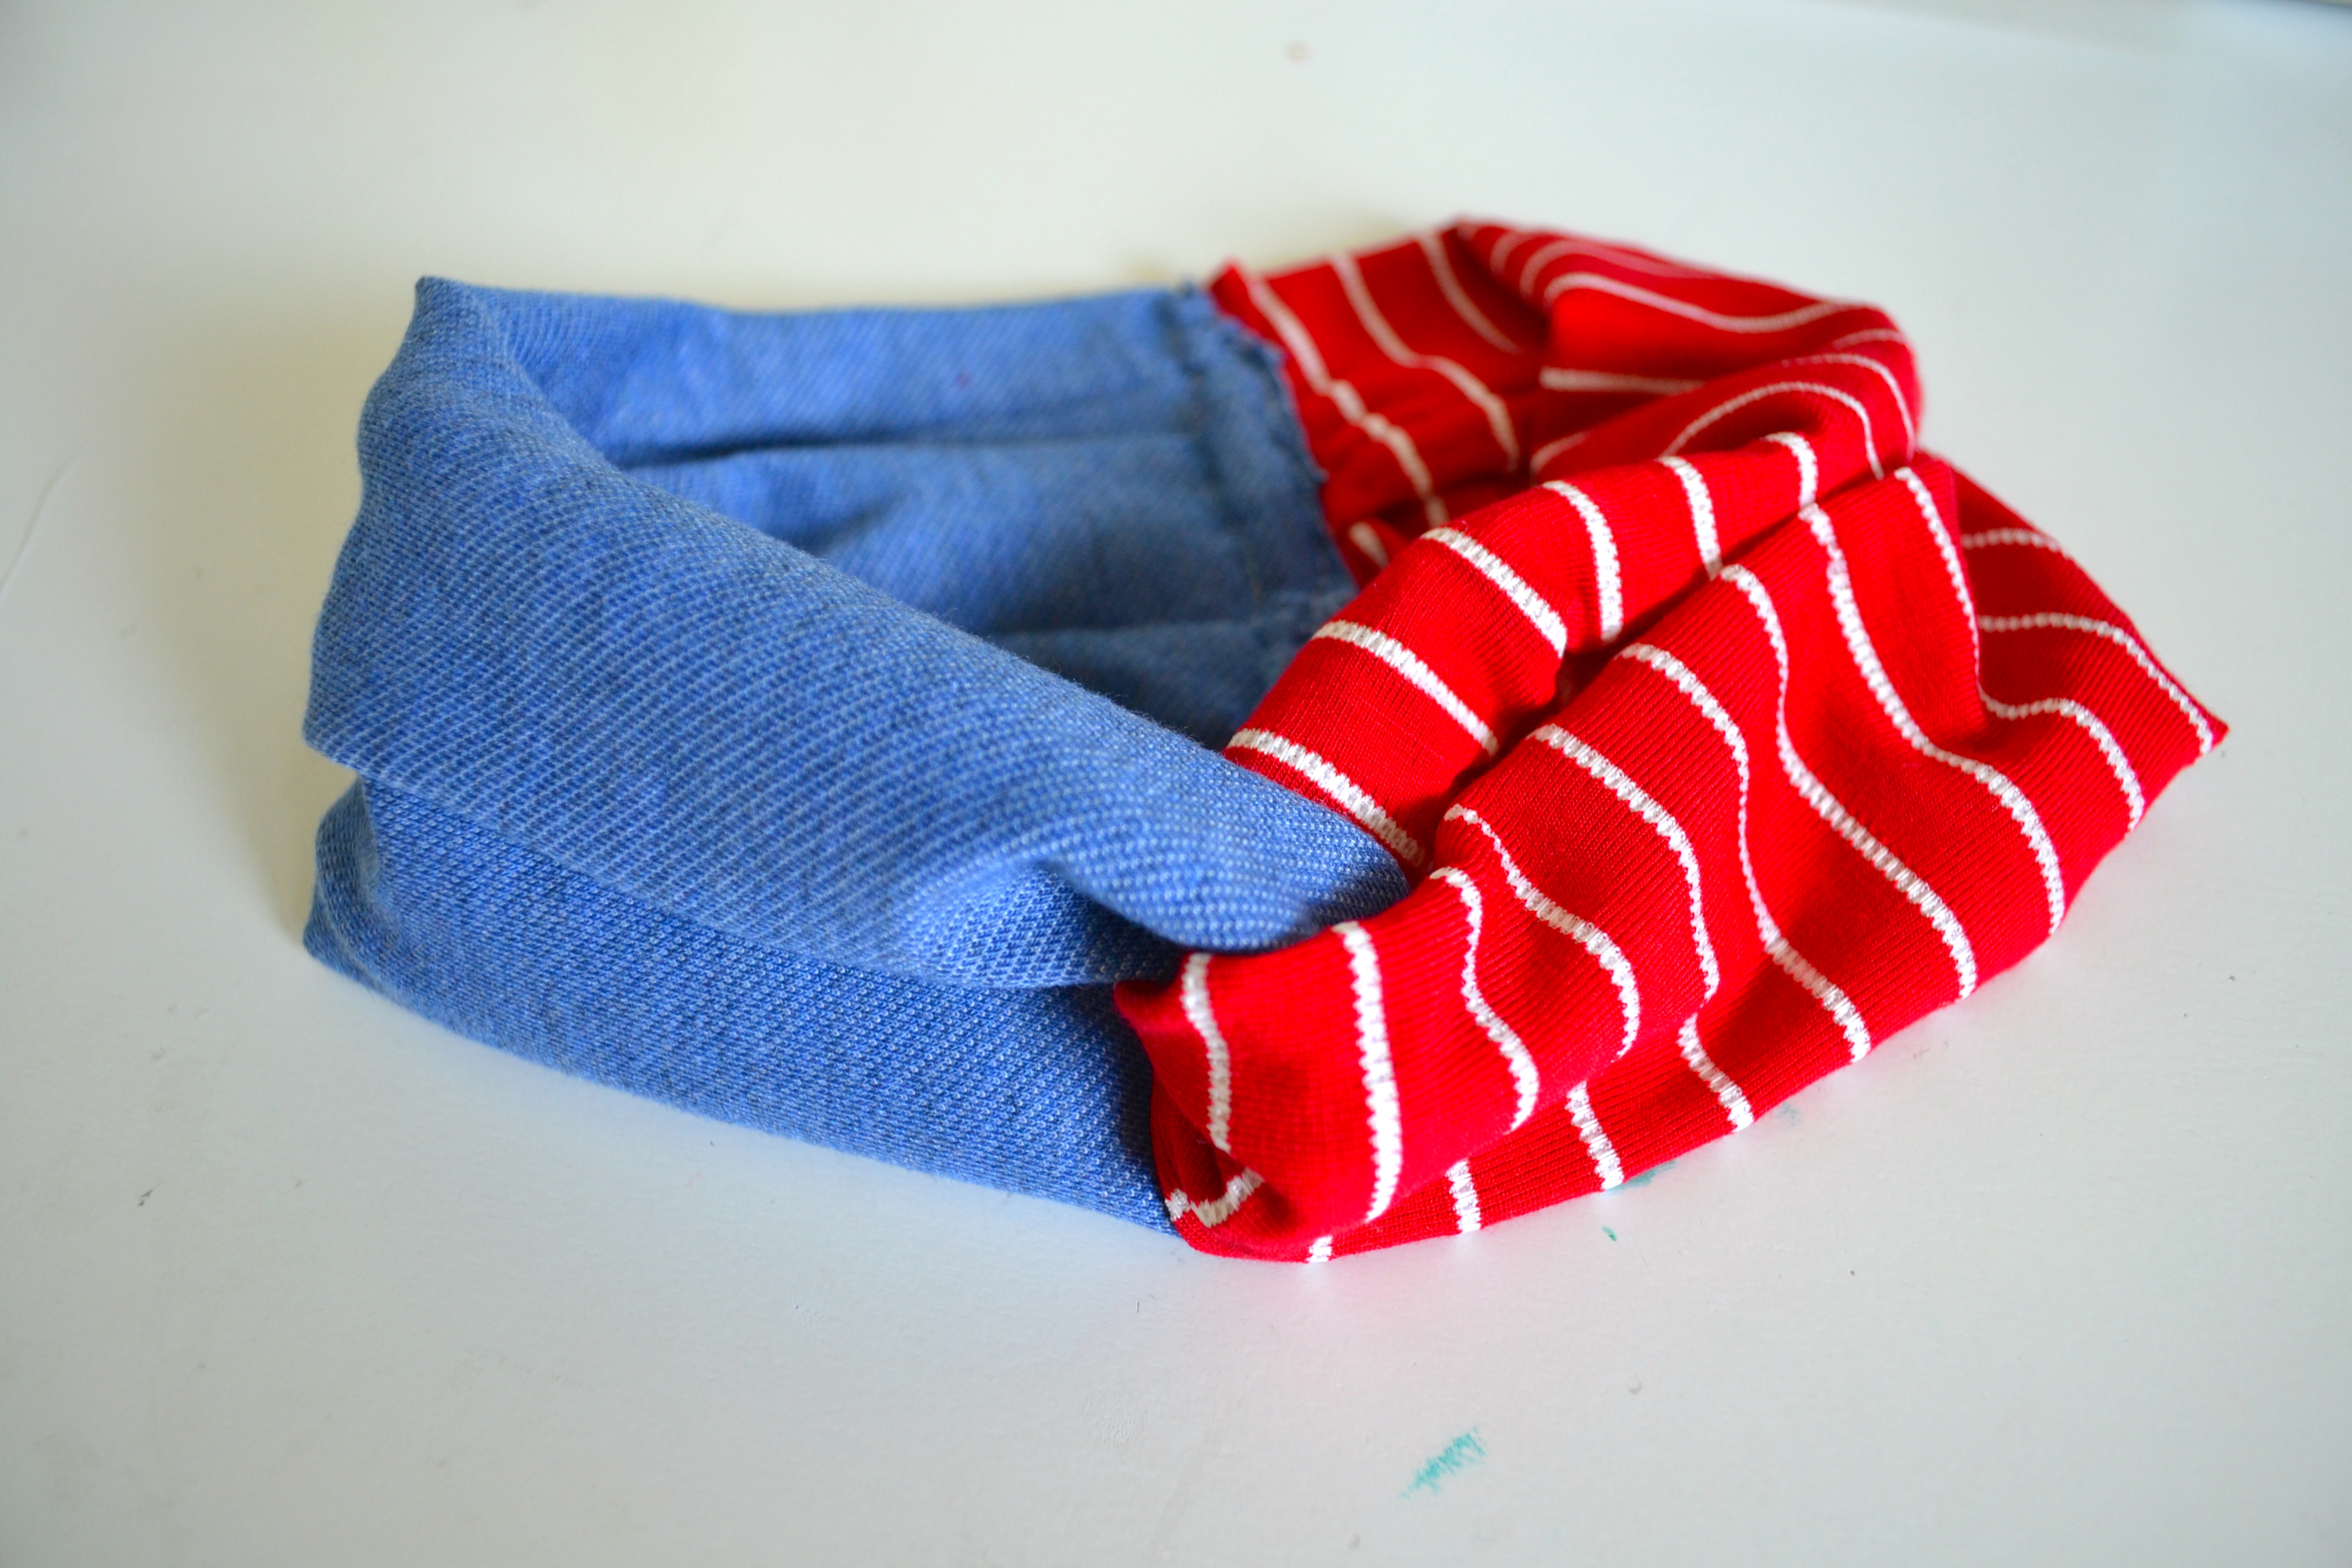
- Now, take one strip and fold it in half. Then, take the other strip and fold it in half, but THROUGH the fold of the first one. Thus, linking the 2 strips together (see picture above).
- Make sure all the seams face the same way and align the ends of the strips together so they’re straight.
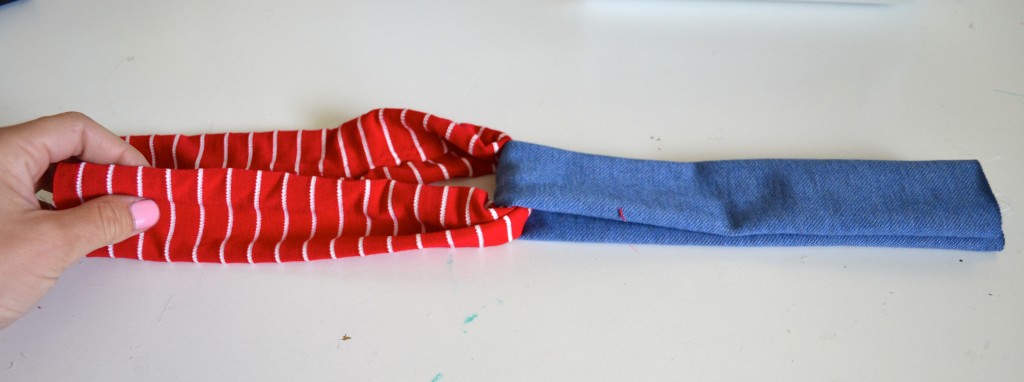
Step 4:
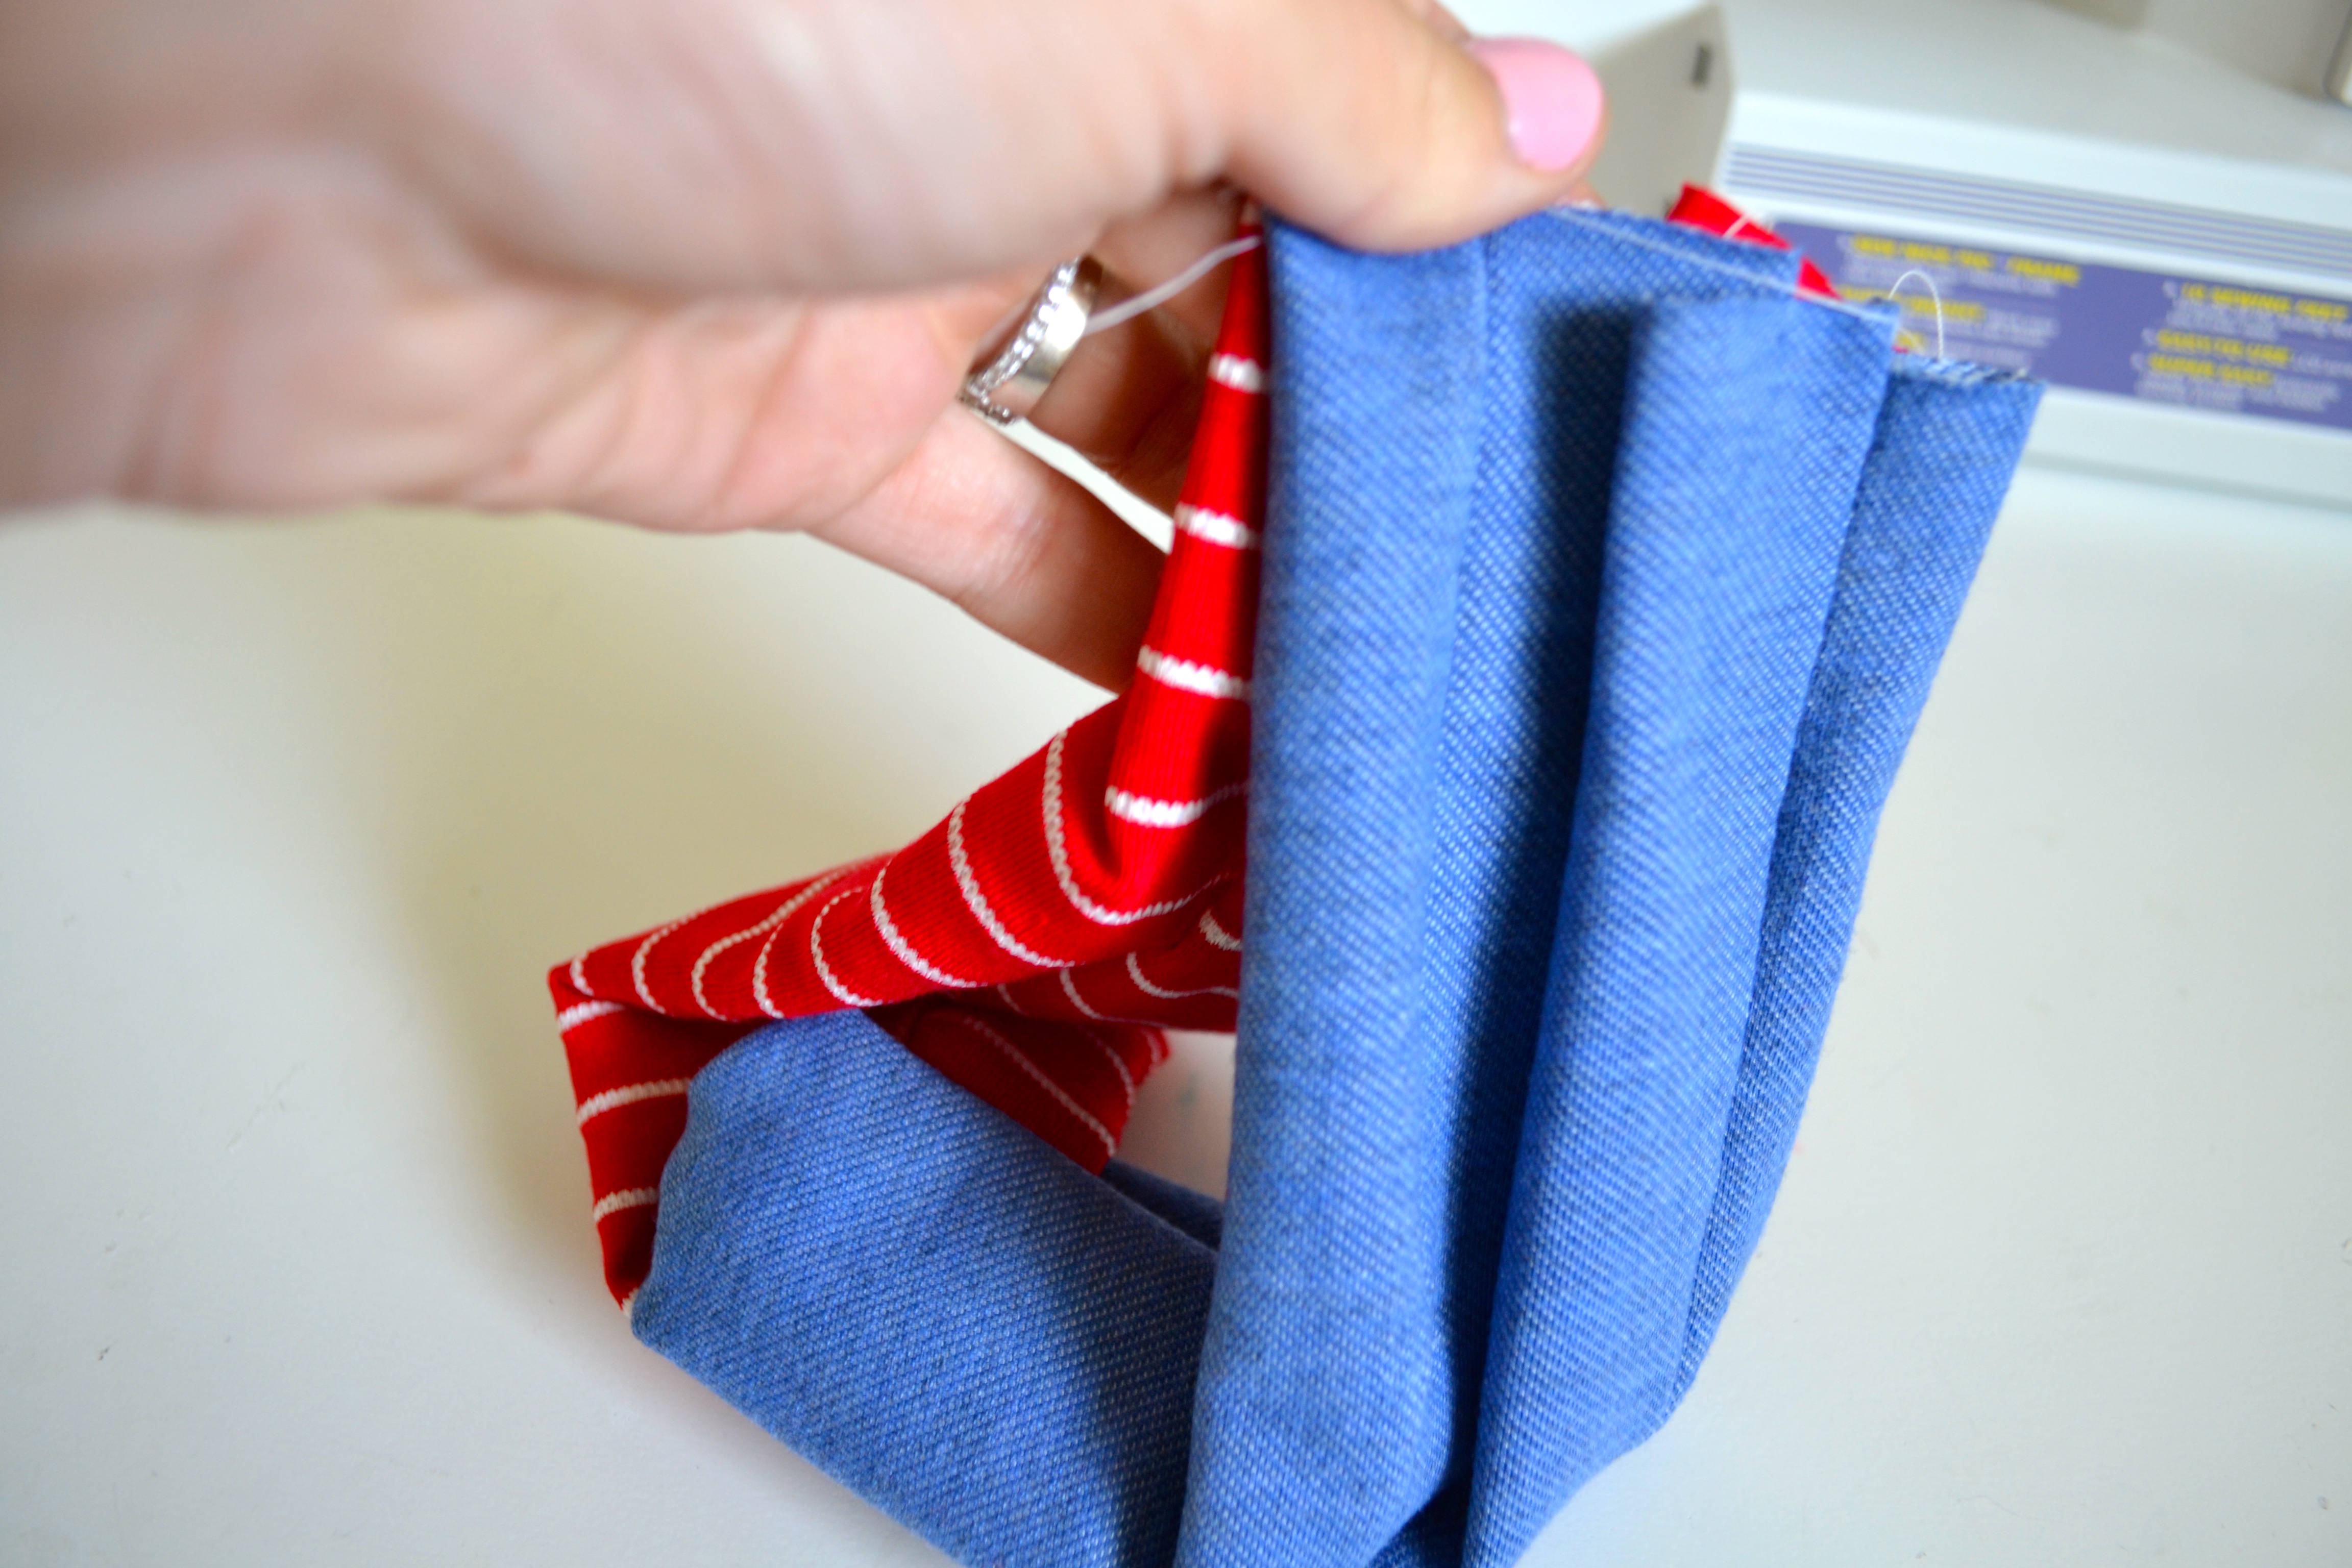
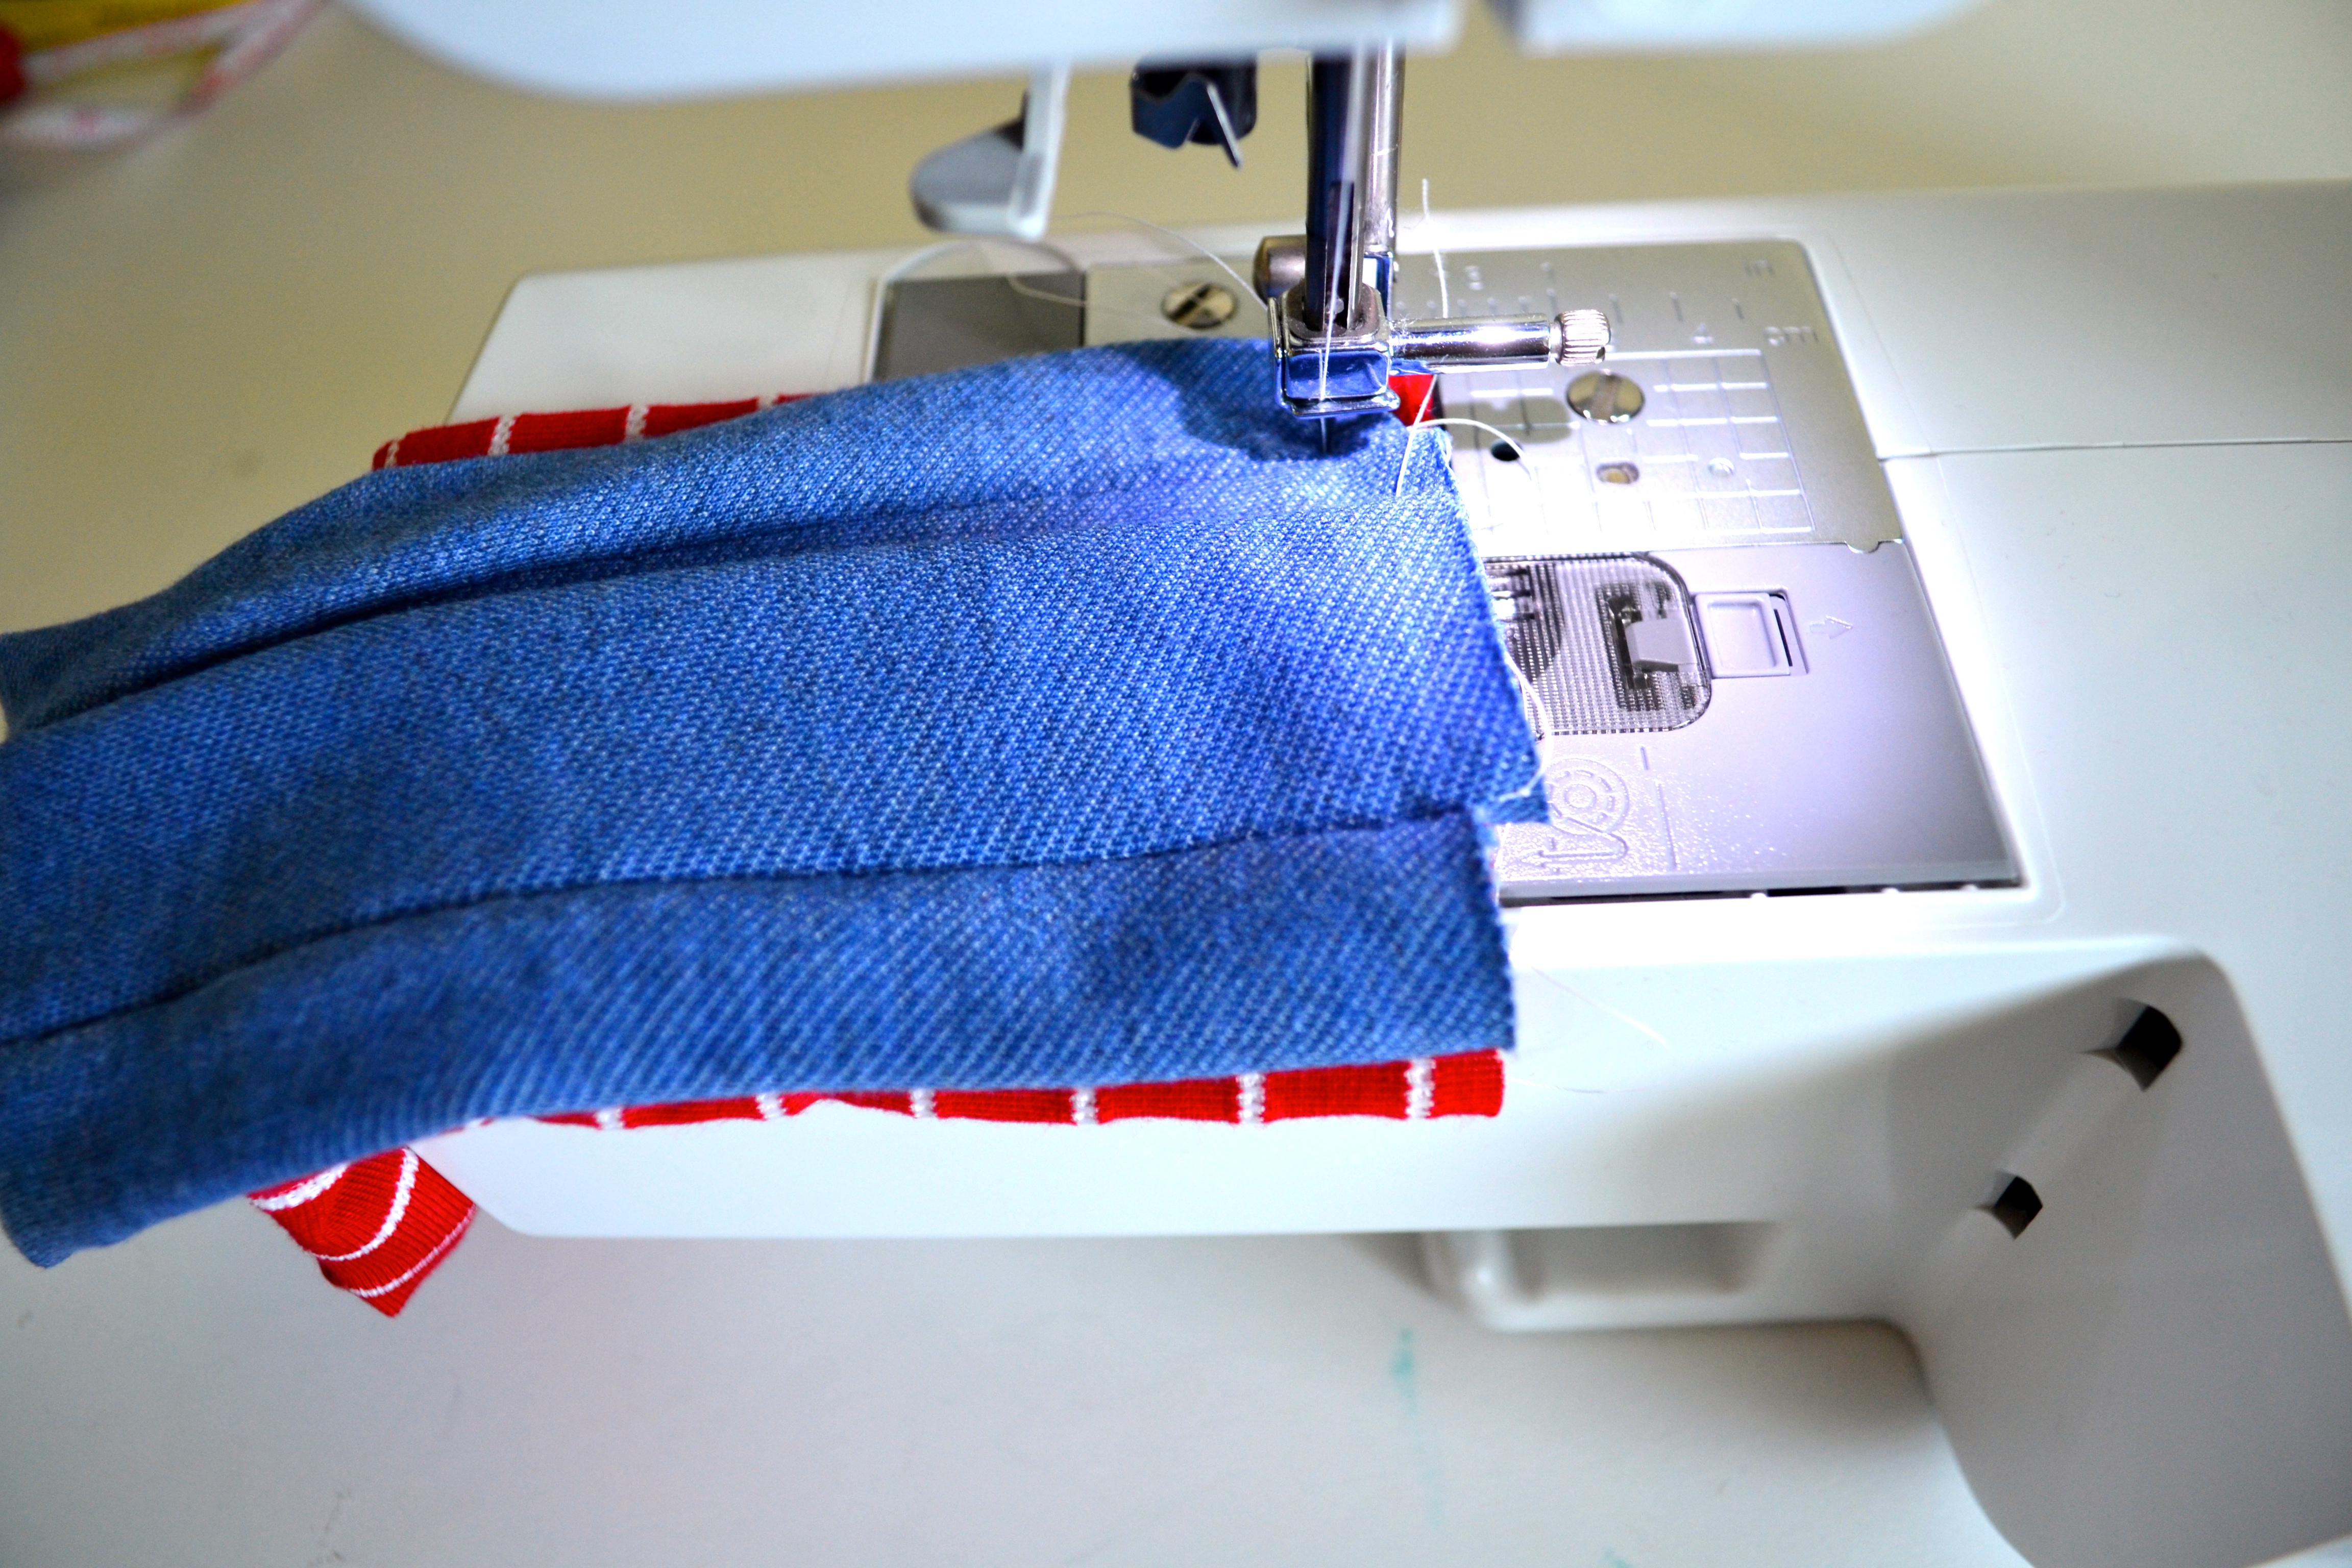
- NOW, once you’ve taken the folded side strips and aligned the ends, take each end and bring them both up from the table toward you. Put one end flat up against the end from the other side of the headband, and run it through your sewing machine to seam the headband together.
- Again, if you’re not sewing, you’d use your iron on seam tape in between the 2 sides, instead.
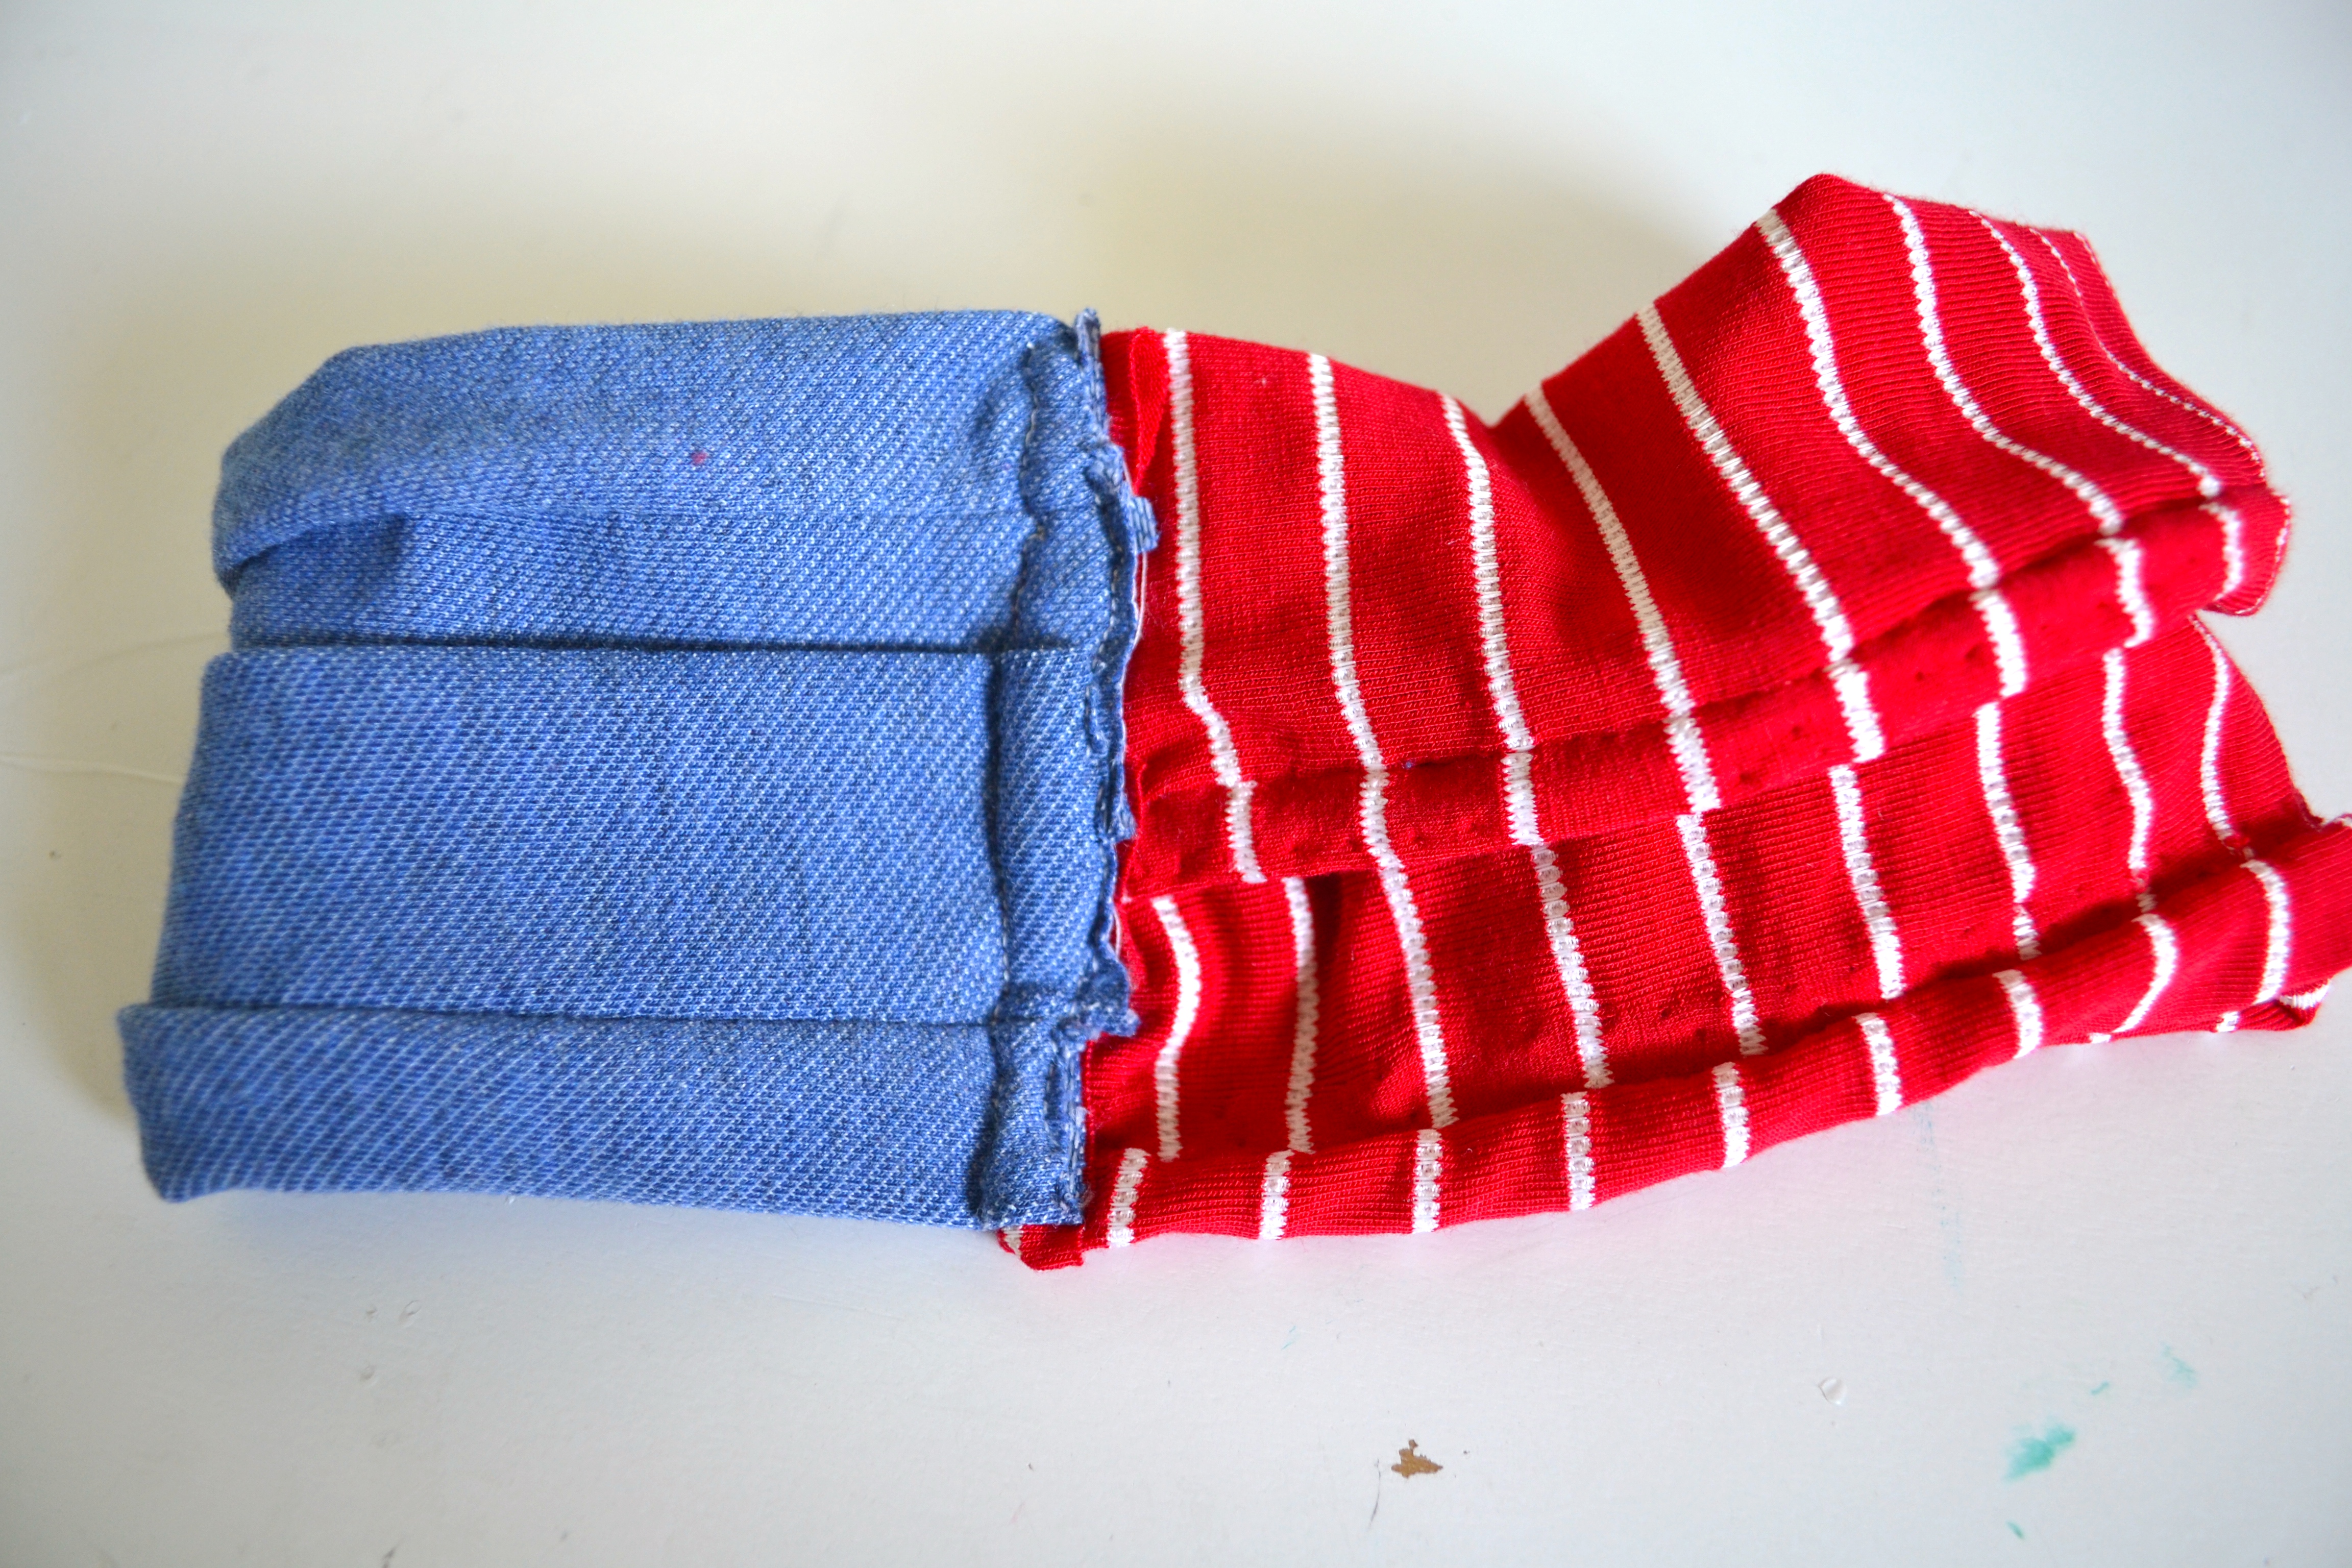
- Once the seam is completed, flip the headband so the seam is on the INSIDE.
Voi la! You now have your trendy twisted turban headwrap. Perfect for that boho chic look.It’s amazing how a little twist can spruce up such an old staple to make it cute and relevant again, huh?
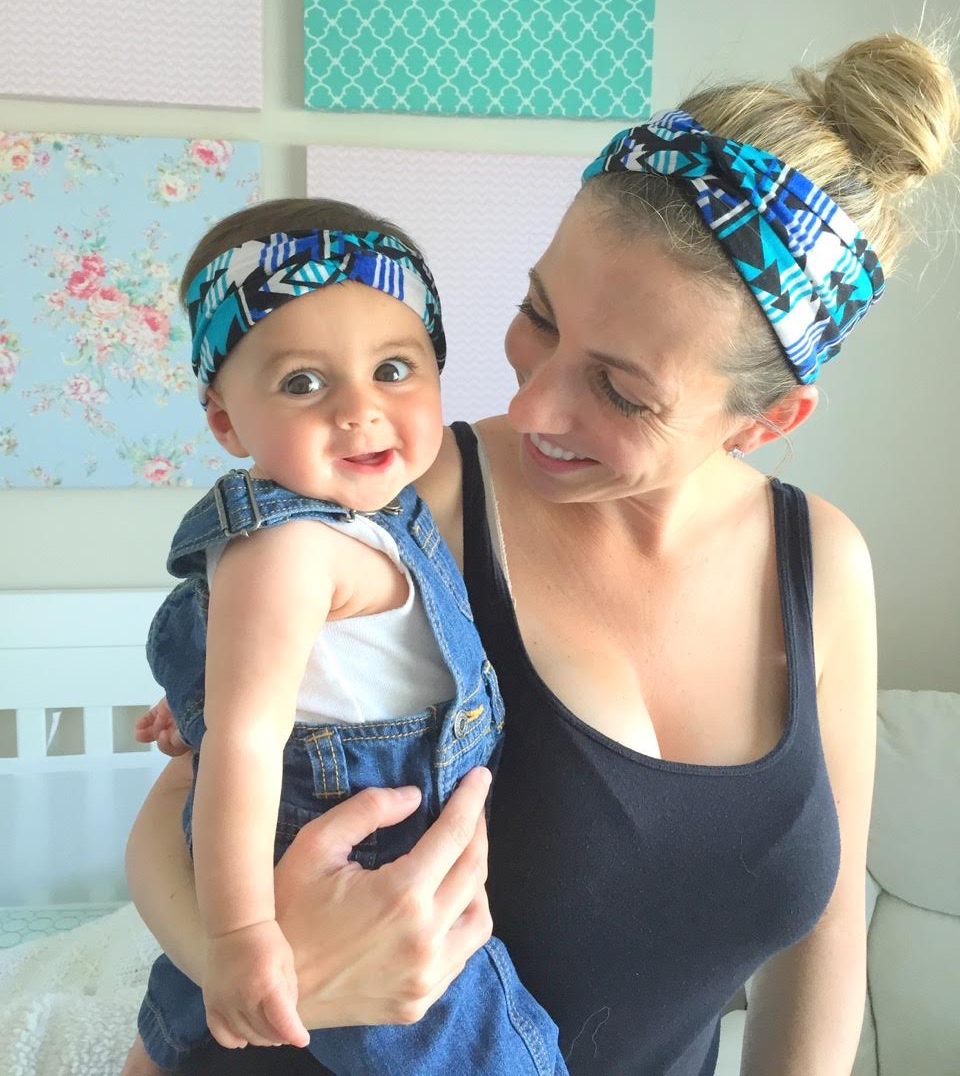
And what’s even cuter (for all you mommies or cool aunties out there) is you can make matching ones for your little ones. TWINNING! While it’s an easy accessory to keep your hair out of your face, it’s just an adorable way to complete a toddler’s ensemble. You can’t go wrong.
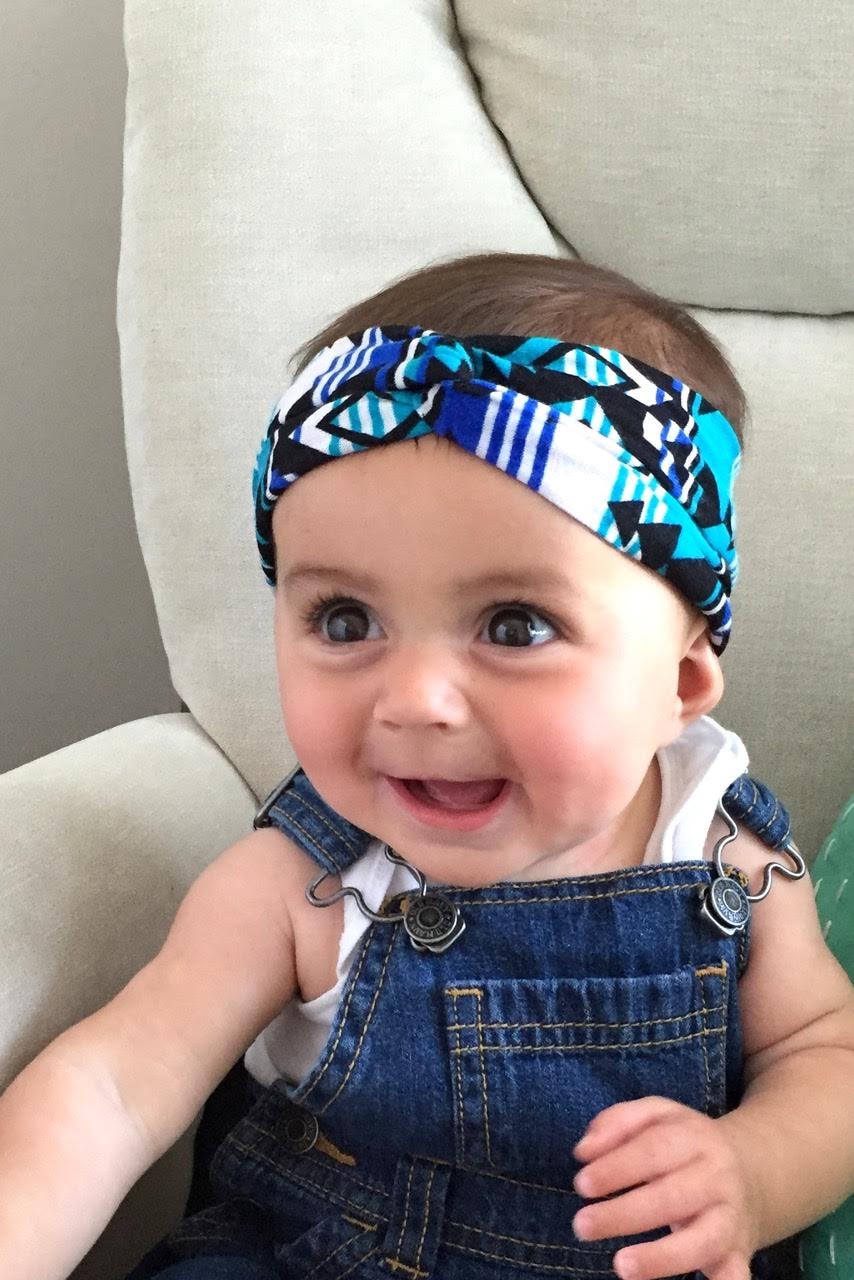
Ah, Tessa’s back to model my latest creation (you may remember her as the cutest little model ever for my baby bow tutorial). But this time, he brought her mommy Heather! I’m kind of obsessed with them, aren’t you? Watch out Riley Curry, Tessa the baby model is on your tail!! They rock these twist headwraps like there’s no tomorrow. I LOVE it! Don’t you?
Now, what’s that you say? You’re having trouble finding the time to do this tutorial? Fear not. As always, I have some options for sale in my shop (if they’re not there now- they will be soon, I promise!). Not as cheap as if you were to DIY – but I try to be cost sensitive and competitive against the $24 rip offs! Because I pity the fool who pays that for a TODDLER headband! Crazy.
And if you’re looking for a quick list to DIY, here’s a recap of everything you’ll need:
- Measuring Tape
- 1/3 yard of Stretchy fabric (I suggest a jersey 4 way stretch)
- Sewing machine (needle and thread will work if you don’t have a machine)
- Iron on double sided seam tape (for a “no sew” option if you don’t want to sew anything)
Hello,
Just wondering what type of thread you use for your headbands ? I made this and it’s like there’s no stretch after a certain point . Thinking maybe the thread I am using is wrong ?
Thanks
I’m guessing zigzag stitch would help with that? I feel like a straight stitch would reduce the stretch… not sure , though.
Thank you for this tutorial! I had a pretty good idea of how to make a twisted headband/turban but your post helped so much with details I forgot like the measurement chart and the pictures of your sewing process really helped me not have to deal with any trial and error on my cuts and stitches. Thanks again!
I used a zigzag and it worked great. For the final seam to attach all of the ends together, I used a straight stitch because stretch doesn’t matter there. I covered that up too to give the band more options. You can also buy an elastic thread which will give it more give if you need full on stretch without a catching point. That’s what I would normally use but I didn’t have it with me. Happy sewing. They are so easy and super duper cute!!
Can you post a video of you doing these steps?
Great idea! So simple and yet so darn cute! Thanks for sharing 🙂
At the point of getting them put together and you say to make sure all of your seams are facing the same way.
I’m assuming that right sides facing is wrong since my seams are on the outside.
So does that mean I face each seam out.. like on each piece?
Sorry if thats confusing but I’m a tad confused too.
Would love a video tutorial!!