So if you follow along with my blog you can probably tell two things from my posts: I have a super cute puppy and am expecting a baby in July.
And one thing I do know from experience is that when you have a chaotic household full of babies and pets, sleep is your best friend! So when the UPS guy with your latest Amazon Prime delivery decides to ding dong ditch your front door during nap time, it can only be assumed he’s the enemy and must be stopped!
But you still need those diaper deliveries. Such a conundrum…
My baby isn’t even here yet and I still dread the FedEx guy. It’s ALWAYS the FedEx guy. No matter what it is, signature or not, he will ALWAYS ring my doorbell. And he always seems to come after a day of chasing my dog around the yard, and RIGHT when she lays down for an afternoon nap. BAM! Yep, doorbell rings and dog wants to play again. I can only imagine what it’ll be like with puppy AND baby.
No, I don’t want to imagine it. And those of you that are currently dealing with it now, I feel your pain…
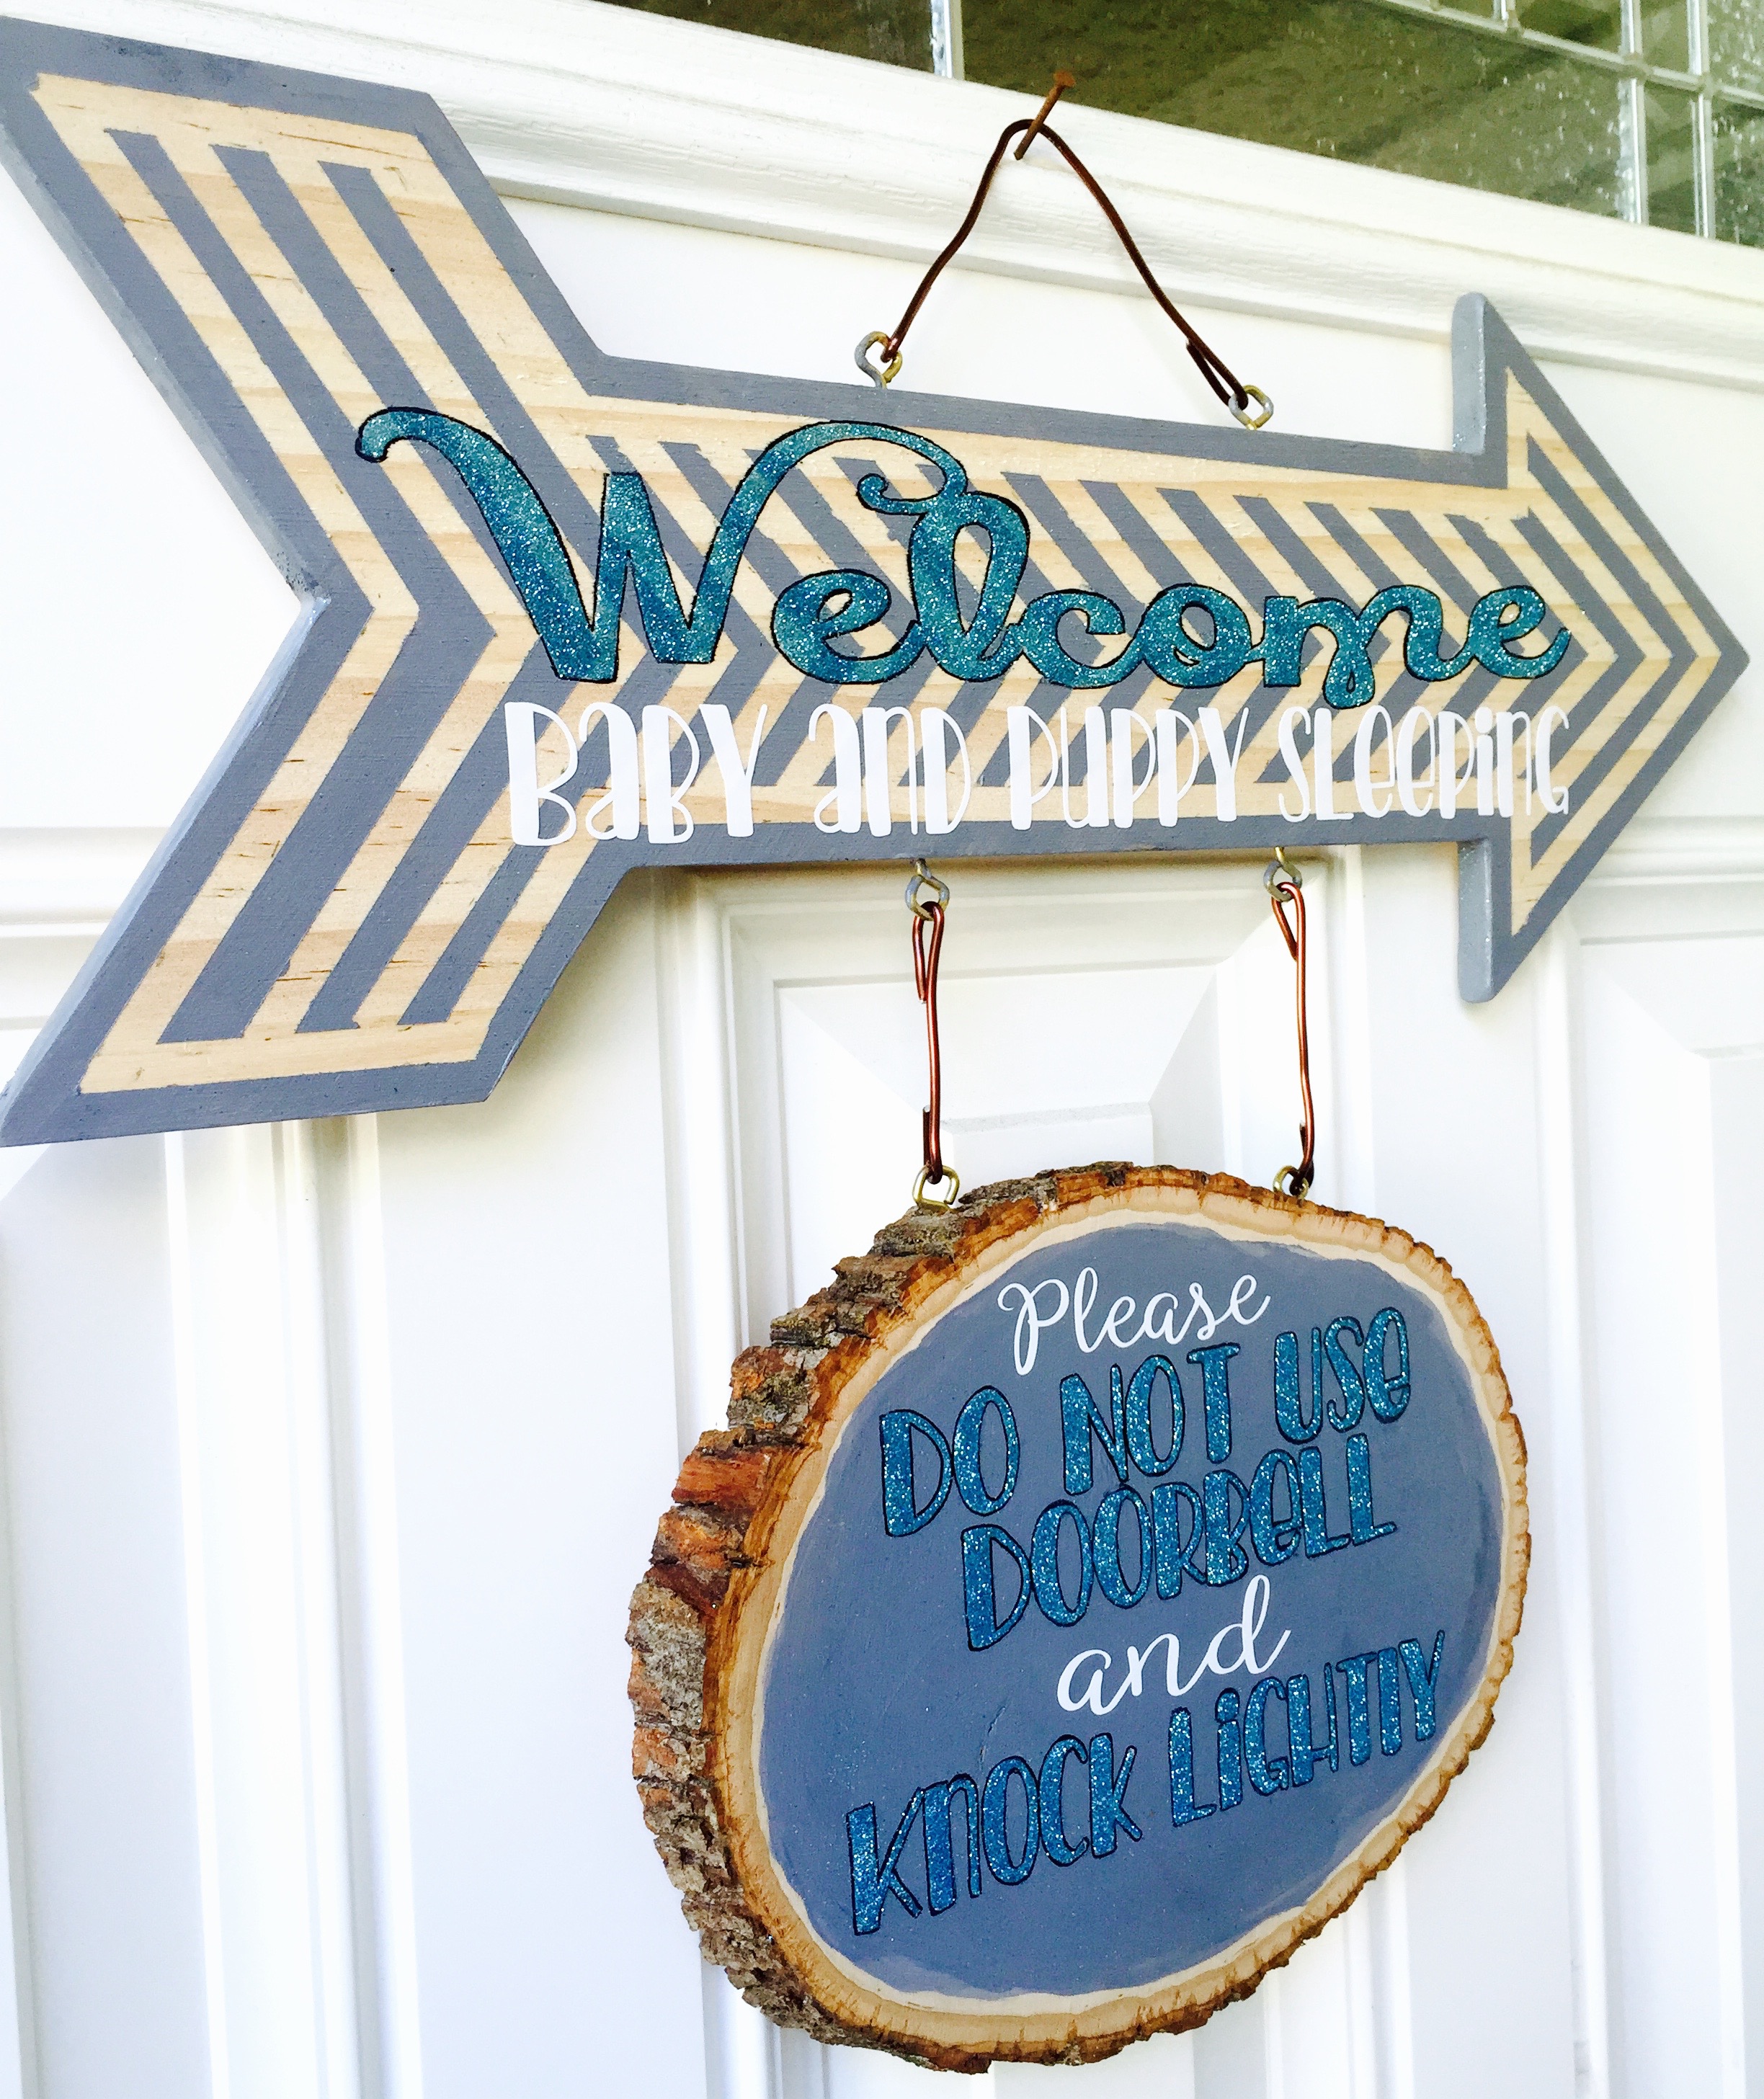
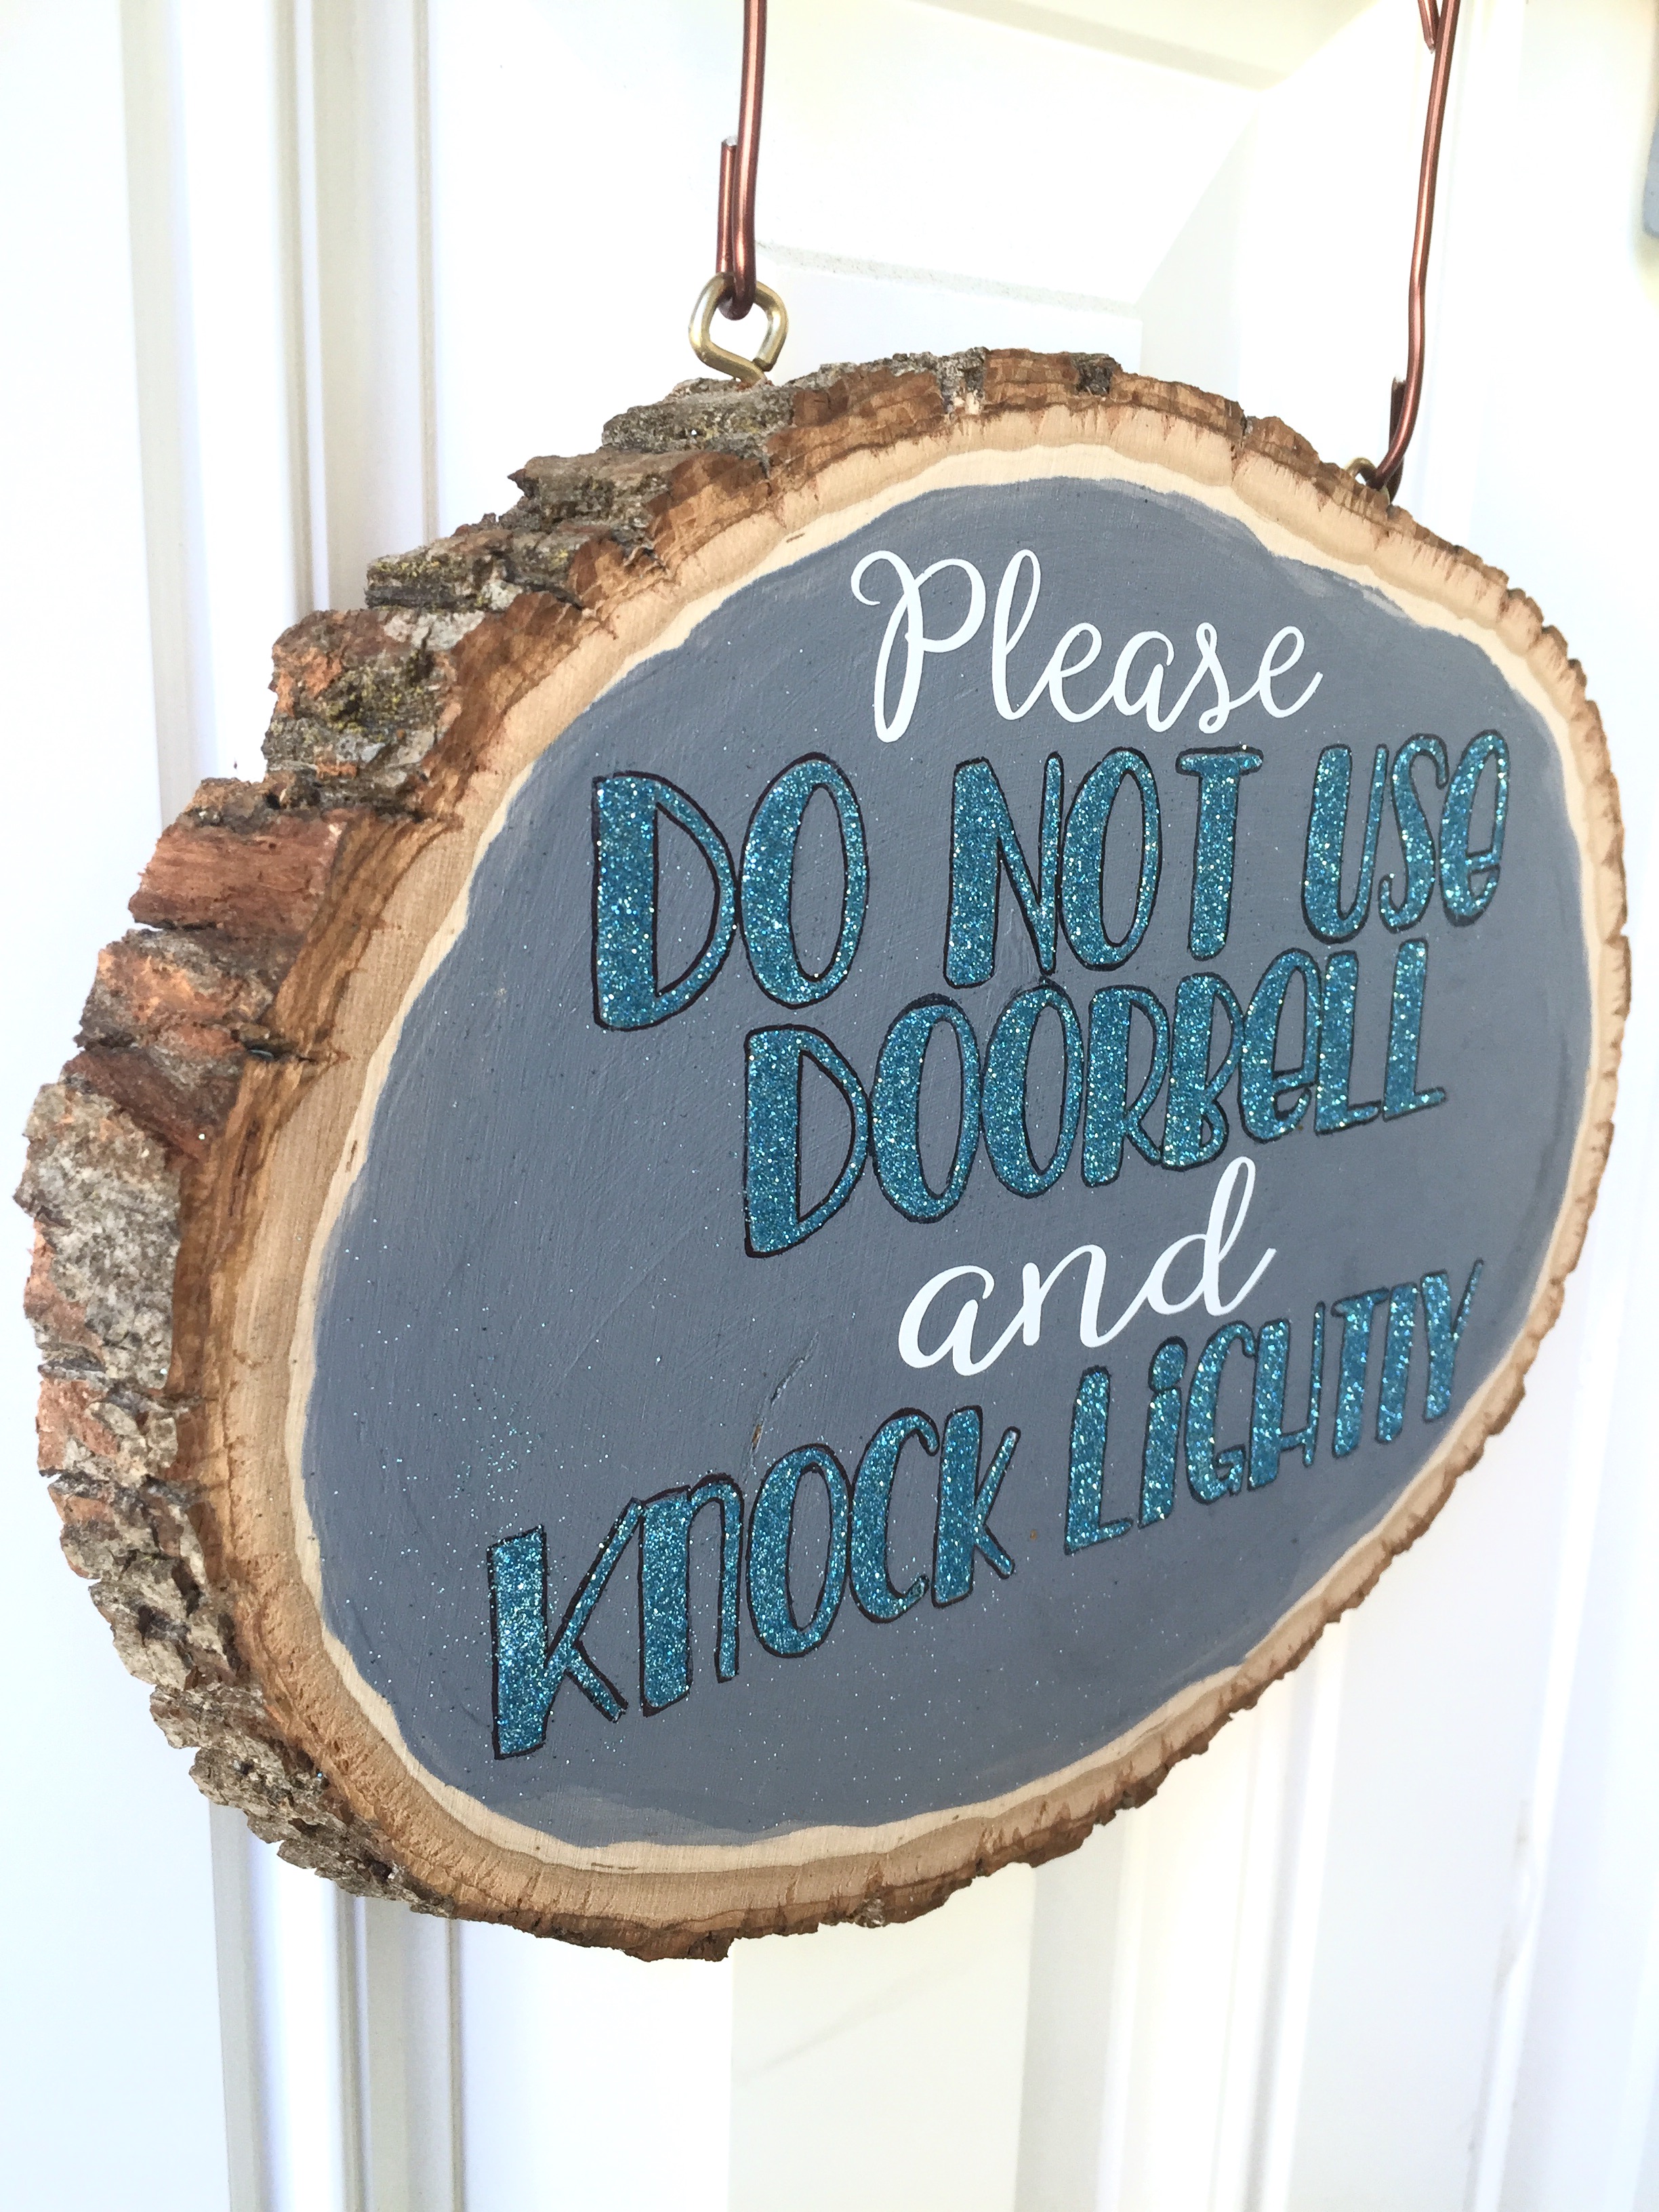
But look no further! Today I show you how to make the cutest sign for your front door that is not only chic, but will keep the bad UPS man from interrupting the 2 most peaceful hours of your day. Complete with glittery fonts (using Silhouette’s double sided adhesive paper) and adorable chevron design techniques. Now that, my fellow crafters, is absolutely priceless!
The Necessary Supplies:
- Silhouette Cameo (with cutting blade and 12″ cutting mat)
- Silhouette Double Sided Adhesive
- Silhouette Glitter (Essential Colors)
- Silhouette 9″ Adhesive Vinyl – White
- Silhouette 9″ Transfer Paper
- Grey Paint
- Small Painting Sponge
- .25″ Blue Painters Tape
- 16″ Wood Arrow
- 10″ Wood Round
- 16″ of wire
- 6 Screw Eyes (seen in frame hanging kits)
Fonts Needed From Silhouette Design Store:
- ZP Moonshine for Lucy (by ScrapNFonts) – Design ID #123092
- PN Peach Preserves Solid (by ScrapNFonts) – Design ID #128942
- Grassy Meadow Font (by Sweet Elsie) – Design ID # 119456
Step 1: Measure and Install Hardware
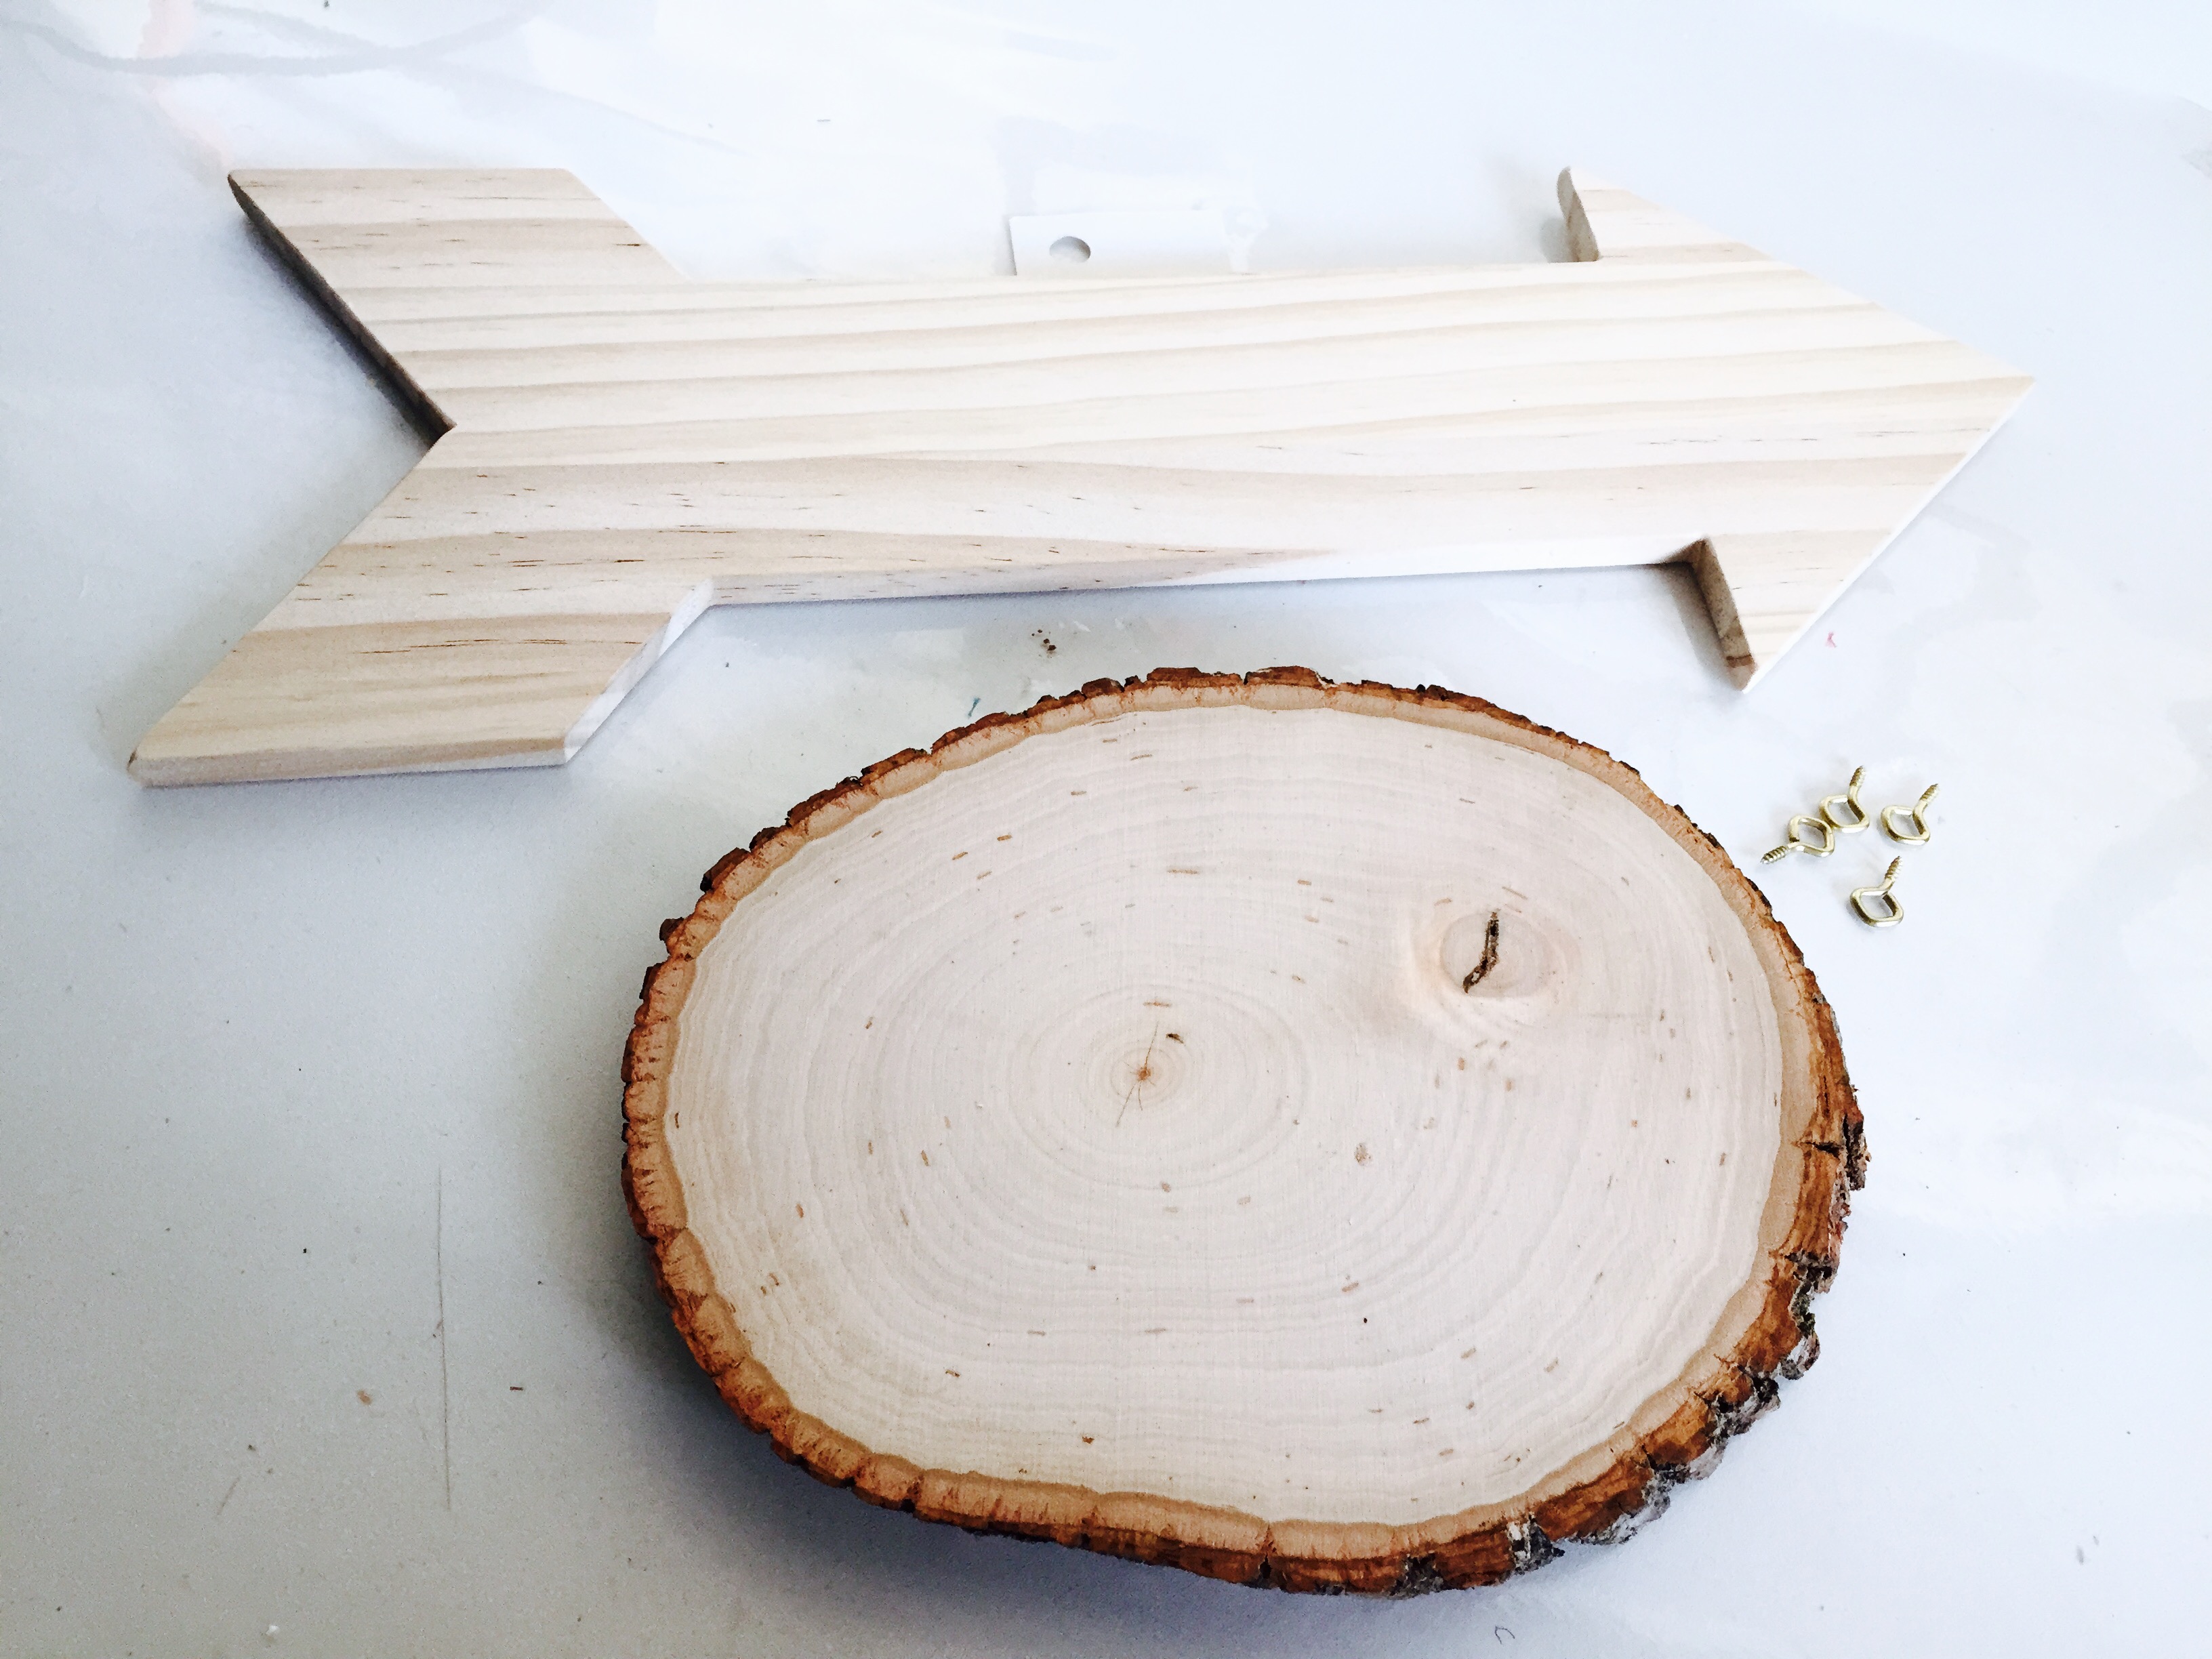
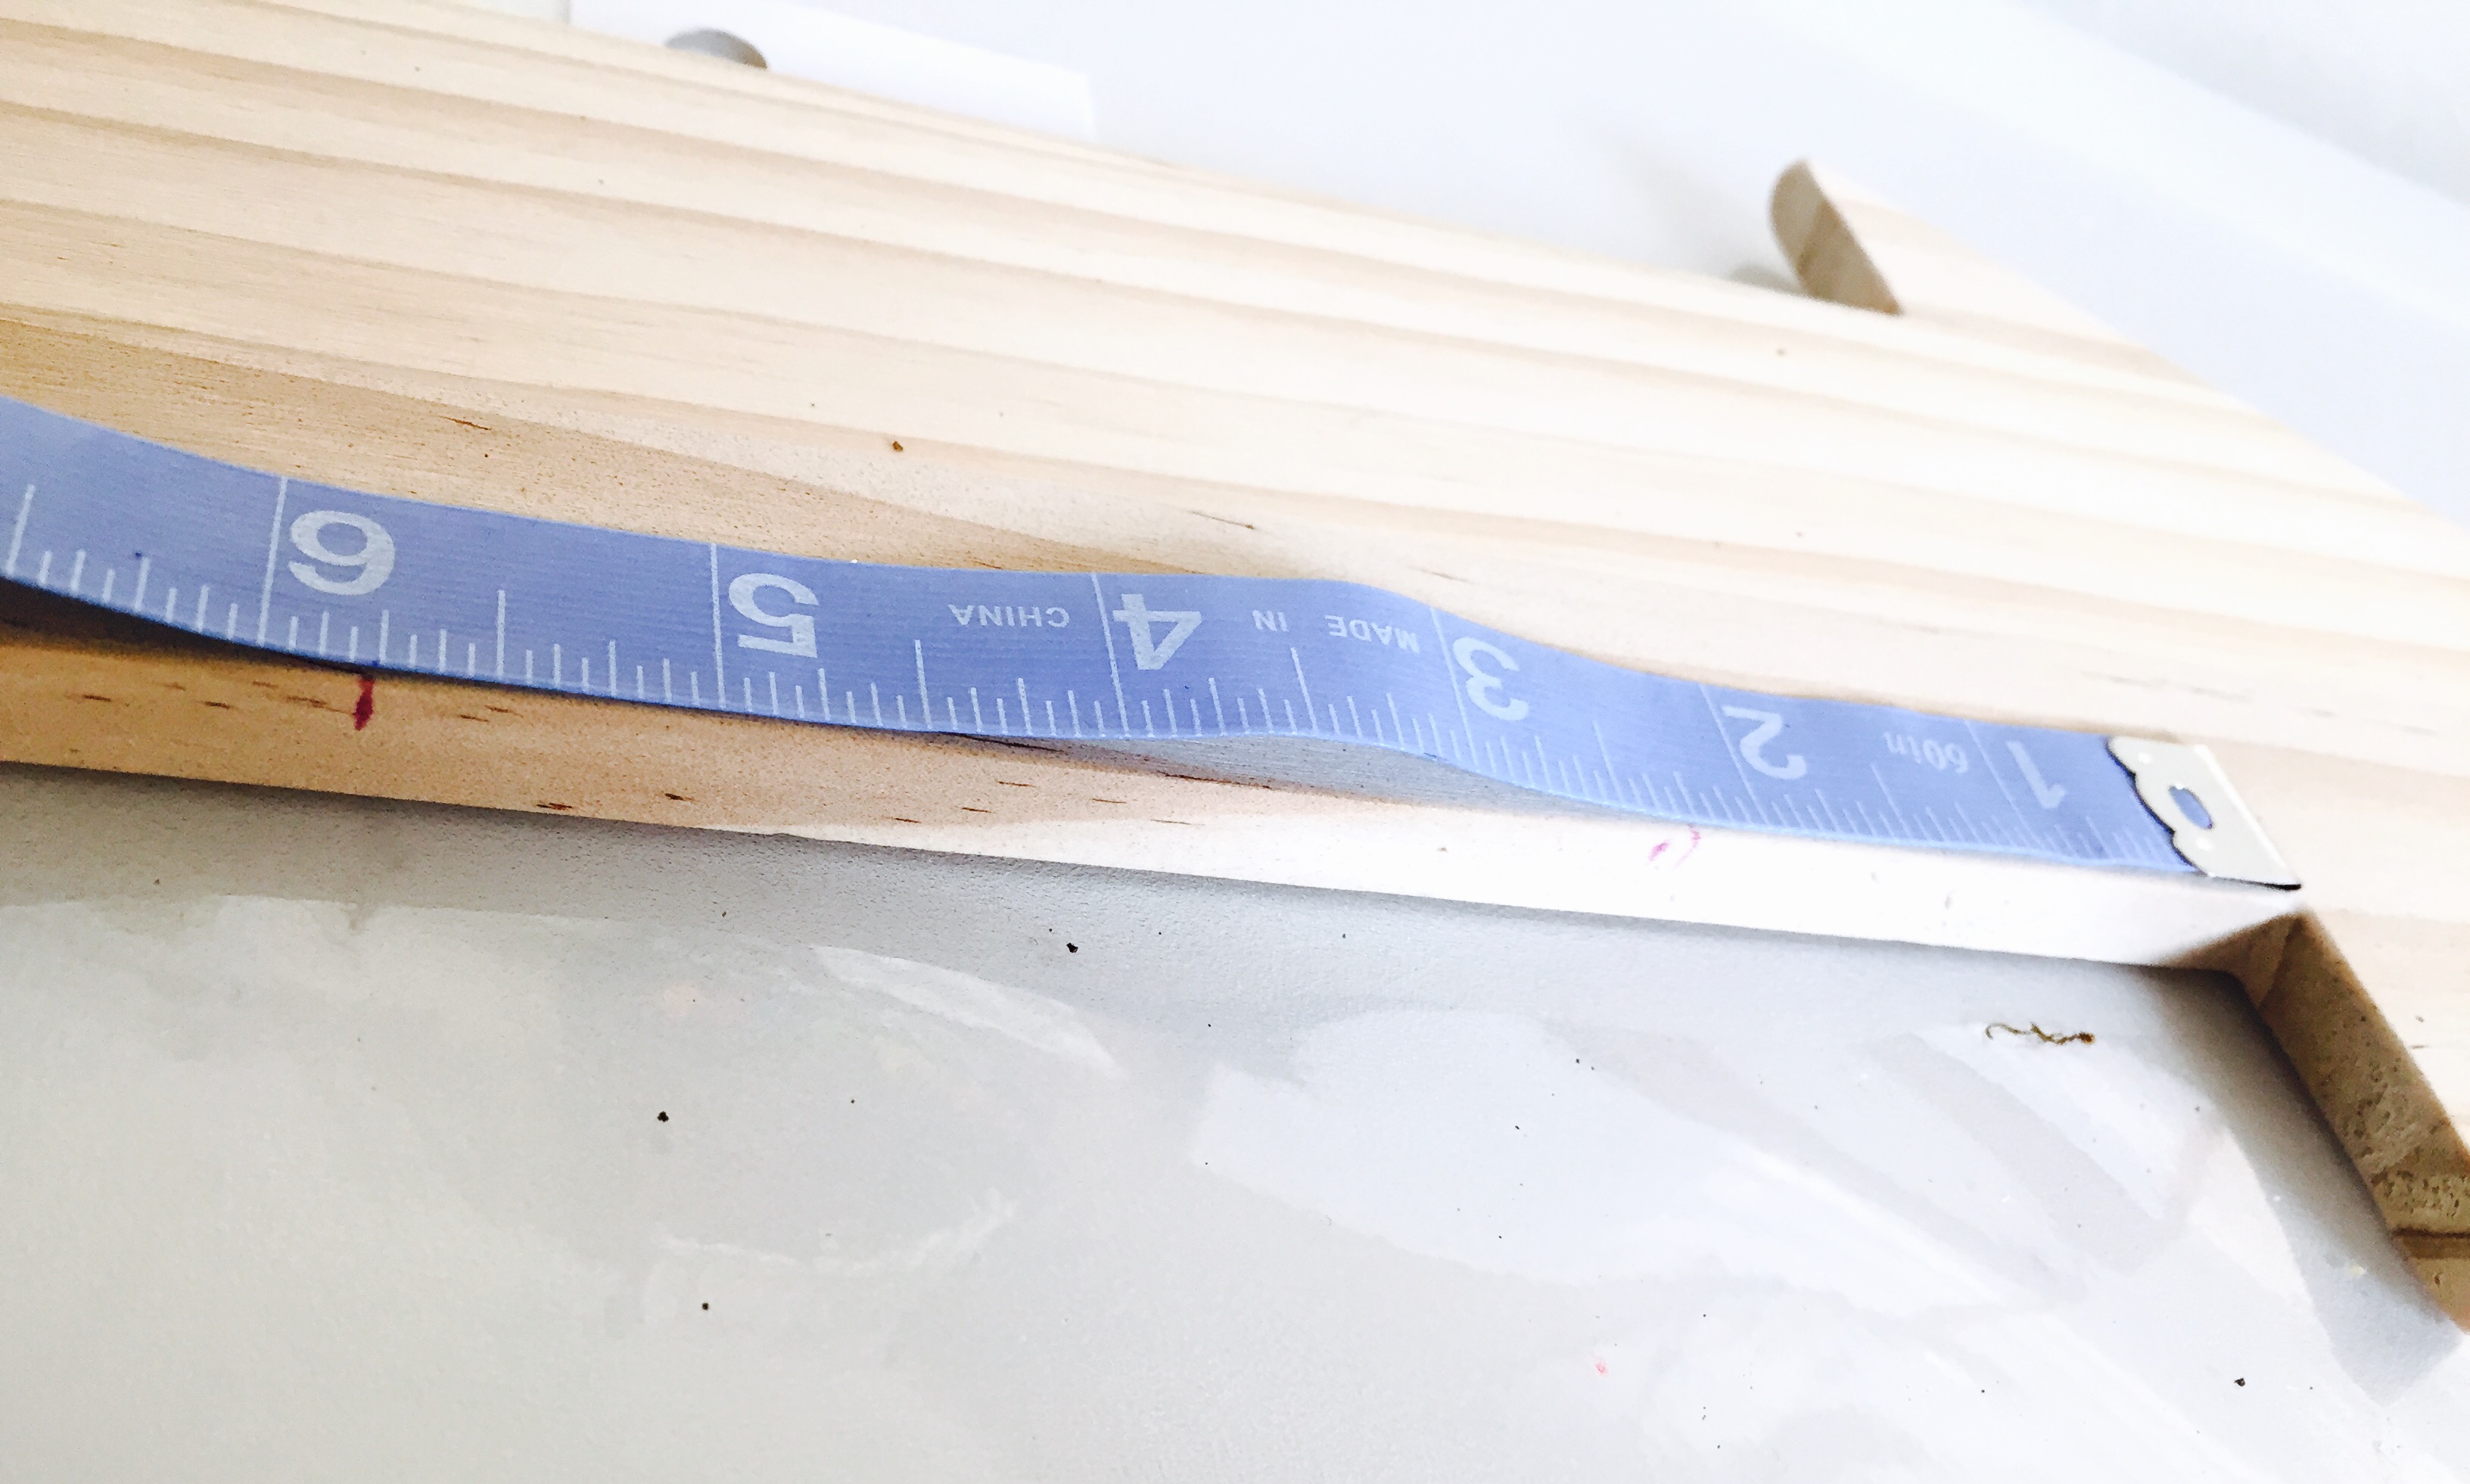
- Measure the space between the back tip of the arrow and the front tip of the arrow tail. Put markings 4″ apart on the top and bottom of this space, then screw your “screw eye” hardware into where your markings are (they’re easy to just turn and screw in with your hand).
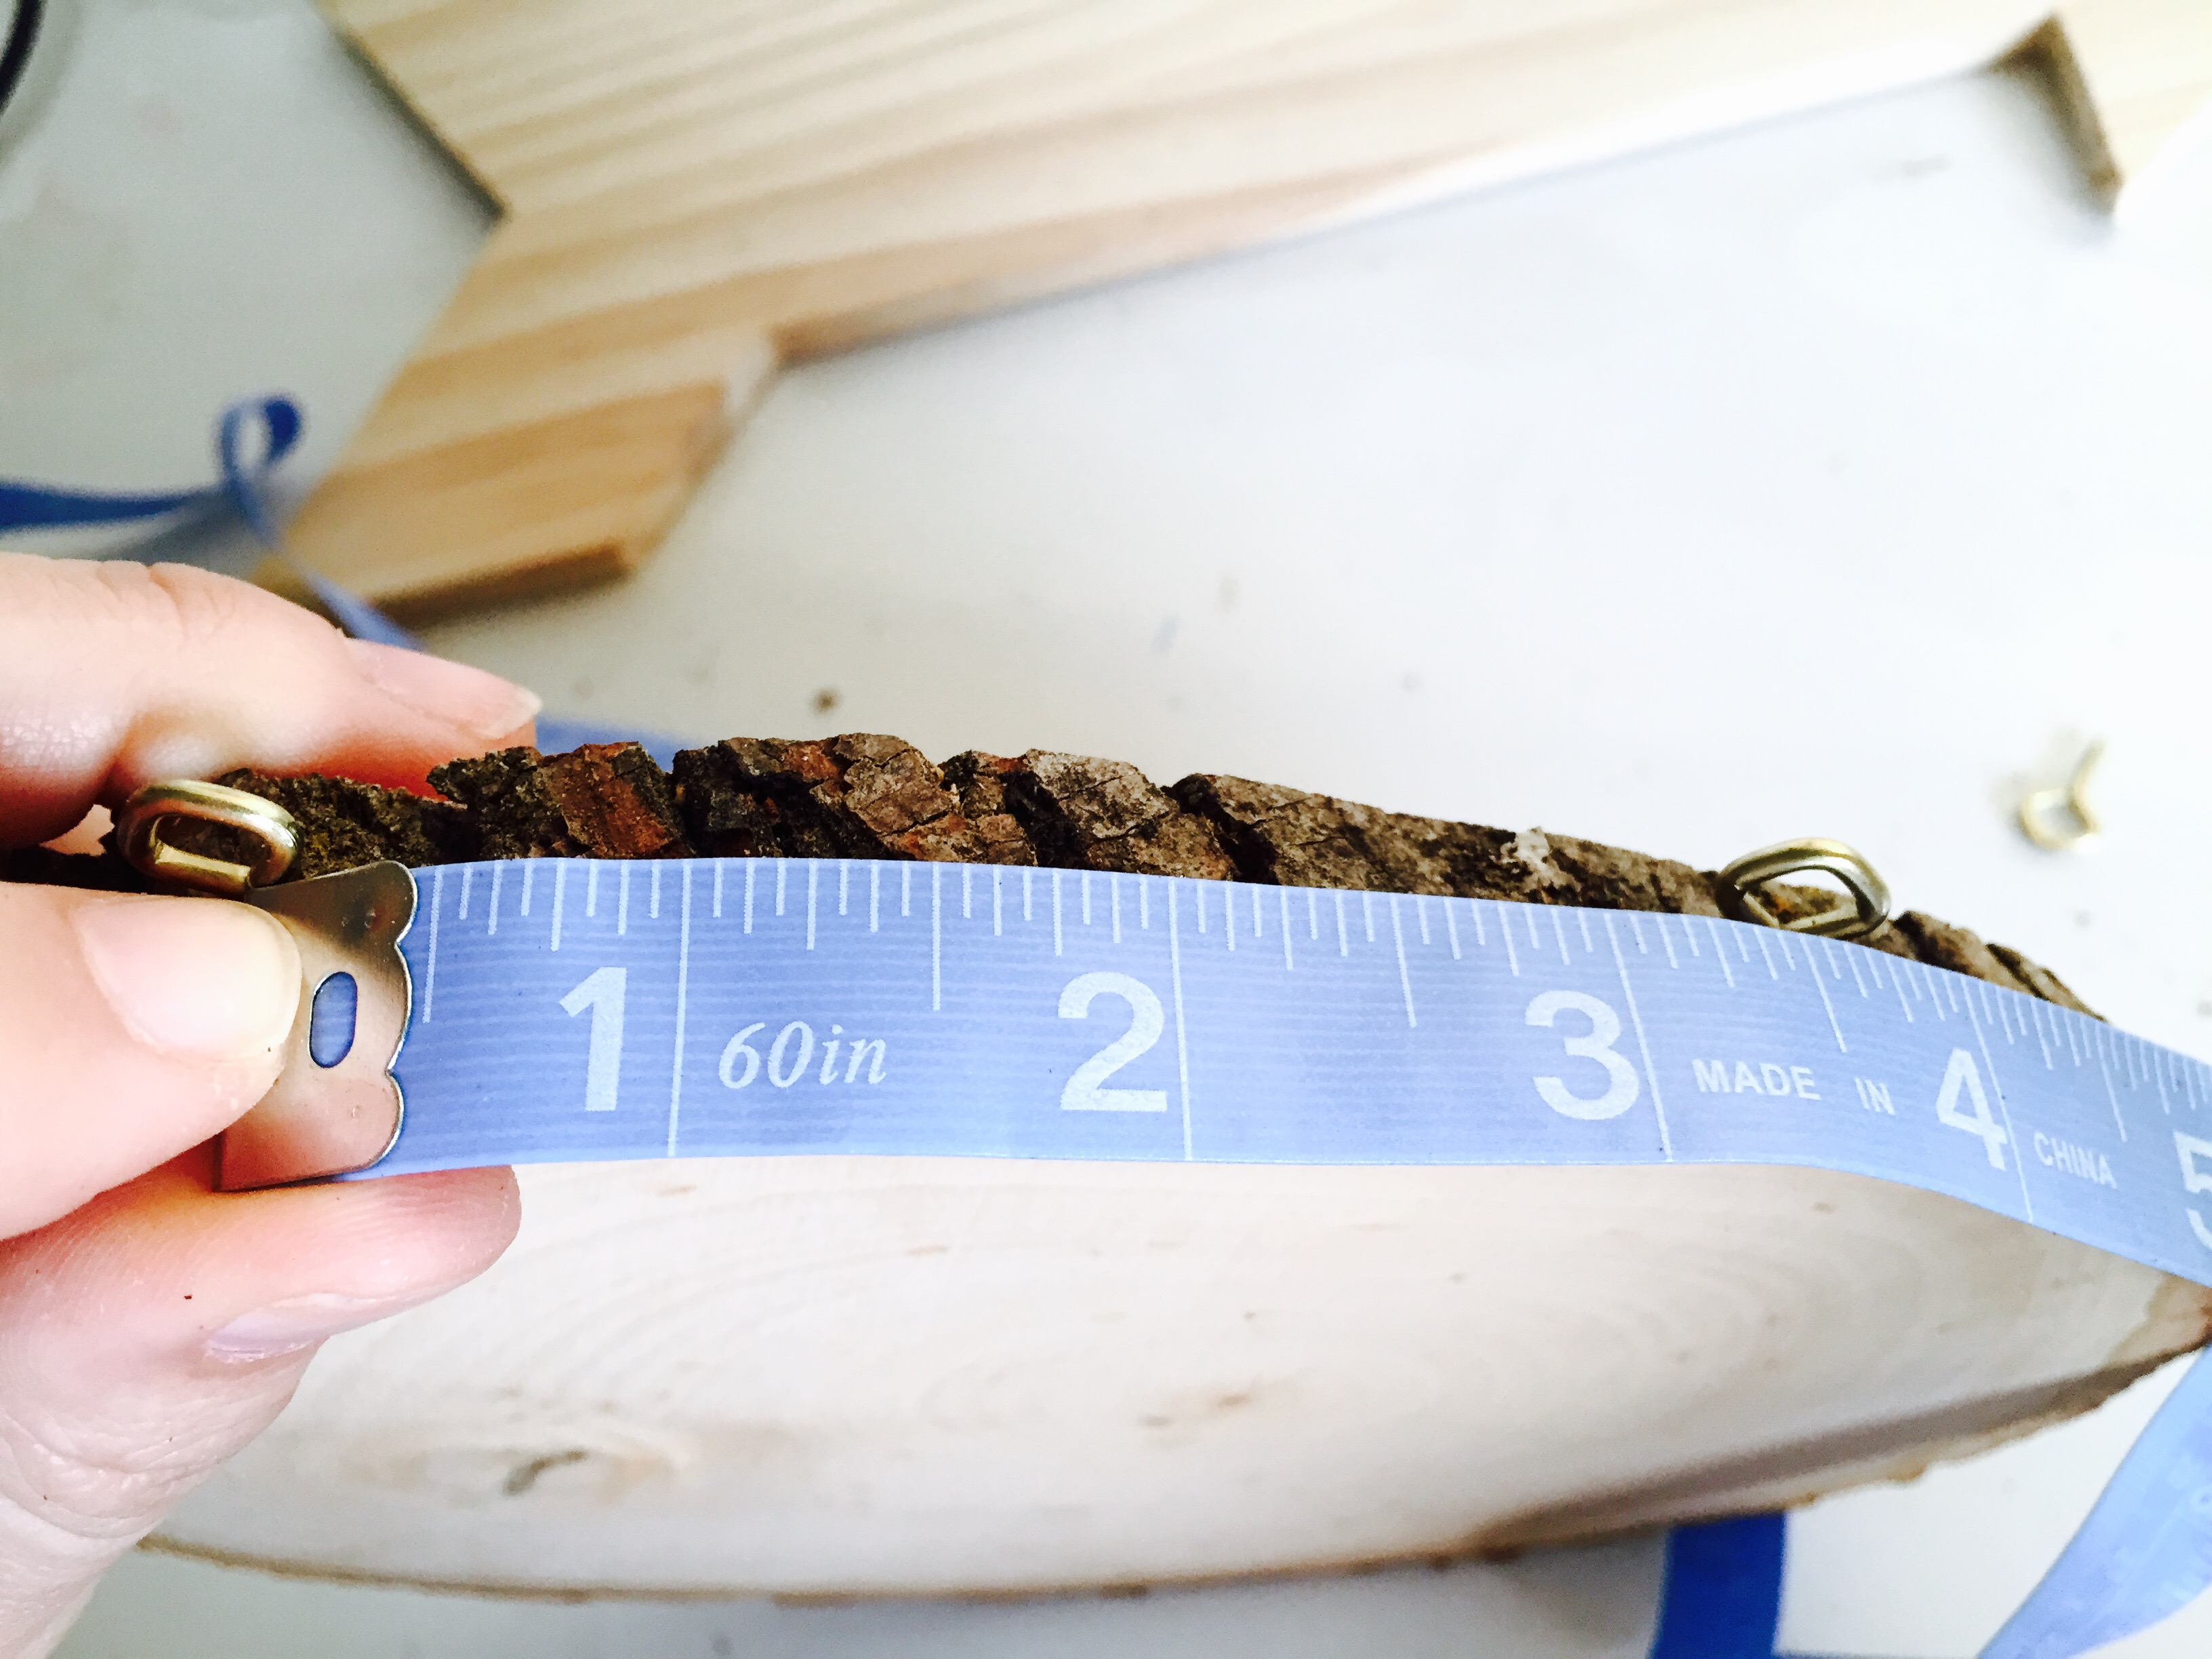
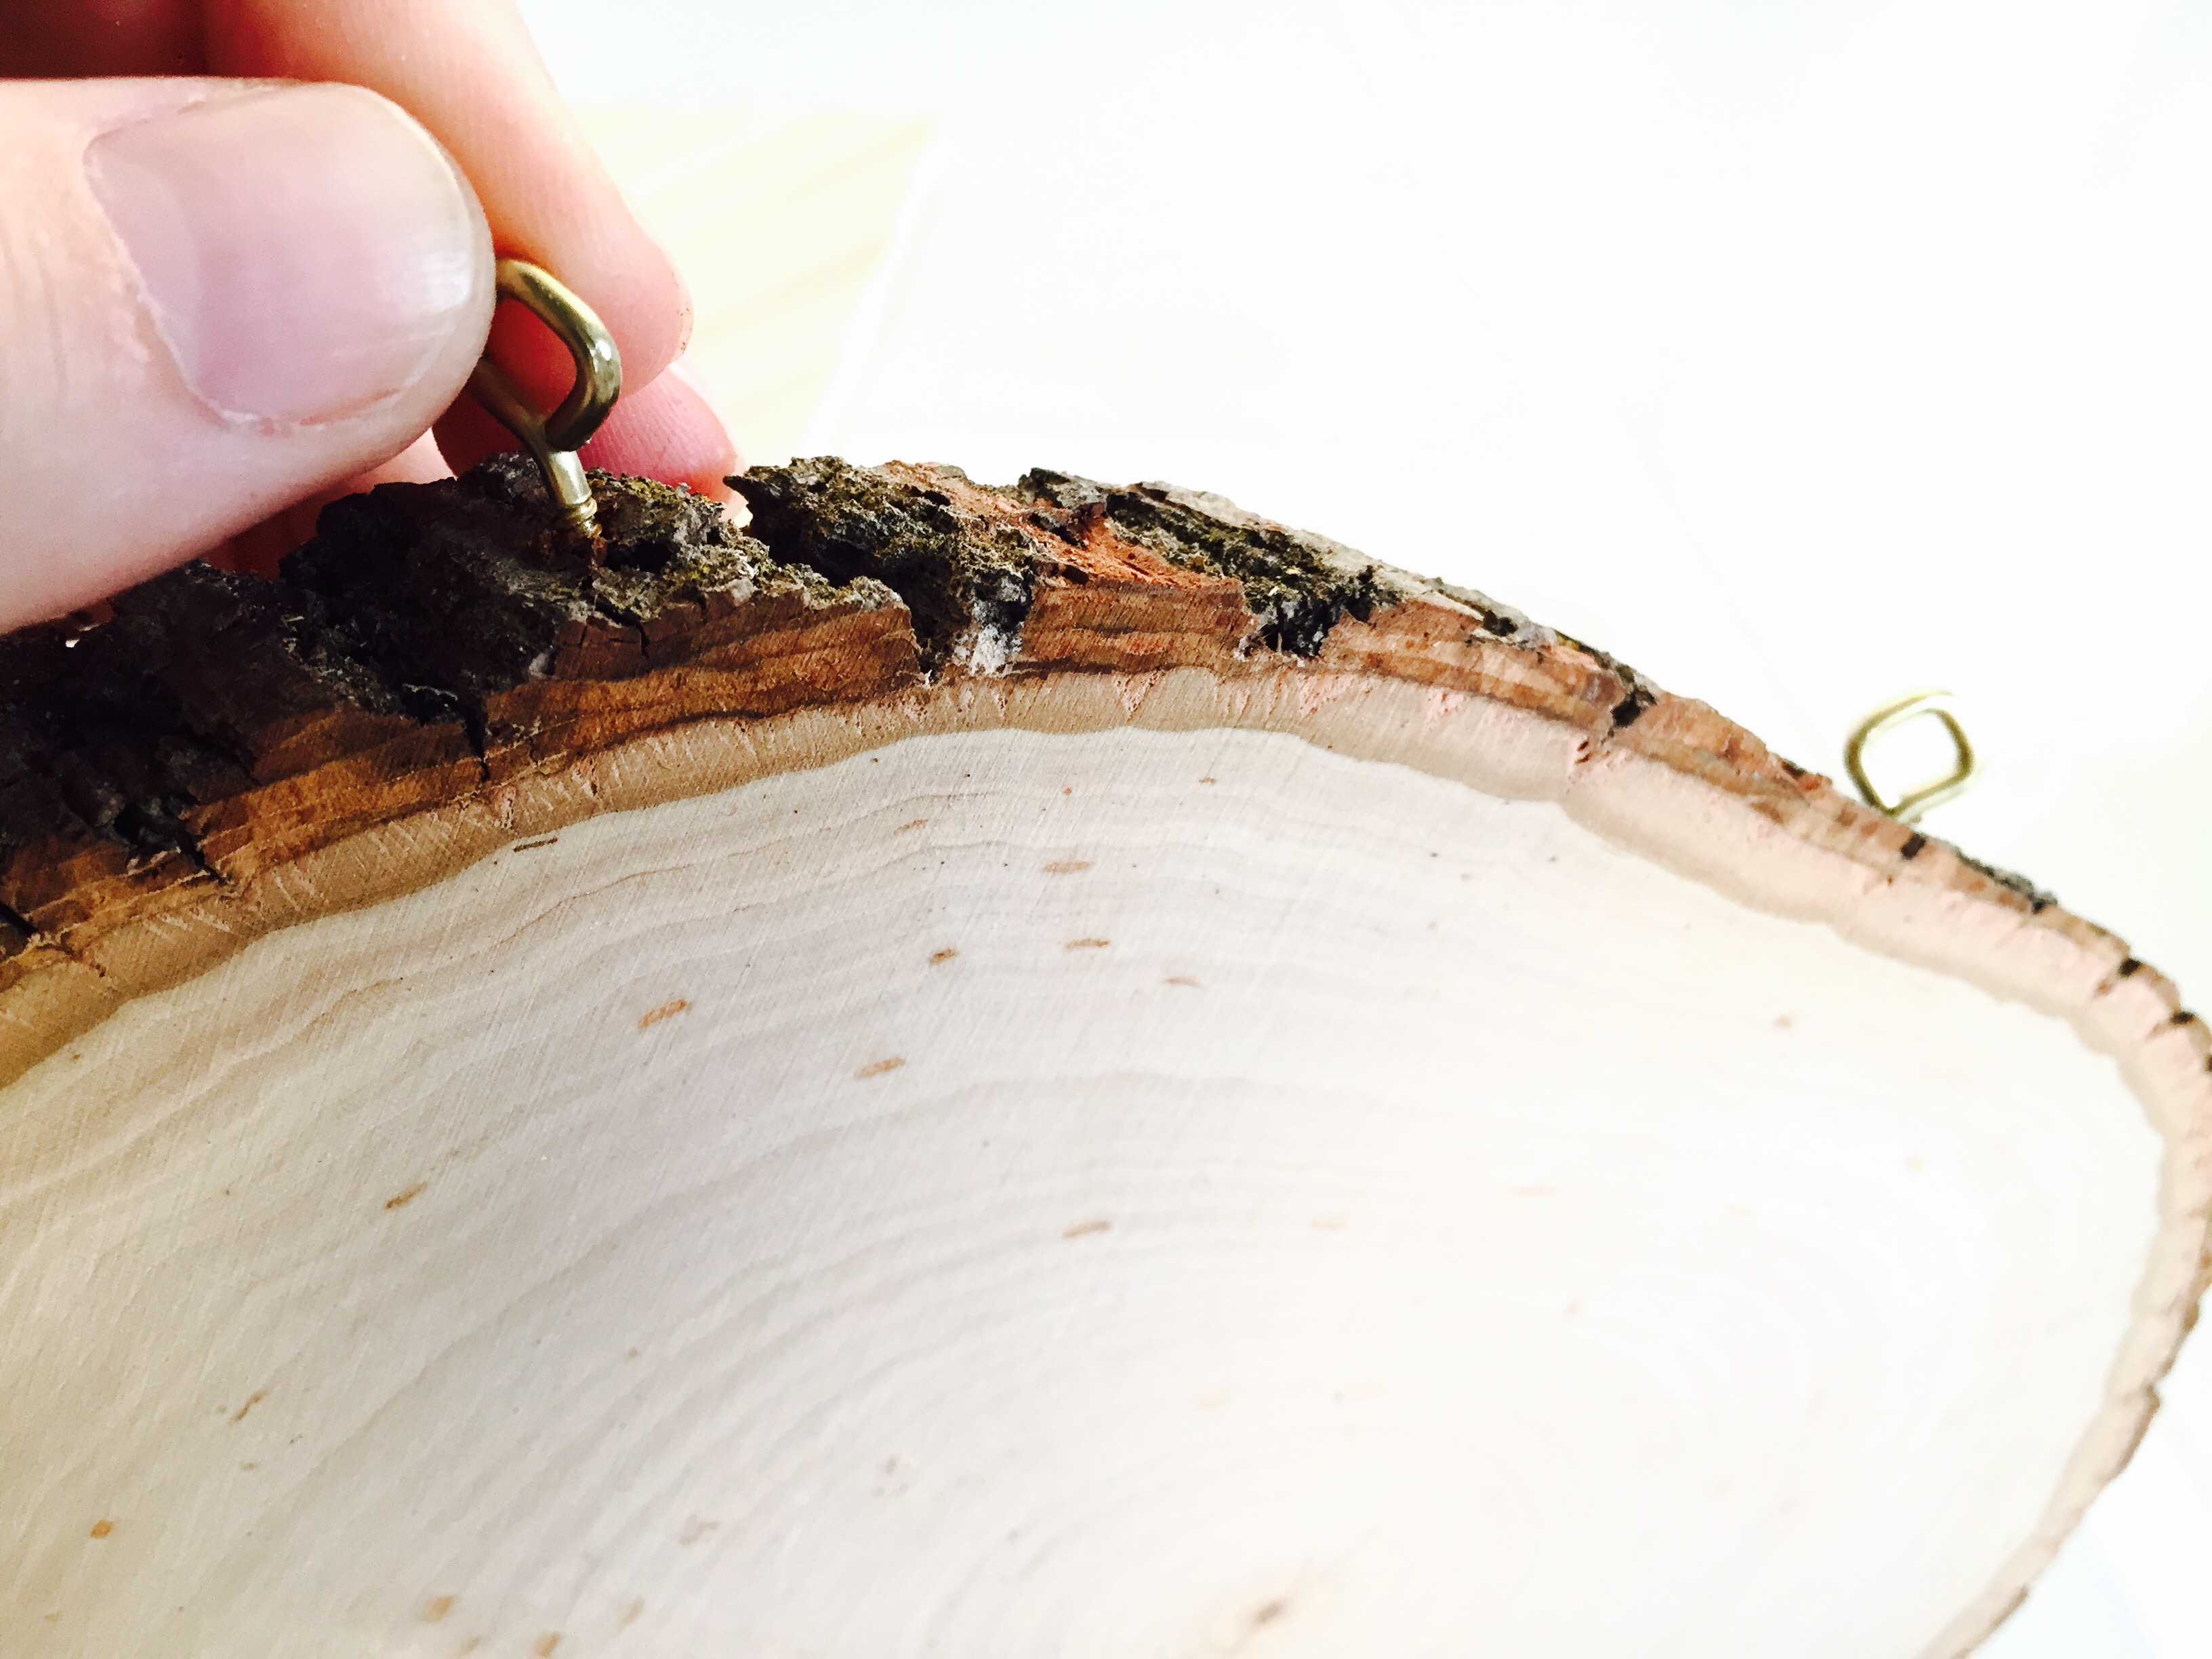
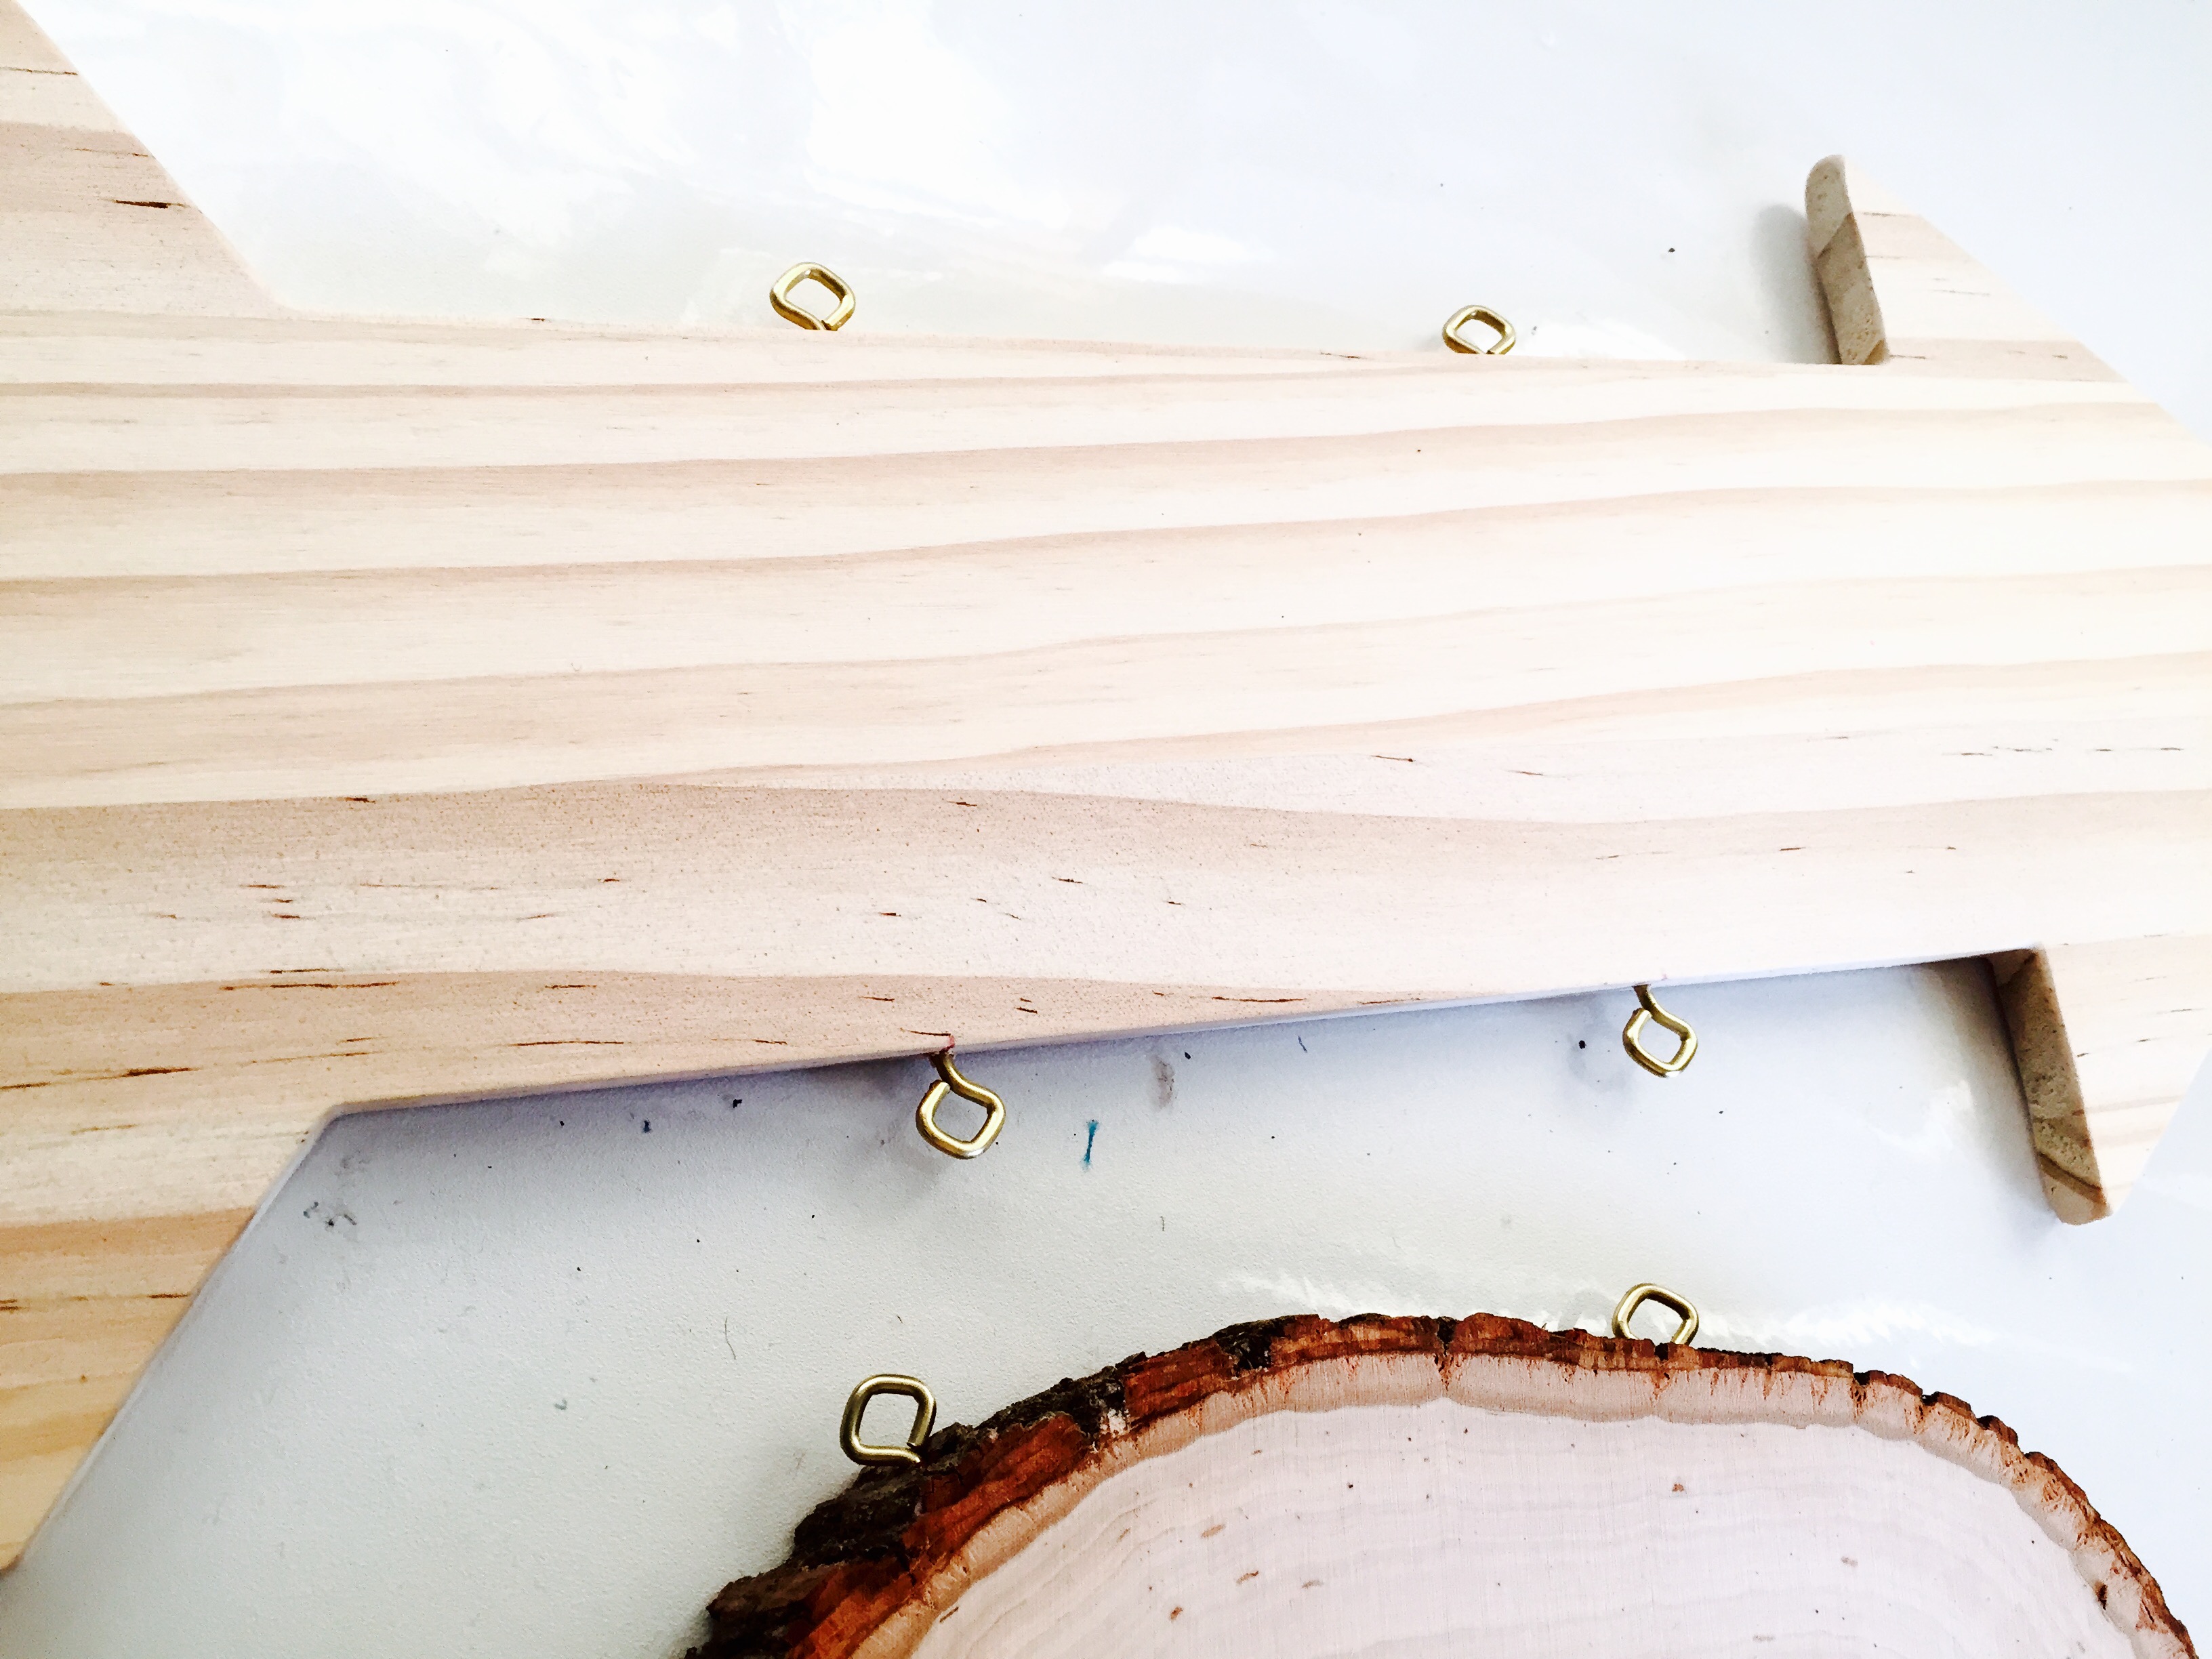
- Do the same thing on your wood round, making the screw eyes 4″ apart on the top of your round. Screw them in.
Step 2: Tape off Chevron Design
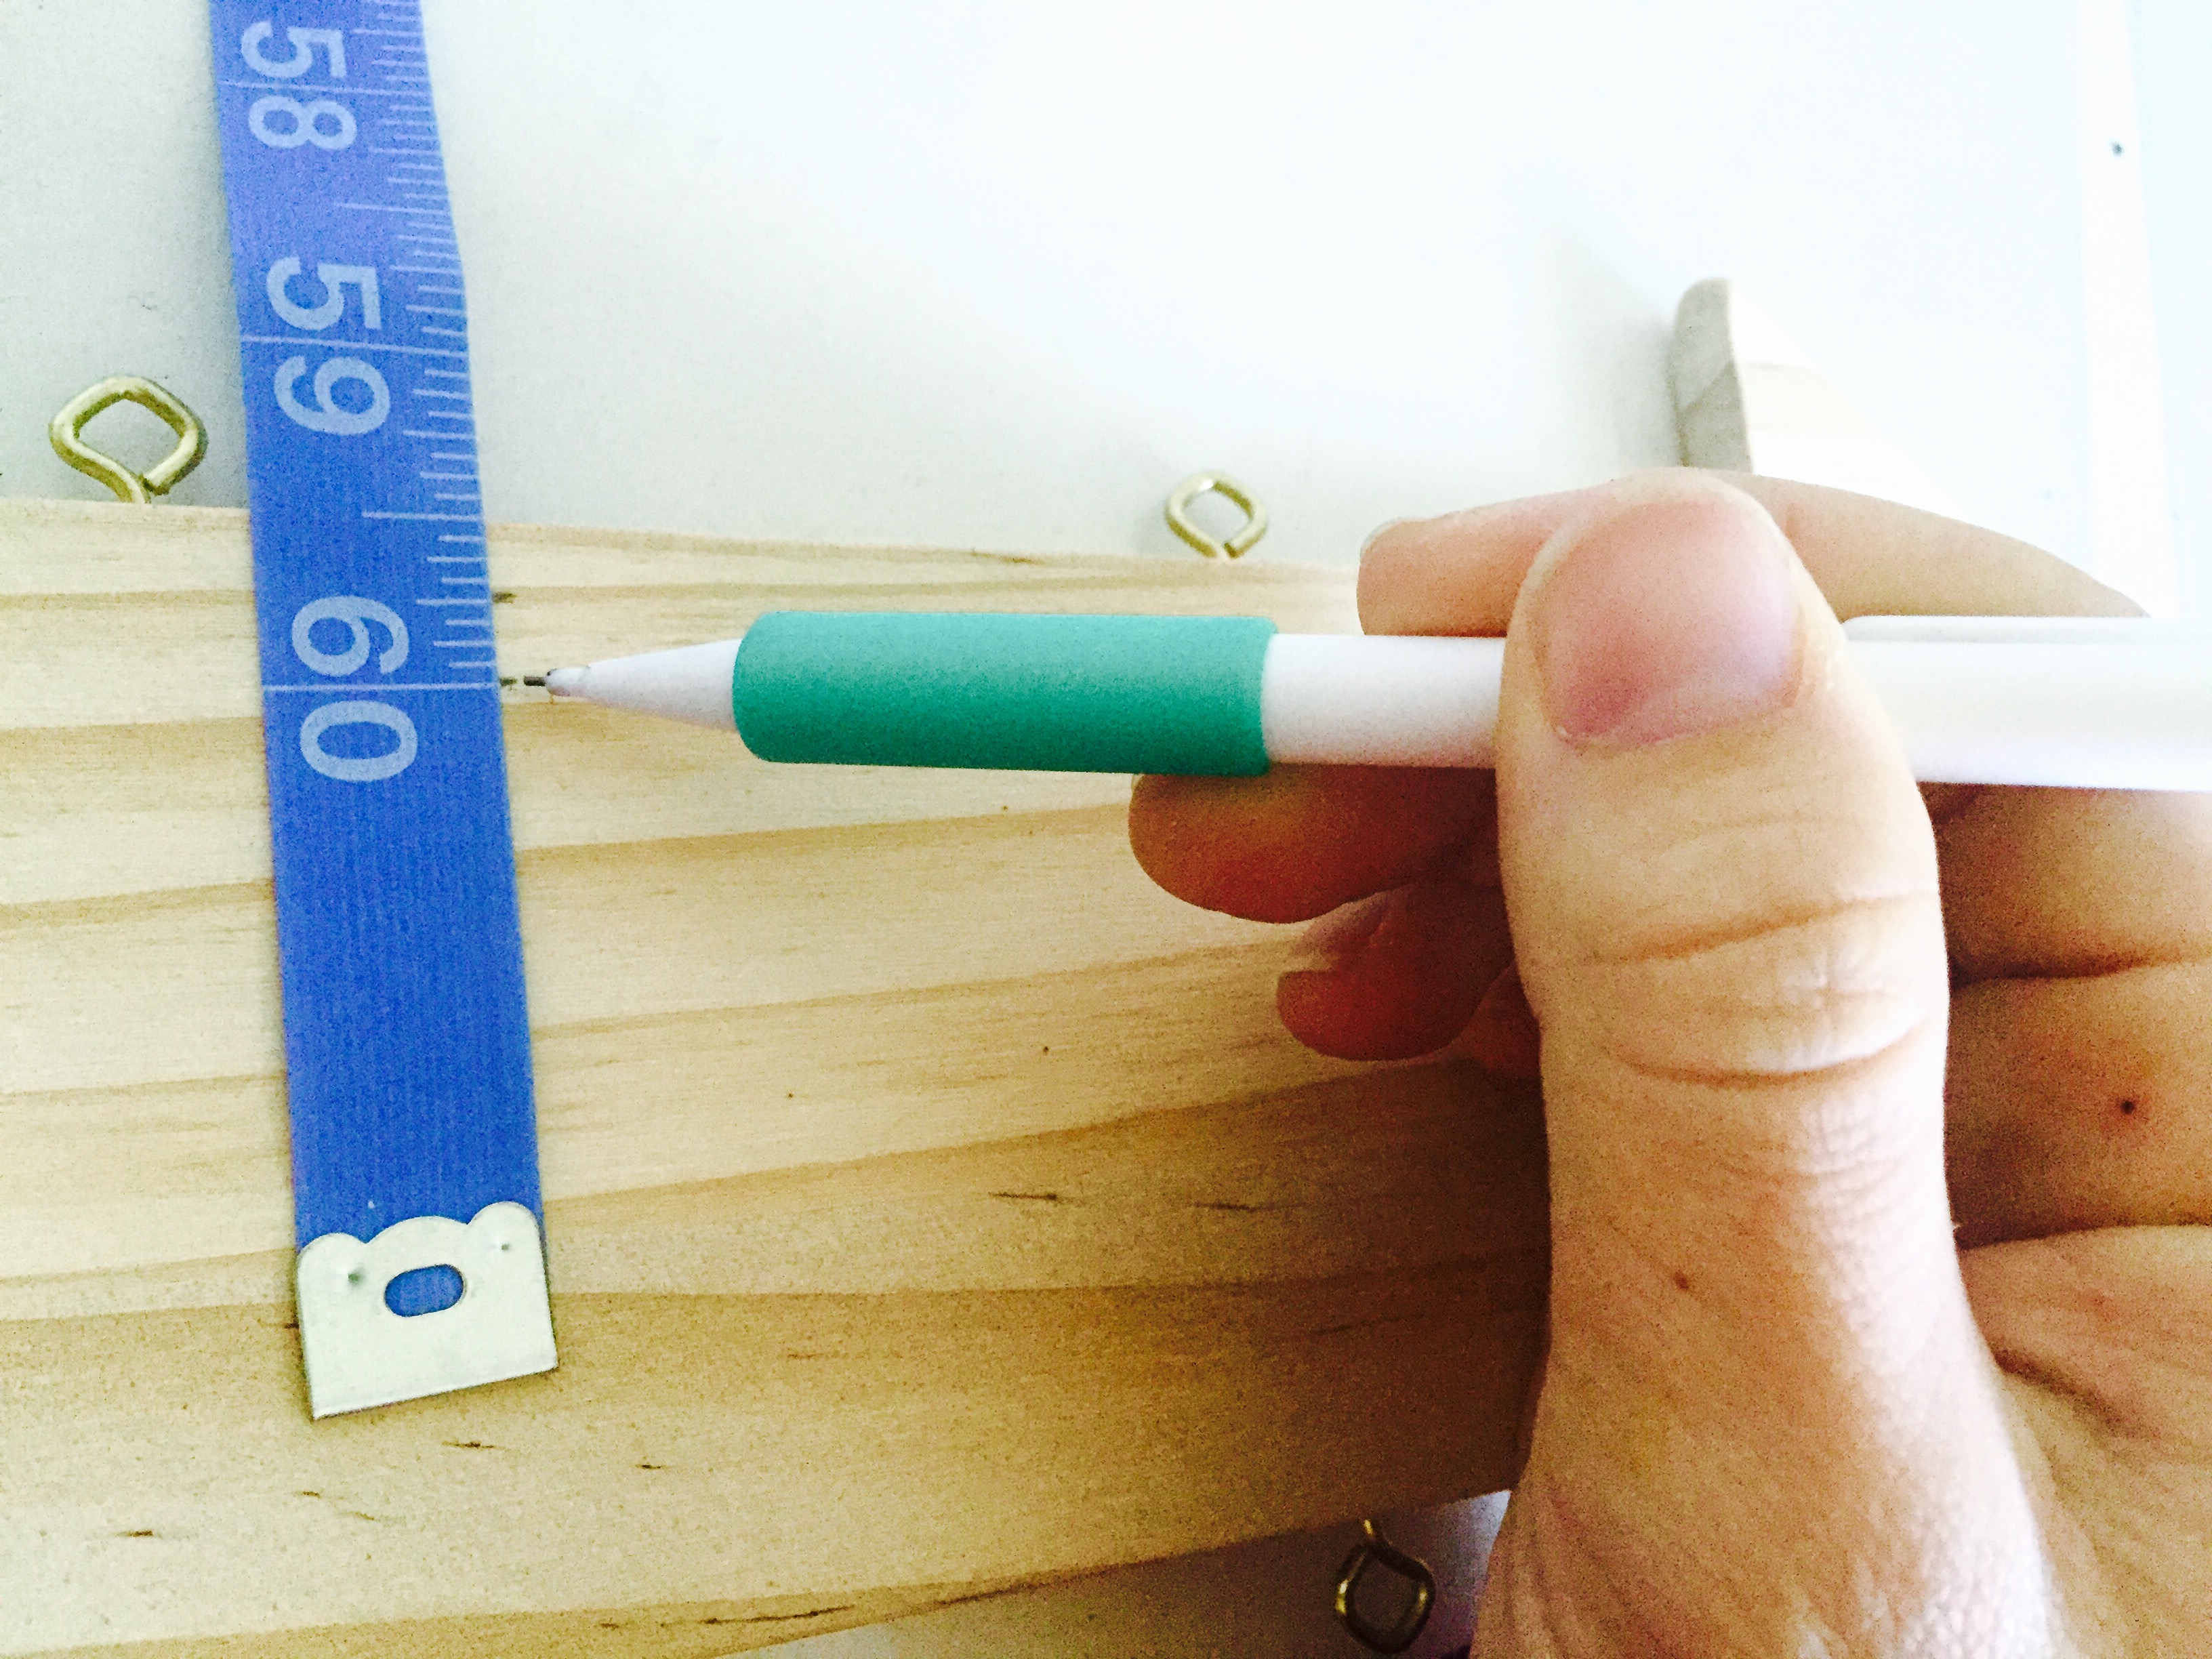
- Measure down the edge of your arrow, .25″ away from the outer edge, making pencil markings along the way.
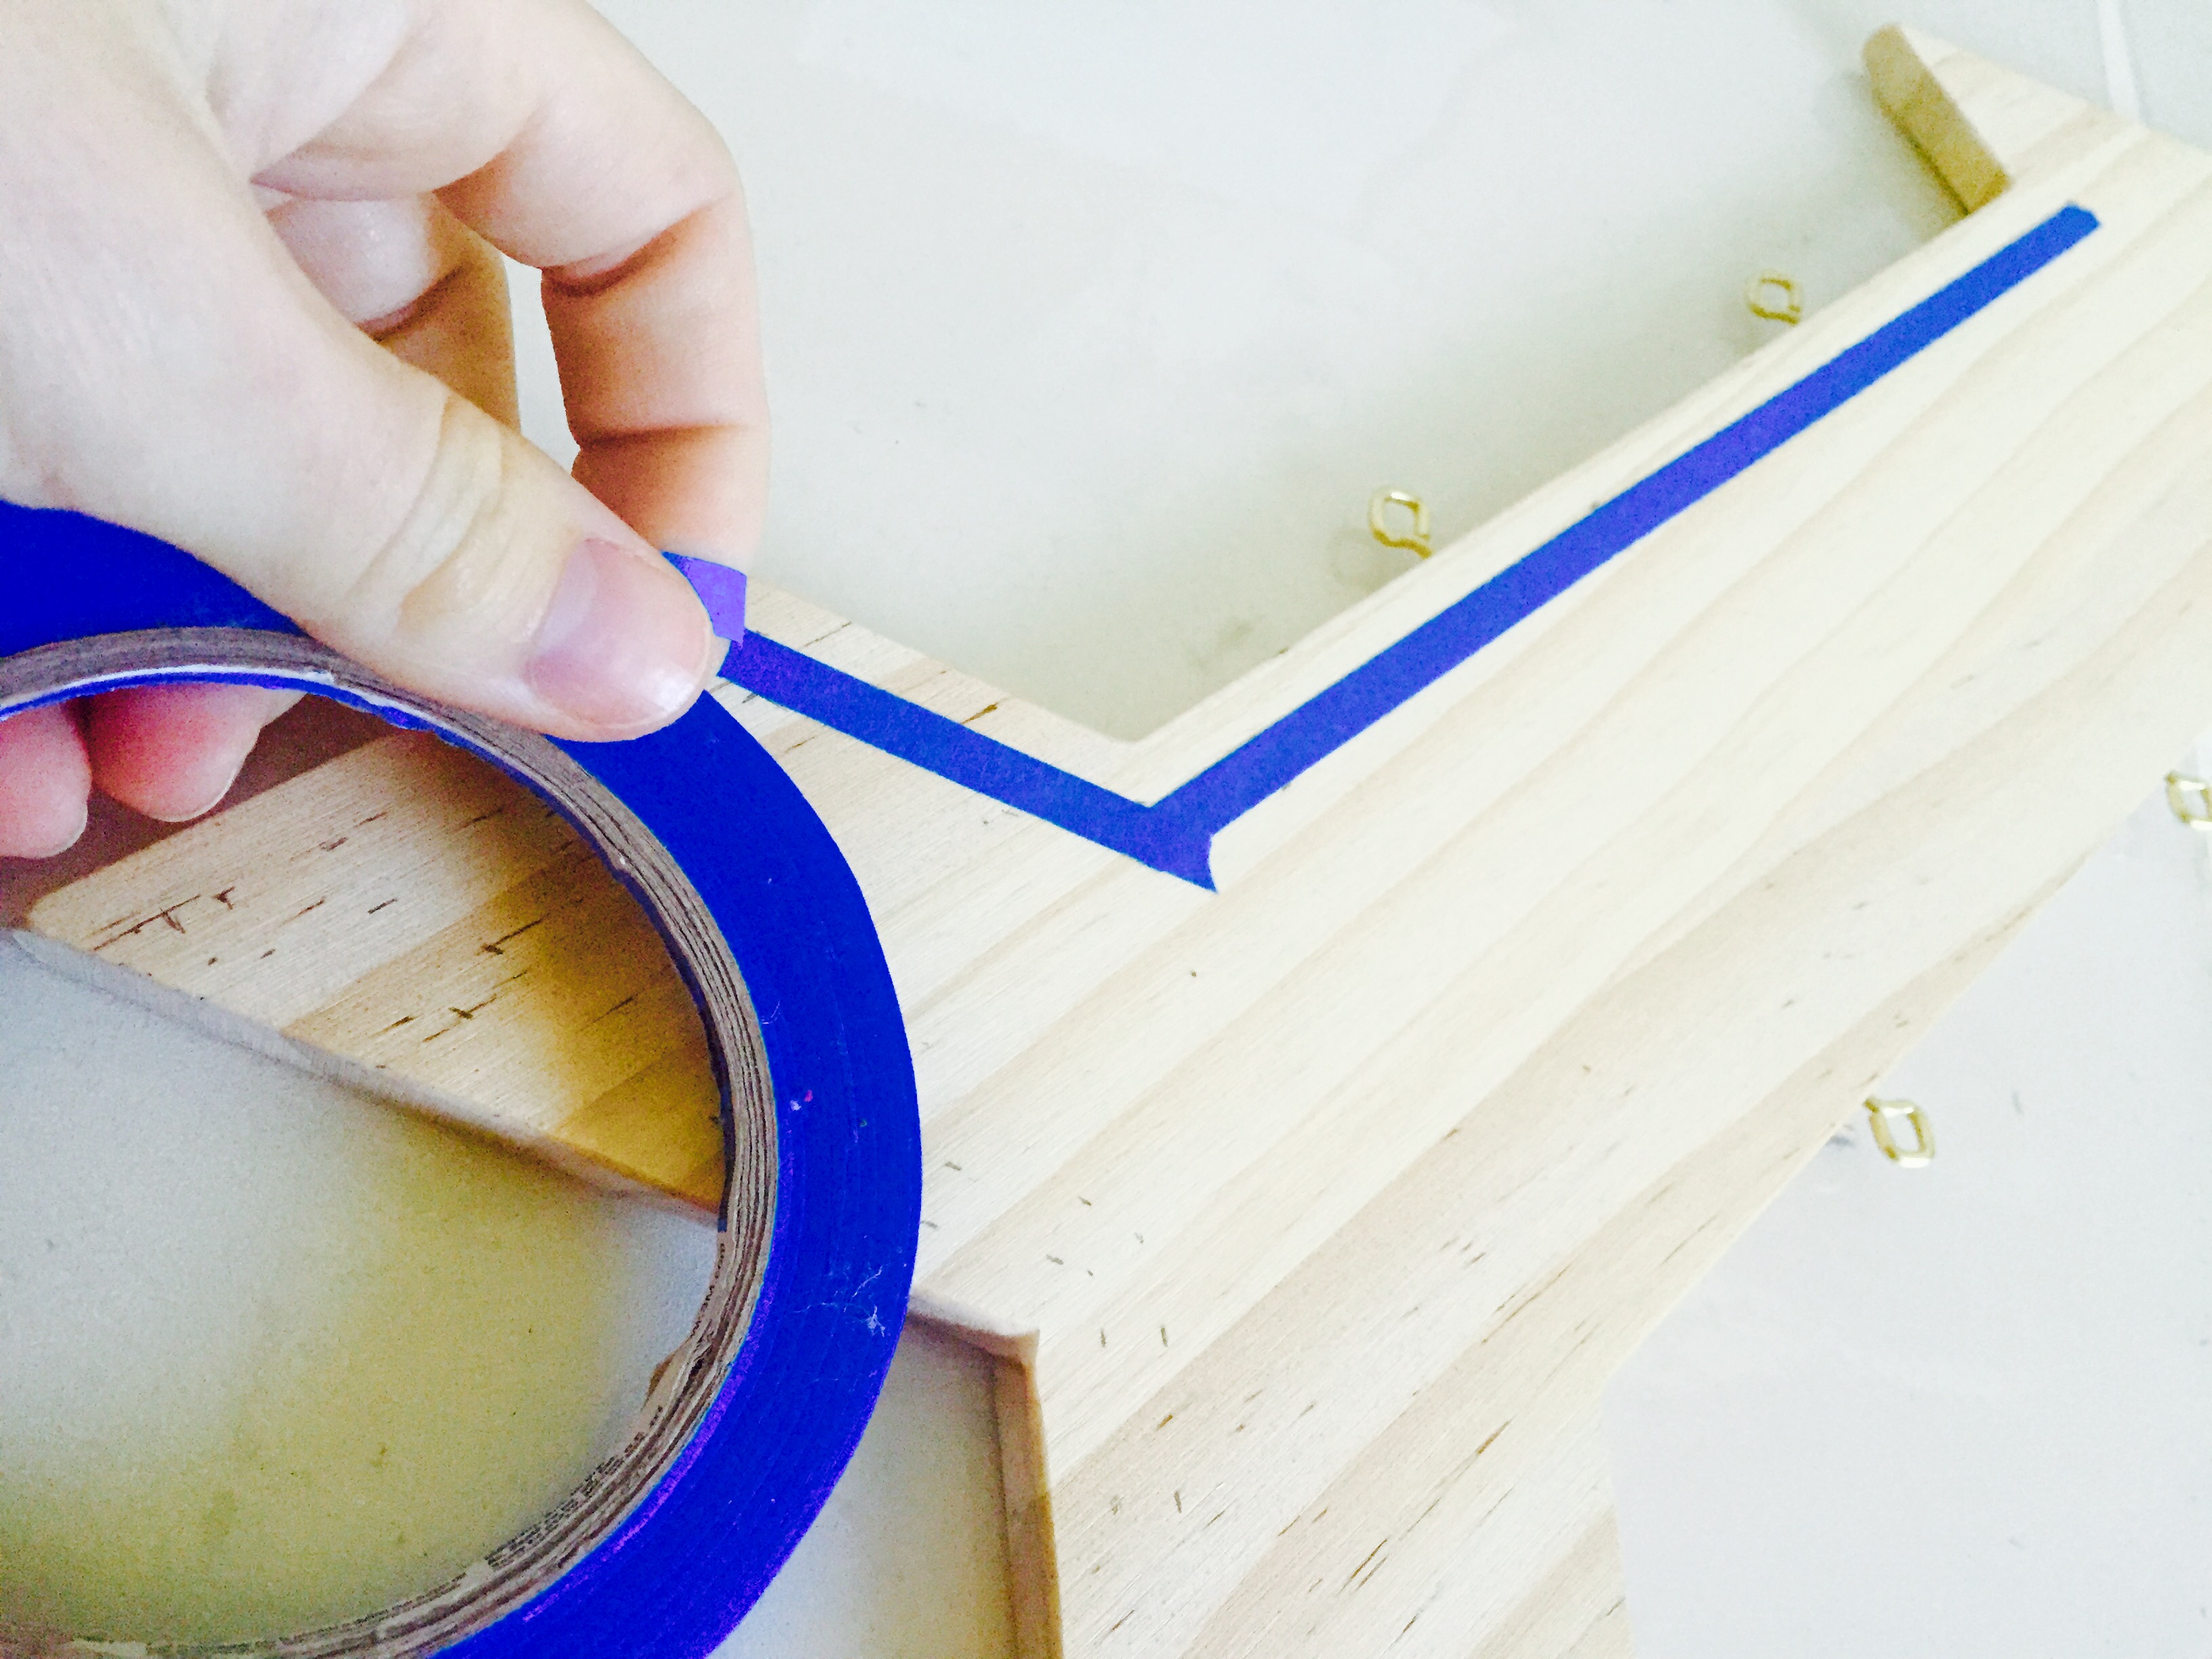
- Then, place your painters tape at the bottom edge of these markings so that the tape is exactly .25″ away from the edge of your arrow.
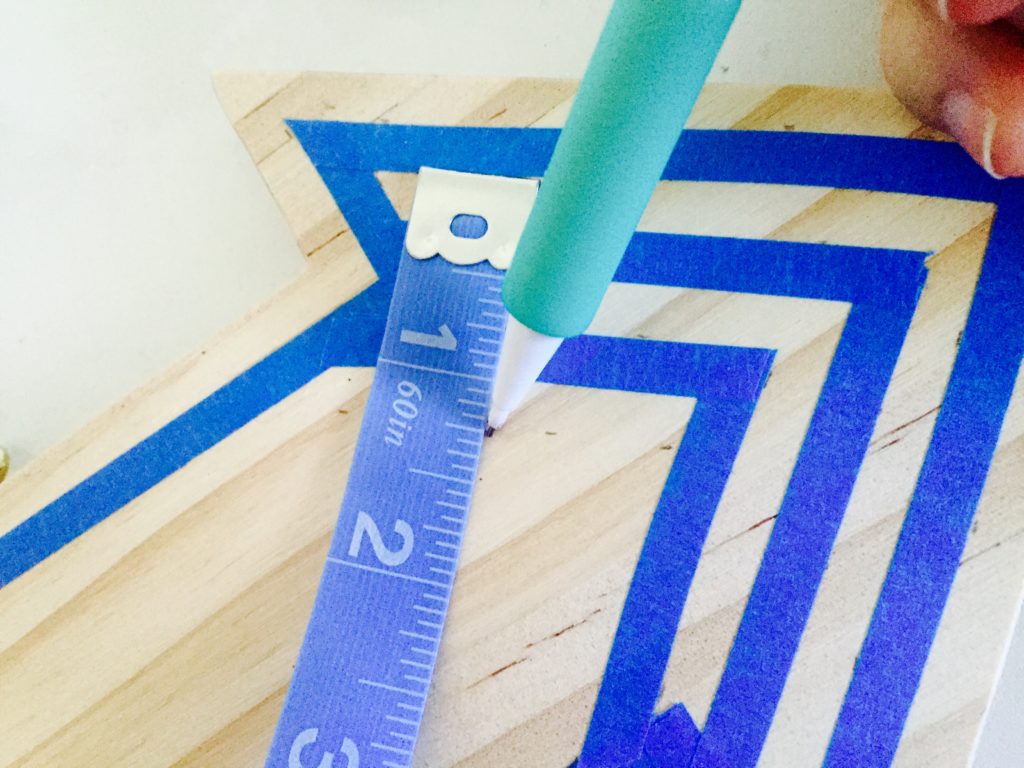
- Now, once your outer edge painters tape is down, make the same measurement (.25″) along the point of the arrow (measuring from the bottom end of your last row of painters tape).
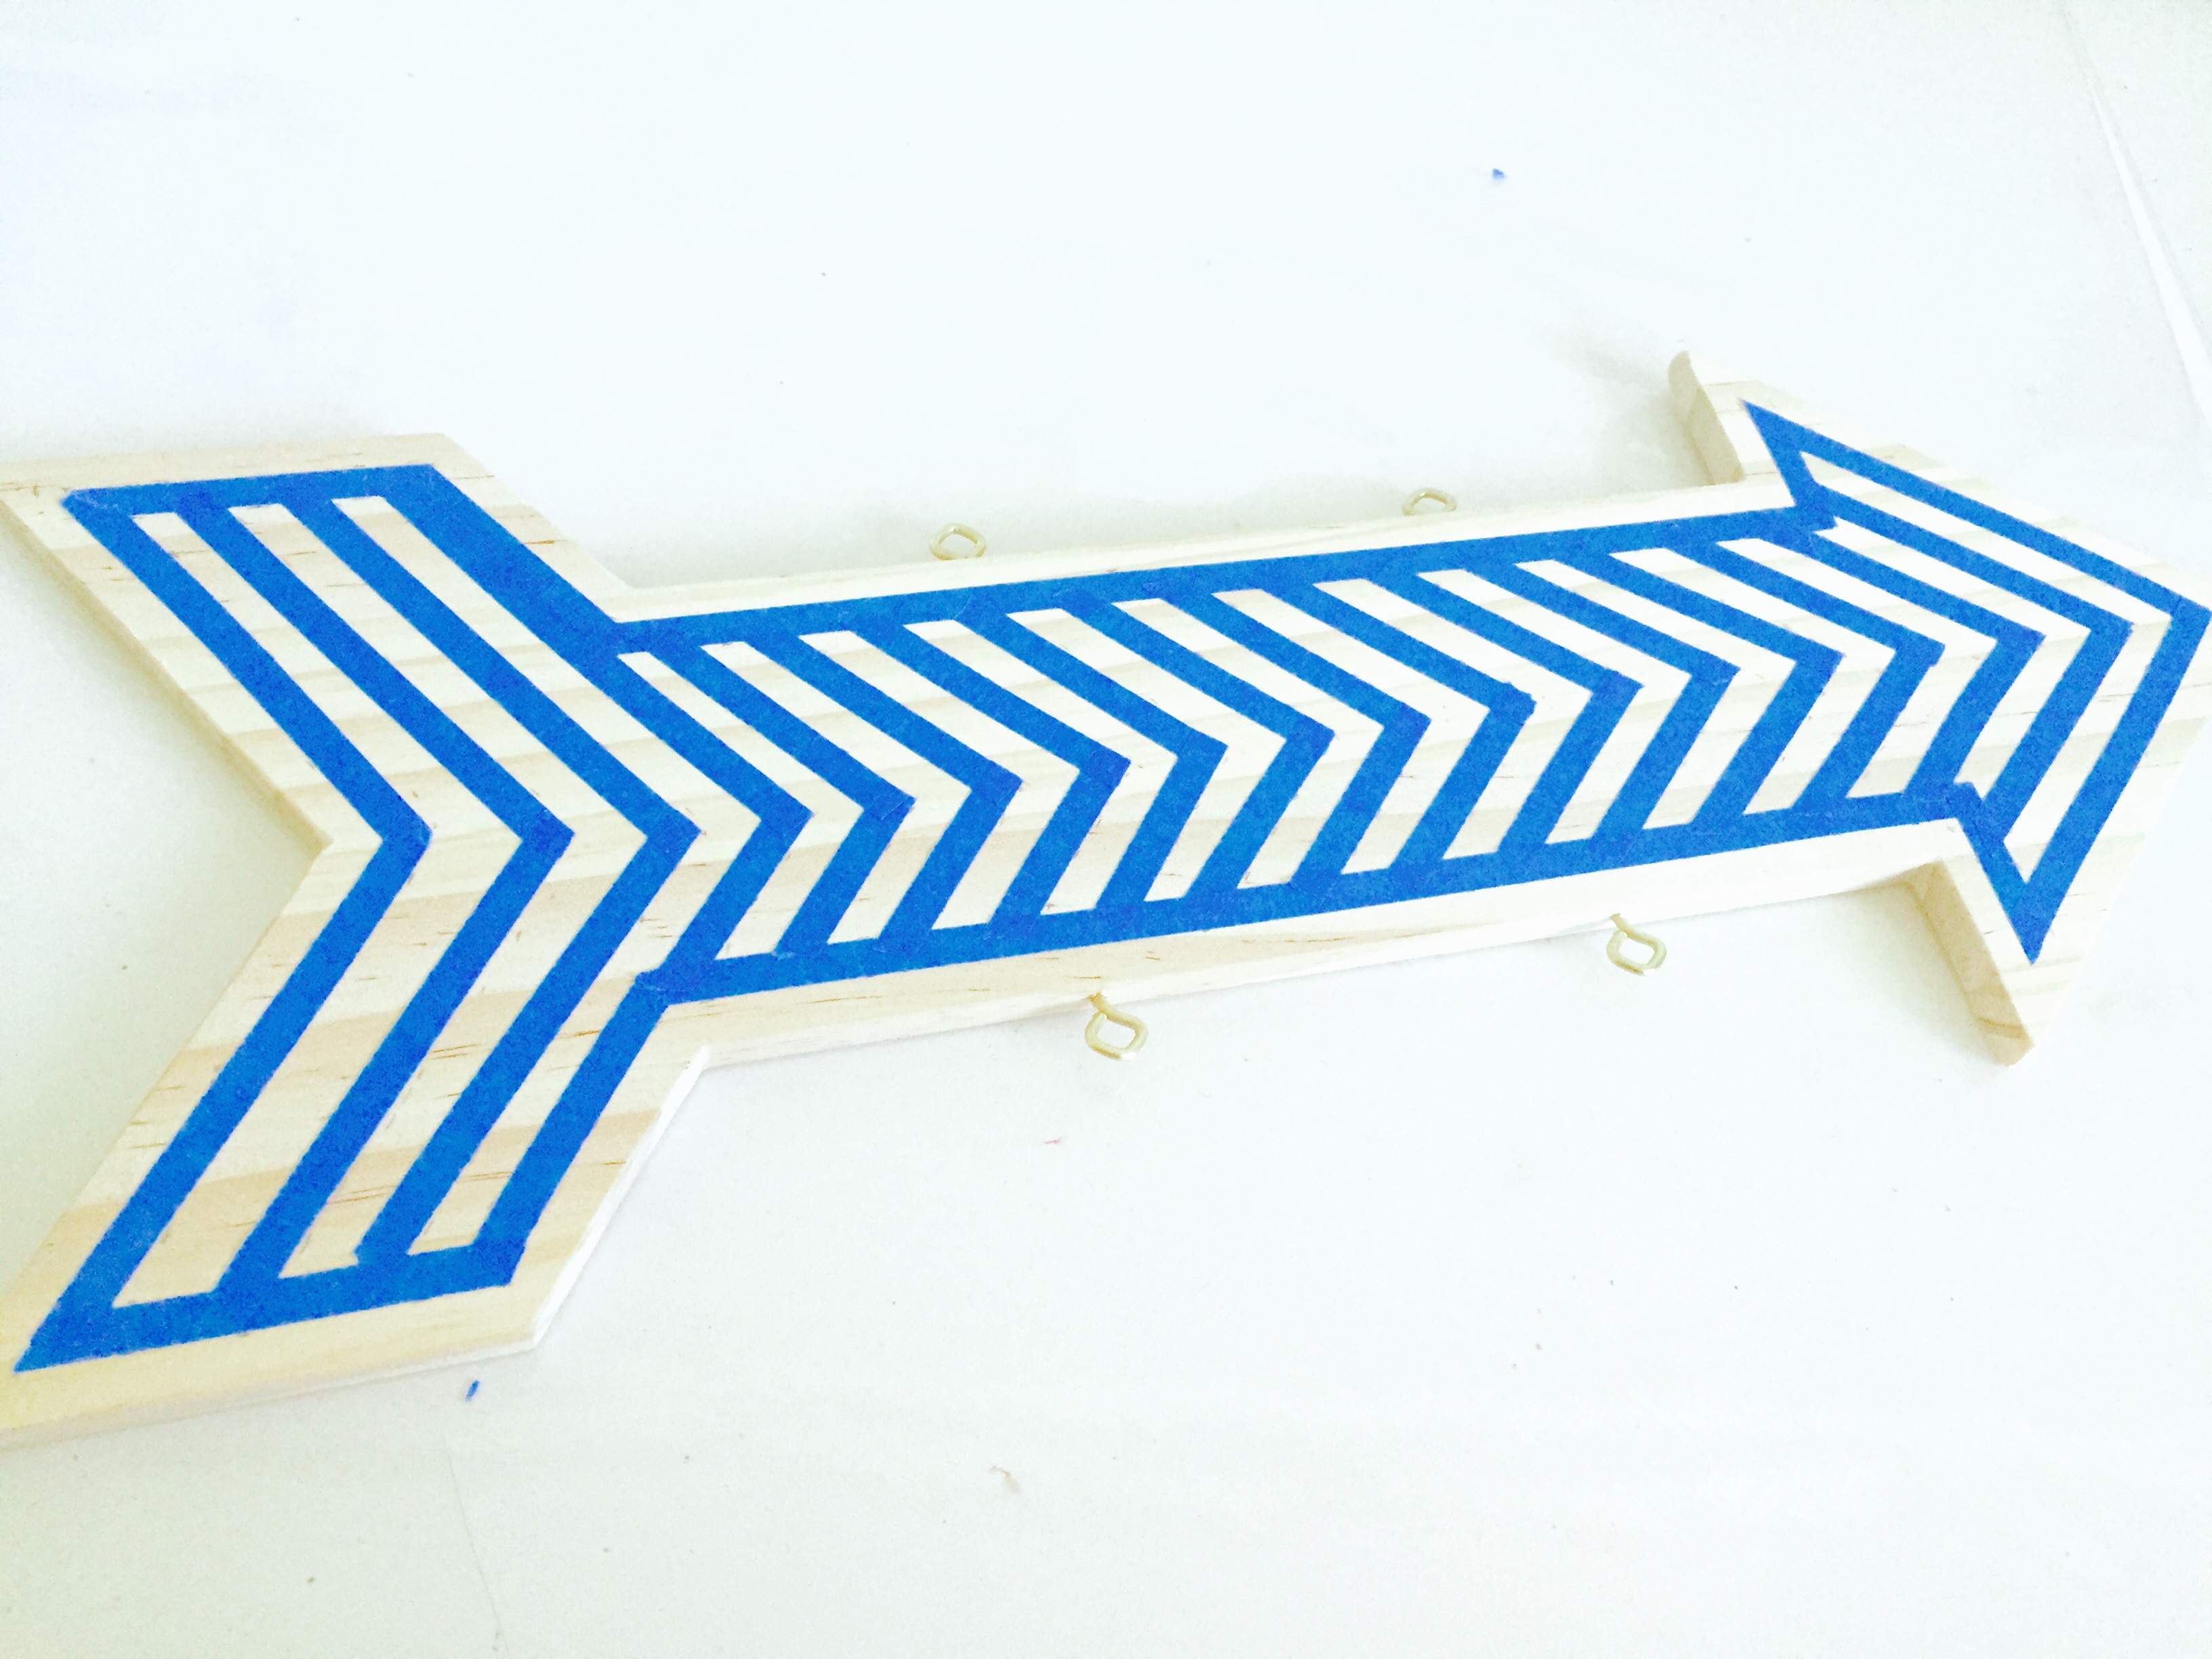
- Continue making these measurements down the entire length of the arrow, until you have painters tape in a pointed formation, and every .25″, along the entire arrow.
Step 3: Paint Your Wood
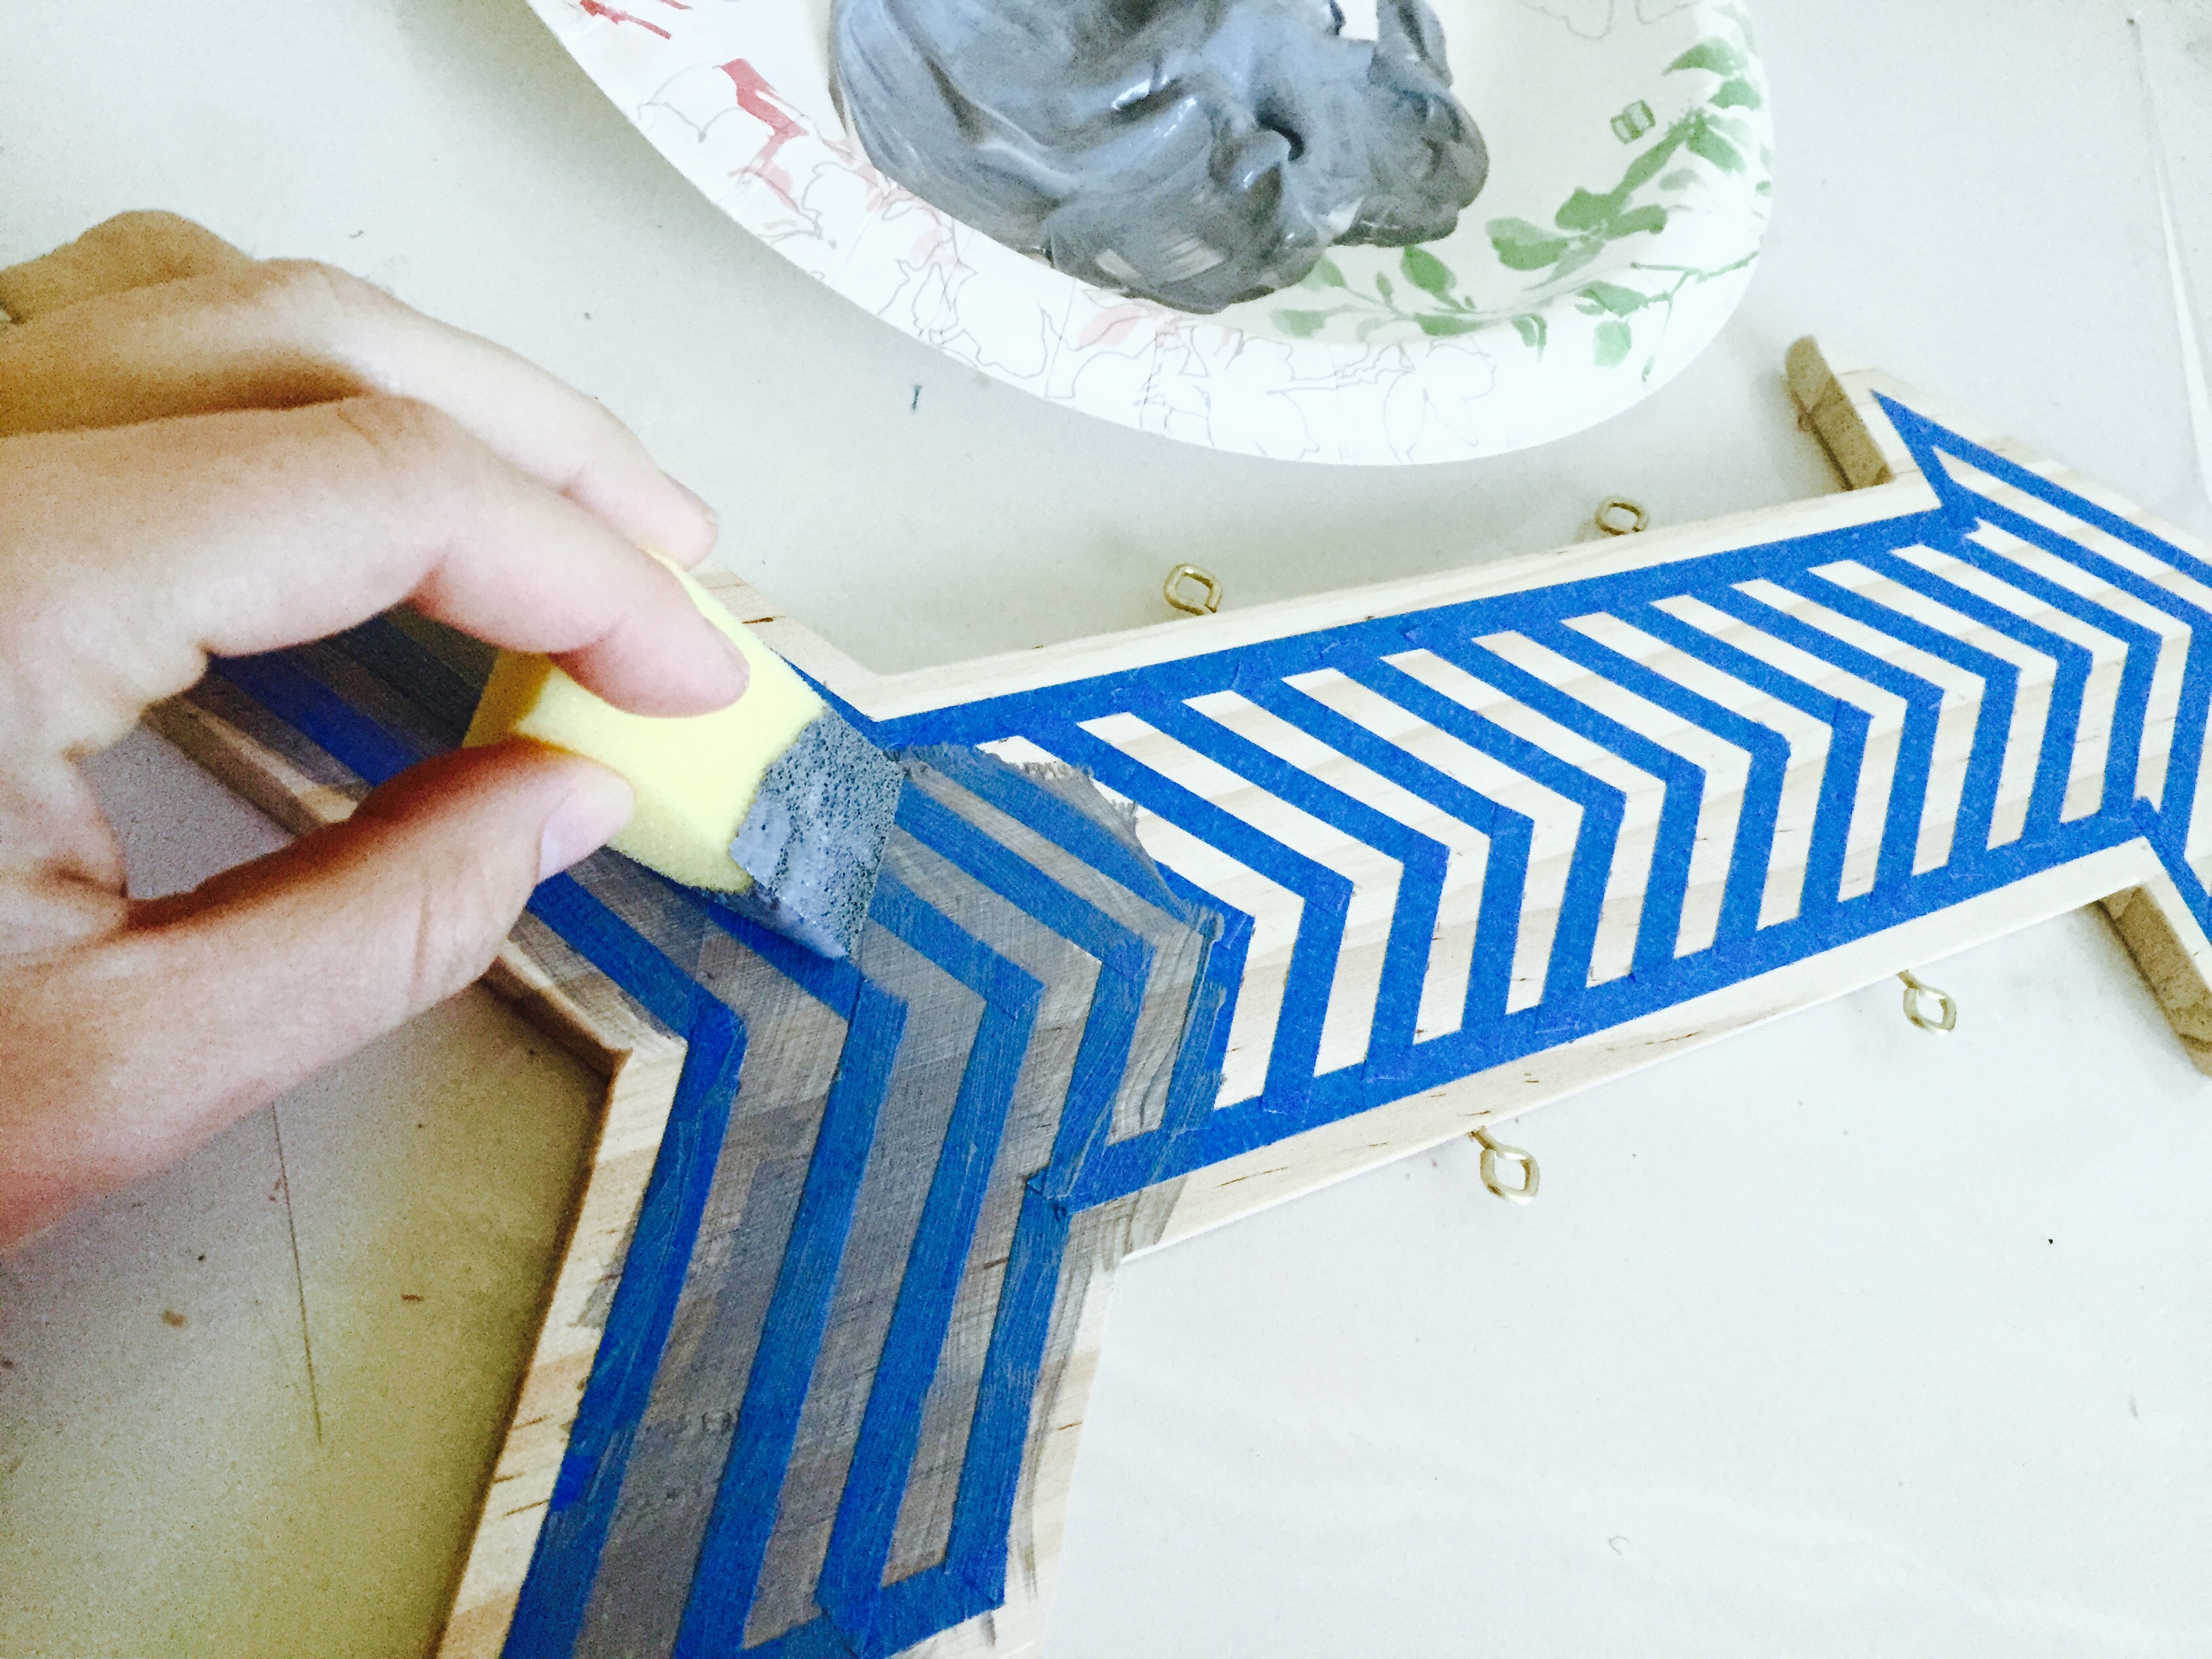
- Paint over your entire arrow (painters tape, and all) with your preferred color paint. Repeat a coat, if need be. Then, let dry for an hour.
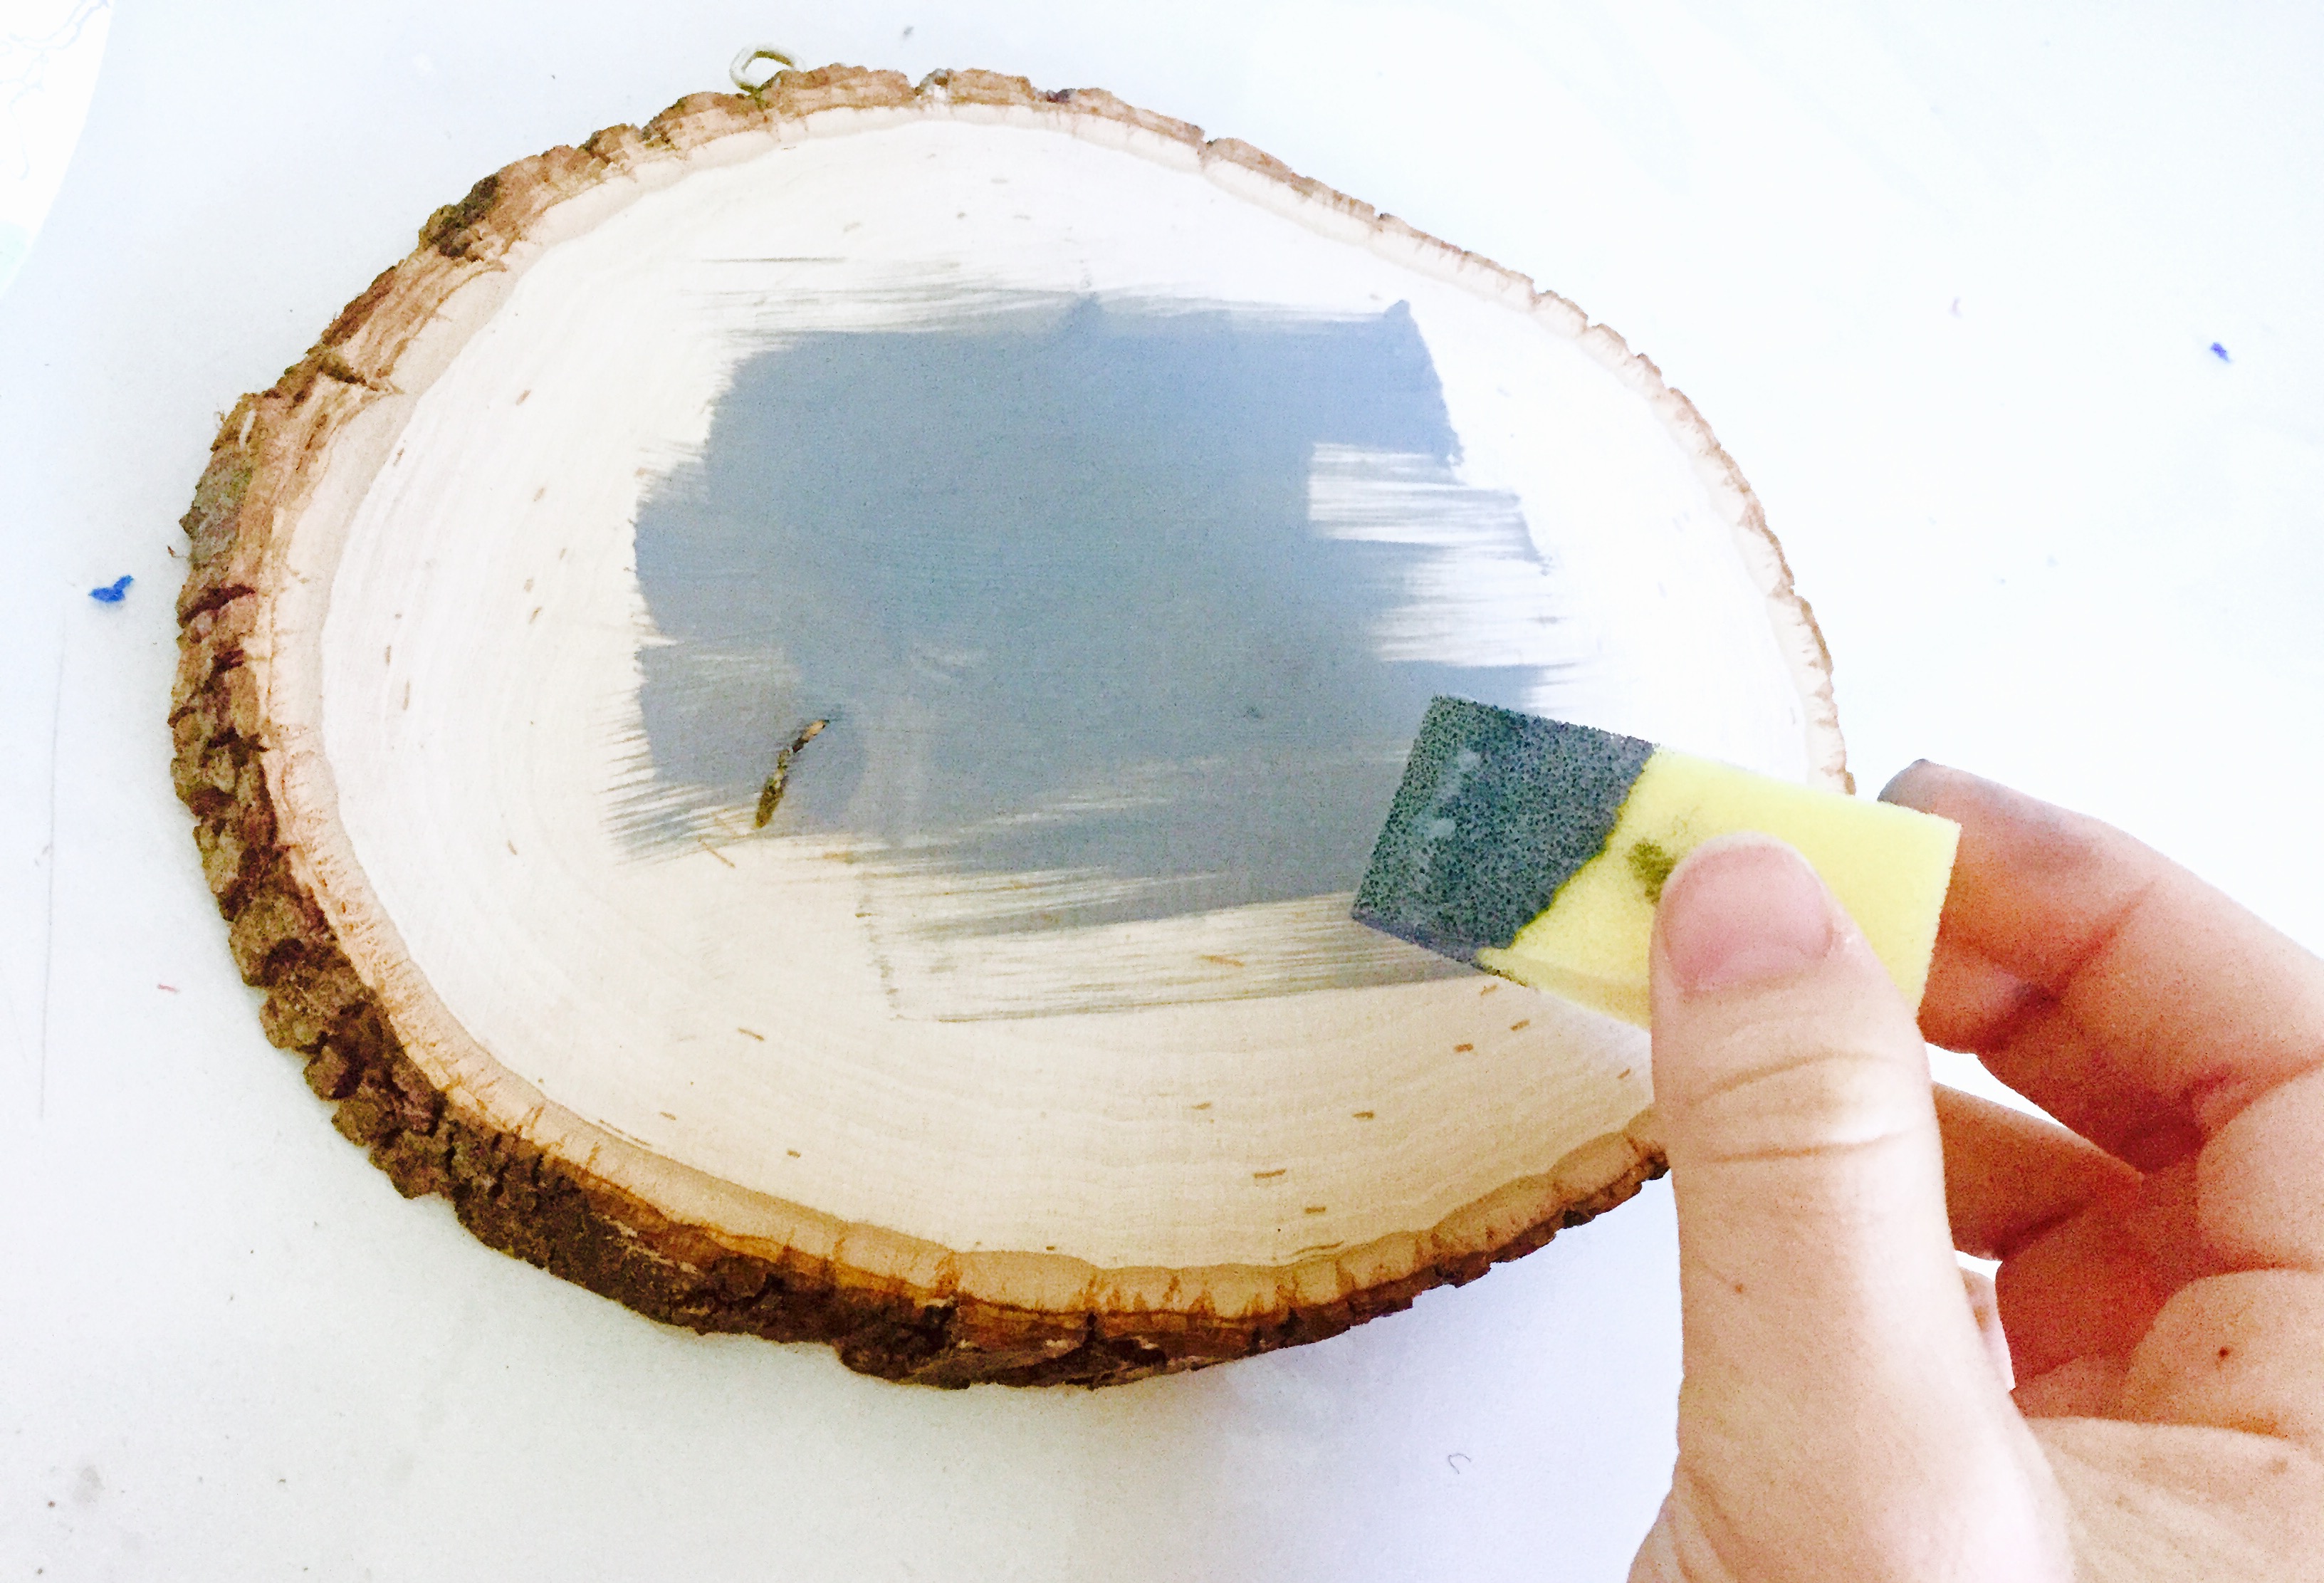
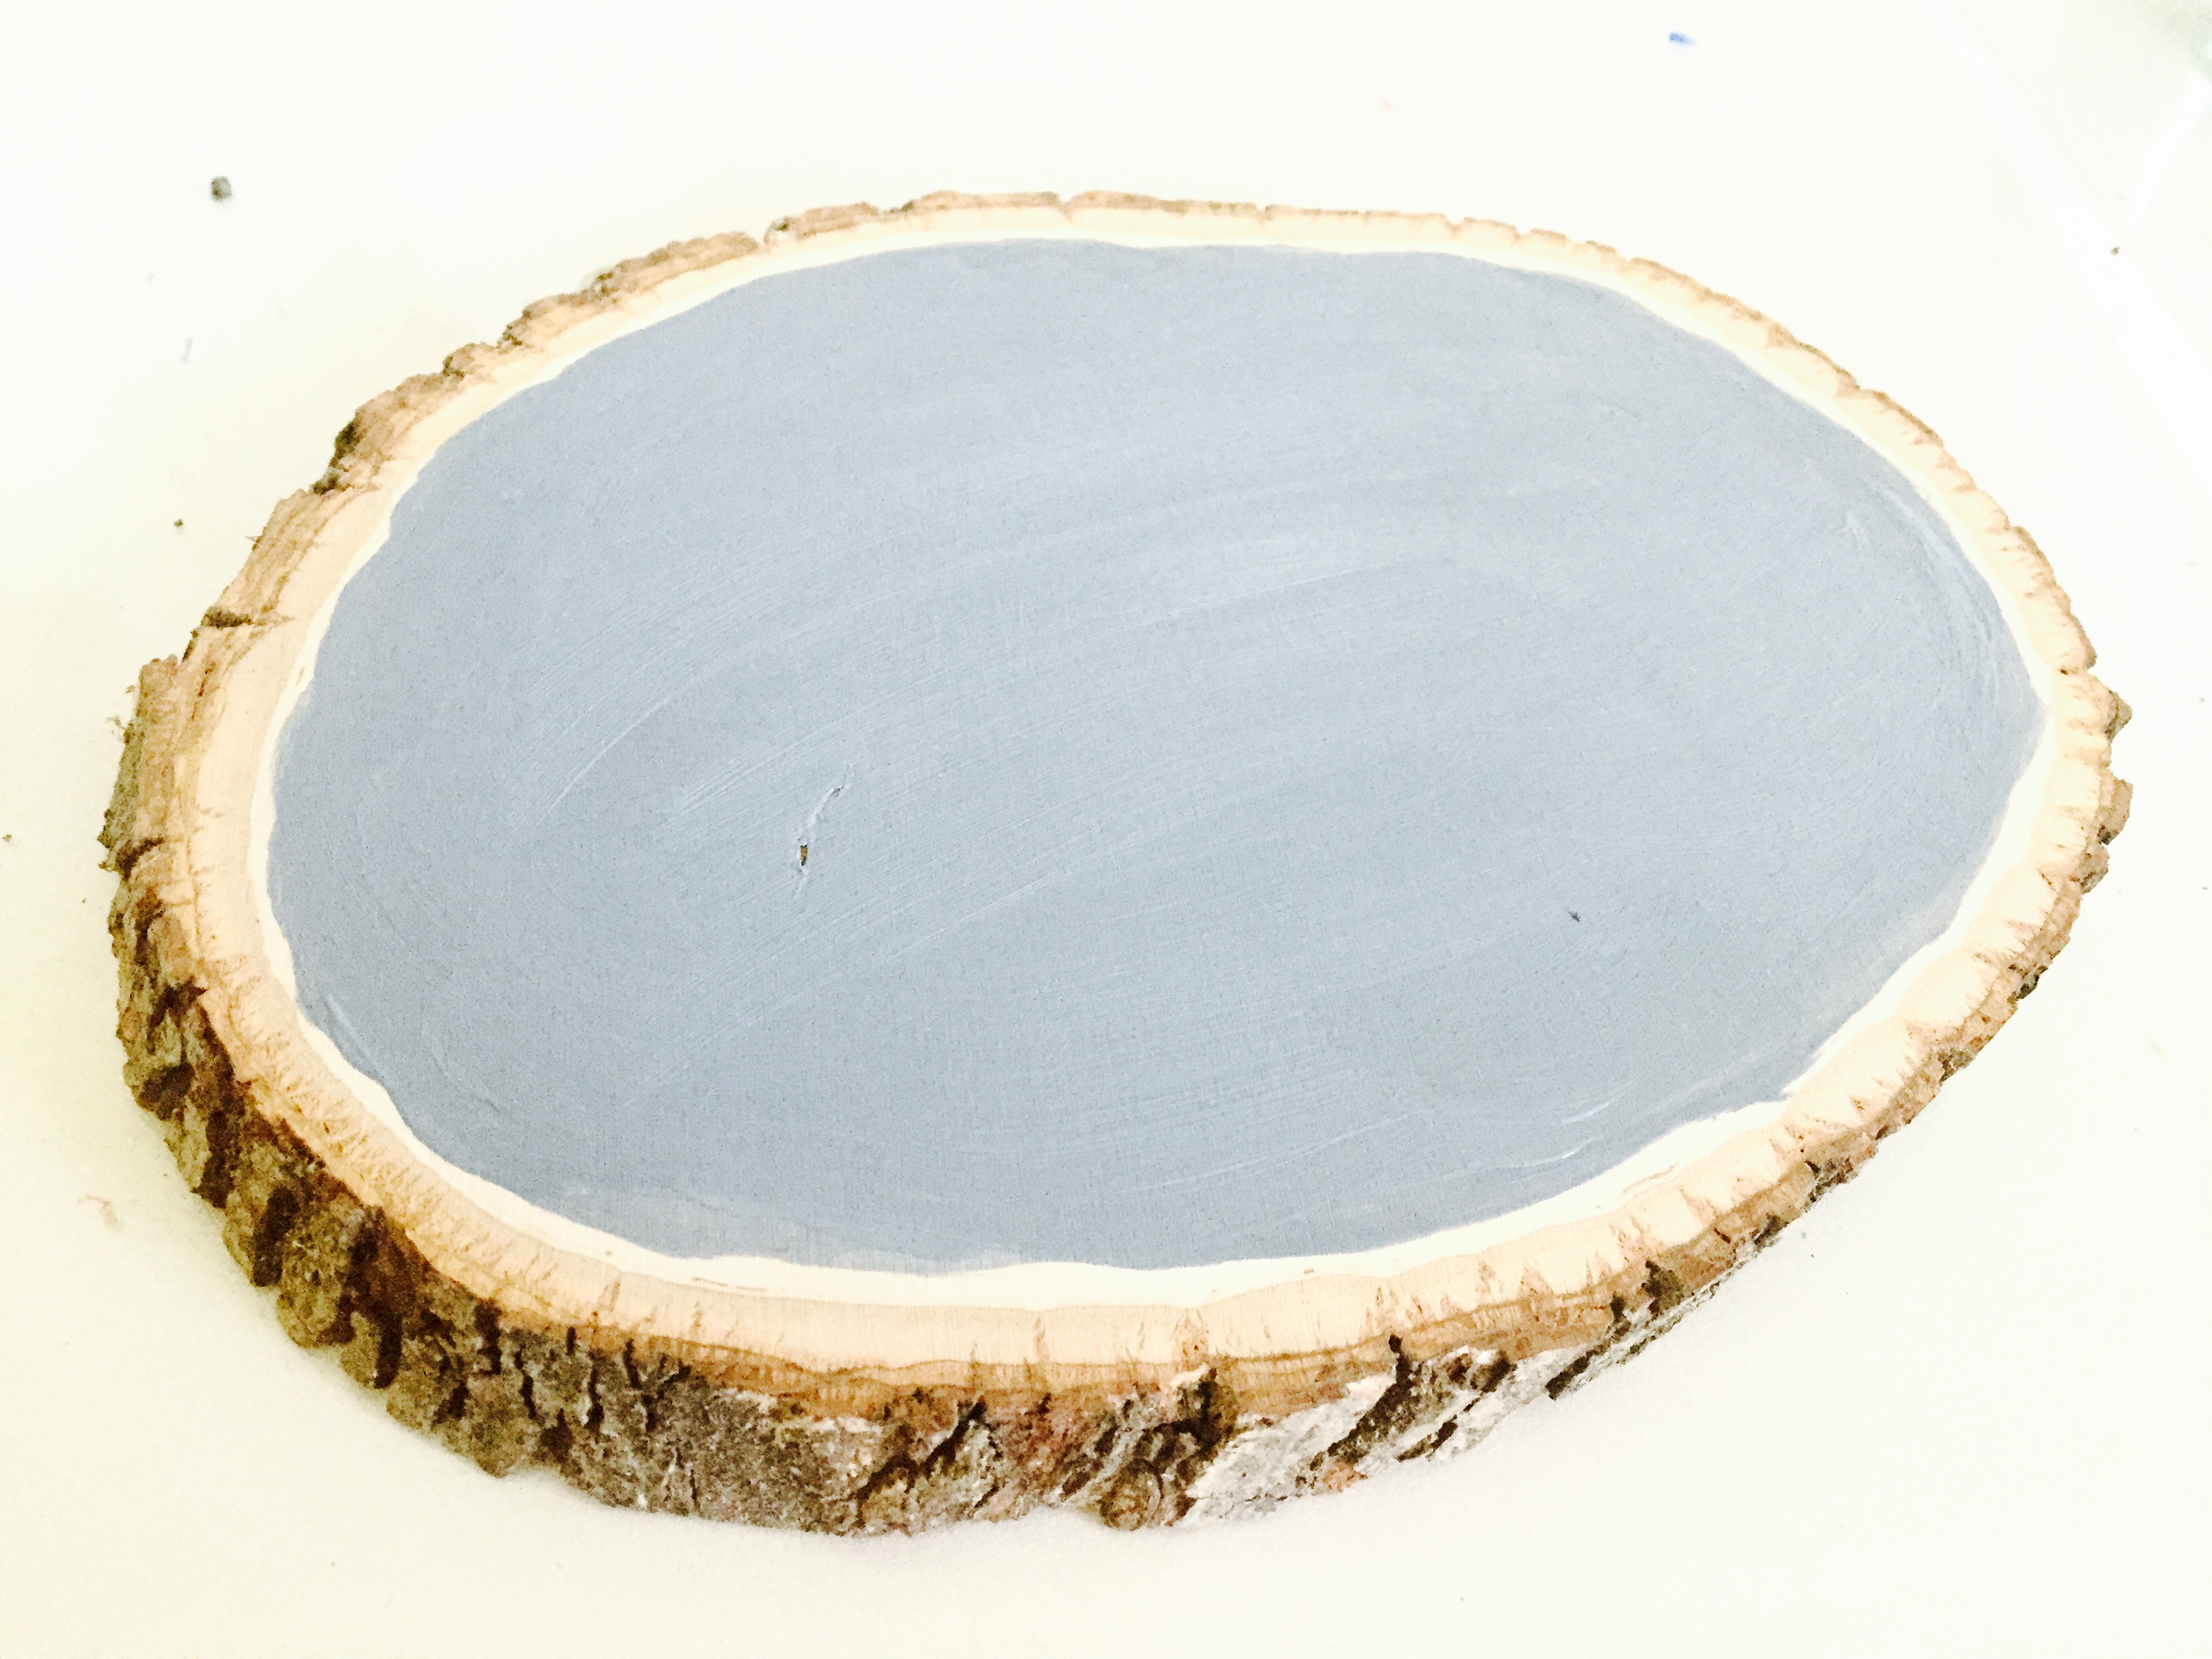
- Do the same thing on your wood round. There won’t be any painter’s tape on here, but I suggest staying about .25-.5″ away from the edge (to keep the “rustic” look). It looks cool by free hand doing it this way.
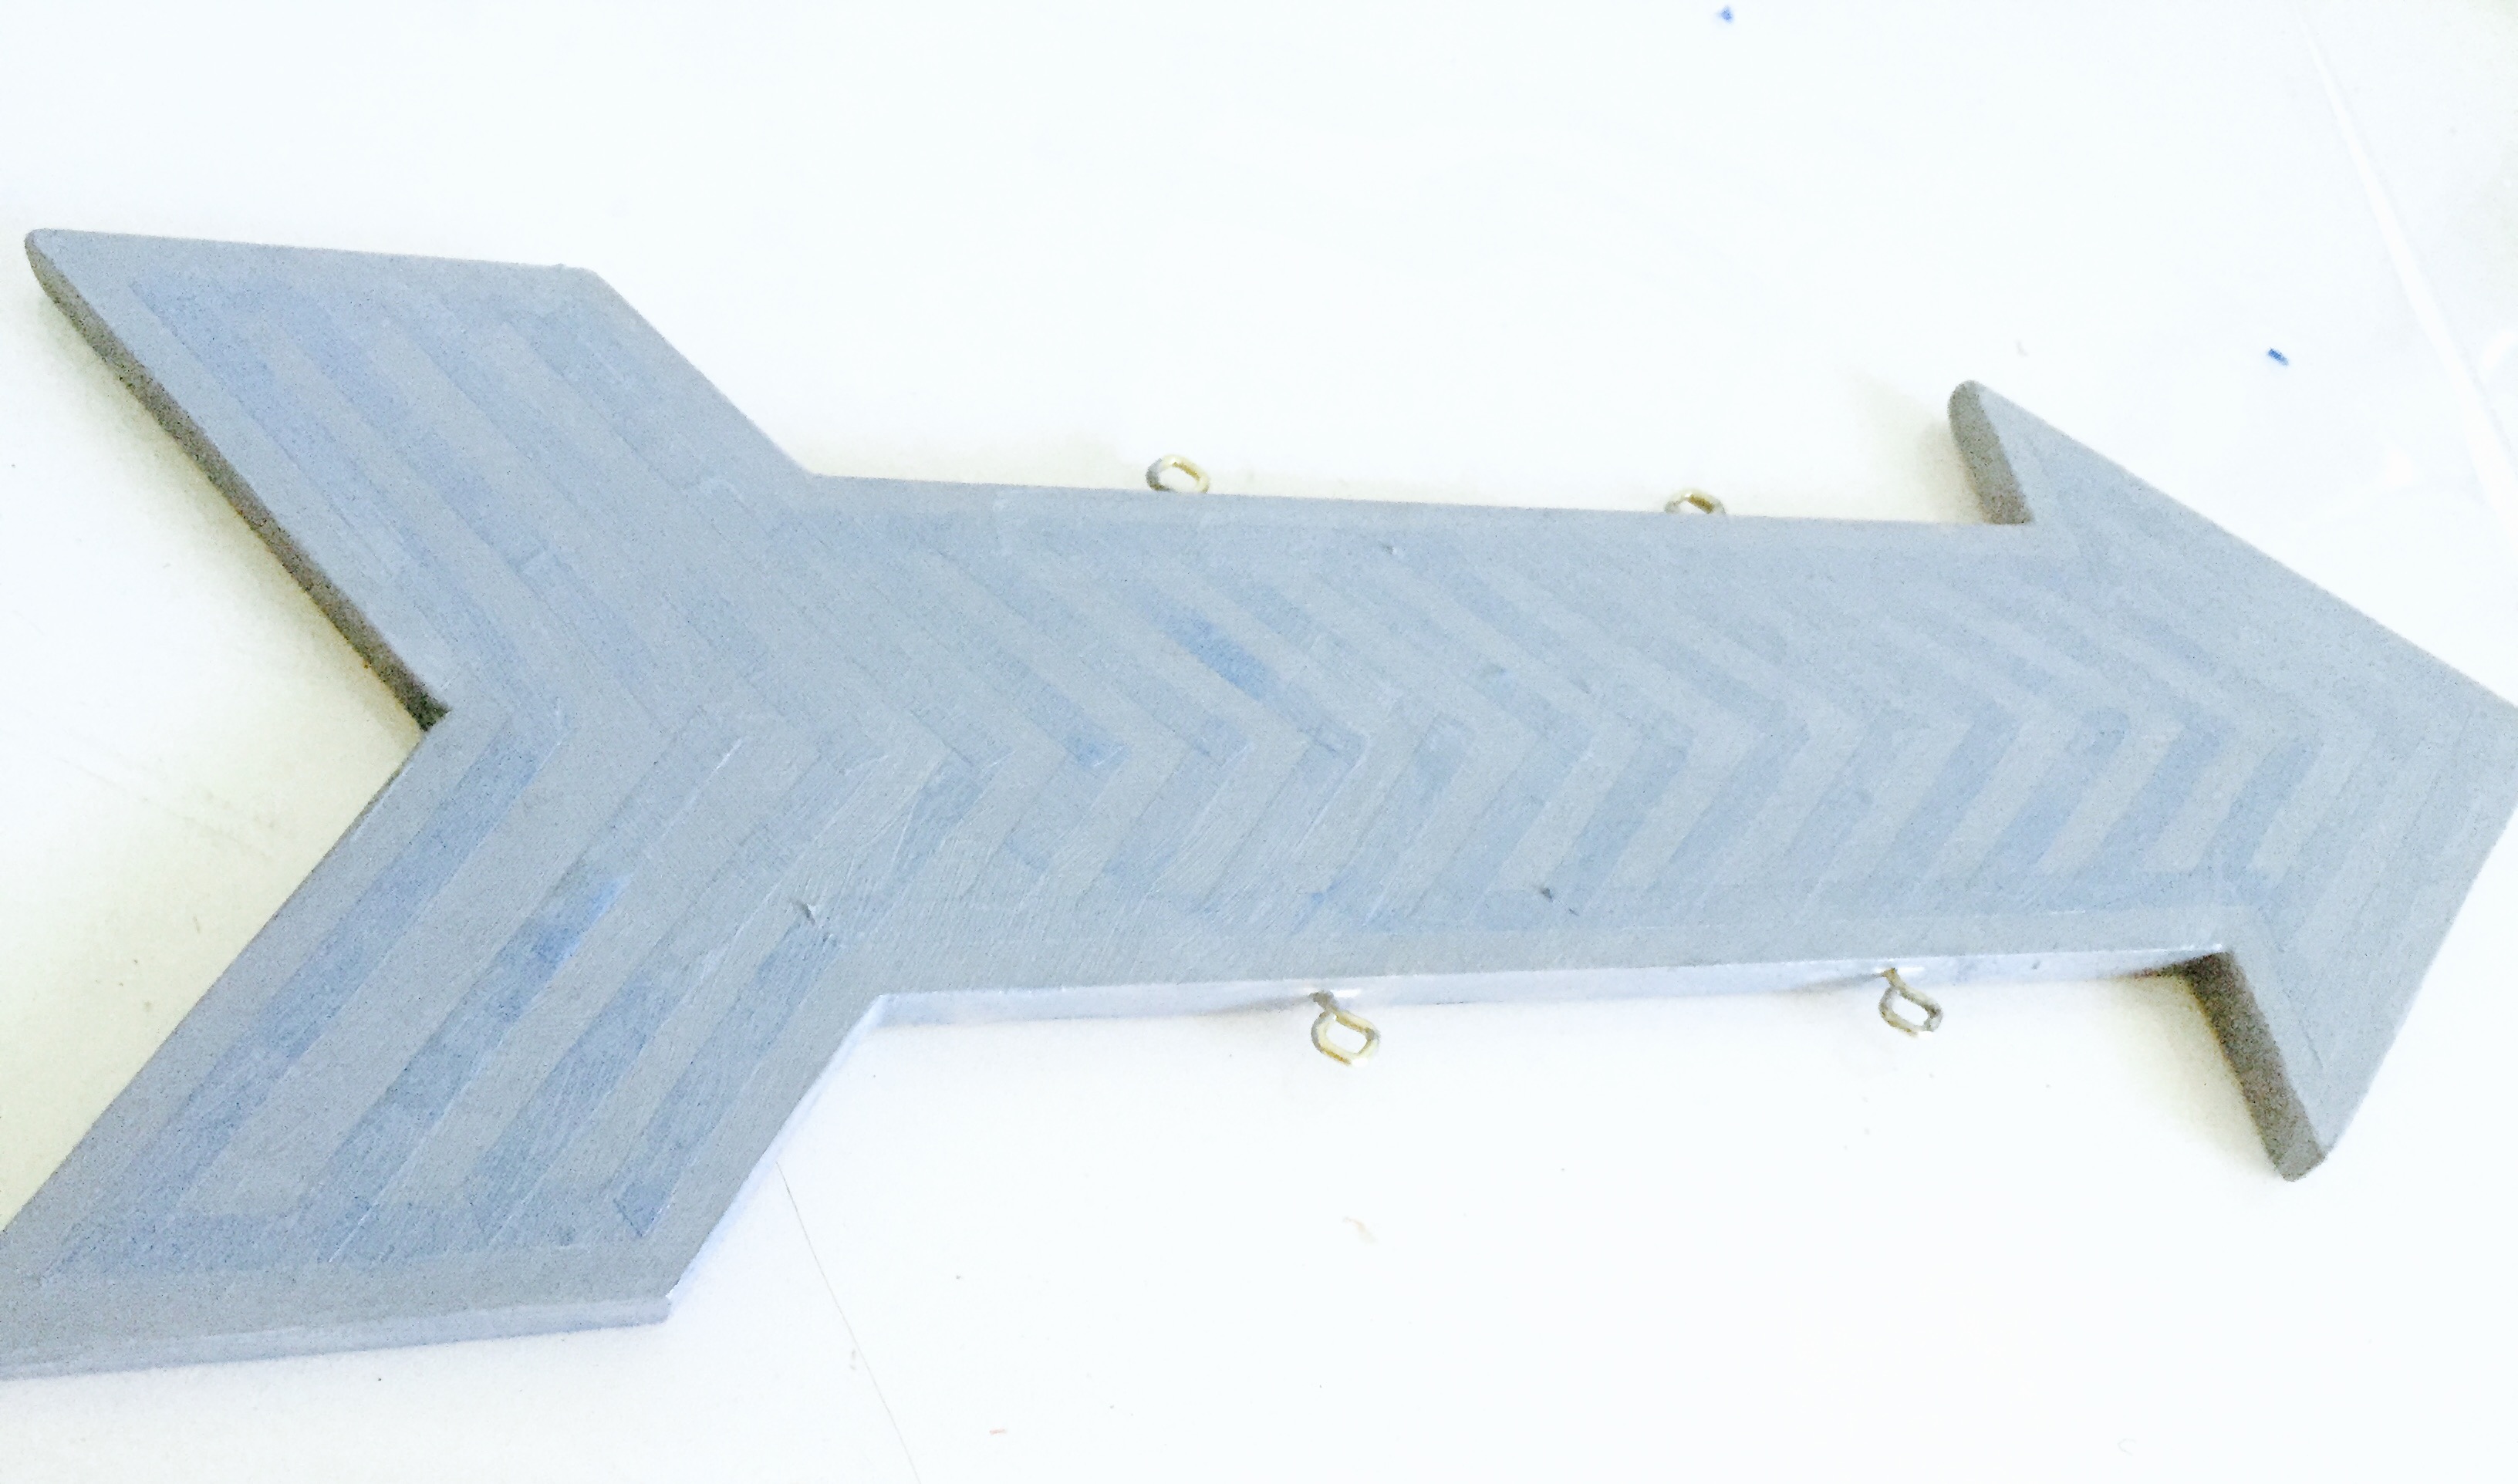
Step 4: Remove Tape
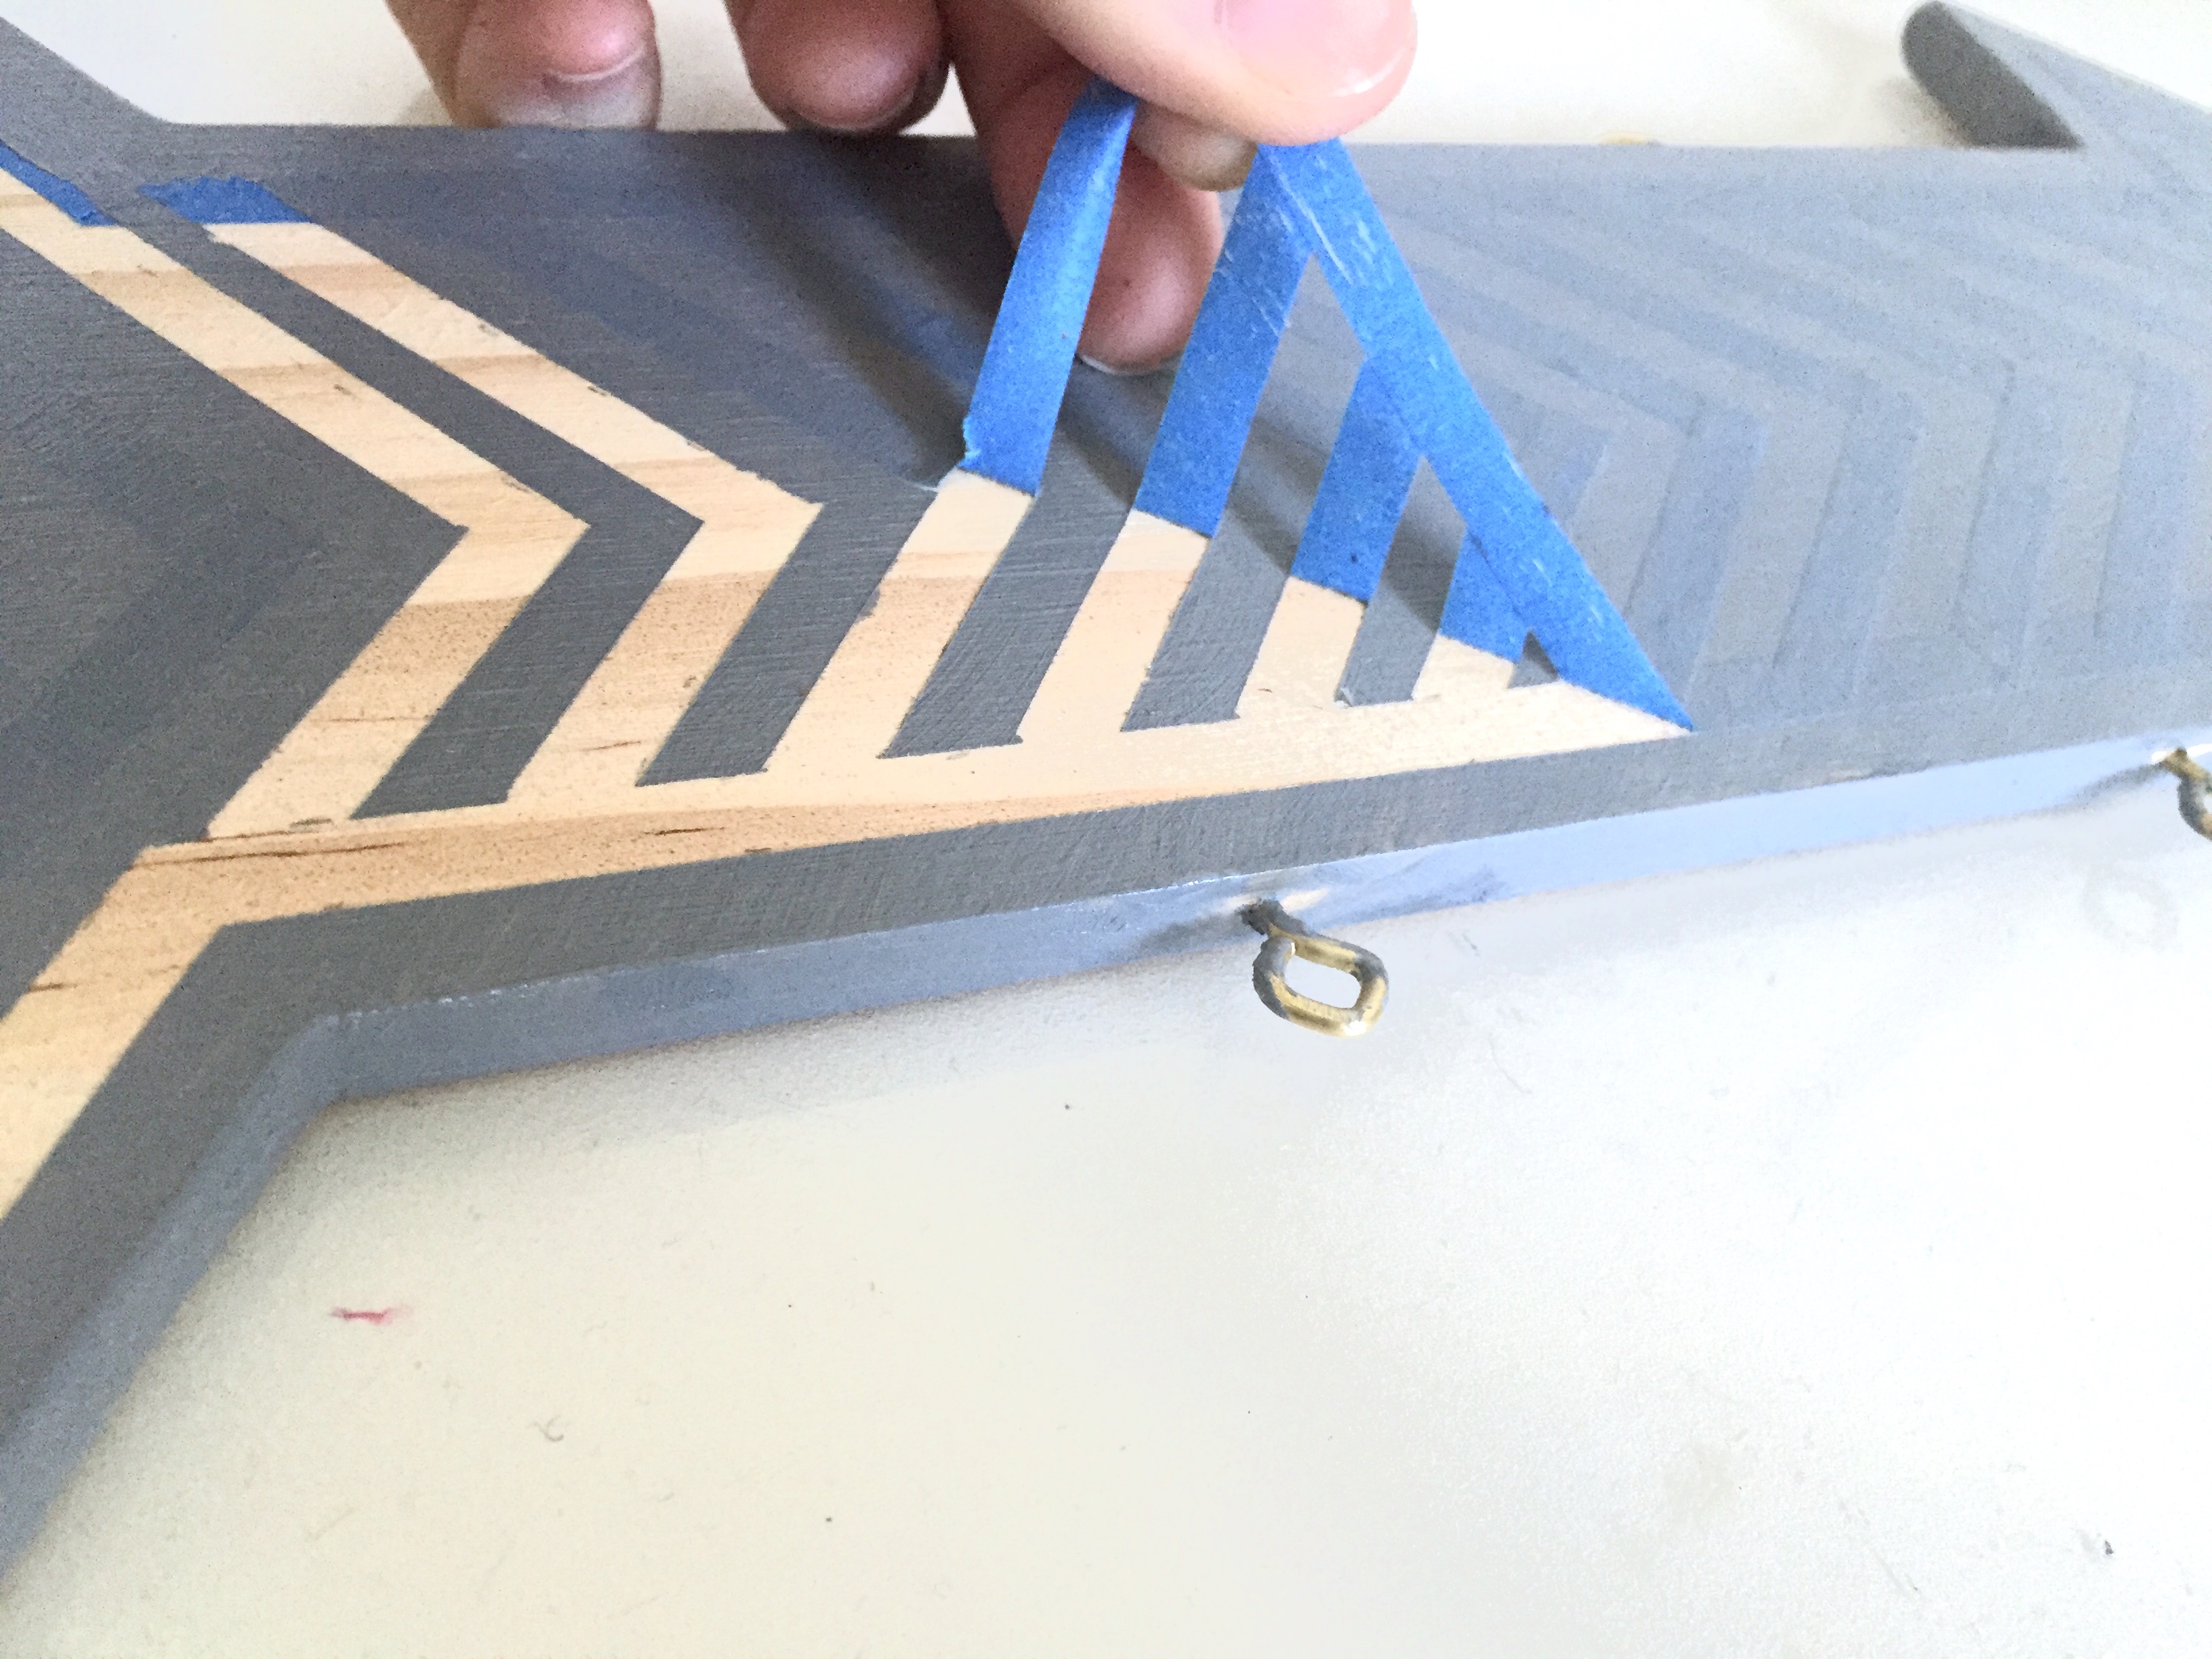
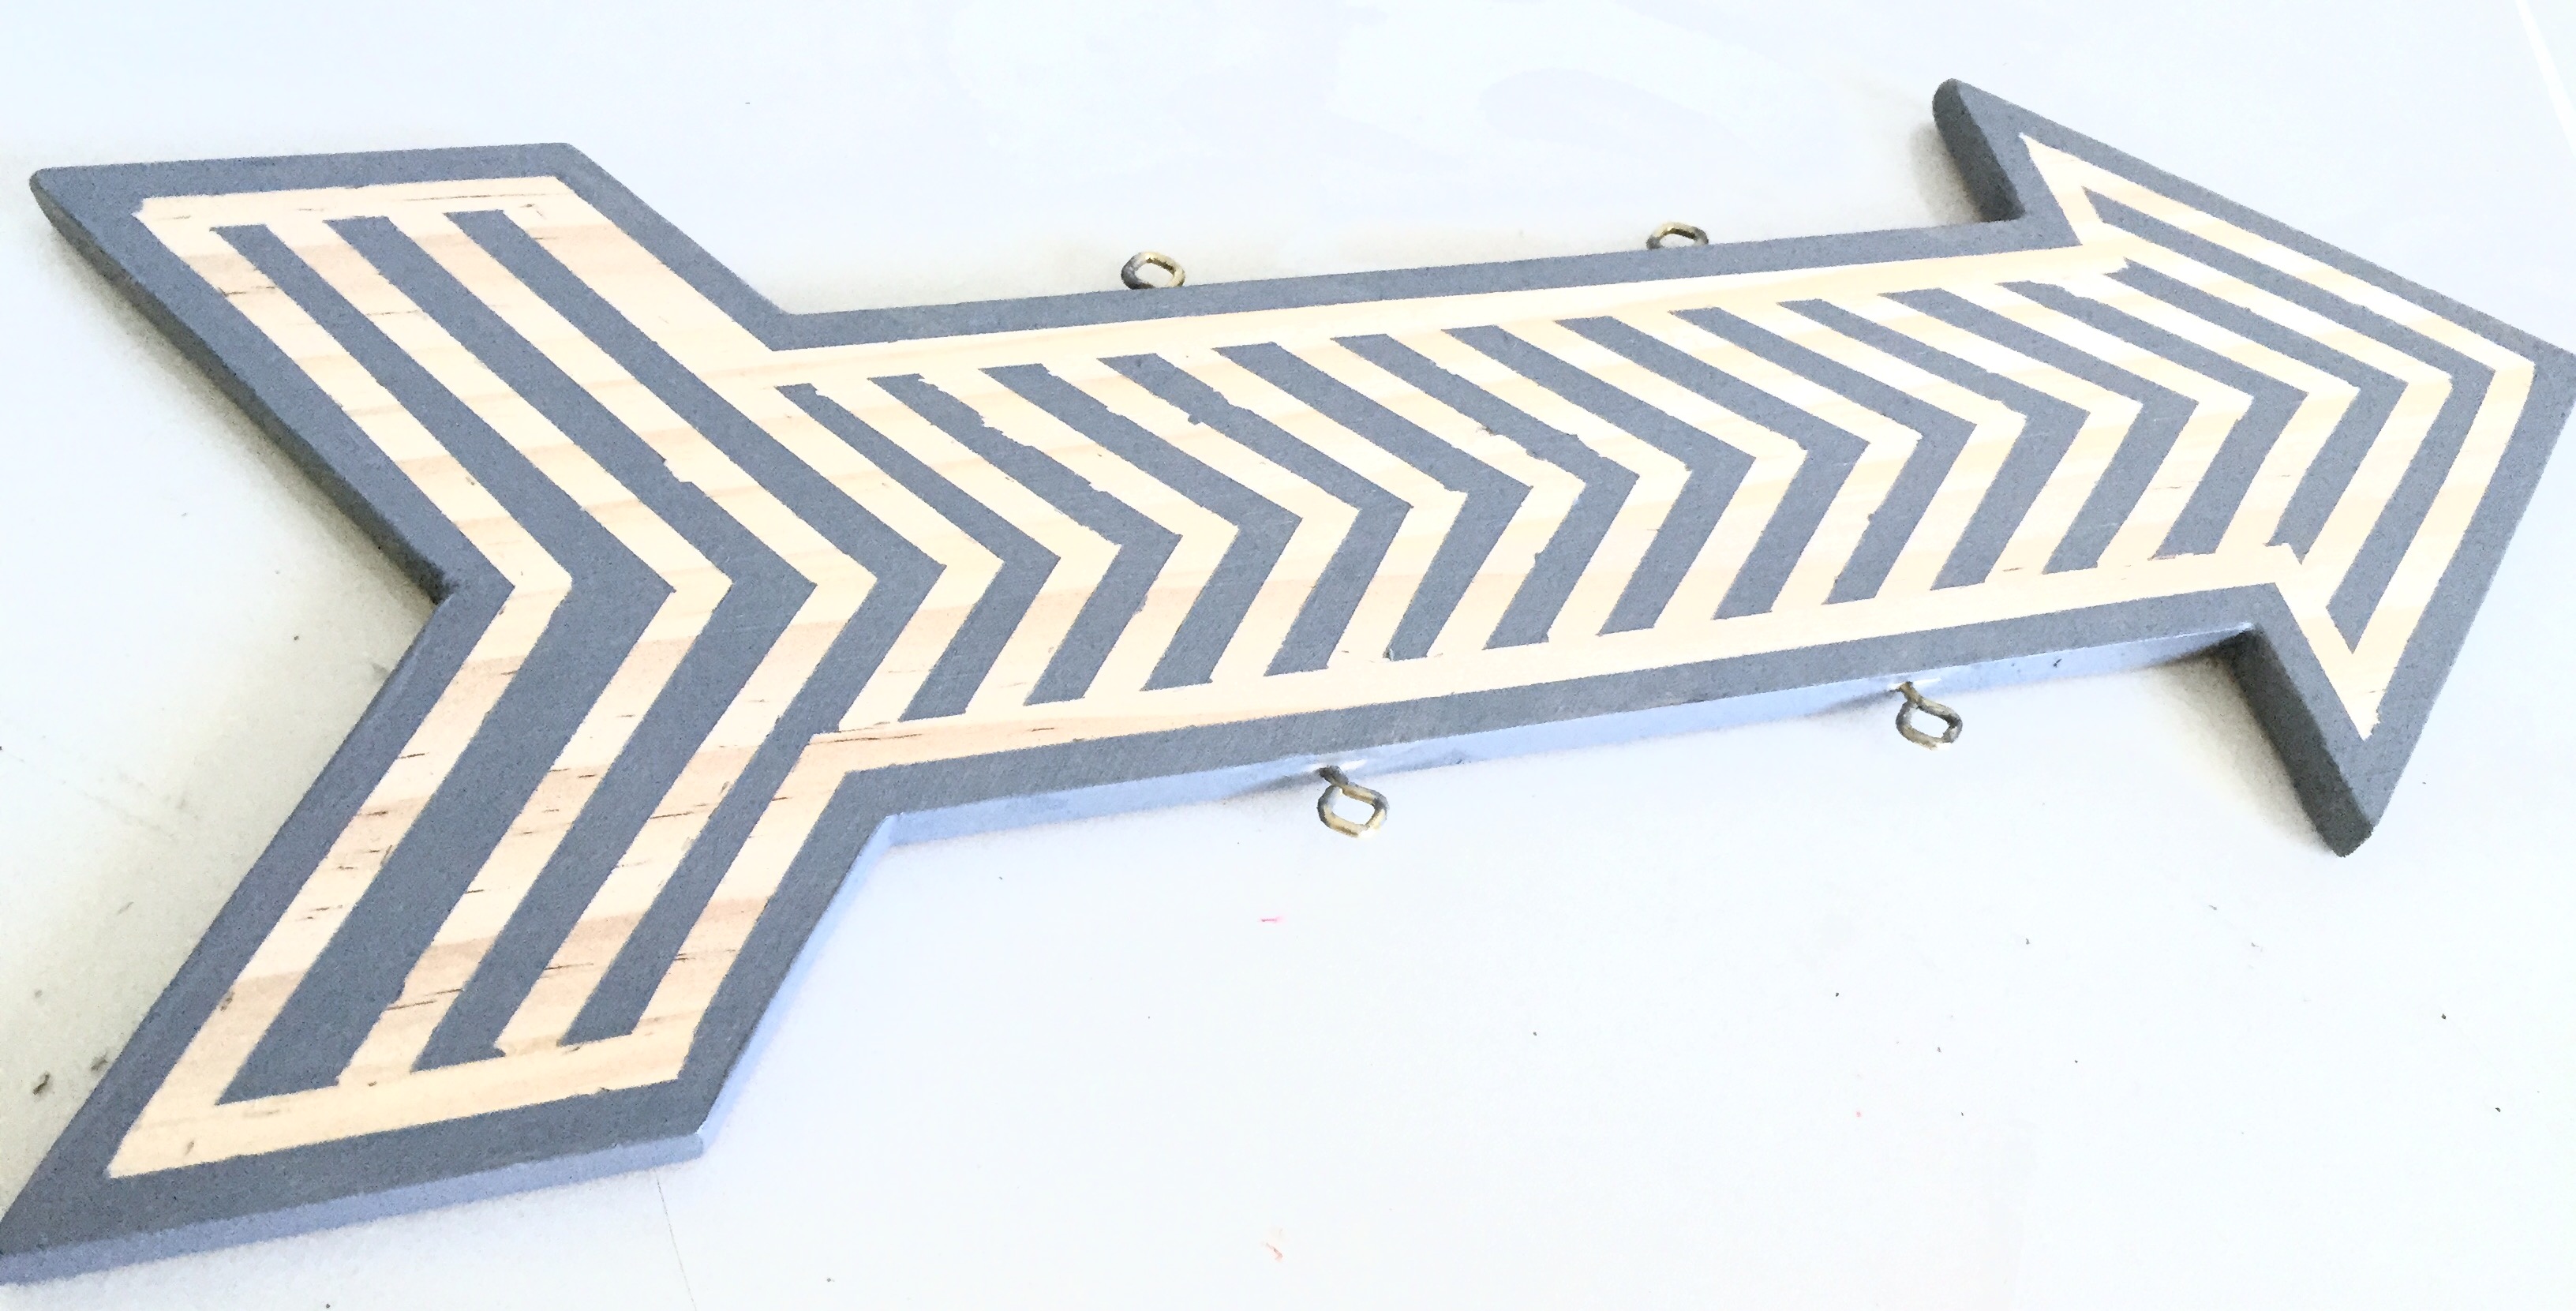
- Once your paint has dried, remove your painters tape from your arrow. You will now have a chevron-striped arrow as the backdrop for your sign. Yippee!
Step 5: Cut out Double Sided Adhesive Design
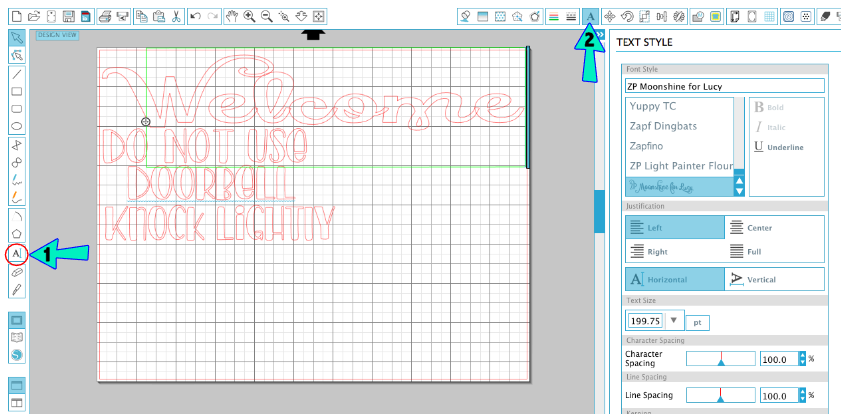
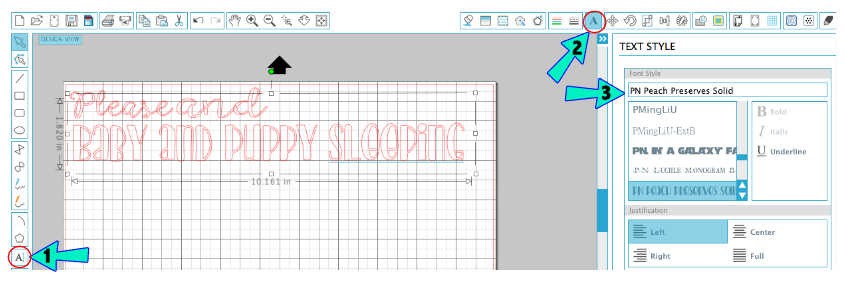
- Now, go into your Silhouette Studio and click on the TEXT tool. Write the words you want to appear in glitter on your screen.
- Once written, click on each text box and choose the correct font you want from your font library on the right side toolbar.
- I used ZP Moonshine for Lucy for the “Welcome” and PN Peach Preserves Solid for the text on the wood round.
- I used ZP Moonshine for Lucy for the “Welcome” and PN Peach Preserves Solid for the text on the wood round.
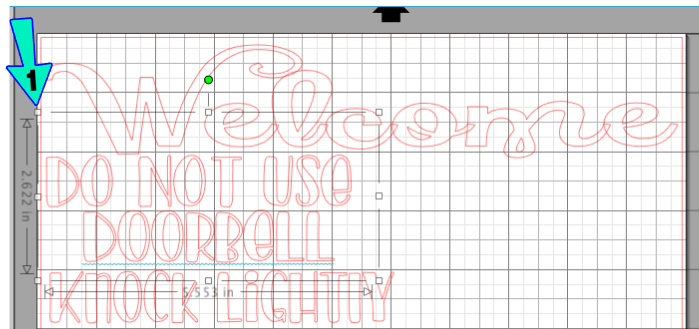
- Measure both your arrow and your wood round to see how large you want your wording to be, and resize your text accordingly by clicking on the phrase and using the edge marks to increase or decrease the size.
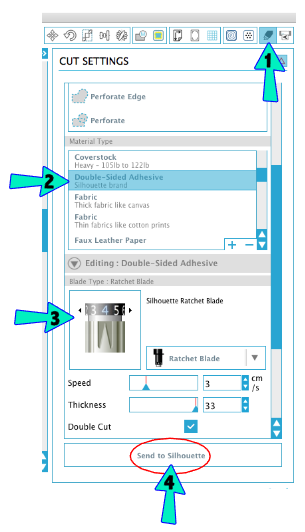
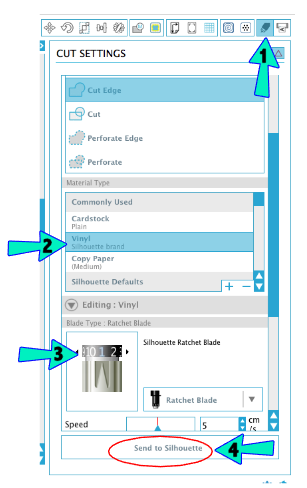
- Finally, place your double sided adhesive on your cutting mat (white side facing up), and load it into the CAMEO. Once loaded, press the CUT icon on the top toolbar, select “Double Sided Adhesive” under the MEDIA section, and adjust your blade according to the settings Silhouette Studio tells you.
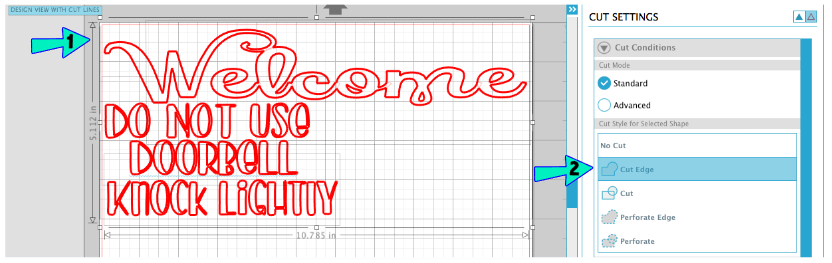
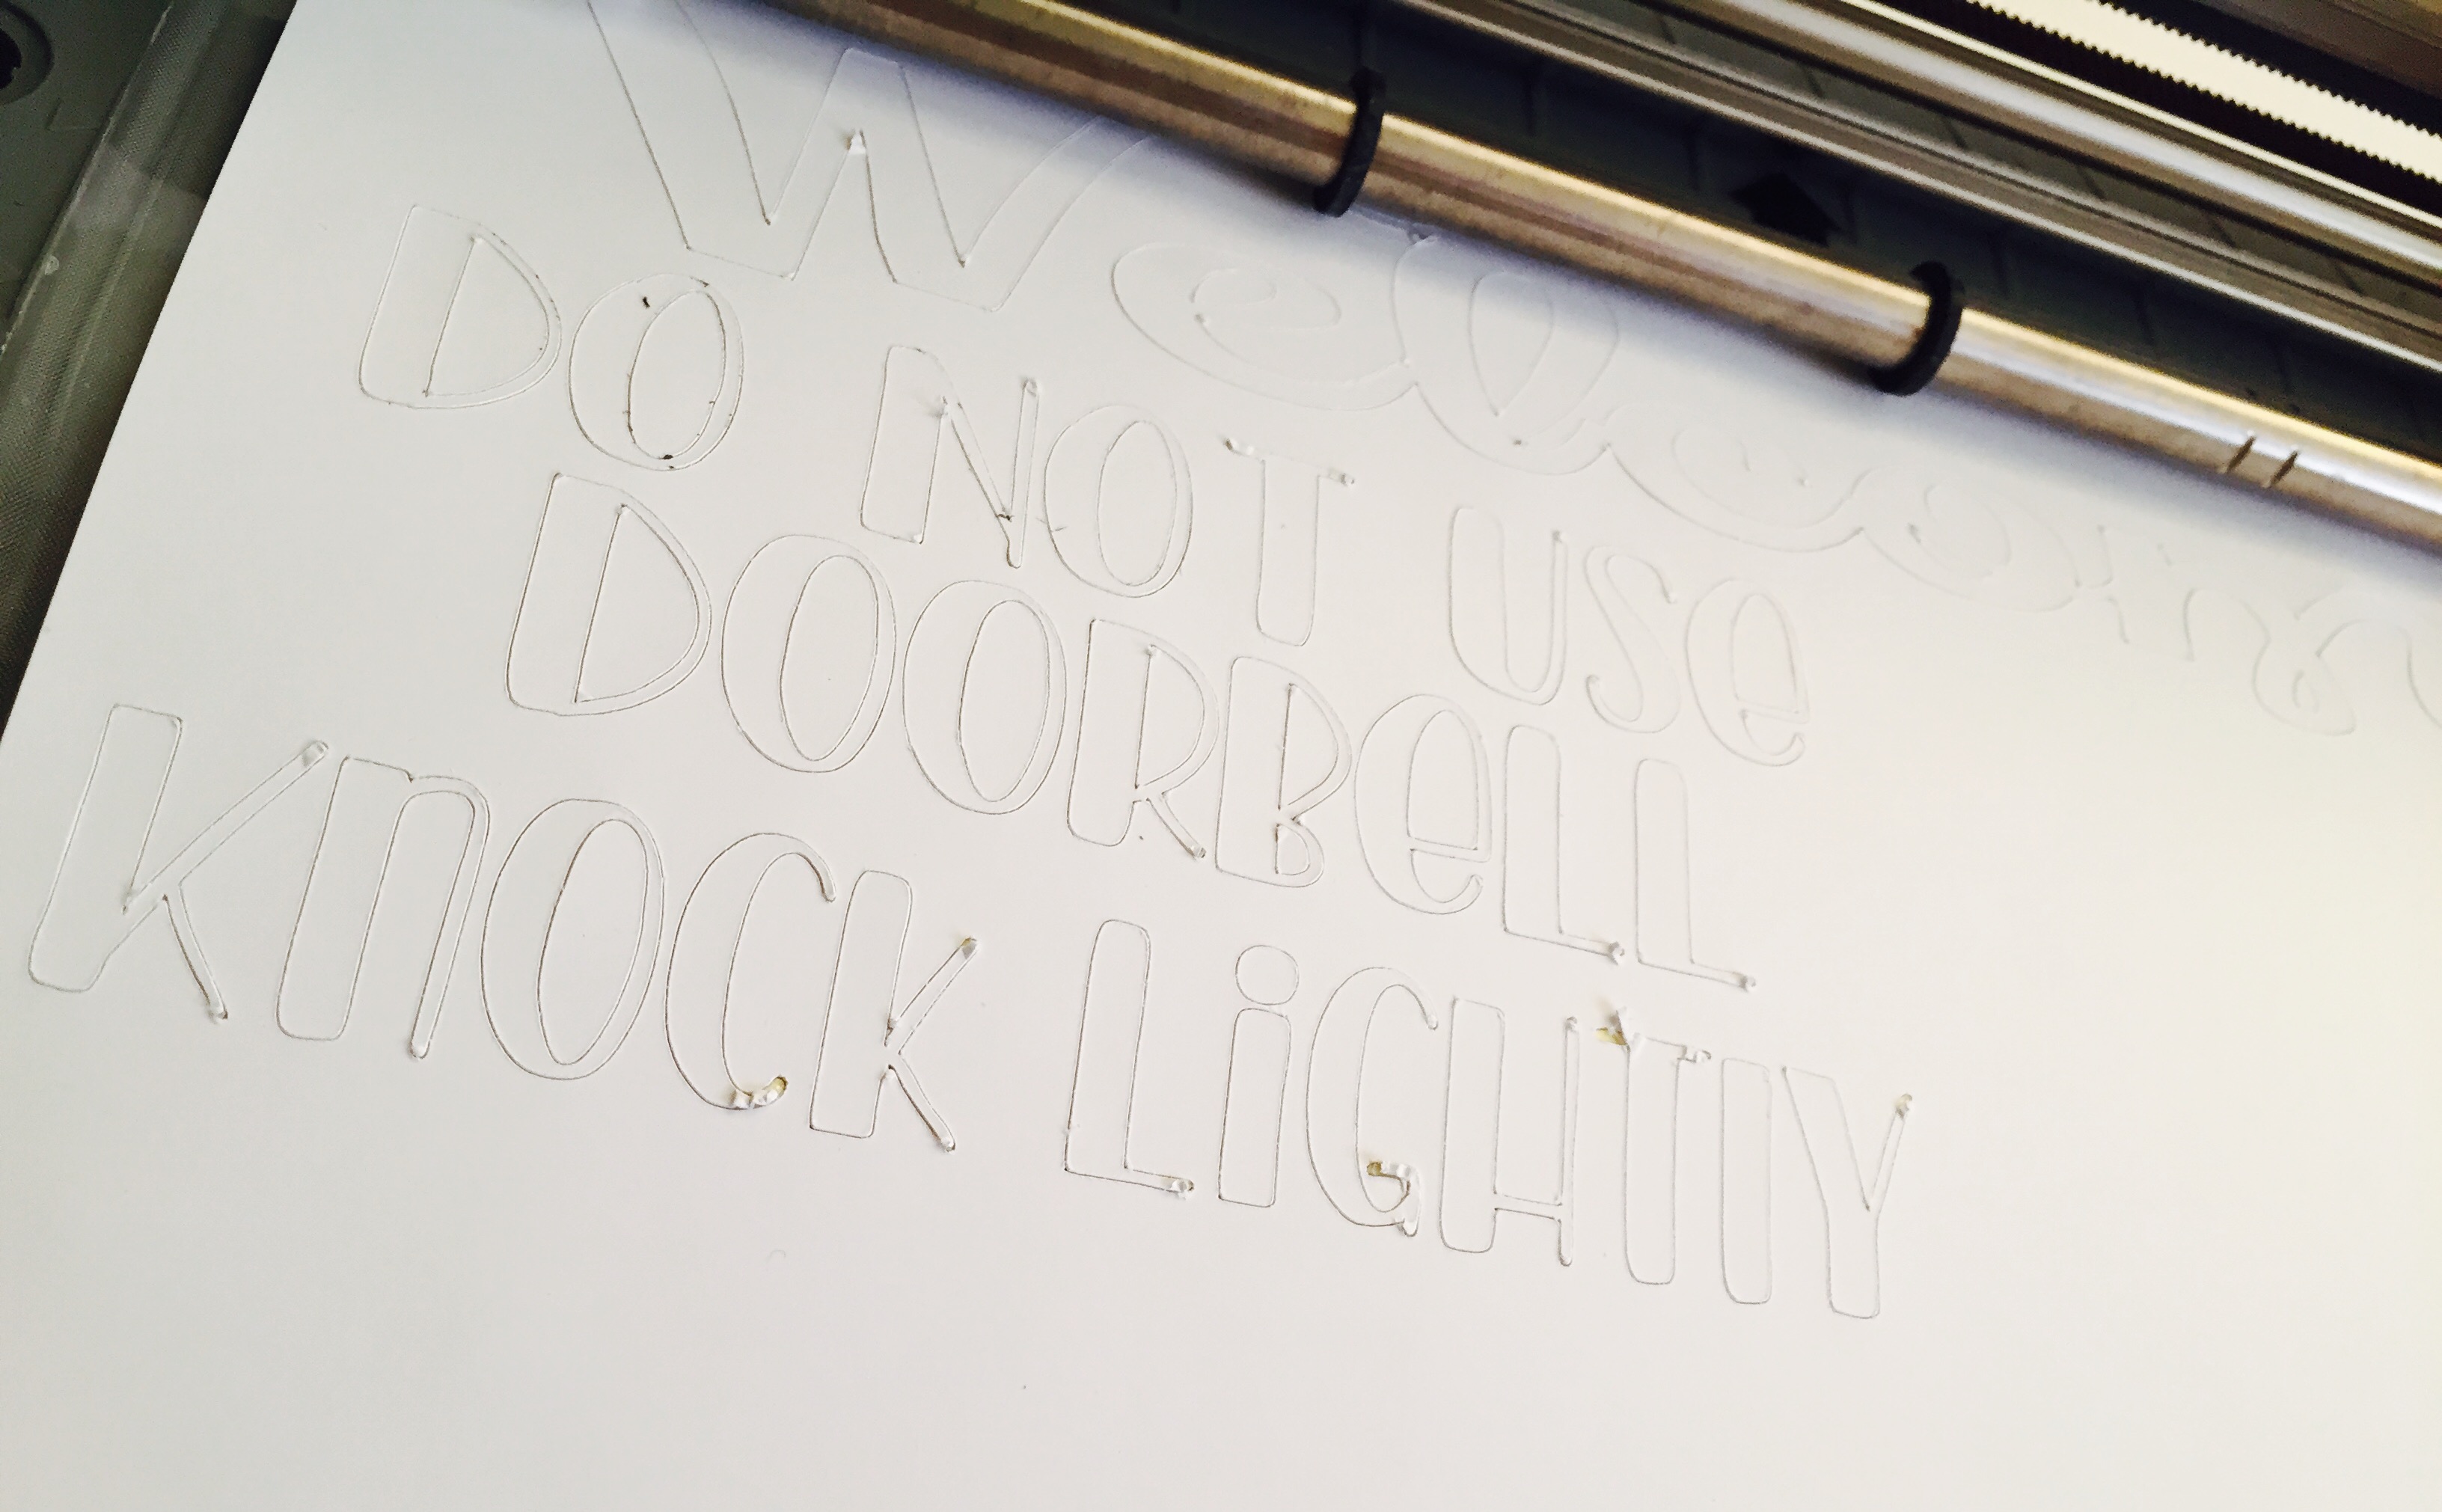
- NOTE: PLEASE make sure all your text is selected during this process, and click on “CUT EDGE” so that the CAMEO does not cut in between overlap on the cursive texts.
- Then, press “Send to Silhouette”.
Step 6: Remove Backing and Put Designs in Place
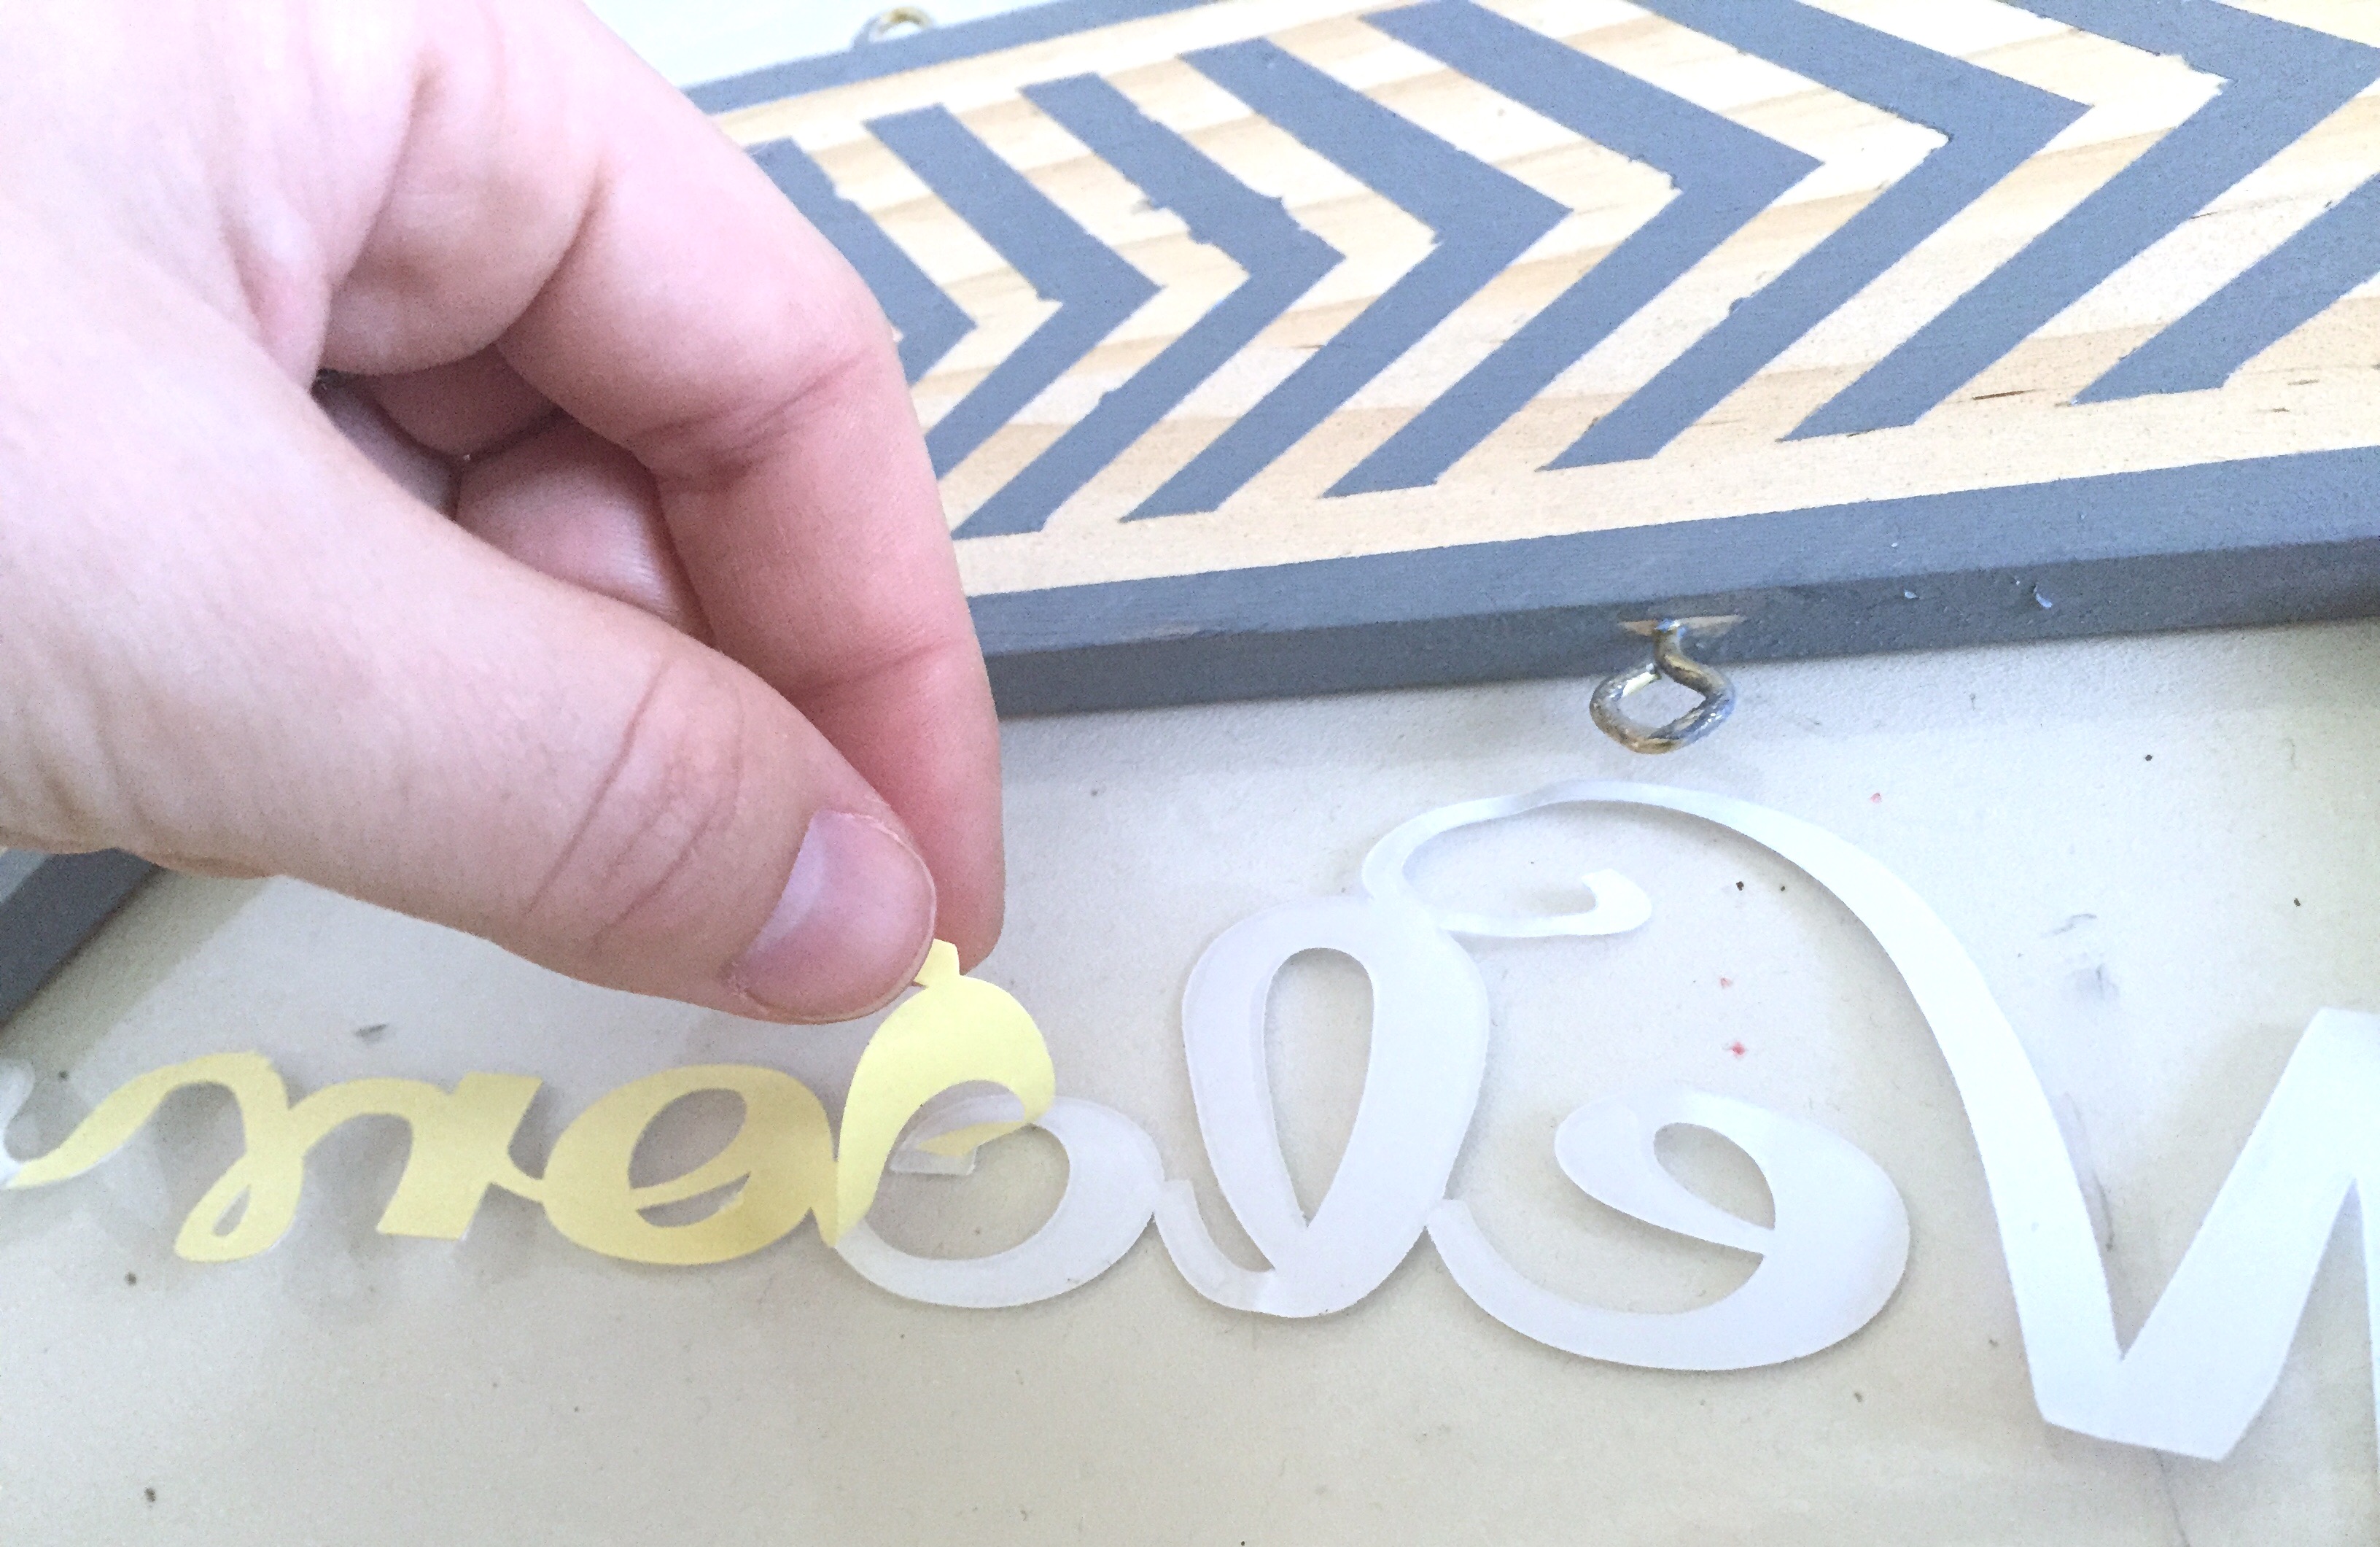
- Once cut, pop your design out from the paper and remove the yellow backing (some of the yellow might be stuck to your cutting mat. That’s OK, just as long as the clear adhesive comes completely off with the white side).
- Place your design exactly where you want it to appear on your arrow, and firmly press down (adhesive side down, white side up).
- Run your finger along the design to make sure it had a firm stick.
- Finally, remove the white top layer so that your clear adhesive design is the only thing left sticking to your arrow. Now, you’re ready for a pop of GLITTER!
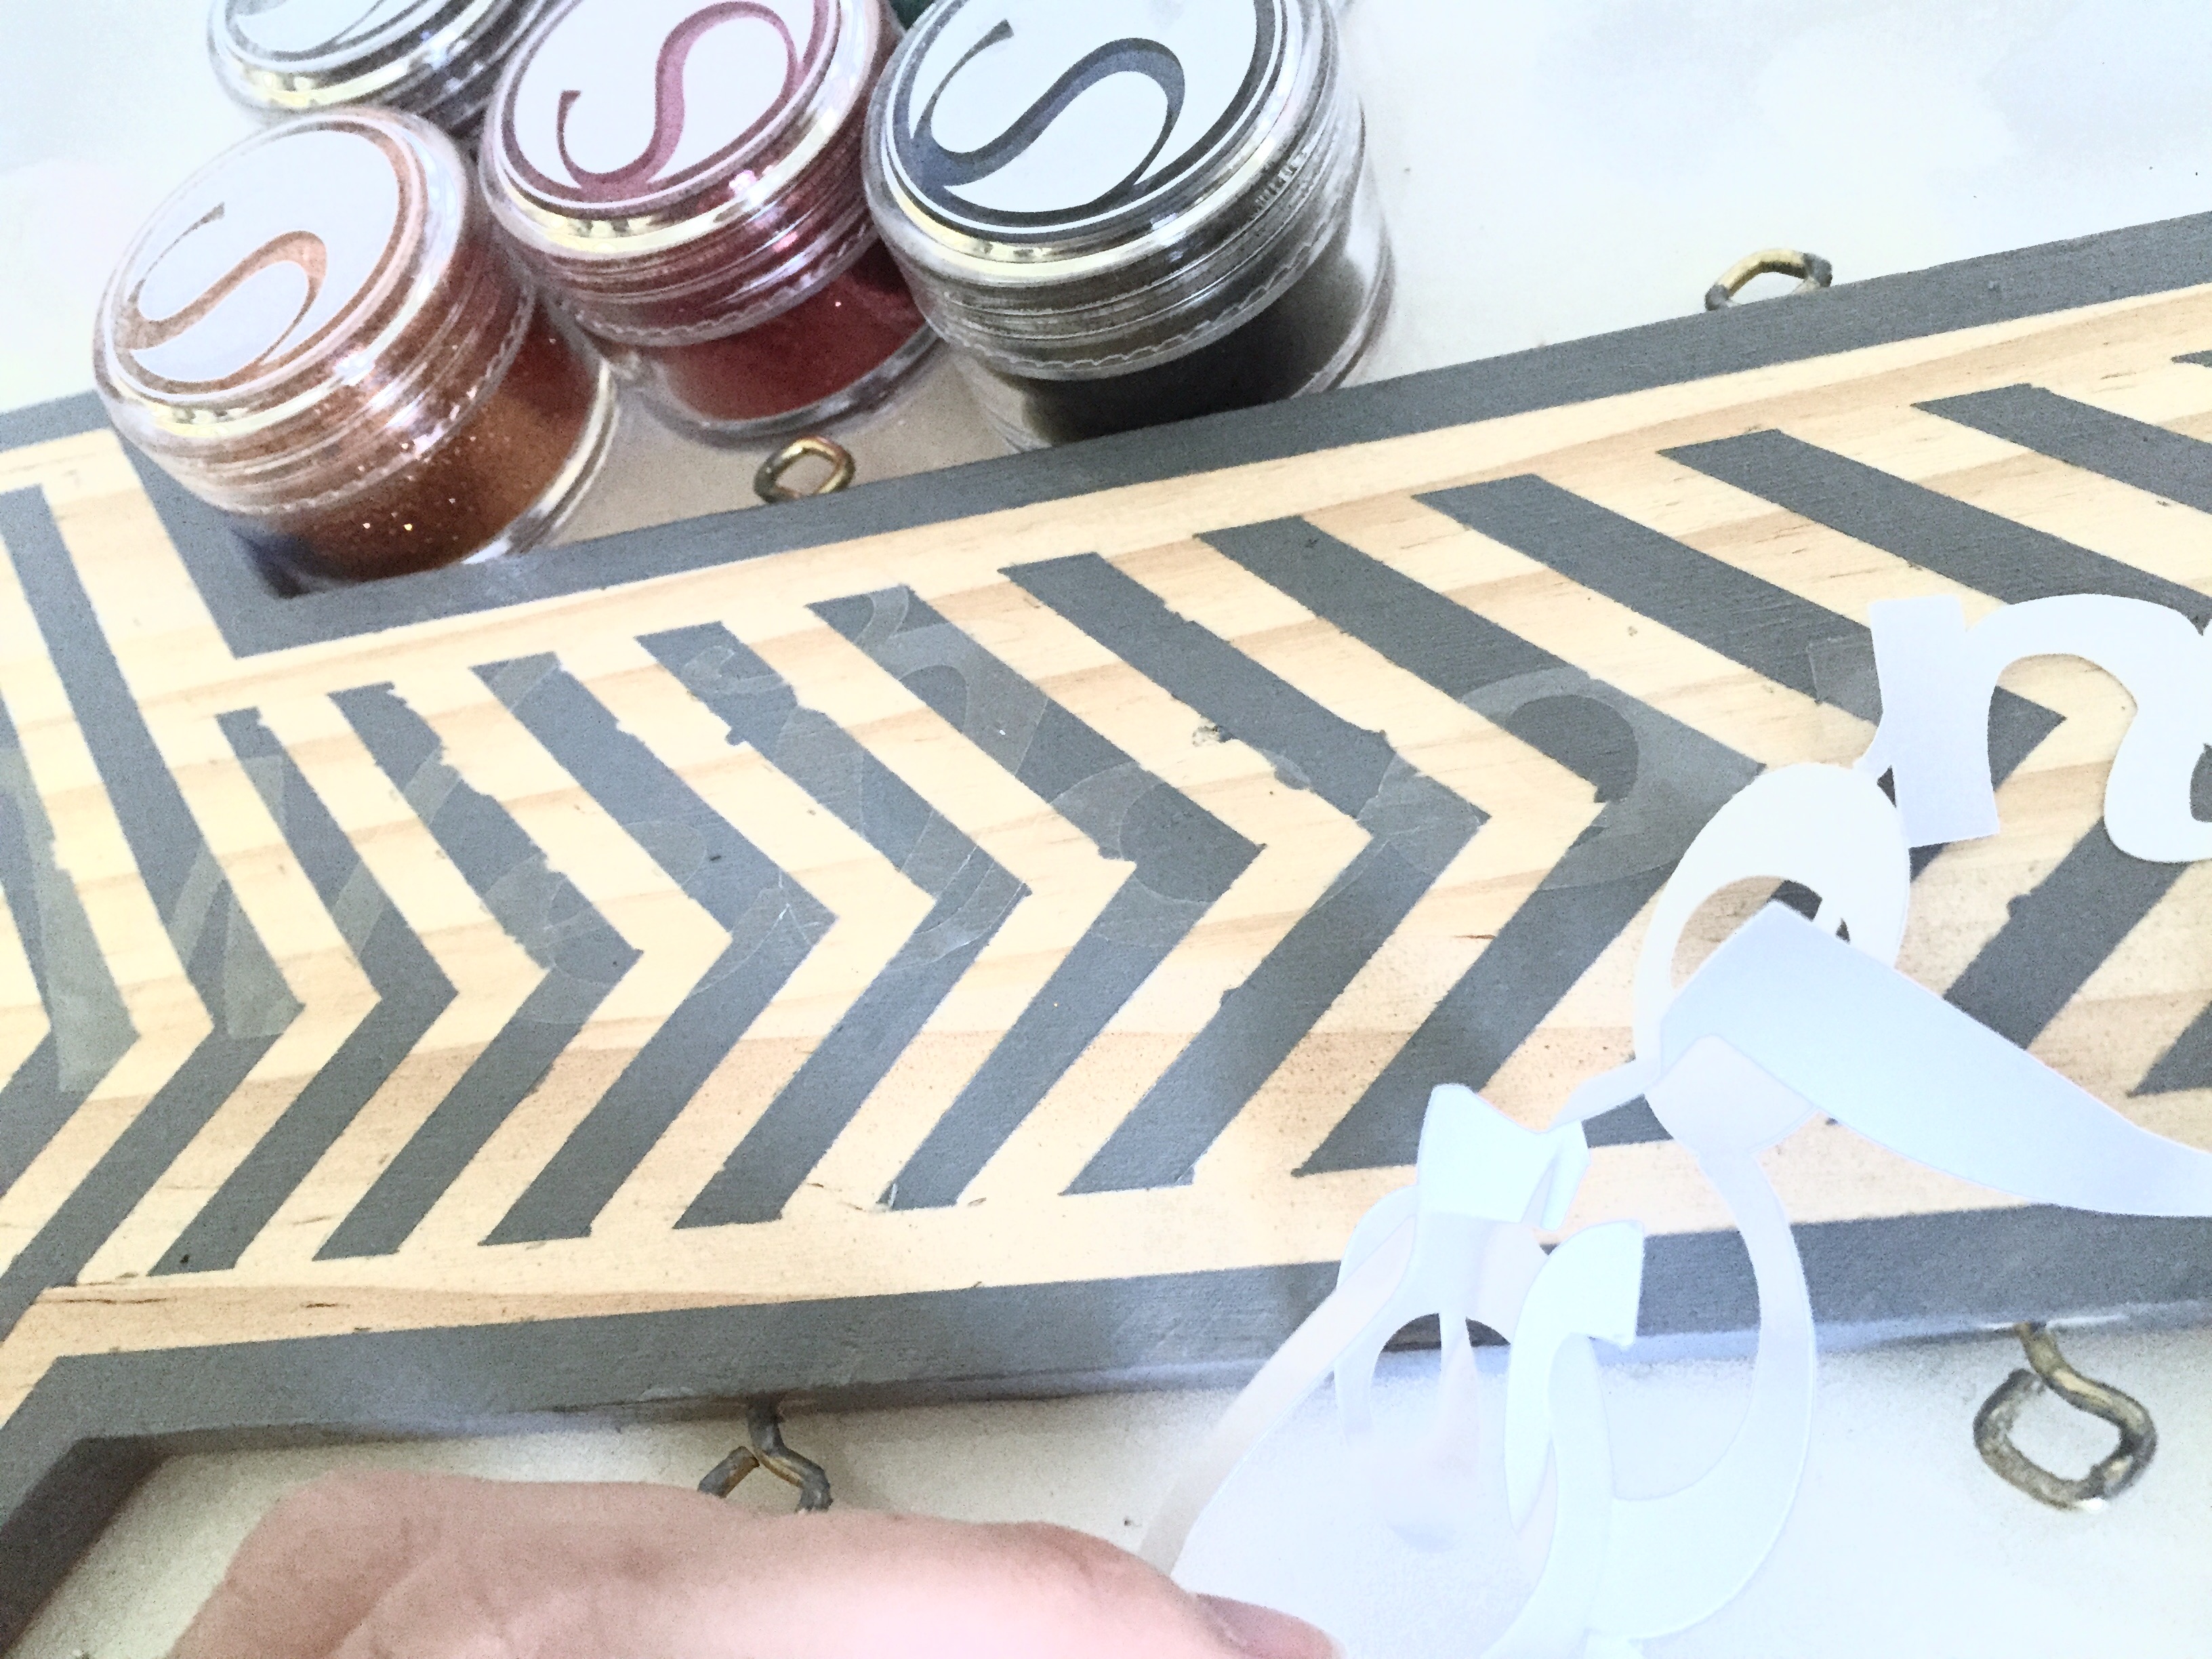
Step 7: Add Glitter
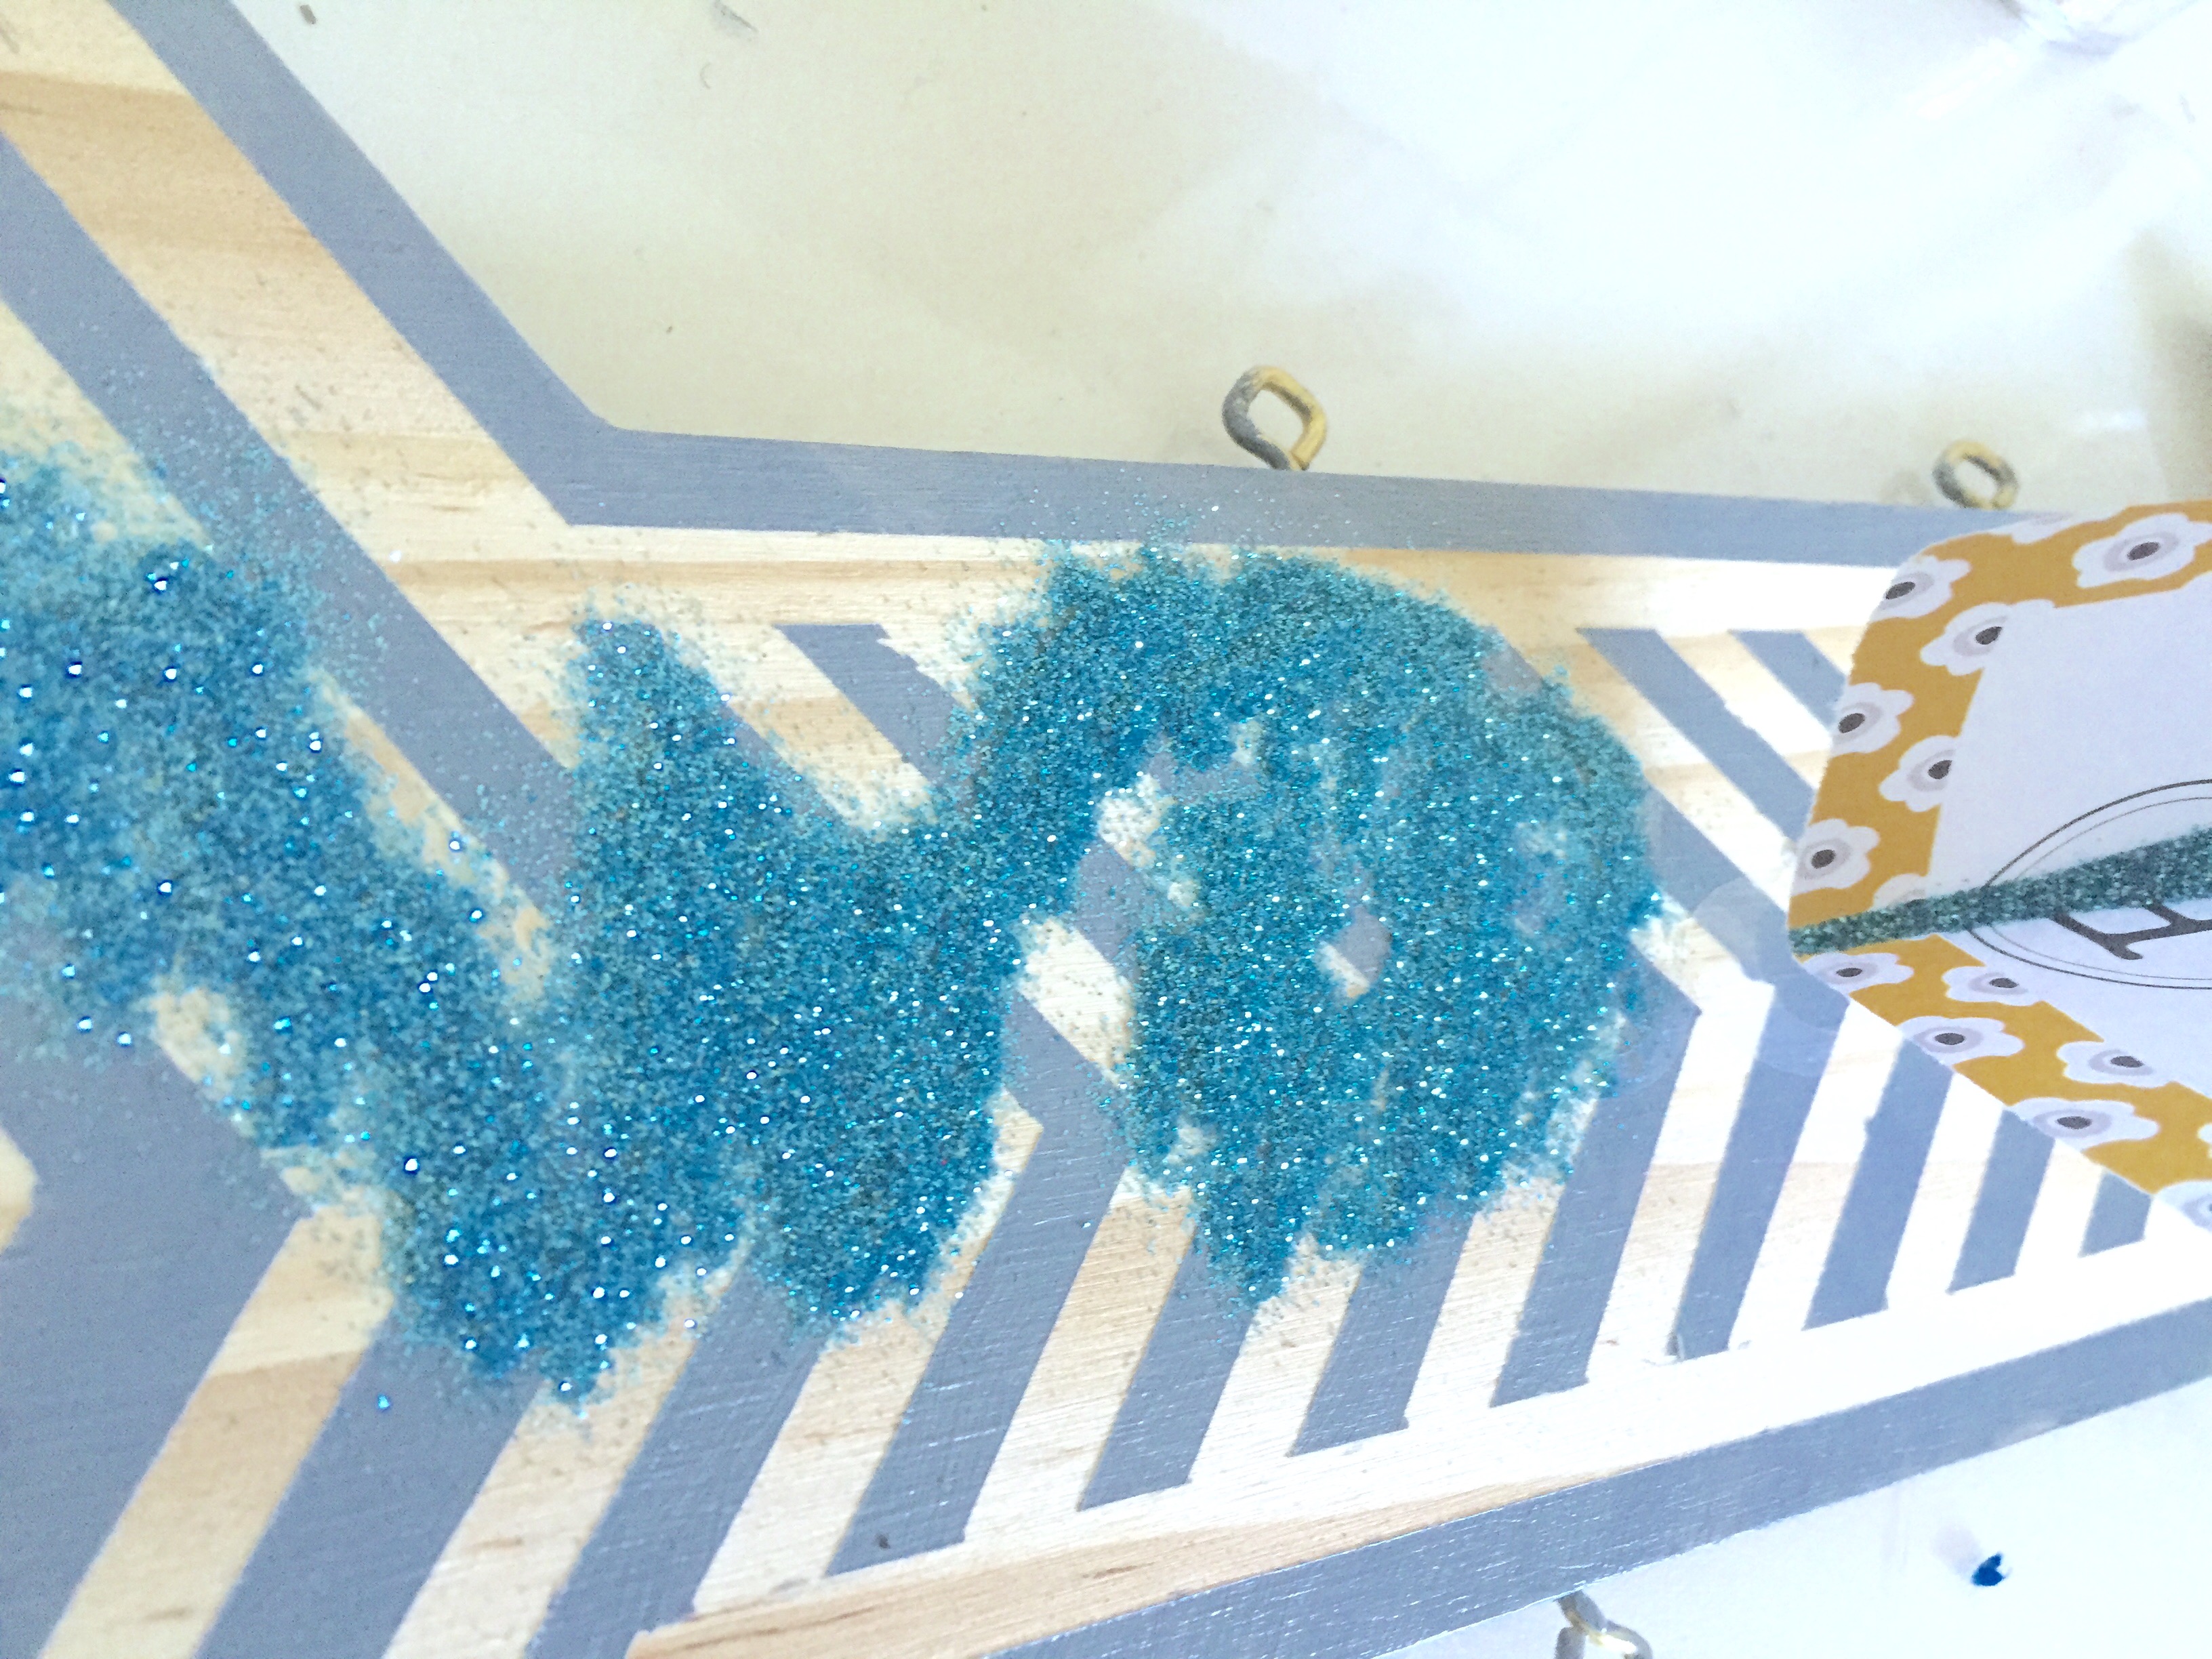
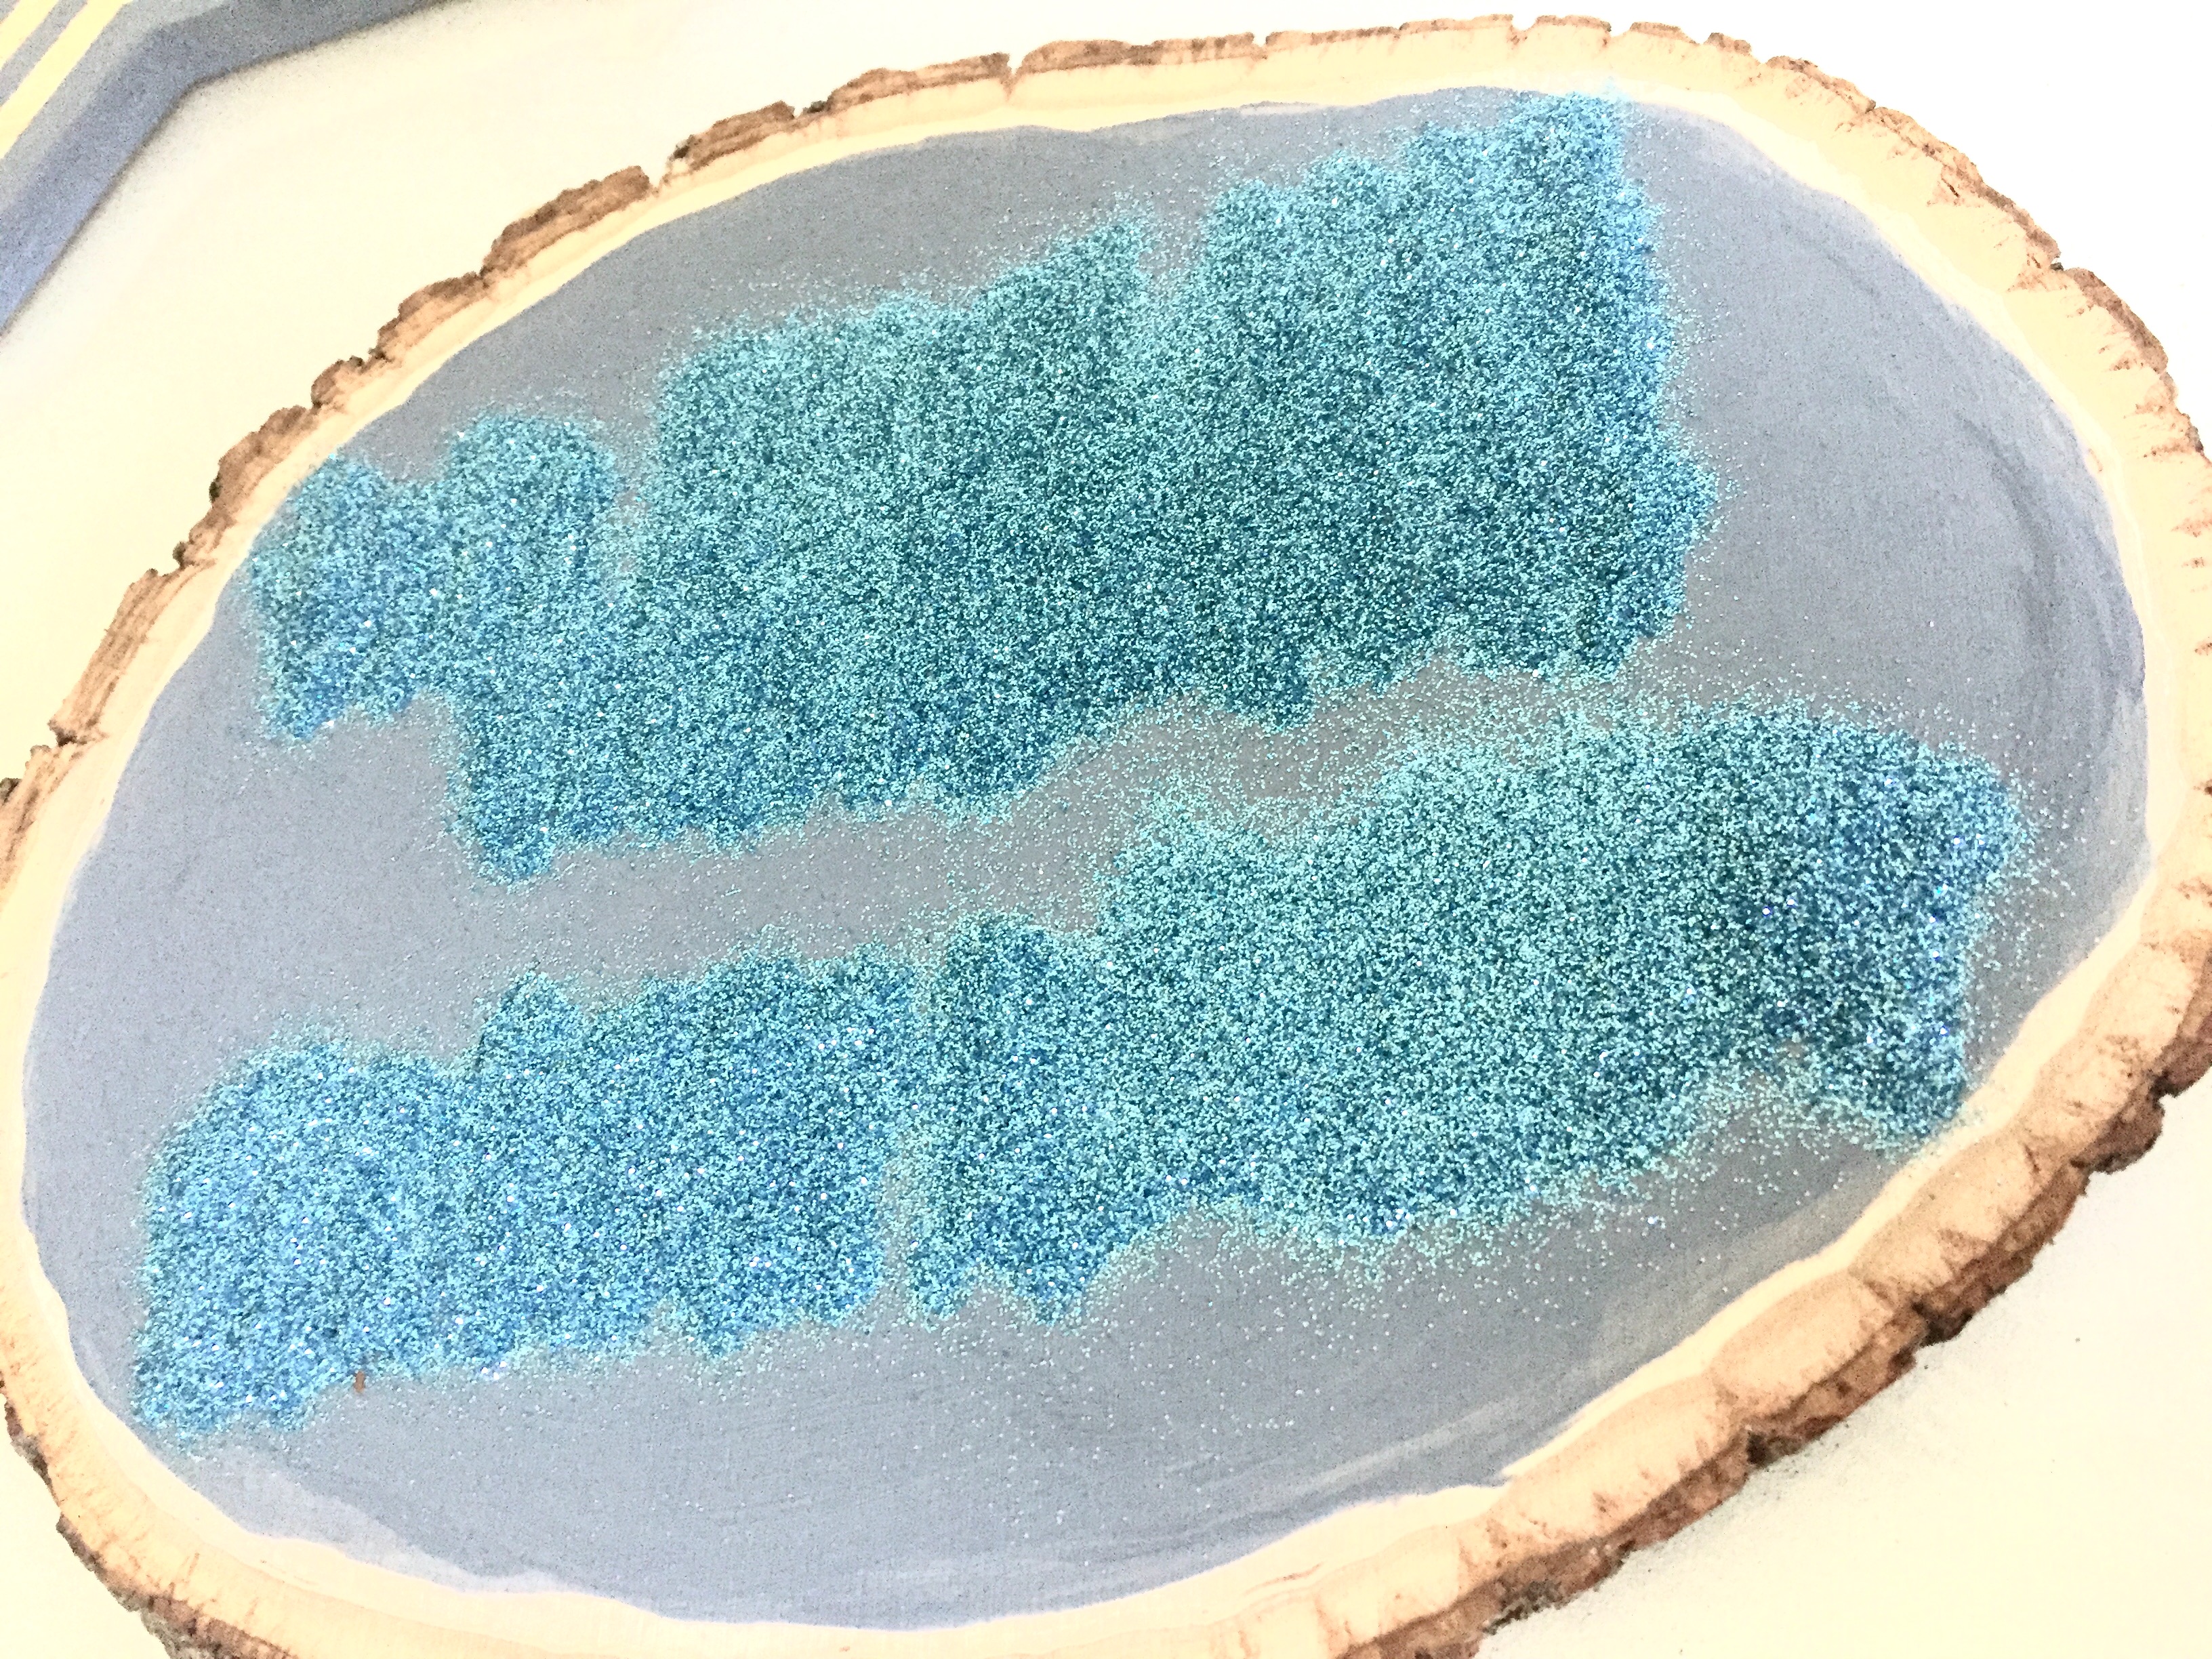
- Gently sprinkle your desired glitter color on top of the clear adhesive design (I chose the blue out of the Silhouette Glitter Essentials pack).
- An easy way to do this without getting totally messy is to pour the glitter first into a piece of paper you’ve folded in half like a hot dog. Then, gently sprinkle the glitter onto your adhesive from the fold in the paper. Saves your hands from all the mess!
- Once the glitter completely covers your design, tip your wood and let the excess fall back onto your paper.
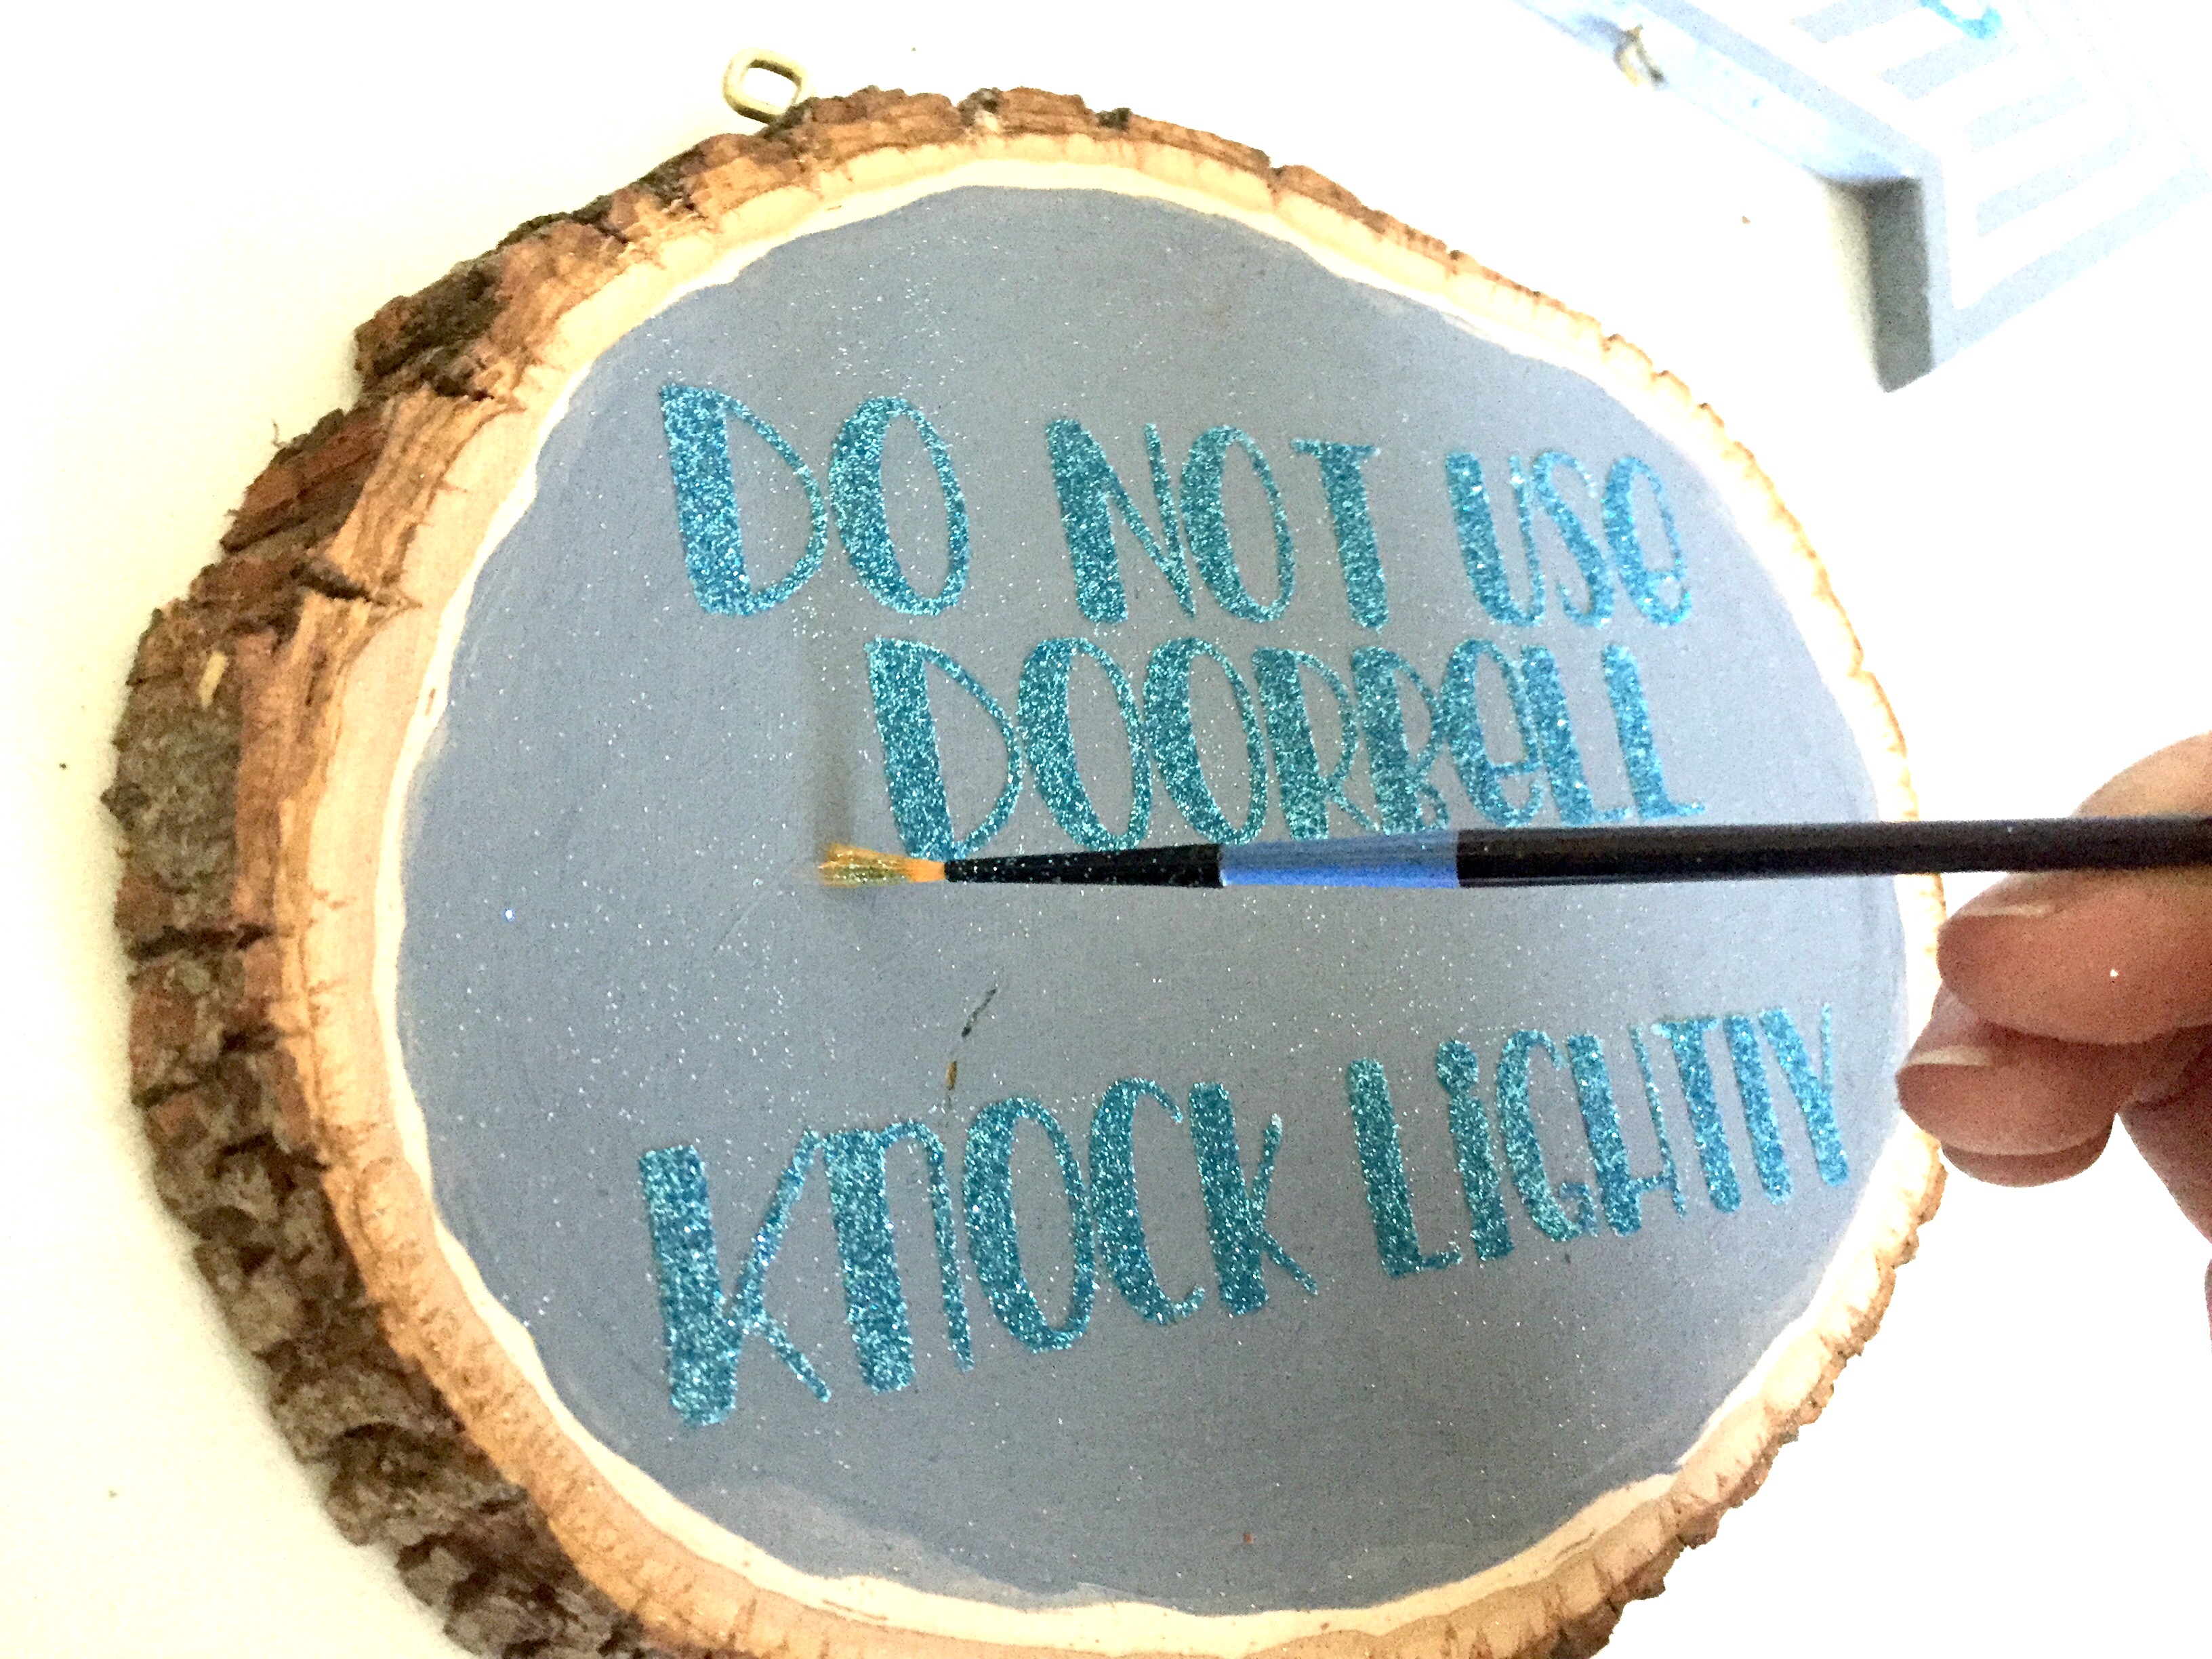
- There will be some scattered glitter left on your wood. I removed as much as I could (after dumping the excess) by dusting a paint brush around my design. It helped get a lot of the excess scattered glitter off of my wood.
Step 8(optional): Outline Glitter Design
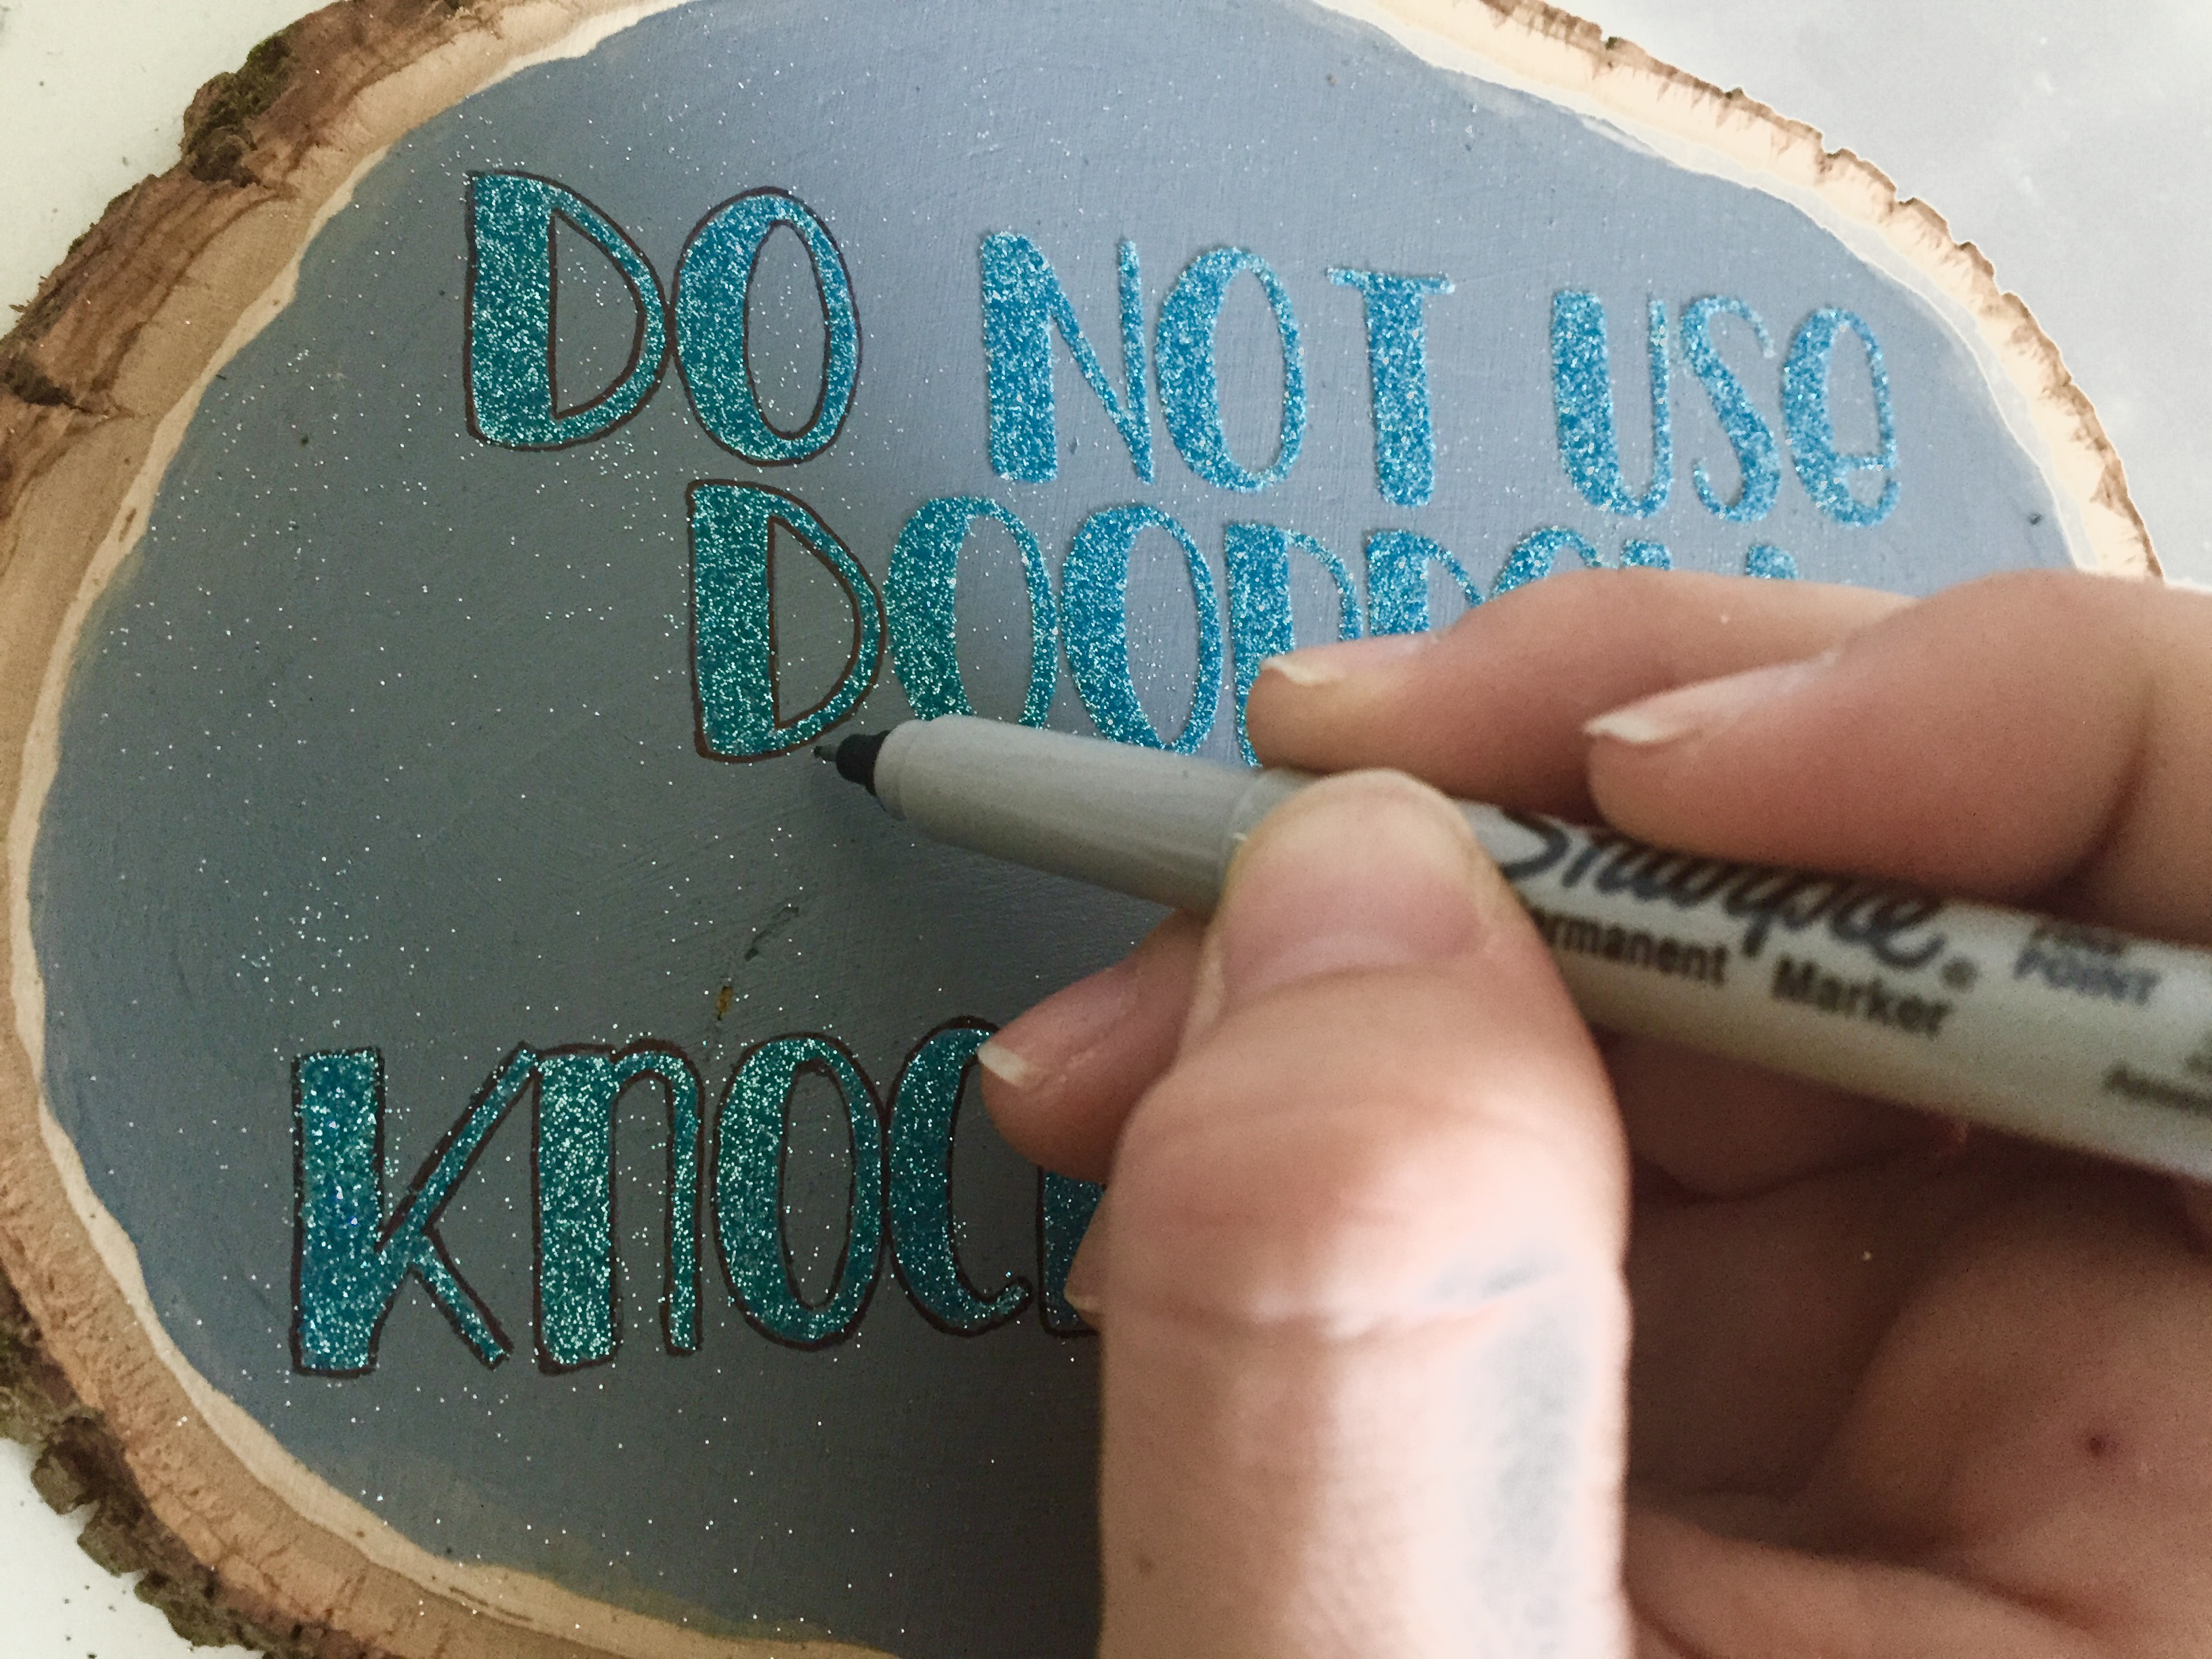
- This step is totally optional. But if you find your glitter needs a little extra POP off of the paint, you can outline your letters with a fine-tipped sharpie pen.
- I did this to all my glitter letters to really make them stand out.
Step 9: Cut Vinyl Design
- Now, time to work with a solid color vinyl for the rest of your wording.
- Just as you did in Step 5, go into your Silhouette Studio and click on the TEXT tool again. Write the words you want to appear in matte vinyl on your screen.
- I used PN Peach Preserves Solid for the text on the arrow and Grassy Meadow for the wood round.
- Then, place your vinyl onto your cutting mat (vinyl side up) and load into your CAMEO.
- When loaded, press the CUT icon on the top toolbar, select “Silhouette Vinyl” under the MEDIA section, and adjust your blade according to the settings Silhouette Studio tells you. Then, press “Send to Silhouette”.


- Again, make sure you’re text is selected and you press “cut edge” before sending your design to be cut.
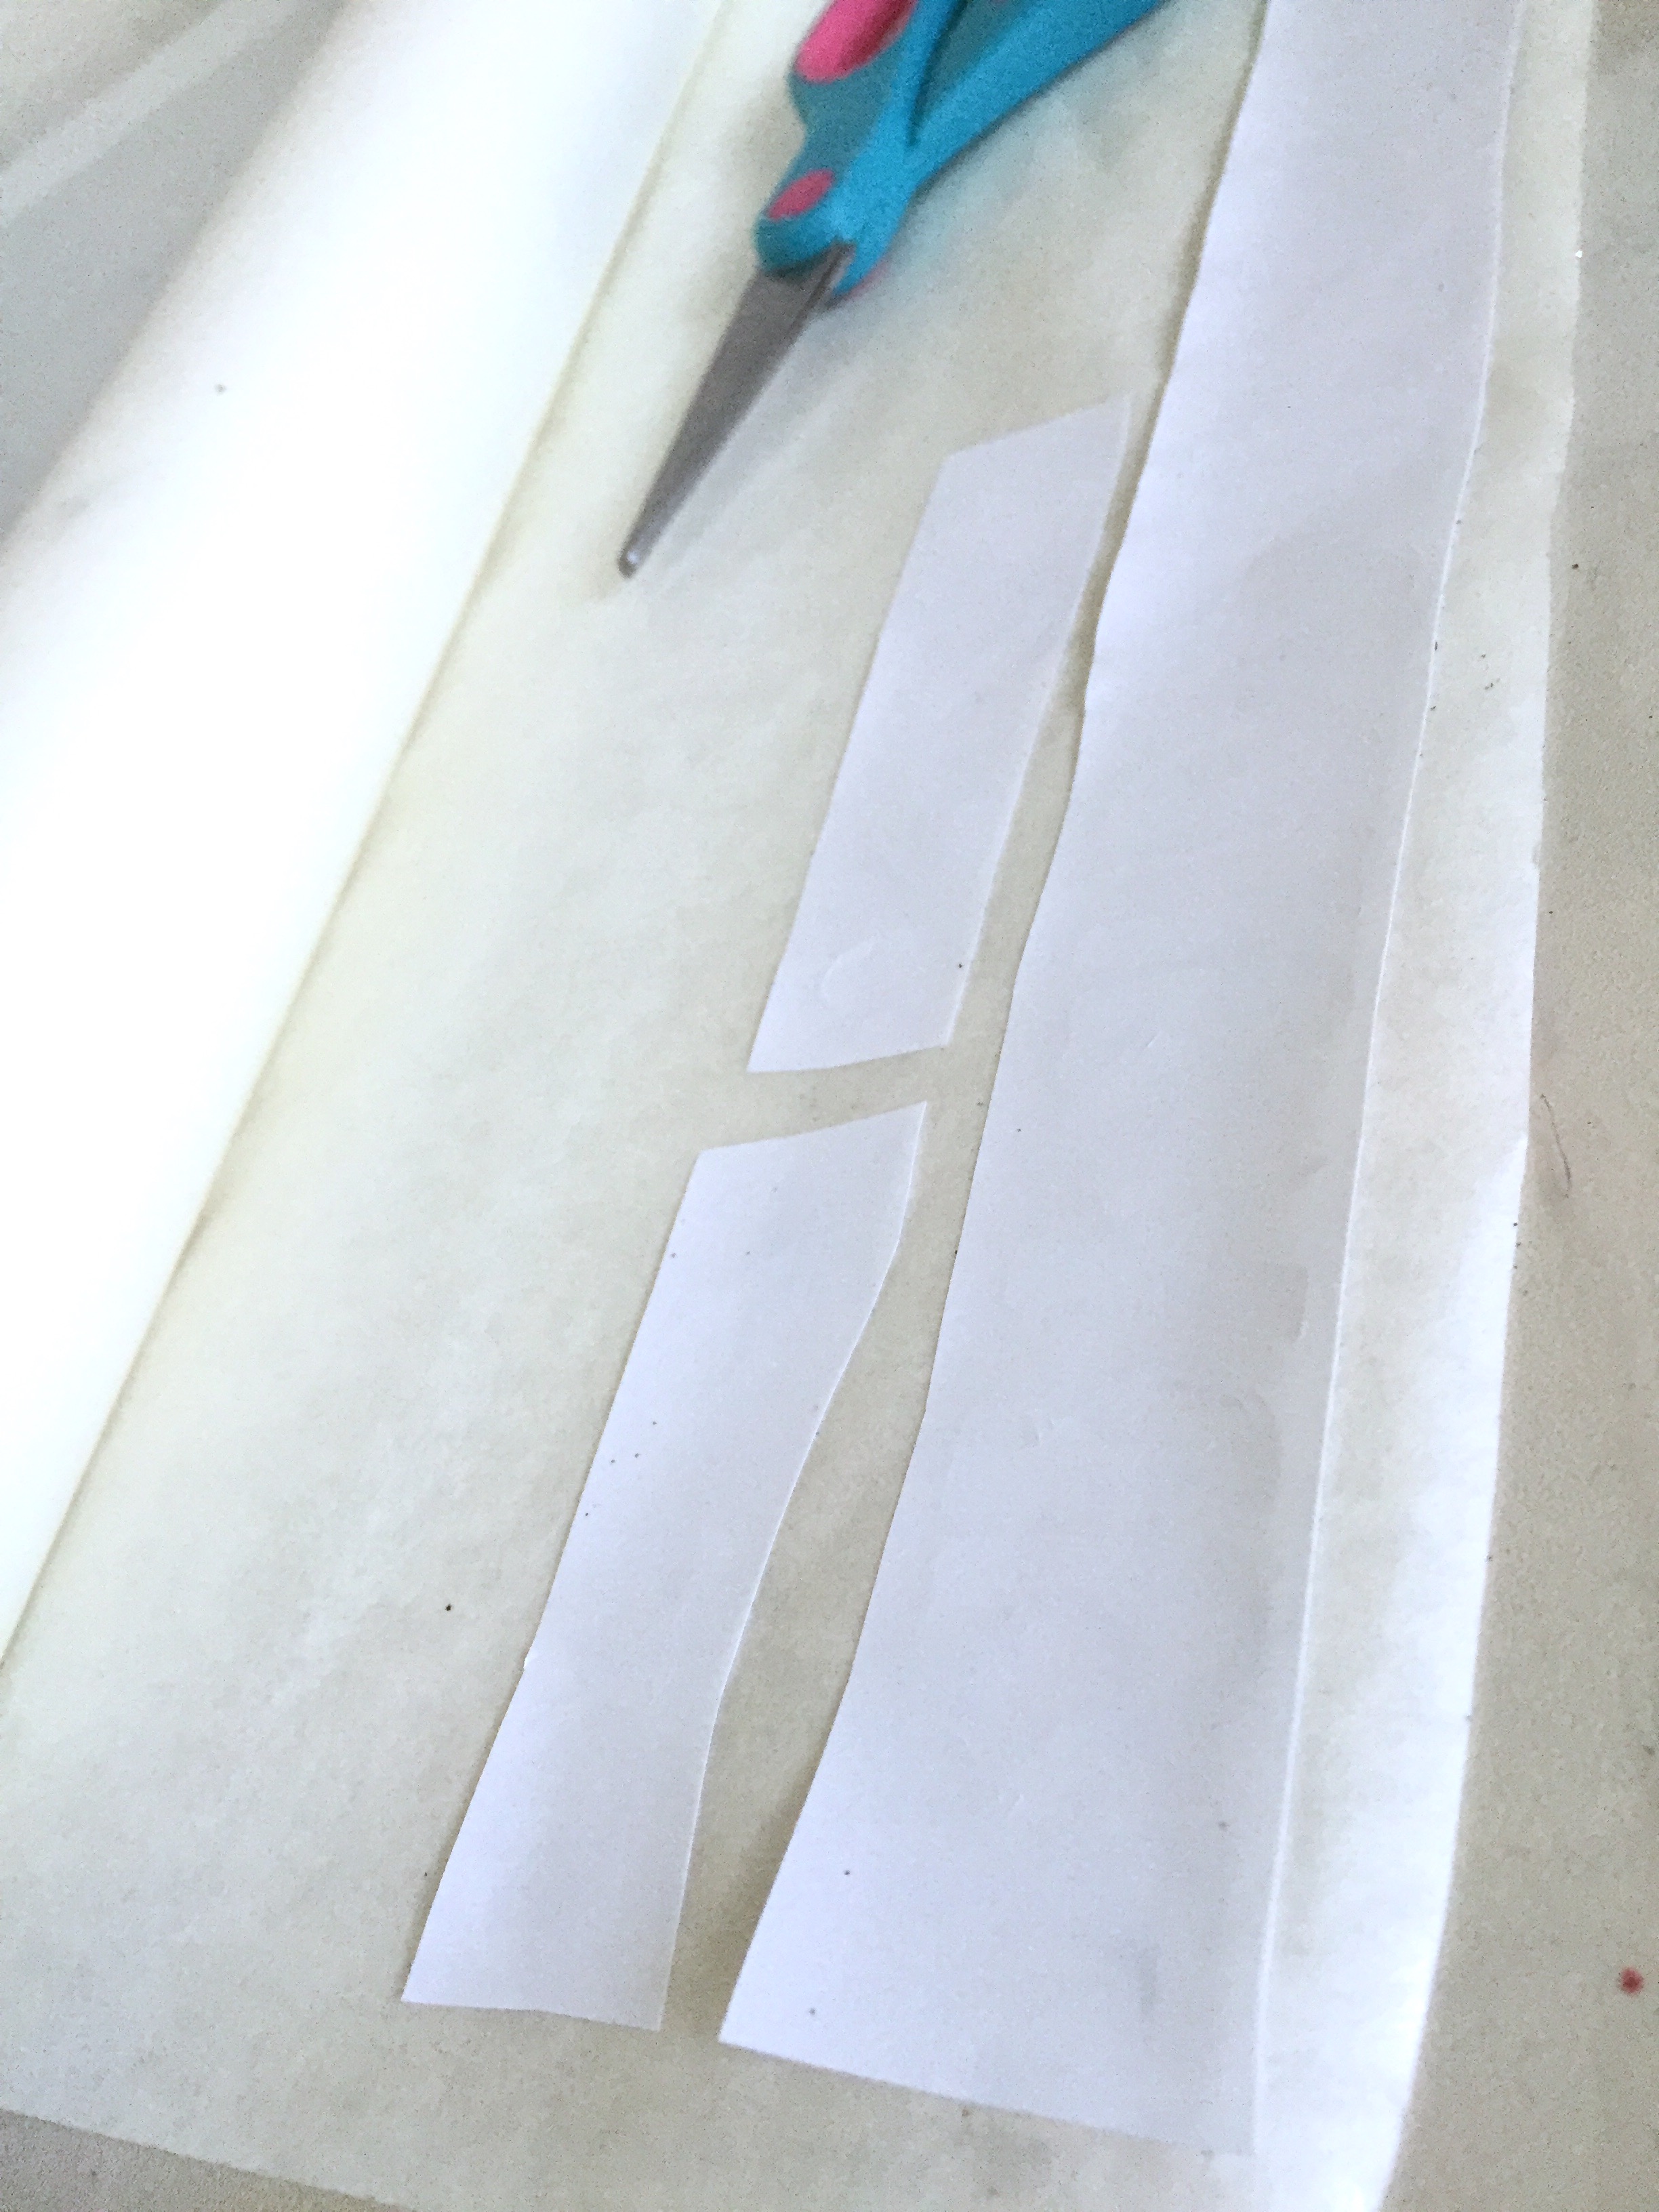
- Once cut, remove all the excess vinyl from around your design.
- Now, place your vinyl (face down) onto the sticky side of your transfer paper. Press down firmly on top of your design so that it sticks well to the transfer paper.
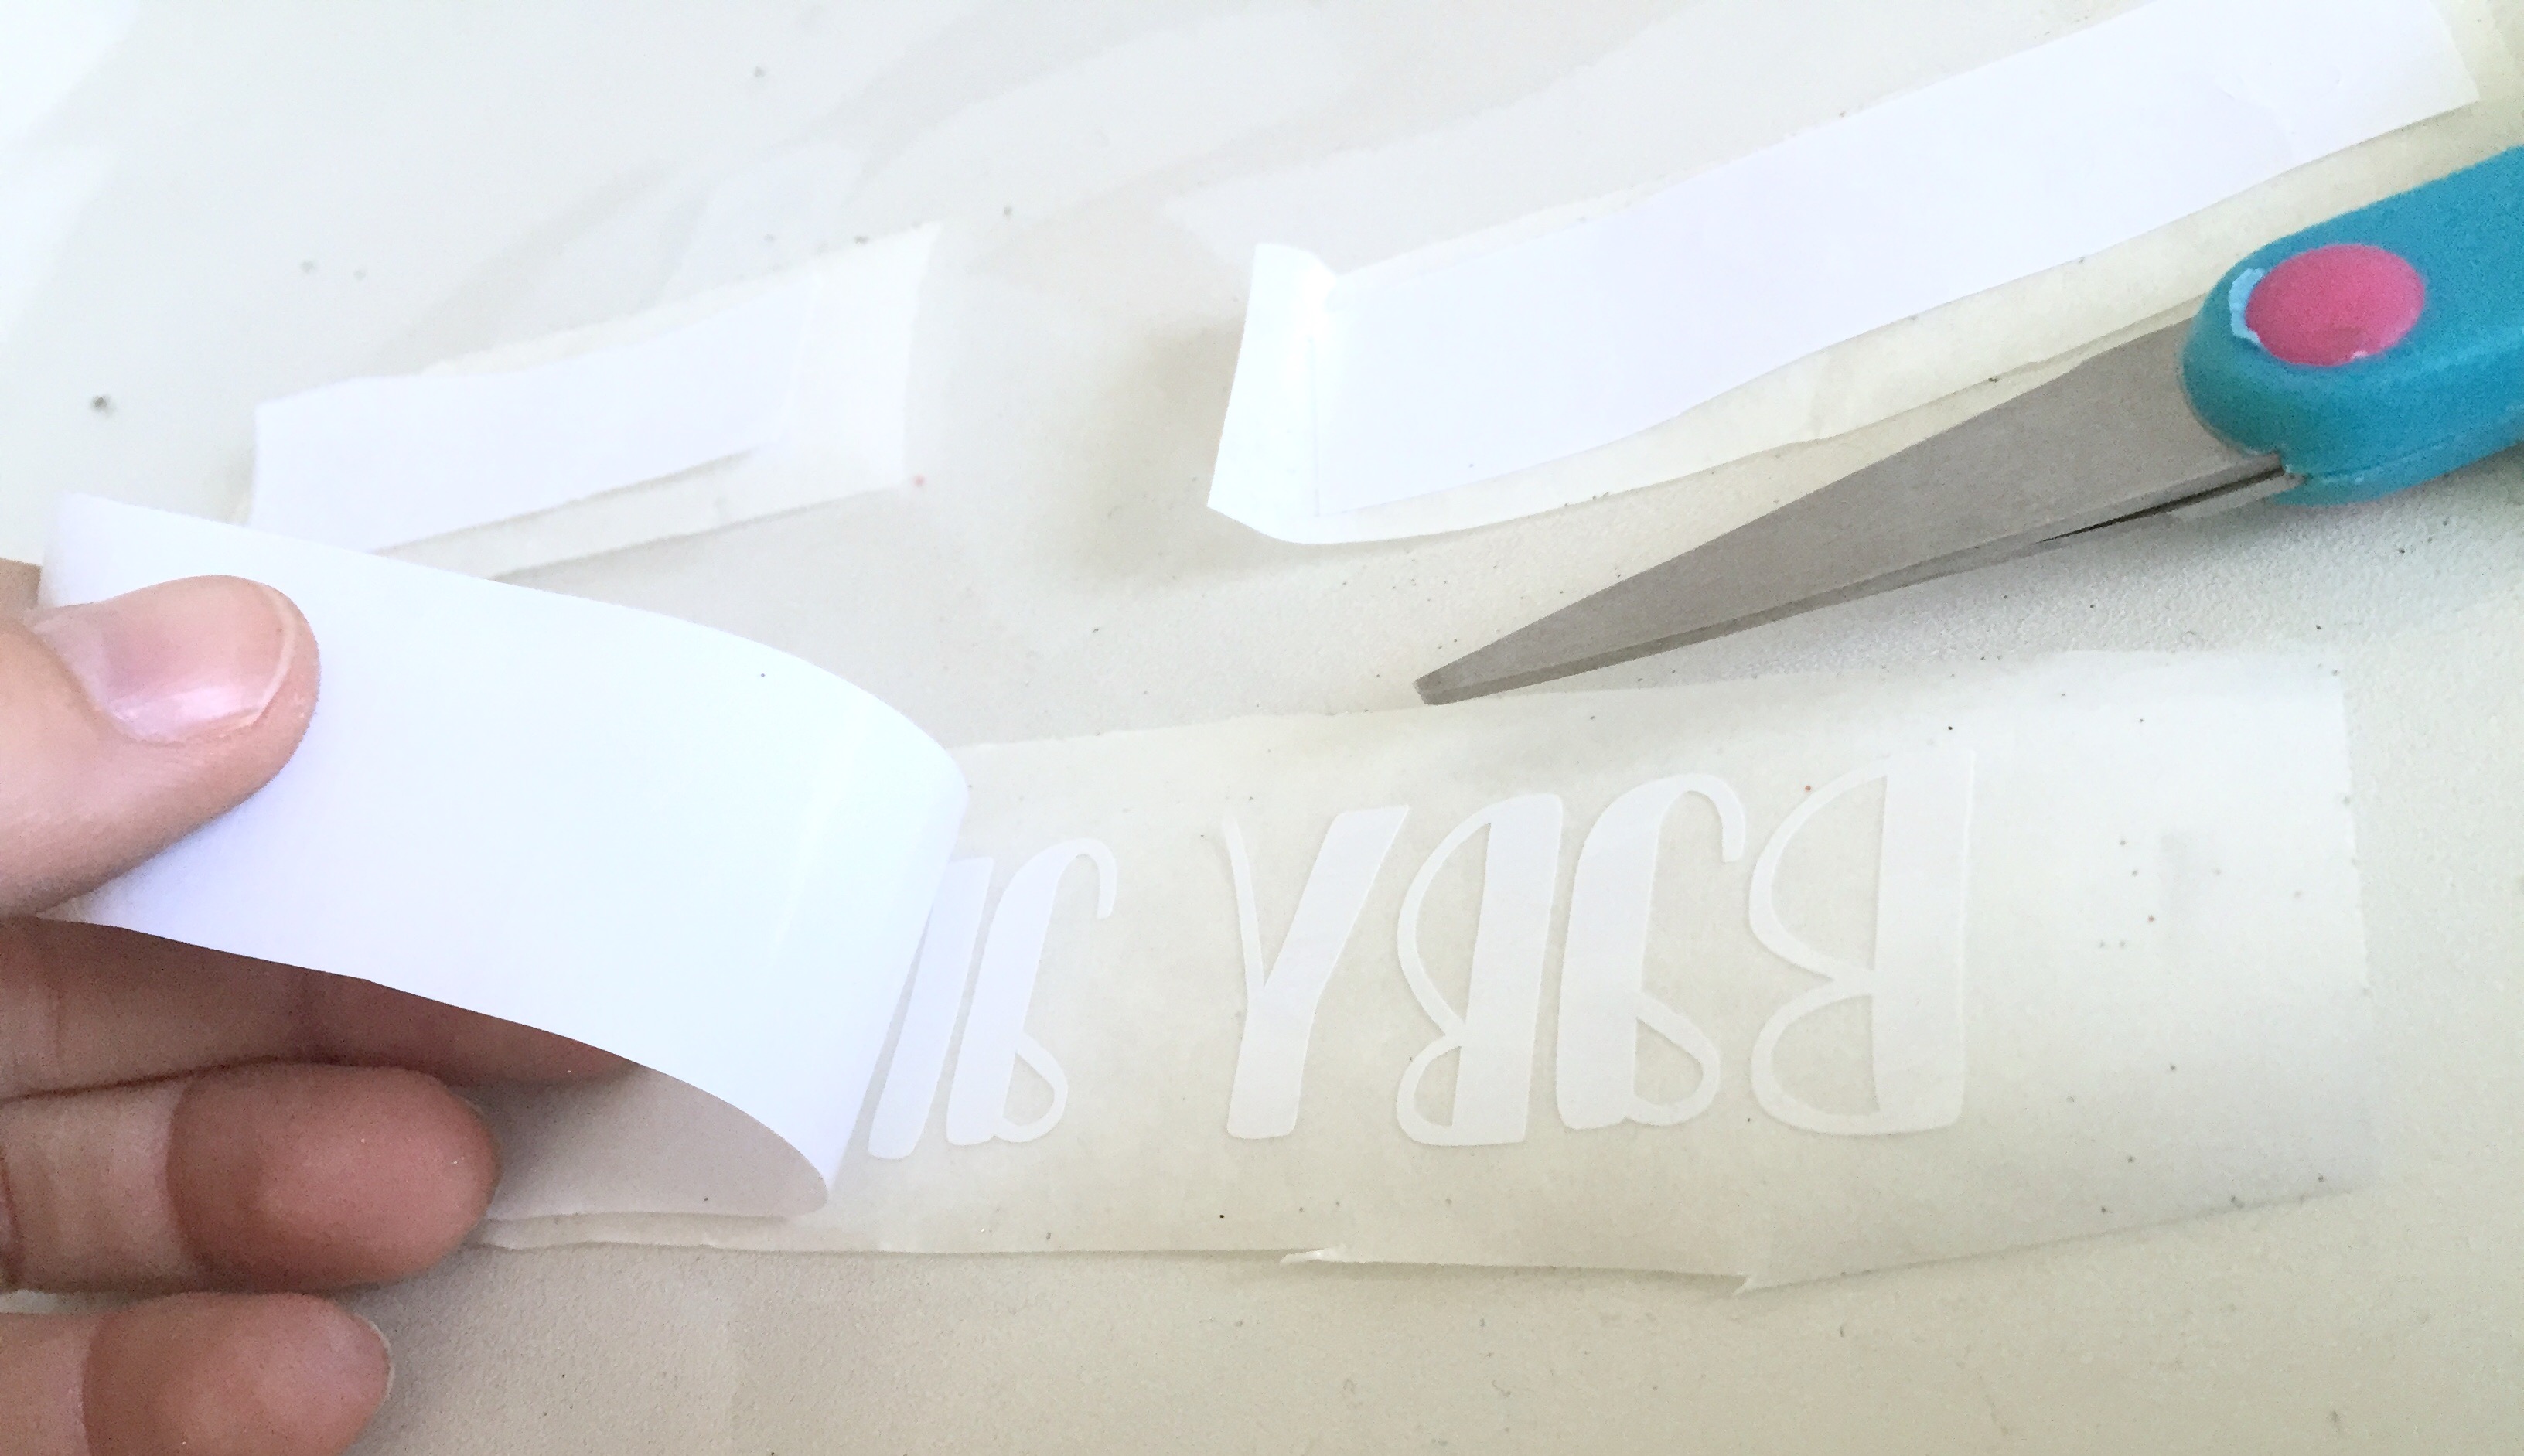
- Once you think your vinyl is good and stuck onto your transfer paper, remove the white backing from your vinyl. This will leave your vinyl design stuck to your transfer paper (in a backwards, mirrored image).
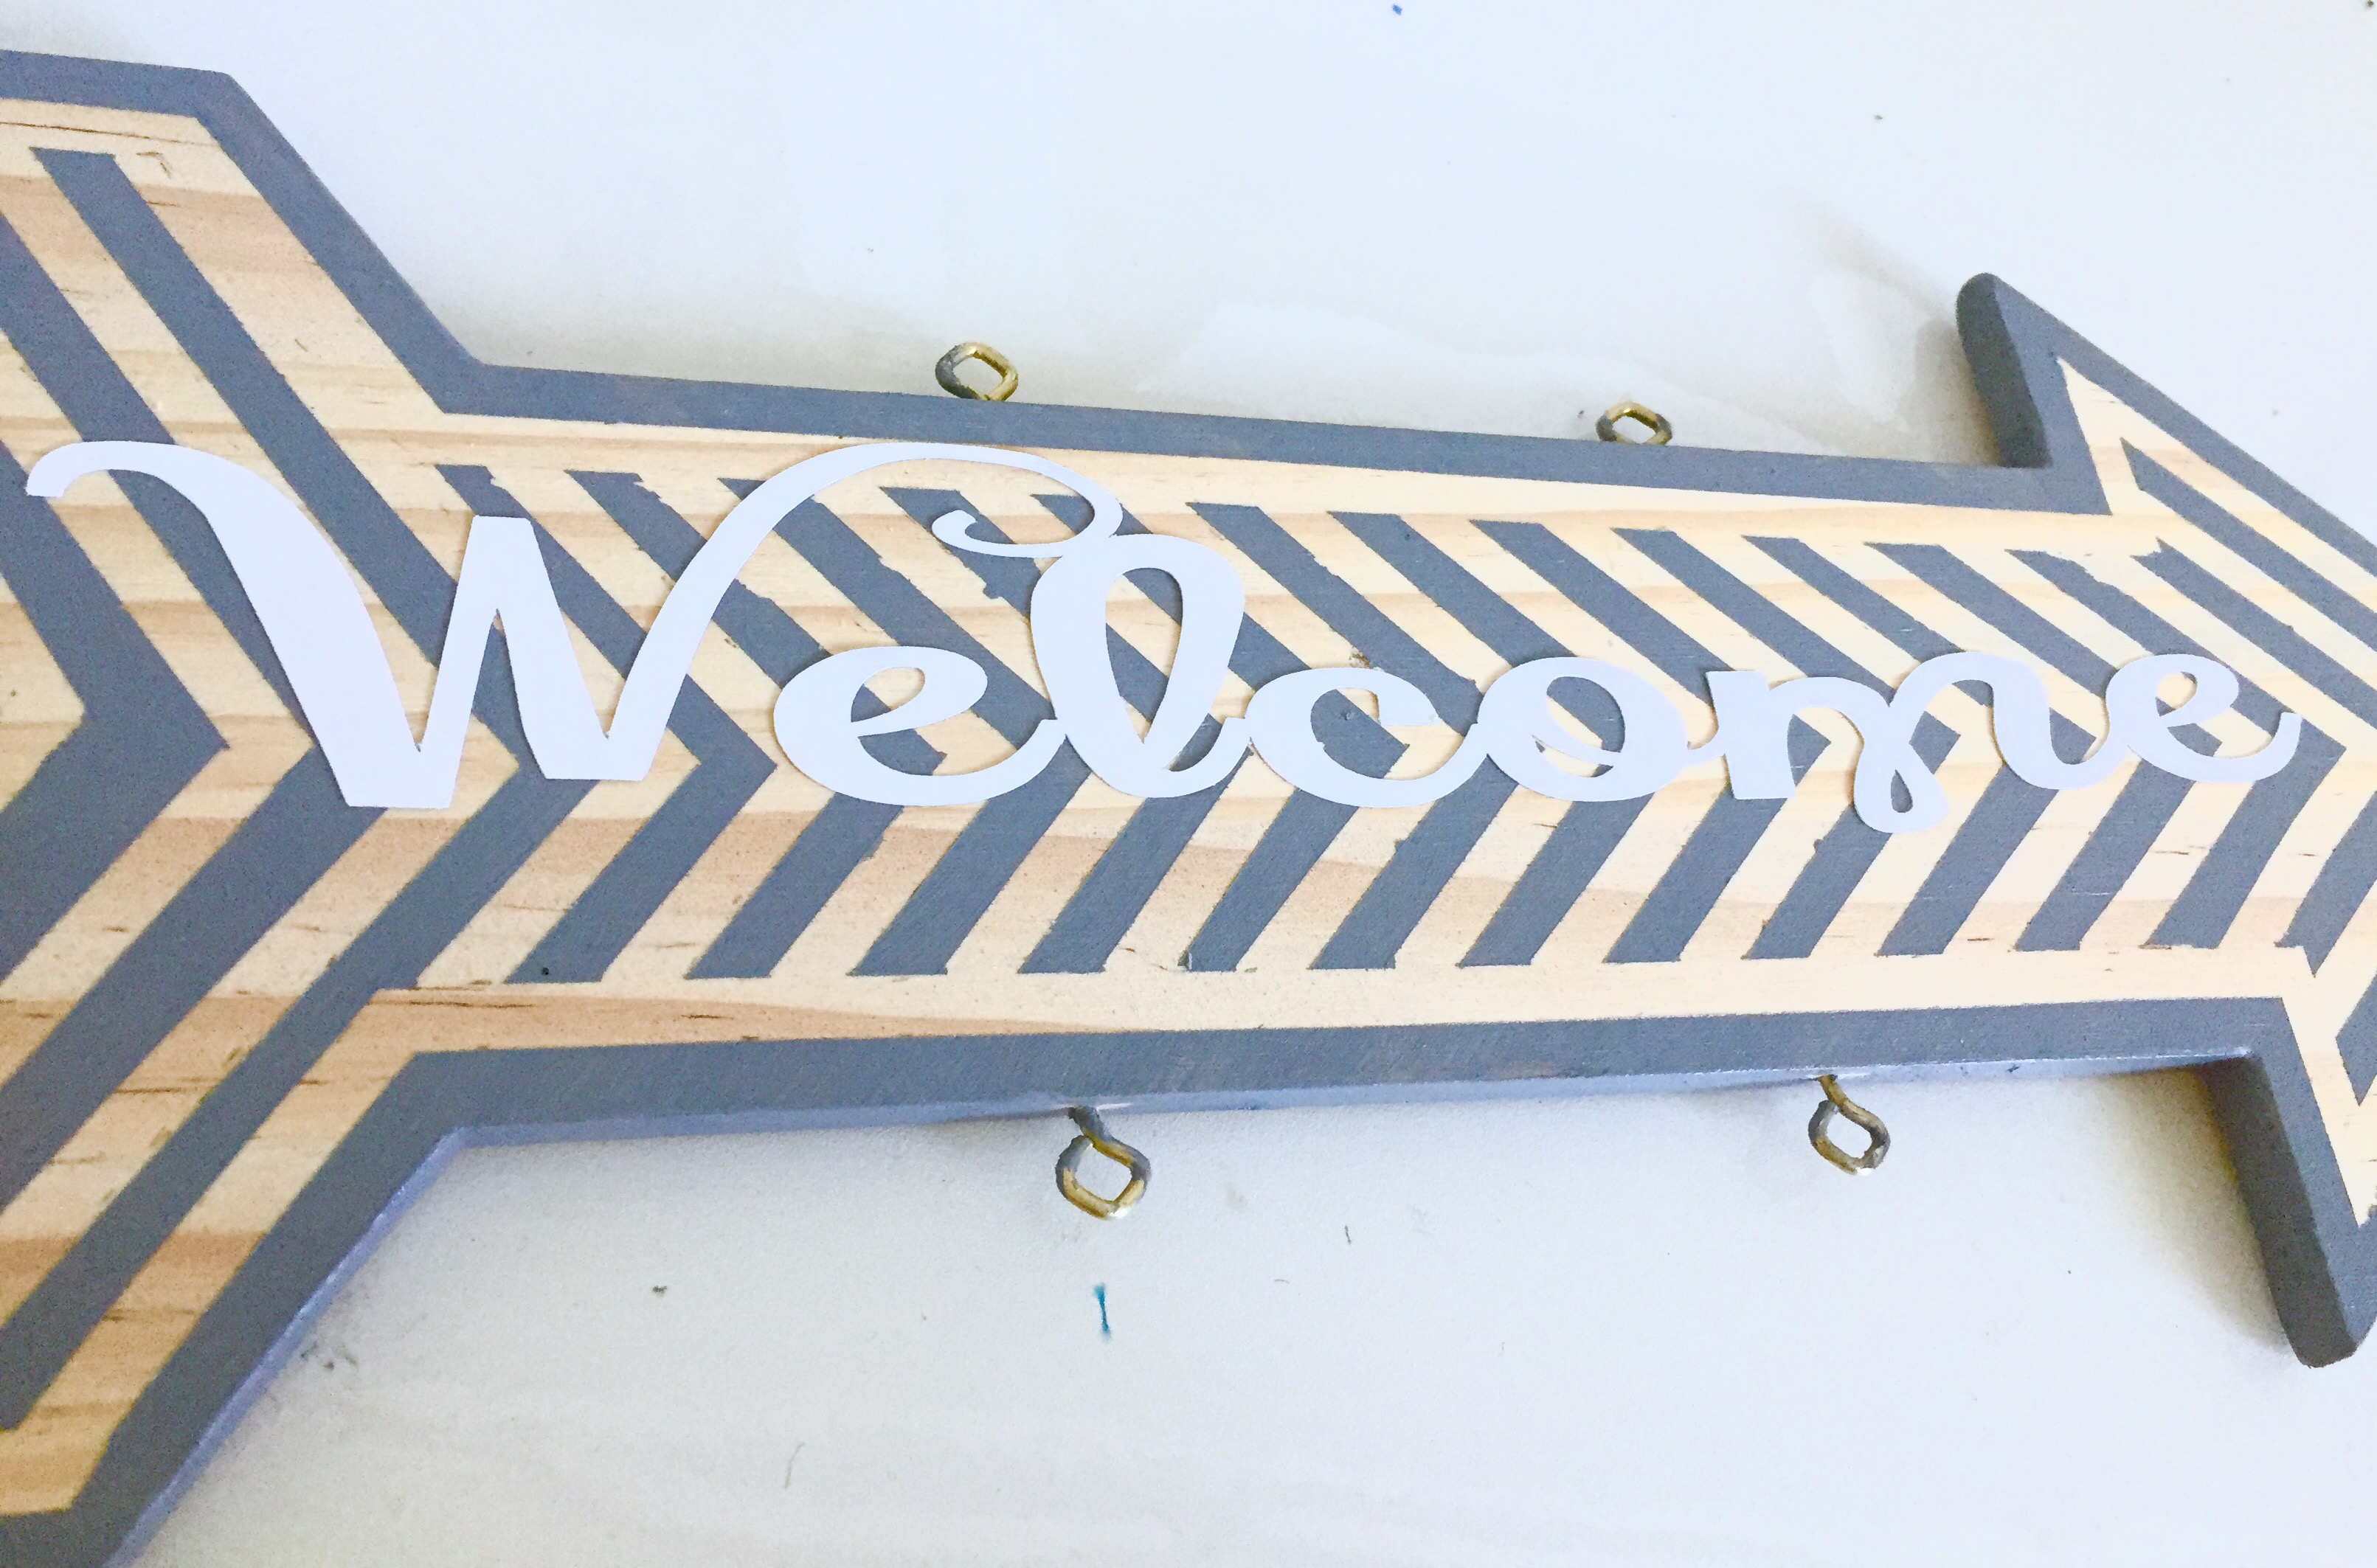
Step 10: Place Vinyl in Place Using Transfer Paper

- Now, place your vinyl/transfer paper combo EXACTLY where you want your vinyl design to go (sticky side down).
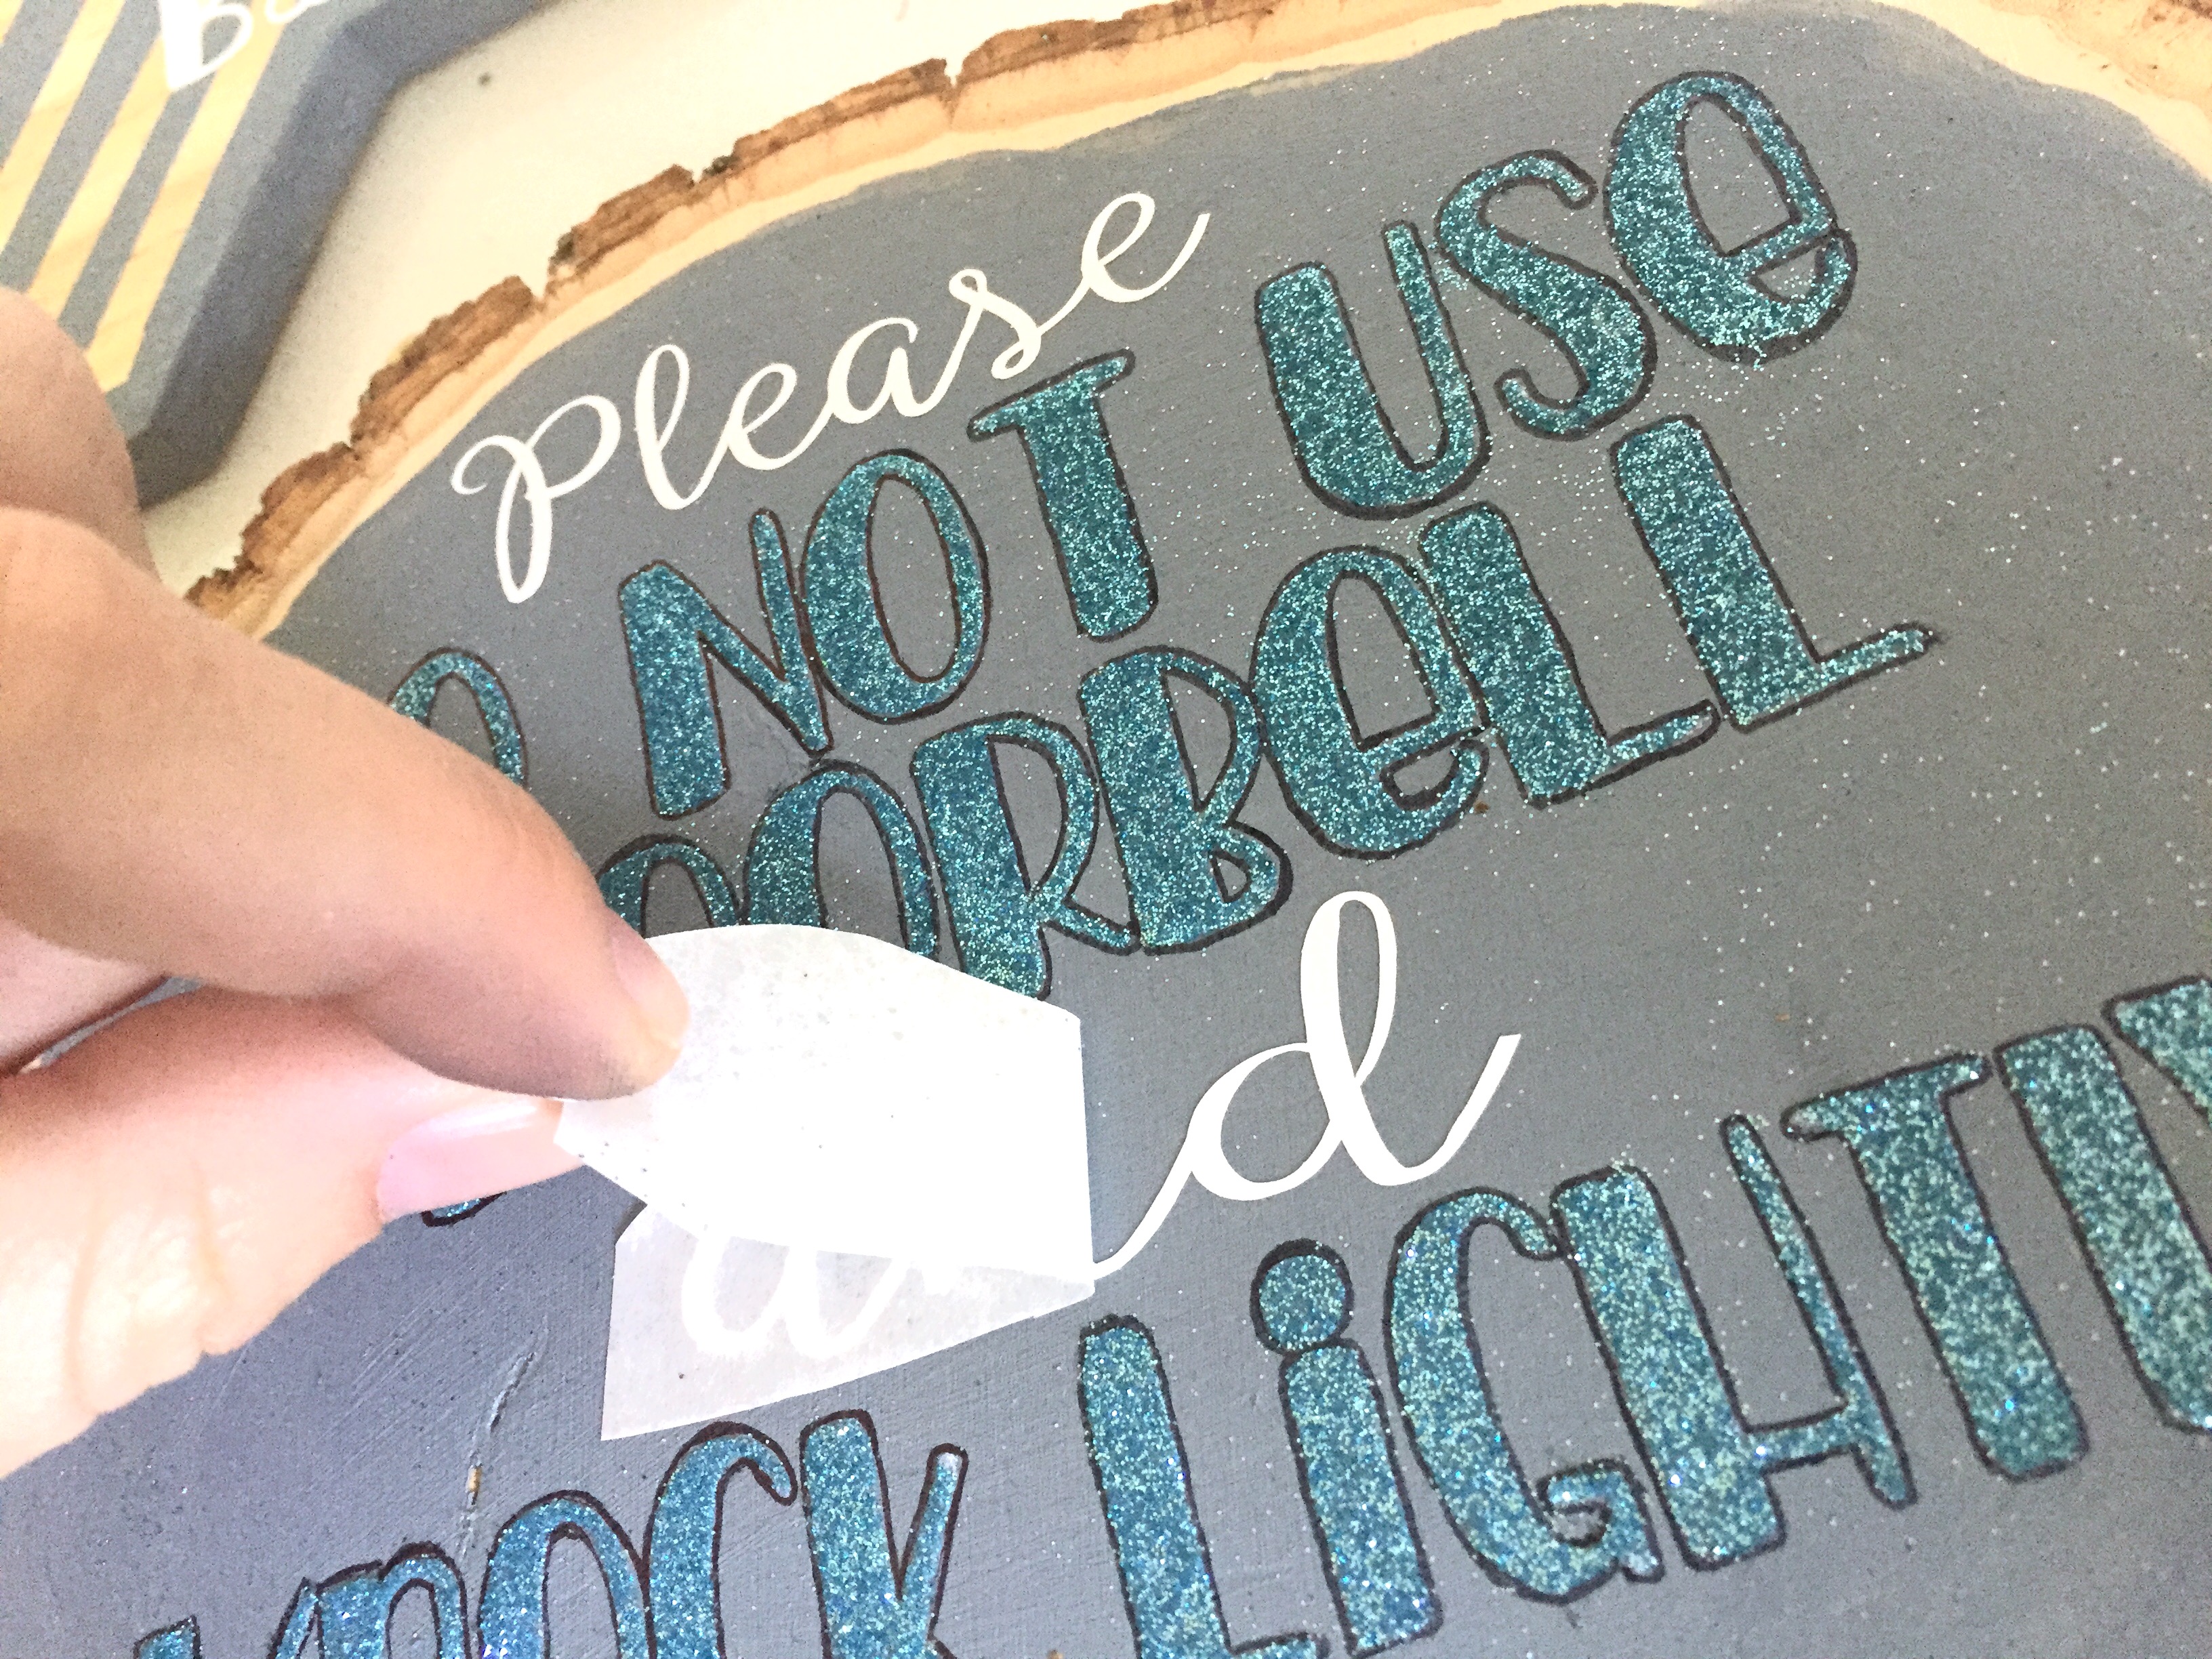
- Again, press firmly down onto your design to ensure the vinyl is stuck well to your wood.
- Once you think the vinyl is secure, remove the transfer tape from the top of your vinyl design, leaving your vinyl design stuck on your wood!
Step 11: Add Wire for Hanging
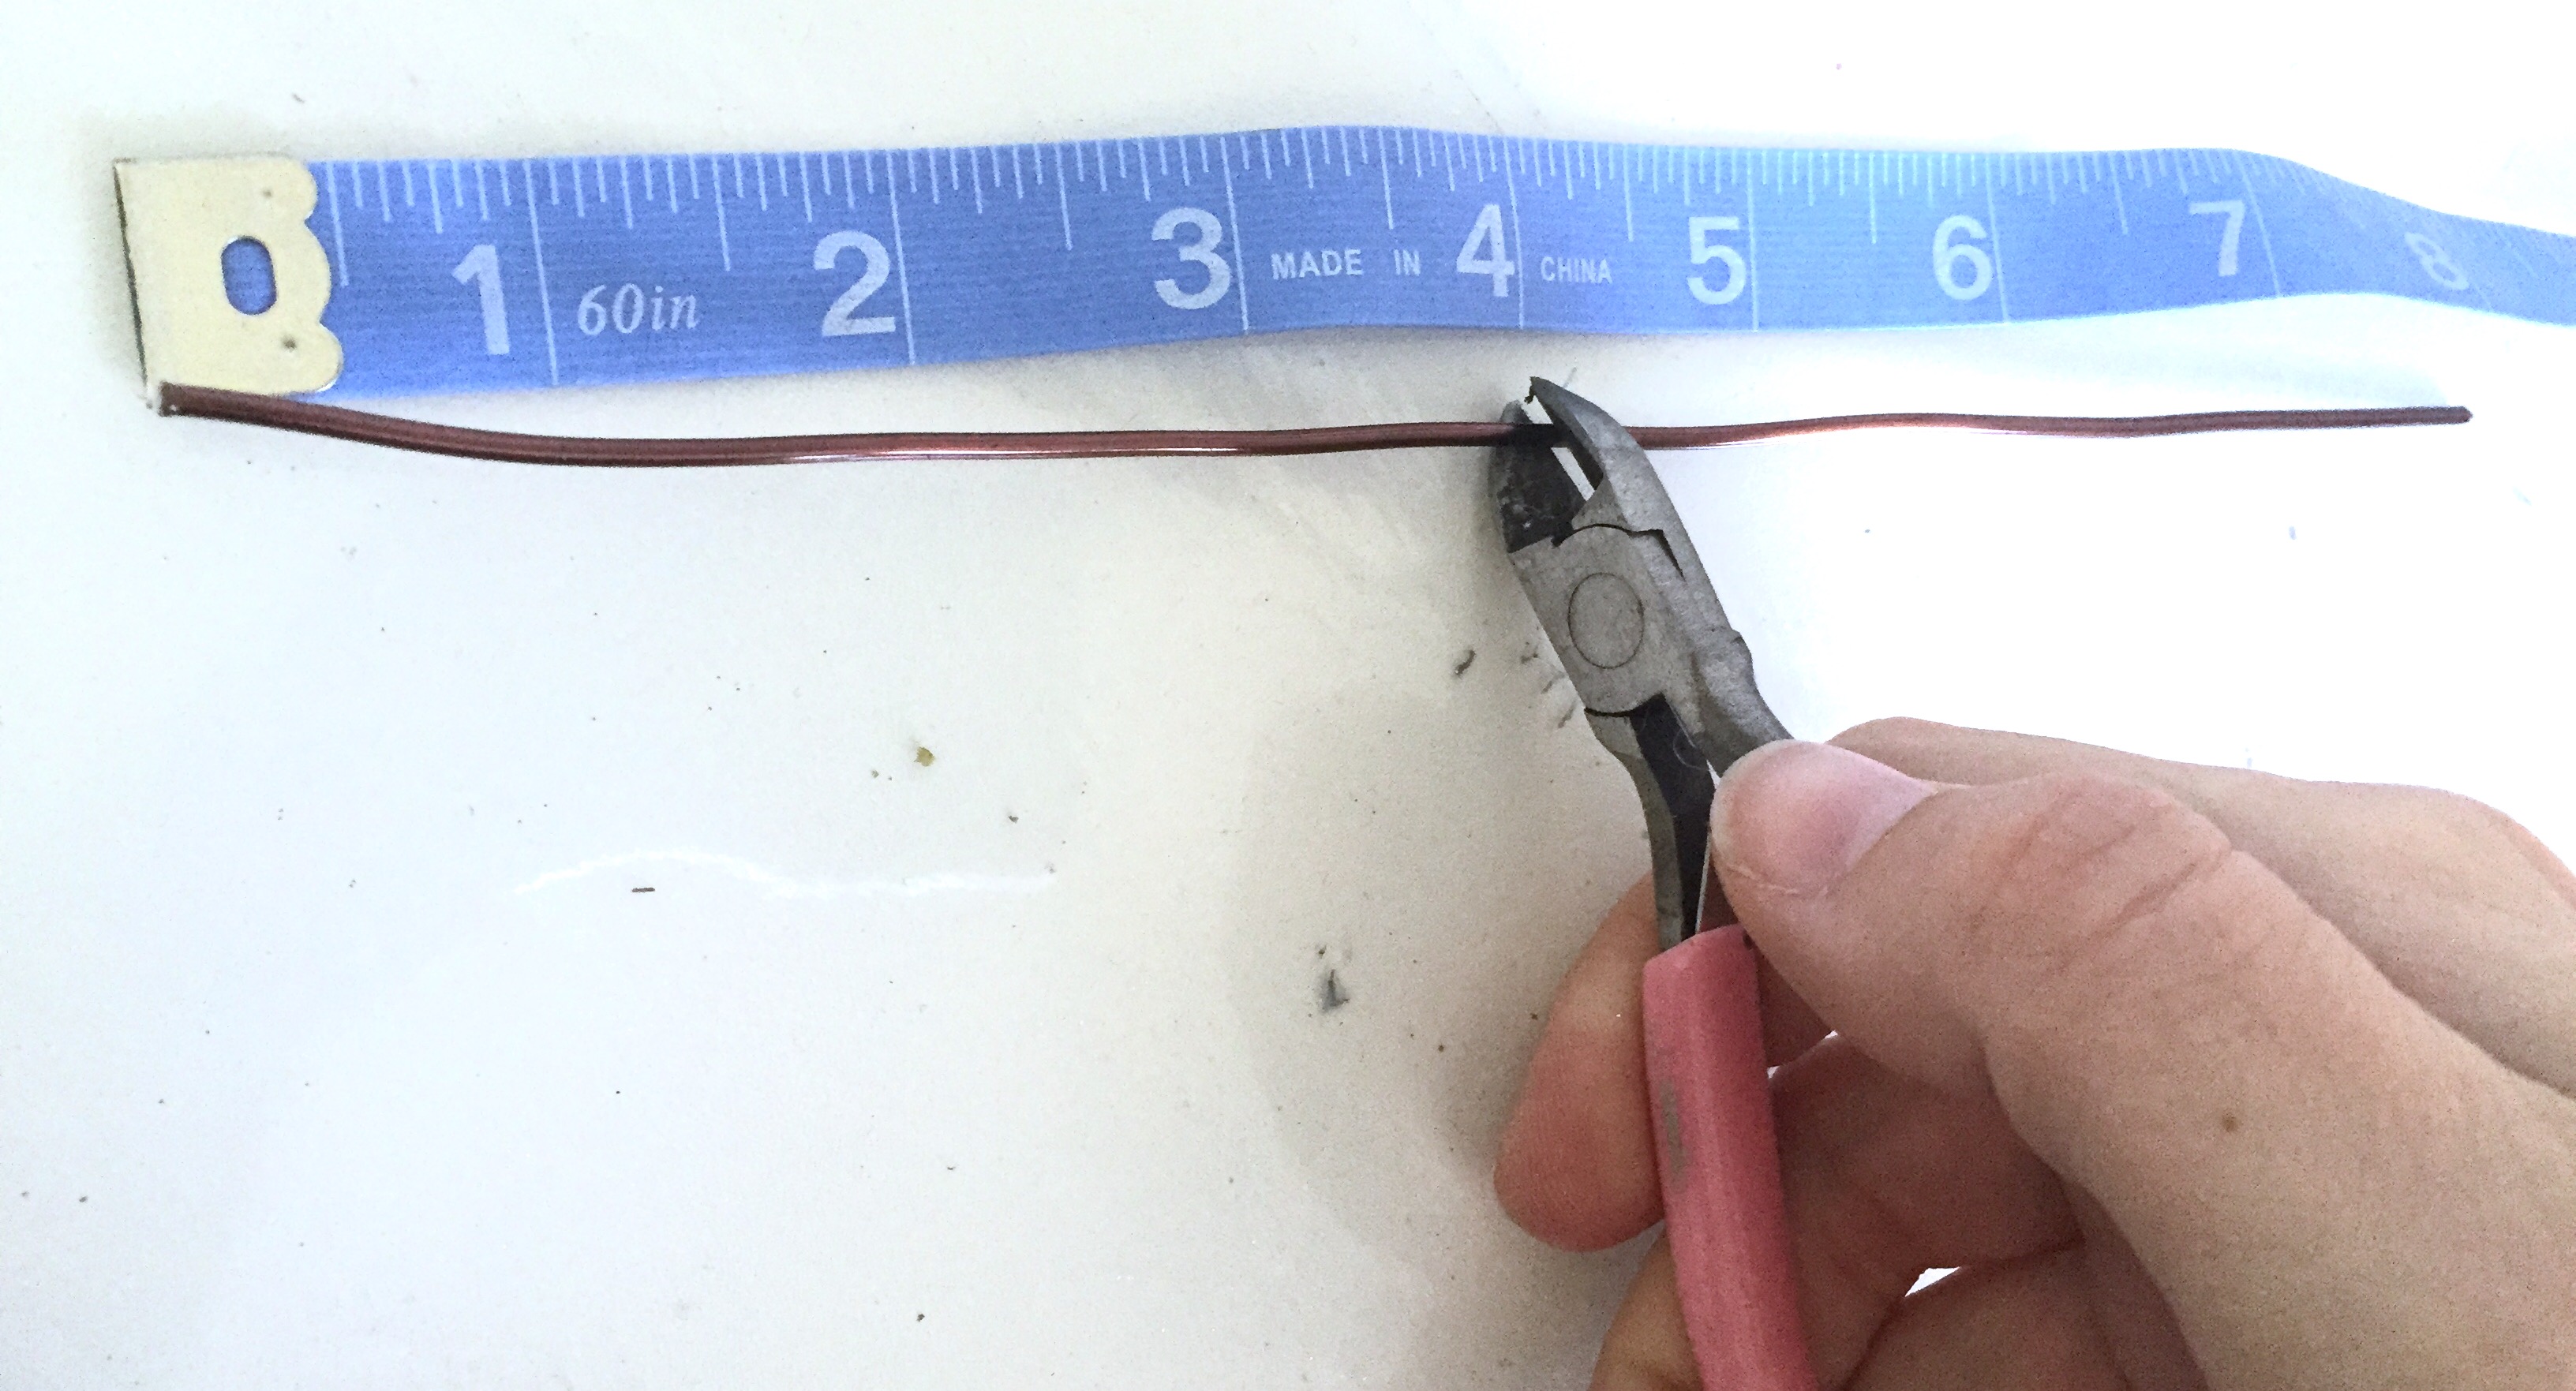
- Last but not least, take your wire and measure out 3 segments (two, 4″ lengths and one, 8″ length). Use wire cutters or scissors to cut.
- Then, use the two, 4″ length segments to attach the brackets on the top of your wood round to the brackets on the bottom of your arrow (bending the wire through the brackets into a loop).
- Use your 8″ long segment to attach to the 2 brackets on top of your arrow for easy hanging.
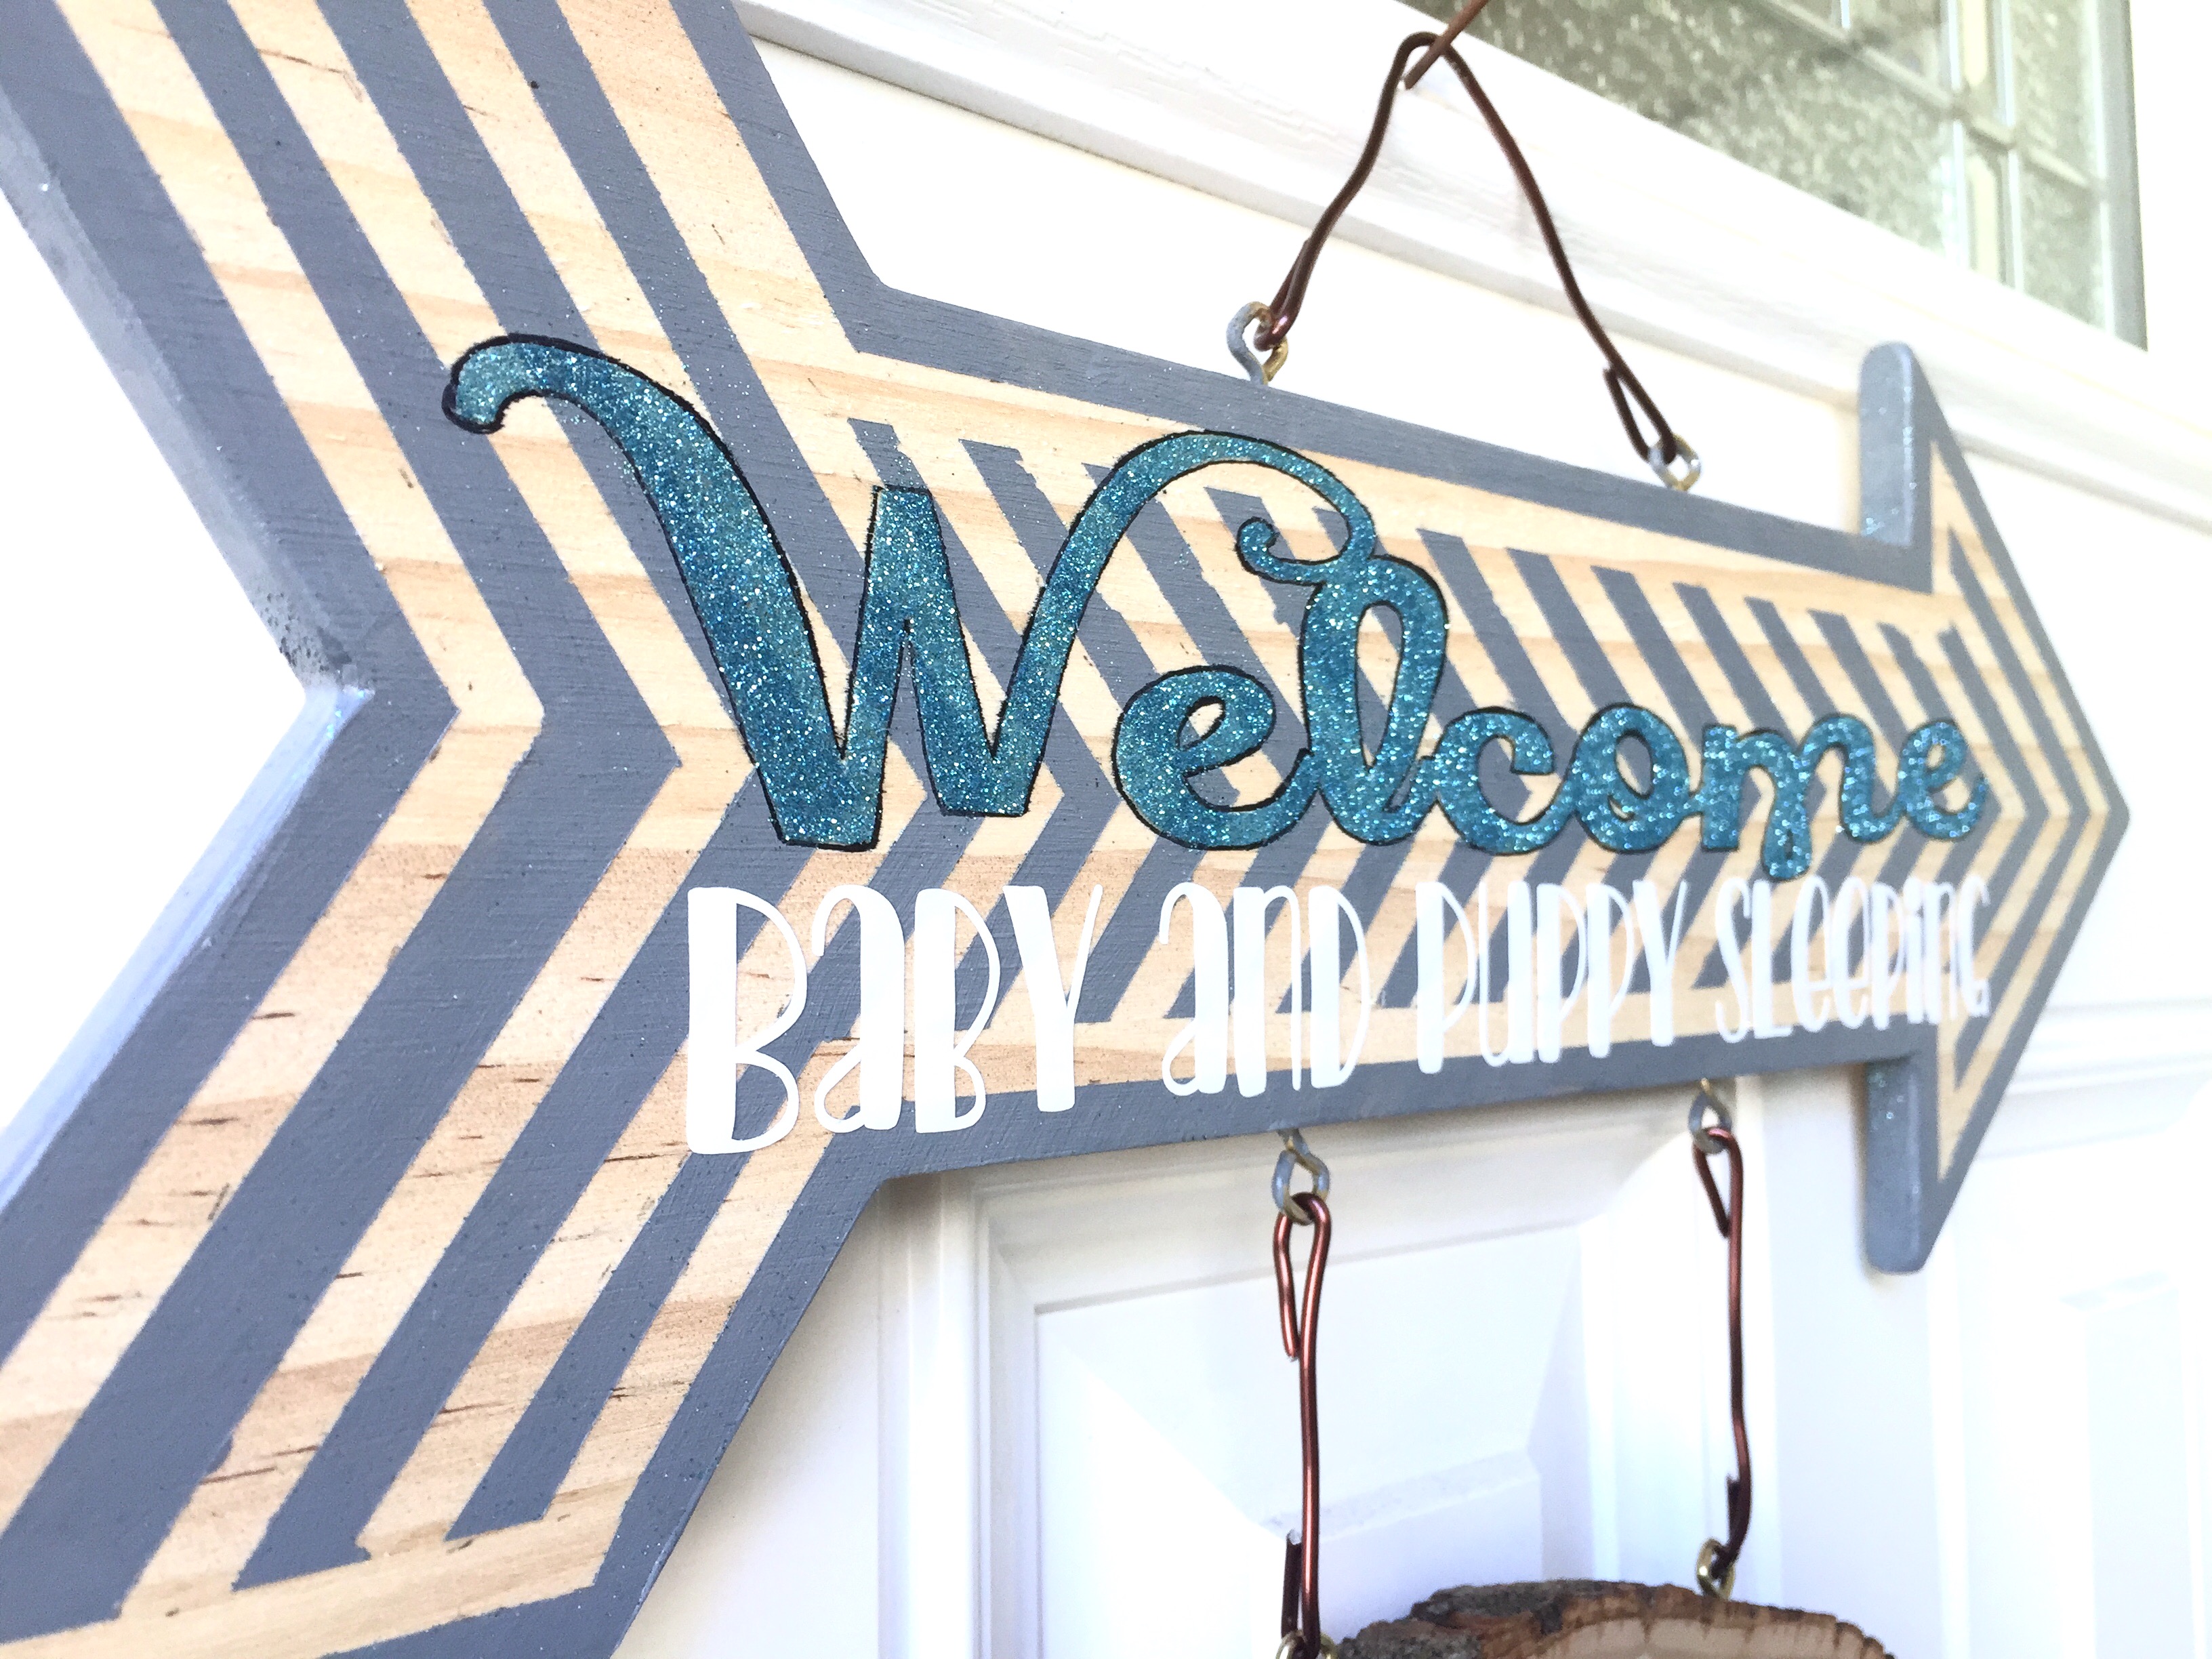
And voi la! Your sign is door-ready!

I do have to tell you, I was quite worried this sign wouldn’t work. I mean, it’s ADORABLE, yes. But, once I finished it I found myself questioning if it was easy enough to read. Would these delivery guys REALLY pay attention, or even be able to decipher what it says quickly enough to know not to ring and run?
Well, I’m VERY delighted to report that yes, in fact this sign DOES WORK! YIPPEE! As I write this post, I’ve had this sign up for exactly one week. And not one delivery guy has rang my doorbell! And if they do knock, it’s very soft and respectful. I cannot believe it! They actually are paying attention, and CARE! It’s a miracle!
So I would suggest that even if you don’t have kids – but you don’t like the annoying FedEx guy ding dong ditching your front door every time he leaves a package – just make a sign like this to deter him. I guarantee you it’ll work (and your front door will still look adorably chic).
Now if you’re ready to DIY- hooray! Here’s a recap of everything you’ll need:
The Necessary Supplies:
- Silhouette Cameo (with cutting blade and 12″ cutting mat)
- Silhouette Double Sided Adhesive
- Silhouette Glitter (Essential Colors)
- Silhouette 9″ Adhesive Vinyl – White
- Silhouette 9″ Transfer Paper
- Grey Paint
- Small Painting Sponge
- .25″ Blue Painters Tape
- 16″ Wood Arrow
- 10″ Wood Round
- 16″ of wire
- 6 Screw Eyes (seen in frame hanging kits)
HAPPY CRAFTING!!
Aw such a lovely sign! Love the design, so sweet, fresh and original! Bet they liked it a lot! 🙂