If you’re getting married in the near future, you are in the right spot! Most people spend all their time leading up to their wedding stressing over the wedding details. Their dress, their hair, the venue, the food, etc.
I know I did. As you can tell from my DIY wedding post, and all the tutorials that followed after, I did a LOT of my wedding myself. I spend countless hours hunting for the perfect supplies, and crafting days away. In the end, I can truly say everything was exactly what I wanted.
What I can tell you often gets overlooked, or put on the back burner, is a carefully planned honeymoon. In our case, my hubby was put in charge of honeymoon oversight. This was especially hard for me, being as planning is NOT in Travis’ nature. Date nights are even tough to plan out (unless they’re for an extra special occasion). So giving him the reigns to completely plan a 2 and a half week trek around Europe was REALLY testing the scope of his unknown planning abilities.
But in this case, I had absolutely NO time (if you’re an upcoming bride, you can feel me). So I gave up control (eek!). In the end, he ended up doing an amazing job, and our trip was the incredible trip of a lifetime that we’d hope it would be.
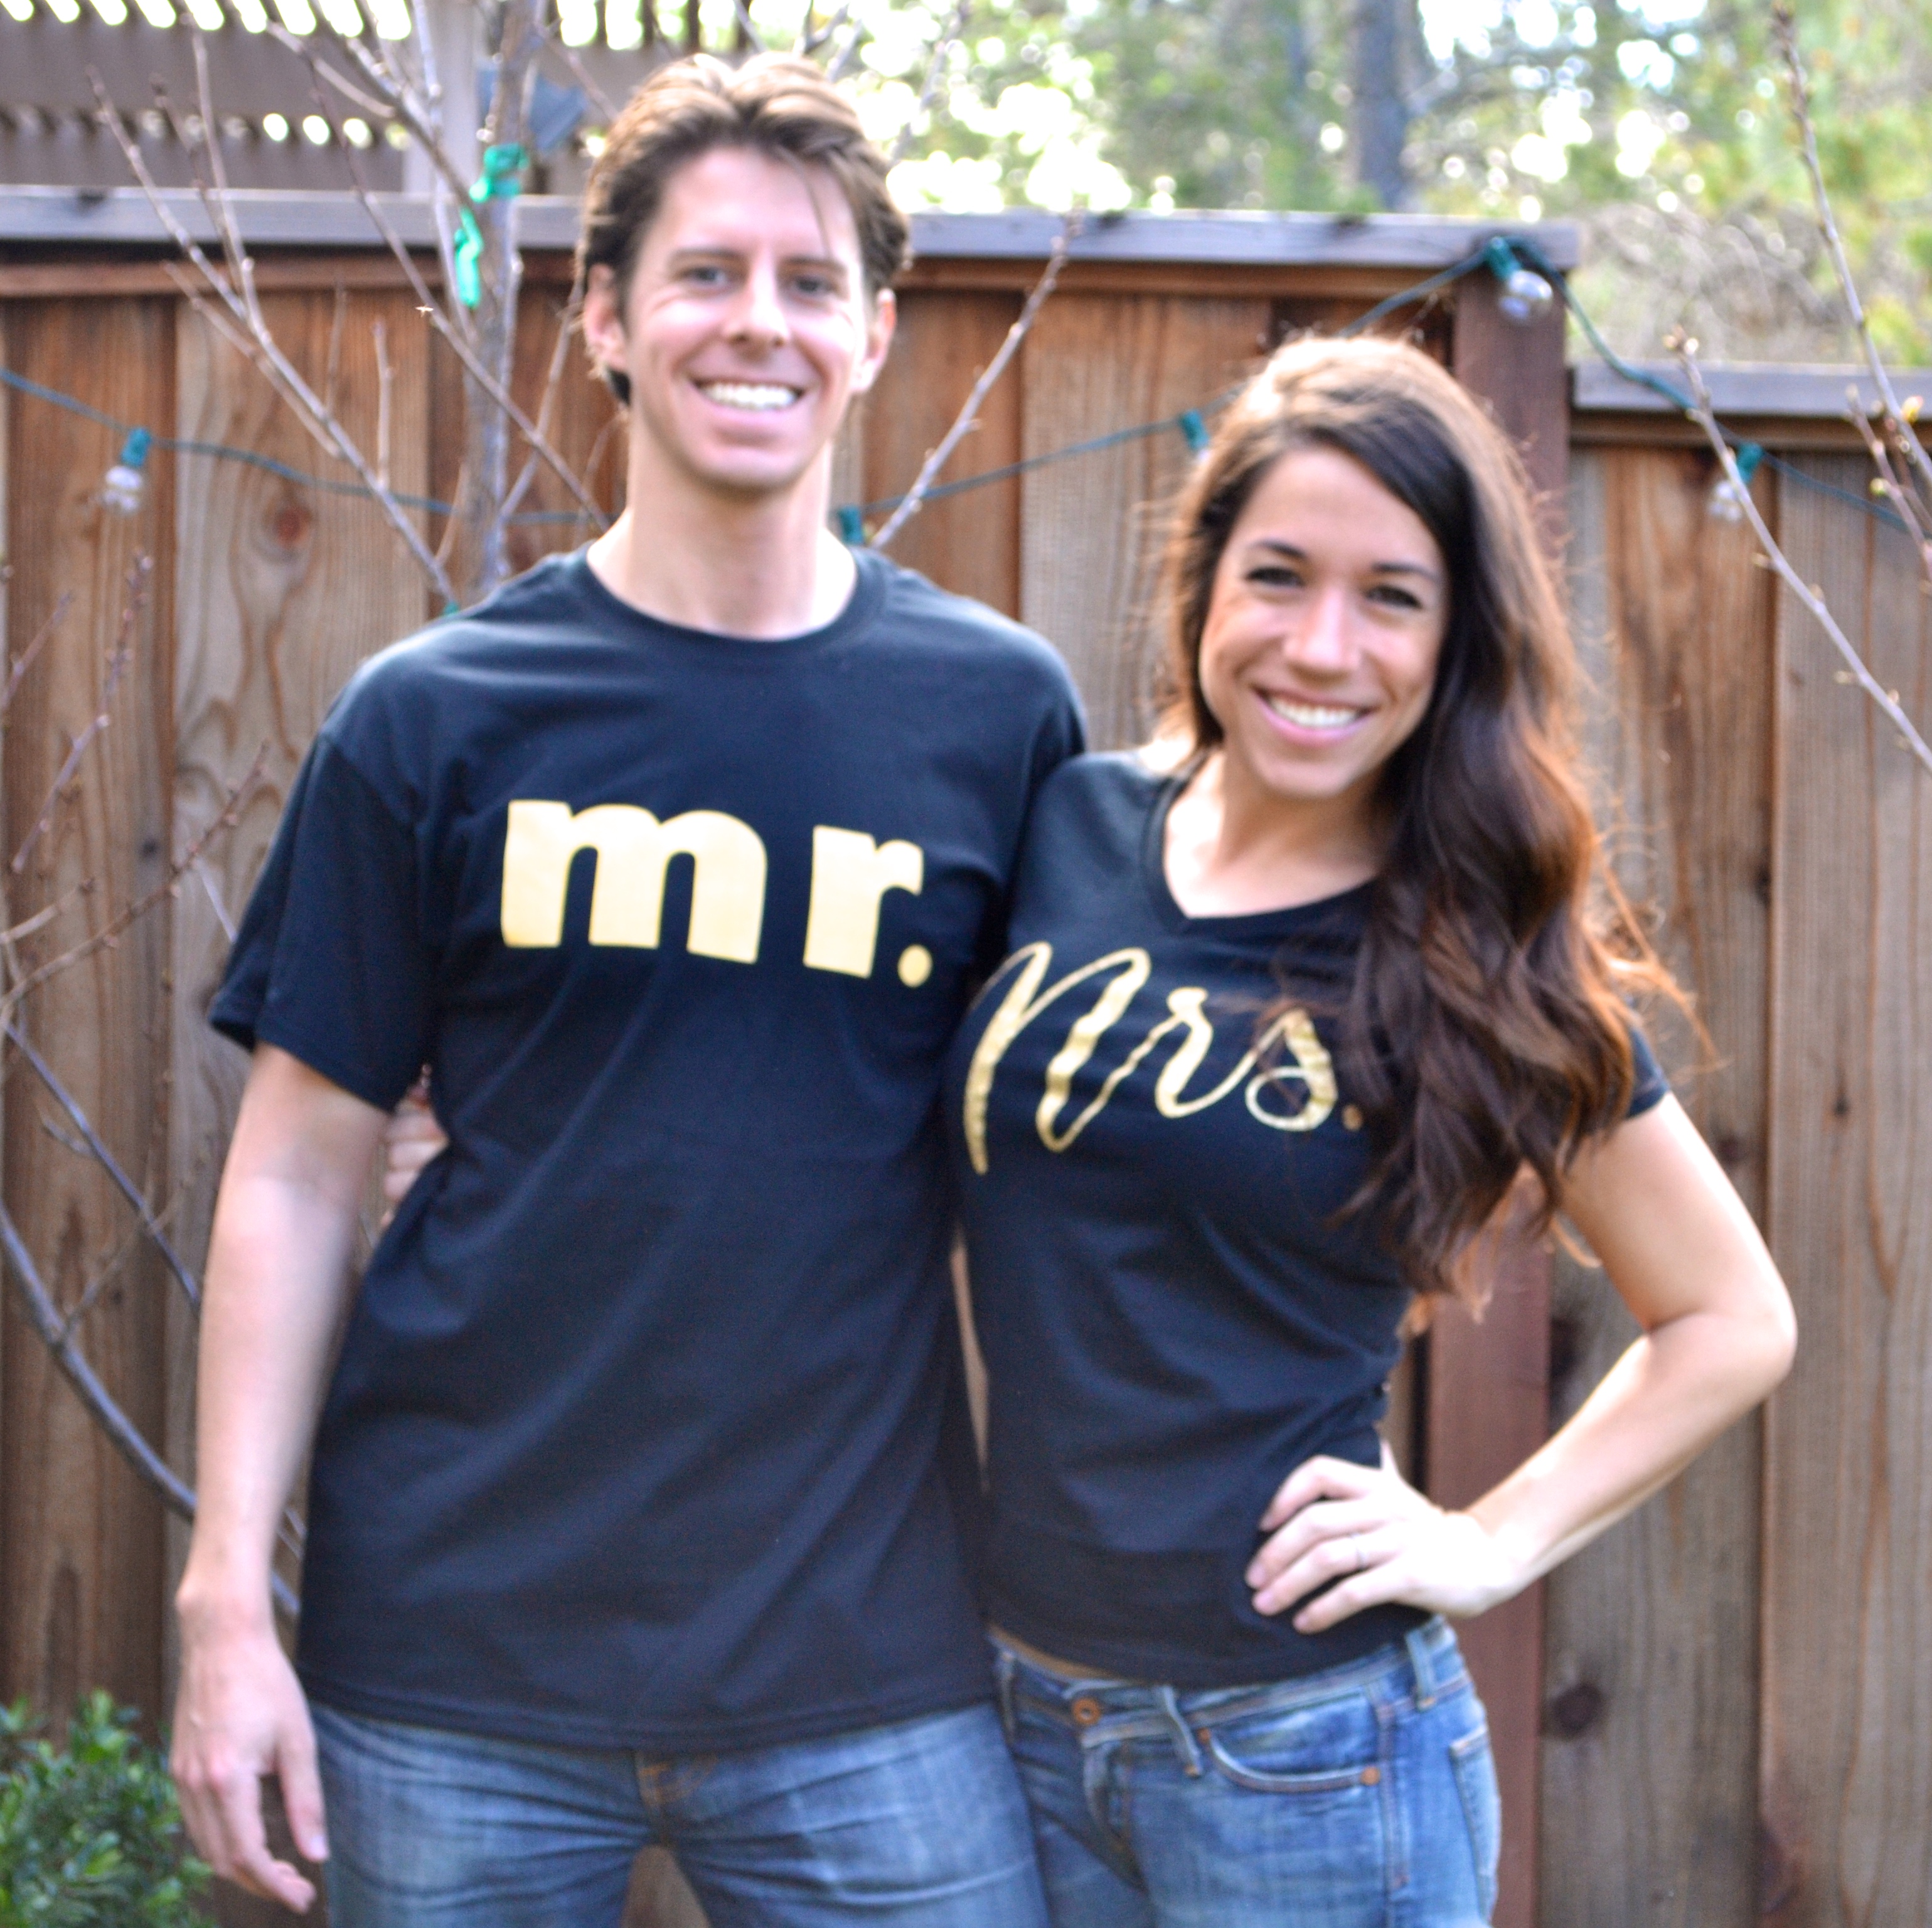
However, one thing I didn’t think about (that would have never even crossed Travis’ mind) were Mr and Mrs shirts. When you’re a newlywed, it’s pretty much the only acceptable time in your life that you and your spouse are allowed to match (and it actually be considered cute by others).
And a HUGE perk of matching with your new spouse, is letting everyone else know that you’re newly married! No matter who you are, if you see a couple that’s just been wed, you’re immediately happy for their happiness. And guaranteed, if someone is in the hospitality industry and you’re on your honeymoon, they’ll do whatever they can to treat you right. This means, possible upgrades, possible freebies, etc!
Who WOULDN’T want to enjoy the perks of being newly married? I mean, you only get married once (hopefully), you only go on one honeymoon (hopefully), so you might as well do it right!
Making these DIY Mr and Mrs shirts for your honeymoon is super easy, they look adorable, and they’ll (hopefully) get you the honeymoon treatment you deserve. Below, I give you the supplies you’ll need and the steps to take to make these at home yourself. And I promise, they take no time at all so they won’t interfere with your already busy wedding planning schedule!
Steps to DIY Mr and Mrs Shirts for Your Honeymoon
The Necessary Supplies:
- 2 Plain T-shirts (one in a ladies fit and one in a men’s fit)
- IF USING A CUTTING MACHINE:
- Glitter heat transfer Vinyl (I used gold)
- Regular Heat Transfer Vinyl (yellow matches gold)
- IF NOT USING A CUTTING MACHINE:
- Printable heat transfer paper (for dark fabrics)
- Glitter
- Fabric Glue
Step 1:
- Download the printable templates here:
- Upload them into either your Silhouette design studio or a Word processing document. Make sure the margins are set to print on an 8.5×11″ piece of paper.
Step 2 (if using a cutting machine):
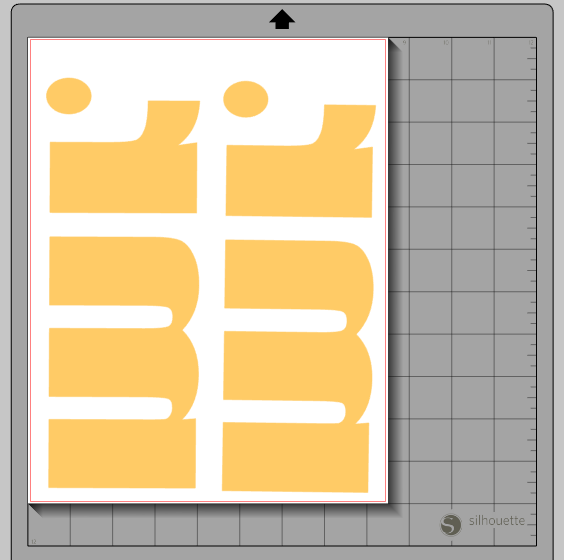
- Start with your “Mr.” shirt. Reverse the design in your design studio so that it’s a “mirror” image and looks backward on your screen.
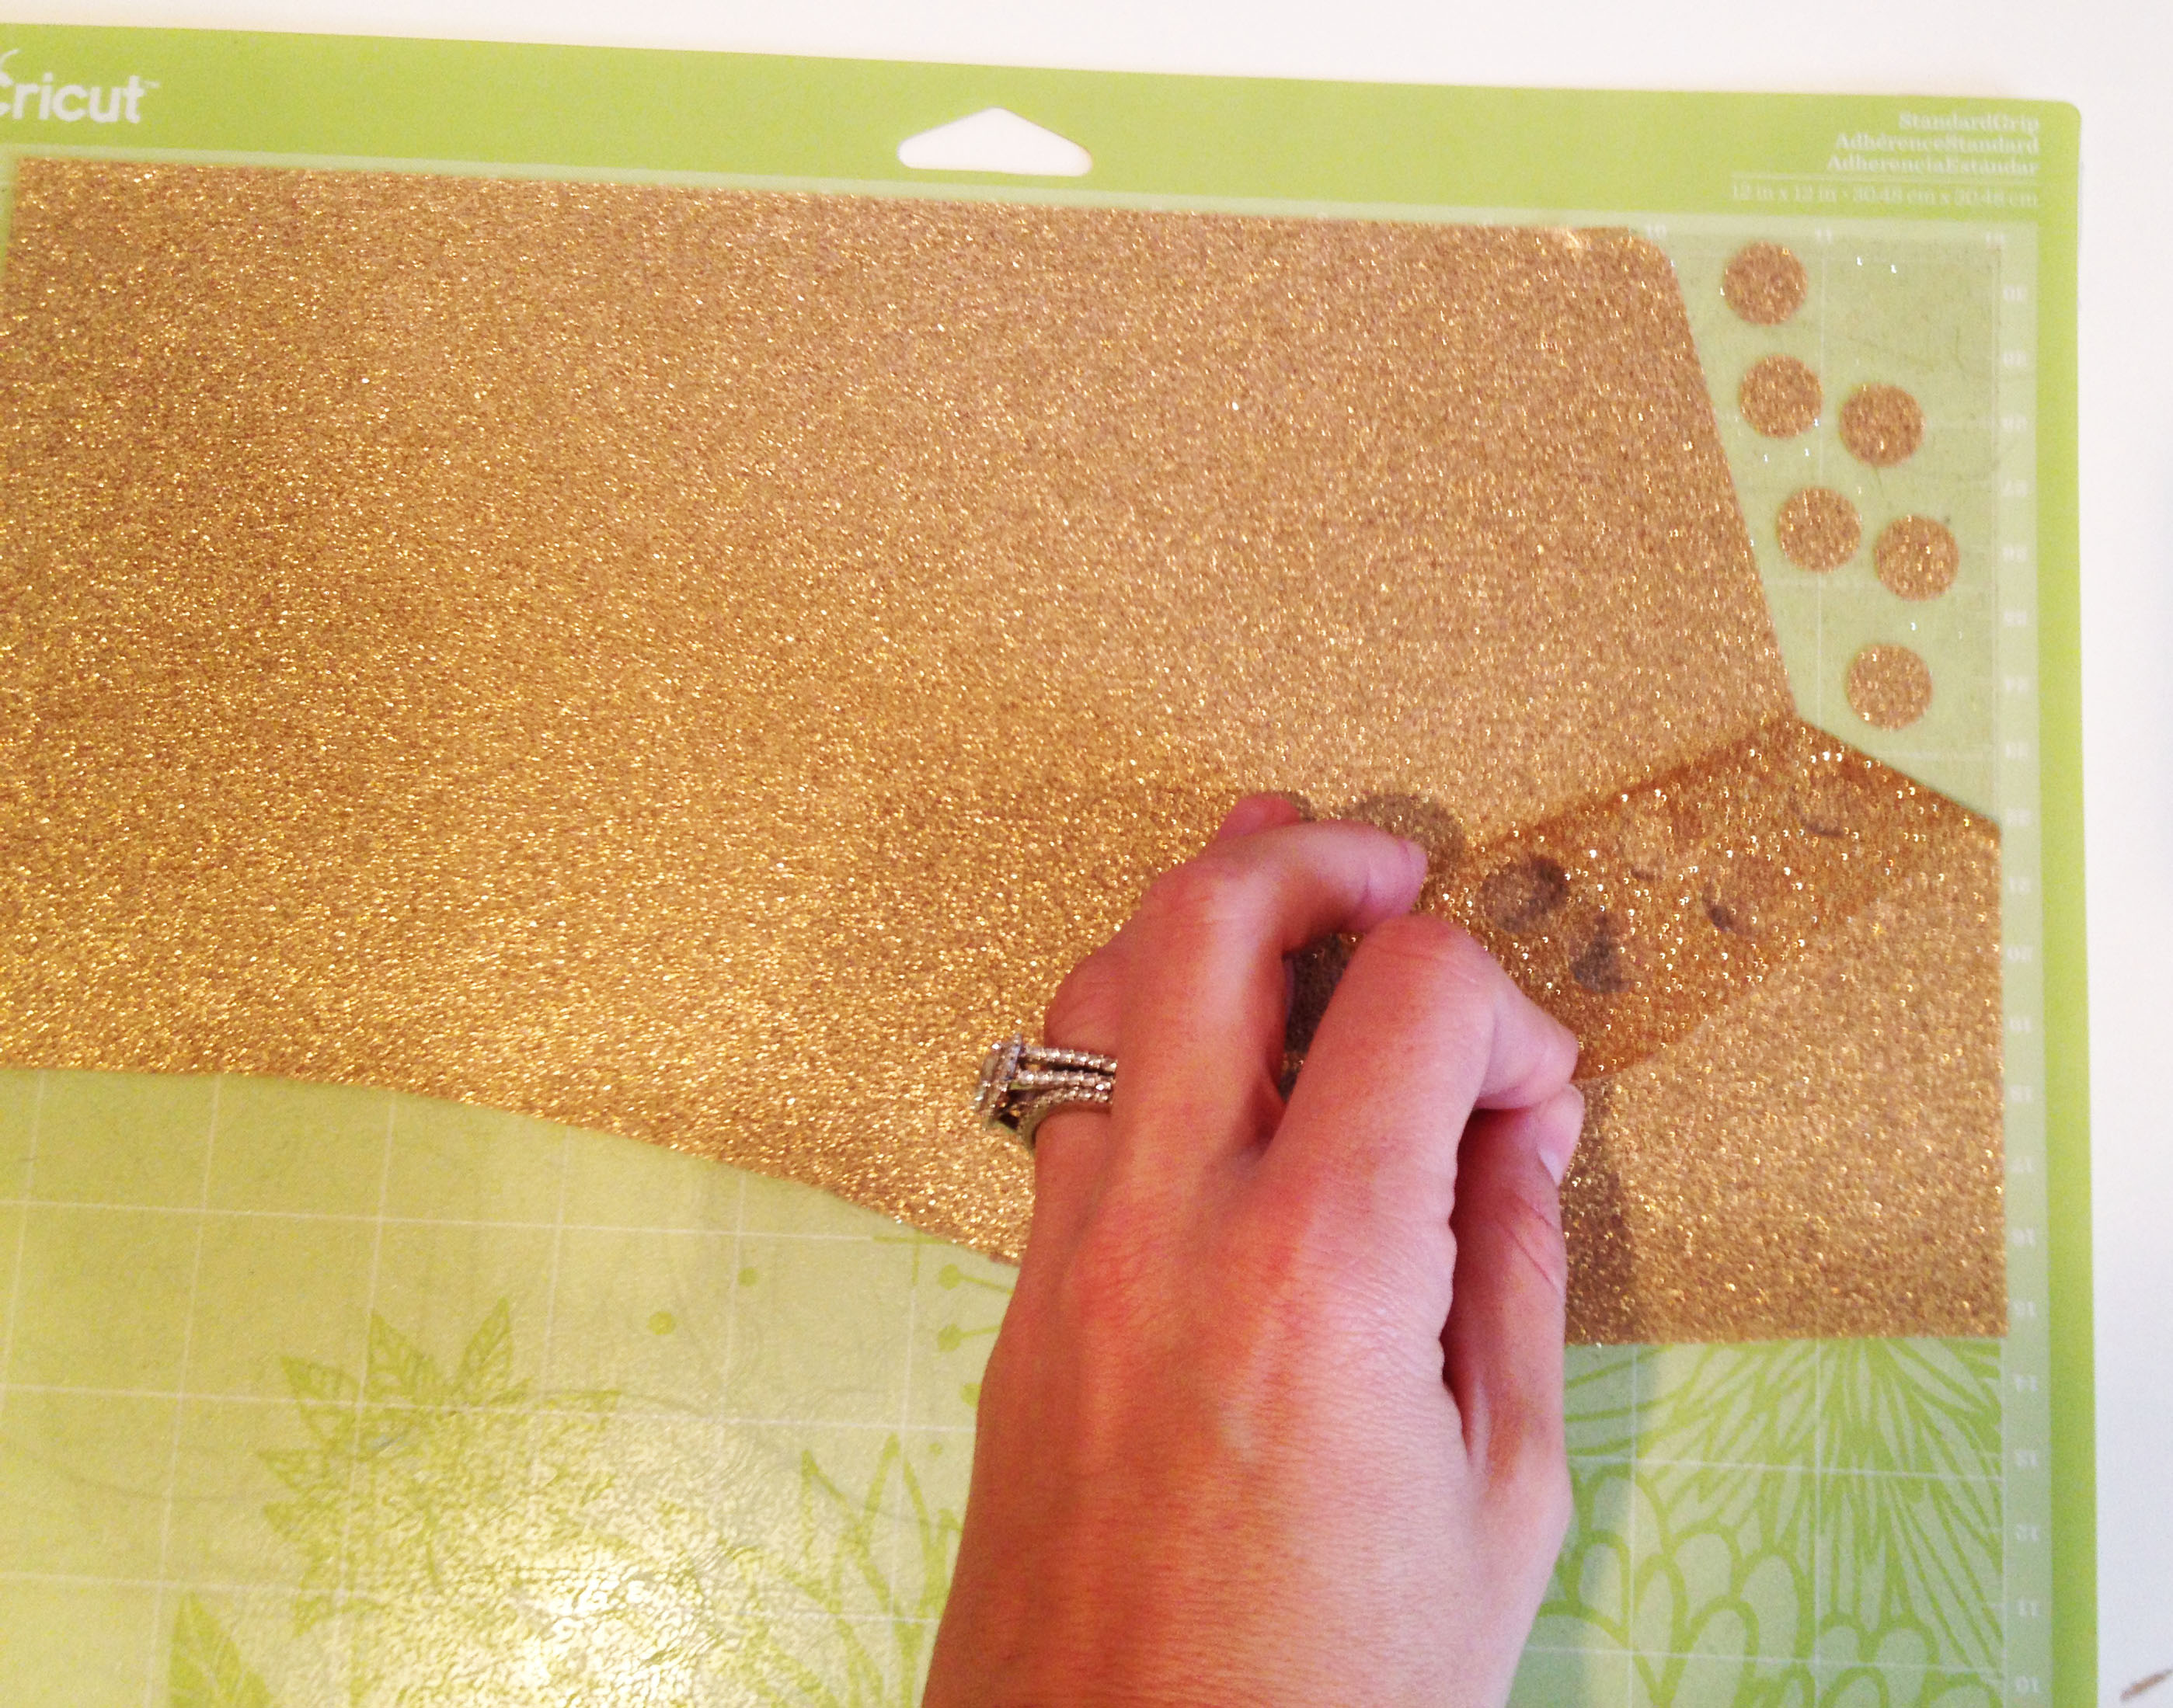
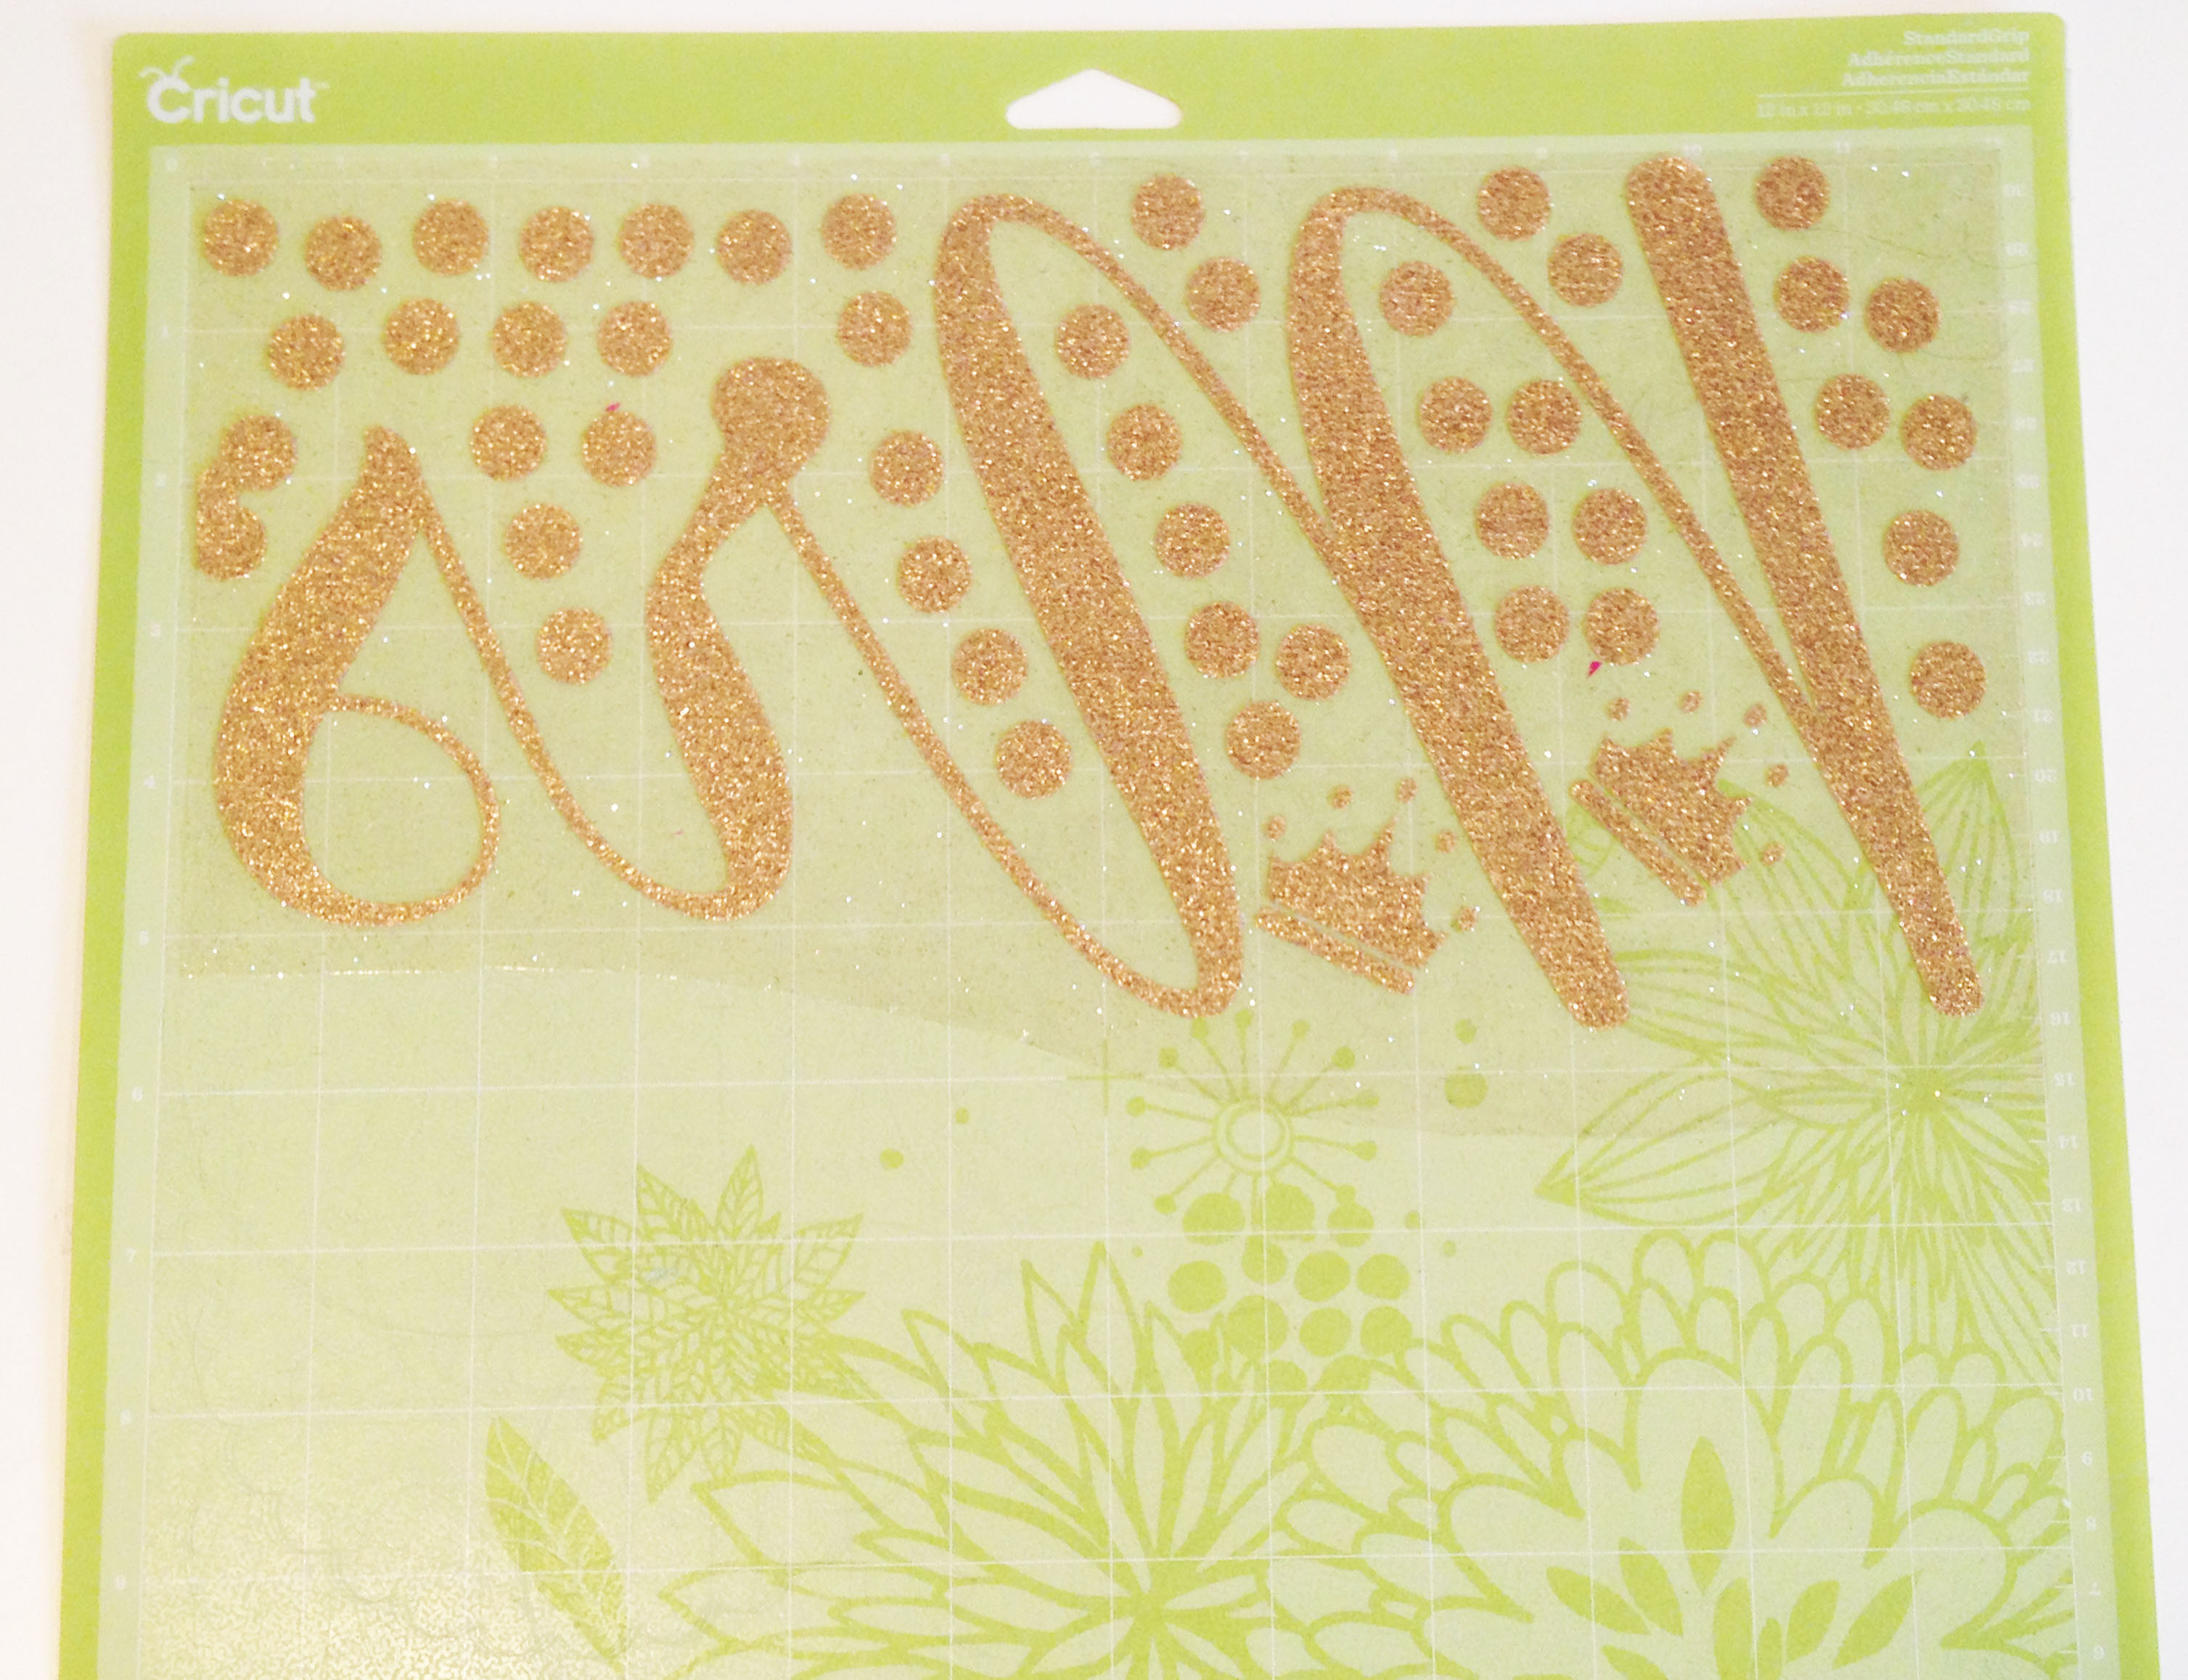
- Load your glitter heat transfer vinyl into your silhouette, and send your design to “cut”.
- For reference, the vinyl says not to use a cutting mat and to set your blade to a “2”. I DO use a cutting mat, and set my blade at a “2” for regular vinyl. I find it’s much easier for me to manage this way.
- Peel away the excess vinyl off of the clear surface so that you’re only left with the MR letters.
Step 2 (if NOT using a cutting machine):
- Start with your “Mr.” shirt. Use your heat transfer paper, load it into your printer (so that the “Mr.” will print on the correct side) and press print.
- Cut it out of the paper (the lines are linear and easy to cut by hand).
- Peel the backing off of the transfer paper.
Step 3 (if using a cutting machine):
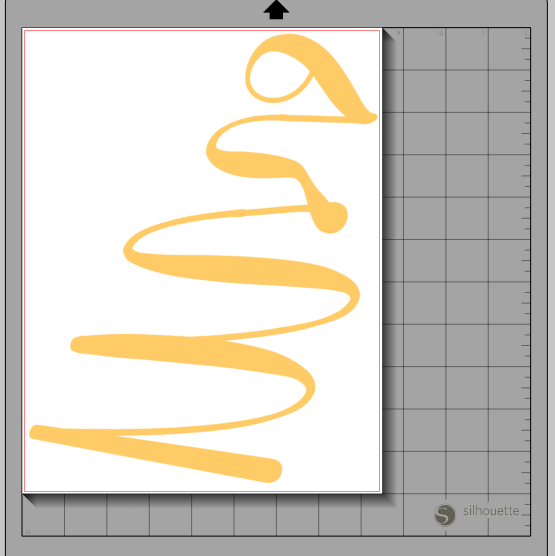
- Now move to your “Mrs” shirt. In your design studio, flip the image so it’s a mirror image (and backwards on your screen).
- Load your glitter heat transfer vinyl into your silhouette, and send your design to “cut”.
- For reference, the vinyl says not to use a cutting mat and to set your blade to a “2”. I DO use a cutting mat, and set my blade at a “3” for glitter vinyl. I find it’s much easier for me to manage this way.
- Peel away the excess vinyl off of the clear surface so that you’re only left with the MRS letters.
- I had extra “dots” and designs because I wanted to make the most out of my vinyl. I used the extra designs for another project 🙂 So I just cut around them so that only the MRS letters were left.
Step 3 (if not using a cutting machine):
- Use your heat transfer paper, load it into your printer (so that the “Mrs.” will print on the correct side) and press print.
- Cut the design out of the paper.
- This is a calligraphy design, so it’s tricky to cut. Be careful when cutting and make small cuts to ensure you don’t snip anything off.
- Peel the backing off of the transfer paper.
Step 4:
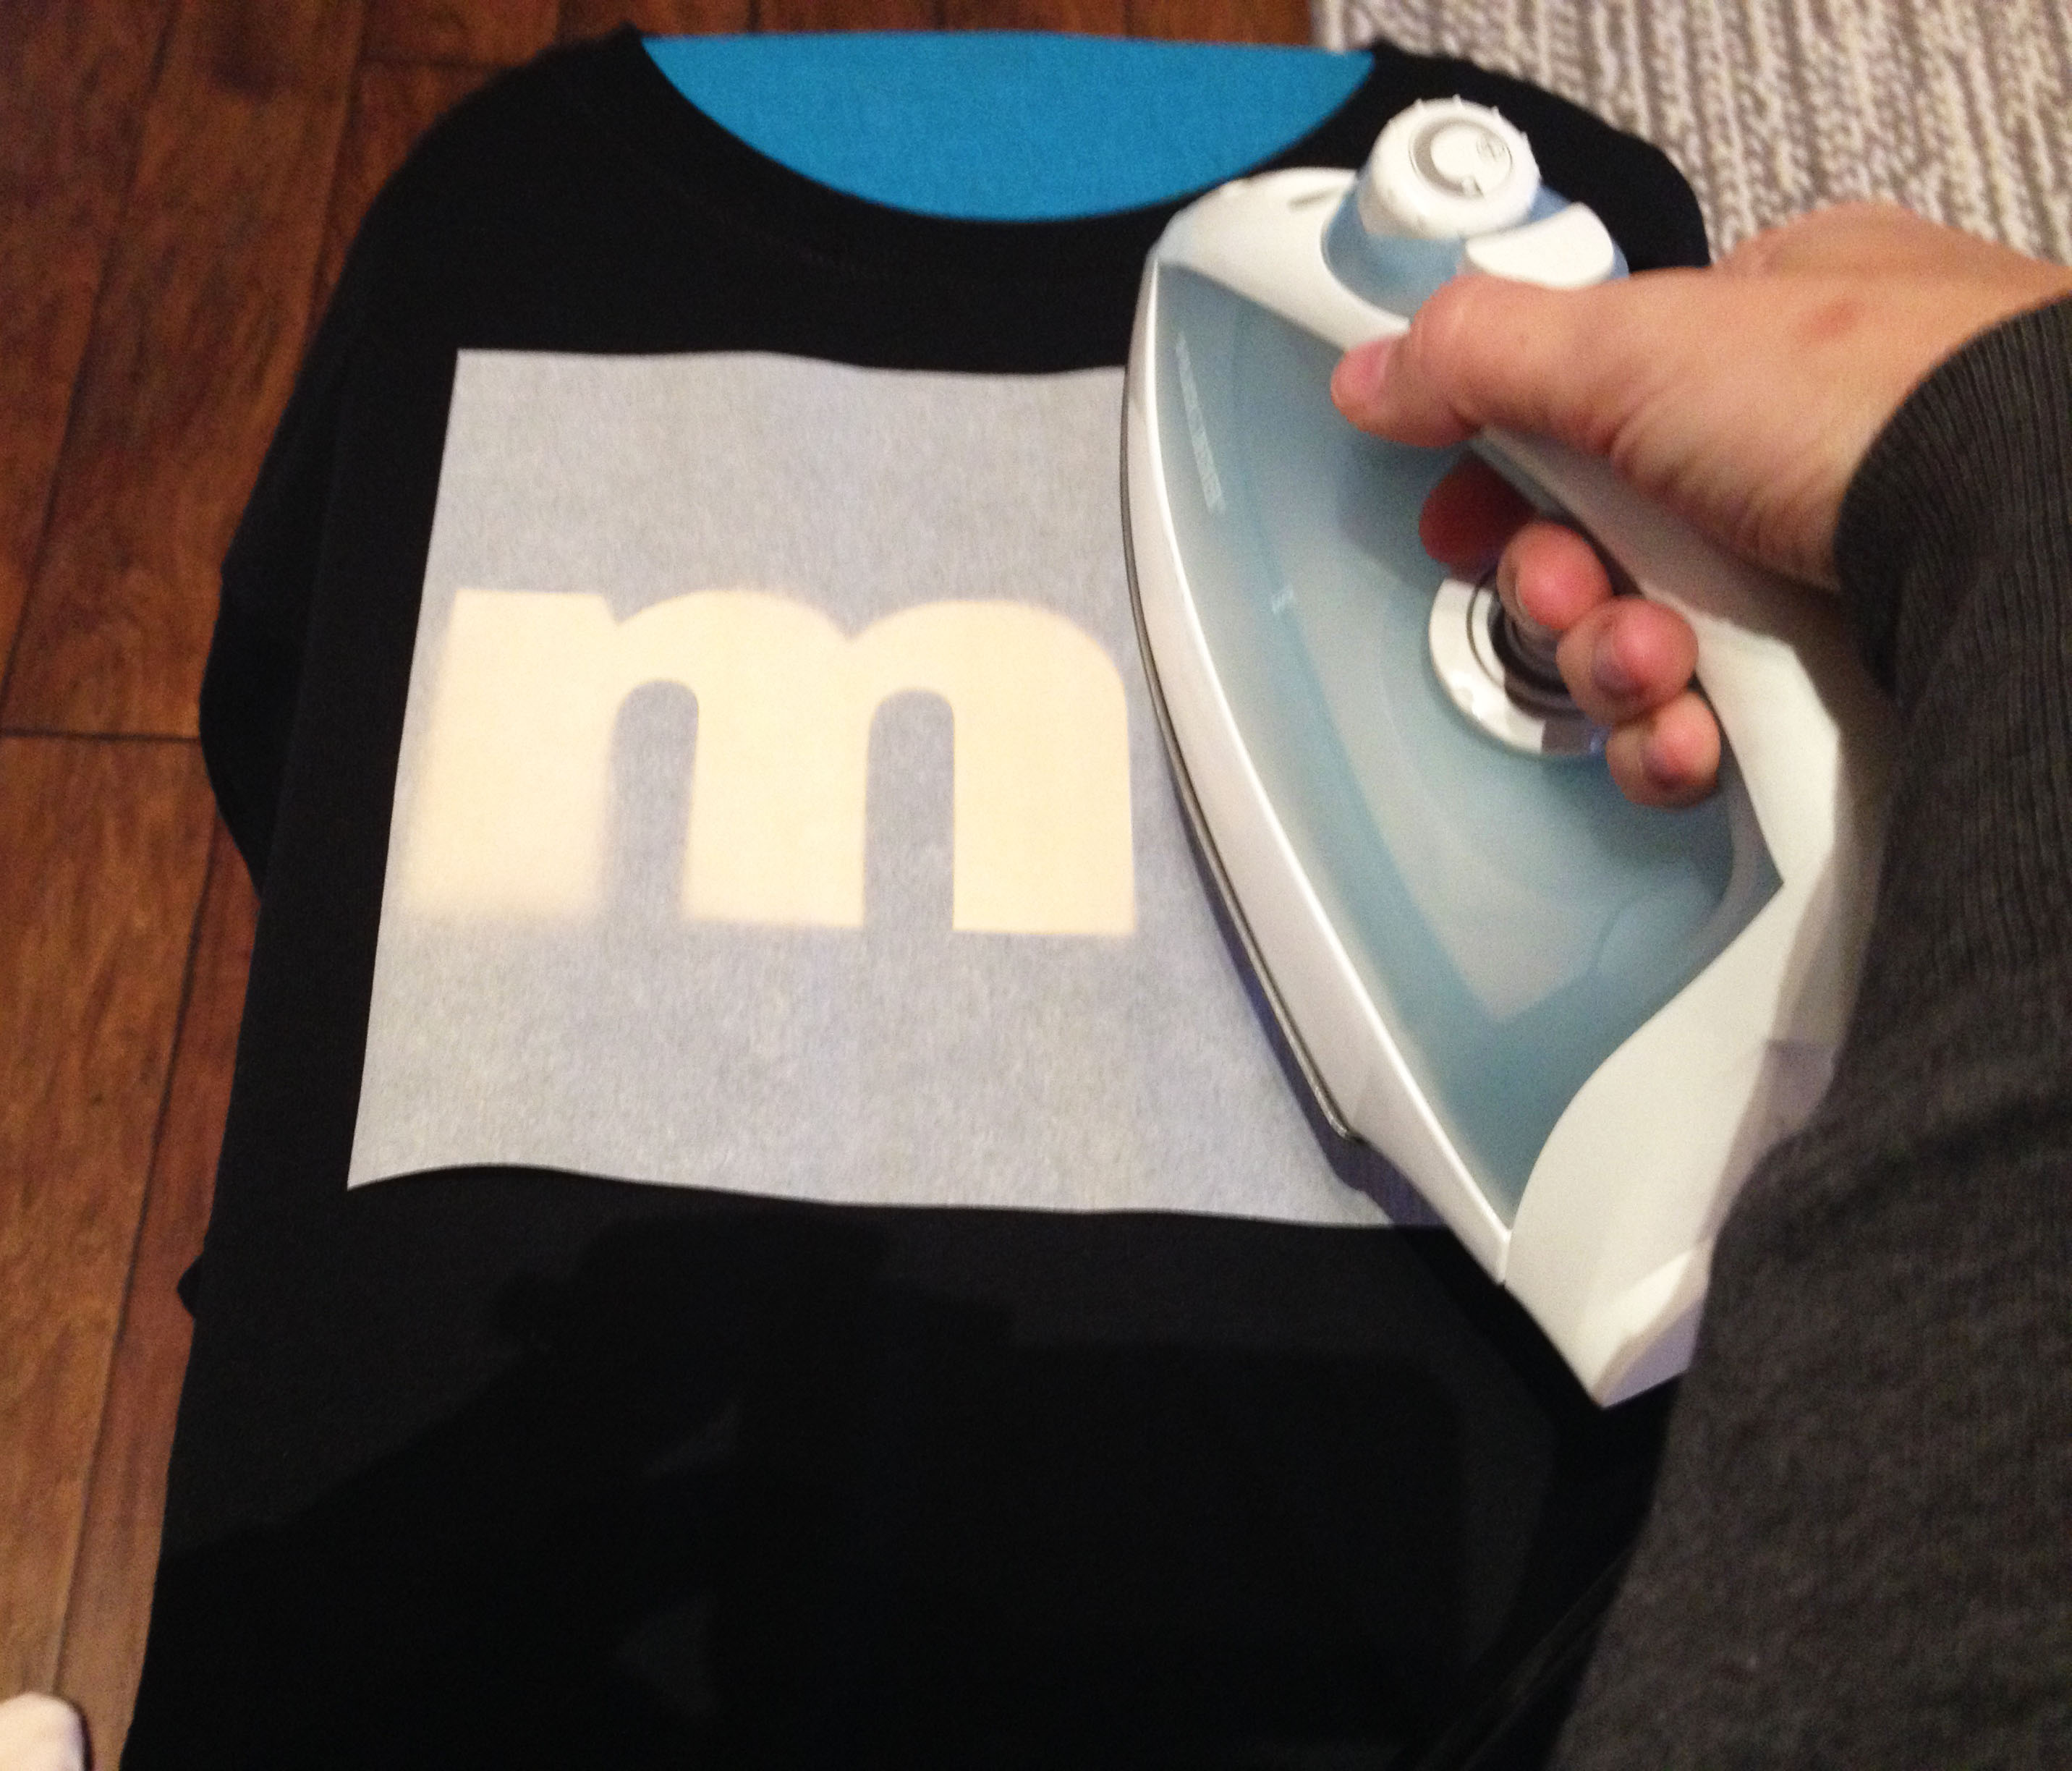
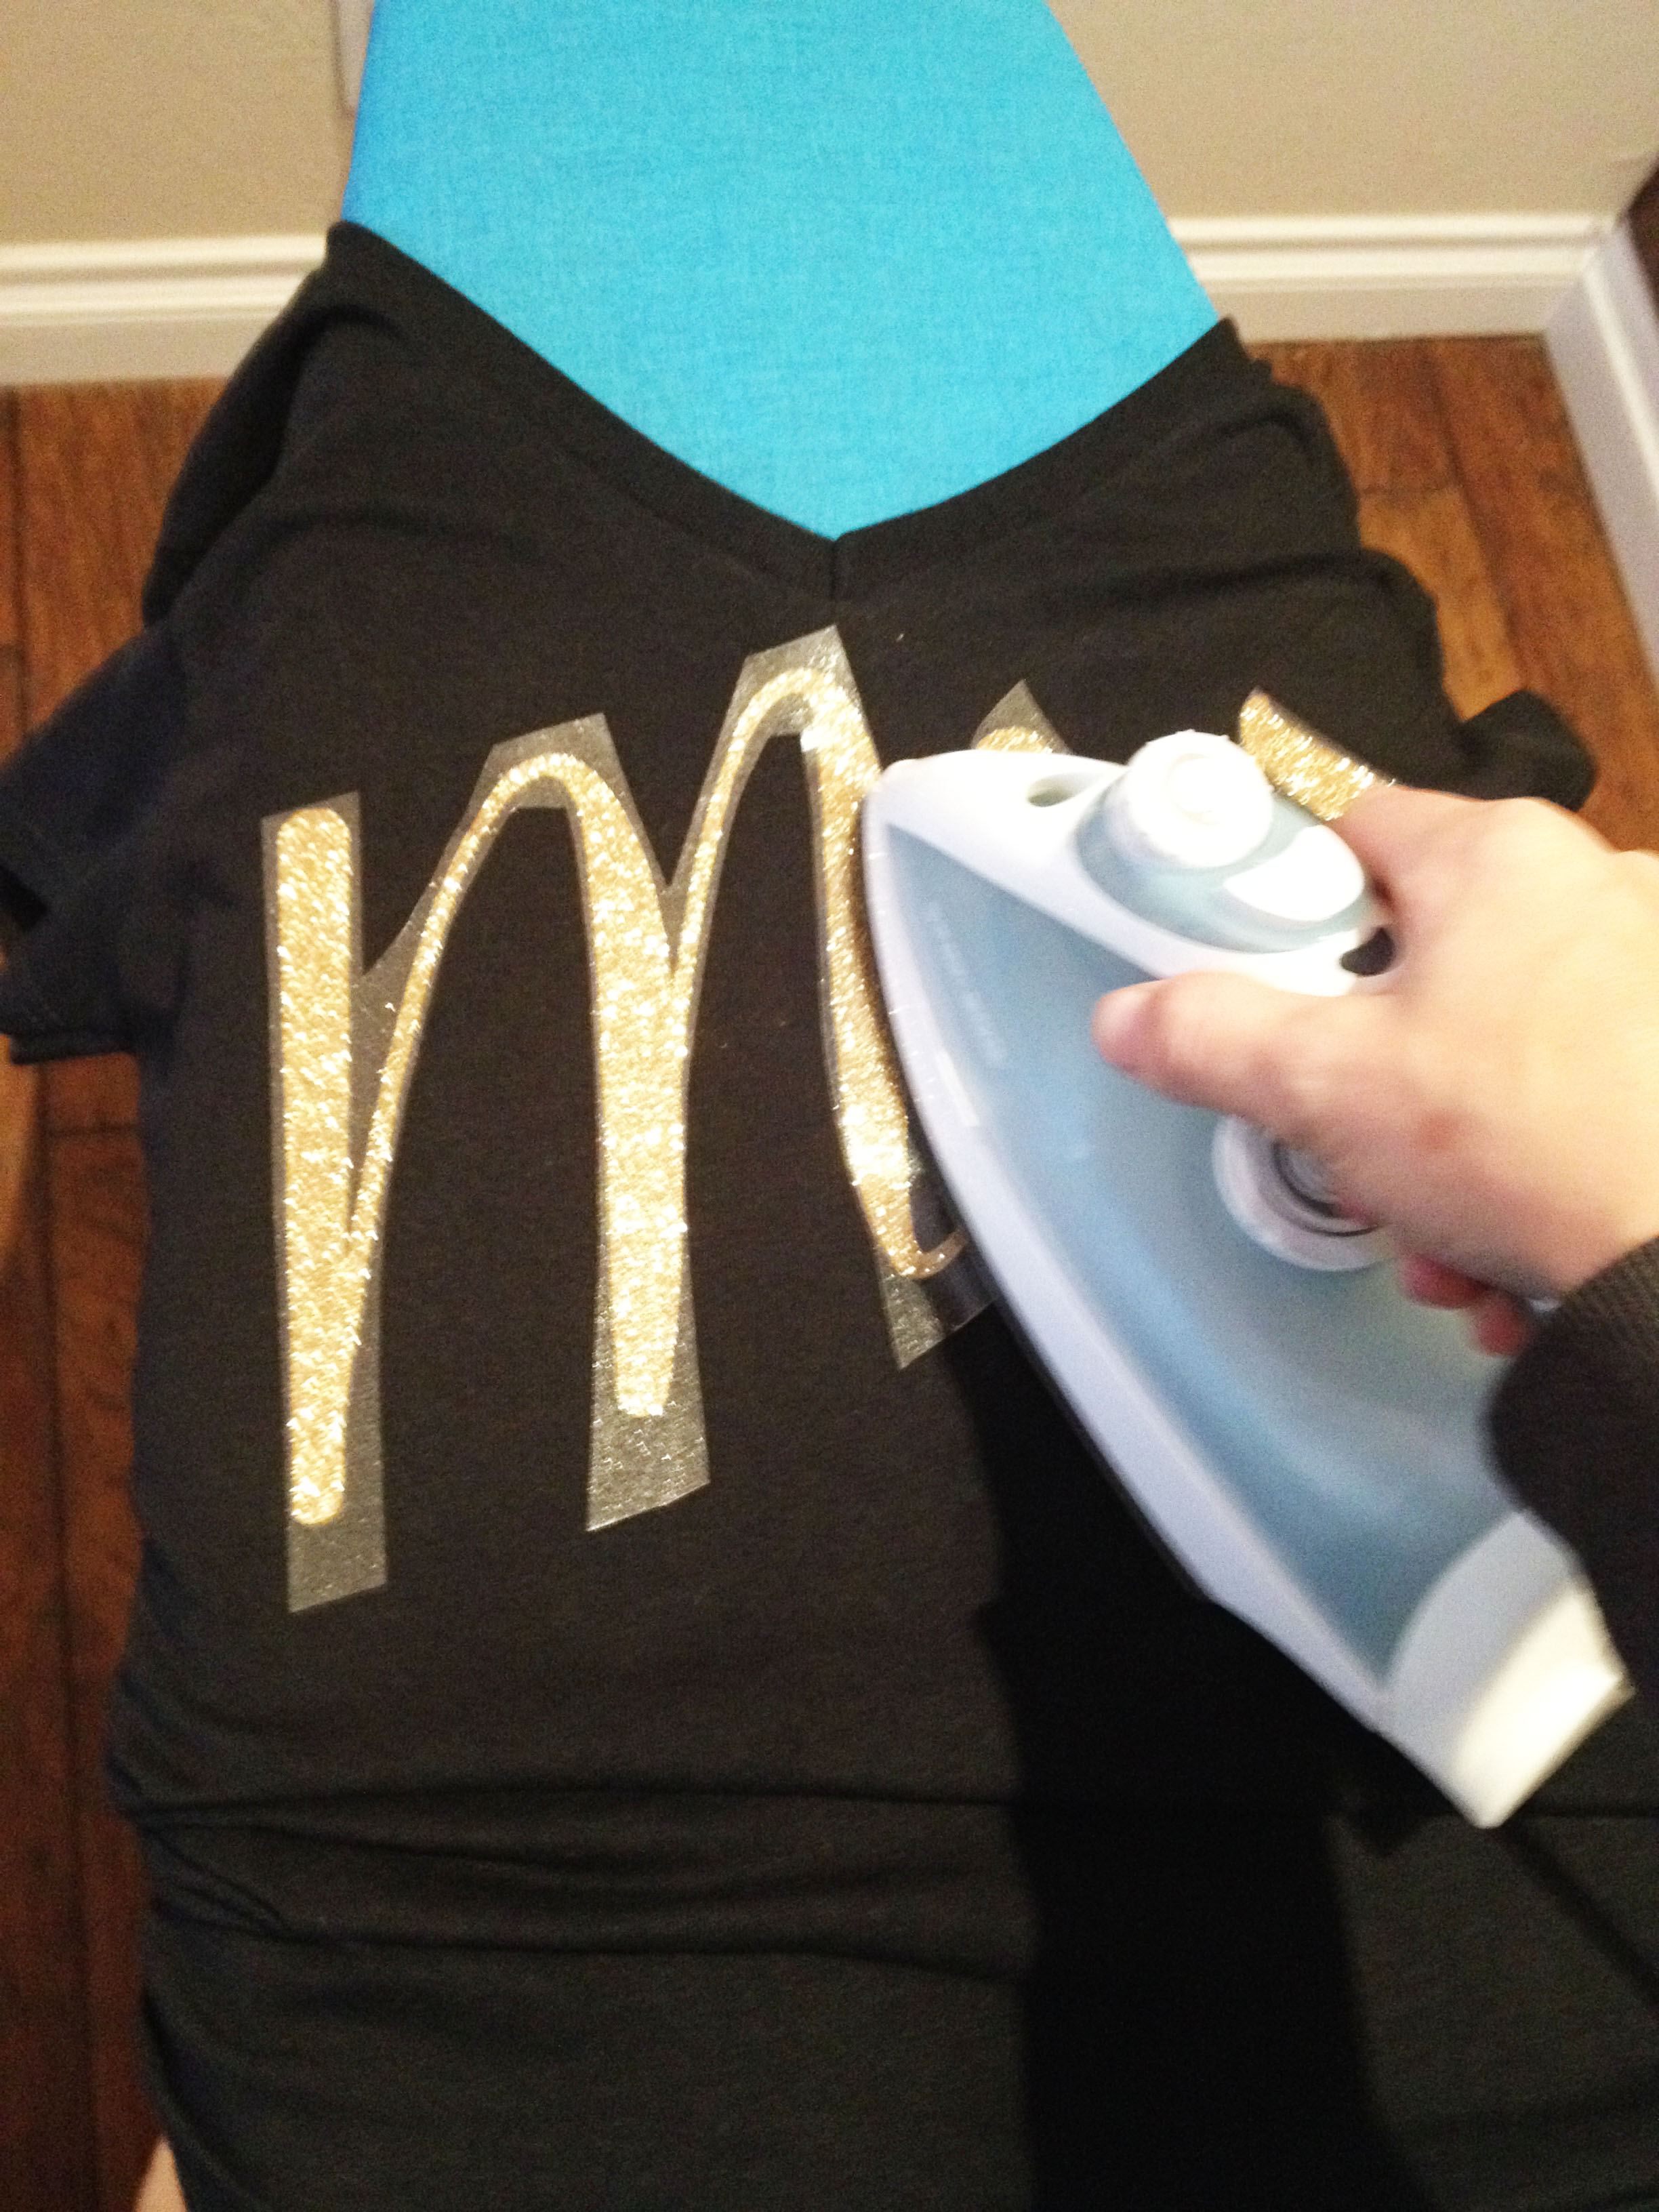
- Put your shirts on your ironing board (you can put one on each side for efficiency).
- Place your letters exactly where you want them on your shirts.
- For the “Mrs”, I placed mine at a slight angle.
- Place a paper towel over the letters, and press against them with your iron to apply heat.
- Make sure your iron is not set to steam, and that it’s not turned up all the way. About half way works just fine.
Step 5:
- If you’re using the vinyl for the Mr and Mrs shirts, peel the clear cover off the vinyl letters.
- Then, you are finished!
- If using the regular heat transfer paper, and you don’t want to glitter your letters – you’re finished too!
Step 6 (ONLY if not using a cutting machine and you want a GLITTER “Mrs.” shirt:
- If you still want your “Mrs.” shirt to sparkle, take some fabric glue and a tiny paint brush, and paint over your letters with the glue.
- Then, take your glitter and sprinkle it over your letters.
- Let sit until dry. Then, shake off the excess glitter.
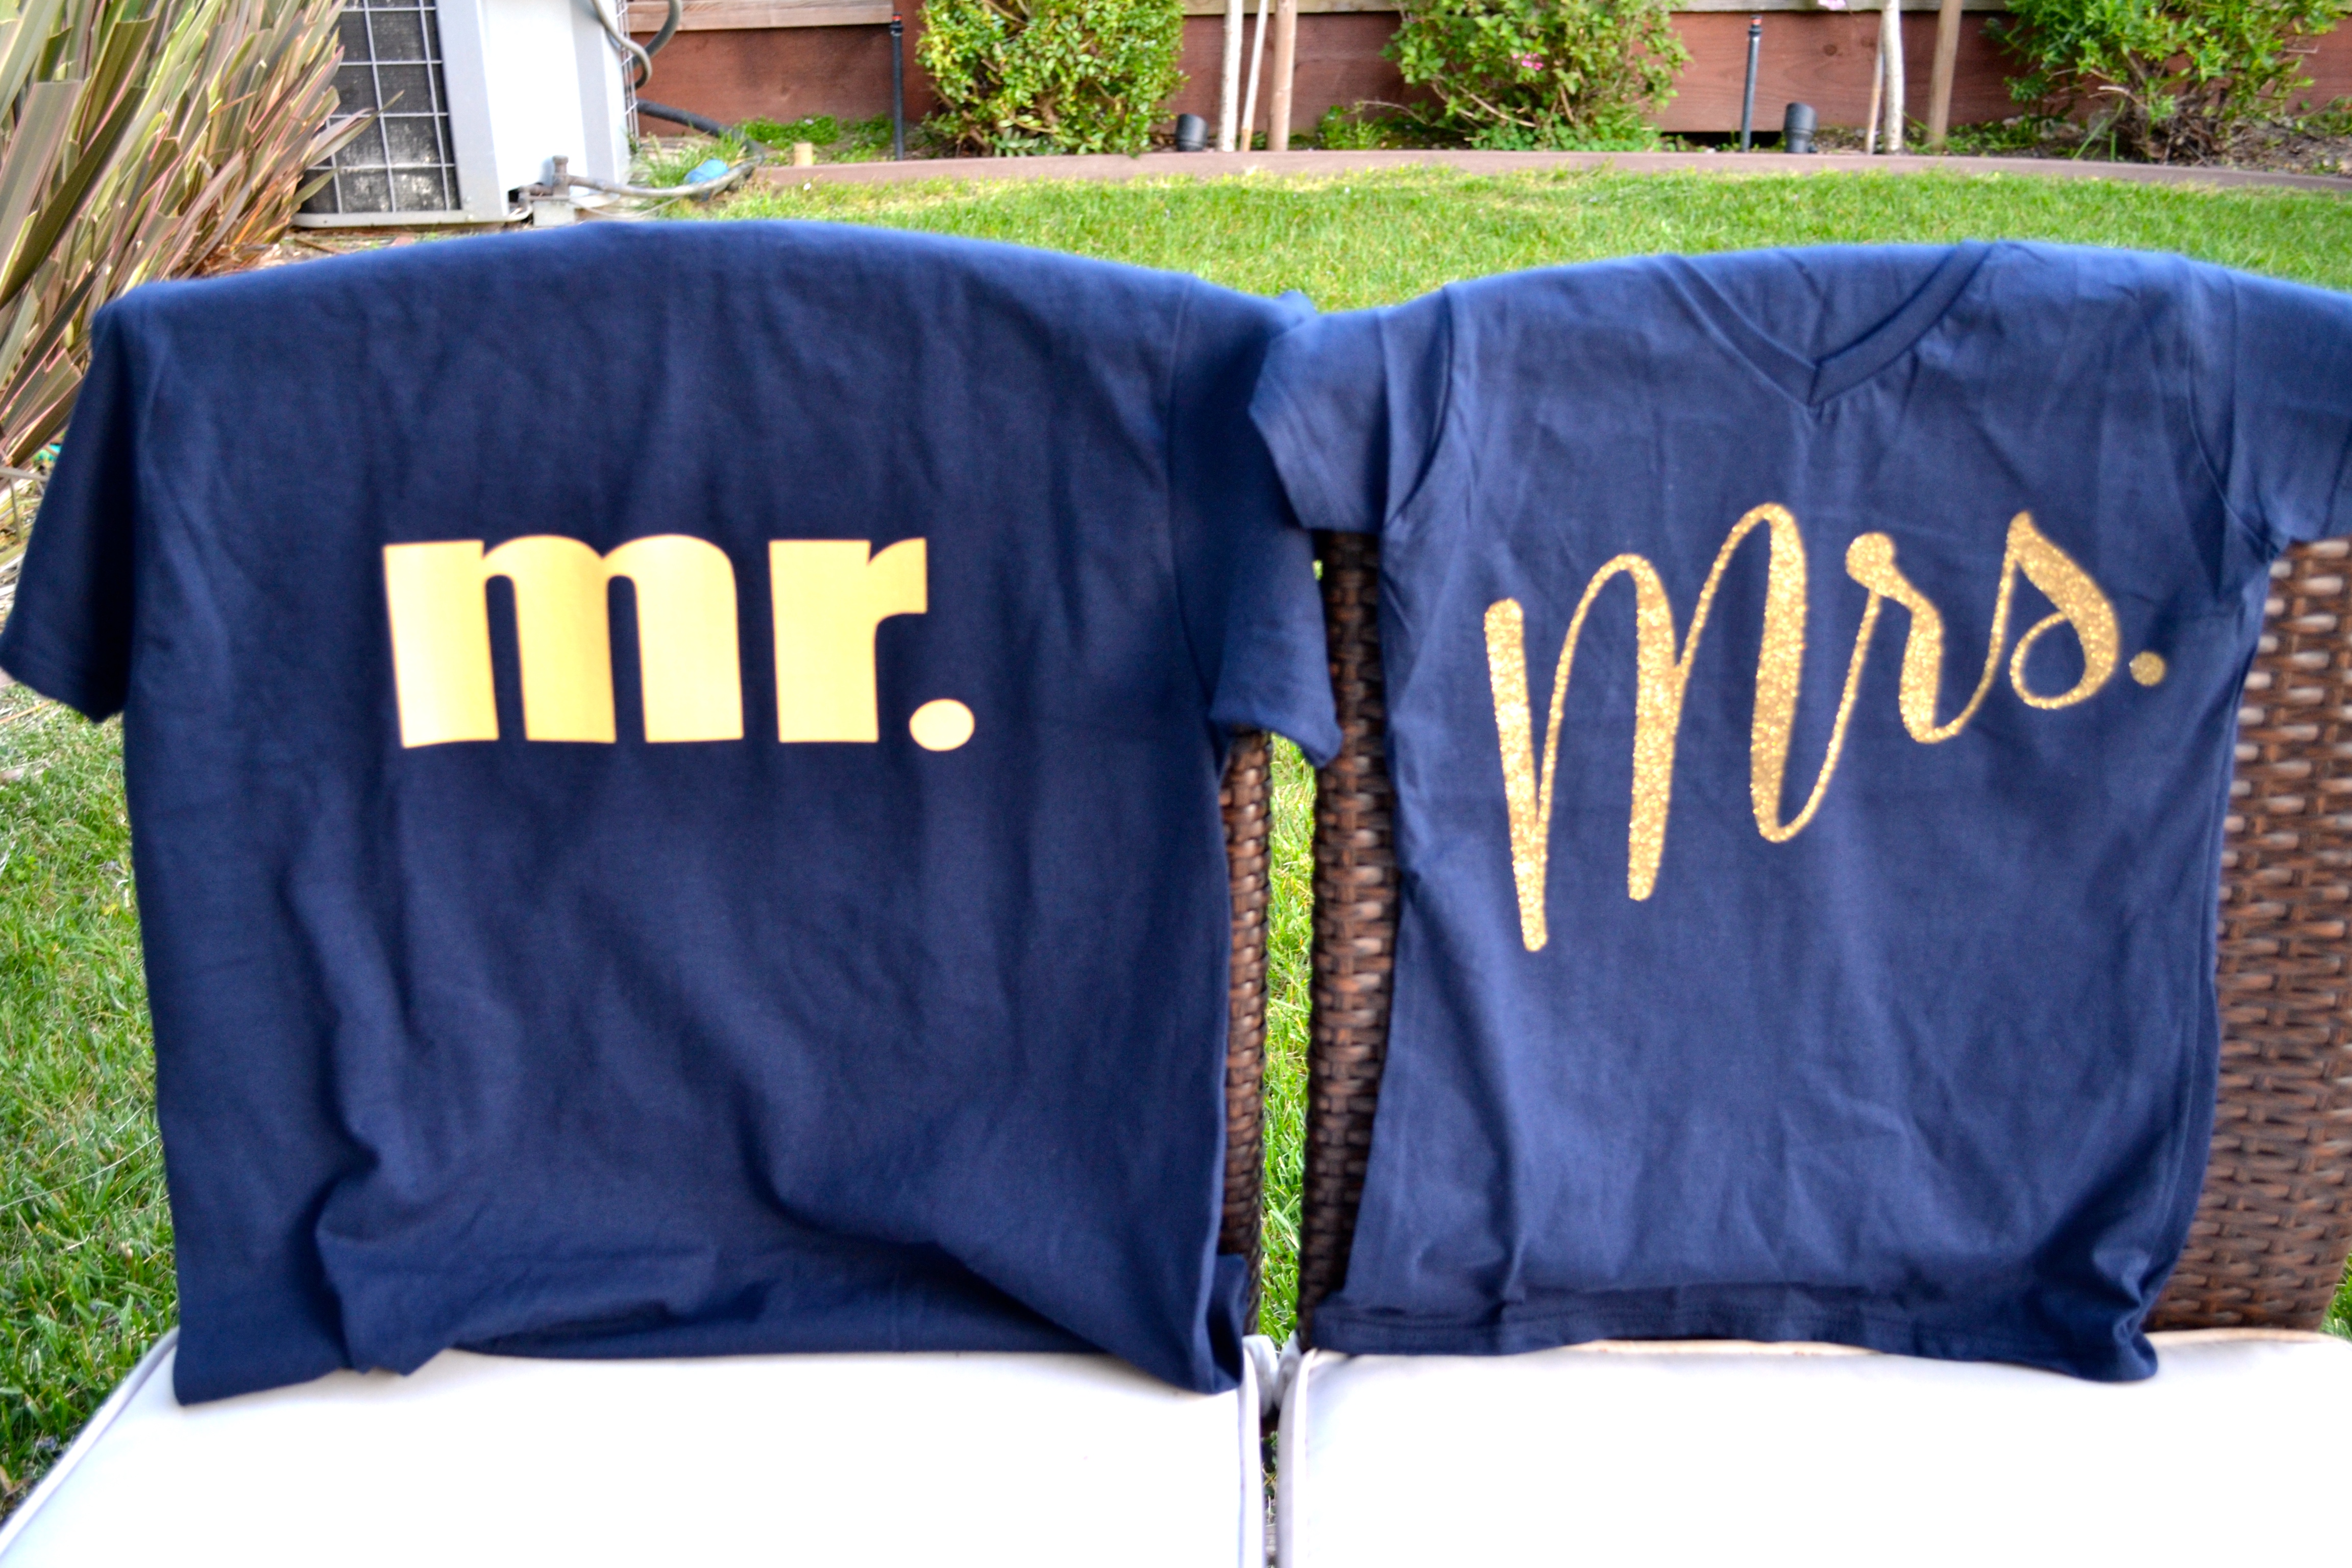
Voi La! Perfect M and Mrs shirts for your honeymoon!
I have to note, that if you’re using the glitter technique WITHOUT a cutting machine and with fabric glue and loose glitter, it may only be a one time wearable shirt. So do make sure to wash it PRIOR to adding the letters and the glitter.
Everything else will stand the test of time, and you’ll be able to wash and wear as many times as you like (if you feel like reliving the honeymoon matching phase over and over again).
You can also make your own designs that say HUBBY and WIFEY instead. Or something just as cute. Now that you know how make these, the world is your oyster!

But if I could give you one bit of advice (being a newlywed myself) is to definitely add these to your pre-wedding list of to-dos. Whether it’s to DIY, or buy them from my shop, just get them! Your upgrades are waiting….
And if you’re feeling inspired, here’s a recap of everything you’ll need to make your own Mr and Mrs shirts:
- 2 Plain T-shirts (one in a ladies fit and one in a men’s fit)
- IF USING A CUTTING MACHINE:
- Glitter heat transfer Vinyl (I used gold)
- Regular Heat Transfer Vinyl (yellow matches gold)
- IF NOT USING A CUTTING MACHINE:
- Printable heat transfer paper (for dark fabrics)
- Glitter
- Fabric Glue
Hi Kaitlin, Great Blog! We found you on care.com in December and didn’t know if we should reply there or here. We would love to chat with you. Thanks, Suzy
Hi Kaitlin, Great Blog! We found you on care.com in December and didn’t know if we should reply there or here. We are just now looking for a part-time Nanny in Walnut Creek. We would love to chat with you. Thanks, Suzy