By now, if you’ve been reading my posts, you know that I’ve been feverishly working on the nursery for my little baby boy that’s due in July. If he’s not due until July, what’s the rush, you ask?
Well, because if you know me, you know I think WAYY ahead of schedule. Also, because trying to put together a nursery in the heat of summer when I look and feel like a whale doesn’t sound like the most appealing thing in the word. So the earlier, the better I say!
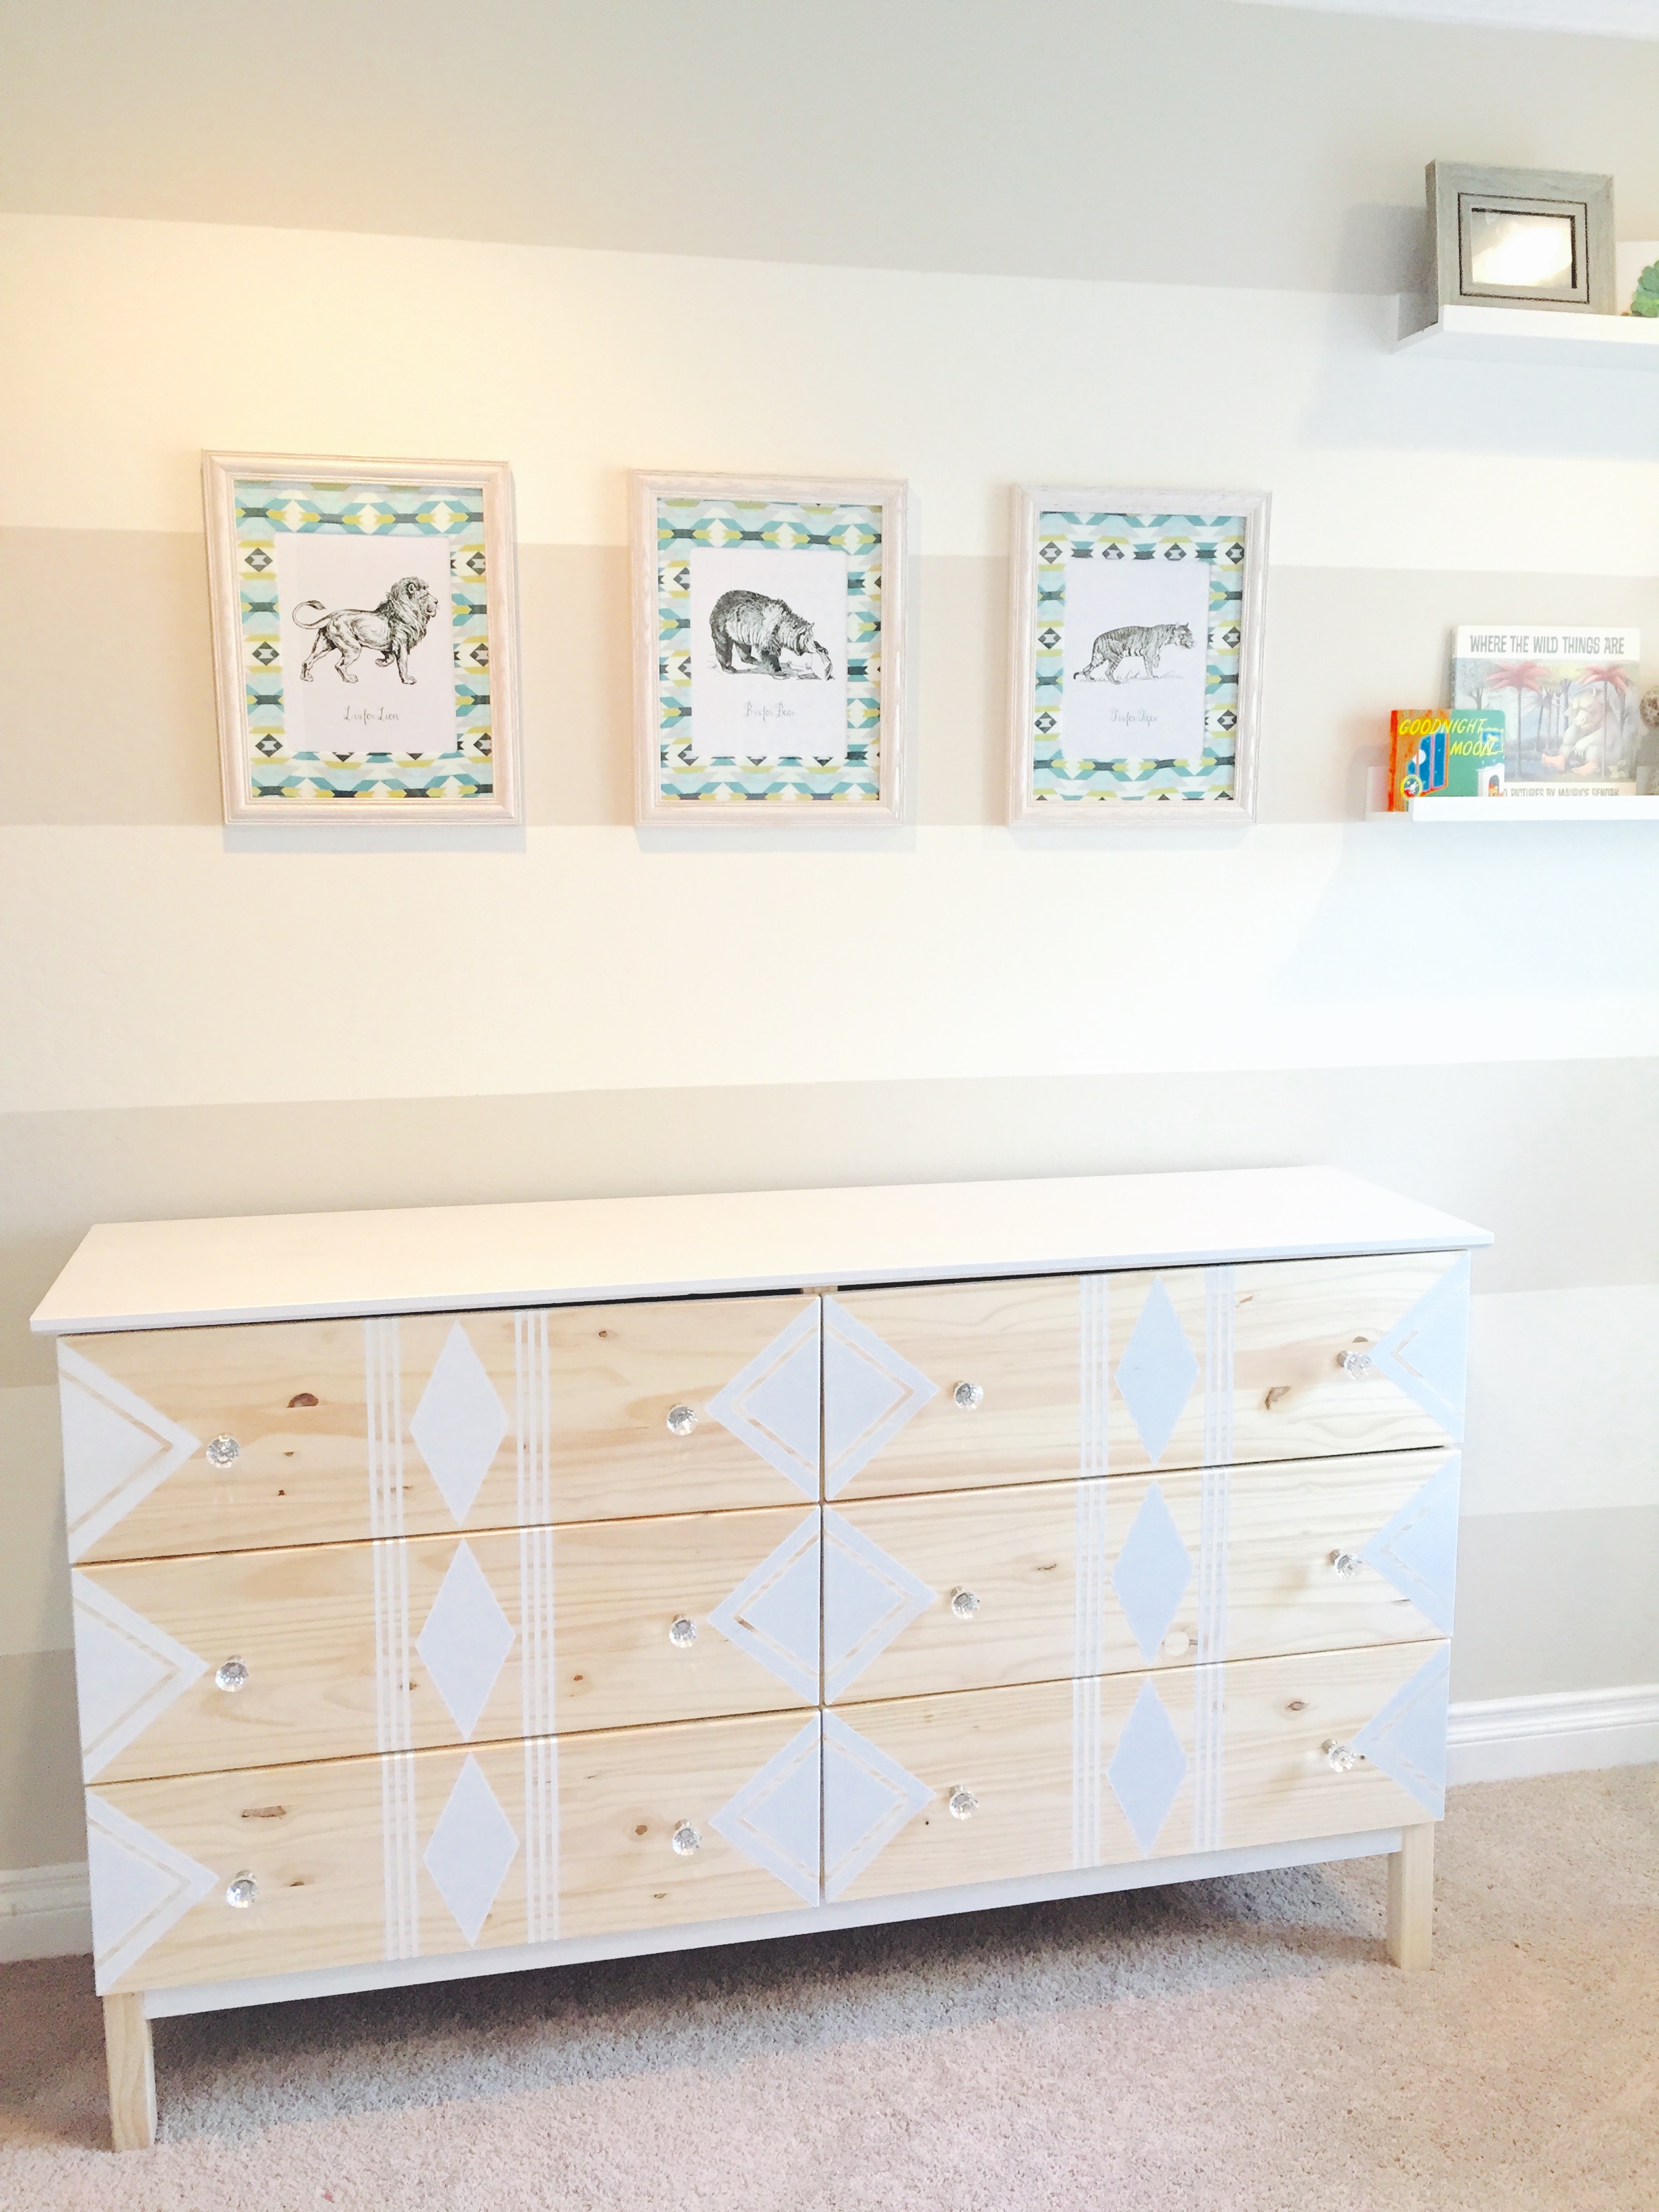
A couple weeks ago, I gave you the first glimpse into my little man’s world with this fun dresser Ikea hack. The entire inspiration for the feel of his room was based around this dresser. As I mentioned in that post, I wanted something for him that wasn’t necessarily a typical “baby” room. But something that was still sweet, would still have appeal as he grew older, and that mom and dad didn’t HATE looking at every time we walked into his room.
Since the dresser has sort of a geometric feel, I decided to carry that theme throughout the room and go with a sort of “aztec” theme – if you can even call that a theme. Not with baby elephants or little Indians or anything, but by using different geometric and wilderness patterns to bring the room together, but still make each individual piece stand out.
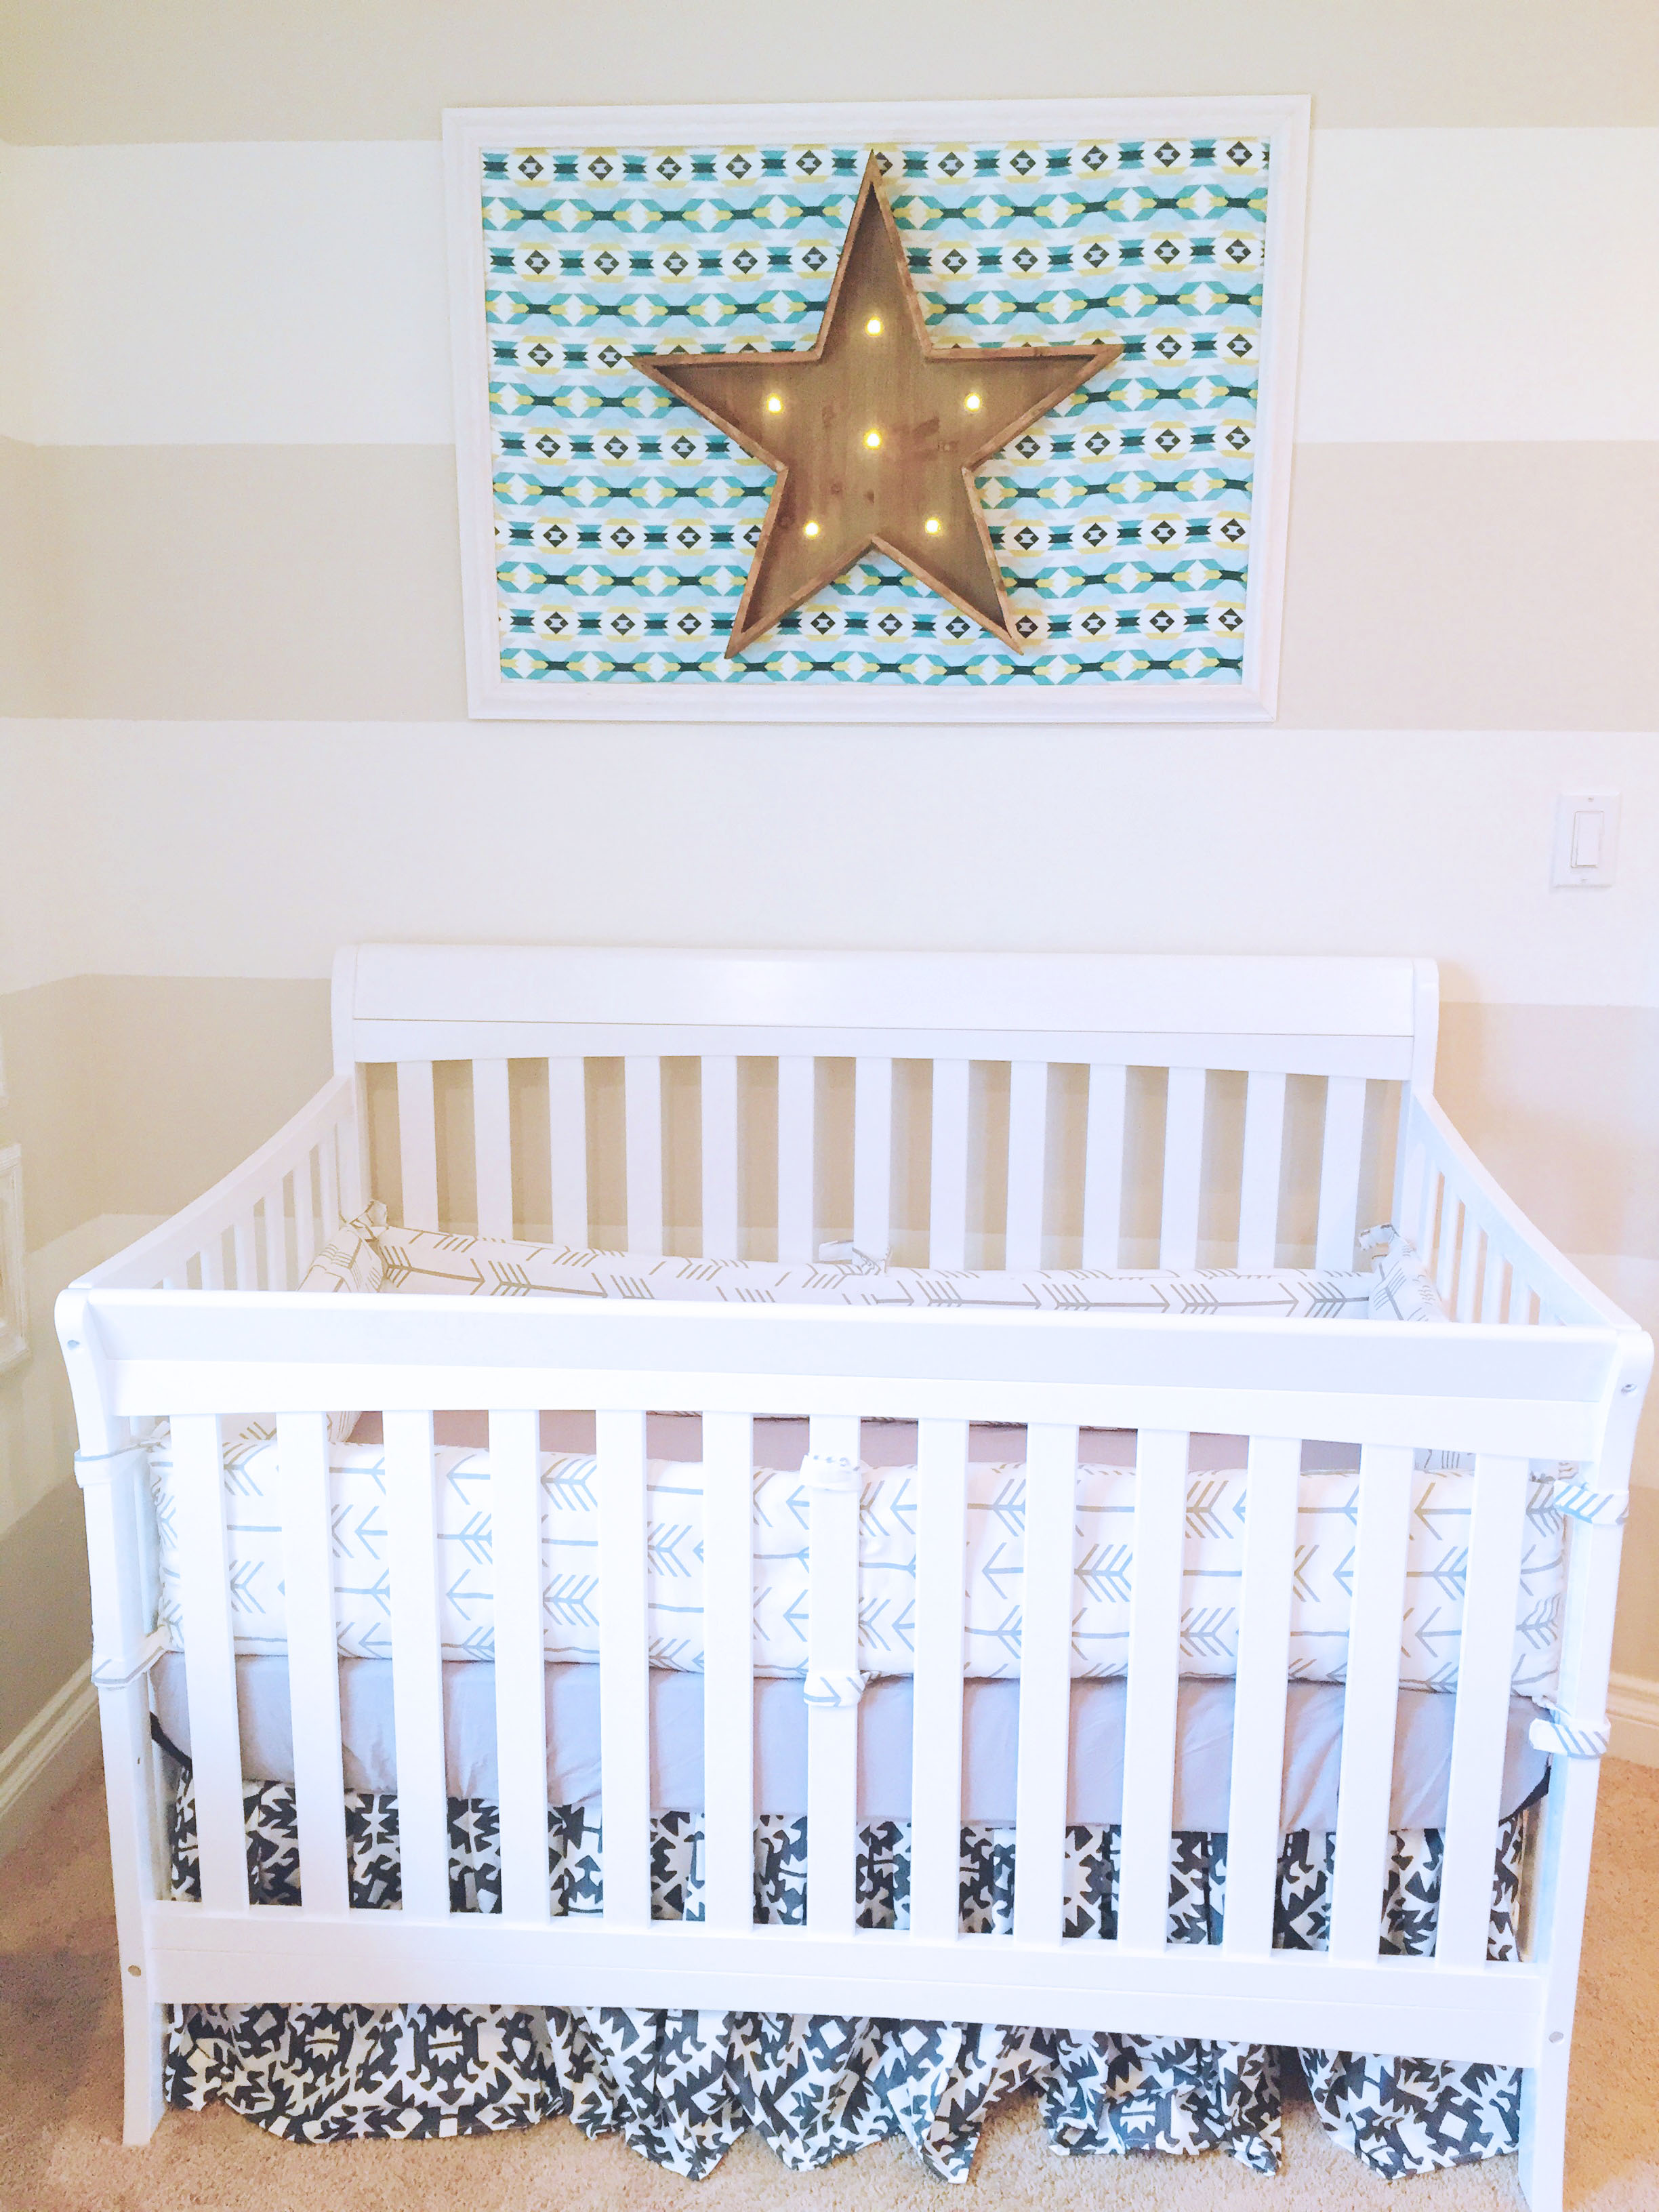
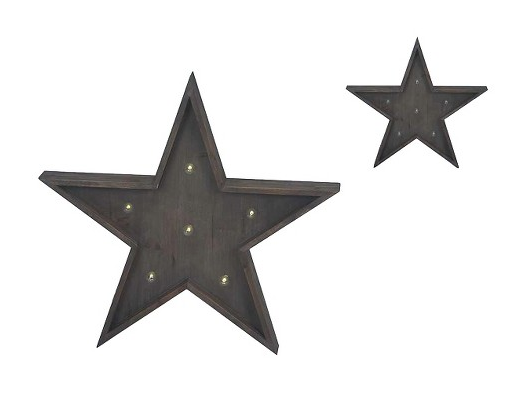
I knew I wanted a nightlight in his room, and was kind of obsessed with the idea of marquee lights. You know, the ones with the big bulbs inside of a letter or a shape. And since I was going with different shapes (and considering the fact that we’re keeping Bizi Baby’s a secret until his arrival), I found the coolest wood star Marquee at Target:
Star Marquee from Target
If sold out, Similar Marquee Found Here
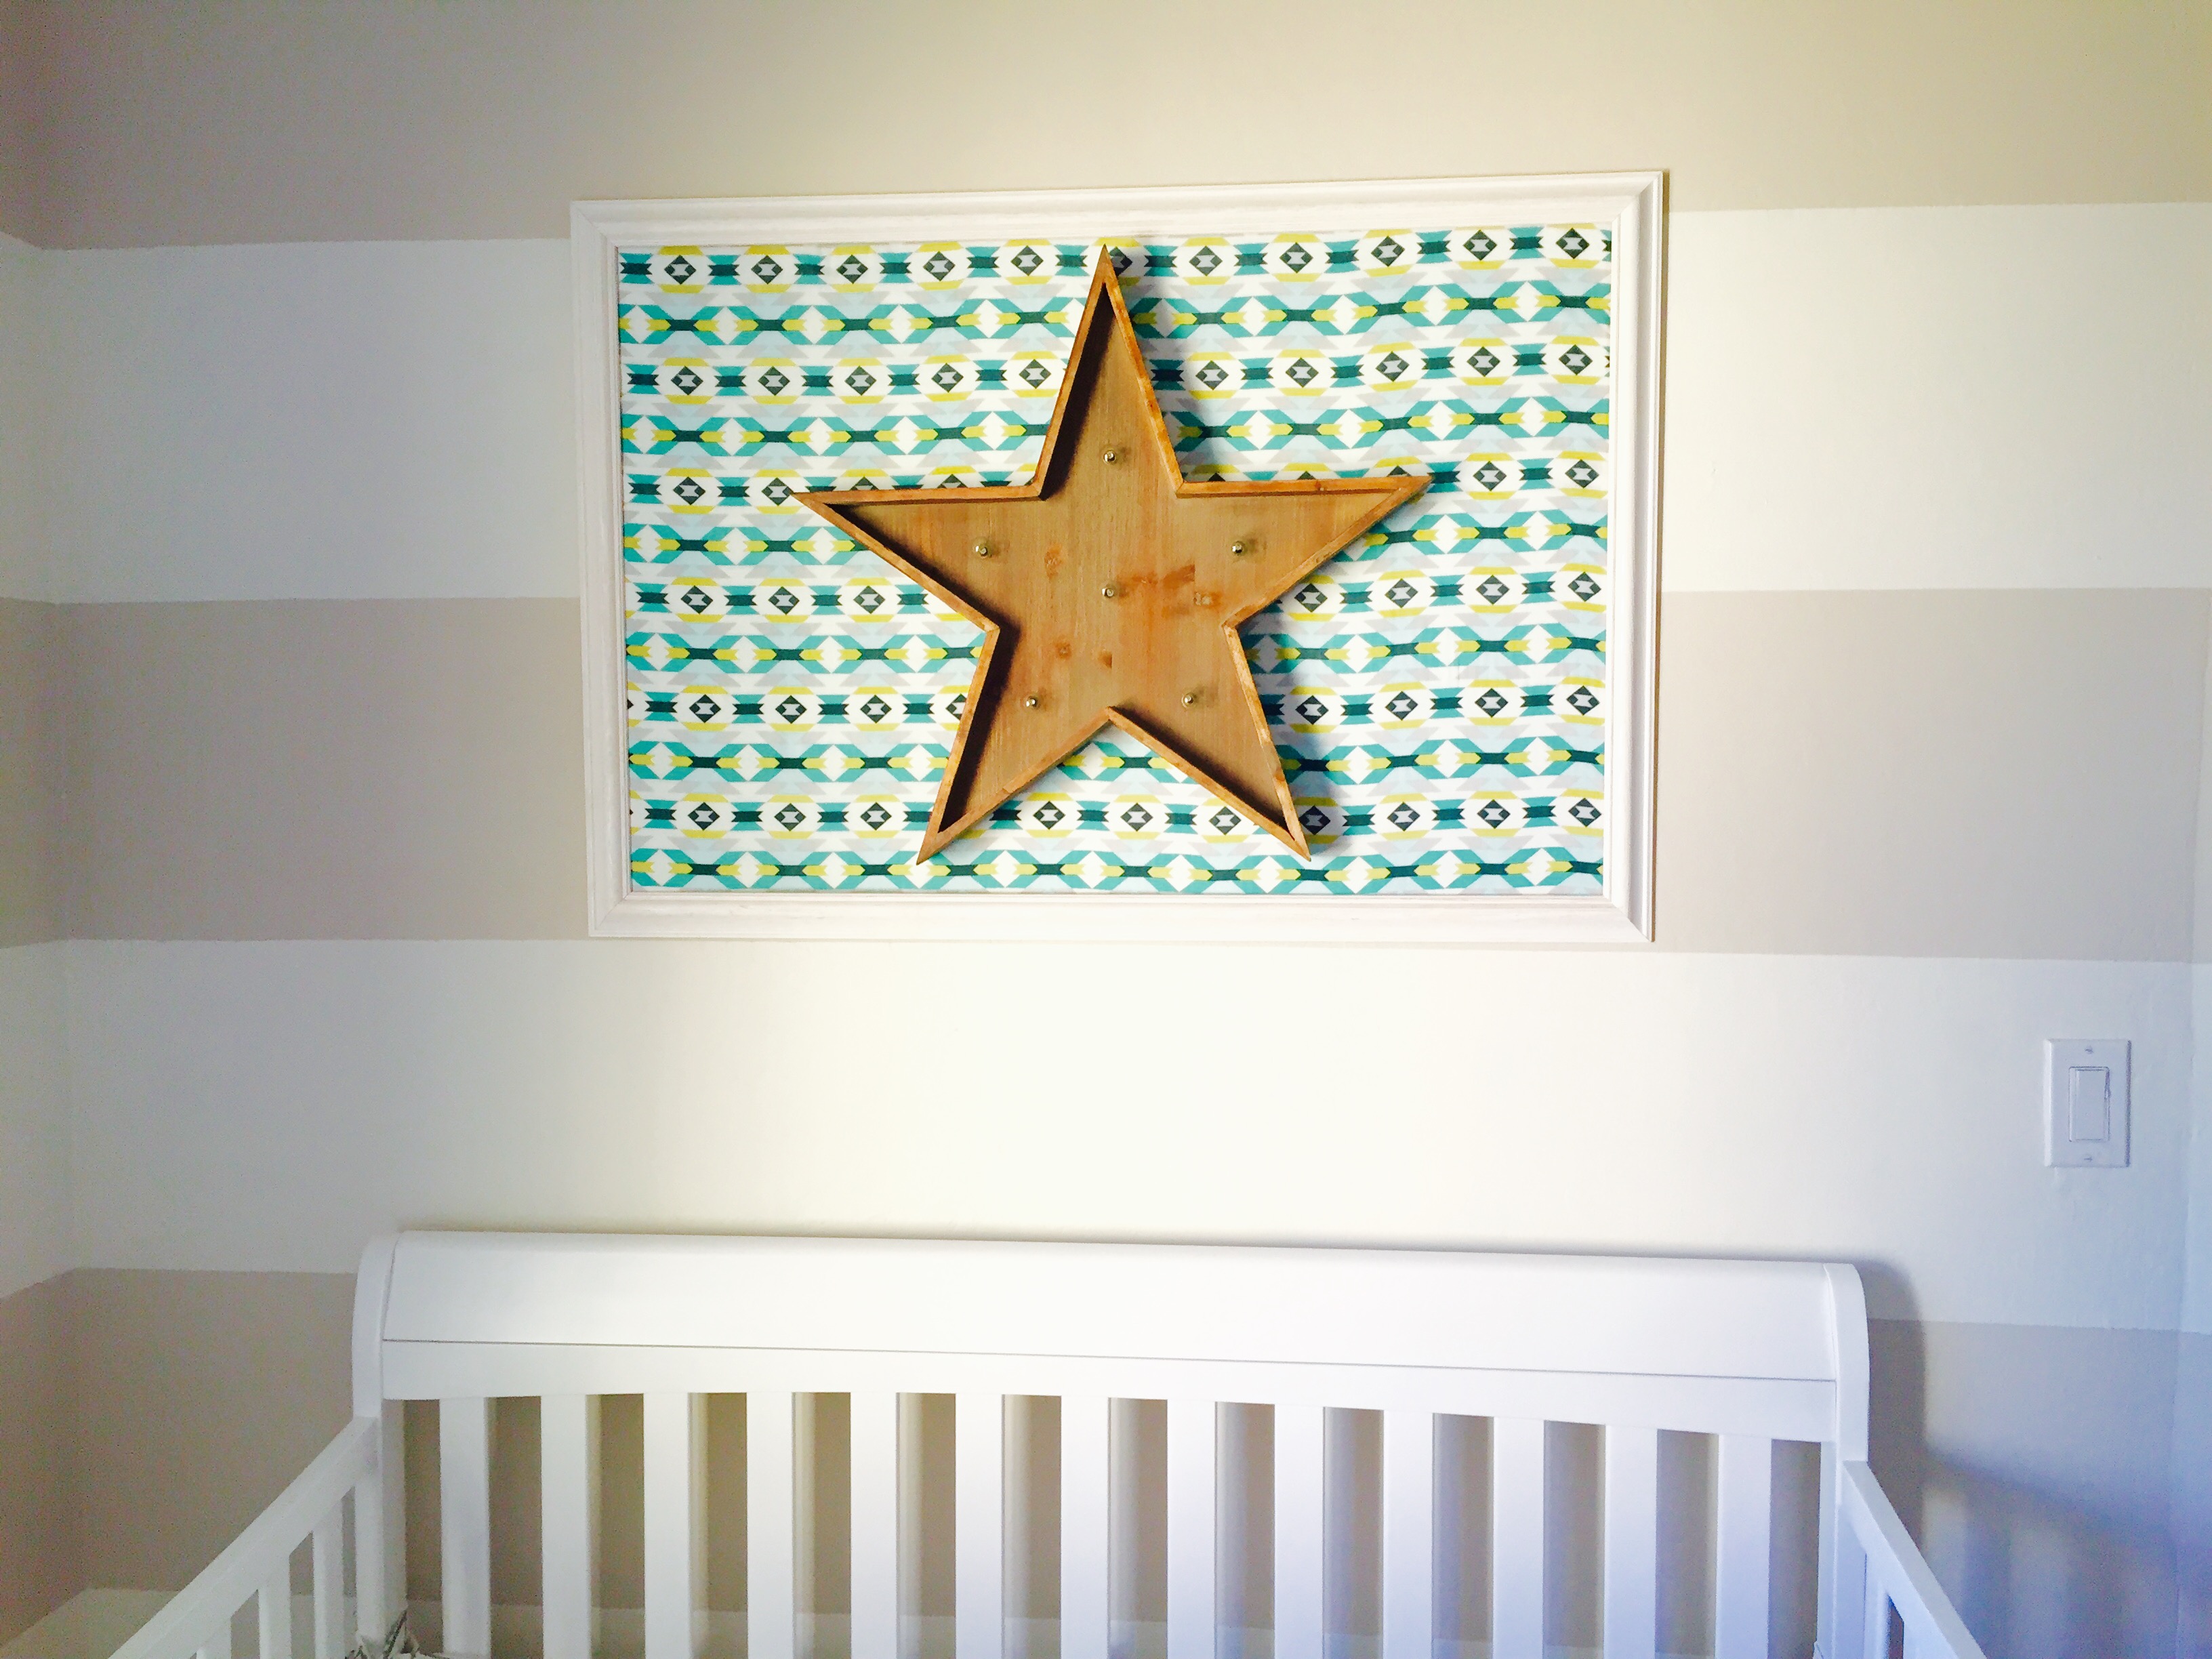
Hooray! Now, the star isn’t HUGE. It’s about 23×23″. It was going to look adorable over his little crib, but I needed a little something extra to make it stand out as a focal point of the room. Also, to tie in the “aztec” theme. For this, I decided I needed to frame it.
Now, not in the traditional sense. There would be no glass. However, I wanted the marquee light to be enclosed in a frame, with a cool patterned backdrop, to make the star light a focal point of the room and not just a tiny wall accessory.
But there is nothing out there that is just labeled as a “frame backdrop”. There are frame mattes, and even those are plain. So this was definitely a DIY project. Right up my alley.
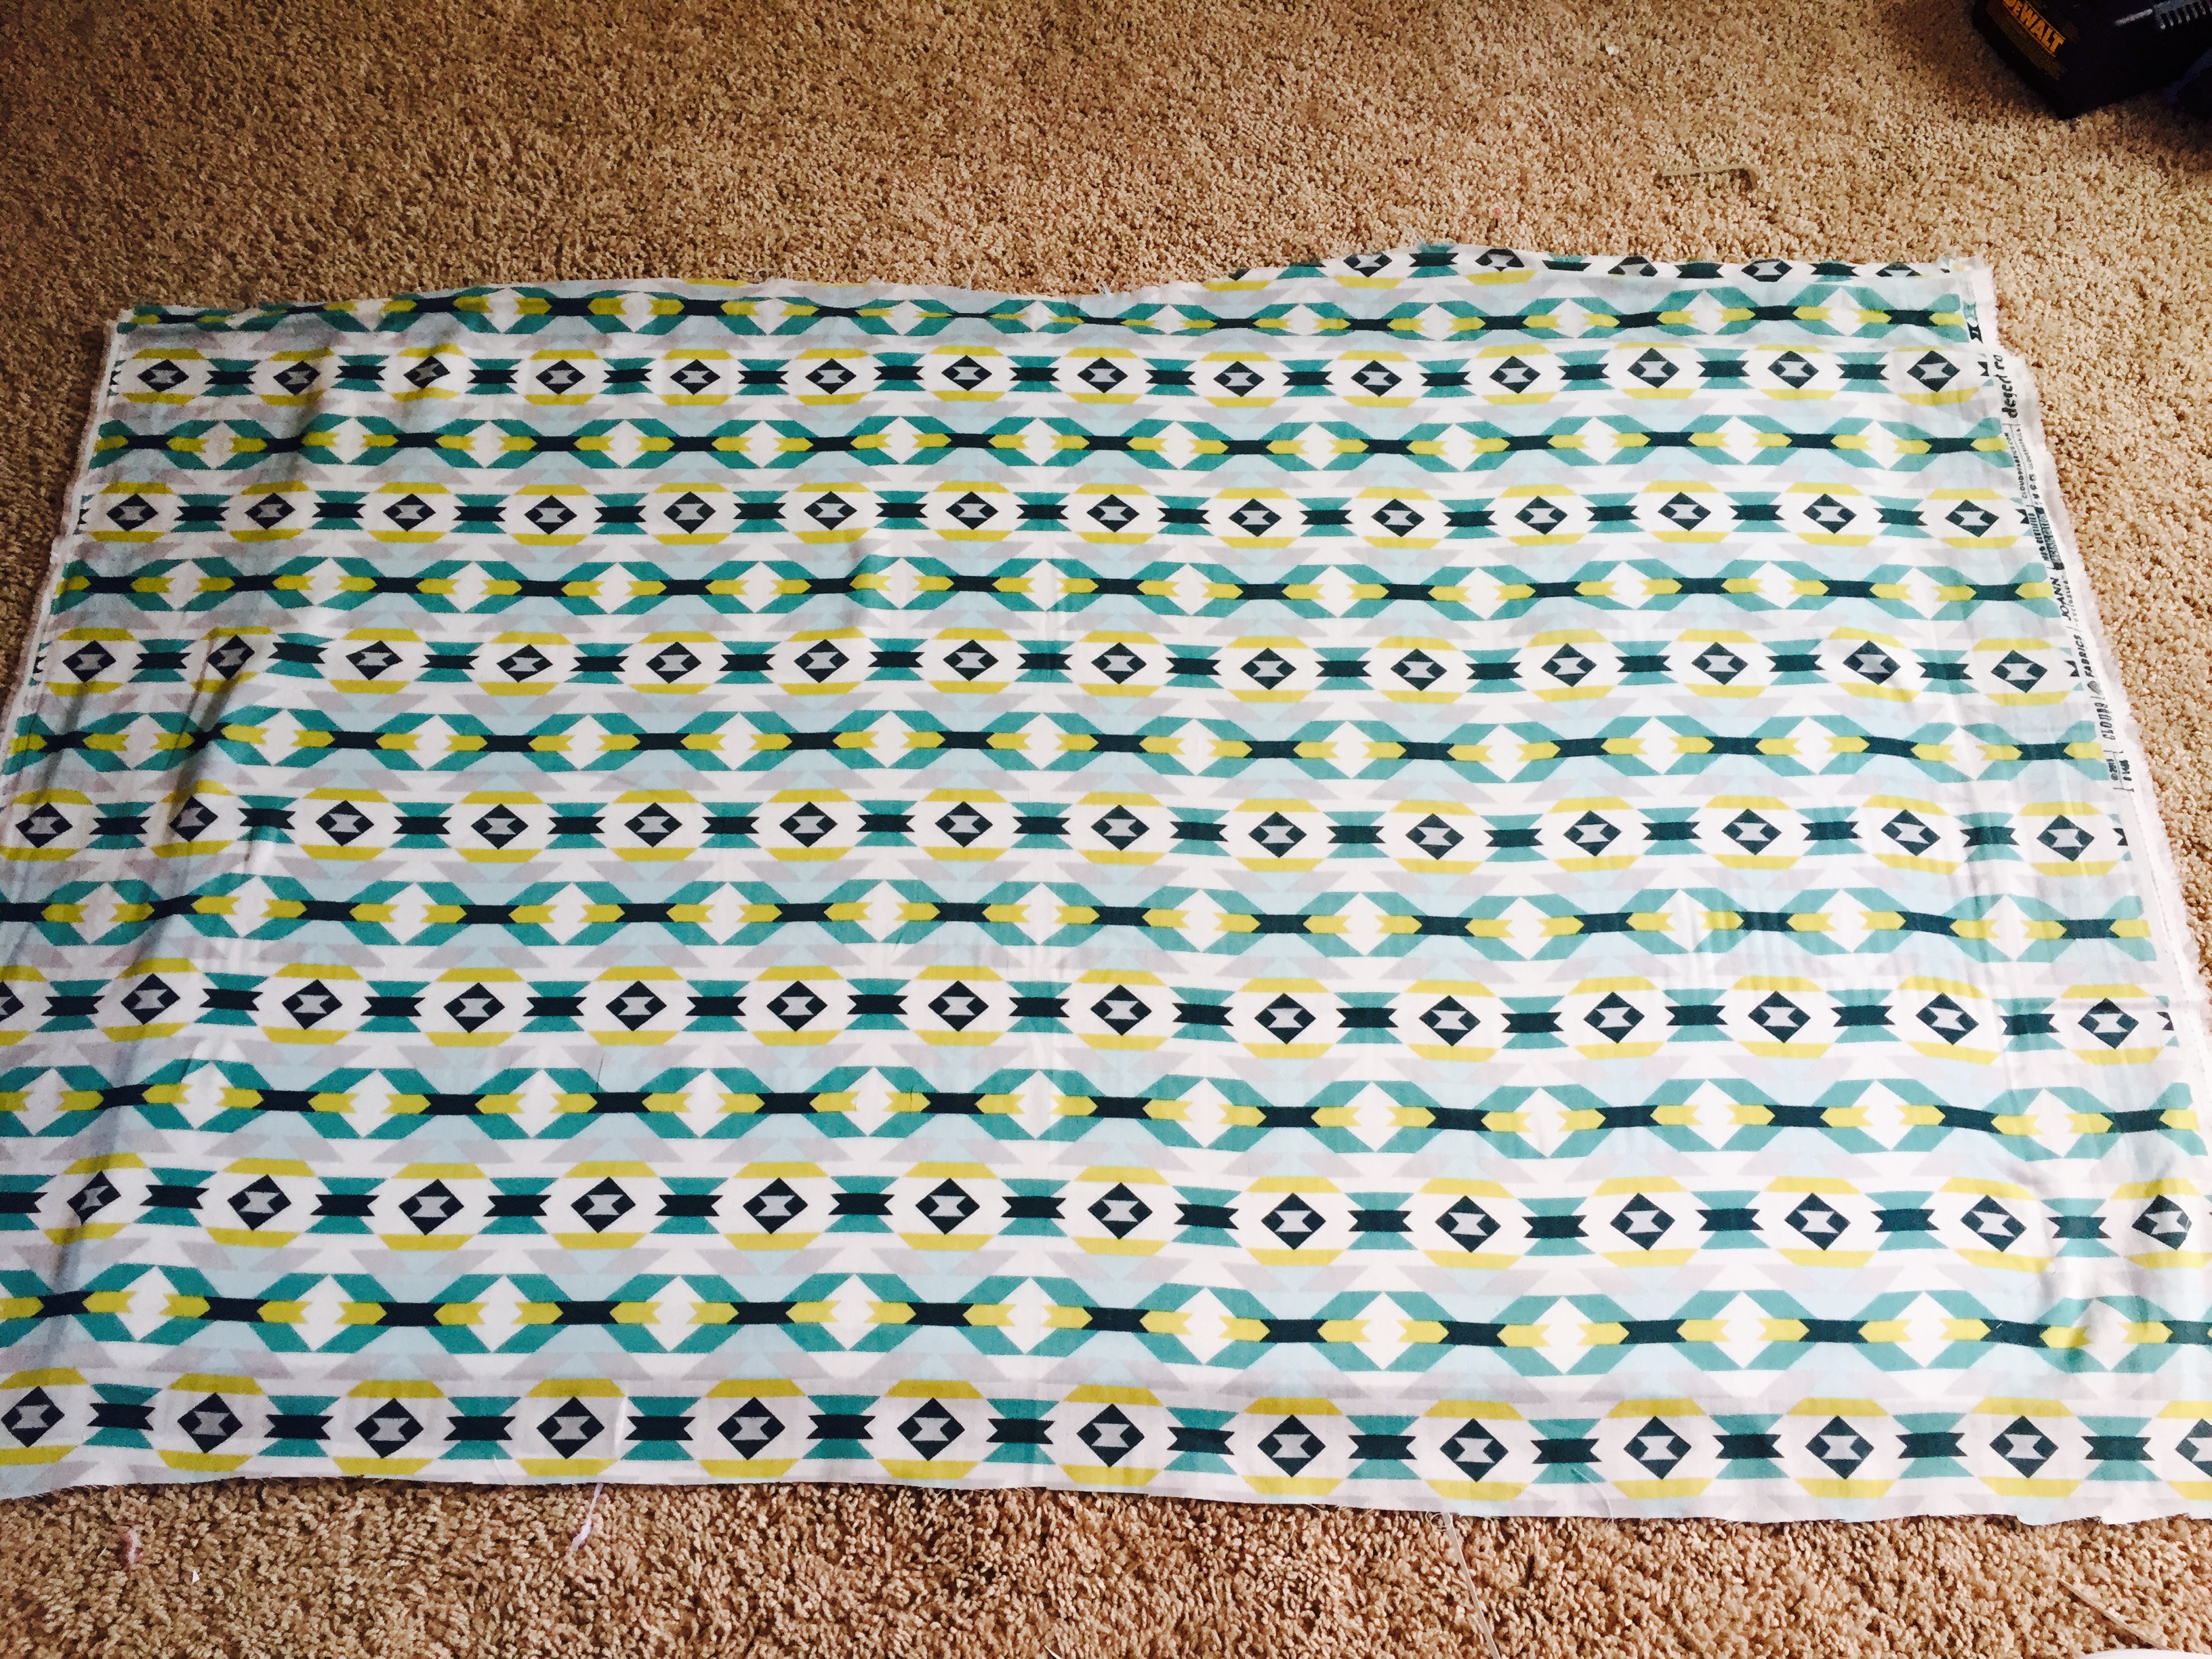
So immediately went out and found the cutest “aztec” fabric at Joann Fabrics, the perfect large frame on Amazon, and got to work. And I do have to say, I impressed myself with the end result:
StorkCraft Crib from Amazon
Bedding is DIY (post coming soon)
So if you’re looking to recreate this look yourself, just follow my steps below to get your own custom photo mat. I even include hanging instructions so you can make sure everything is straight, lined up, and WILL NOT fall!
And if you keep reading, I show you how to make the traditional photo mats (for hanging pictures) from this technique as well.
TARVA Unfinished Pine Dresser from Ikea
(Find Ikea HACK here)
Floating Wall Shelves from Amazon
No more spending an excessive amount of money on custom framing. Now you can just DIY!
DIY Custom Photo Mat – BACKDROP Style
The Necessary Supplies:
- Large 24×36″ Whitewash Pine Frame (no glass or backing needed)
- Mounting Hardware for frame
- 24×36″ White Foam Core Board
- 1 Yard- Fabric of choice
- Mine was from Joann Fabric
- Adhesive Mounting Spray
- Glue gun and glue
- Light Up Wood Star (or Initial Marquee)
- Screws and wall anchors
- Tape measure or ruler
- Nails (to mount frame on wall) and hammer
Step 1:

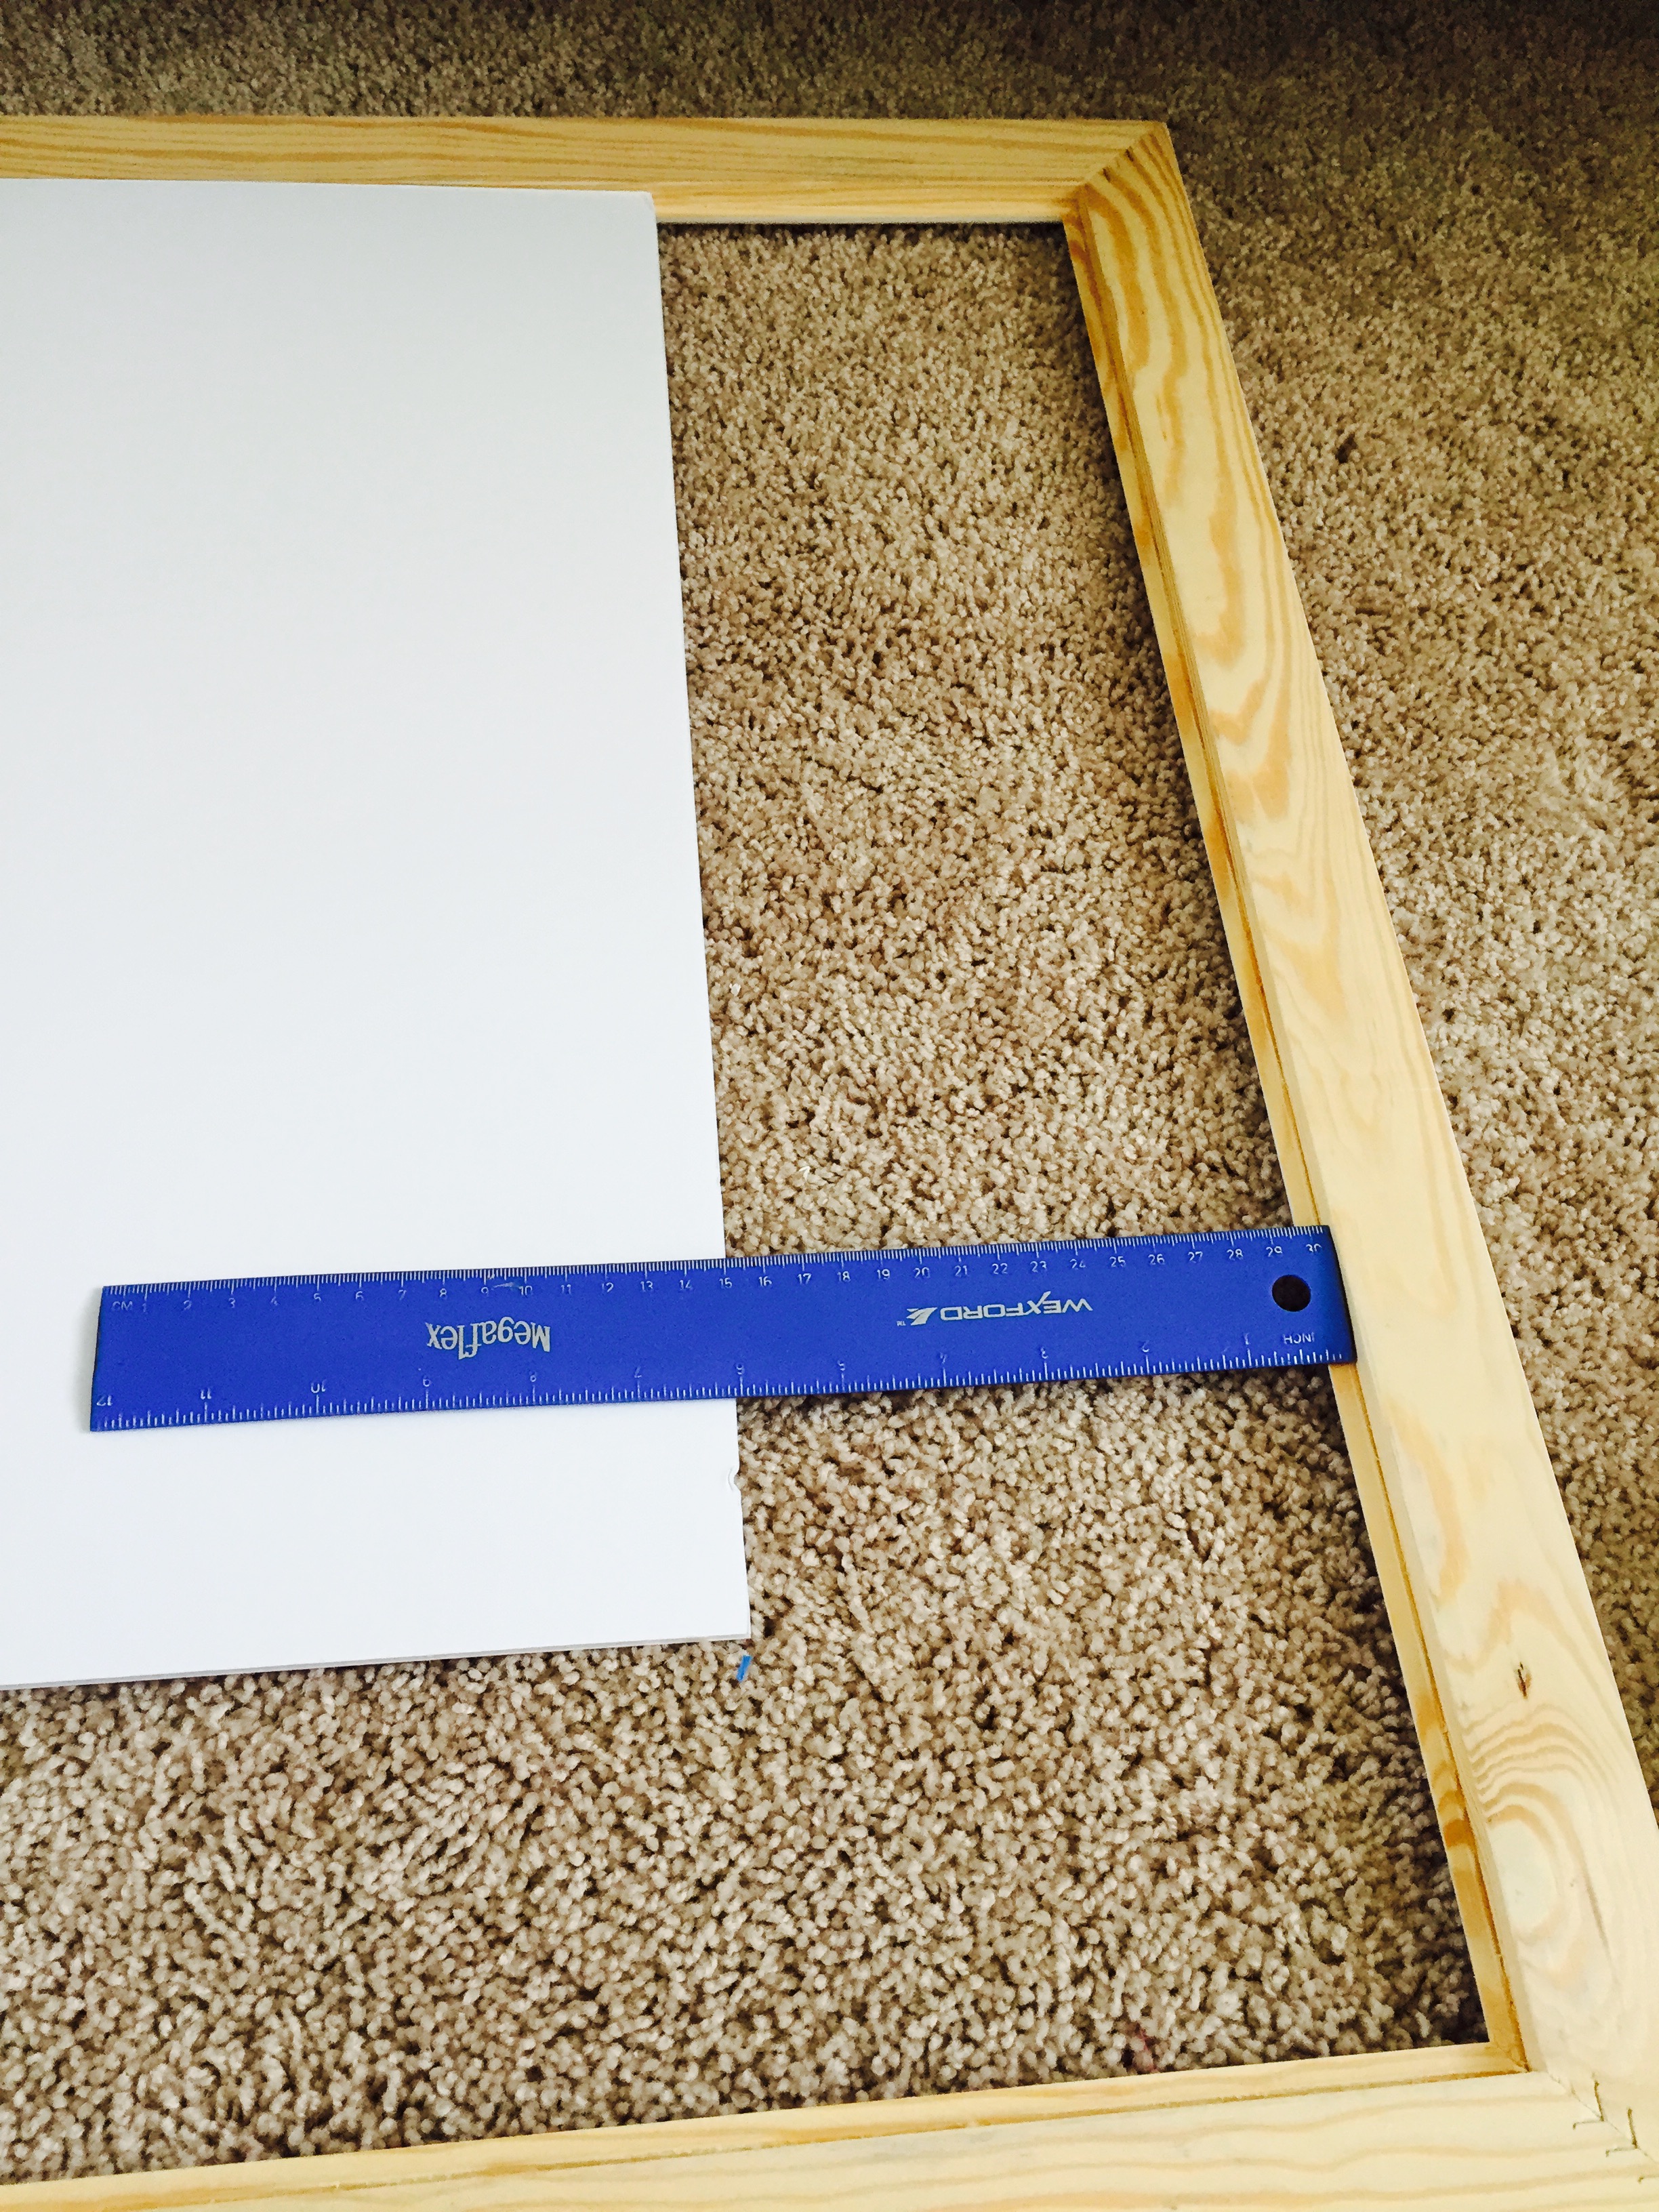
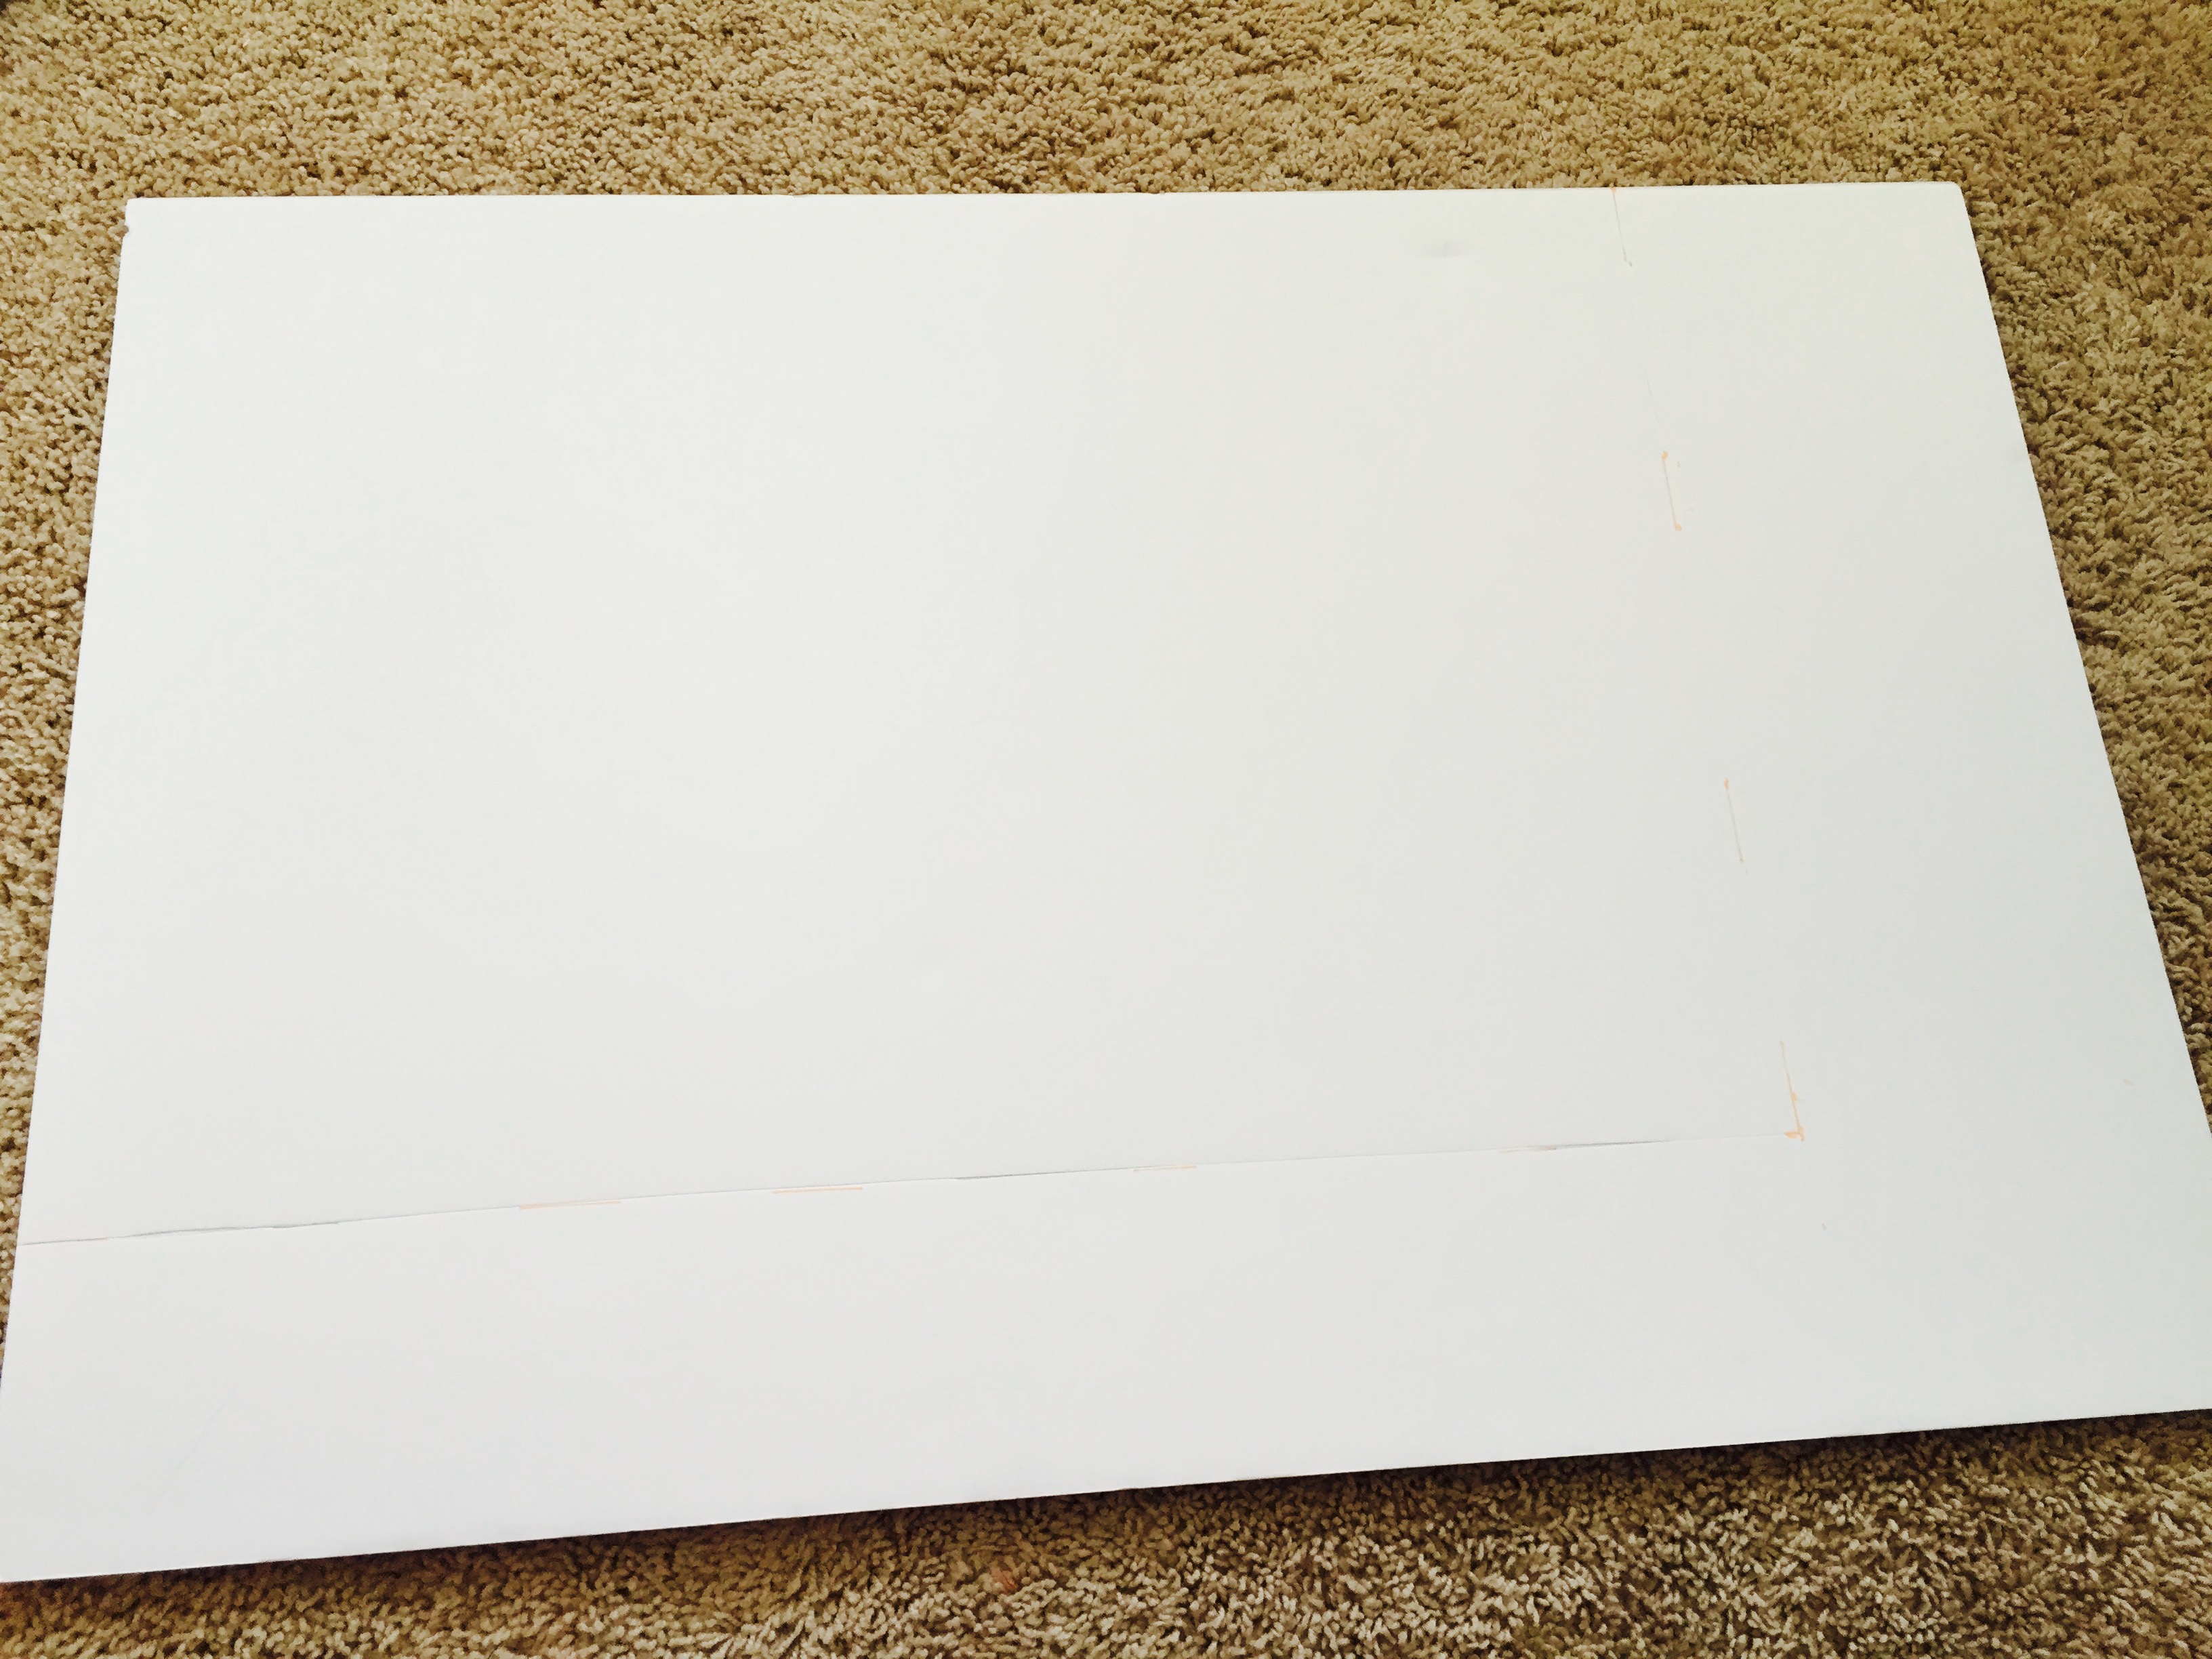
- If your foam board is the size of the inside of your frame, skip to step 2.
- If your foam board is smaller than the inside of your frame, measure how much more you need to add to the foam board on each side to make it fit perfectly inside of the frame.
- Cut pieces from a second piece of foam board to fill the gaps, and use hot glue to attach those pieces to your first piece of foam board.
- Finally, take 2 pieces of poster board (they can be smaller) and use your spray glue to adhere them on the top and bottom of the foam board you’ve hot glued together. This will ensure the glued seams do not come apart.
- Now, you should have a study backboard piece to fit perfectly inside of whatever size frame you’re choosing to work with.
Step 2:
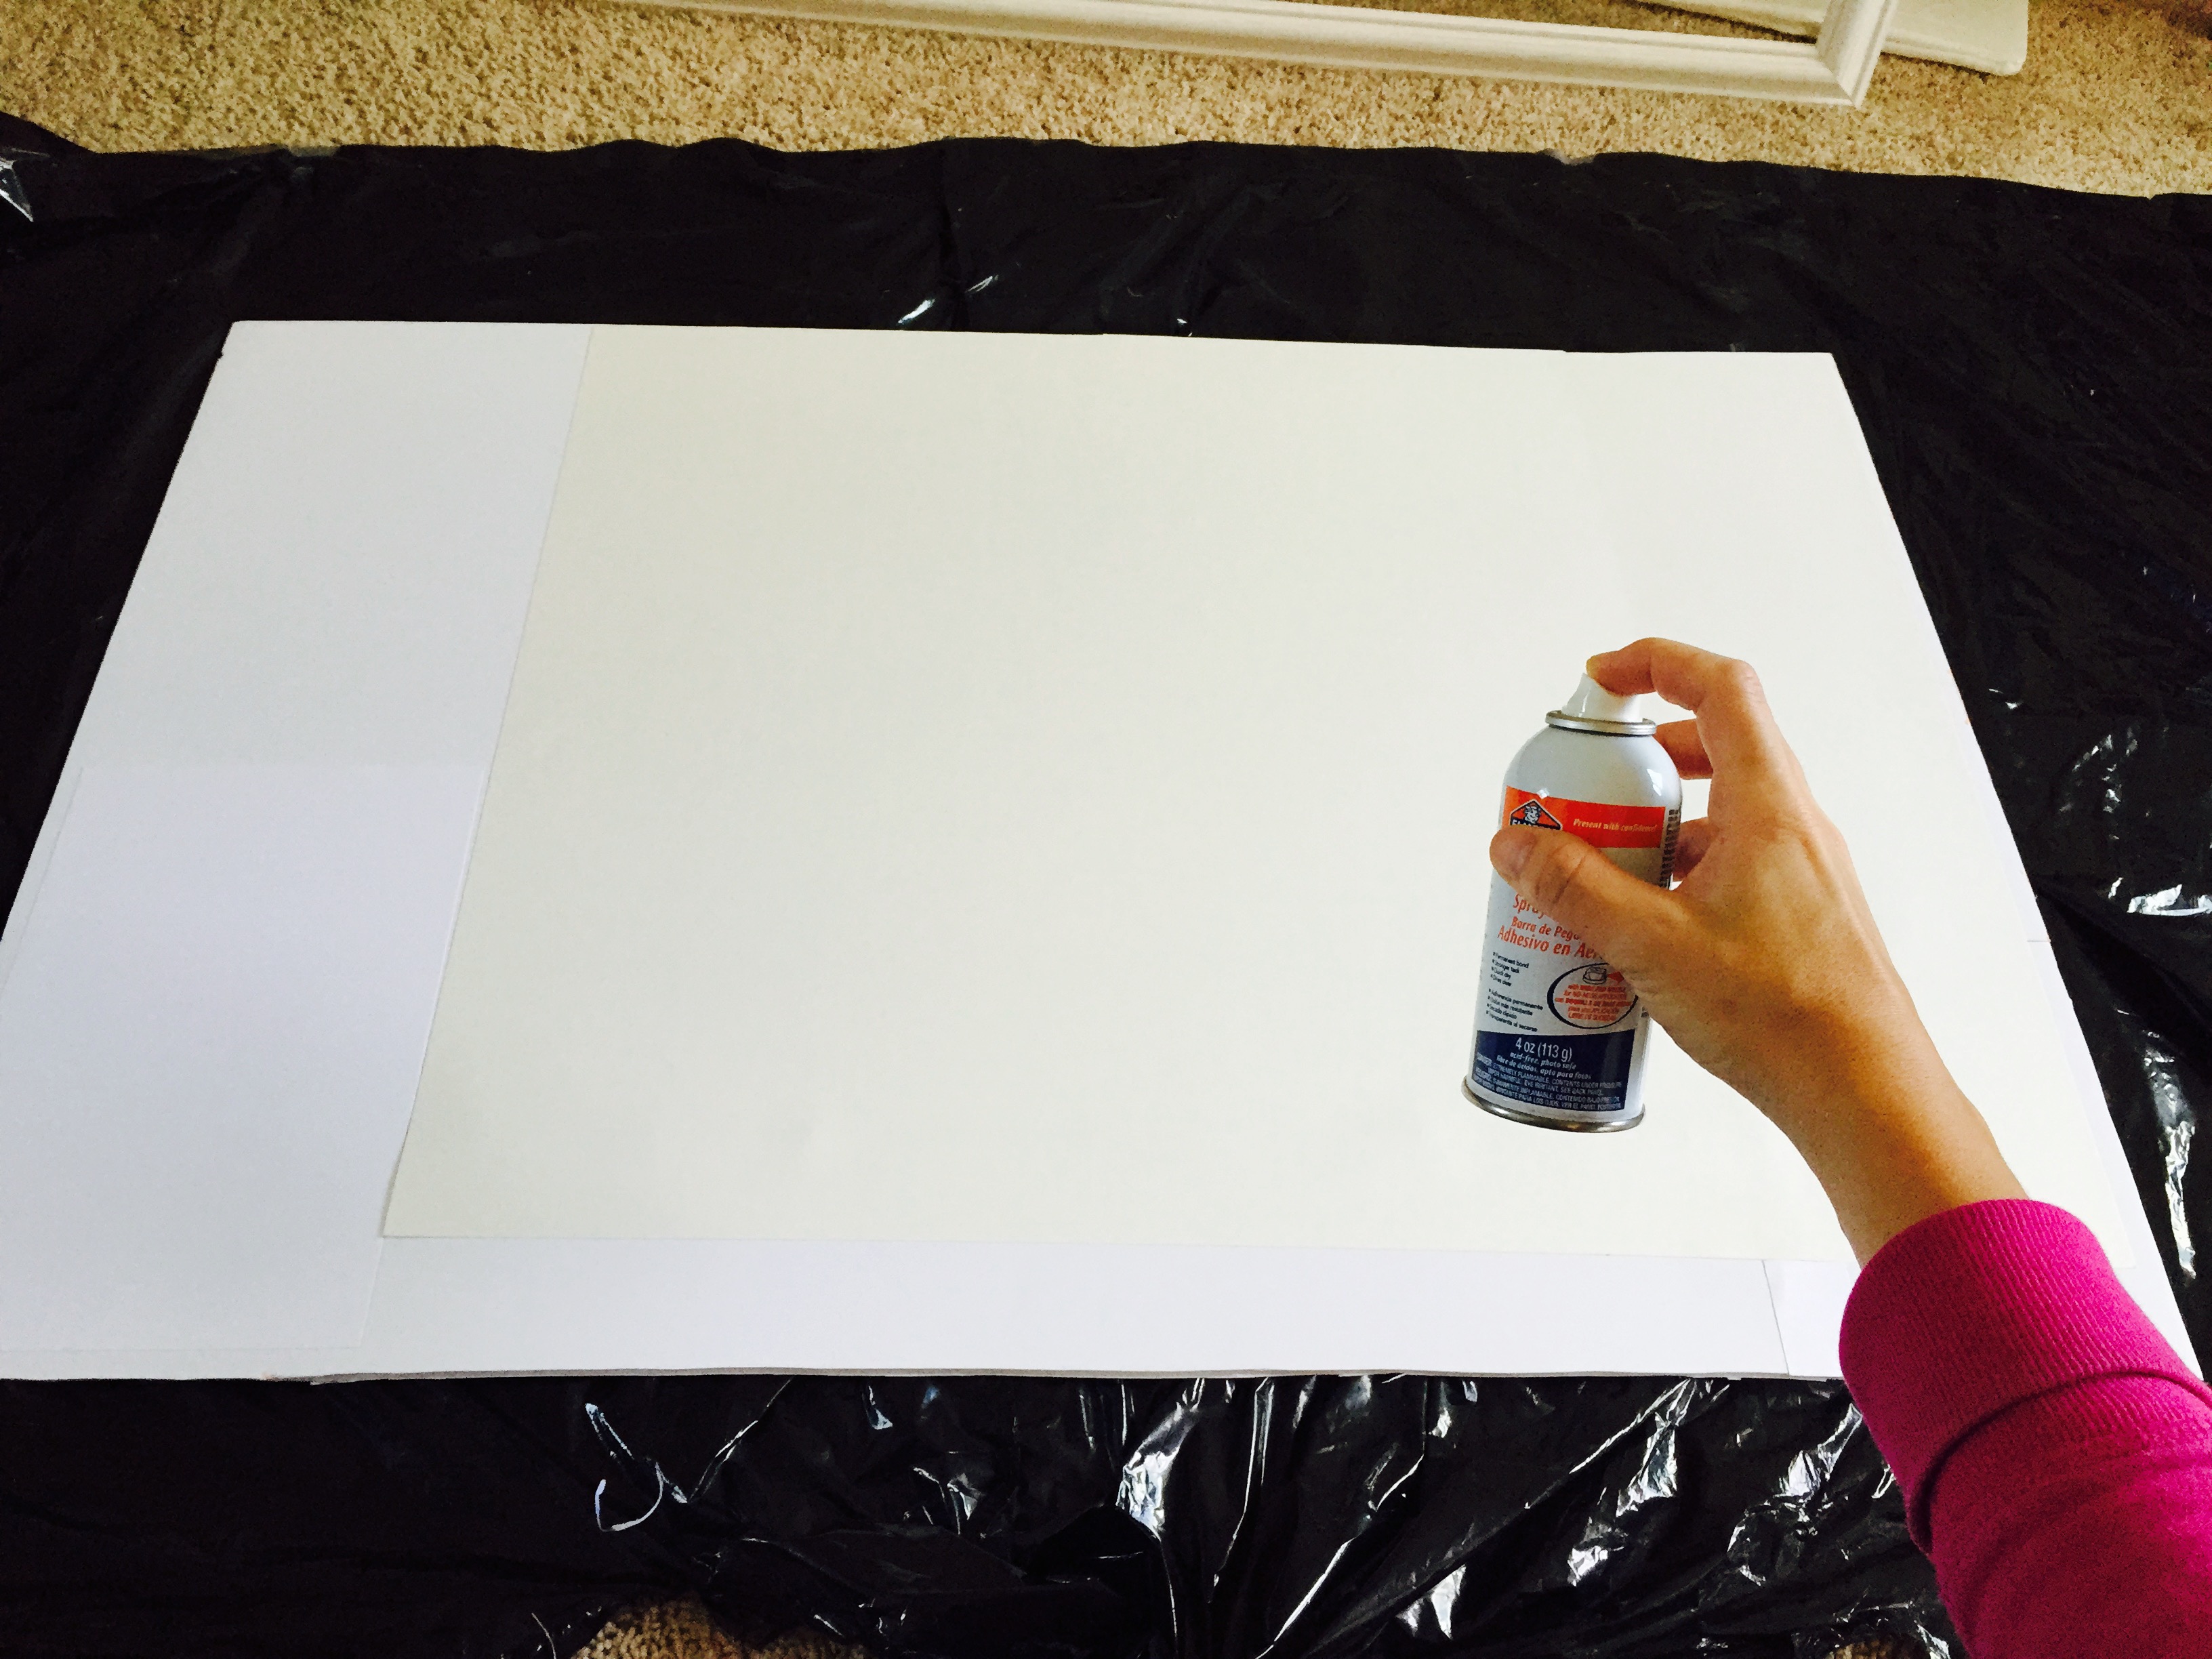
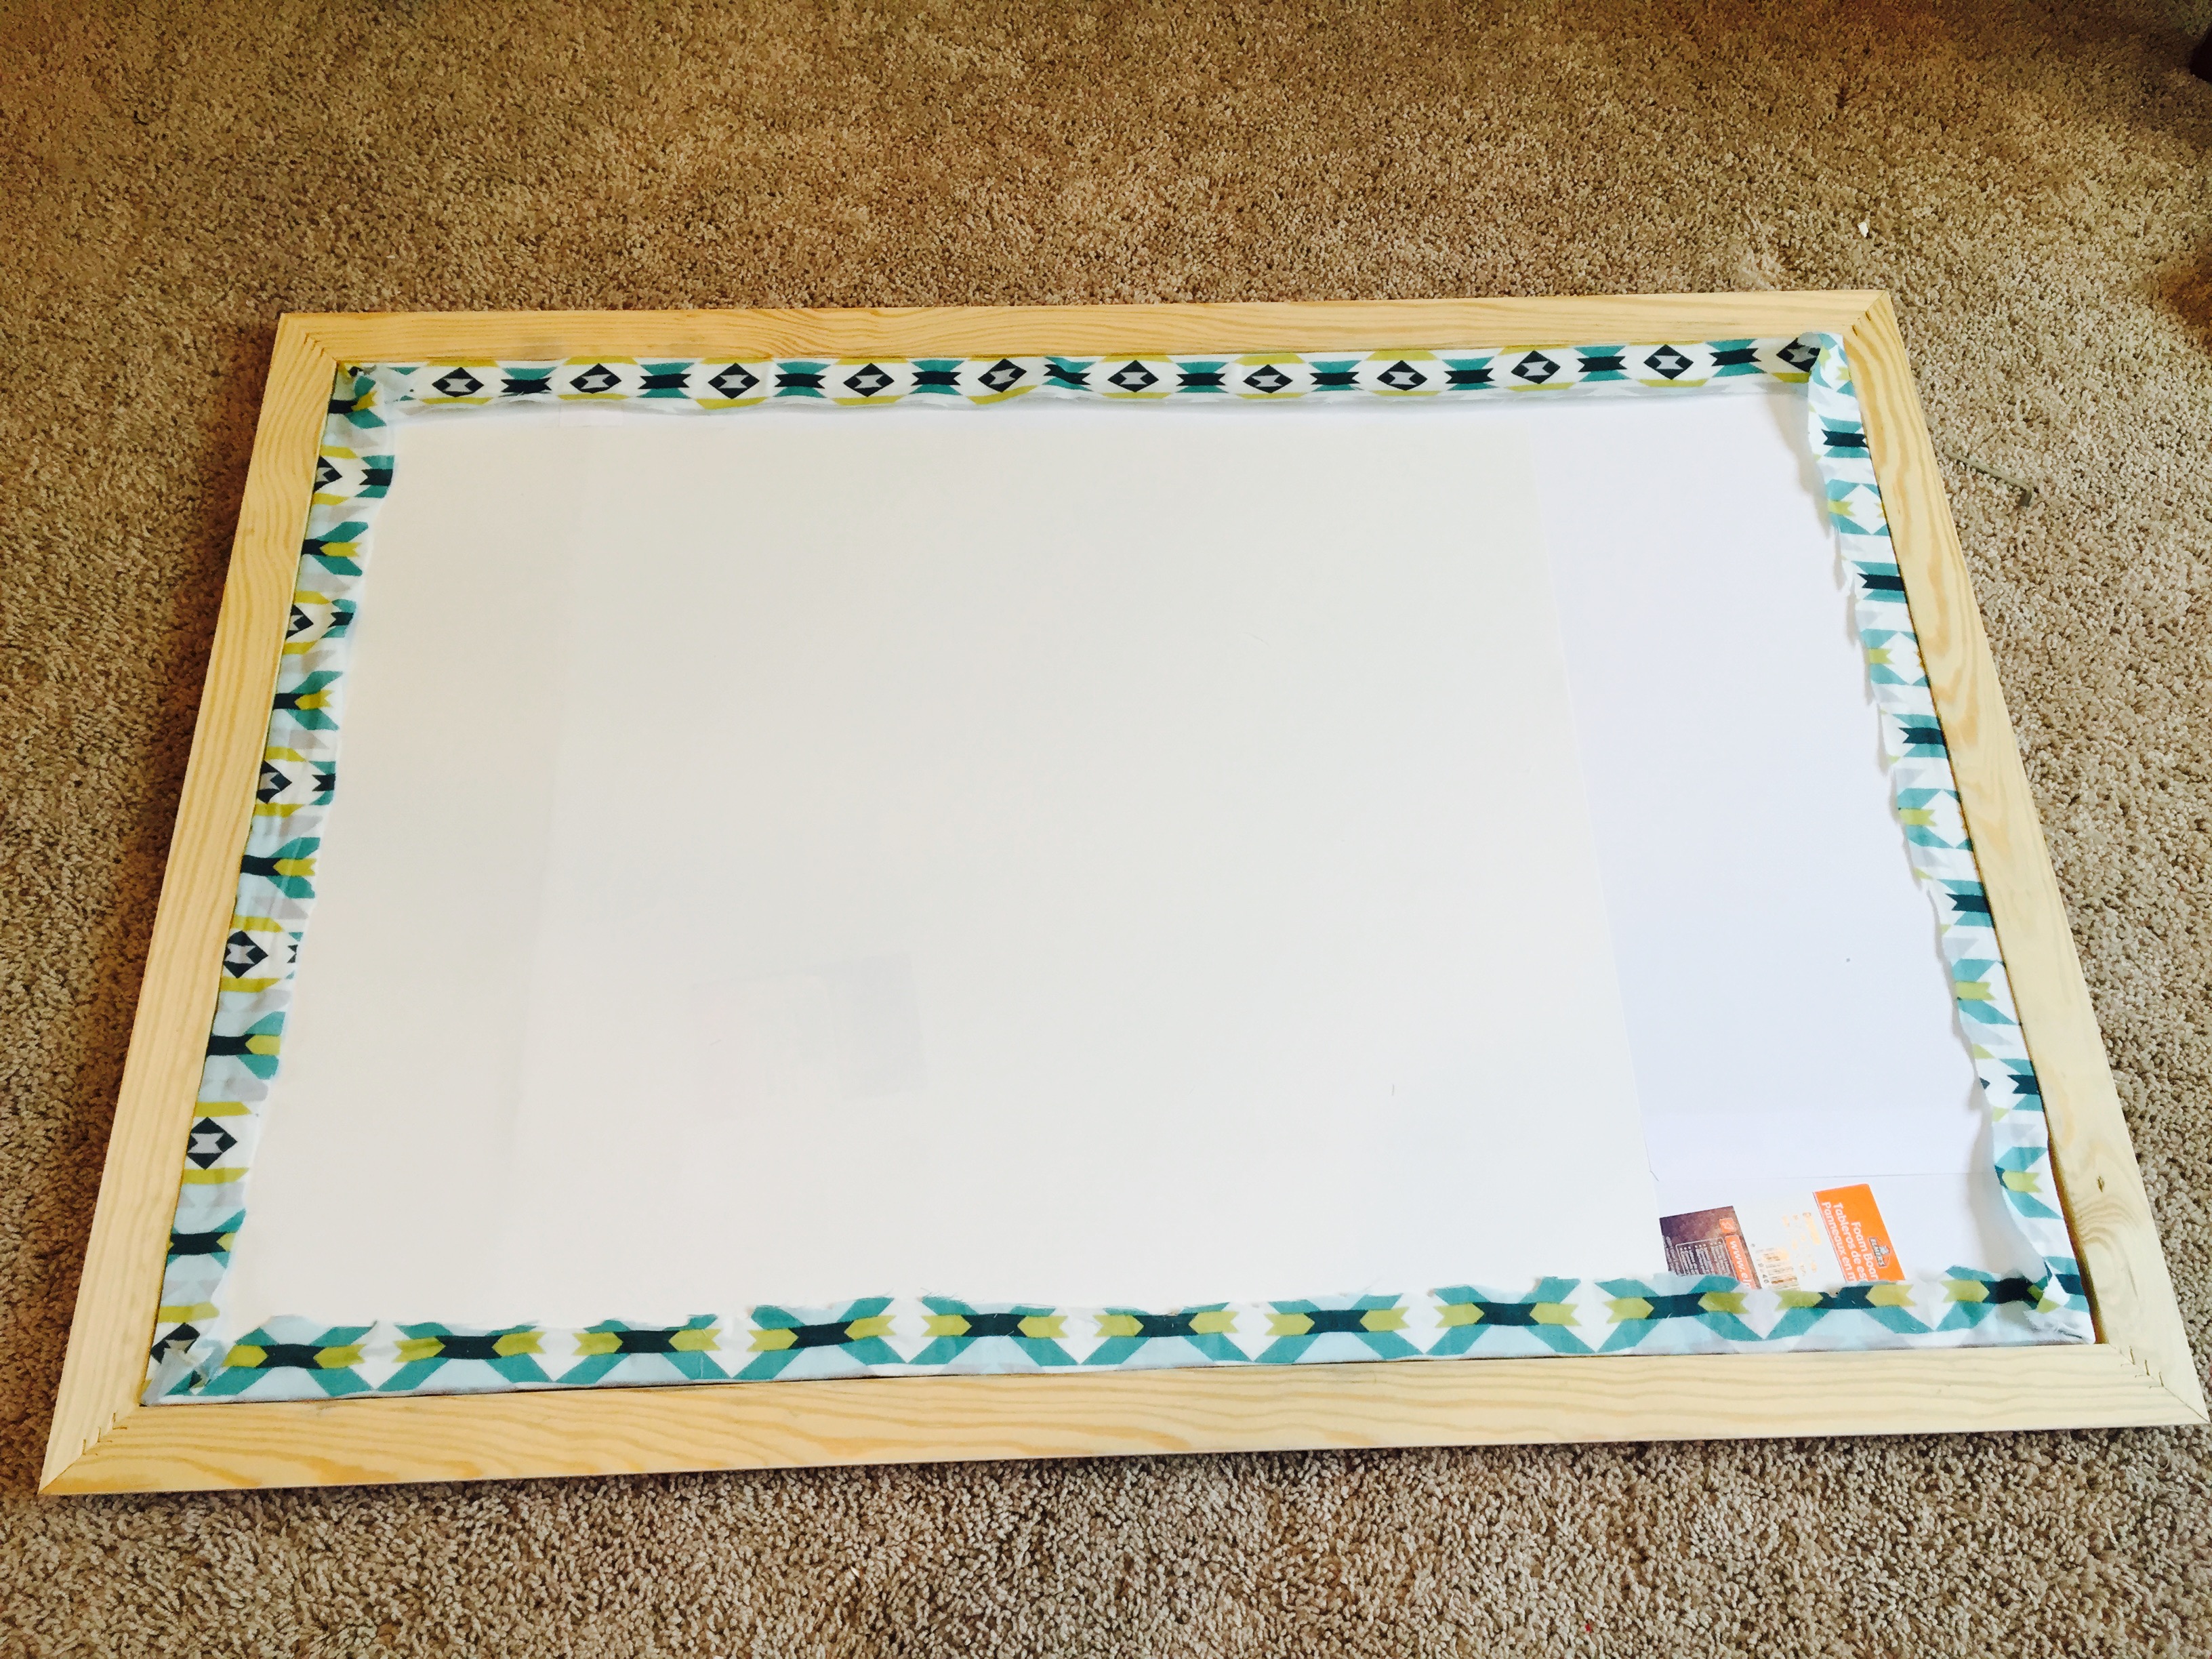
- Now that you have a full size board to use as the backdrop for your frame, put your fabric face down on the ground (so that the wrong side is up facing you).
- Spray the front of your backdrop board with spray adhesive glue, and place the board front side down on the back side of your fabric.
- Press down a bit on all sides to ensure the fabric is adhering well.
- Finally, flip the board over so that the front of the board is showing (with the right side of the fabric facing up). Smooth out any wrinkles with your hands and let the glue dry for 5-10 minutes.
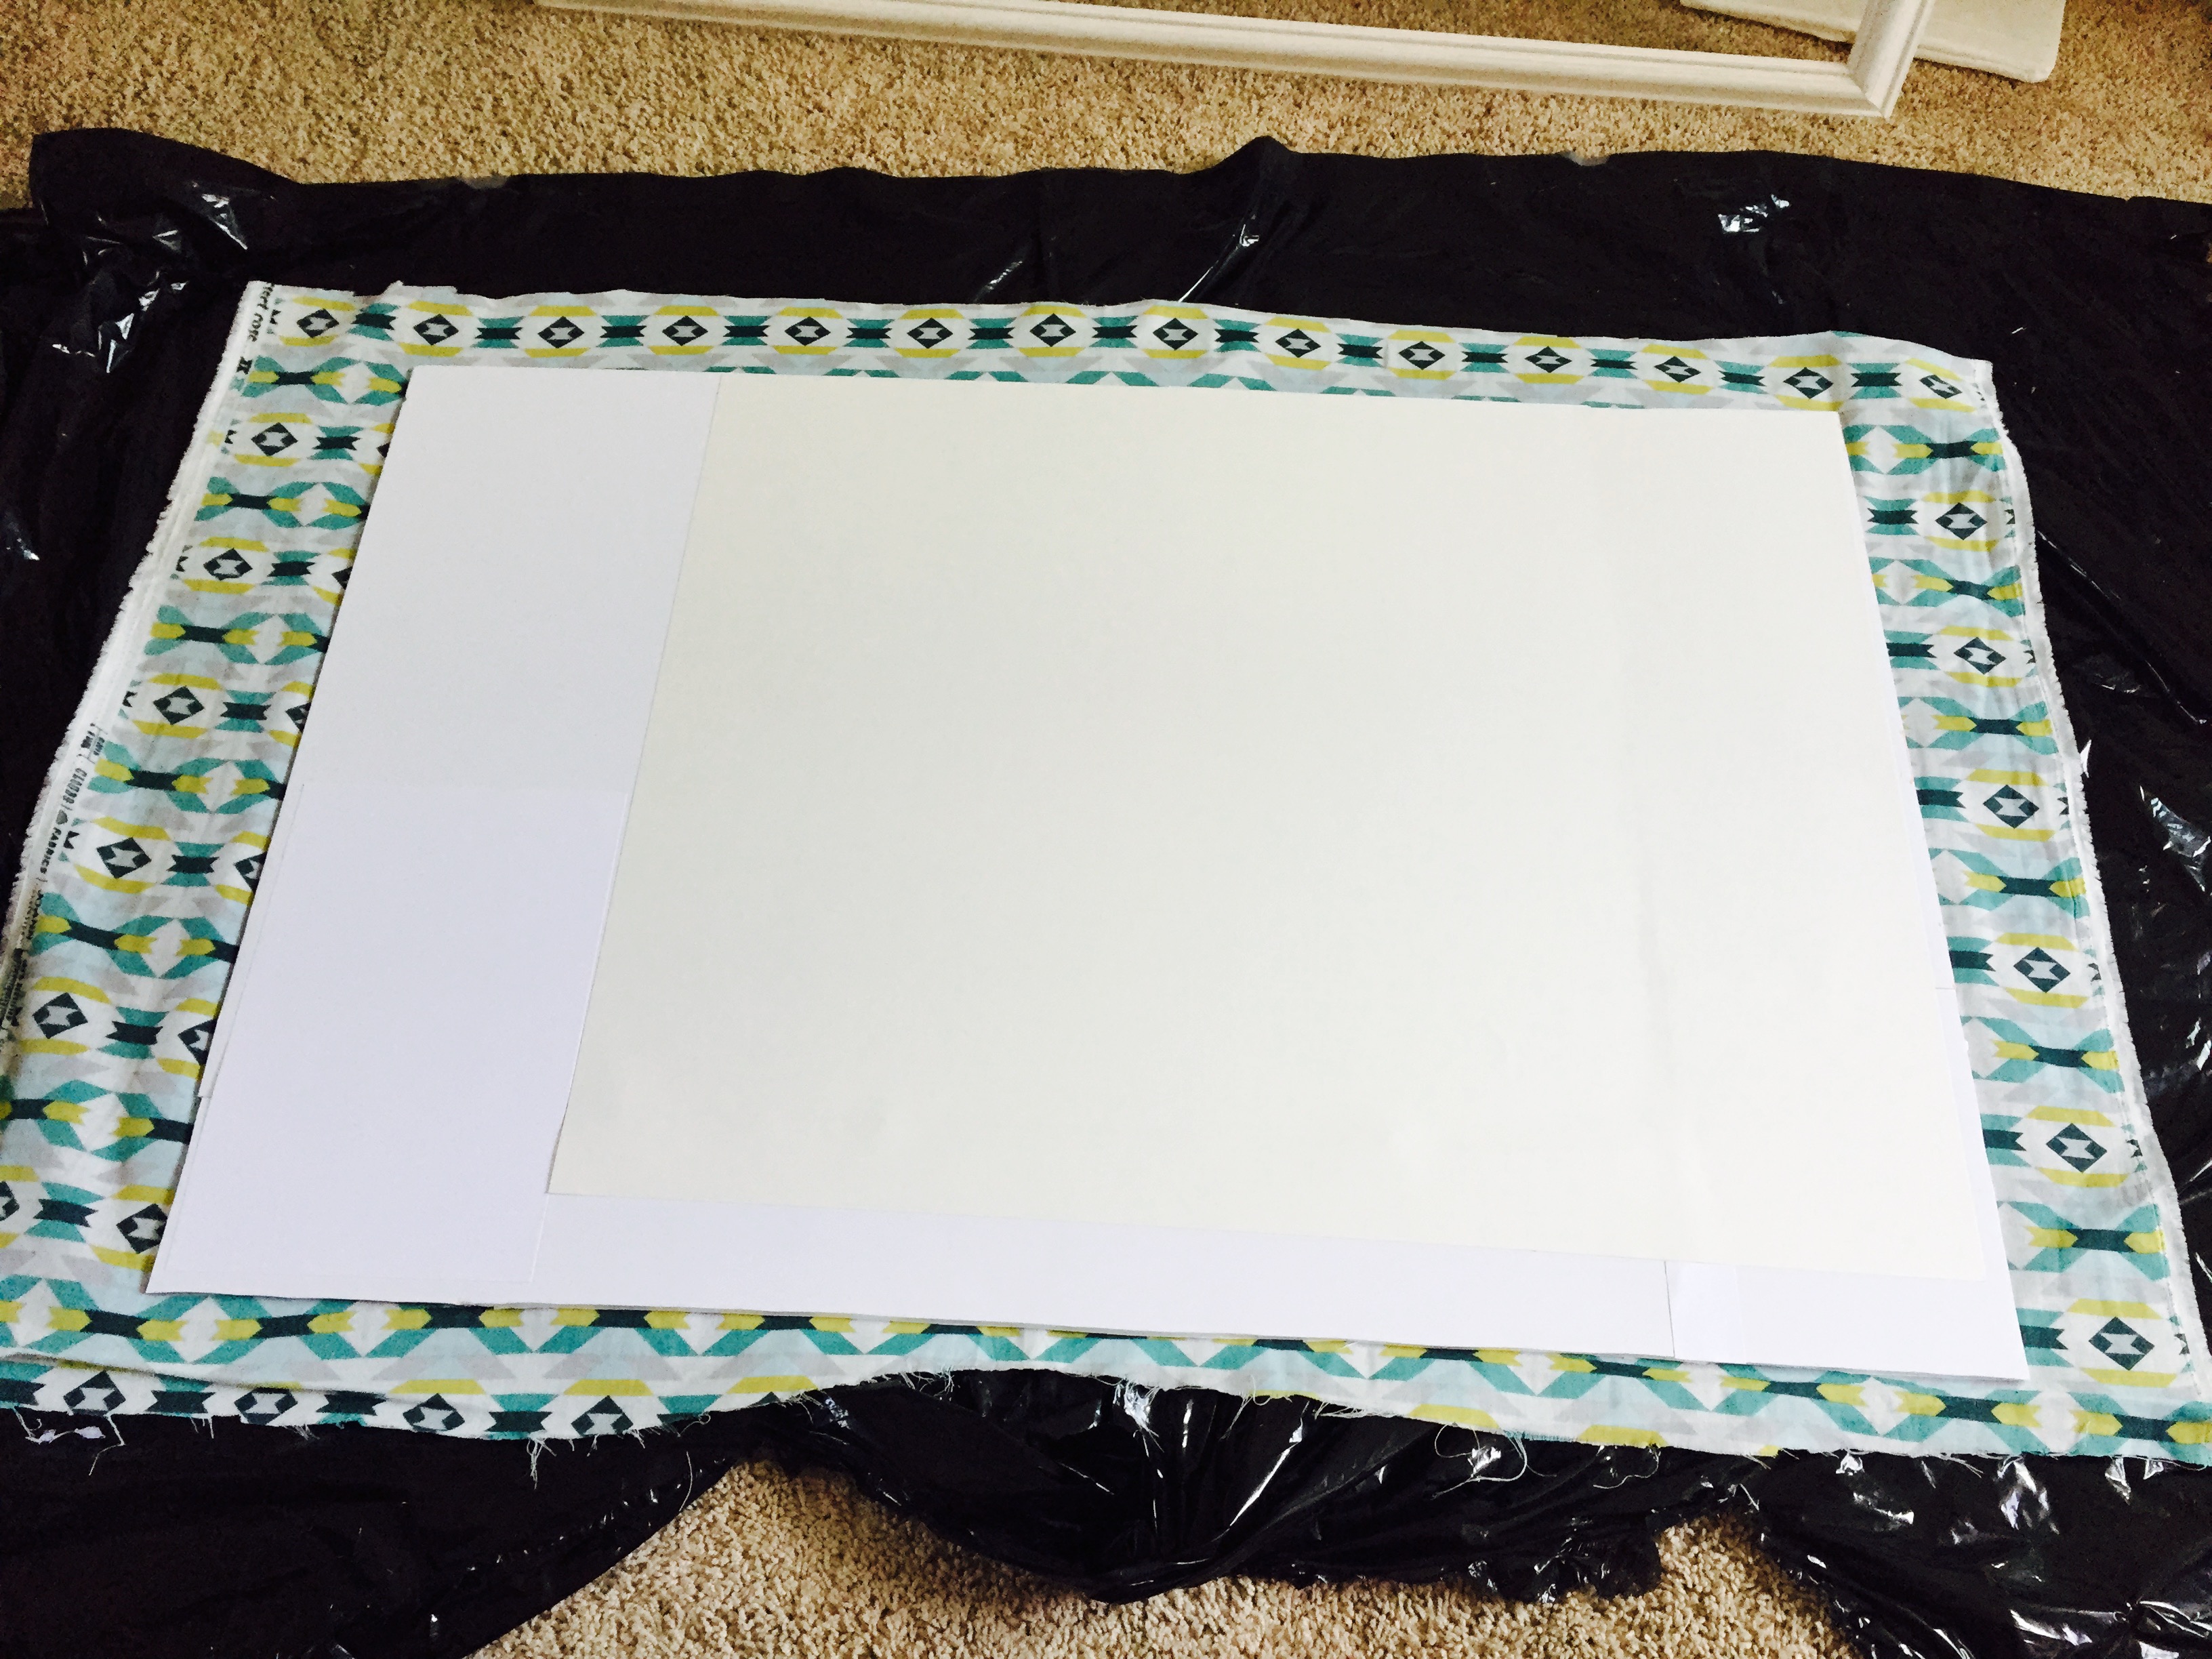
Step 3:
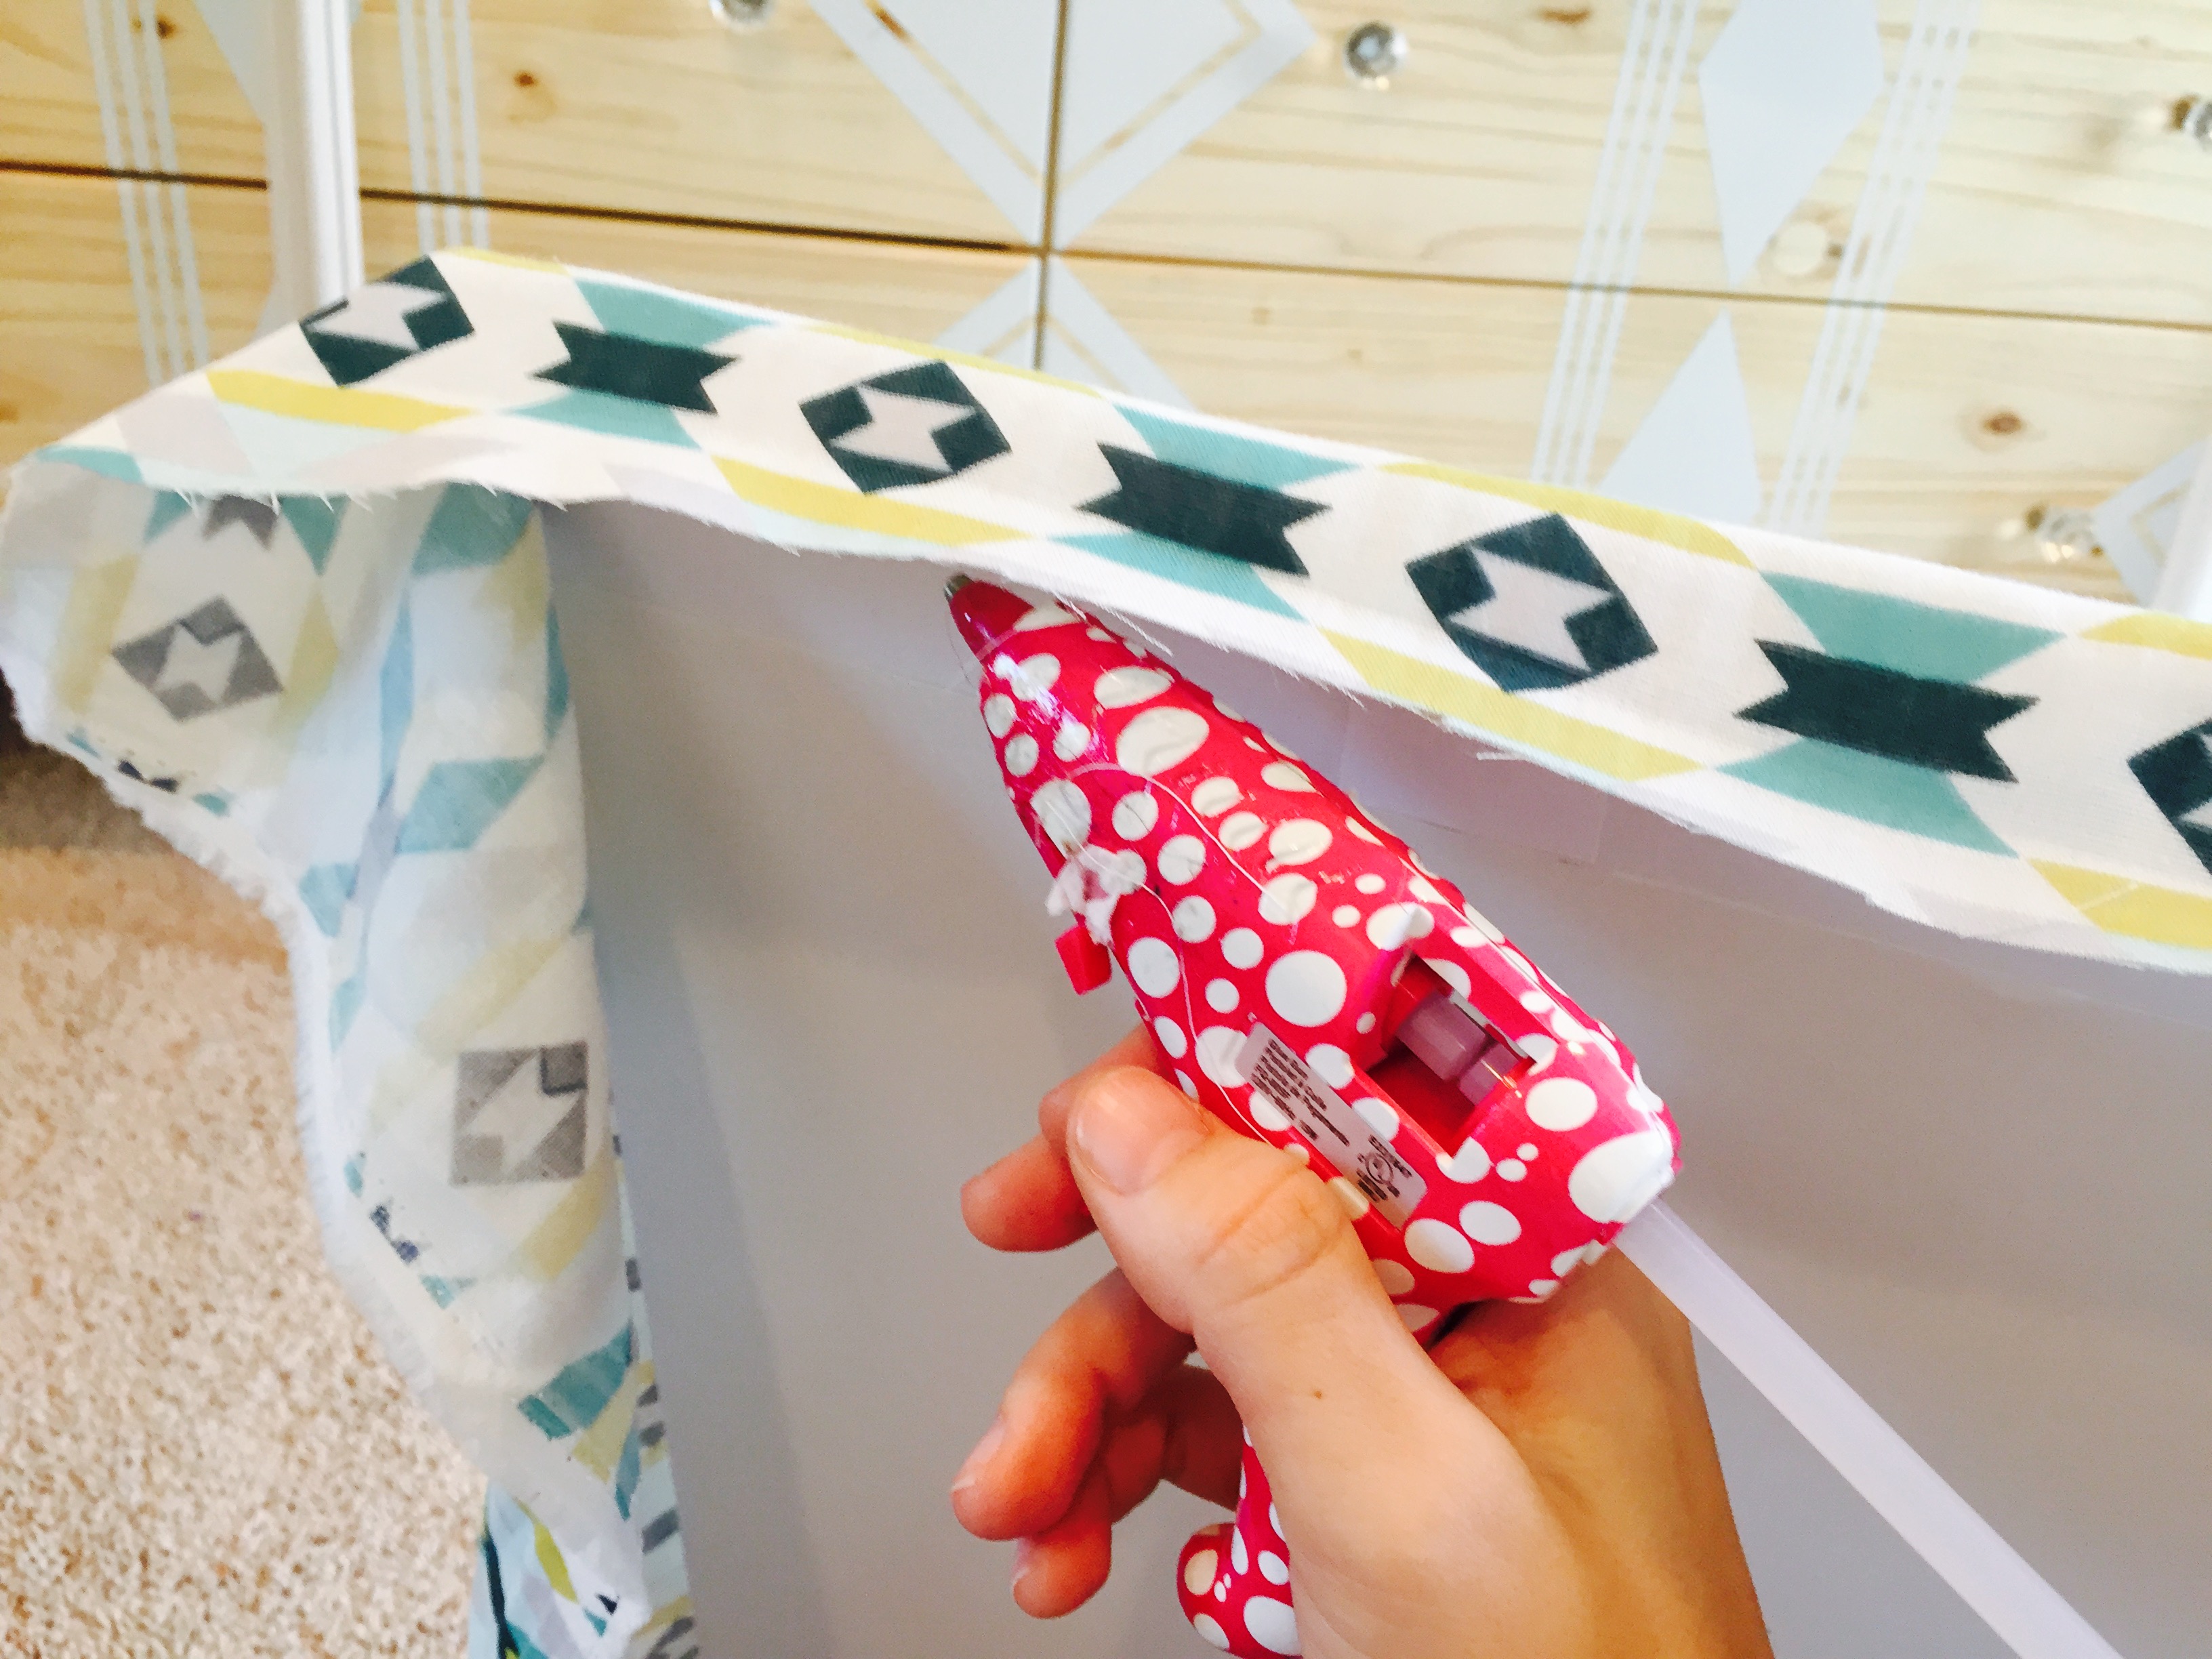
- To finish off the fabric, use your hot glue gun and glue the top, bottom, and side edges of about 2″ of the excess fabric to the back of the board.
- This will ensure that the fabric is not only adhered to the front of the board, but that it is also adhered to the back so it will have a secure hold.
Step 4:
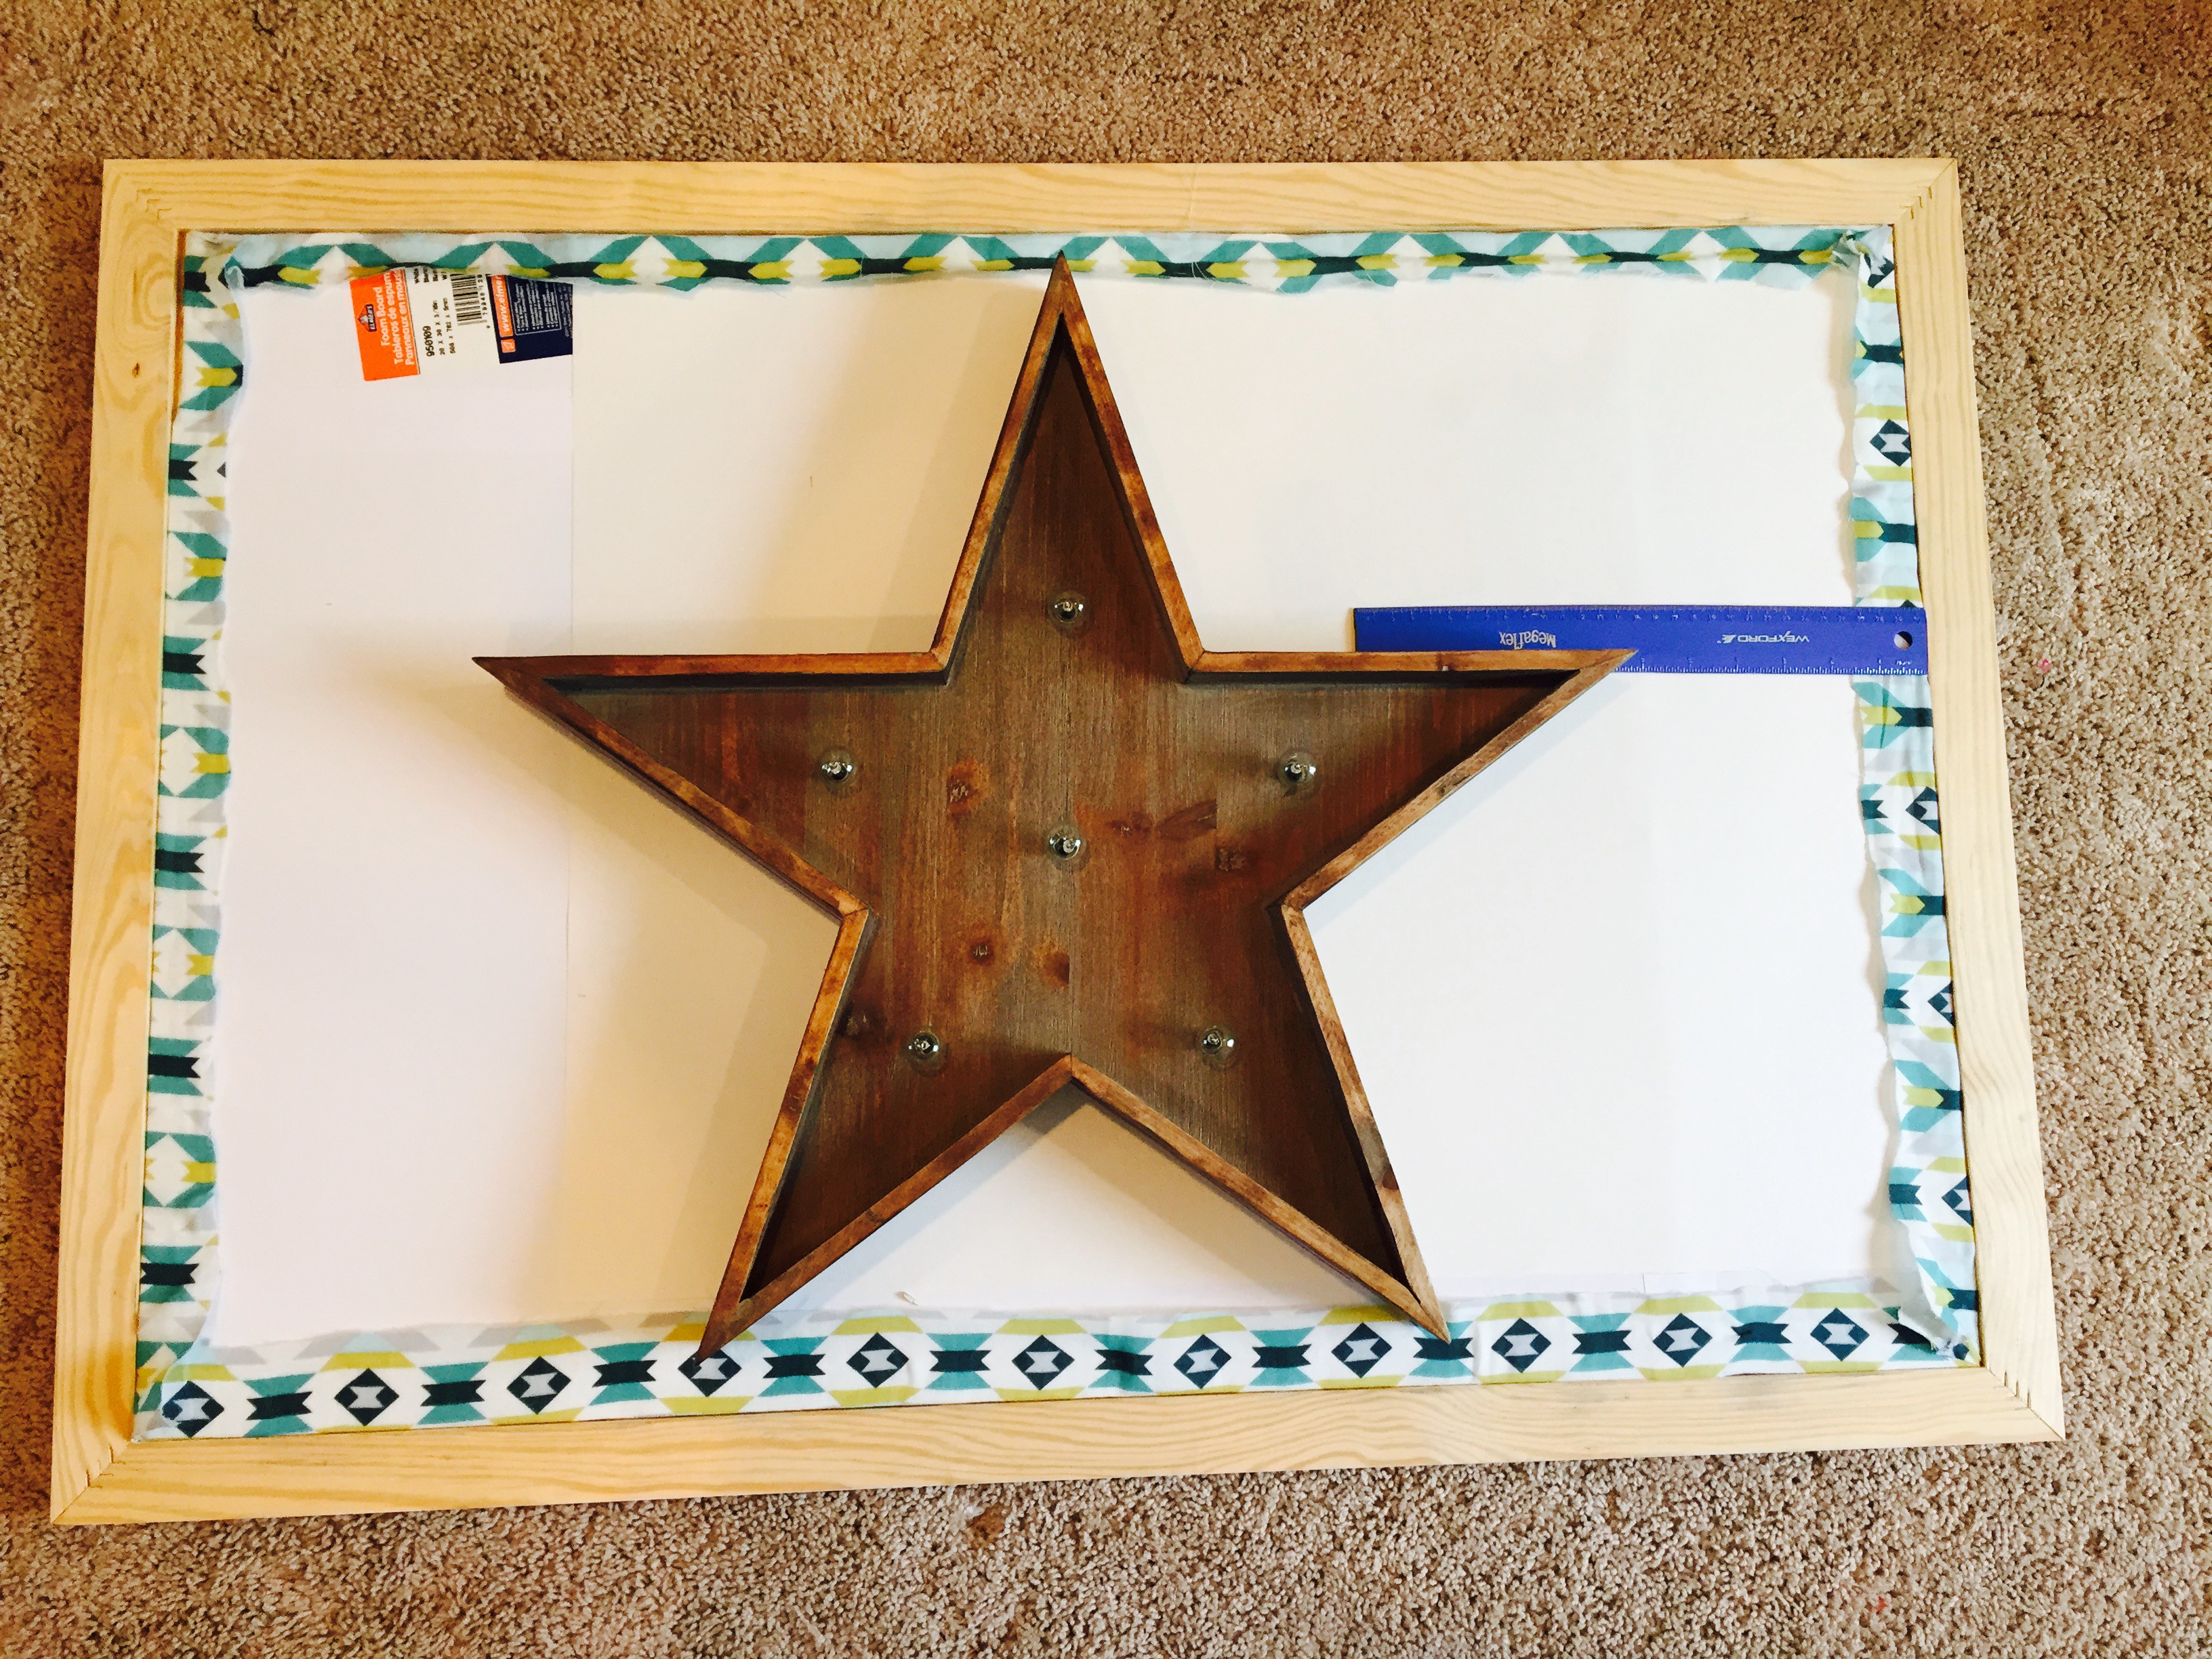


- On the back side of your board (non-fabric side) measure your star (or marquee letter) in comparison to your frame. When all sides (top, bottom, left, and right)are equidistant from their respective edges of the frame, trance your marquee light onto the board.
- Then, measure on the back of your marquee light where the mounting holes are in comparison to its edges.
- On this star, you can see that each hole is 1.25″ up from the crease of the star, and 1.31″ in from the sides.
- Now, draw where the holes fall inside the outline of your marquee light on the back of your board.
Step 5:
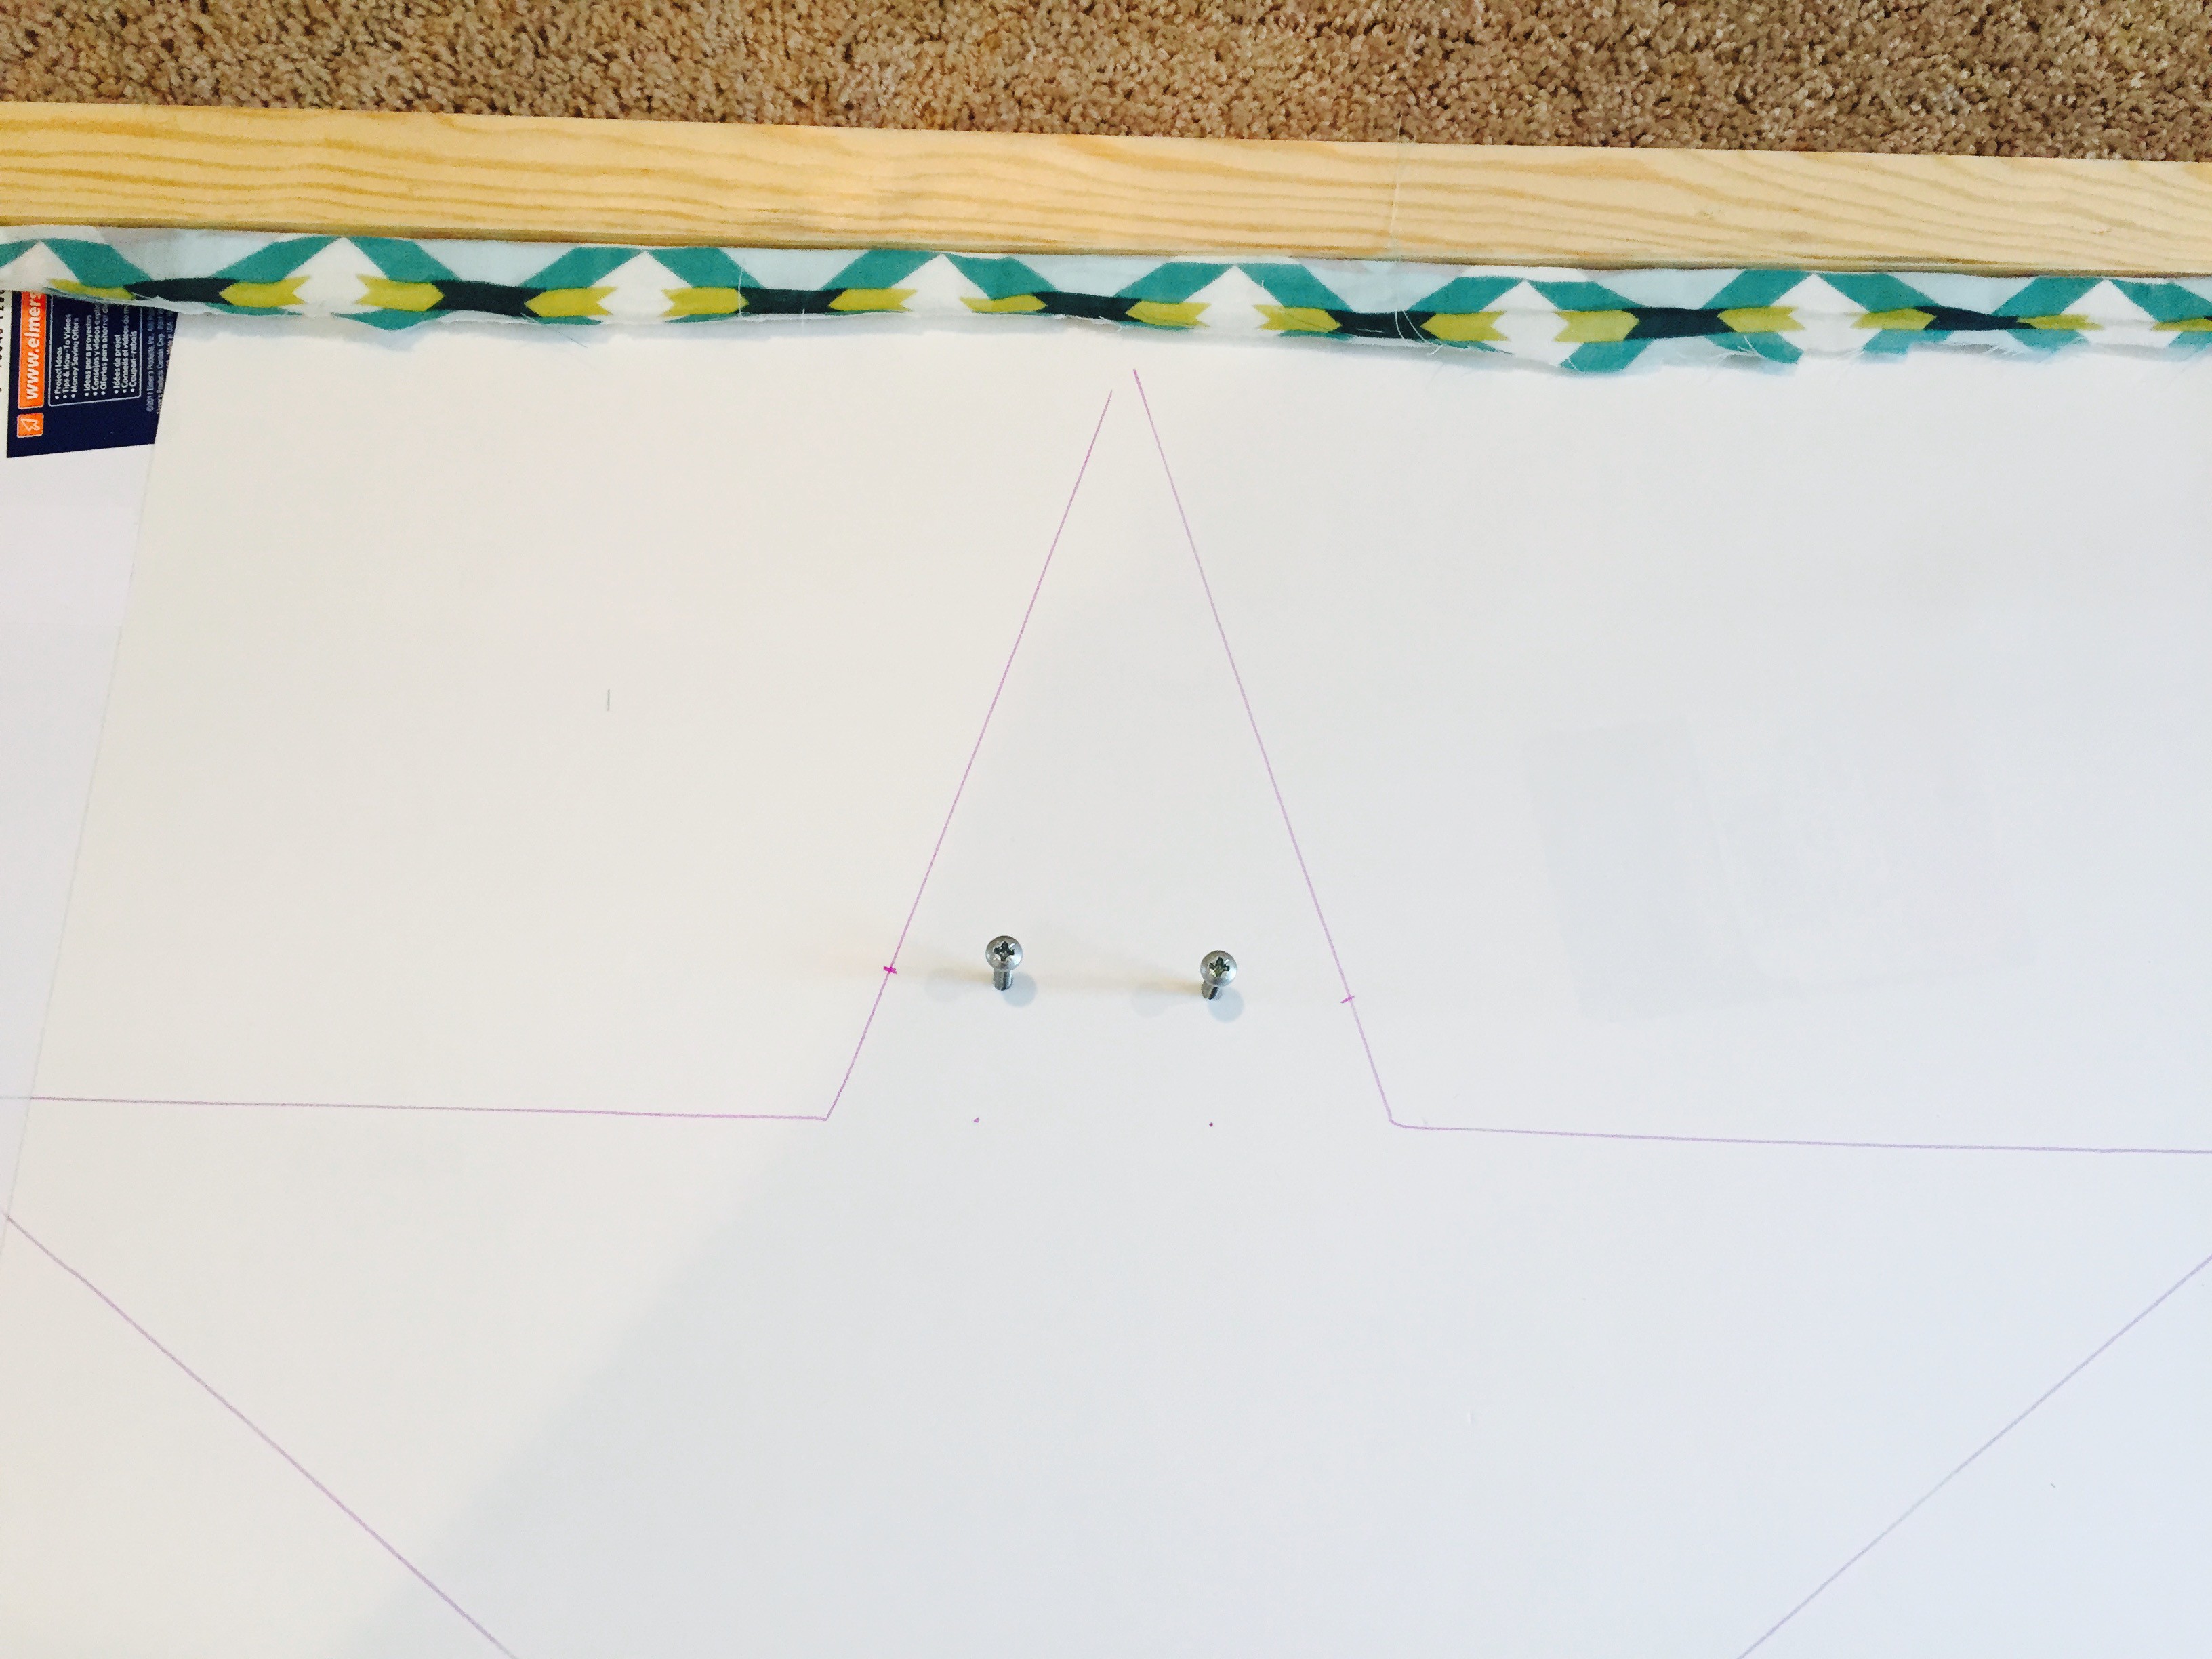
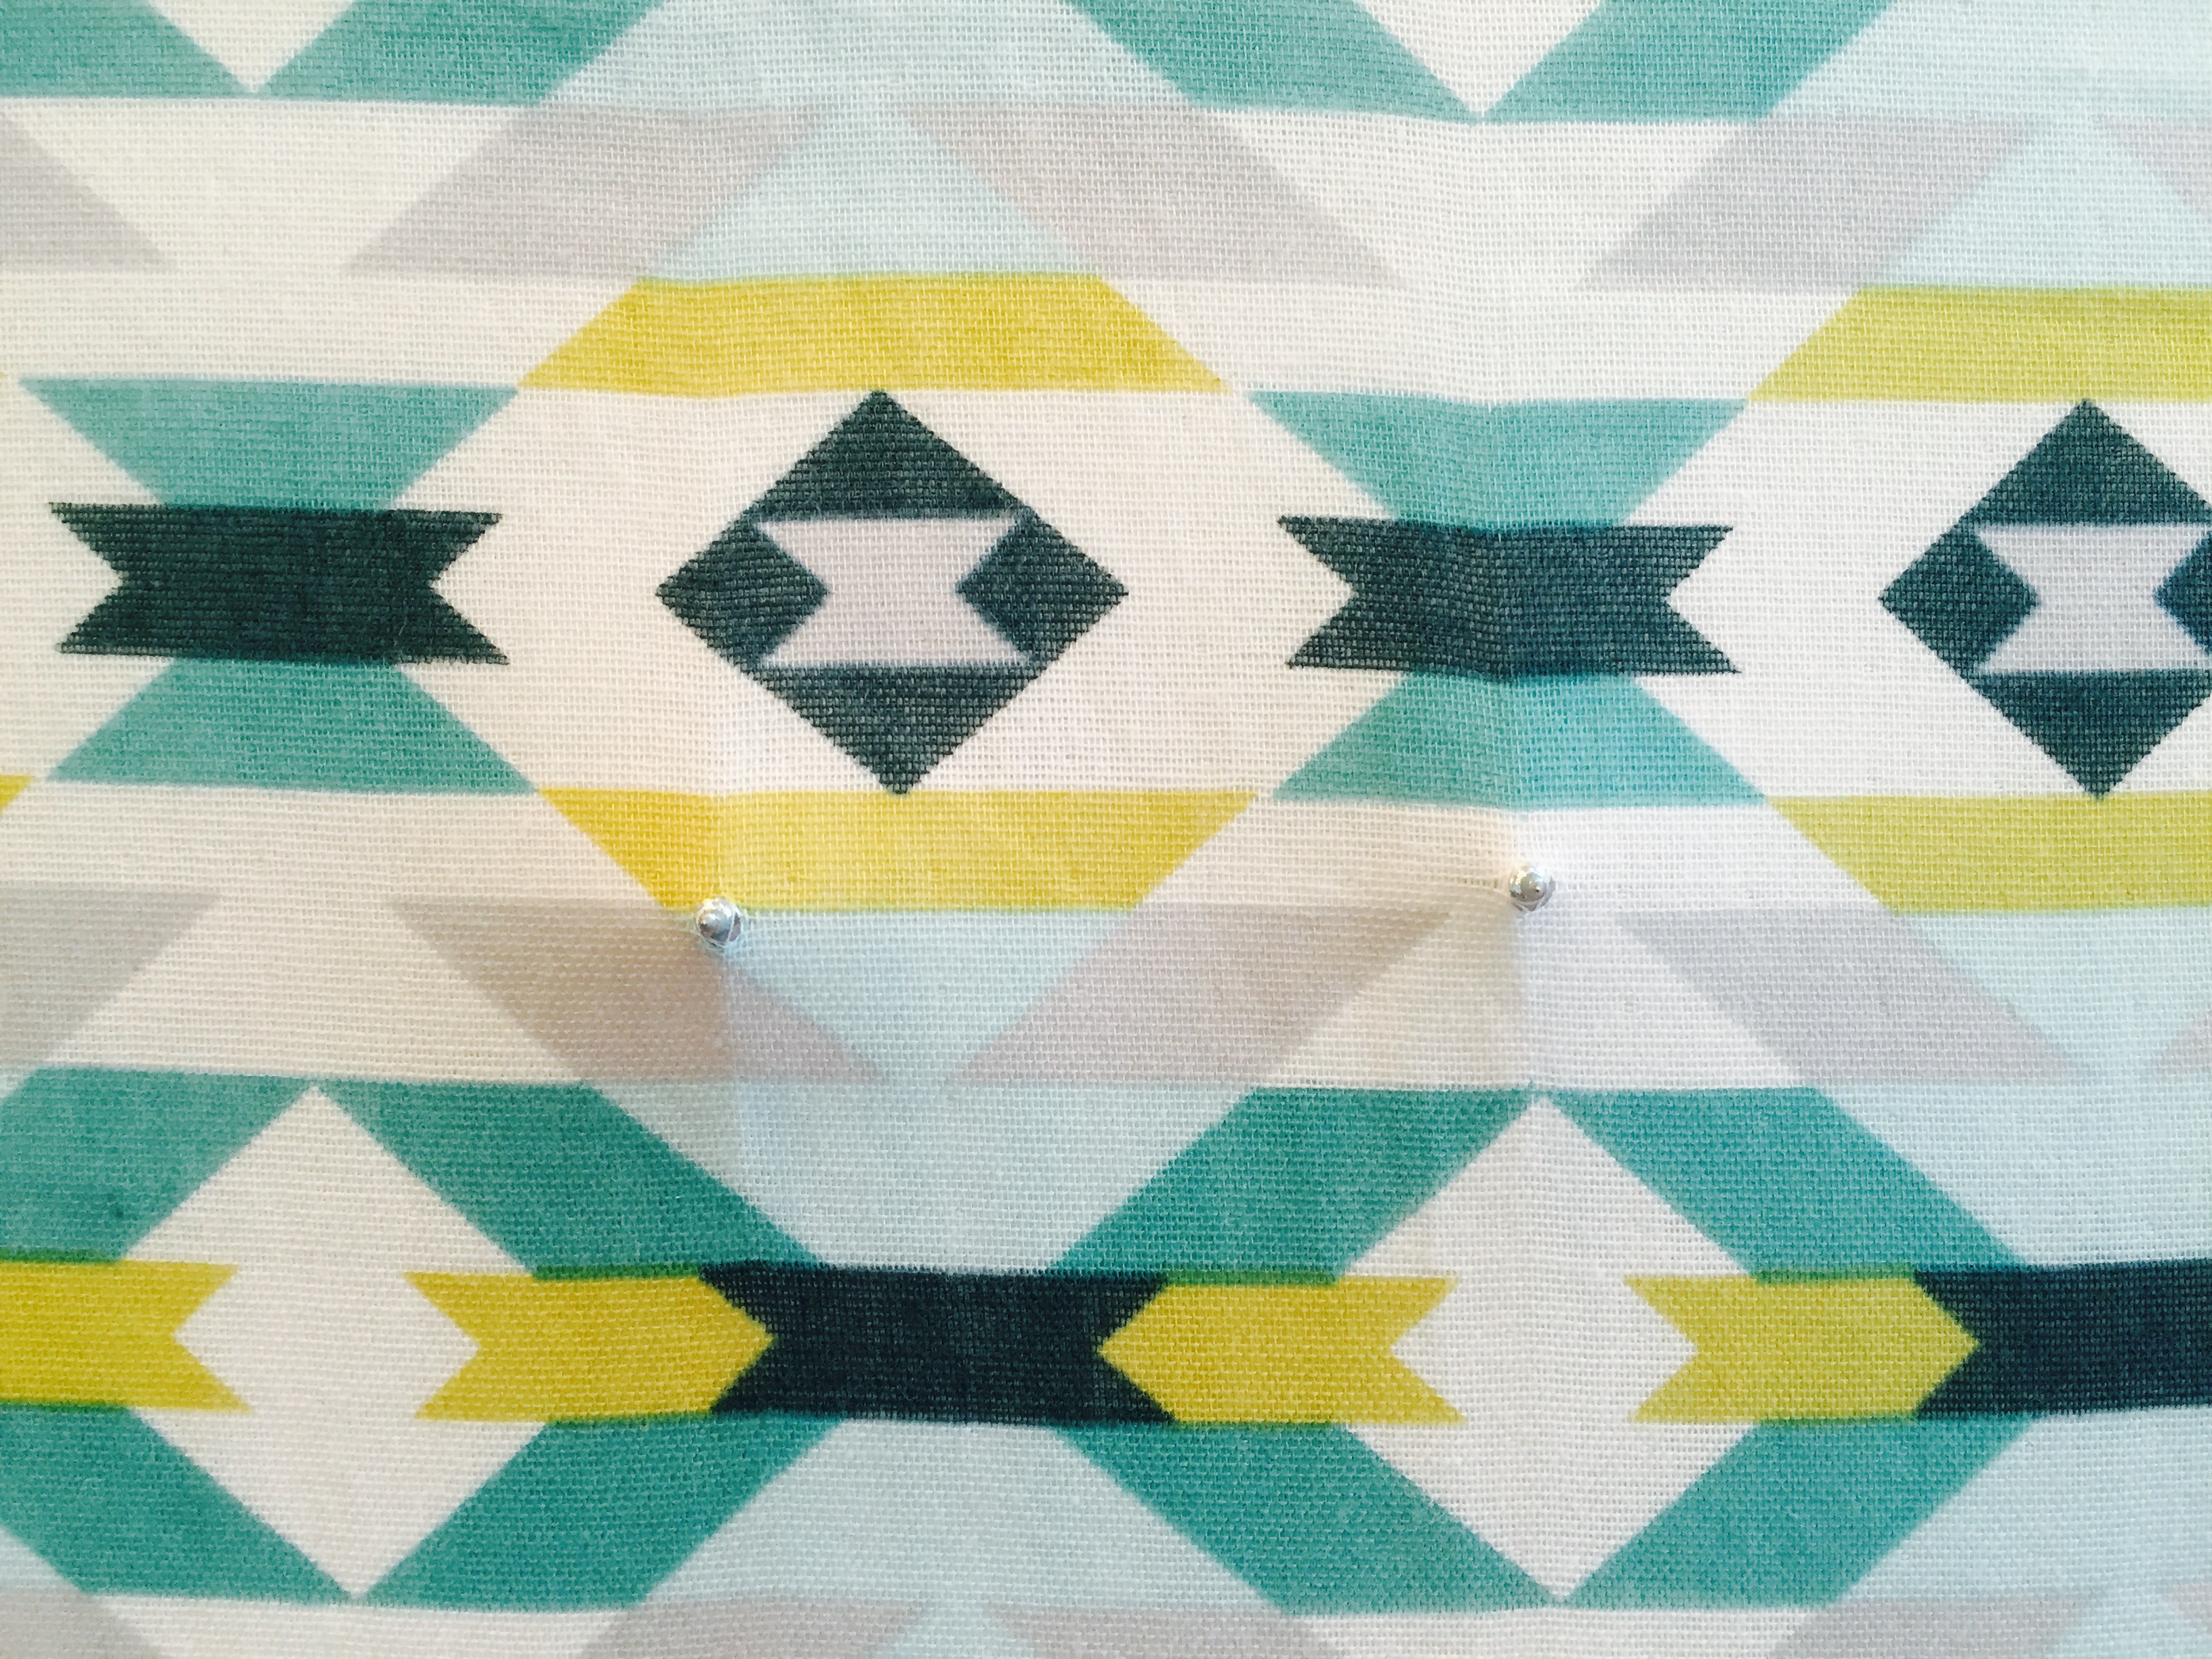
- Once you’ve drawn where you need to make the holes, take 2 screws and screw them through the back of the board all the way through the front of the board (including the fabric) exactly where you drew the hole markings.
- You can see in picture #2 how the screws will gently poke through the front of the fabric. DO NOT tear the fabric or force them to go even further through. A gentle poke is quite enough to leave a mark for you to see when hanging.
- Once finished, remove the screws from the back and place them through the front – again, gently.
Step 6:
- Finally, measure exactly where you’d like to hang your frame on your wall.
- If you need help with hanging frames, head to my gallery wall tutorial. I go in depth how to measure a wall so your frame hangs exactly where you want it to.
- Align your frame exactly where you’d like it to hang, and nail a couple nails into the wall where the mounting hardware is on your frame. This will keep the frame hung up nice and straight.
- Now, hang your frame and mat – WITHOUT your marquee light attached.
- Now, push the 2 screws you’ve moved to the front of the board into the wall, just so they make enough of a dent for you to see. Then remove your frame and mat.
- Lastly, where you see the screw indentations, hammer in wall anchors into your wall. Then re-hang the frame, and screw the screws into the front of the mat and into the wall where you’ve inserted the wall anchors (if you’ve aligned everything correctly, you should be able to feel the wall anchors from the front when screwing your screws in place.
- Now, you can hang your marquee light!
And ta da!! It sounds complicated, but is actually quite simple. For this, you just need to be patient, and diligent with precise measurements. If you take your time with measuring and use a level to make sure everything is straight, you should be able to walk through these steps no problem!
Now, if you’re looking for something a little less complicated, this second tutorial is for you. And it’s more versatile, too! Imagine being able to custom frame ANYTHING you want. Really, ANYTHING. All you need is the frame, a frame mat (you could even make the mat yourself using the foam board we used above, if you have an odd shaped picture), and some fabric.
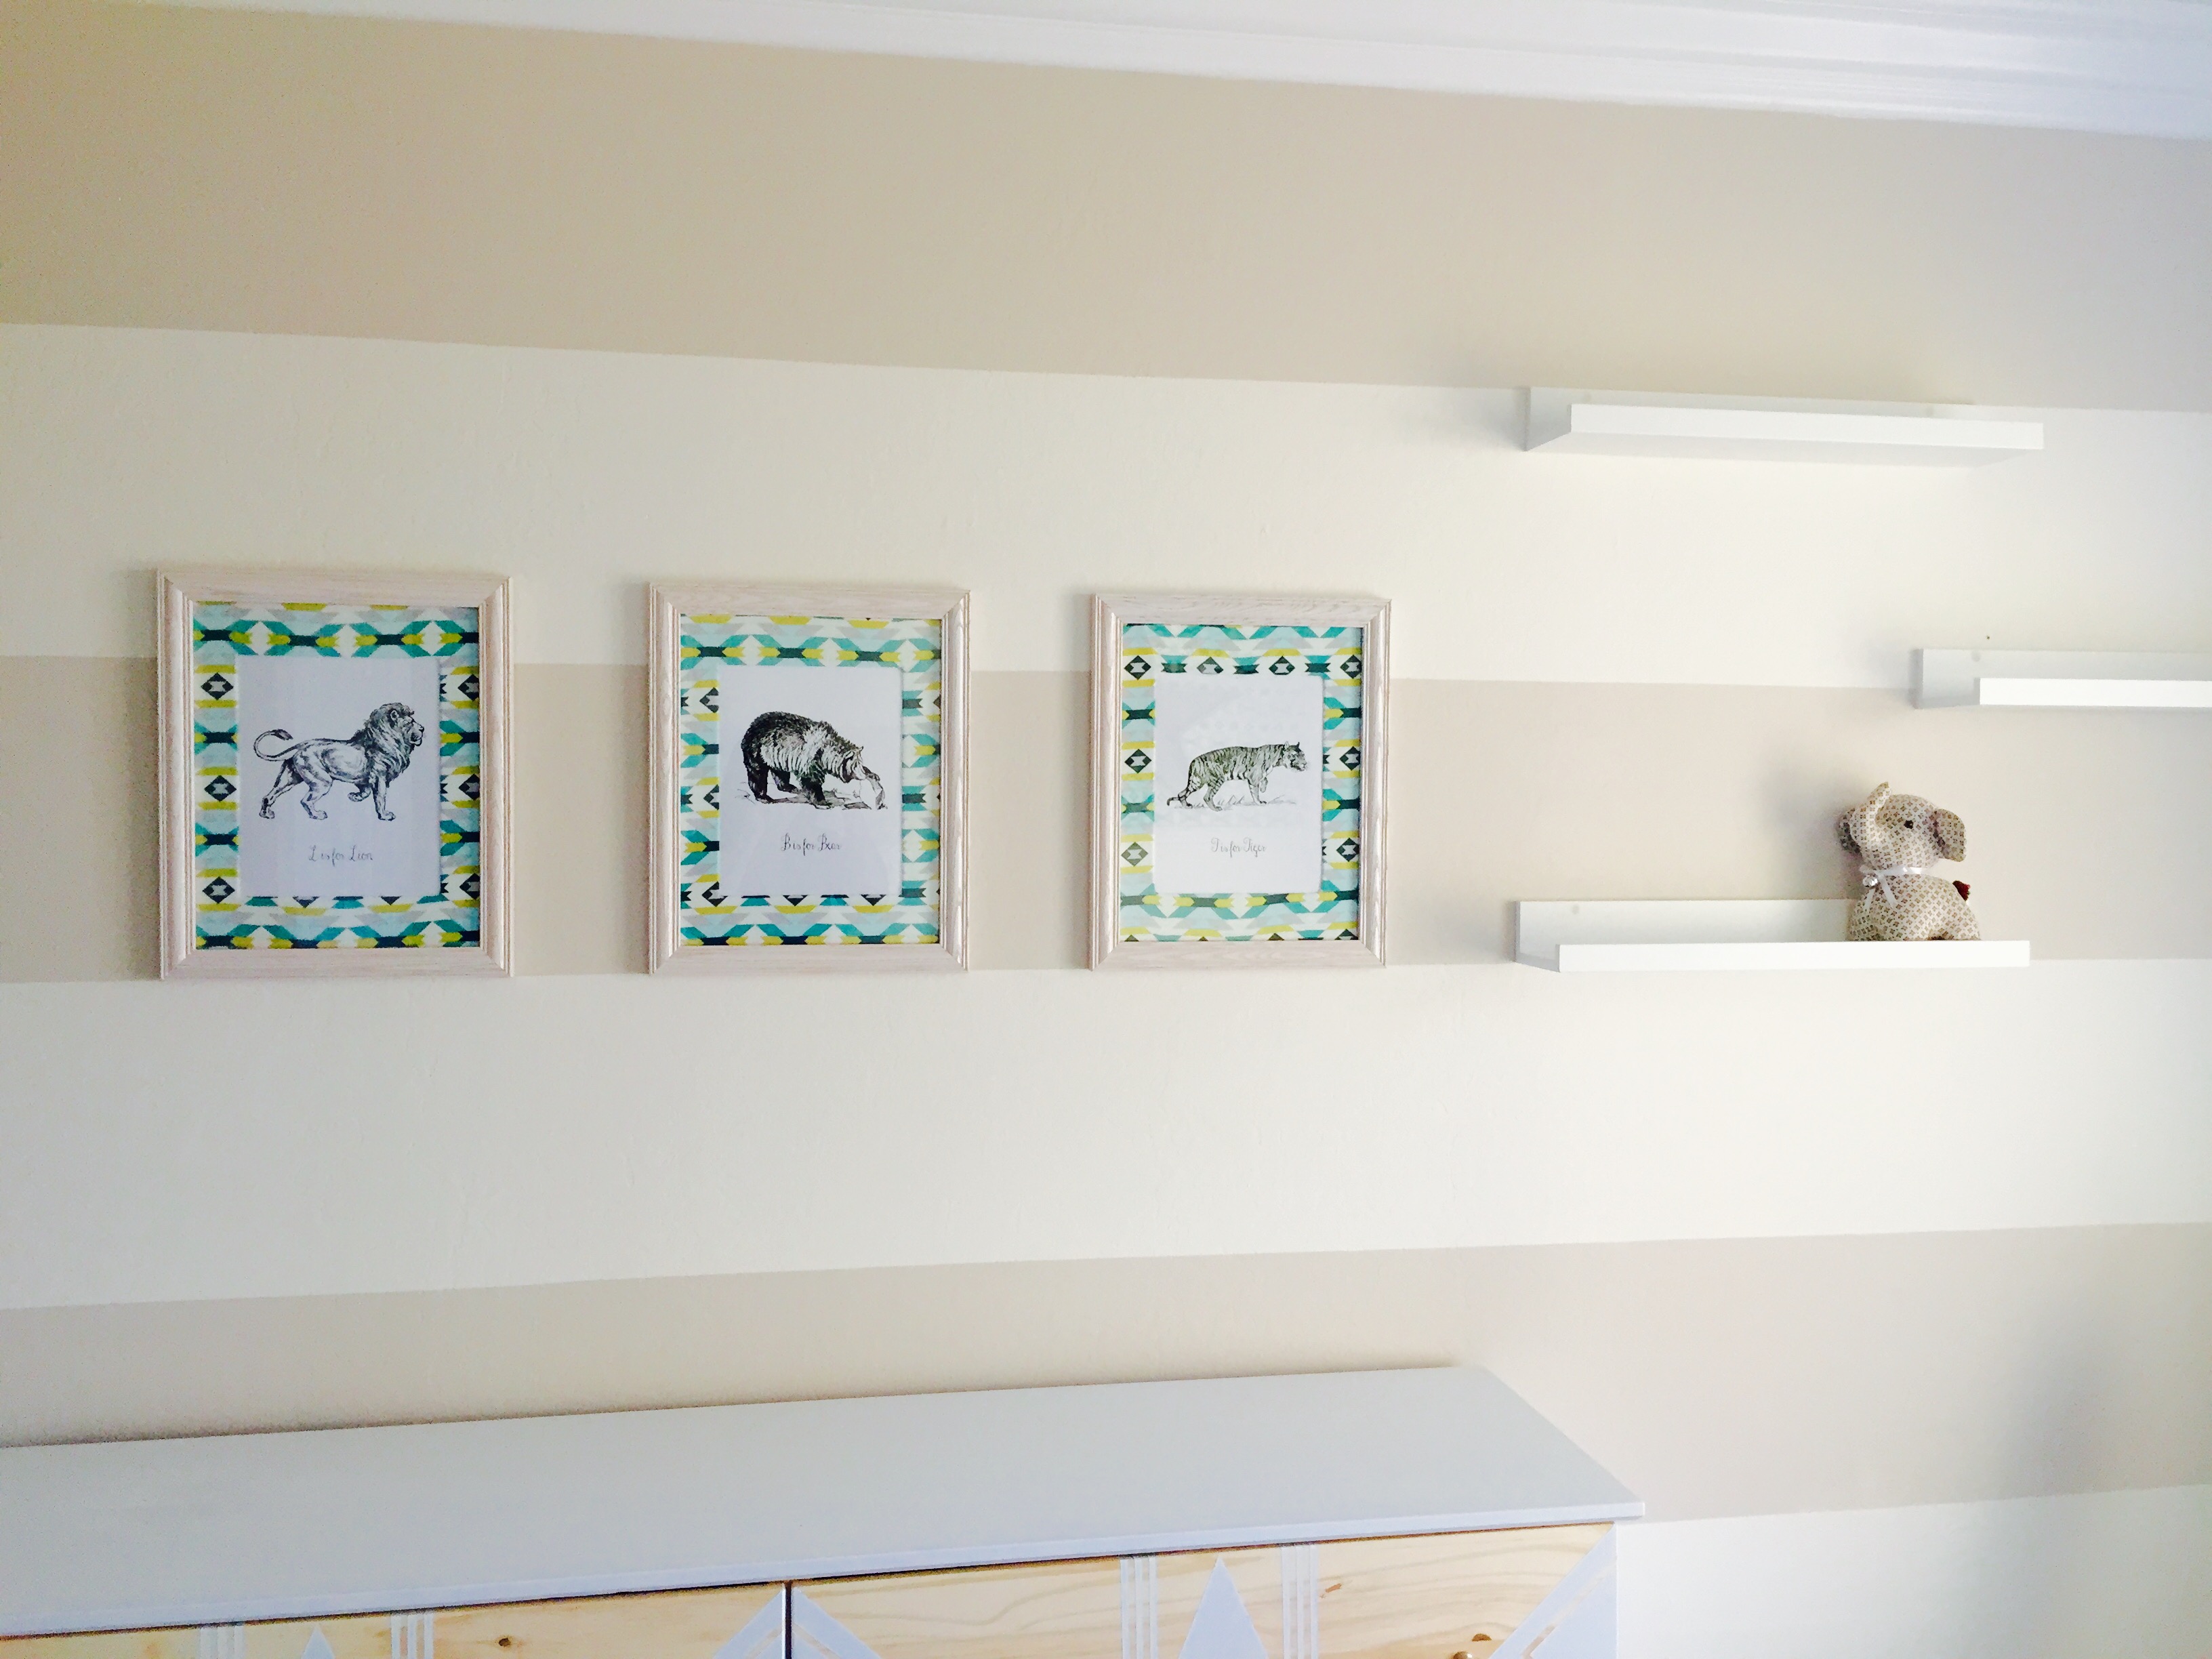
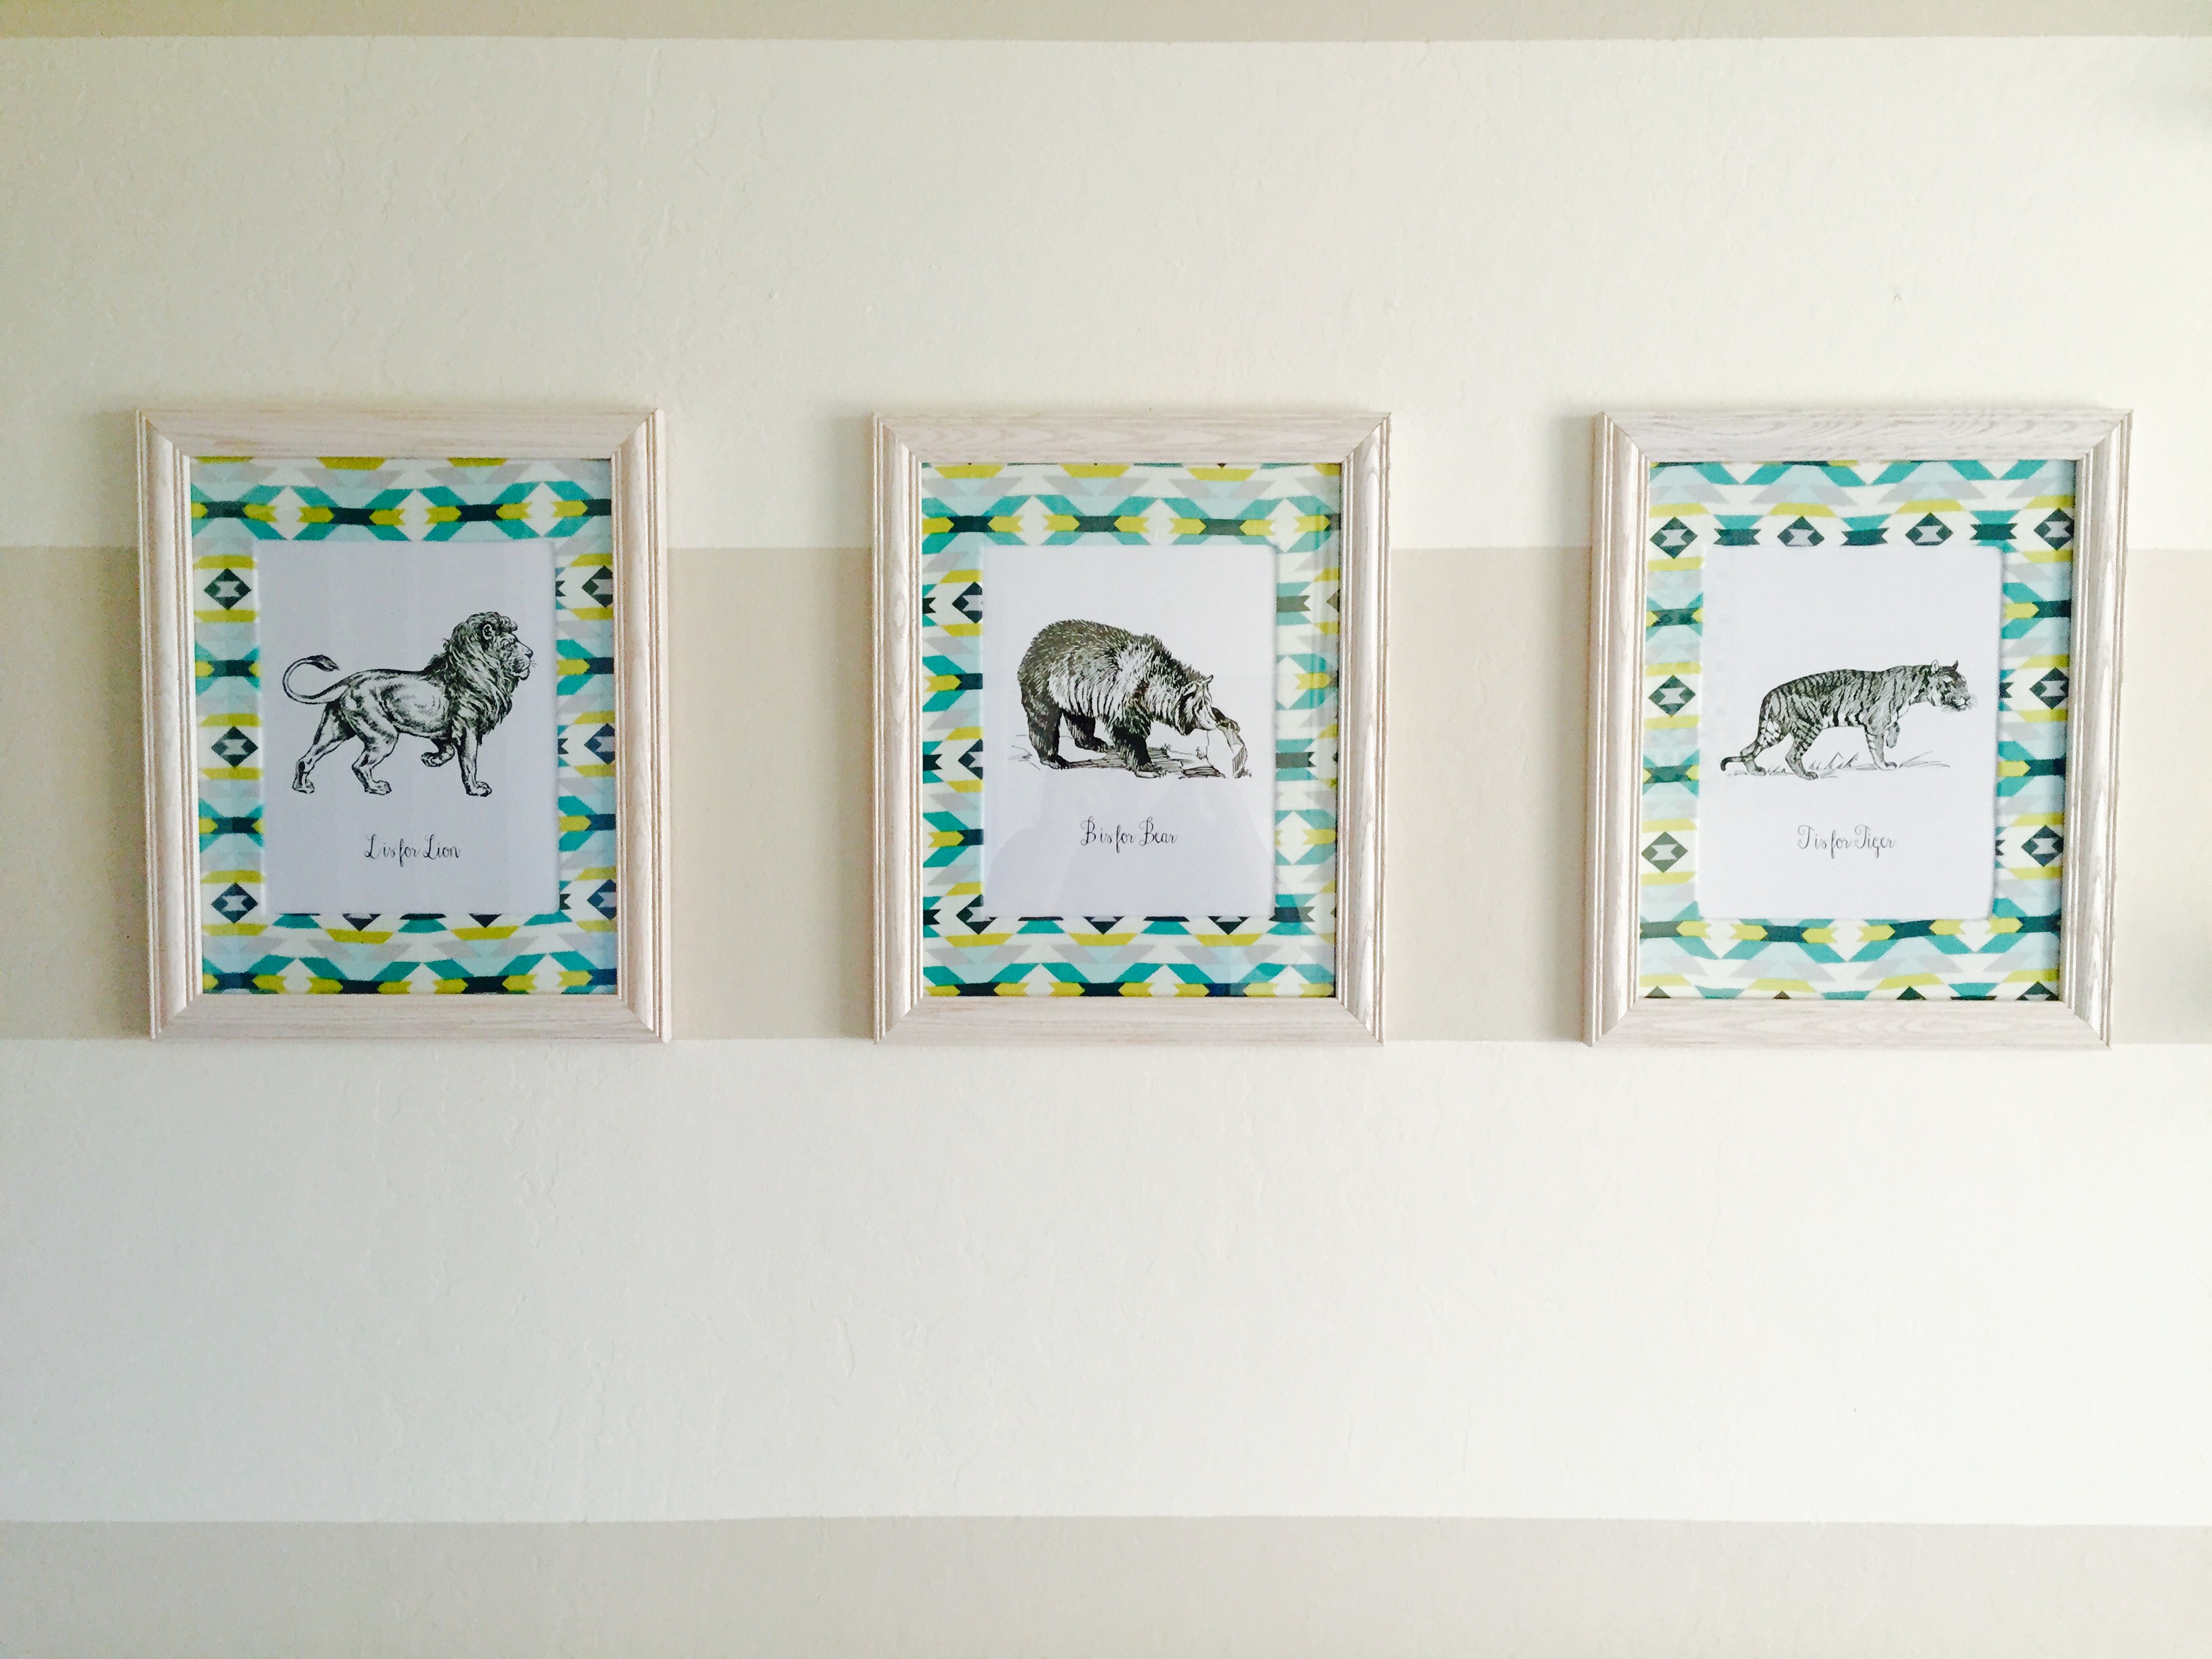
For lil’ man’s room, I wanted to use the same fabric I used for the marquee backdrop to make a cohesive look. I also used the same frames, just in smaller sizes.
But this time, I was actually framing drawings of wilderness animals.. lions and tigers and bears, oh my! Hehe 🙂 And I was able to custom make the photo mats to match the marquee backdrop and bring a cohesive look to the wall decor around the room.
So if you’re looking for a quick way to make your pictures stand out, this second tutorial is for you!
DIY Custom Photo Mat – TRADITIONAL FRAME Style
The Necessary Supplies:
- 11×14″ Whitewash Pine Picture Frames (I used 3)
- These need glass and a backing. Everything needed is included in the link above.
- 11×14″ to fit 8×10″ picture mats (I used 3)
- Leftover fabric from above (or 1/2 yard of new fabric)
- Adhesive mounting spray
- Glue gun and glue
- Nails (to mount frames on wall) and hammer
Step 1:
- Proceed as explained in Step 2 above, spraying the front of your photo mat with adhesive glue spray and placing it adhesive side down on the back side of a piece of fabric.
- Once adhered to the front, use your hot glue gun to glue the excess edges of the fabric to the back of the photo mat.
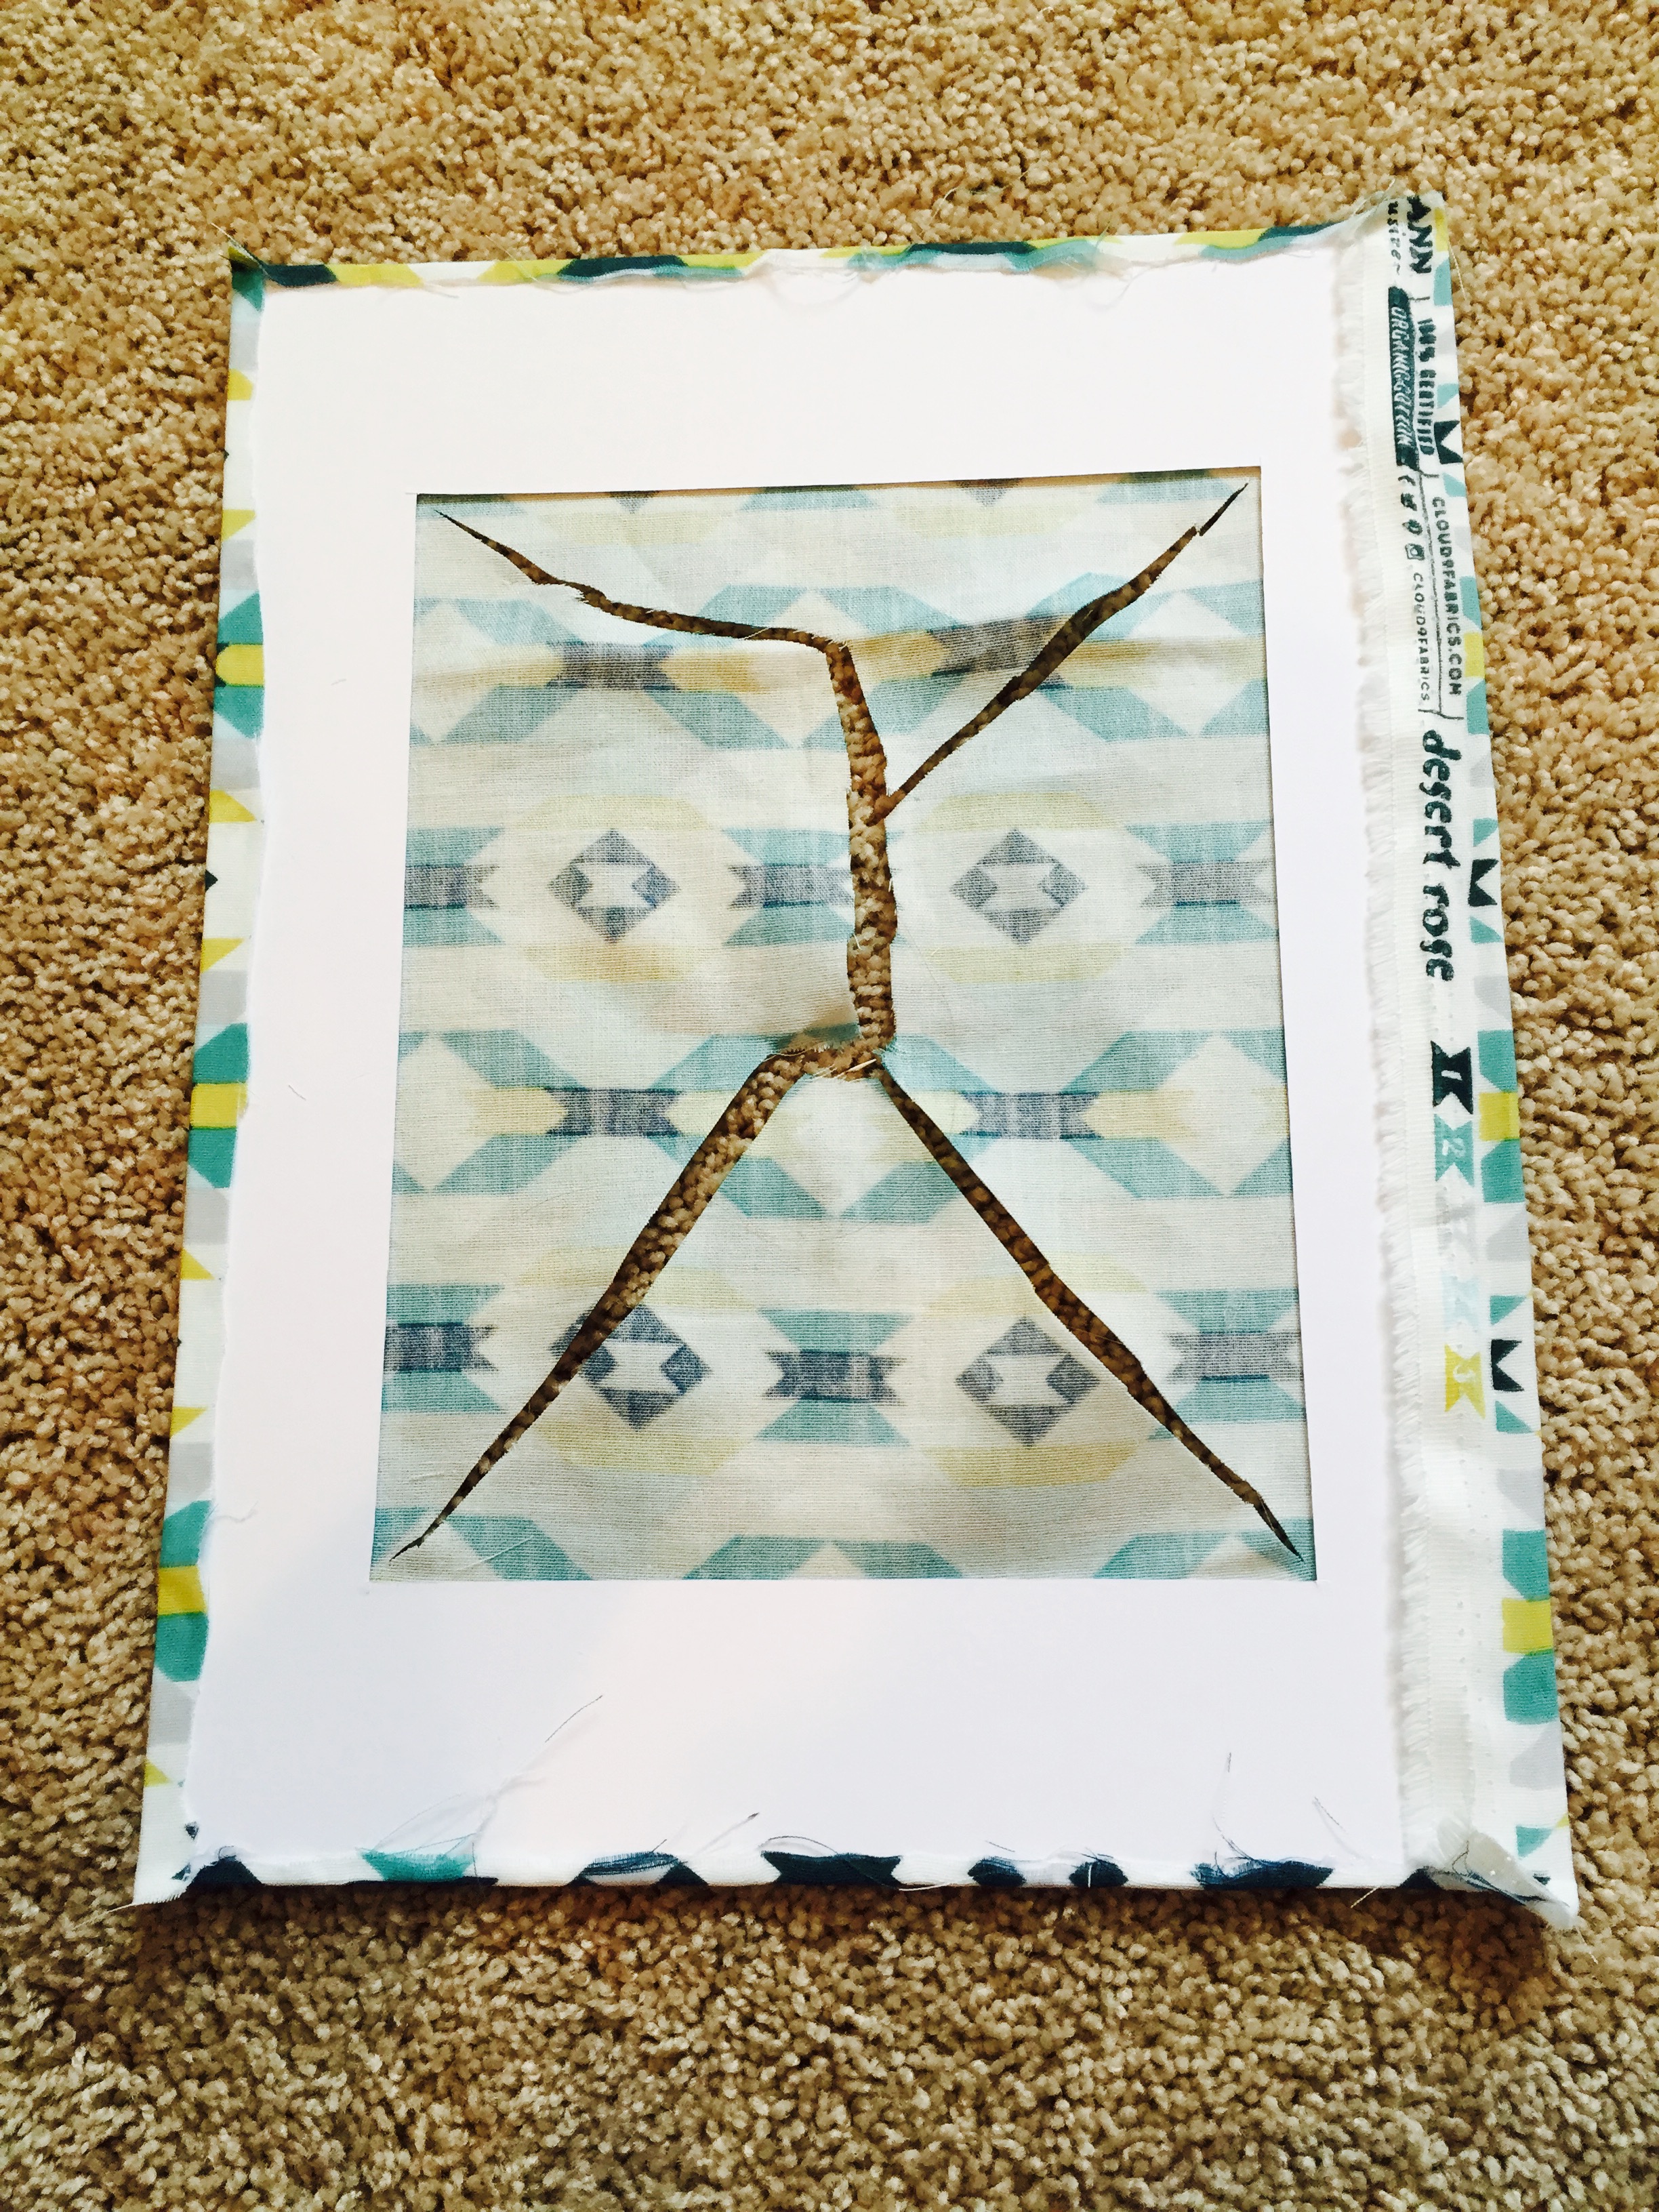
- Finally, once the fabric is completely adhered to the photo mat, use your scissors to cut an X shape into the fabric in the center of the mat (all the way to each corner of the photo mat).
Step 2:
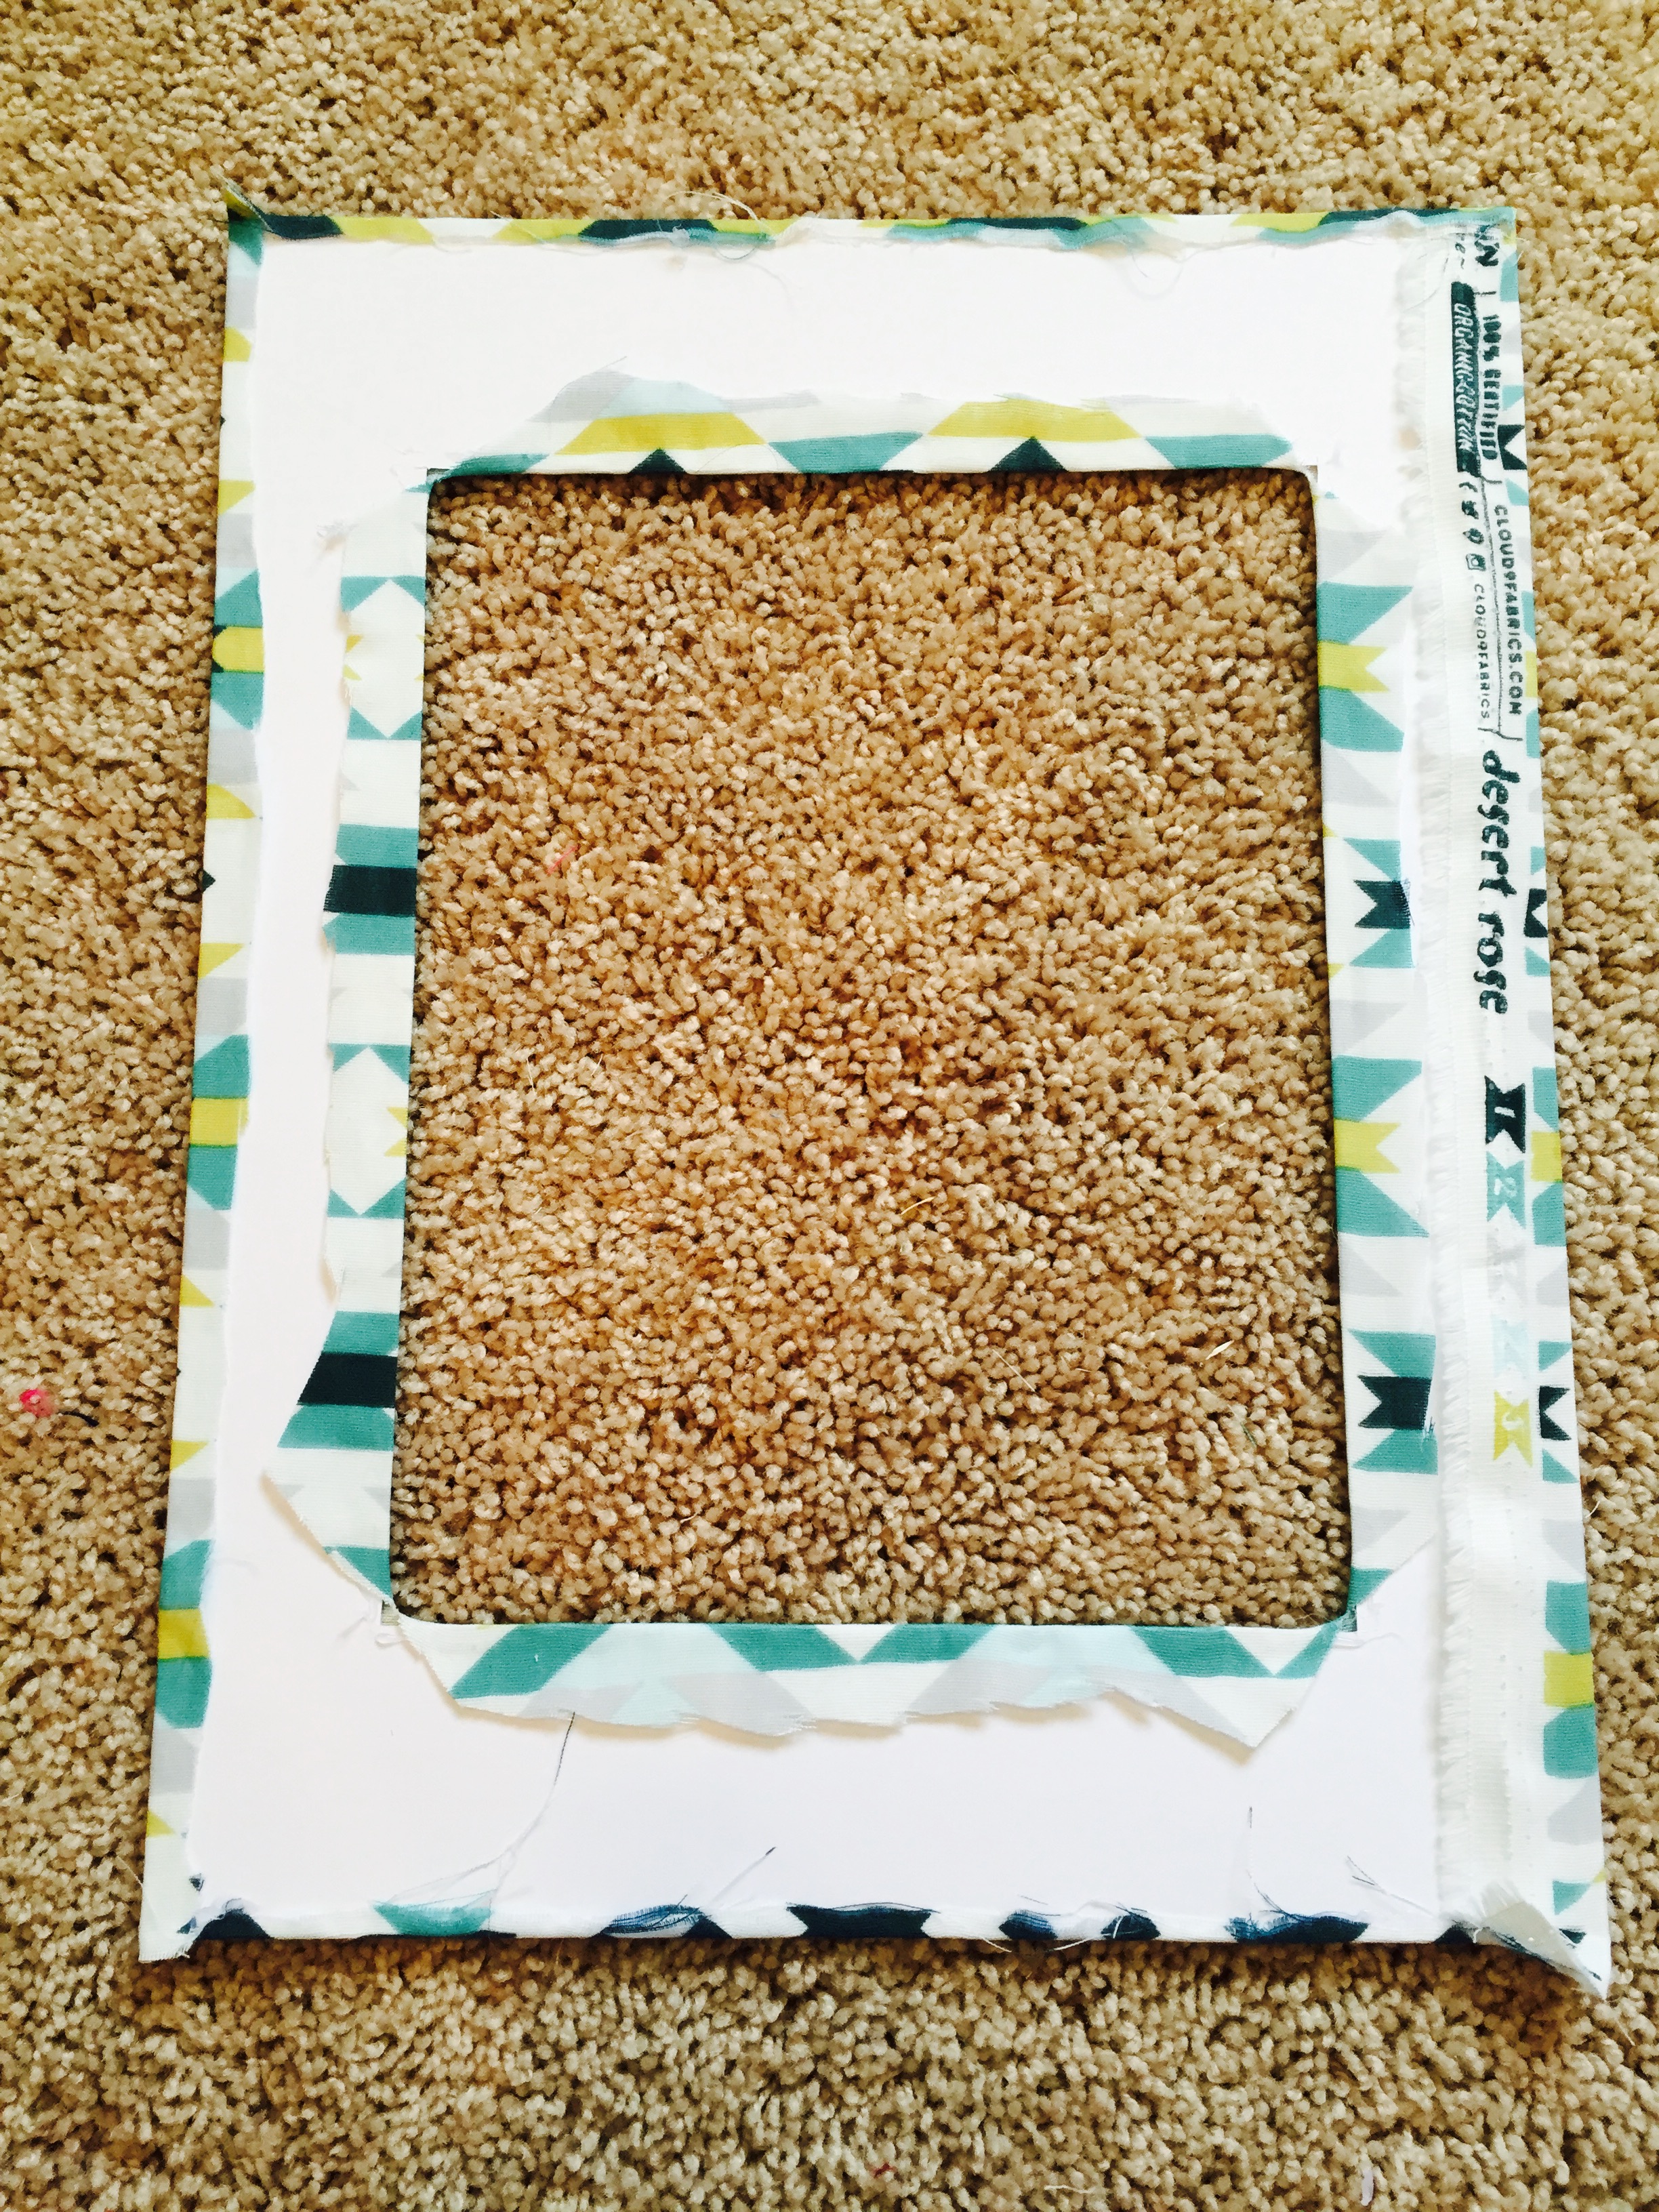
- Now, cut off all the excess fabric in the middle of the mat, leaving about .5-1″ of fabric off each edge of the mat.
- Fold the excess fabric over each inside edge of the photo mat and again, with your glue gun, glue the excess fabric down to the back side of the mat.
Step 3:

- Finally, stick your mat in your frame and put your picture behind it
And ta da!! You have your very own custom photo mats! Custom framing has never been so easy, or cheap!
If you’re wondering where I got the cute animal drawings from, they’re from a shop in Etsy. SUCH a clutch place to find almost anything you need, for any room, and any theme. I swear by it (and no, I don’t get paid by Etsy for saying this stuff. I just really love their interface and shopping options).
So there you have it. A tiny sneak peek into my little man’s world. I’ll be posting more as the weeks go on. Next up, the custom bedding (shown in the picture at the top of this post) that I made just for him. It was a LOT easier than I had ever thought (and I am not an expert sewer, trust me). It just took some time, as all DIY projects do.
But in the meantime, if these custom photo mats have you jazzed up to give your room a little refresh, here’s a recap of everything you’ll need to DIY:
DIY Custom Photo Mat – BACKDROP Style
- Large 24×36″ Whitewash Pine Frame (no glass or backing needed)
- Mounting Hardware for frame
- 24×36″ White Foam Core Board
- 1 Yard- Fabric of choice
- Mine was from Joann Fabric
- Adhesive Mounting Spray
- Glue gun and glue
- Light Up Wood Star (or Initial Marquee)
- Screws and wall anchors
- Tape measure or ruler
- Nails (to mount frame on wall) and hammer
DIY Custom Photo Mat – TRADITIONAL FRAME Style
- 11×14″ Whitewash Pine Picture Frames (I used 3)
- These need glass and a backing. Everything needed is included in the link above.
- 11×14″ to fit 8×10″ picture mats (I used 3)
- Leftover fabric from above (or 1/2 yard of new fabric)
- Adhesive mounting spray
- Glue gun and glue
- Nails (to mount frames on wall) and hammer
HAPPY CRAFTING!!
Leave a Reply