Ok, so today I have a little twist on all the baby crafts I’ve been debuting lately. This one’s a little larger than before. That’s right, this one’s for MOM! While you’re pregnant (and for 18 to life after) mommy’s always seem to come second fiddle to your little one. Well, today, indulge in a craft for yourself! You deserve it.
Now that I’m eating for two (sort of) I use any excuse I can get to run for some ice cream. And most every time, my excuse is my baby. He REALLY wants some ice cream, so who am I to deny him his cravings? So when this ice cream design popped up as the free cut file of the week, both baby and I were stoked!
Now, I’ve been crafting for quite some time, and feel I’m pretty knowledgeable with my Silhouette CAMEO die cutting machine. However, I decided that this design needed a little more flare than my normal shirts with glitter heat transfer material could provide. So I decided to try out the clean cut fusible fabric stabilizer (which I had never used before). This stuff essentially turns ANY fabric you have into an easy iron-on applique.
Basically, the way it works is you apply this stuff to the back of the fabric you want to use (by ironing it on), remove the backing, and then your fabric is now an iron-on fabric! It’s really easy, and you can use your cutting machine (or scissors, if you don’t have a machine) to cut your fabric into any shape you want! It’s pretty neat.
And I must say, this was the most exciting craft I’ve done in a while. This stuff is so cool, you guys! Seriously, if you haven’t tried it out yet, I can’t wait for you to play with it. And even if you’re not pregnant, you can still use the tools and cut files below to make something extra fun for summertime. Because let’s face it, pregnant or not, who doesn’t love ice cream… and a fun craft to go with it? Am I right? 😉
How To Make A Funny Maternity Shirt – With Iron On Fabric
The Necessary Supplies:
- Silhouette CAMEO
- Silhouette fabric cutting blade
- 12×12″ CAMEO cutting mat
- Silhouette clean cut fusible fabric stabilizer
- Silhouette 12″ smooth heat transfer vinyl- black
- Maternity T-Shirt
- Or plain tote bag if you want to try a different approach
- 4-5 different color fabric squares (approximately 5×10″ each)
- Iron
- Ruler
- Scissors
Shapes Needed From Silhouette Design Store:
- Free Shape of the Week 4/25/16 – Ice Cream Cone
- LW Brush Font (by Lori Whitlock) – Design #111700
- Baby Design (by Melissa Esplin) – Design #9647
- Eat Design (by Kolette Hall) – Design #37104
Step 1:
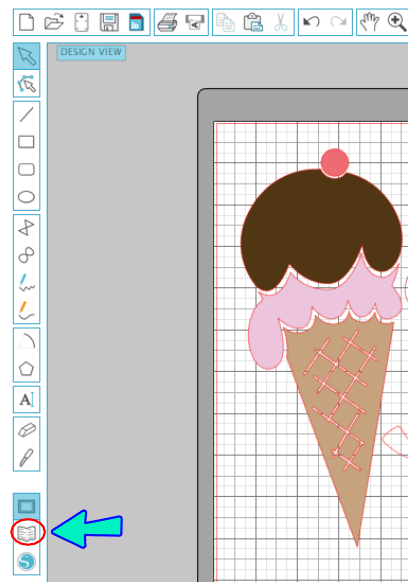
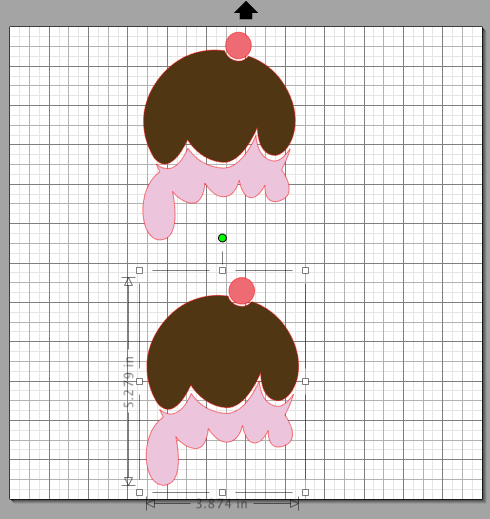
- Download the free shape of the week (ice cream cone) in your Silhouette Design Studio and load it into your design space.
- If you don’t know where the files you download are kept, the little “open book” logo on the left had side toolbar is where you can find your recently downloaded shapes. Once you click on the ice cream cone in there, it will automatically populate into your design space for you.
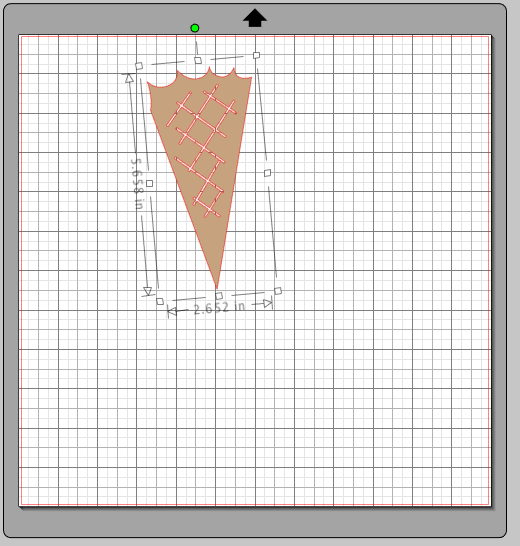
- Now, make the shape however big you want it to appear on your shirt (mine was 9.5 x 3.6″).
- Then, I separated the cone from the rest of the ice cream (and cherry) and removed it from my design field.
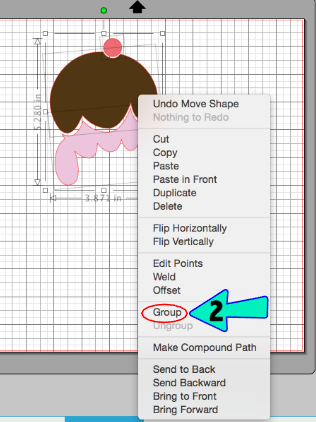
- Once I had the 2 ice cream pieces and cherry selected (you can do this by clicking on each one individually while holding down the SHIFT key) I right clicked again and pressed “Group” to group them all together.
Step 2:
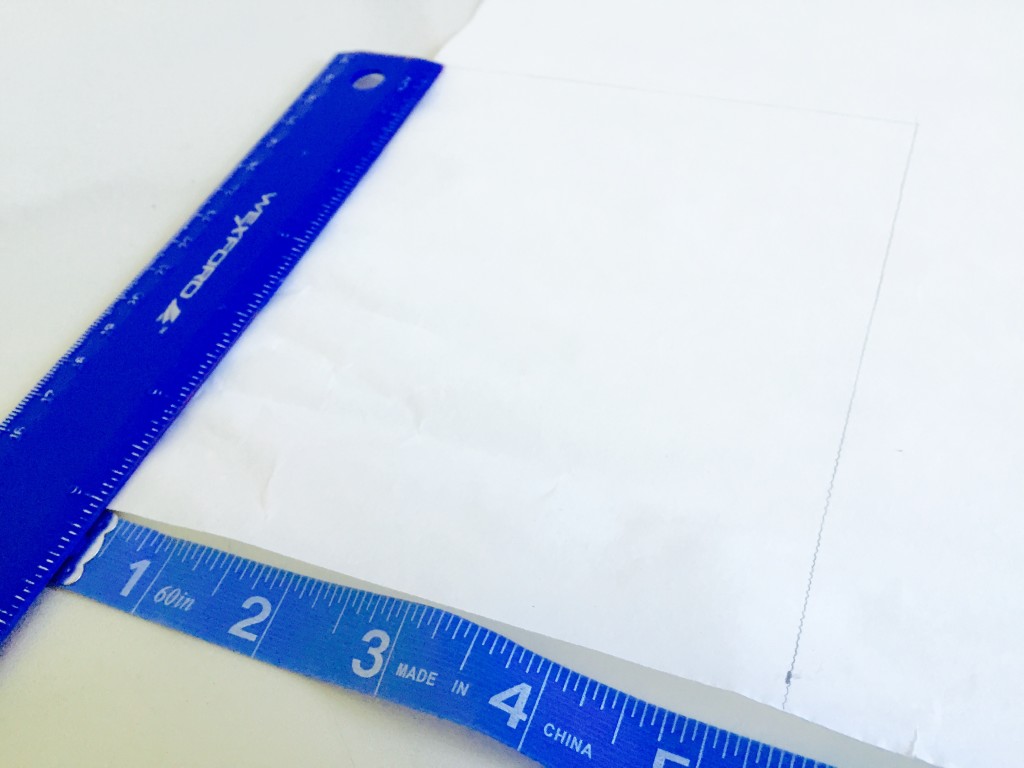
- Now, outside of your Silhouette Design Studio, take your fabric stabilizer roll and measure out a rectangular portion that’s about .5-1″ larger than the shape on your screen.
- For example, my ice cream shape (just the ice cream and cherry) was 5.2×3.8″. So I measured a rectangle that was 6×5″.
- Use your scissors and cut out your rectangle from the fabric stabilizer roll.

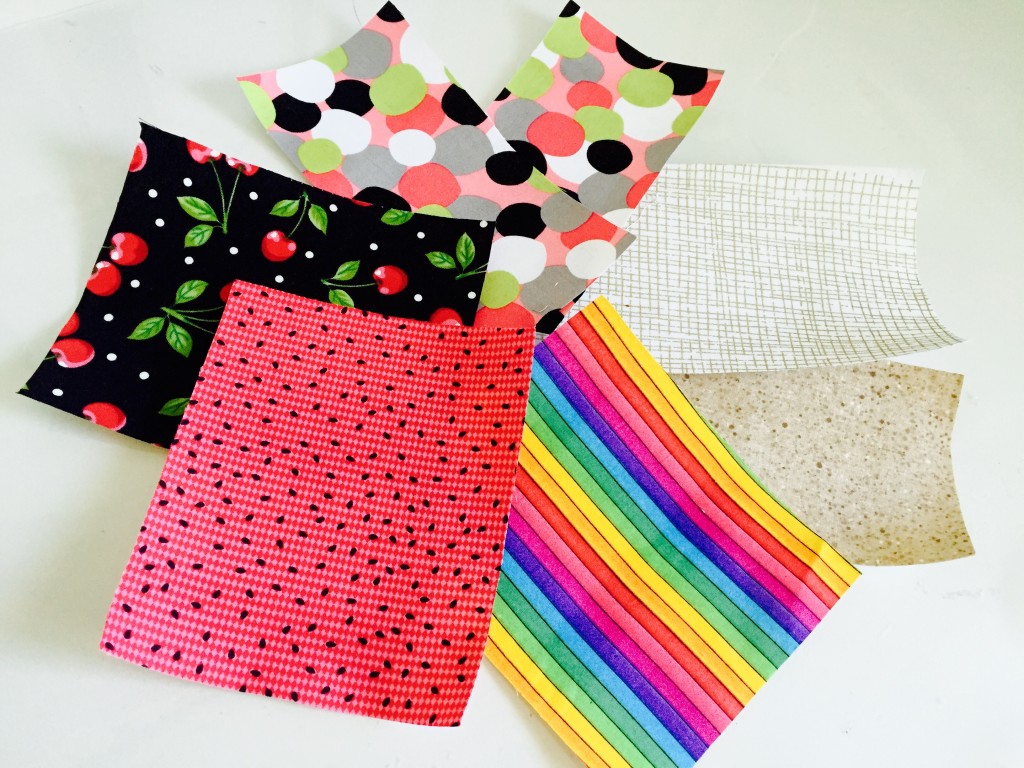
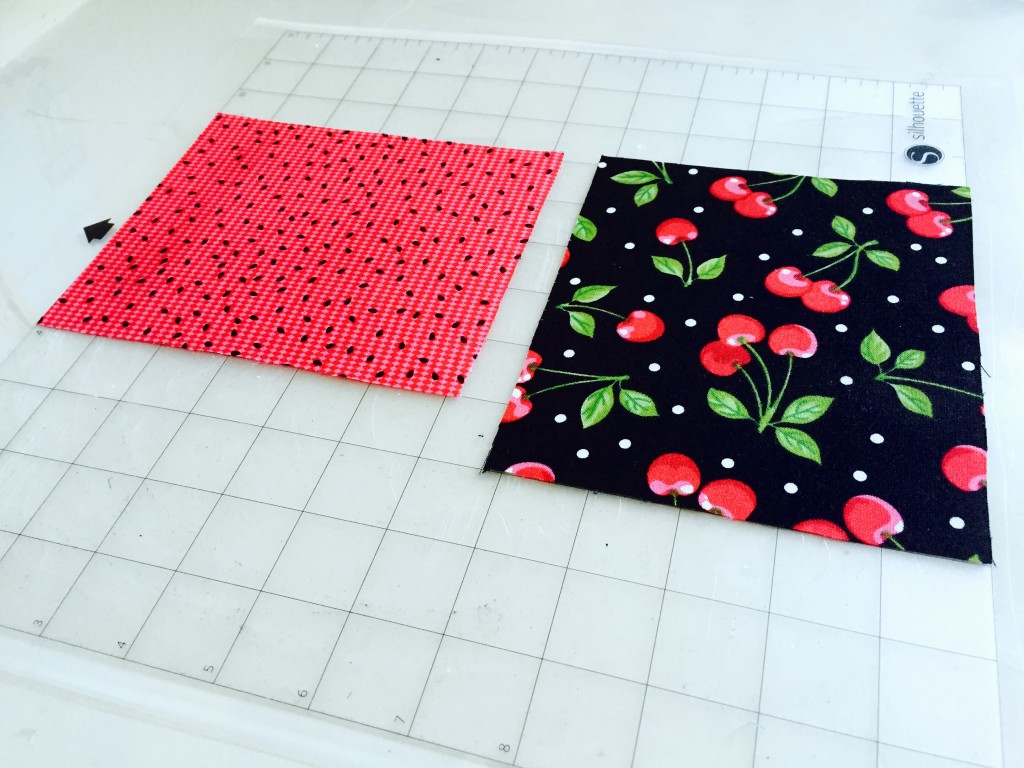
- Now, place your cut fabric stabilizer on top of the fabric you plan to use for that shape, and cut the fabric around the fabric stabilizer, making sure the fabric is a bit larger or the same size as the piece of fabric stabilizer you’ve cut.
- Repeat this step for every shape/piece of fabric in your design (cone, BABY design, and EAT design)
Step 3:

- Now, the cool stuff starts. Woo hoo! Take your cut fabric stabilizer and place it rough side down on the back side of the fabric you’re wanting to use for that particular shape.
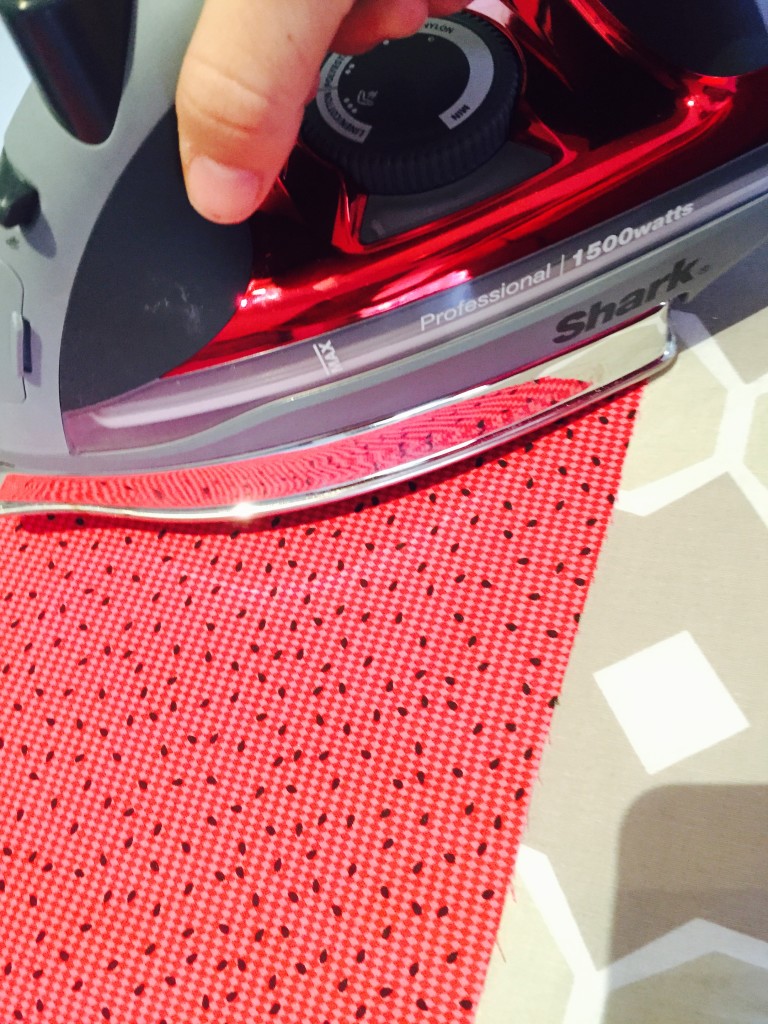
- Then, with your iron on medium/high heat, iron over both pieces for about 5-8 seconds (the packaging says 2, but I found 2 seconds not to be long enough).
- Make sure the fabric is ALWAYS larger than the fabric stabilizer. If any part of the stabilizer is off of the fabric, it will melt directly onto your iron and cause a sticky mess.
- Repeat this process for every piece of stabilizer/fabric you have for all the shapes you’re planning on cutting out.
- I had 5 different color fabrics I used:
- 1 for the cherry
- 1 for one layer of ice cream
- 1 for the second layer of ice cream
- 1 for the cone
- 1 for both the baby design and the eat design
- I had 5 different color fabrics I used:
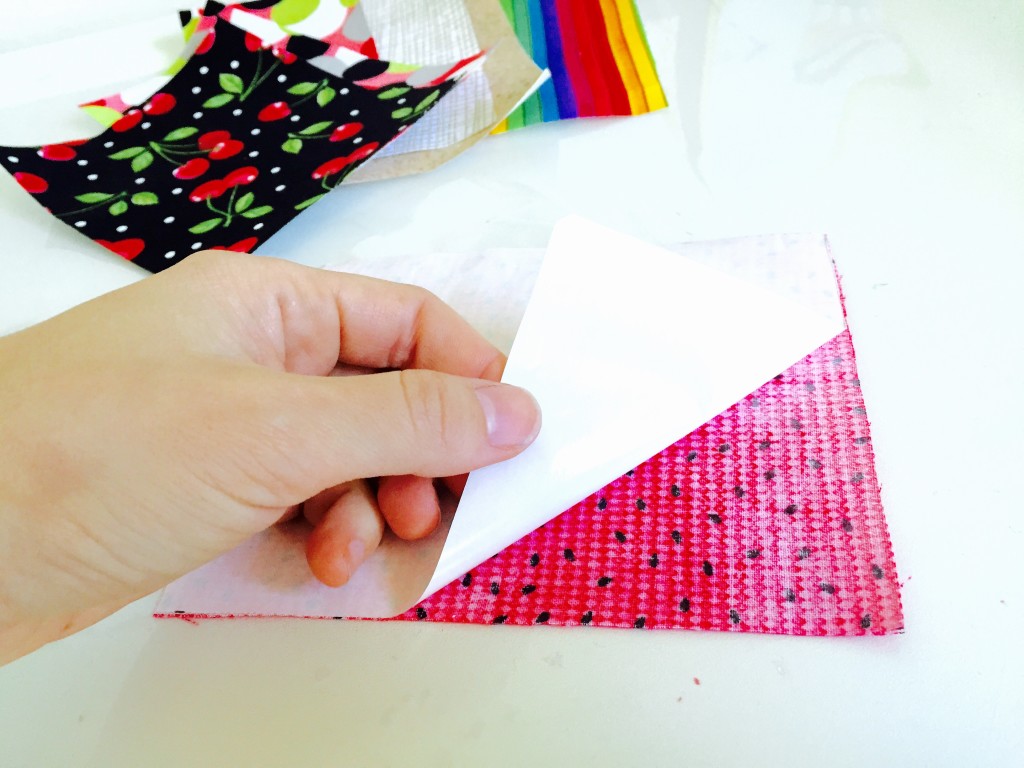
- Finally, remove the paper backing off of the stabilizer. Your stabilizer sheet should now be totally adhered to your fabric, and give the back of the fabric a sort of glossy sheen.
- Do this for every piece of fabric/stabilizer you’ve made.
- Now, your plain fabric has become a legit piece of heat transfer material! Pretty neat, huh? You just need to cut it…
Step 3:
- Time to move back into your Silhouette Design Studio. Place your ice cream and cherry design in the center of the cutting mat on your screen. The reason you avoid the sides is because fabric cannot go underneath the feeder rollers of the CAMEO, so keep your designs away from the edges of the mat.
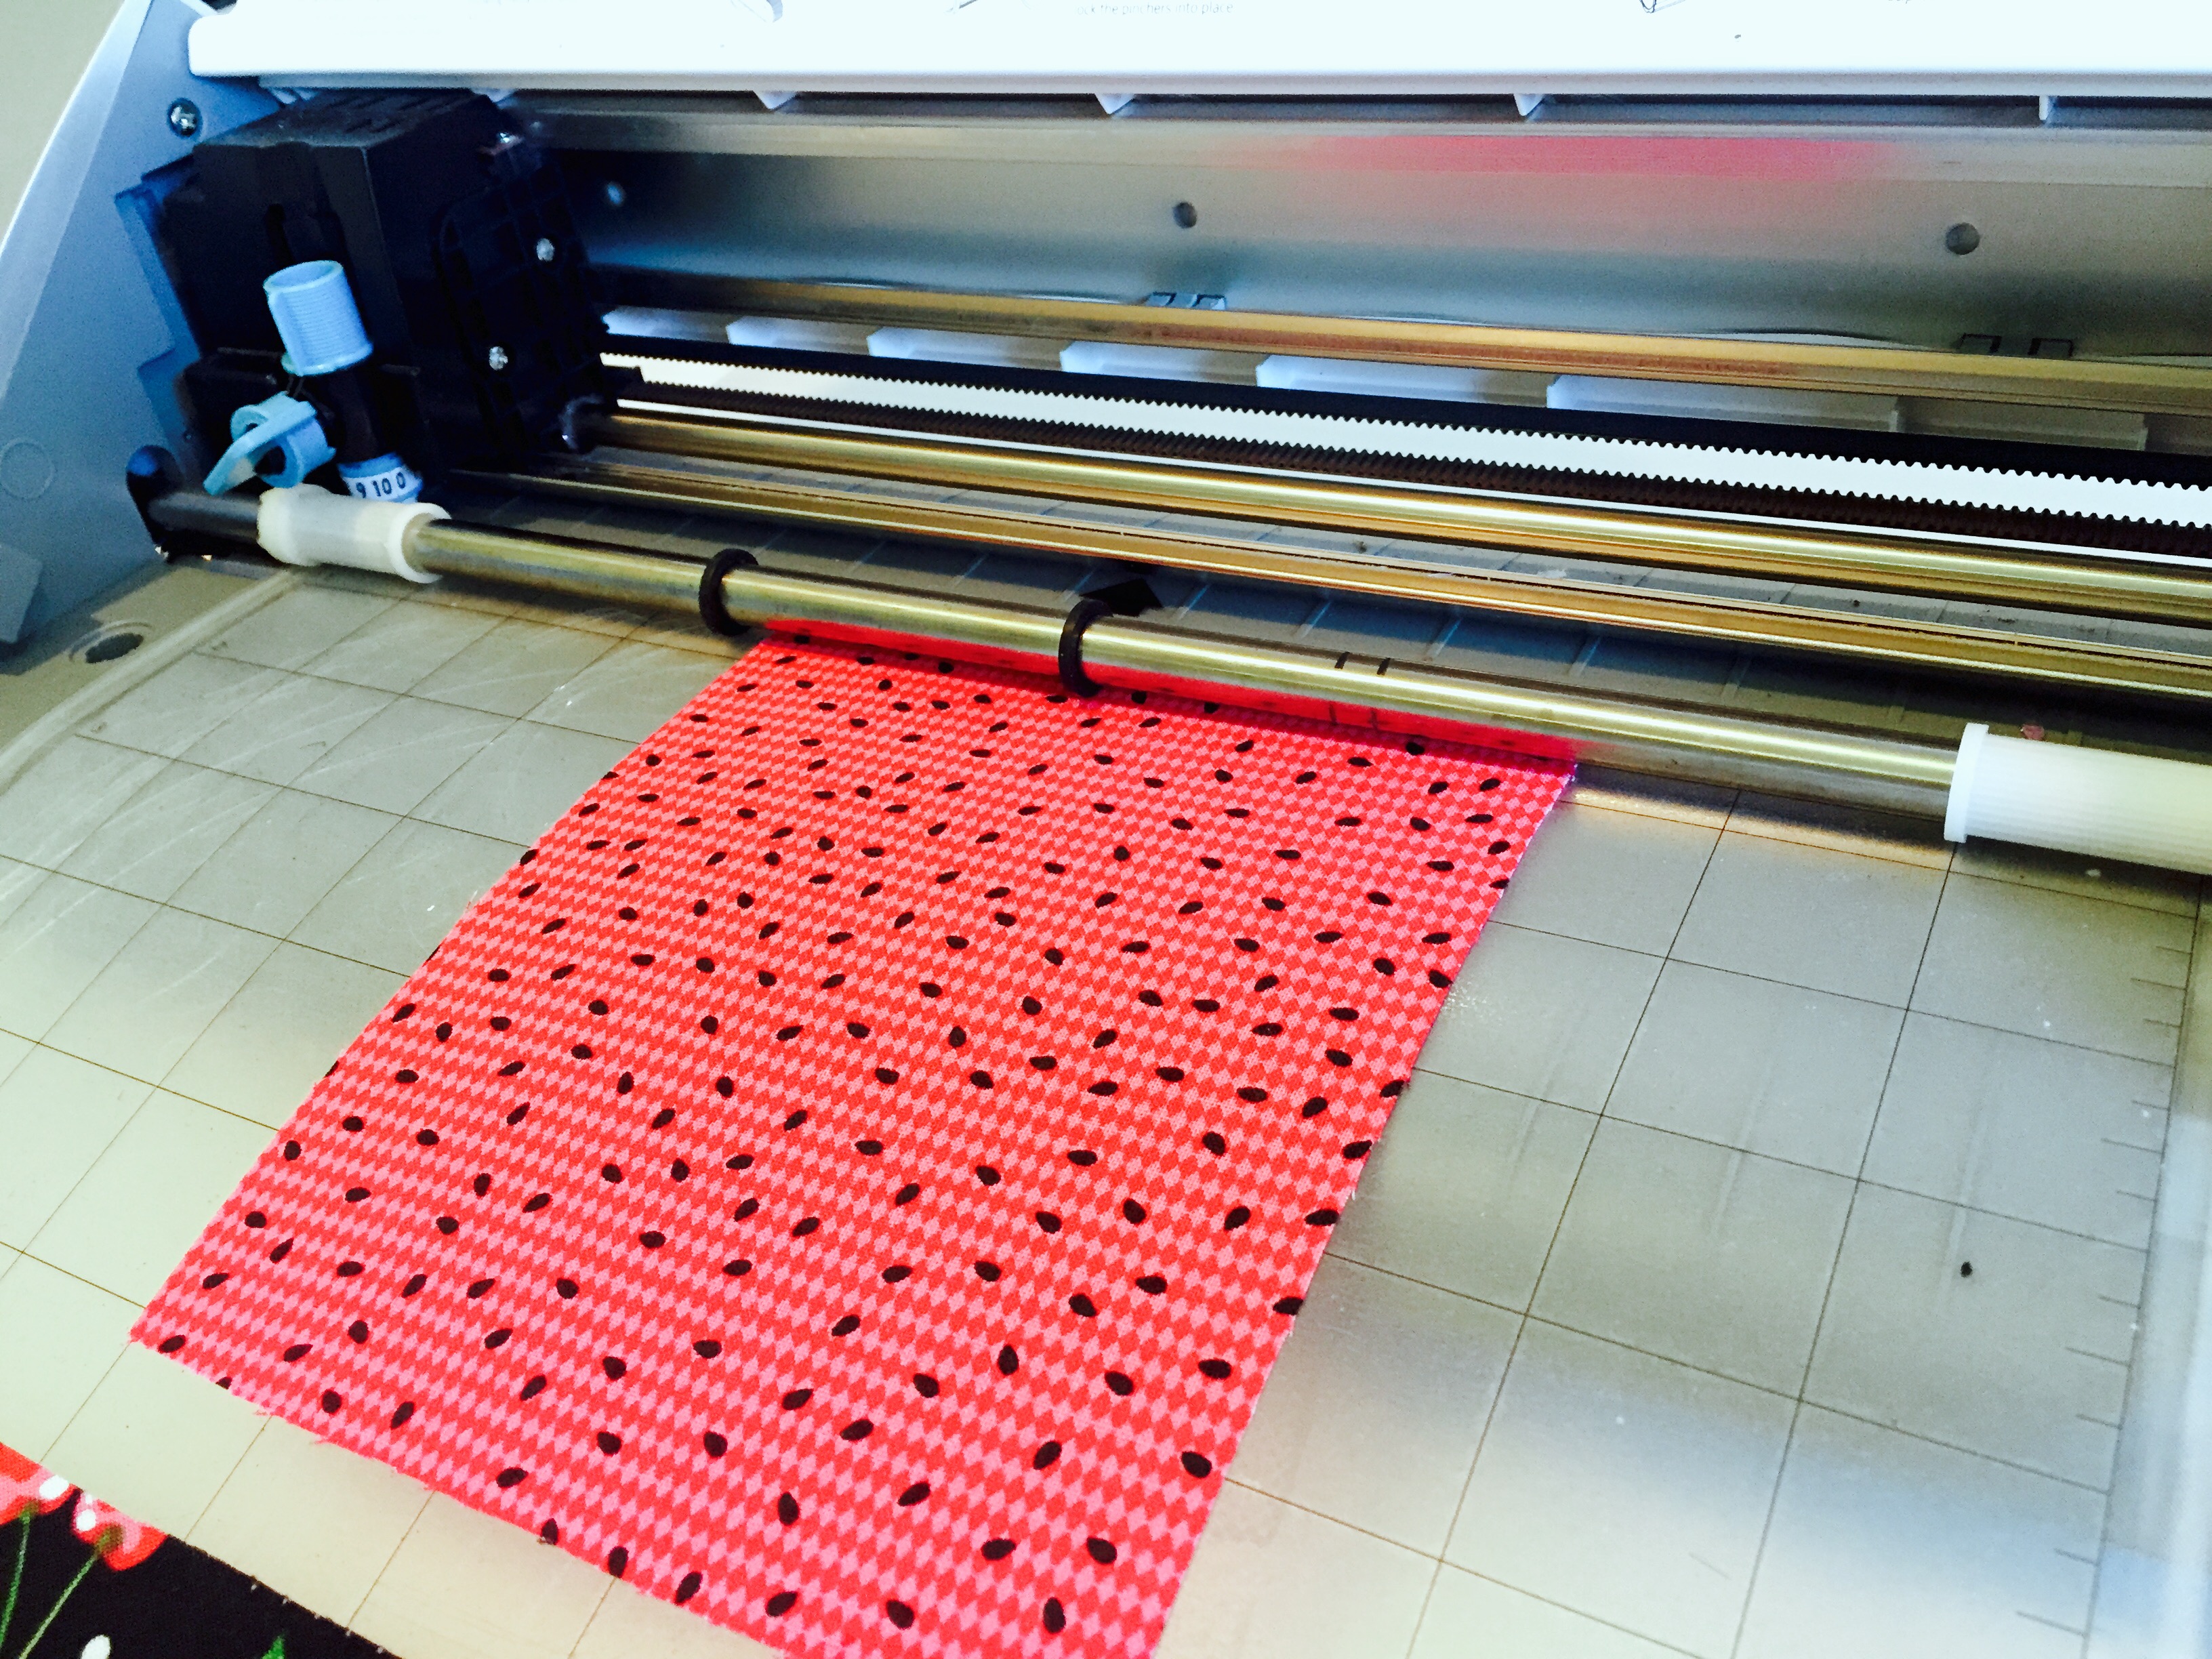
- Place your pieces of fabric (face up, with the stabilizer side down) onto your cutting mat. Remember to line up the fabric at the same place your design shows up in your design studio, and NOT underneath any of the CAMEO feeder rollers (the fabric will bunch of if it’s underneath a roller).
- Then, load your cutting mat into the CAMEO, lining up the left hand side of the cutting mat with the arrow on the left hand side of the machine.
- Also make sure to load your fabric blade (and not a generic blade) into the CAMEO. Regular blades are not sharp enough to make fabric cuts, so you must use the fabric blade.
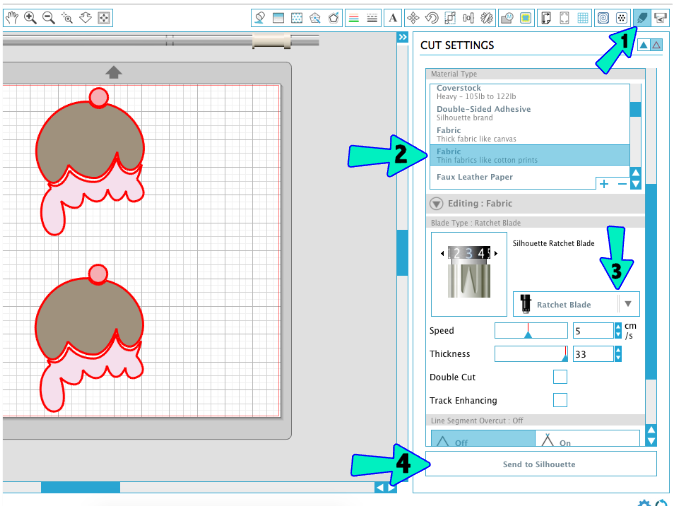
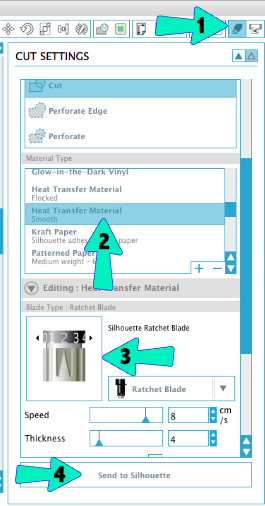
- You’re ready to send your design to be cut! To do this, click the cut icon in the upper right corner of the top toolbar (#1).
- Make sure under the material section to select that you’re working with fabric. Mine was thin cotton material (so that’s what I selected) but if yours is thicker make sure to click on the thicker fabric material right above the one my #2 arrow is pointing to.
- Your blade type must say “ratchet blade” – and if it does – go back to the CAMEO and make sure your fabric blade is adjusted to the setting that works best with this type of material.
- In this case, the blade needs to be set to a 3 cut level.
- Finally, press send to Silhouette (#4) and watch the magic happen!
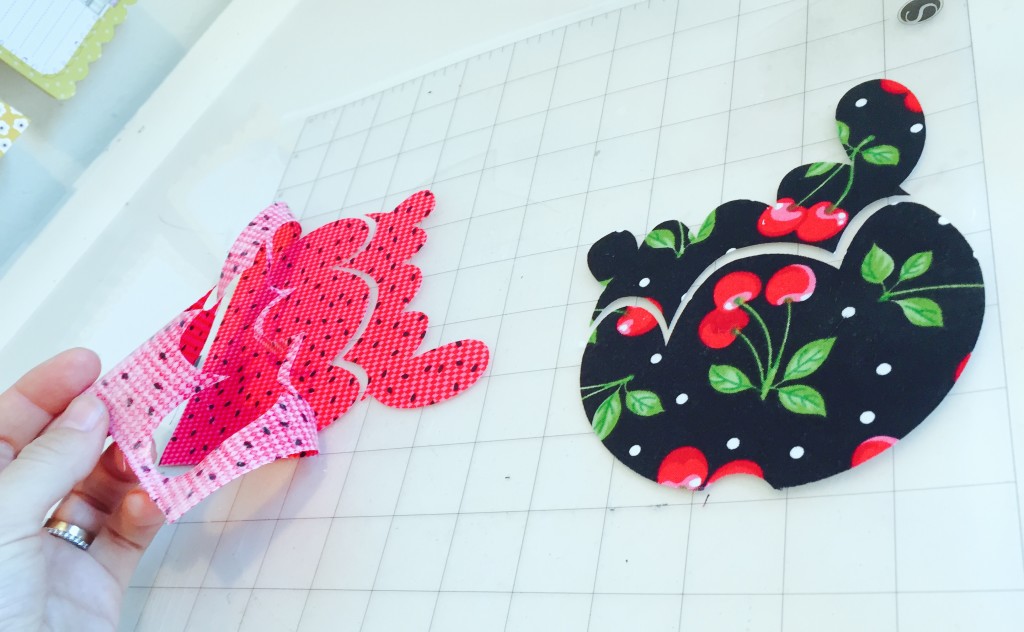
- Now that it’s all cut, remove the extra fabric from the cutting mat and throw it away. Take your cut designs off and set them aside for later use.
Step 4:
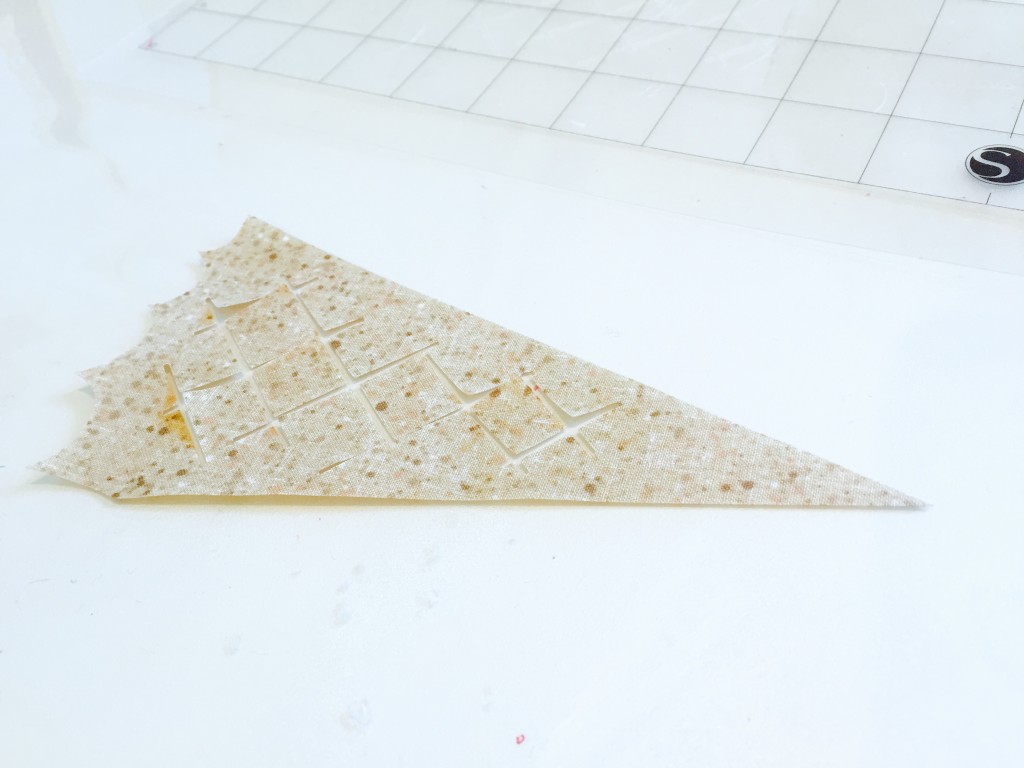
- Repeat all of Step 4 with your cone design as well as your baby and eat designs.
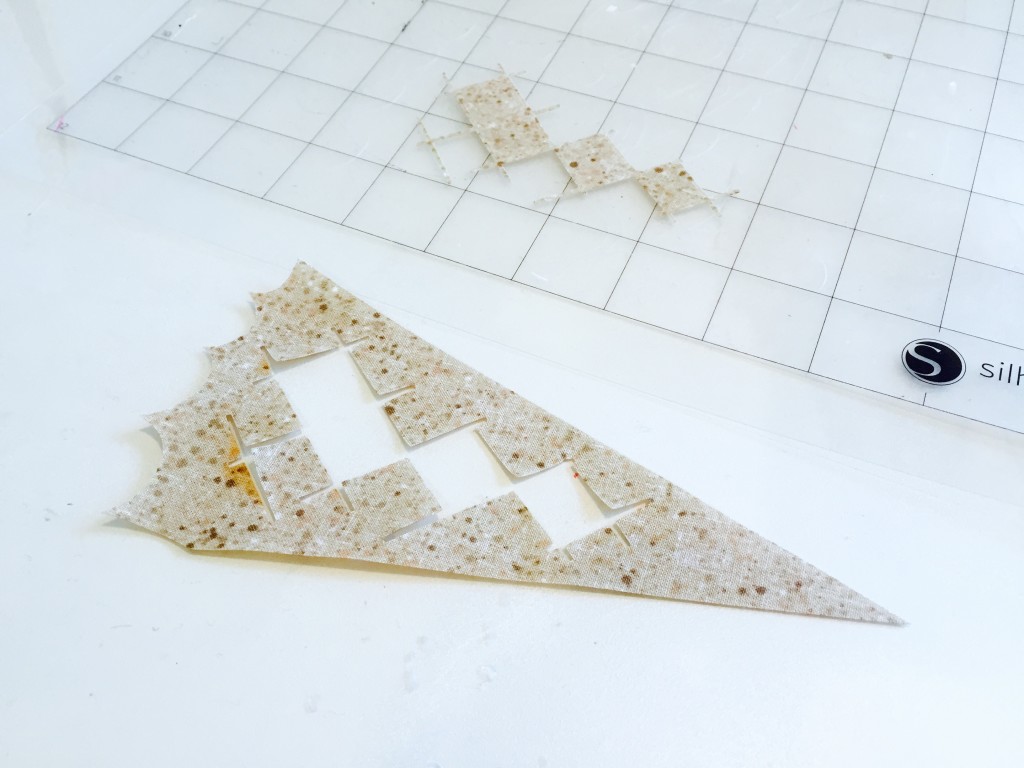
- Just and FYI, since there are so many small cuts in the center of the cone (because duh, they need to be there for it to look like a true waffle cone) you’ll need to piece the cone back together once you remove it from your cutting mat.
- The large piece of the cone will stay intact, and then there will be 4 square pieces left for you to just put back in the center of the cone.
- Make sure to remember which piece goes where, to keep the cute little waffle cuts once you apply the fabric to your final product.
Step 5:
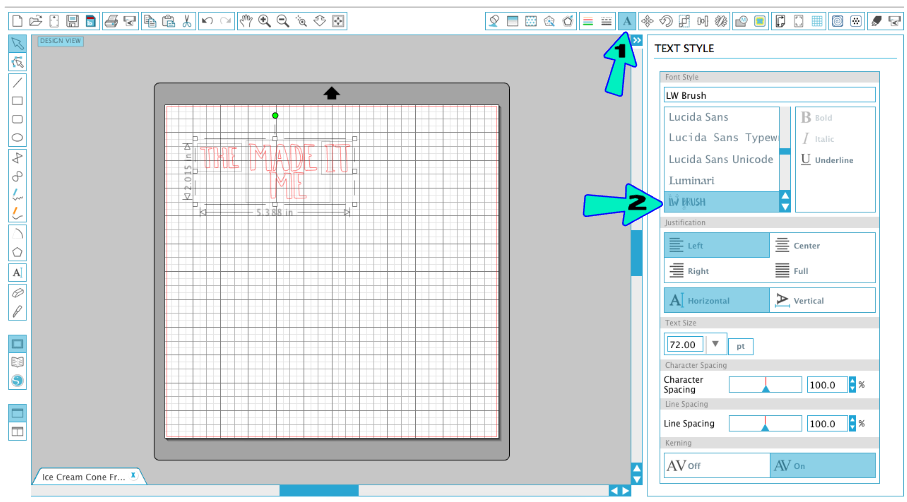
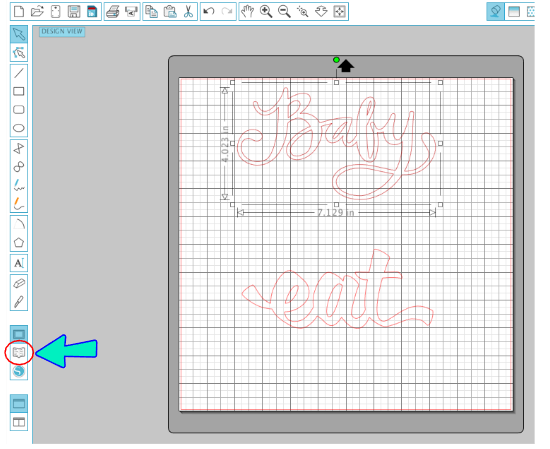
- In your Silhouette Studio®, go into your library and make sure you select your LW Brush font (#111700) out of your library.
- Once your font is loaded, click on the text icon in the top toolbar, make sure LW Brush font is highlighted, and type the text that’s remaining for your shirt (THE baby MADE ME eat IT).
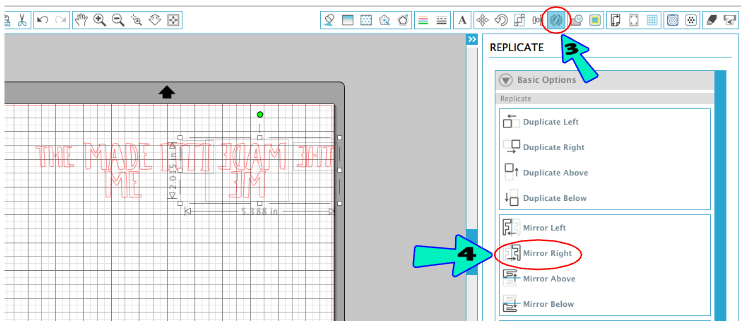
- Then, with your text selected, click on the “Replicate” icon in the top toolbar and choose “Mirror Right”. This will mirror your text.
- Anytime you use heat transfer vinyl, you need to make sure the text is mirrored, because you will flip it over to the glitter side once it’s cut.
- Delete the non-mirrored text, and put the mirrored version inside the mat on your screen.
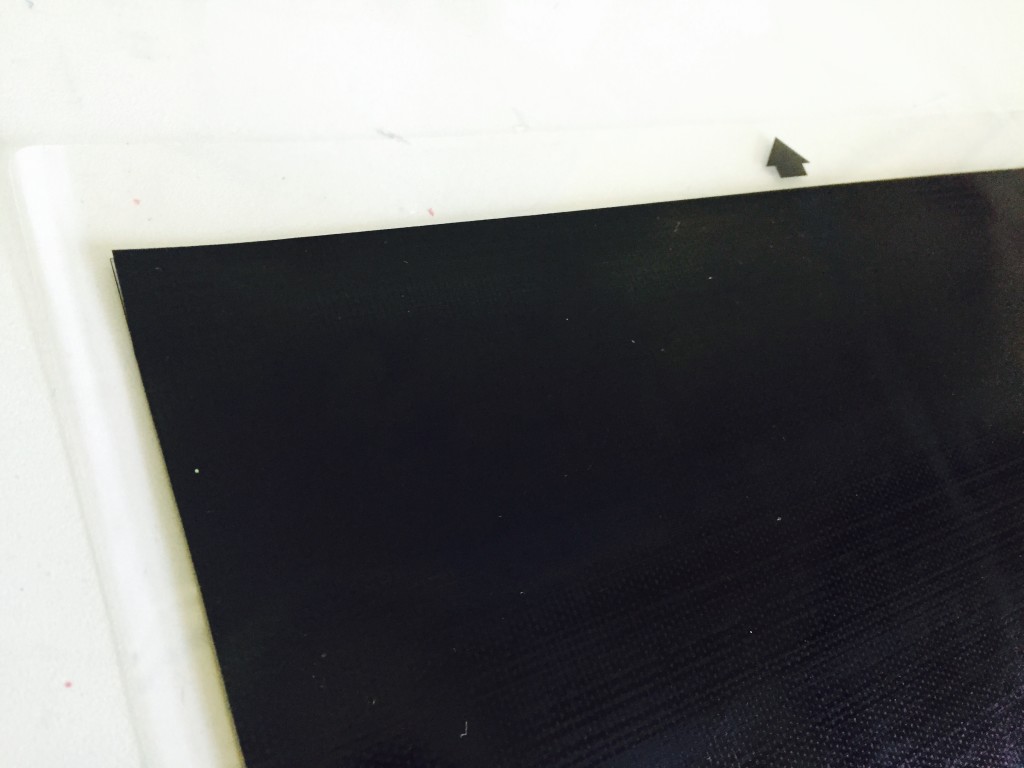
- Put your vinyl (clear cover side down) onto the CAMEO mat and line it up with the grid lines.
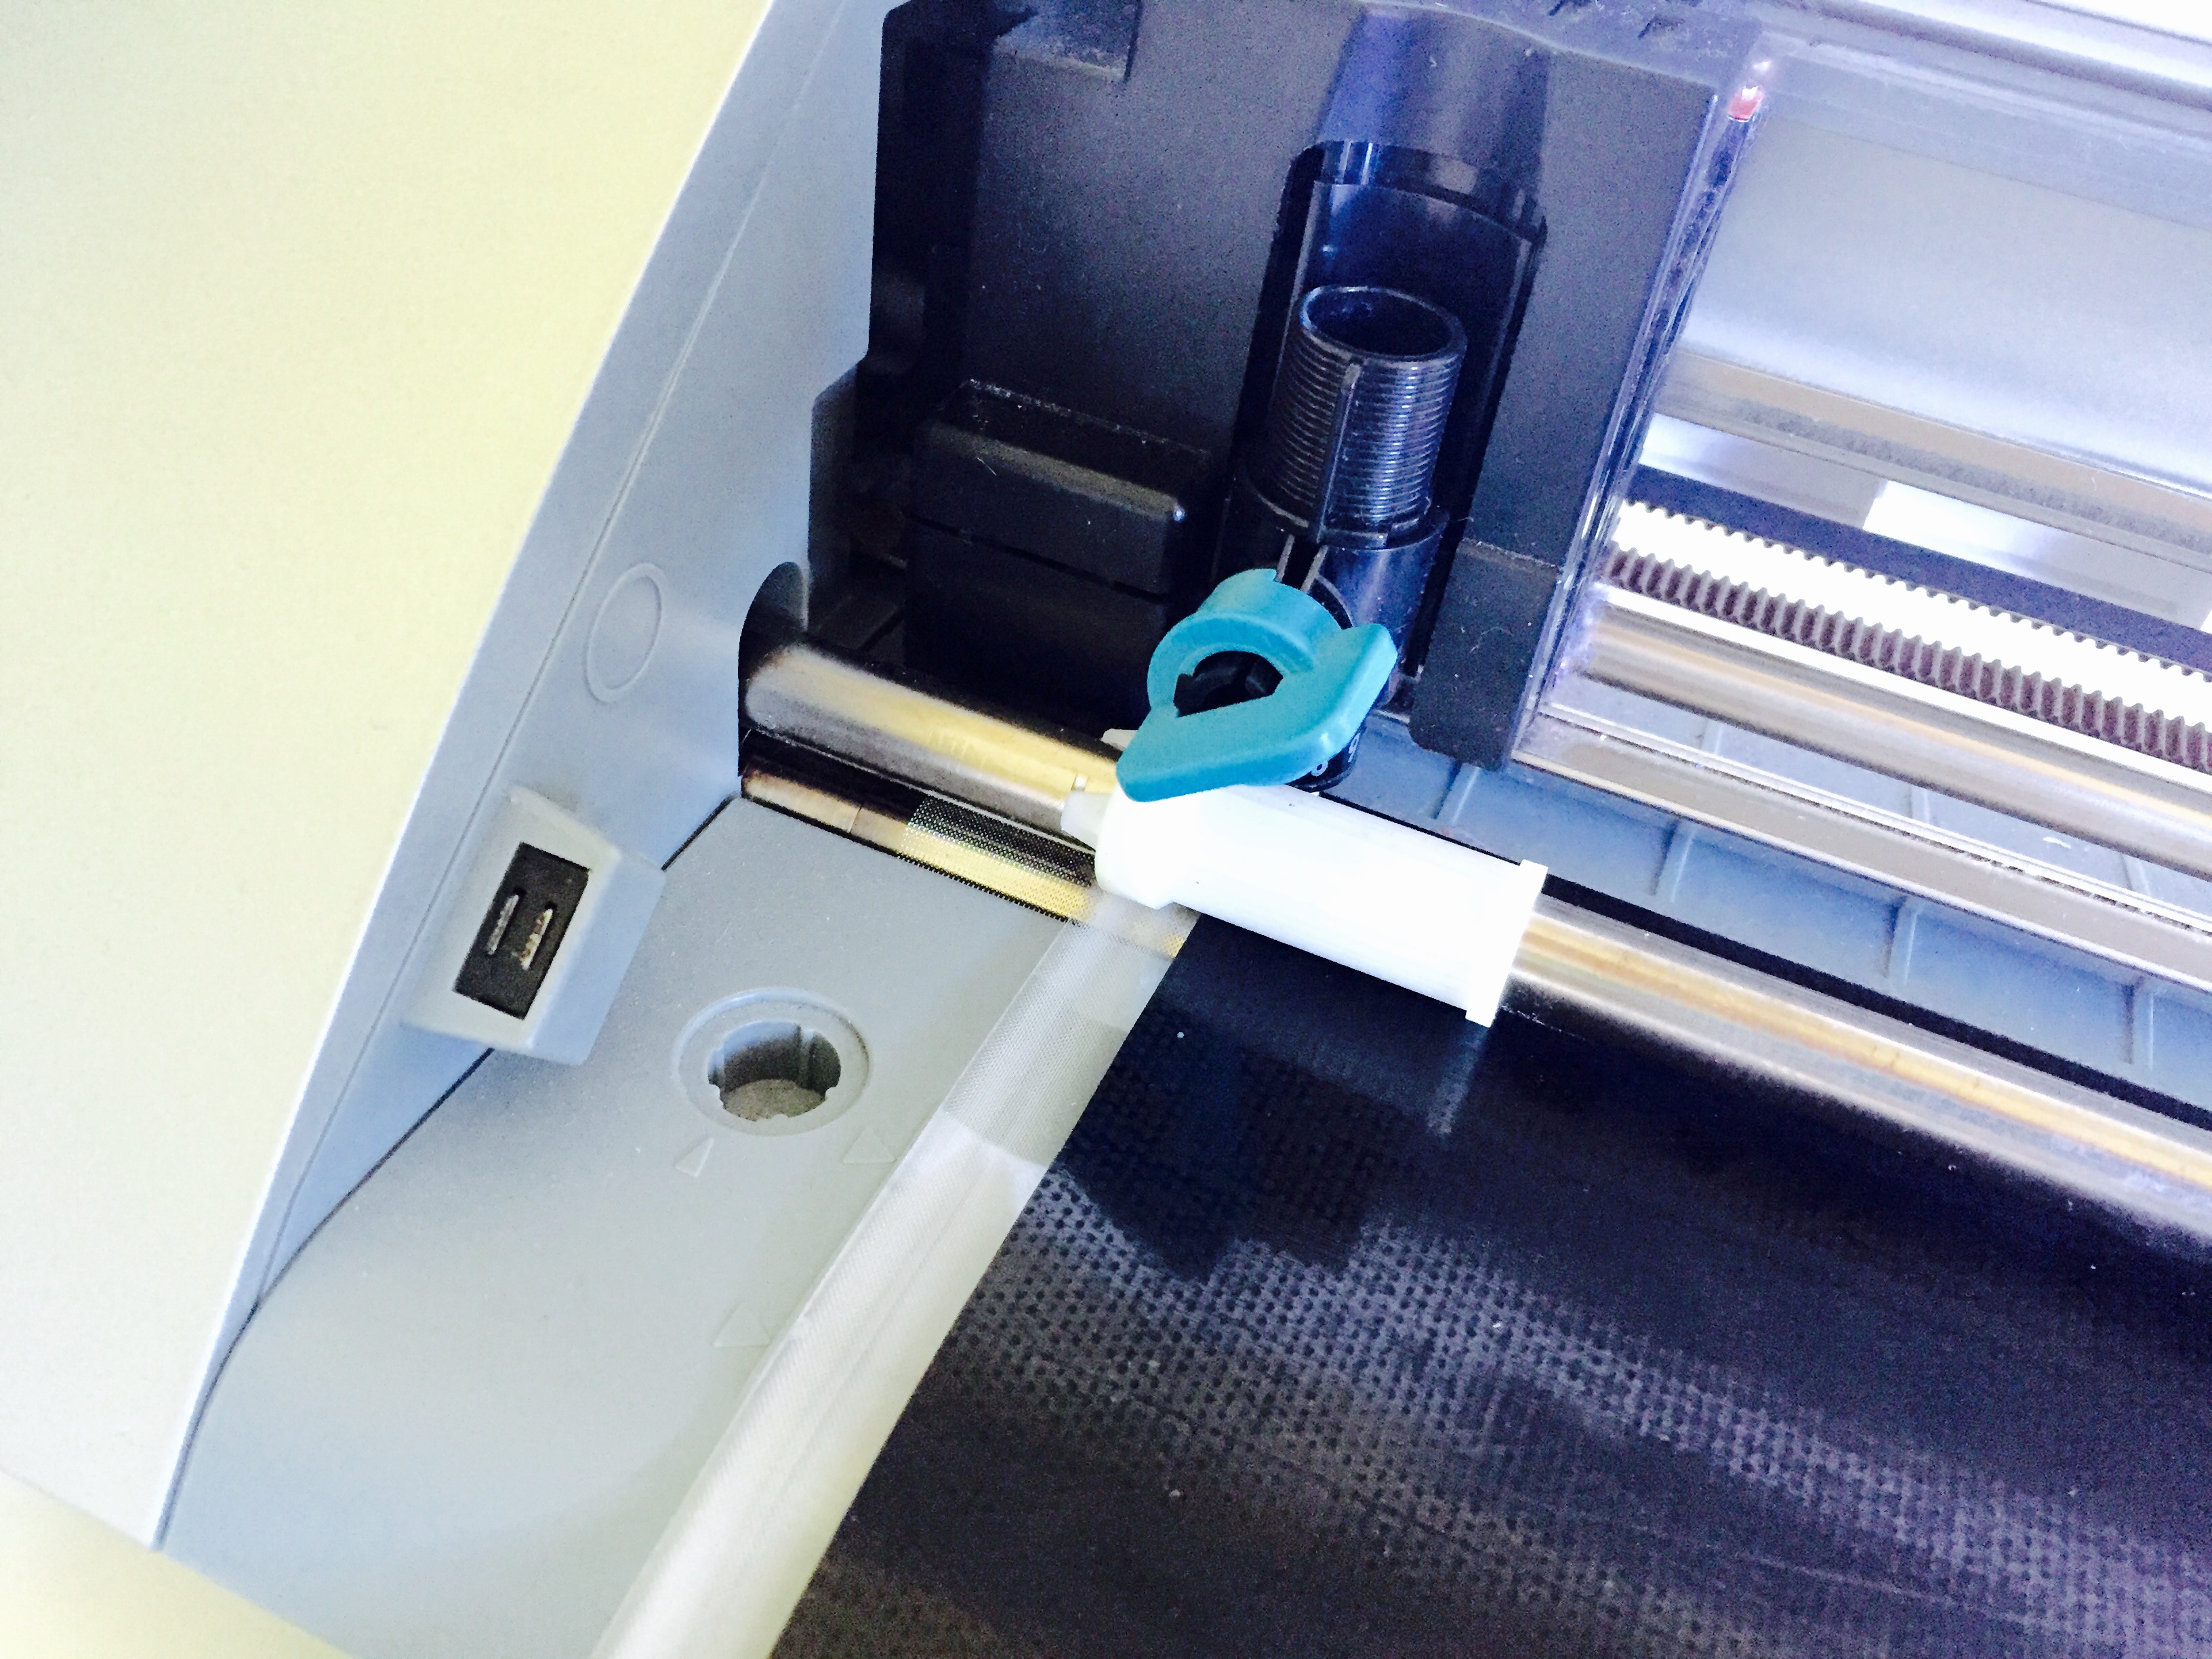
- Then, load the mat it into your CAMEO just as you did in Step 4 with the fabric material. Only this time, it’s perfectly fine for the vinyl to be fed directly under the feeder rollers.
- Once the mat is set in the CAMEO, press the cut icon in the upper right hand toolbar. Make sure you’ve selected the correct material (heat transfer material – smooth) and have your blade set to the suggested settings.
- Then, send your mirrored design to the CAMEO to be cut.
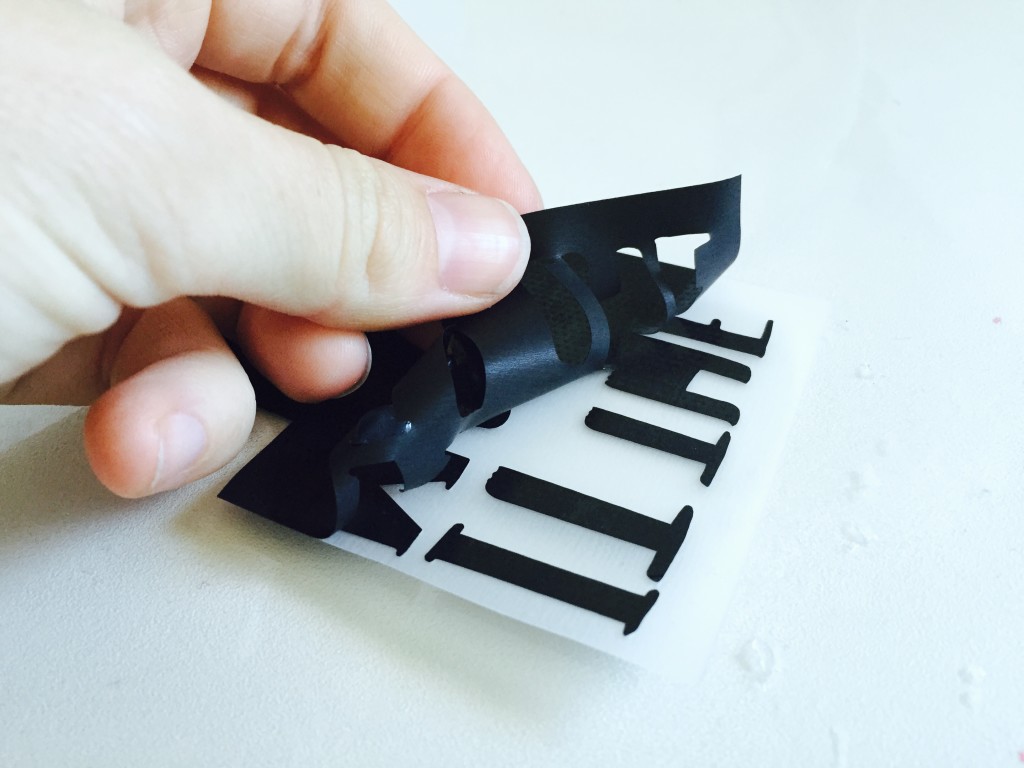
- Remove the excess vinyl from around the cut wording, and use your scissors to cut each word out into their own squares (vinyl AND clear backing together) for easy placement on your final shirt.
Step 6:
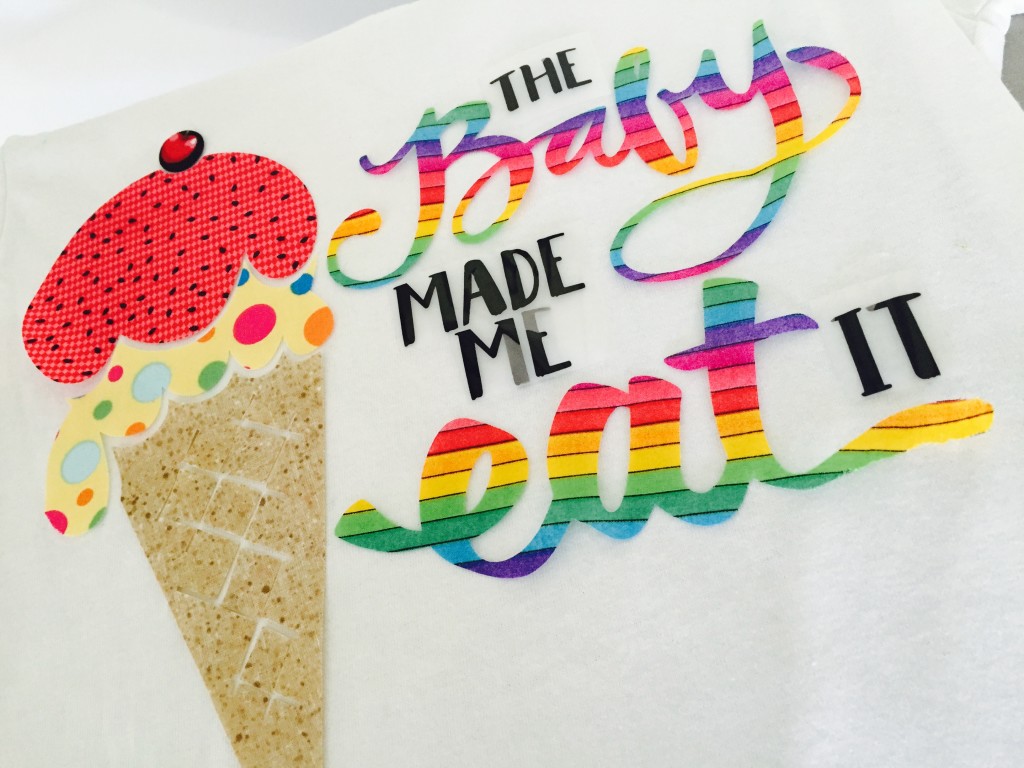
- Yay! You’ve made it – congrats! Now onto the final stretch. We’re almost there. Now that we have some really cool shapes to work with (that are all now totally iron-on appliques, mind you) we’re ready to put them on our final shirt.
- Place each piece individually exactly where you want it to be on your shirt.
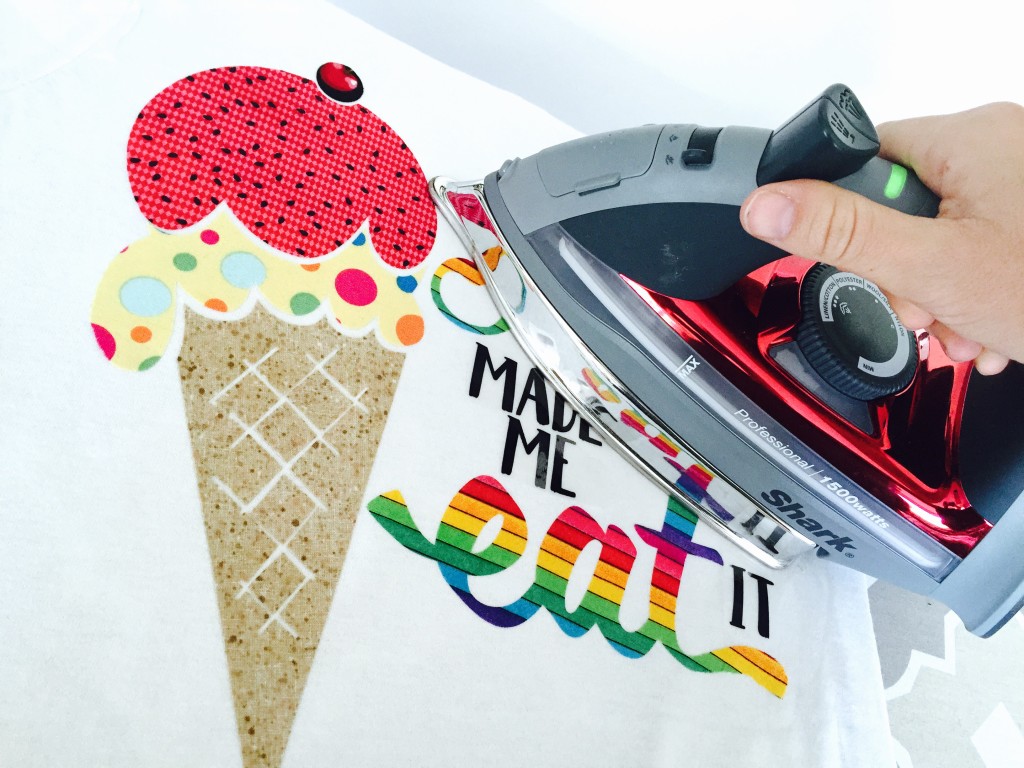
- Now, take your iron (set to medium/high heat) and gently iron over your entire design.
- Make sure to apply enough heat and pressure to each piece, but not move so fast as to knock one piece out of place while ironing another.
- I recommend 5-10 seconds of heat and then picking your iron up off your shirt and placing it down on the next section.
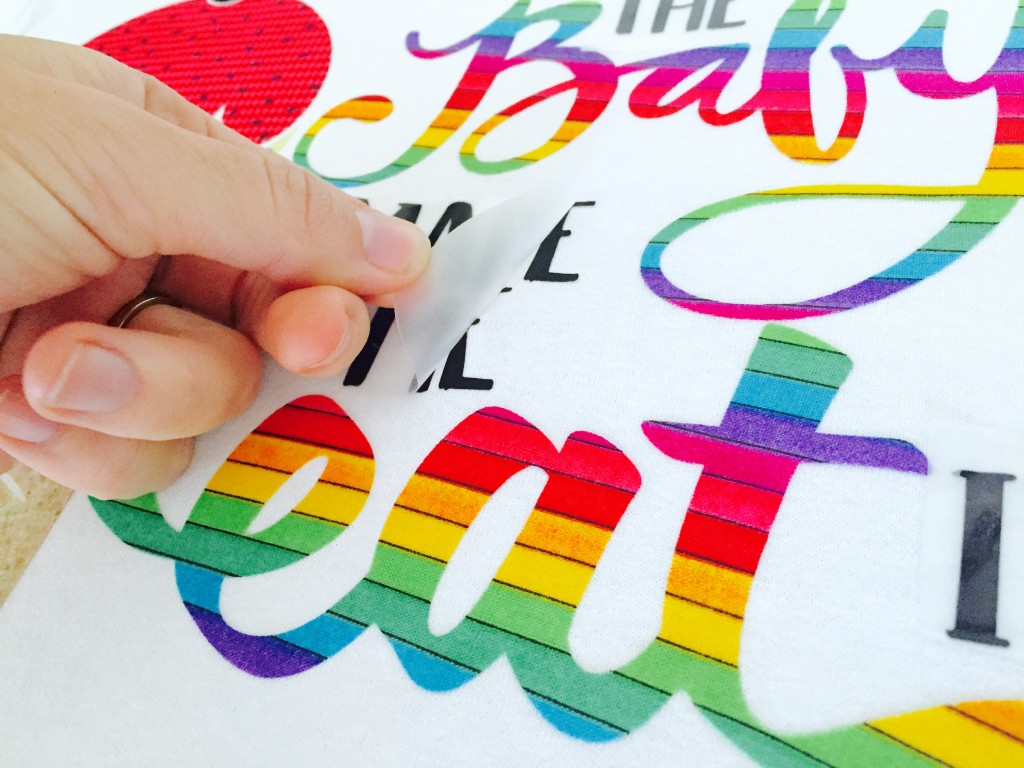
- Finally, remove the clear cover from on top of all the black heat transfer vinyl.
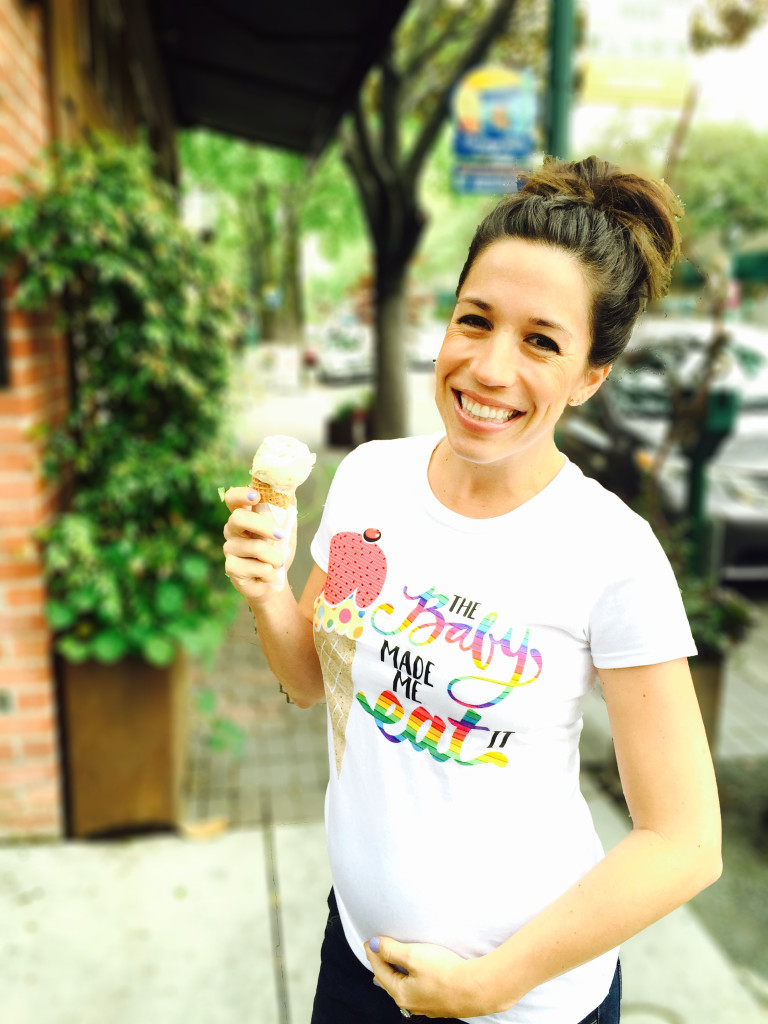
Ta da!


The day I took these pictures, it was probably in the low 60s outside. I swear, the baby made me eat it… and it was DELICIOUS (and totally worth it). Thanks, baby 🙂
This is such a fun shirt, for yourself or a preggo friend. And you don’t have to even make a shirt. Cheap tote bags work really well with this technique, too! So preggo or not, enjoy this fun craft for yourself – no kiddos involved!
If you’re ready to roll, here’s a recap of everything you’ll need:
The Necessary Supplies:
- Silhouette CAMEO
- Silhouette fabric cutting blade
- 12×12″ CAMEO cutting mat
- Silhouette clean cut fusible fabric stabilizer
- Silhouette 12″ smooth heat transfer vinyl- black
- Maternity T-Shirt
- Or plain tote bag if you want to try a different approach
- 4-5 different color fabric squares (approximately 5×10″ each)
- Iron
- Ruler
- Scissors
Shapes Needed From Silhouette Design Store:
- Free Shape of the Week 4/25/16 – Ice Cream Cone
- LW Brush Font (by Lori Whitlock) – Design #111700
- Baby Design (by Melissa Esplin) – Design #9647
- Eat Design (by Kolette Hall) – Design #37104
HAPPY CRAFTING, BABY!!
Leave a Reply