Ok, I have to admit, I’m kind of giddy about this post. I have no idea why this project was so exciting to me – like I don’t have enough going on in my life! In February, I had a a spike in Etsy orders, a friend’s wedding I was making decorations for, a bachelorette party to plan, and a bridal shower to host.
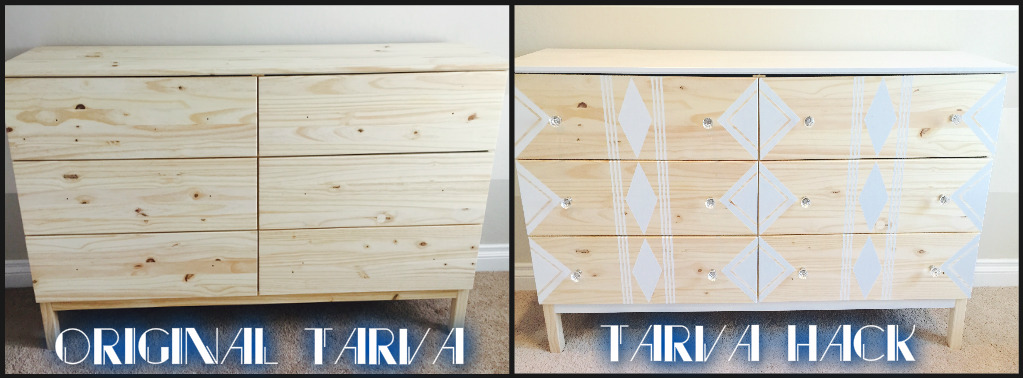
But on top of ALL that madness, I couldn’t get this stinking dresser out of my head. So what was first on my list of projects to complete? The one that had absolutely no urgency…my fun dresser Ikea hack.
Granted, I had this dresser in mind for my baby’s room. However, he’s not due until late July. And this, my friends, was February. I had just returned from a 2 week vacation, and all of my other labor intensive projects had to be done by March!
But…much to my husband’s dismay, I couldn’t resist such a fun project! And at such a low price! You know how I love my DIY bargains 😉 I convinced myself that his entire room needed to be complete before my belly started to get bigger, therefore, this project WAS a priority (right?). Right!
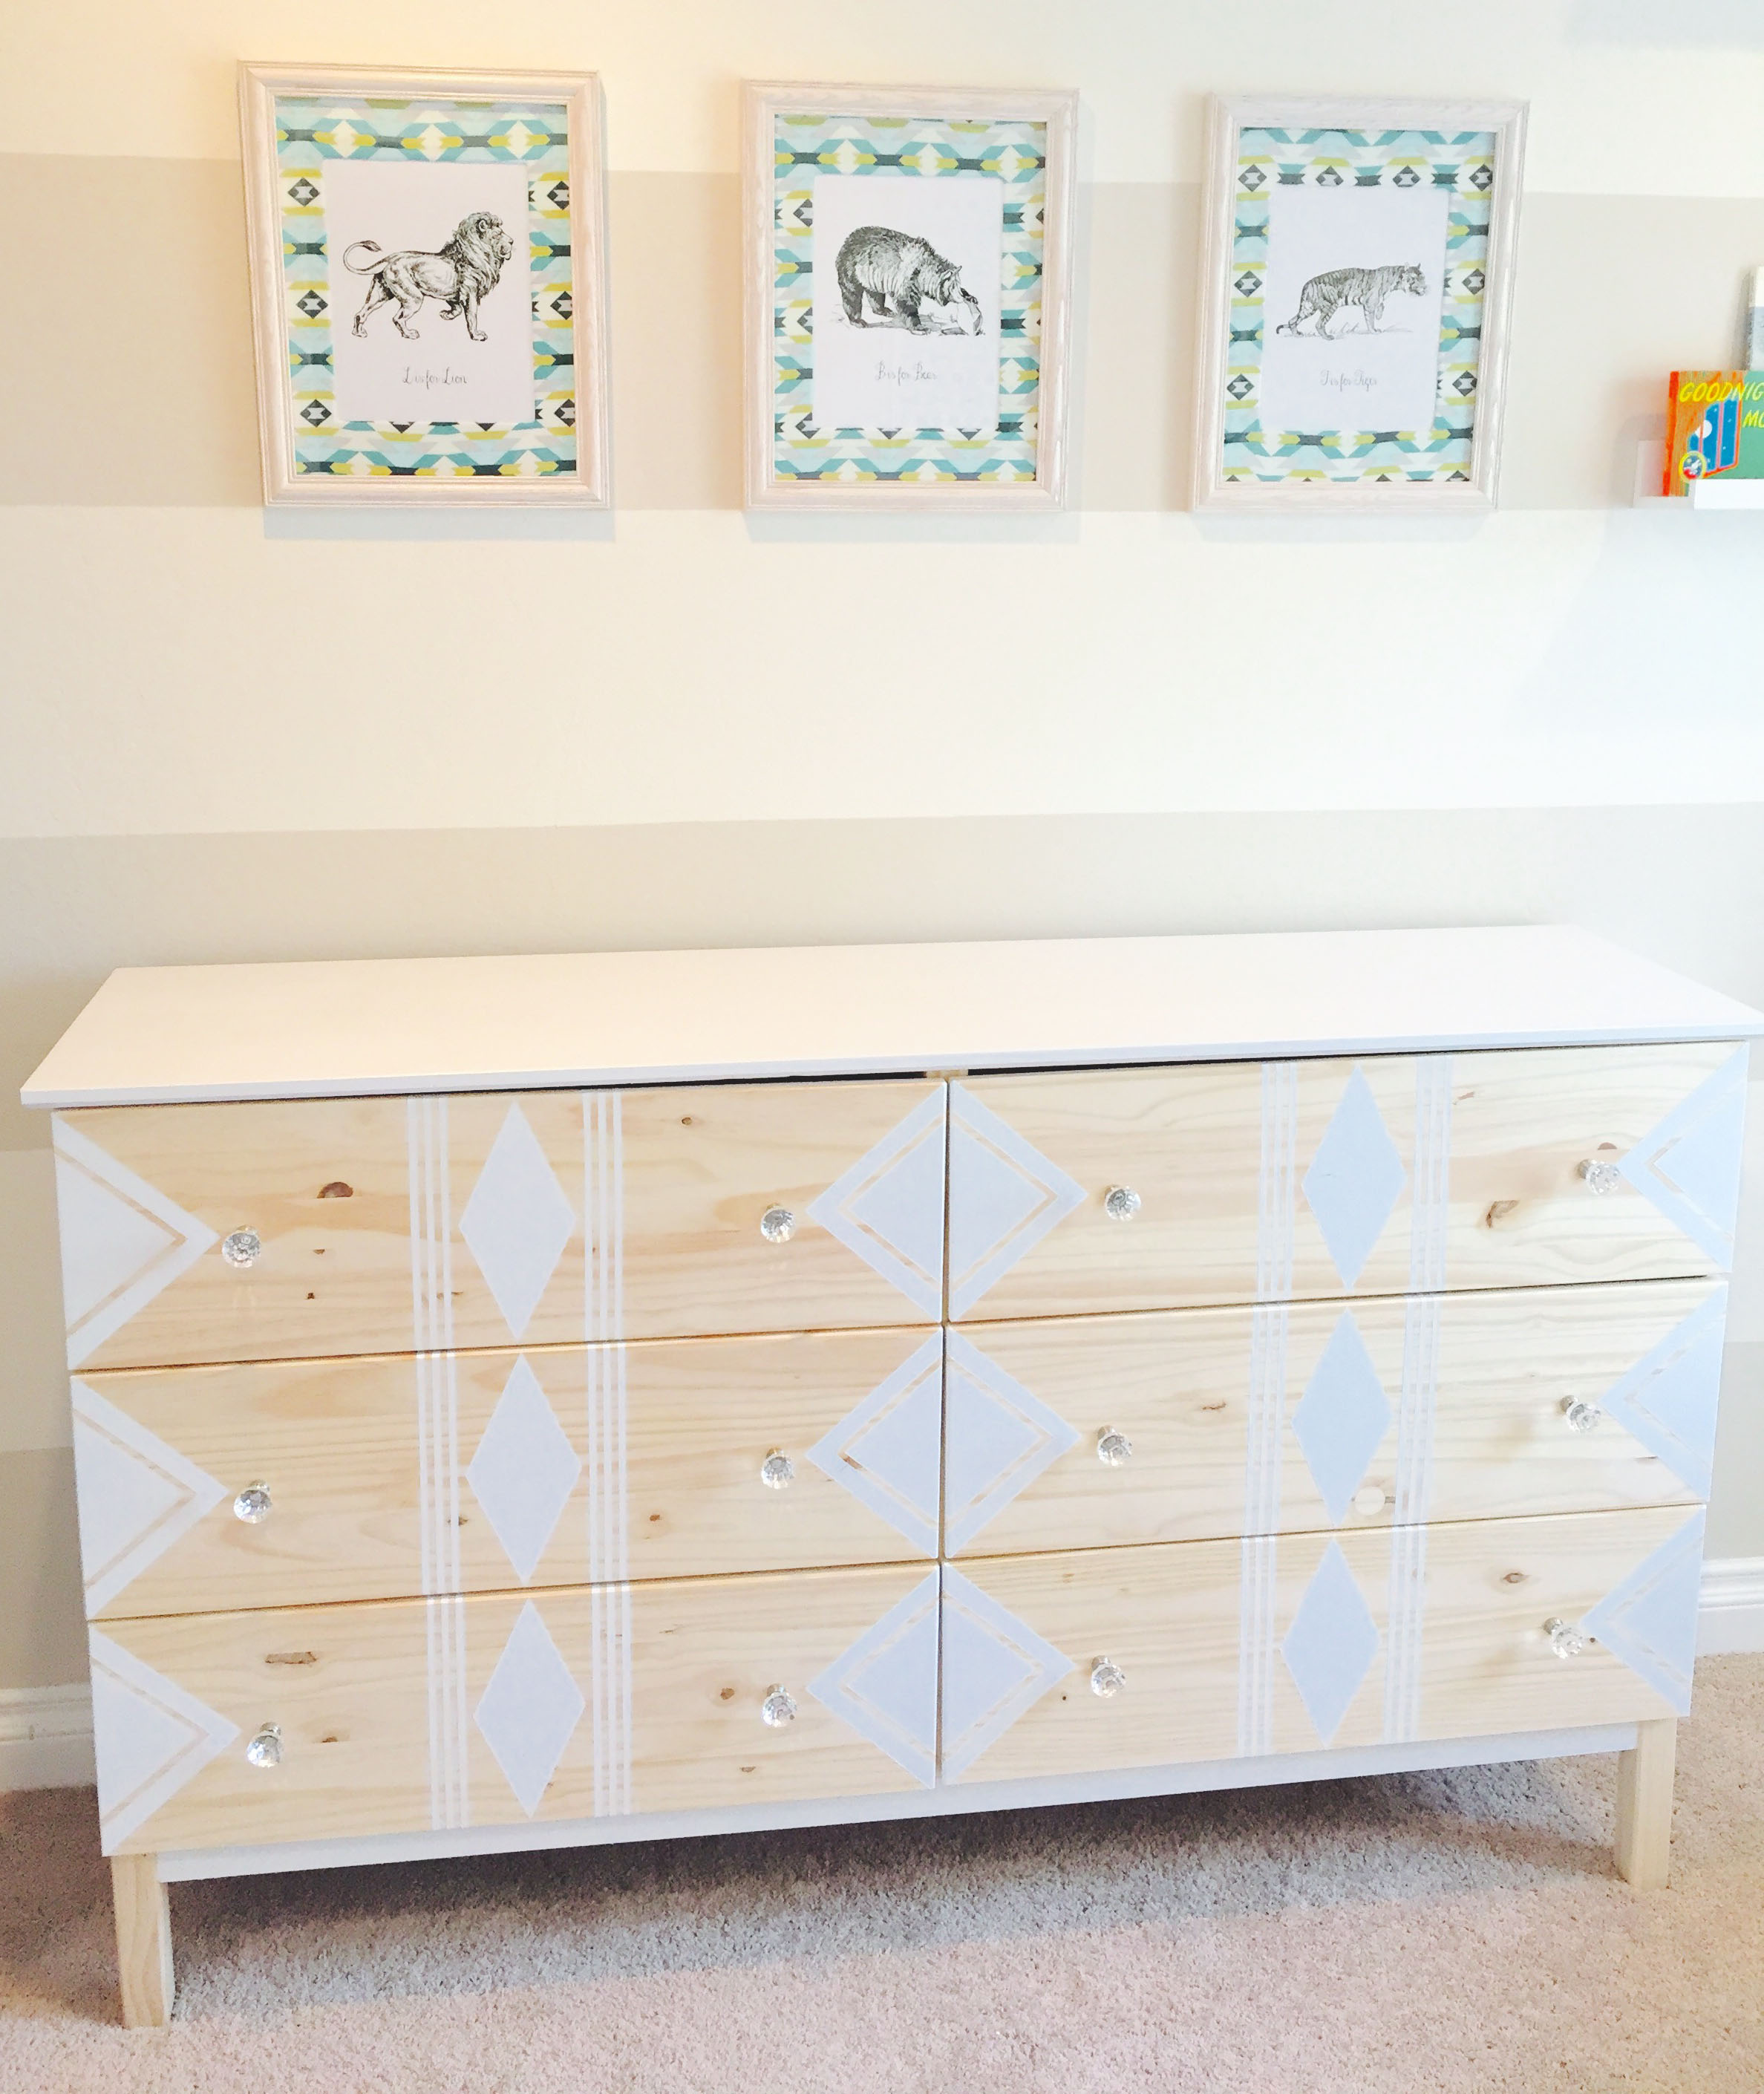
I designed his entire room around this idea for a dresser. I wanted it to look modern, yet outdoorsy and boyish- without being too cliche.
To this date, I have painted his dresser, matted custom frames, sewn custom crib bumper, sewn a custom crib skirt, and I have fabric on the way to make custom curtains and reupholster an old rocking glider chair. All in the matter of 4 weeks. All while STILL having other urgent projects cutting it close to the deadline. Am I crazy- yes, absolutely! Is it worth it? 100%!
Over the coming weeks, I’ll reveal bits and pieces of Bizi Baby’s room, and how to create each unique piece of his little oasis. But I can assuredly tell you, even before finishing his room, that this is by far and away my favorite piece of Bizi Baby’s room.
I mean, it’s so versatile! I kind of wish my bedroom wasn’t already designed so I could use it for myself. But alas, all my projects aren’t that selfish.
But you can totally see how this one isn’t just made for a baby, or a boy. It would add flavor to ANY room, for ANY person, with most ANY taste. It’s one of those irresistable pieces people will be asking you where you got for years to come. And it’s a DIY! You’ll feel so proud when you tell them they can’t buy it in stores and that you did it yourself (sounds so elitist- haha!).
All in, this project cost me around $200 (give or take $15). Can you believe it? That’s less than mot dressers cost retail! And you’ll get a custom piece of furniture! It’s a huge win for your room and your wallet.
Just follow the steps below to make your very own custom Ikea hack dresser! You can follow my design, or make one up yourself. Just use the techniques I show you for taping and painting and you’ll be set to go!
The Necessary Supplies:
- Ikea TARVA 6 drawer chest (unfinished pine)
- You can also make a smaller version using the 3 drawer TARVA or 3 drawer RAST (both cheaper versions, both unfinished pine).
- Crystal Glass Cabinet Knobs (12 pieces)
- 1″ Blue Painter’s Tape (EdgeLock version is my favorite for painting, when available)
- .25″ Blue Painters Tape
- White Oil Based Rustoleum Paint (MUST be oil based, not water based).
- I used the SATIN WHITE finish
- High density sponge roller
- Plastic pan for paint (to dip roller in)
- Foam paint brushes
- Protective sheeting for floor (to use underneath dresser to prevent paint drips onto floor)
Step 1:
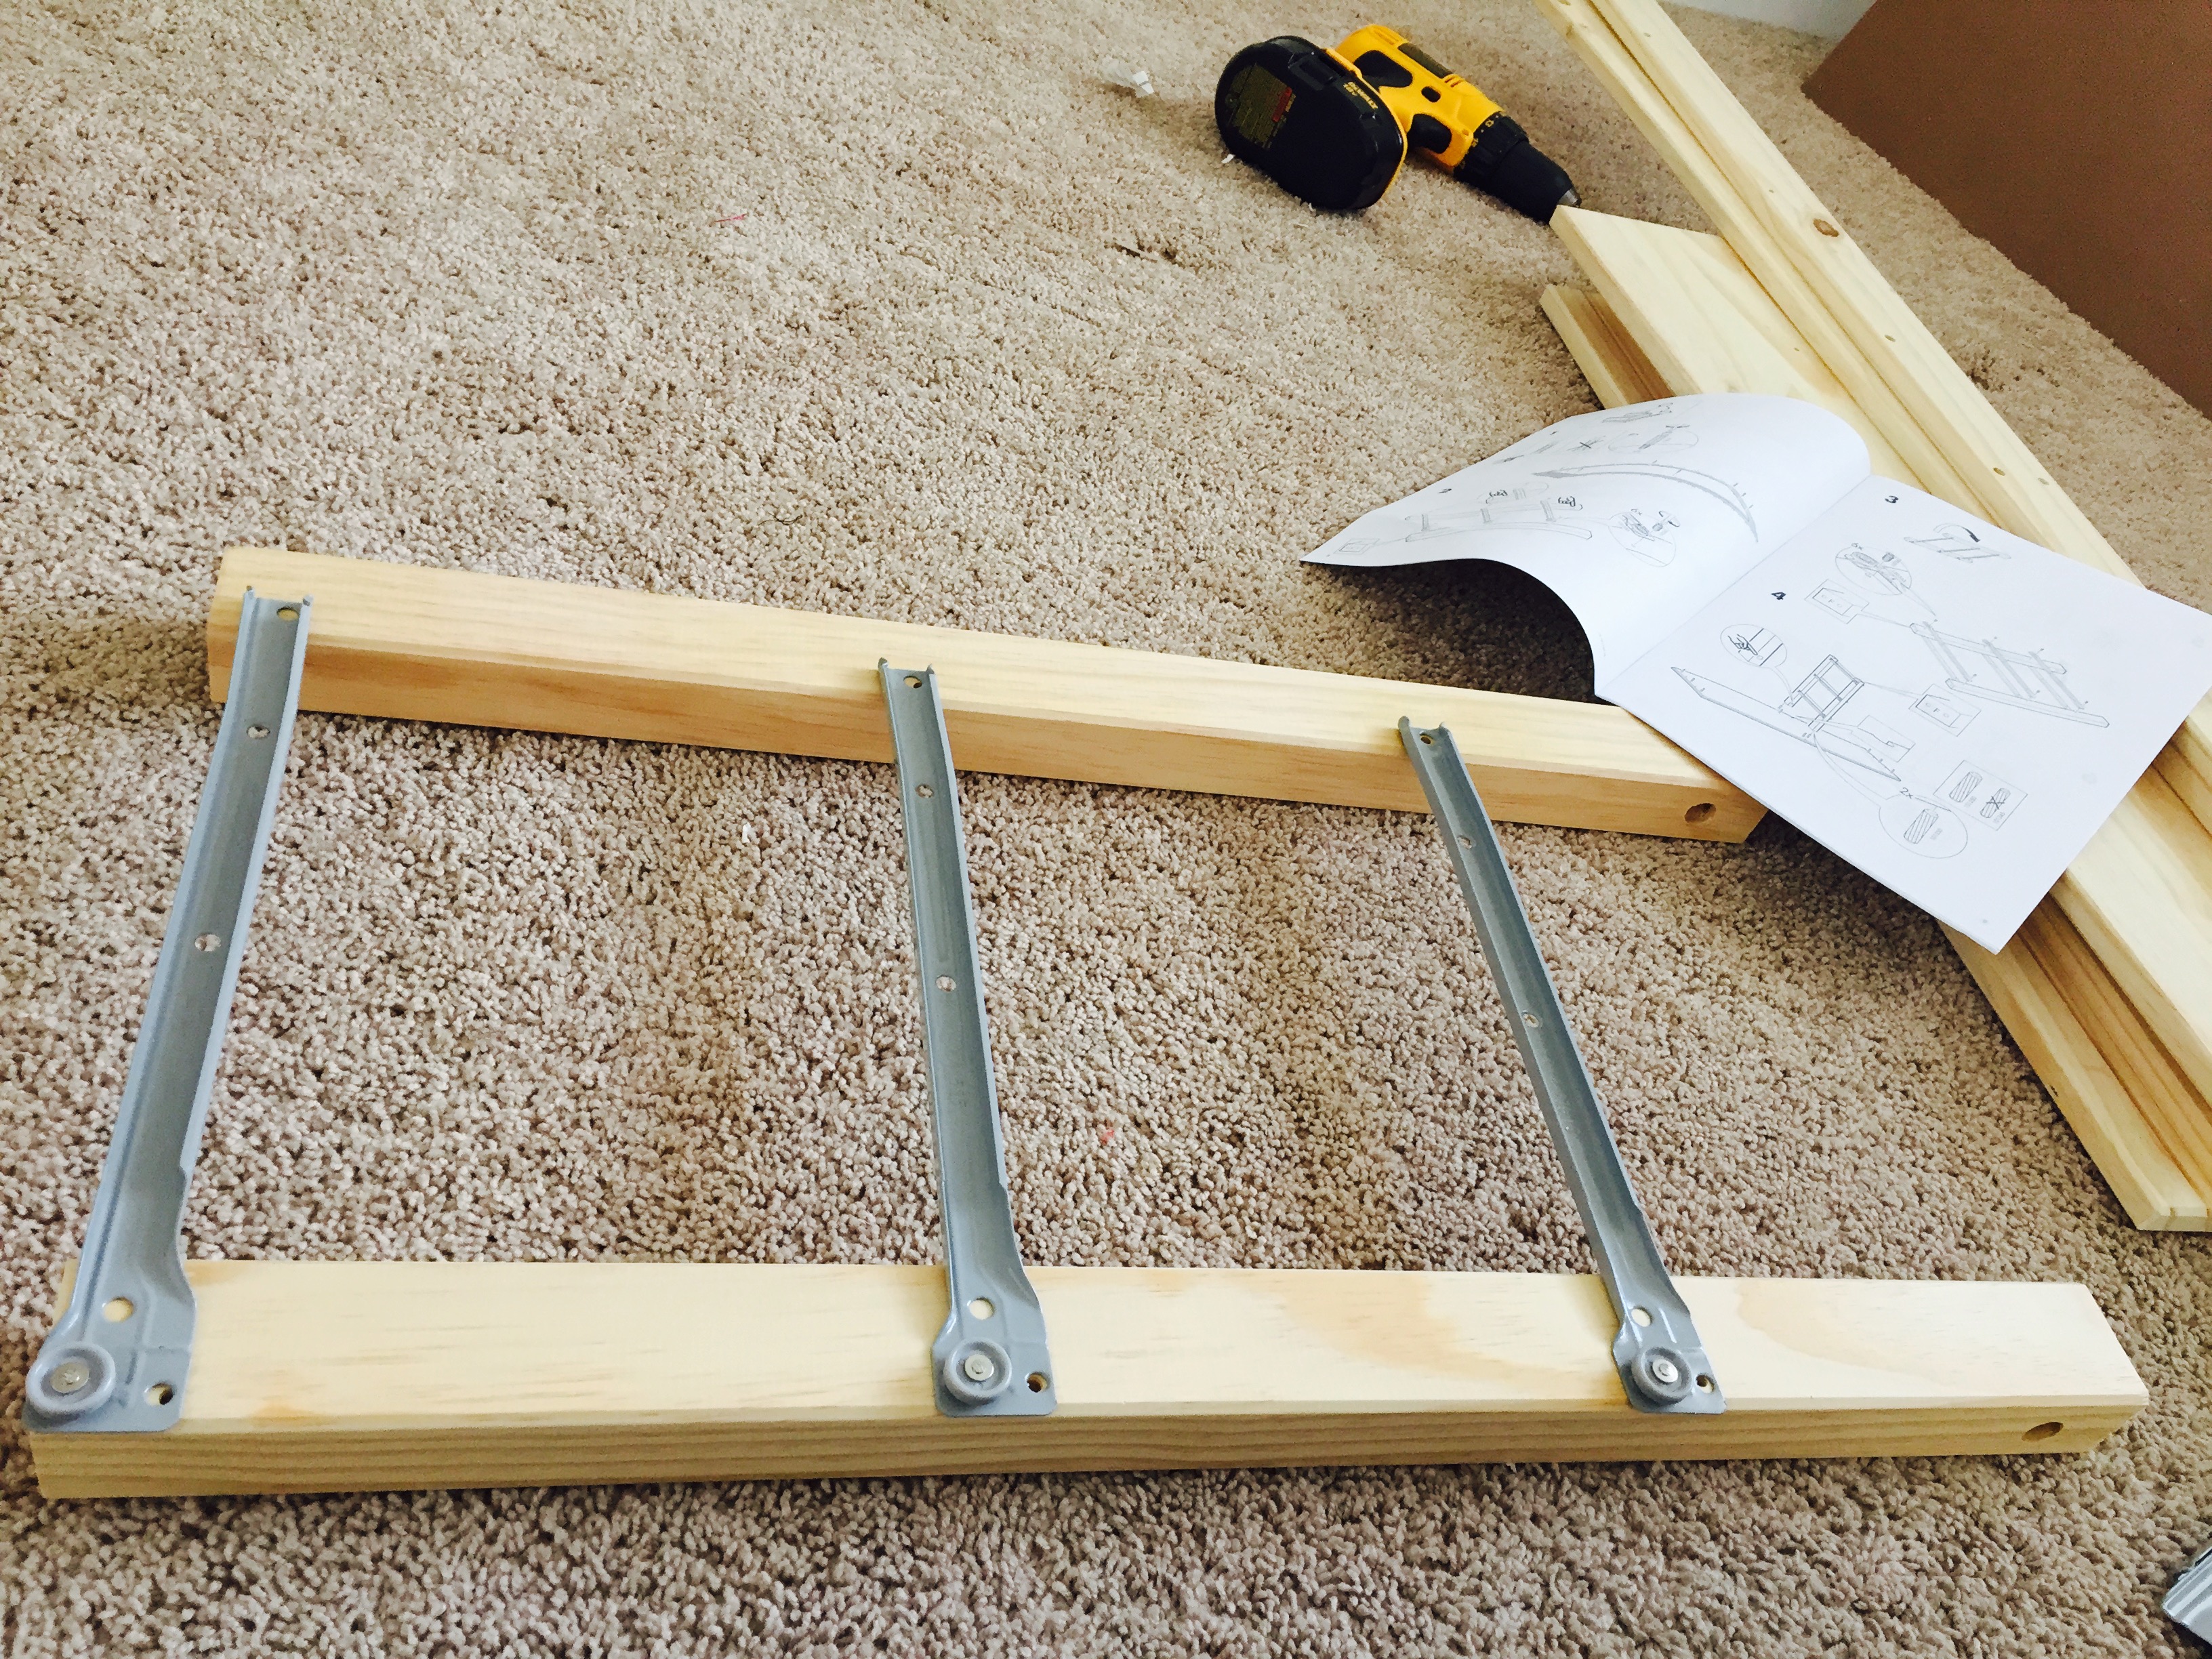
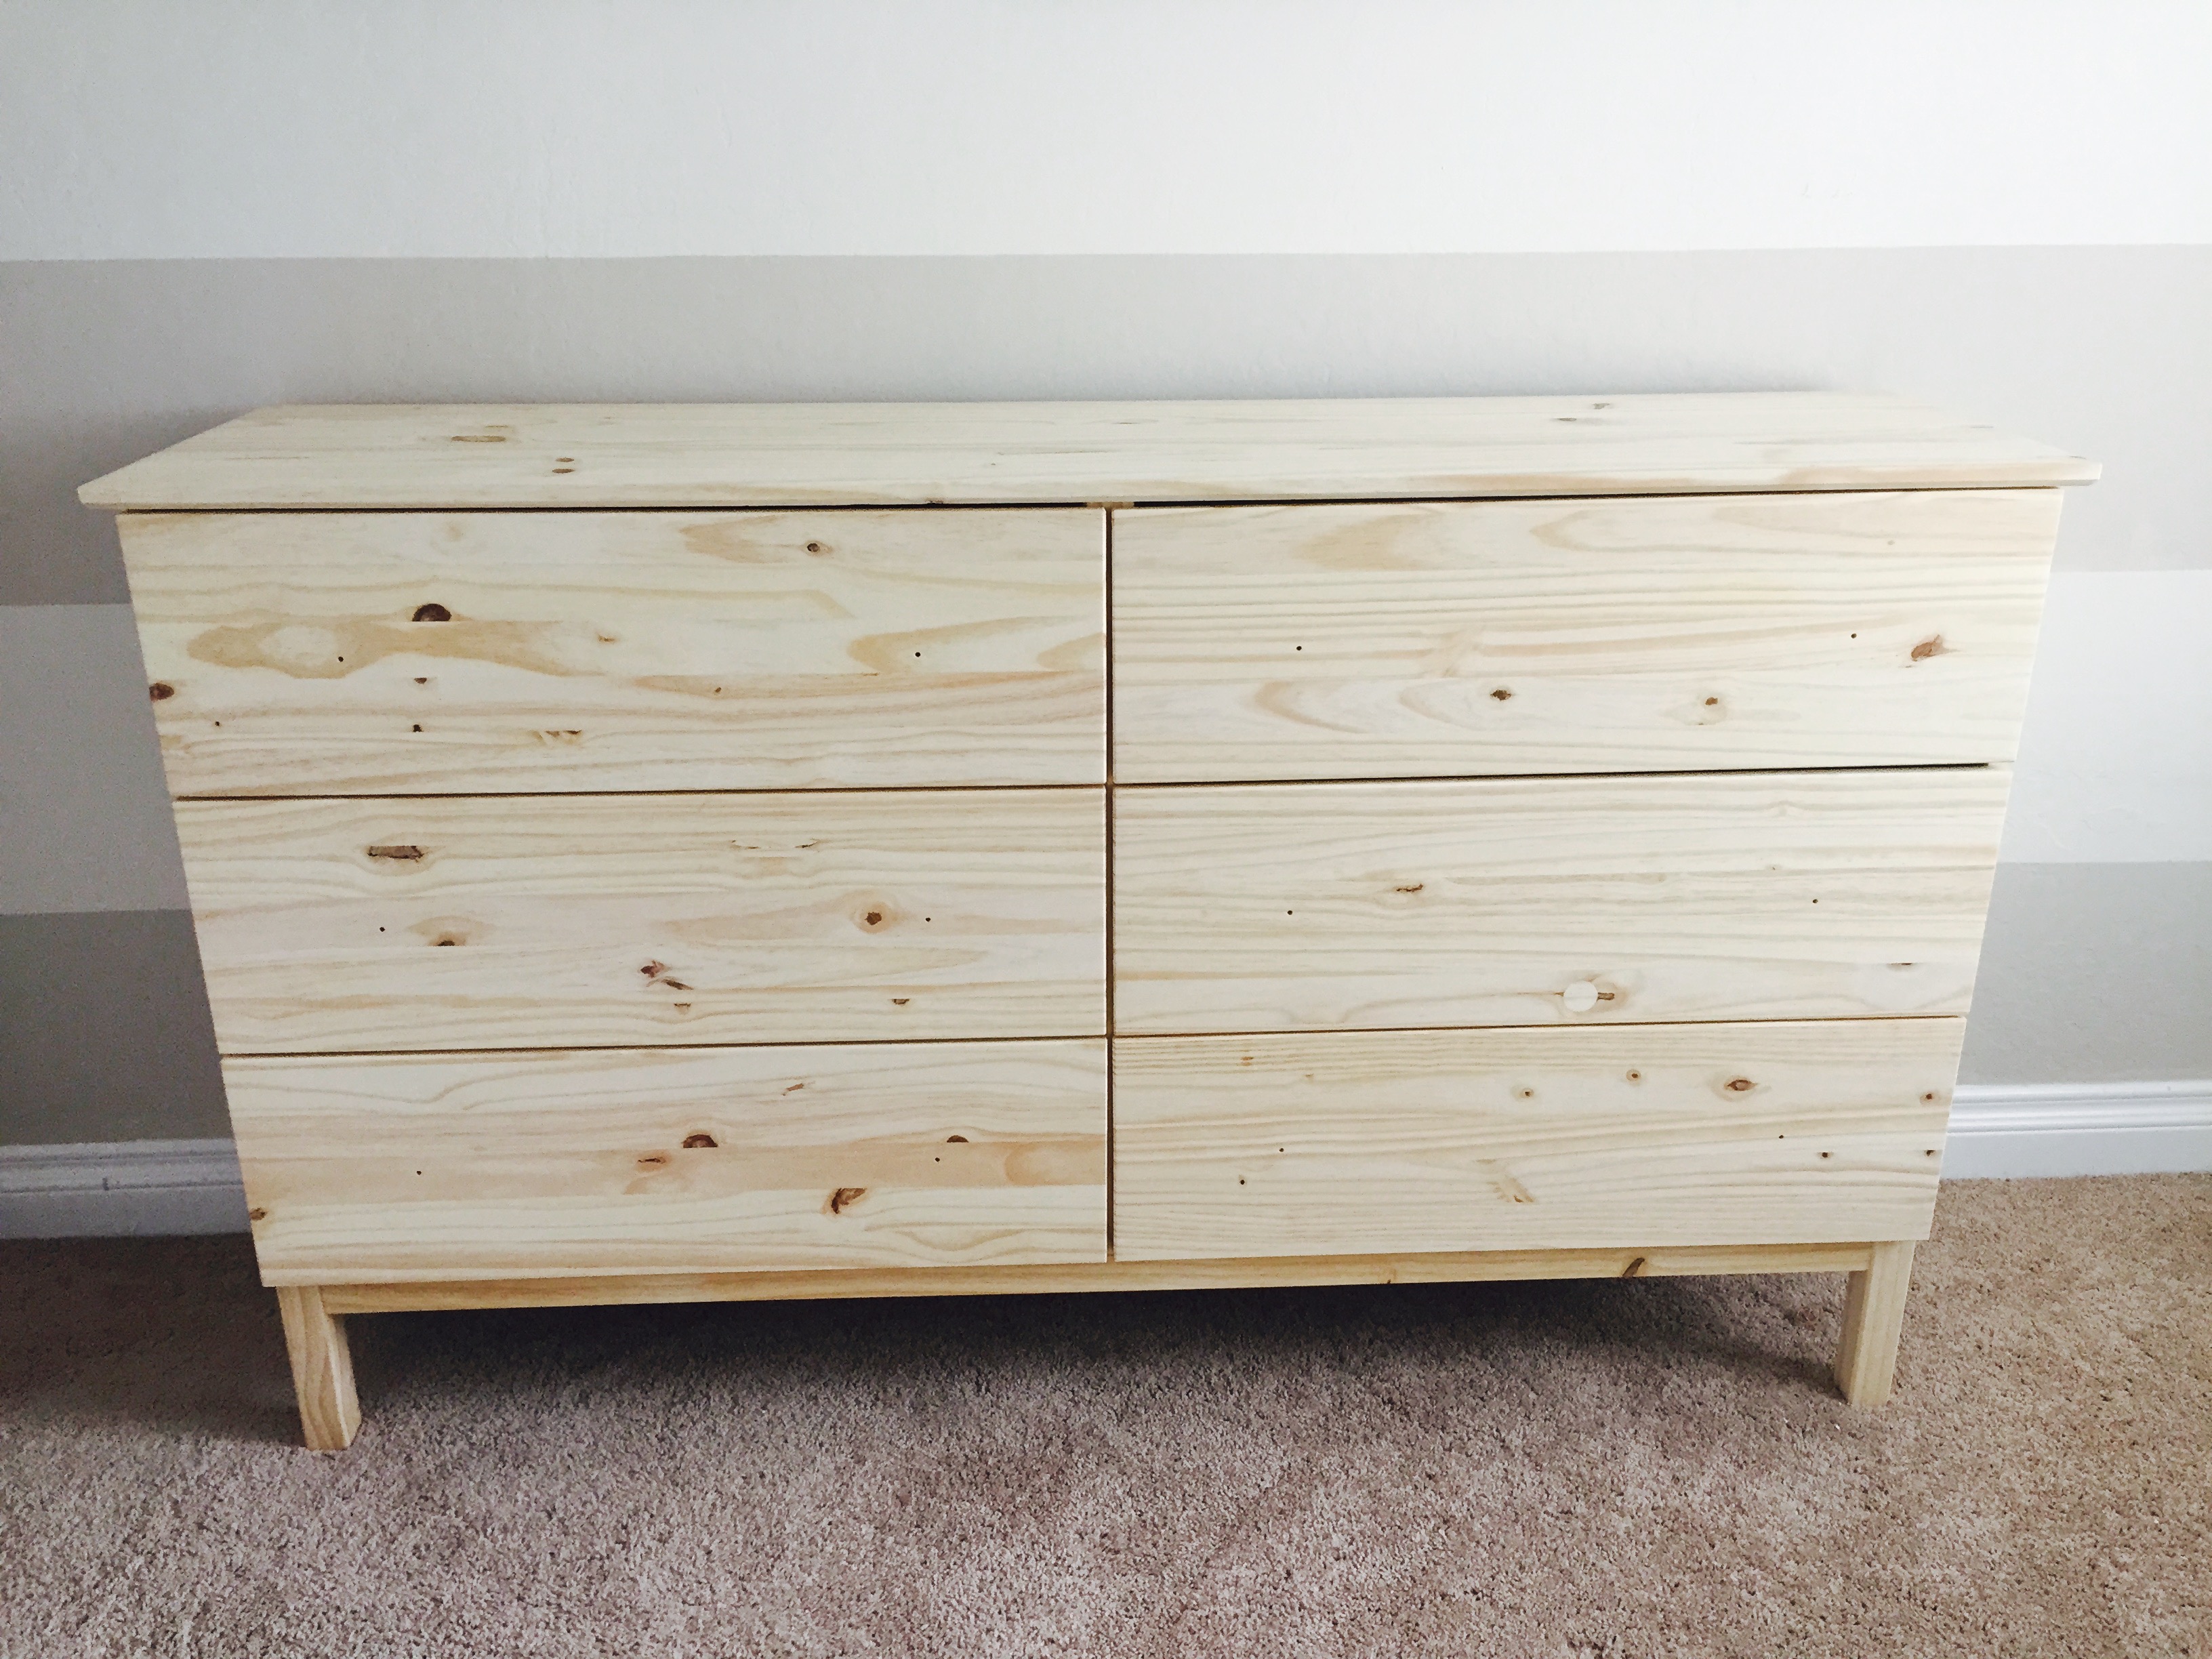
- Assemble your piece of Ikea furniture according to the (often hard to read) instructions.
Step 2:
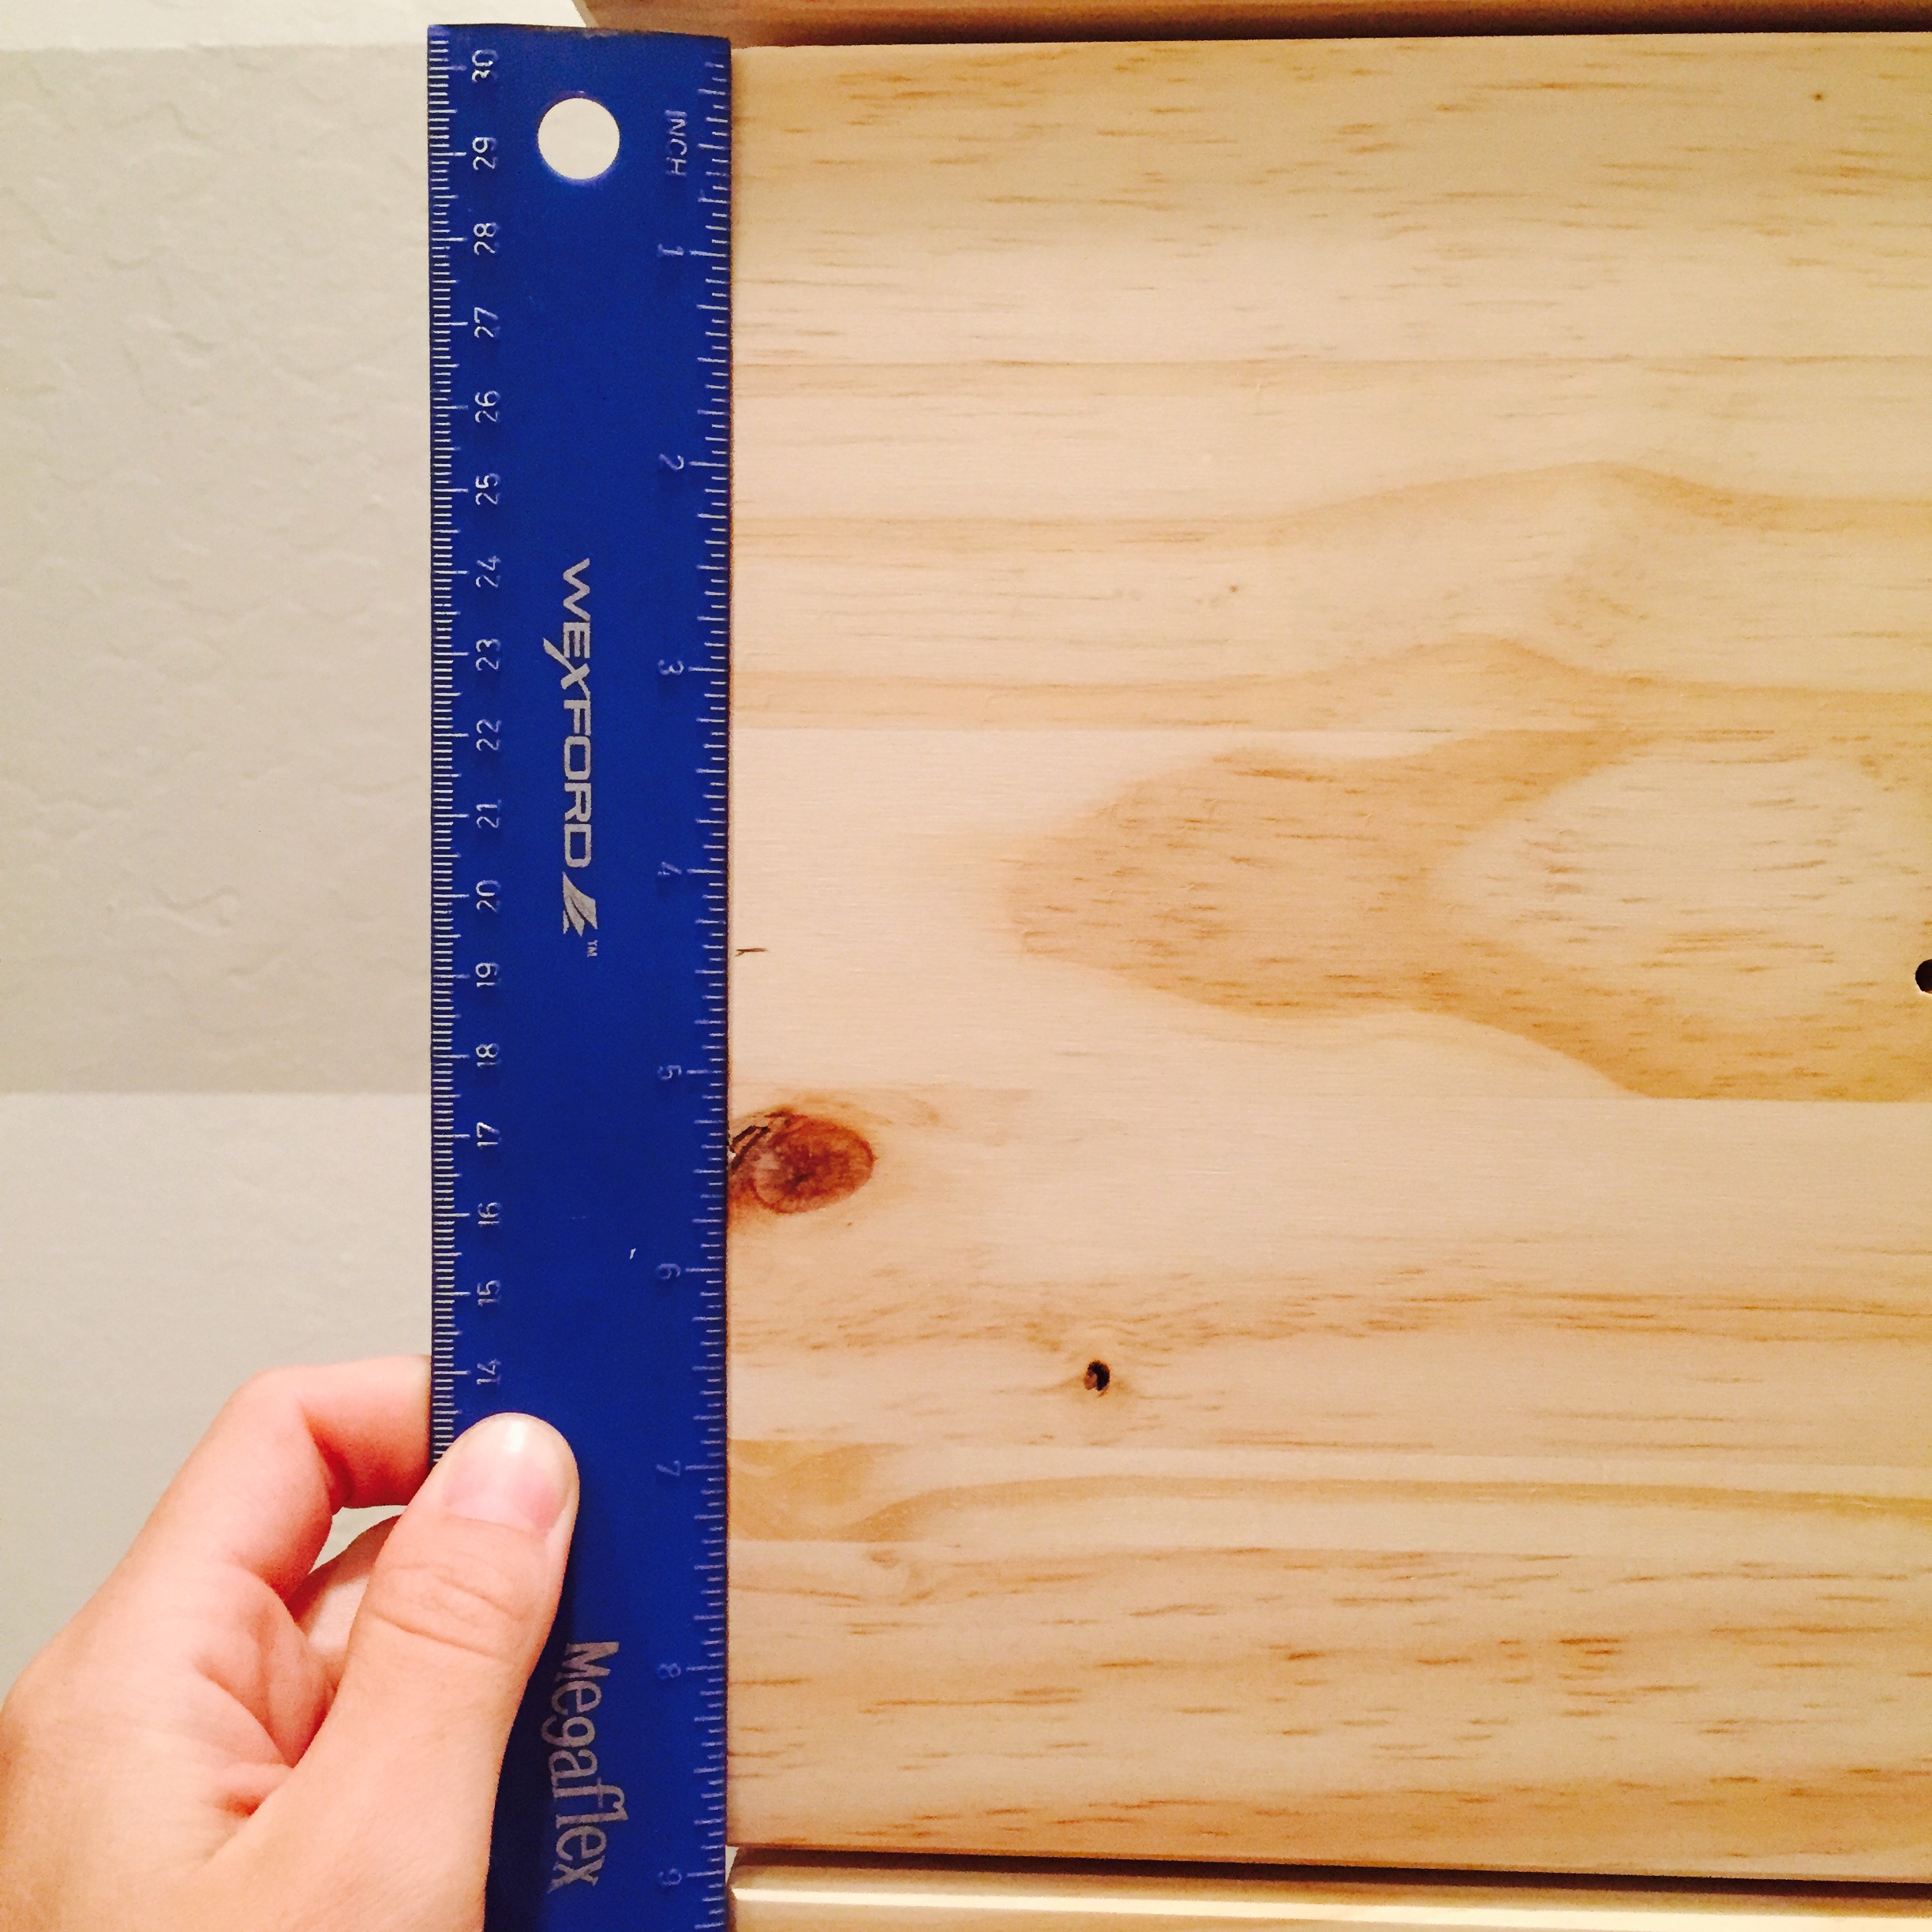
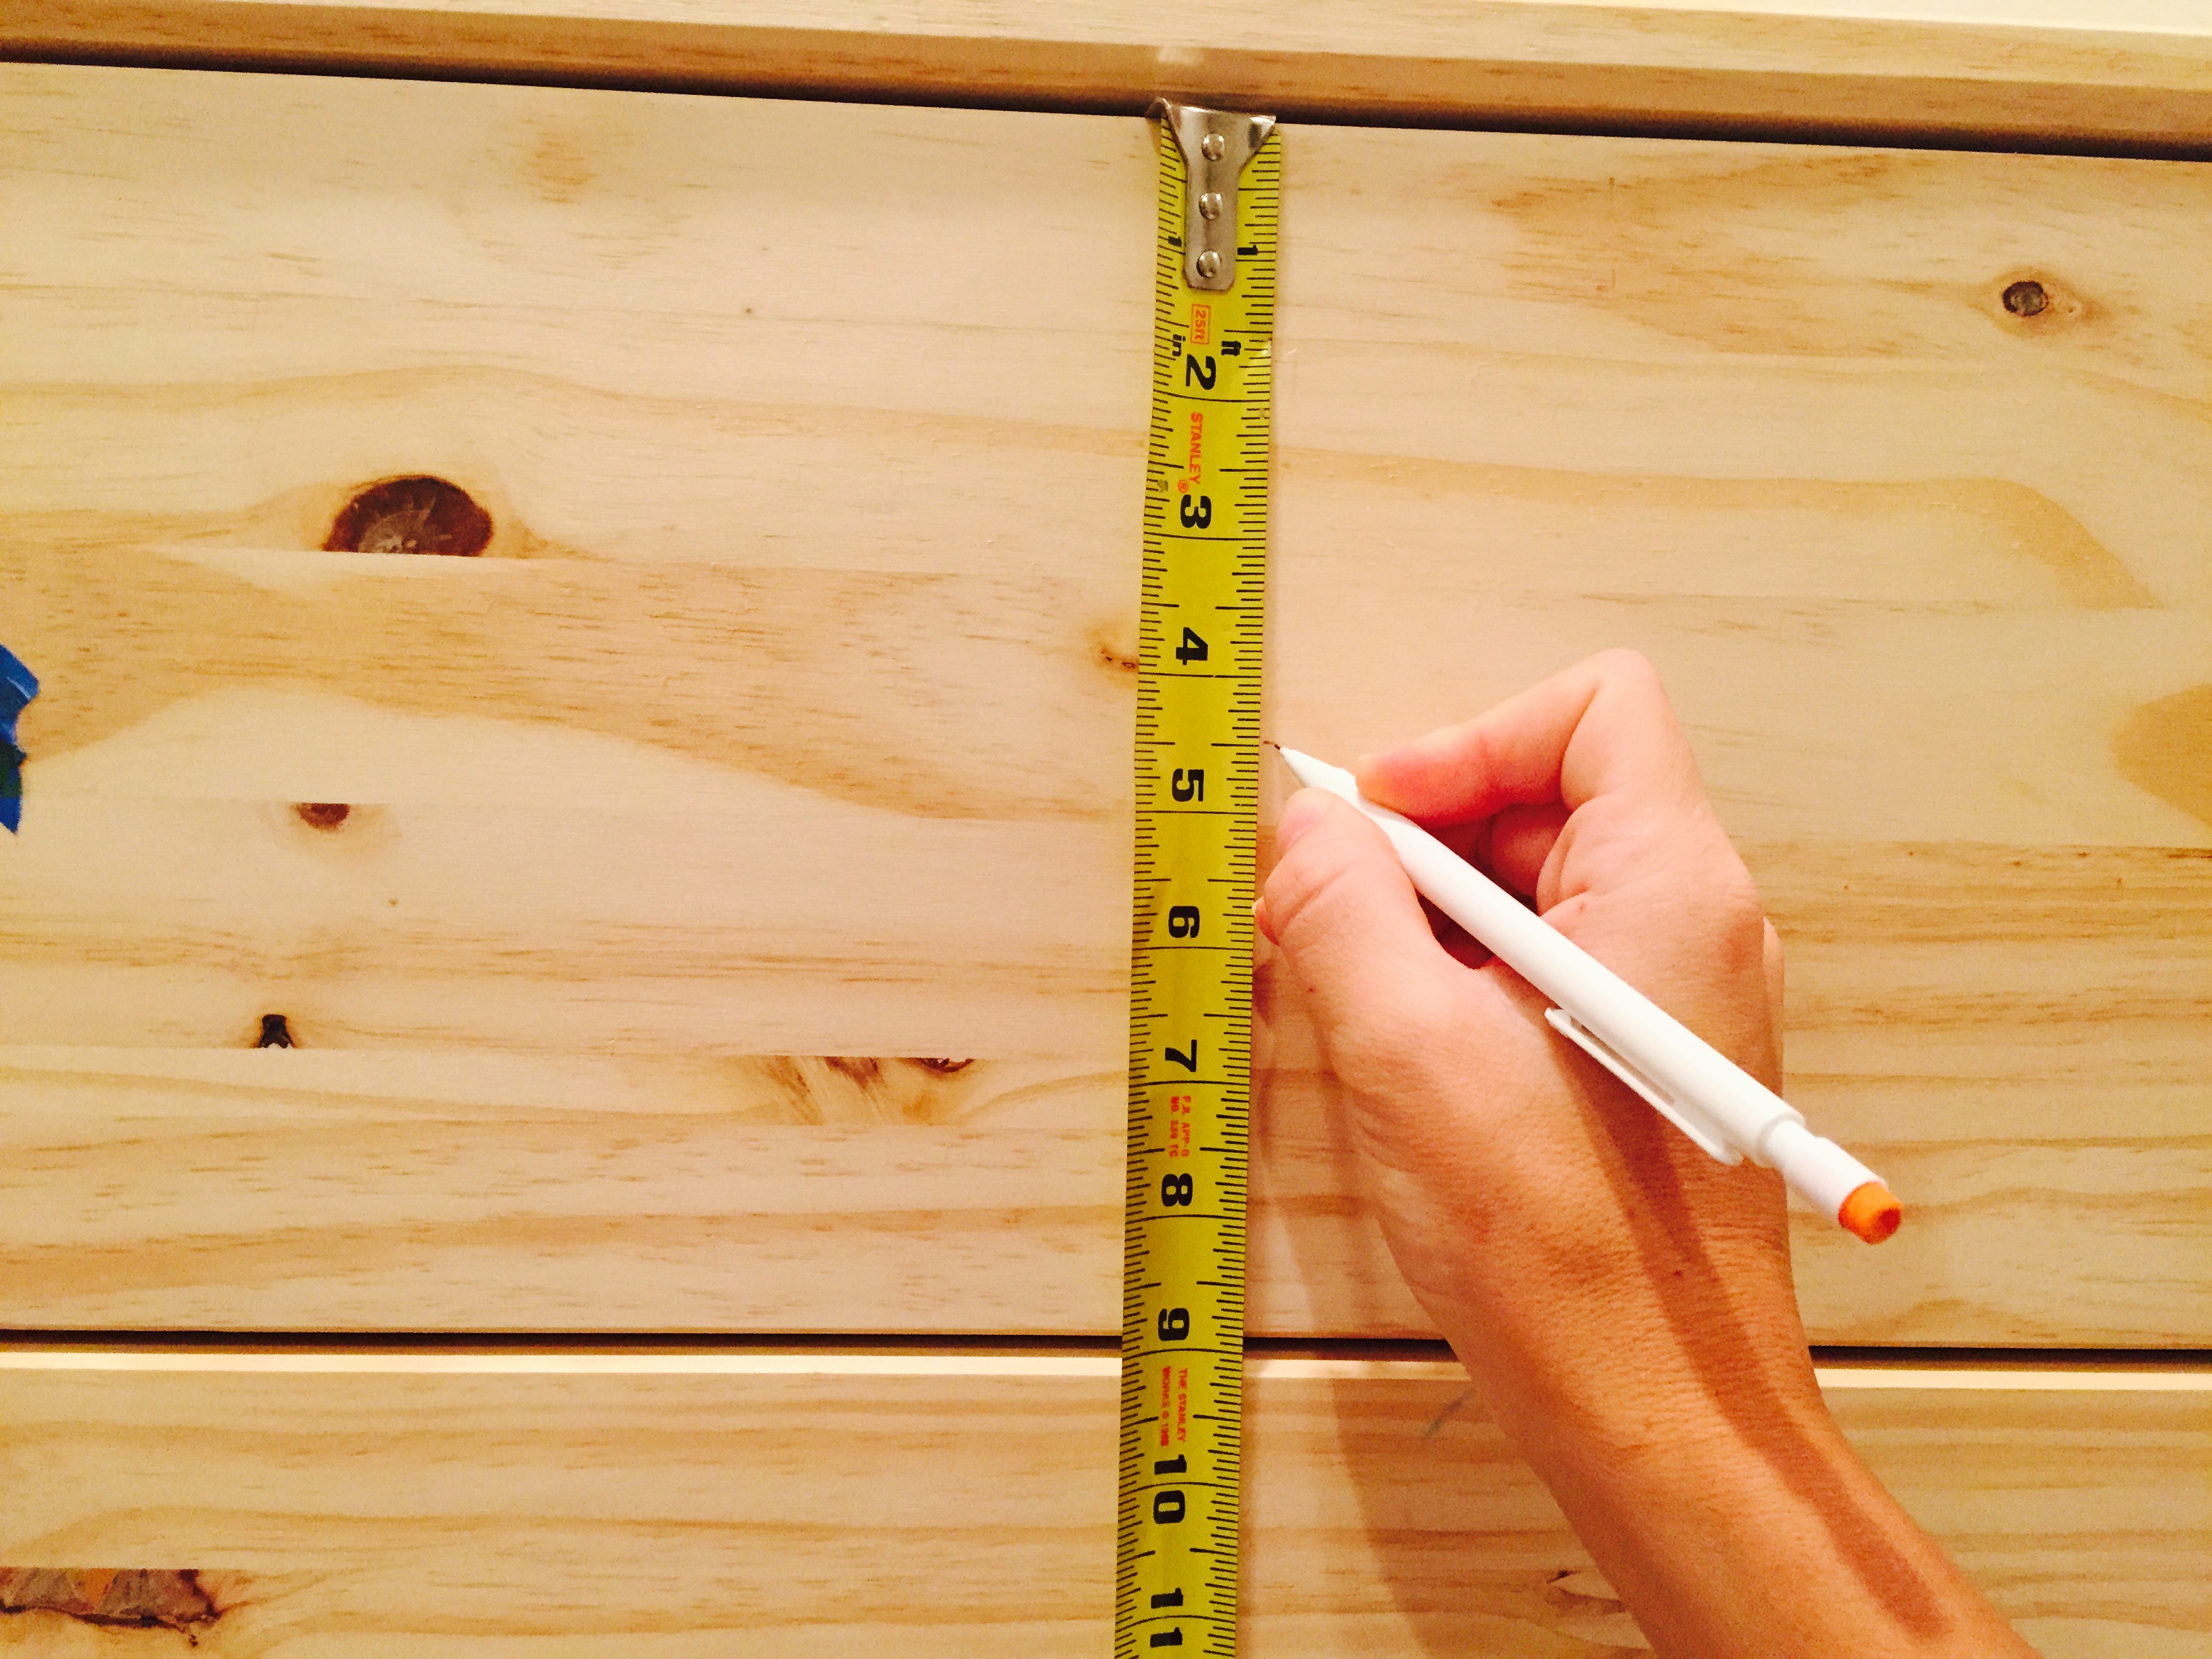
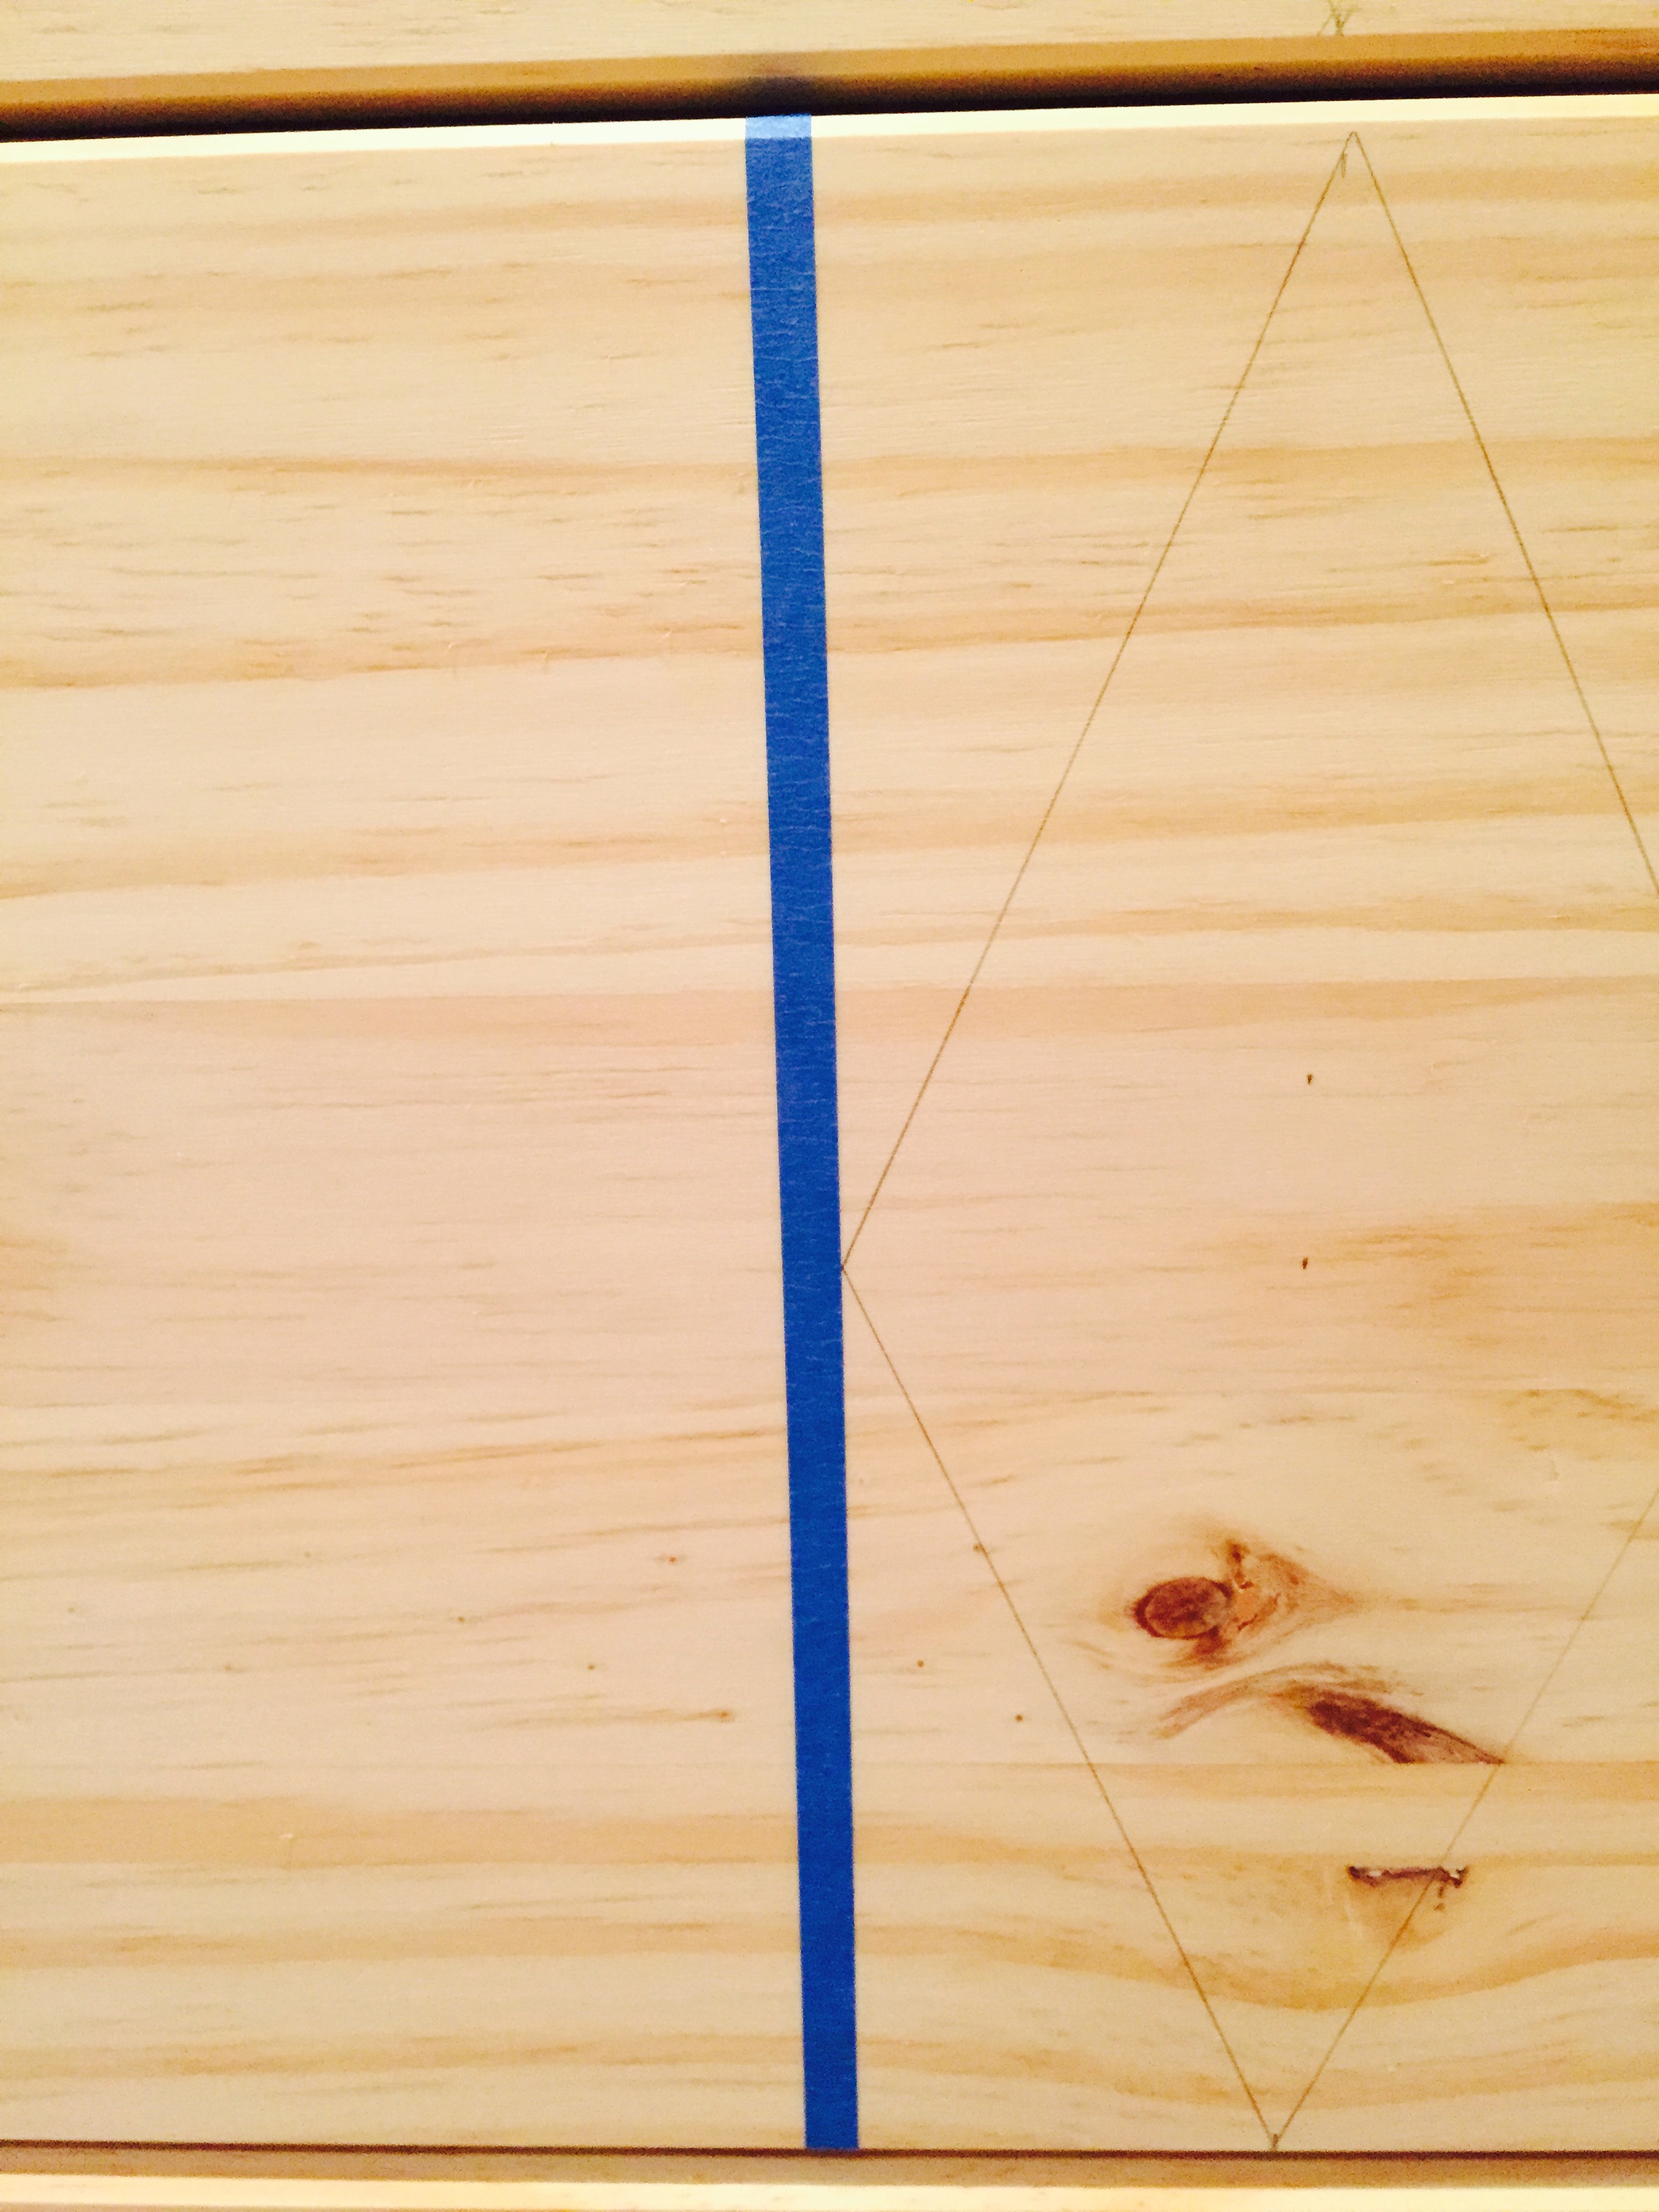
- Measure down the side of each drawer for the drawer length. Put a mark with your pencil directly in the center of the length of the drawer.
- Then, measure about 1″ in from hardware hole on the left side of the drawer. Again, make a mark with your pencil.
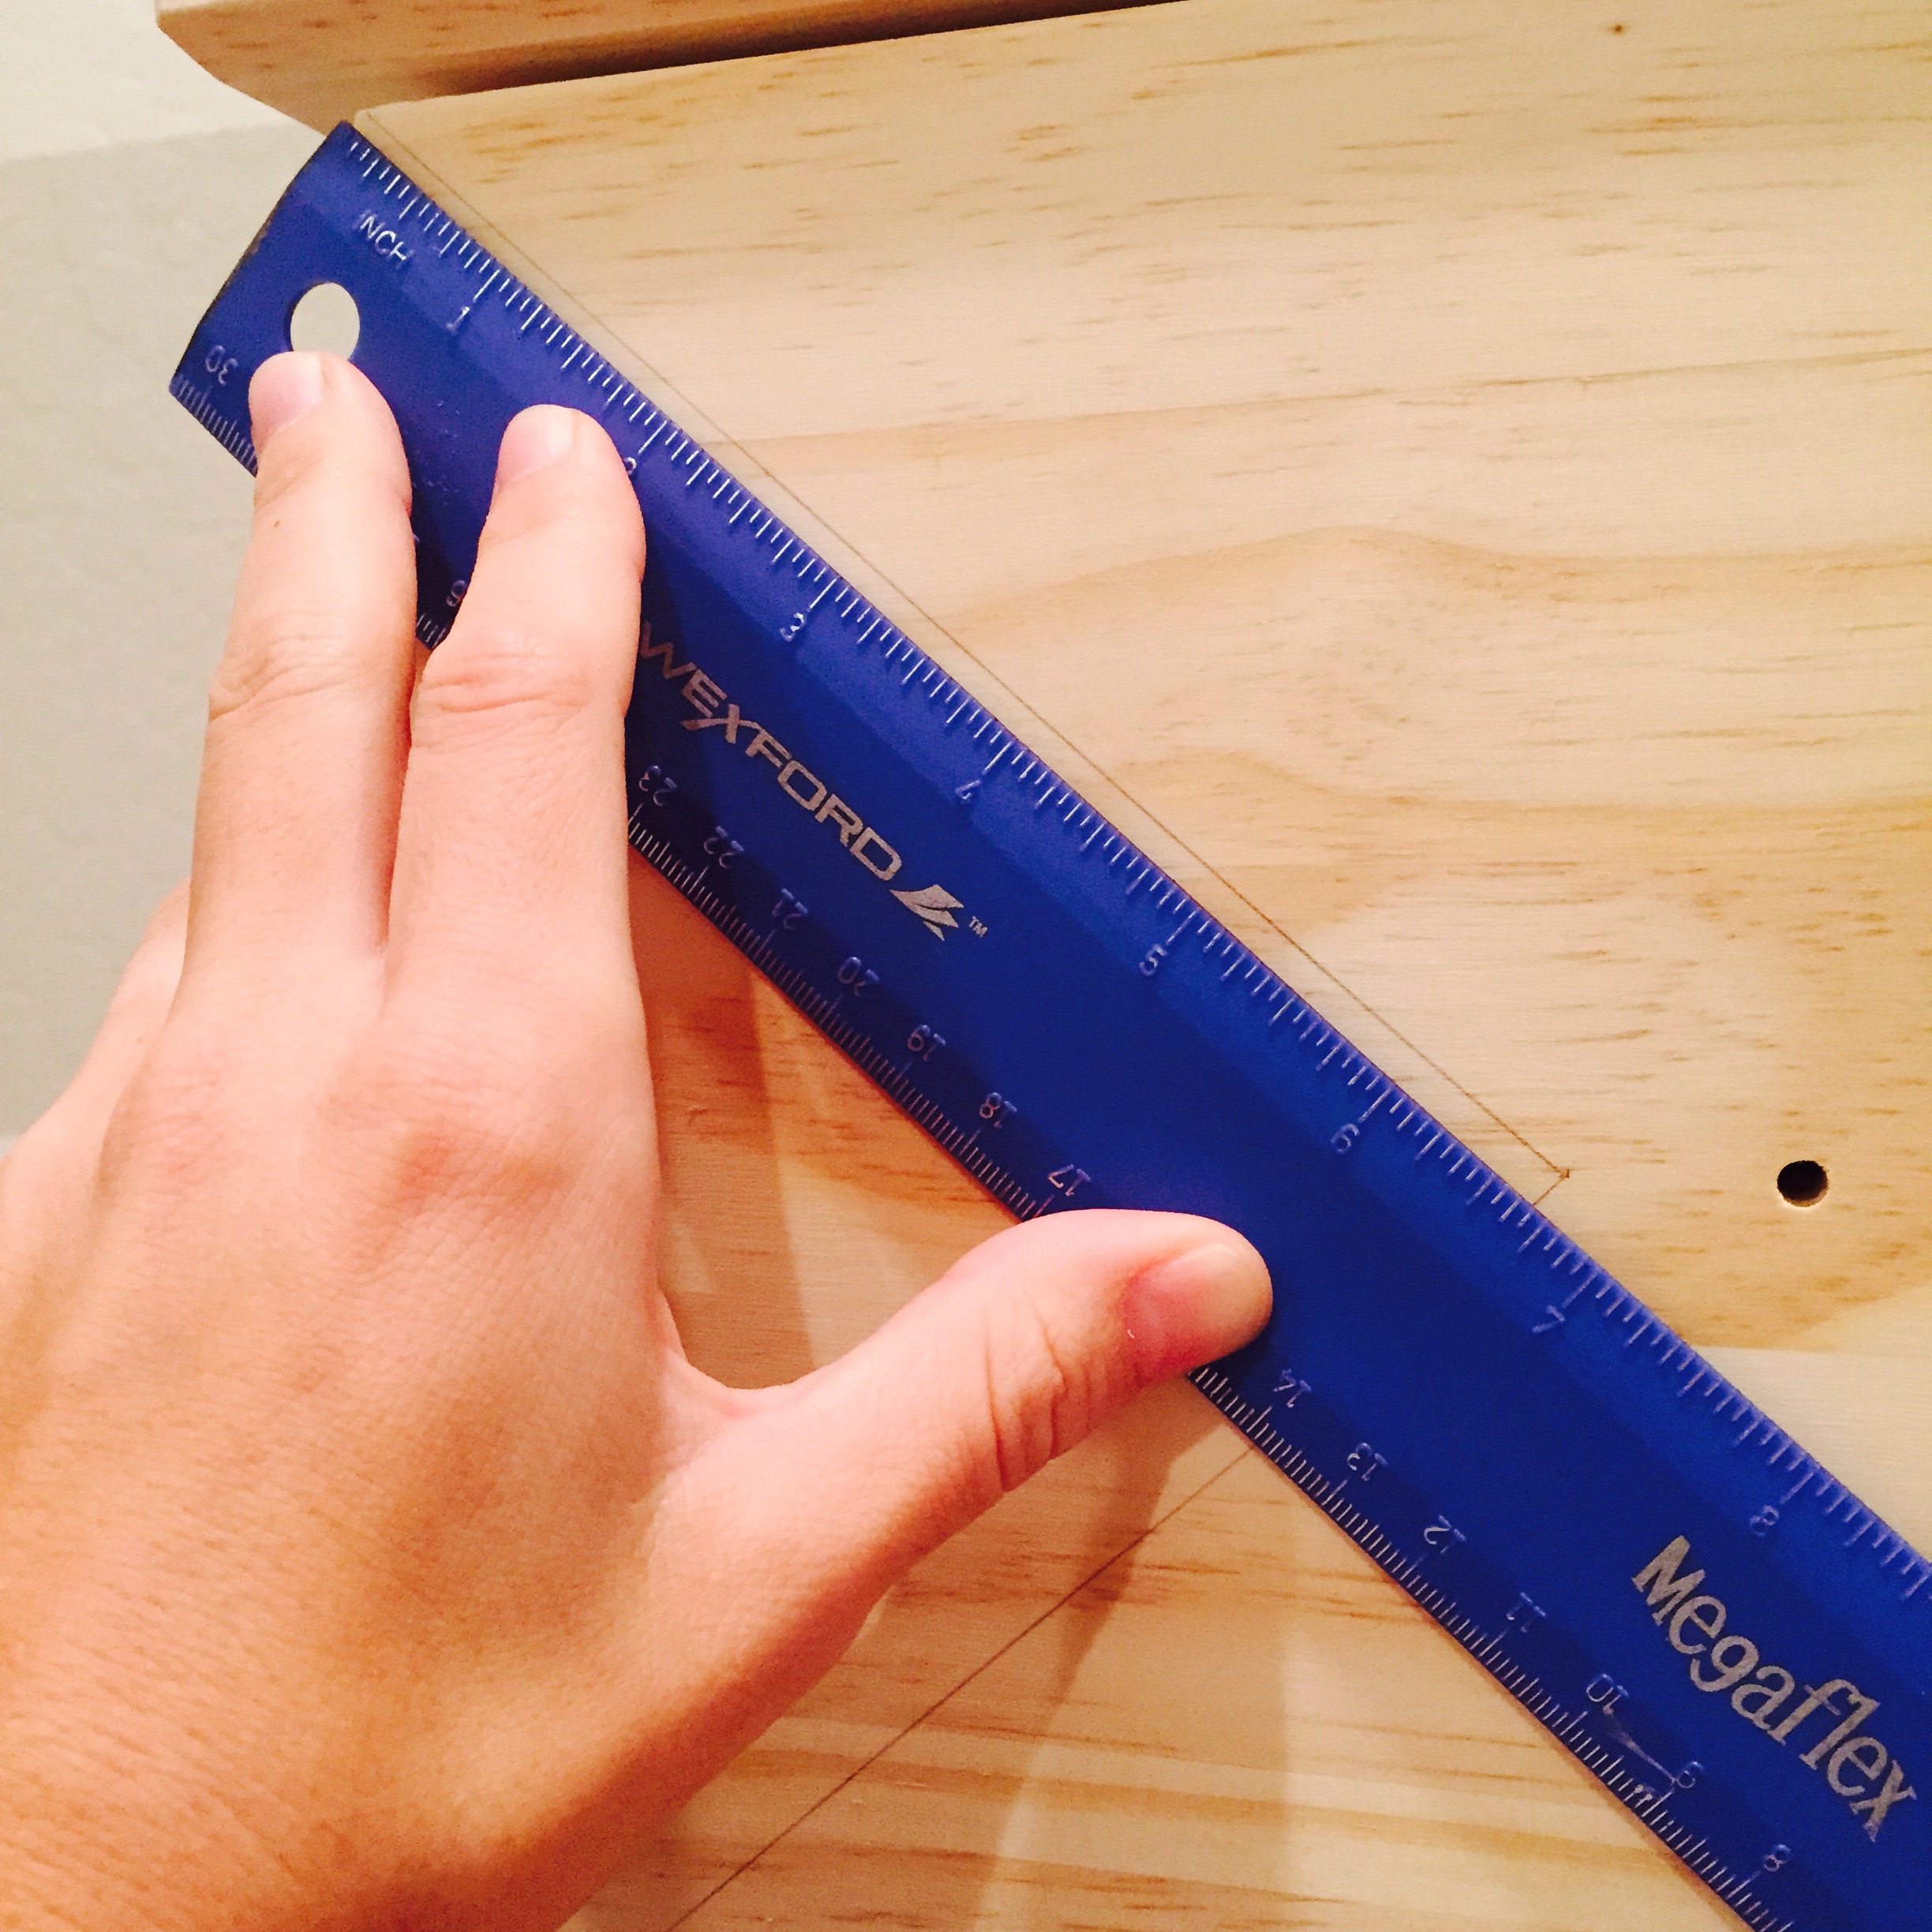
- Now, take your ruler and measure from the top left corner to the pencil marking on the left of the hardware hole. Then again from the bottom left corner of the drawer to the pencil marking on the left of the hardware hole (thus, making a perfect triangle on the left side of the drawer).
- Now, measure an inch down from the top left corner of the drawer, and inch up from the bottom left corner of the drawer, and an inch left of the top of your first triangle. Repeat by making another, smaller triangle inside your first triangle.
- Repeat entire step on the right side of your drawers.
Step 3:
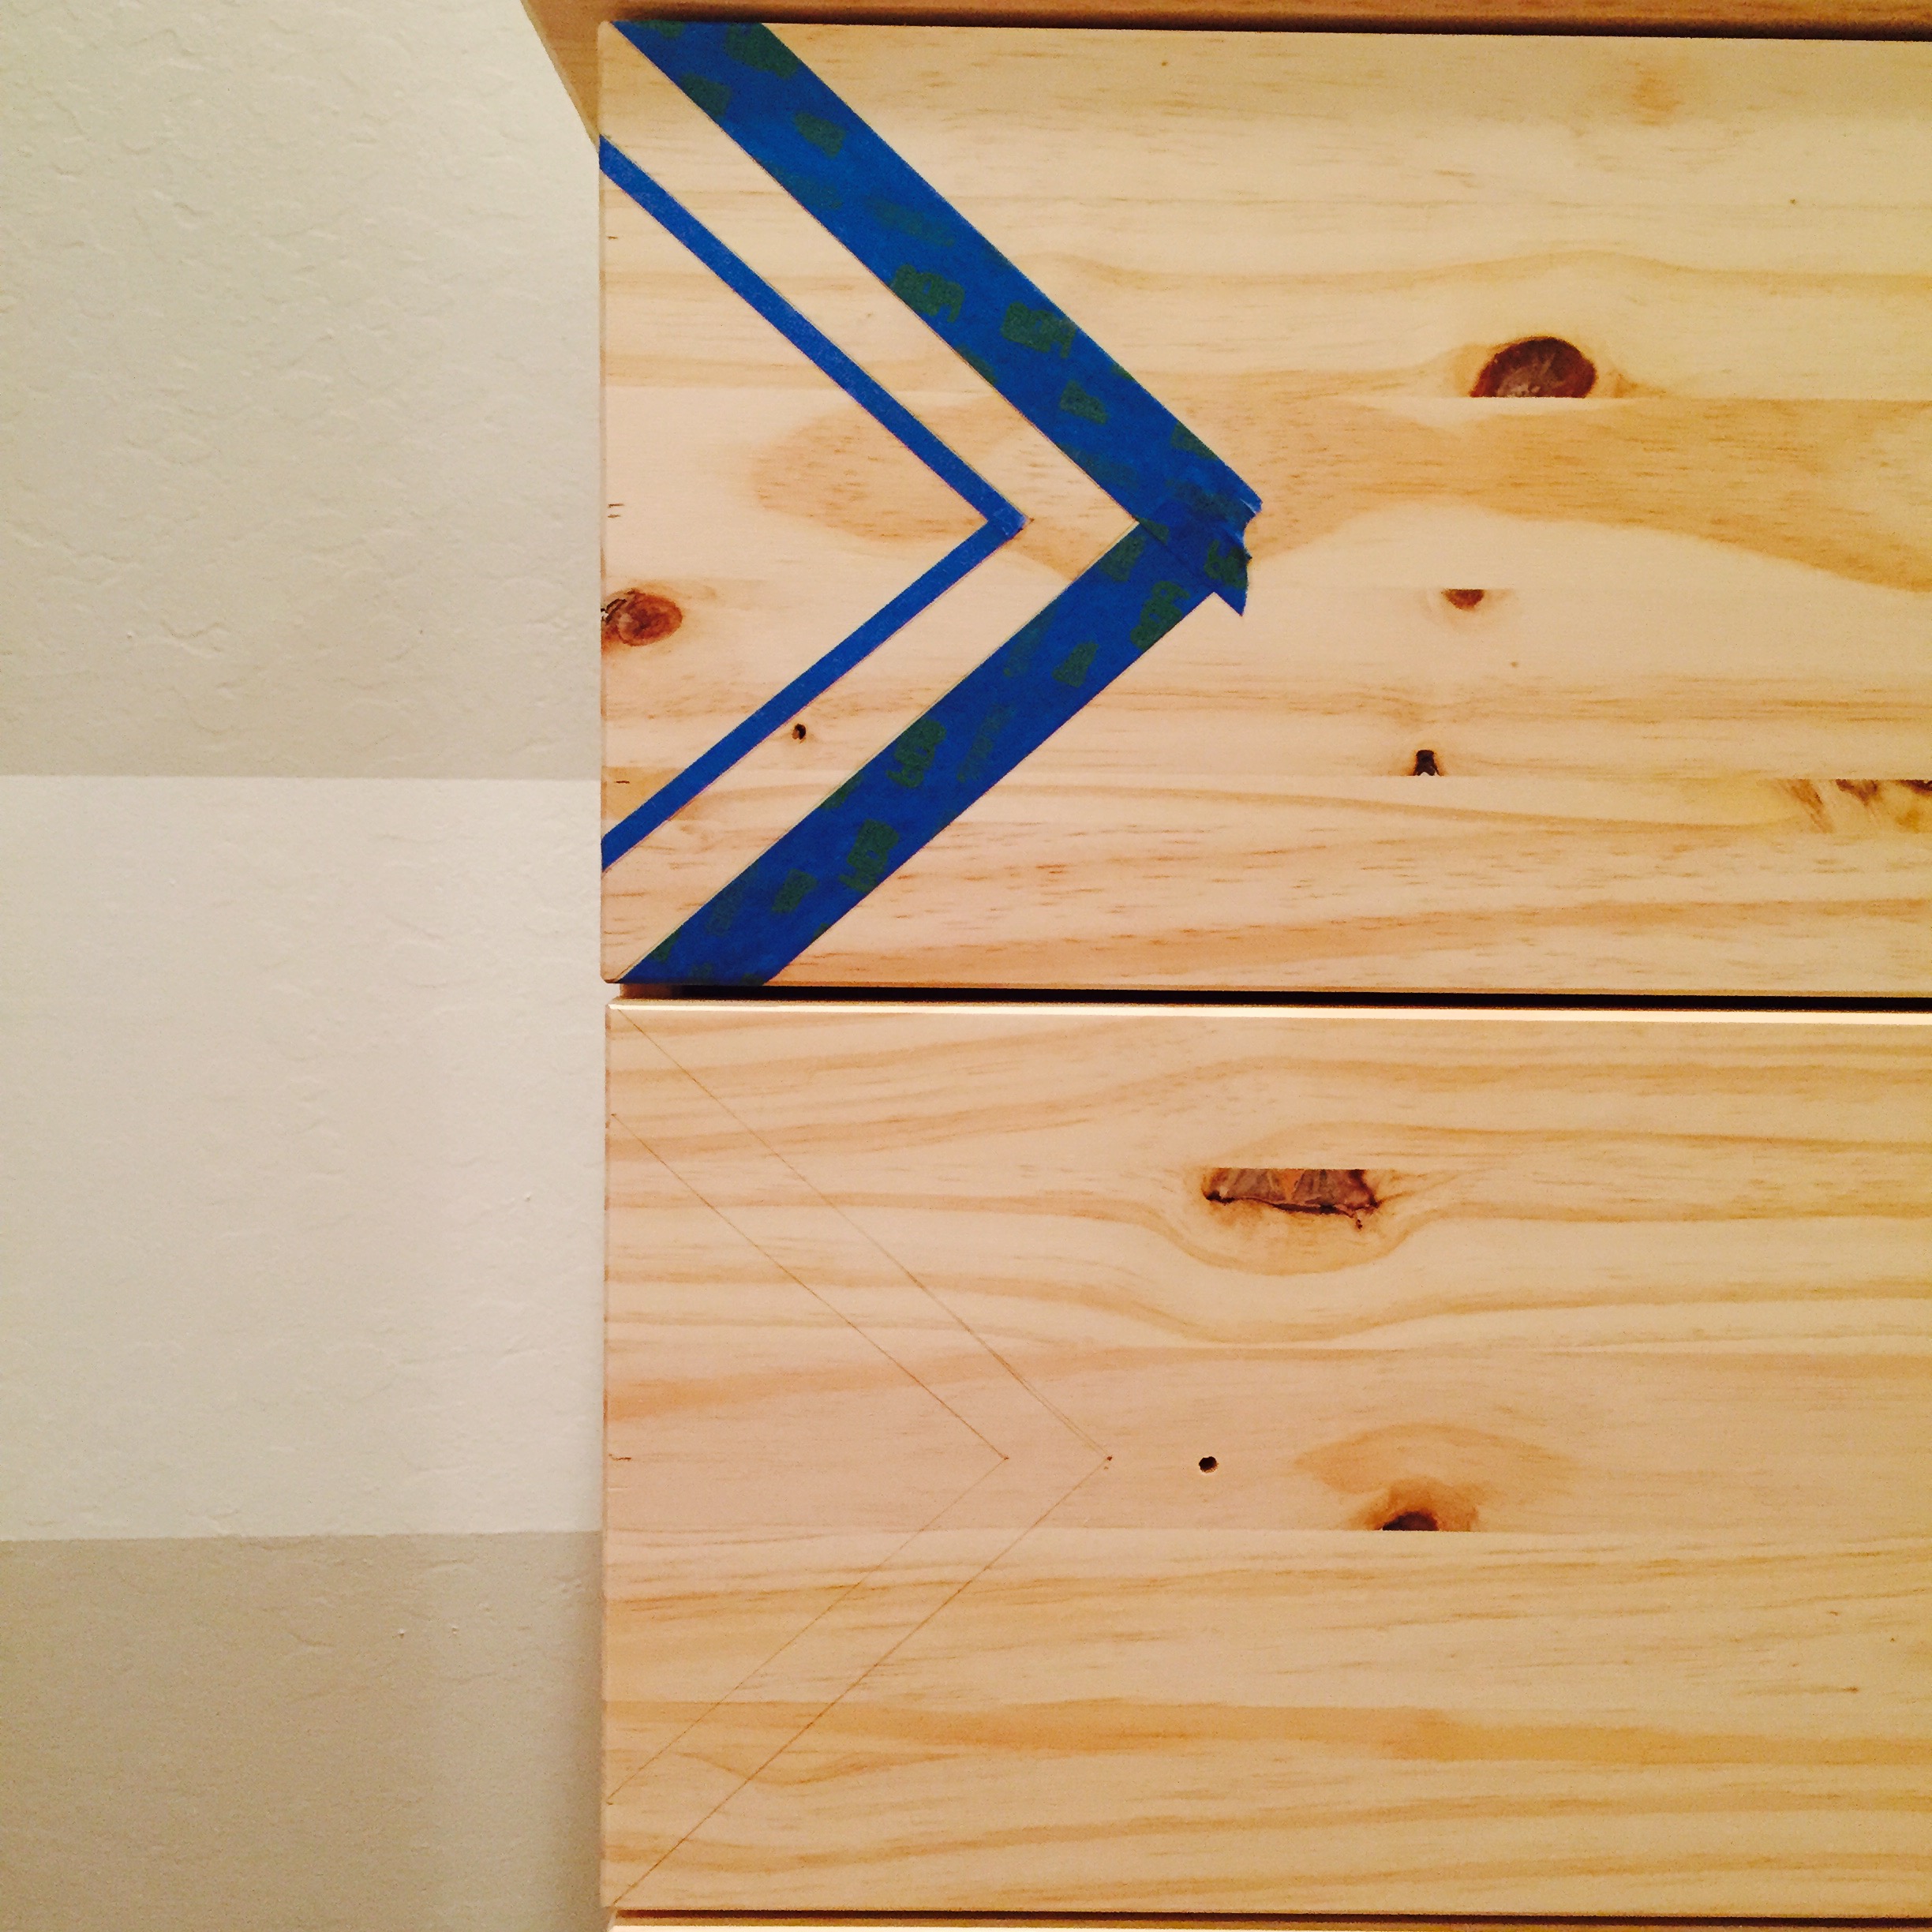
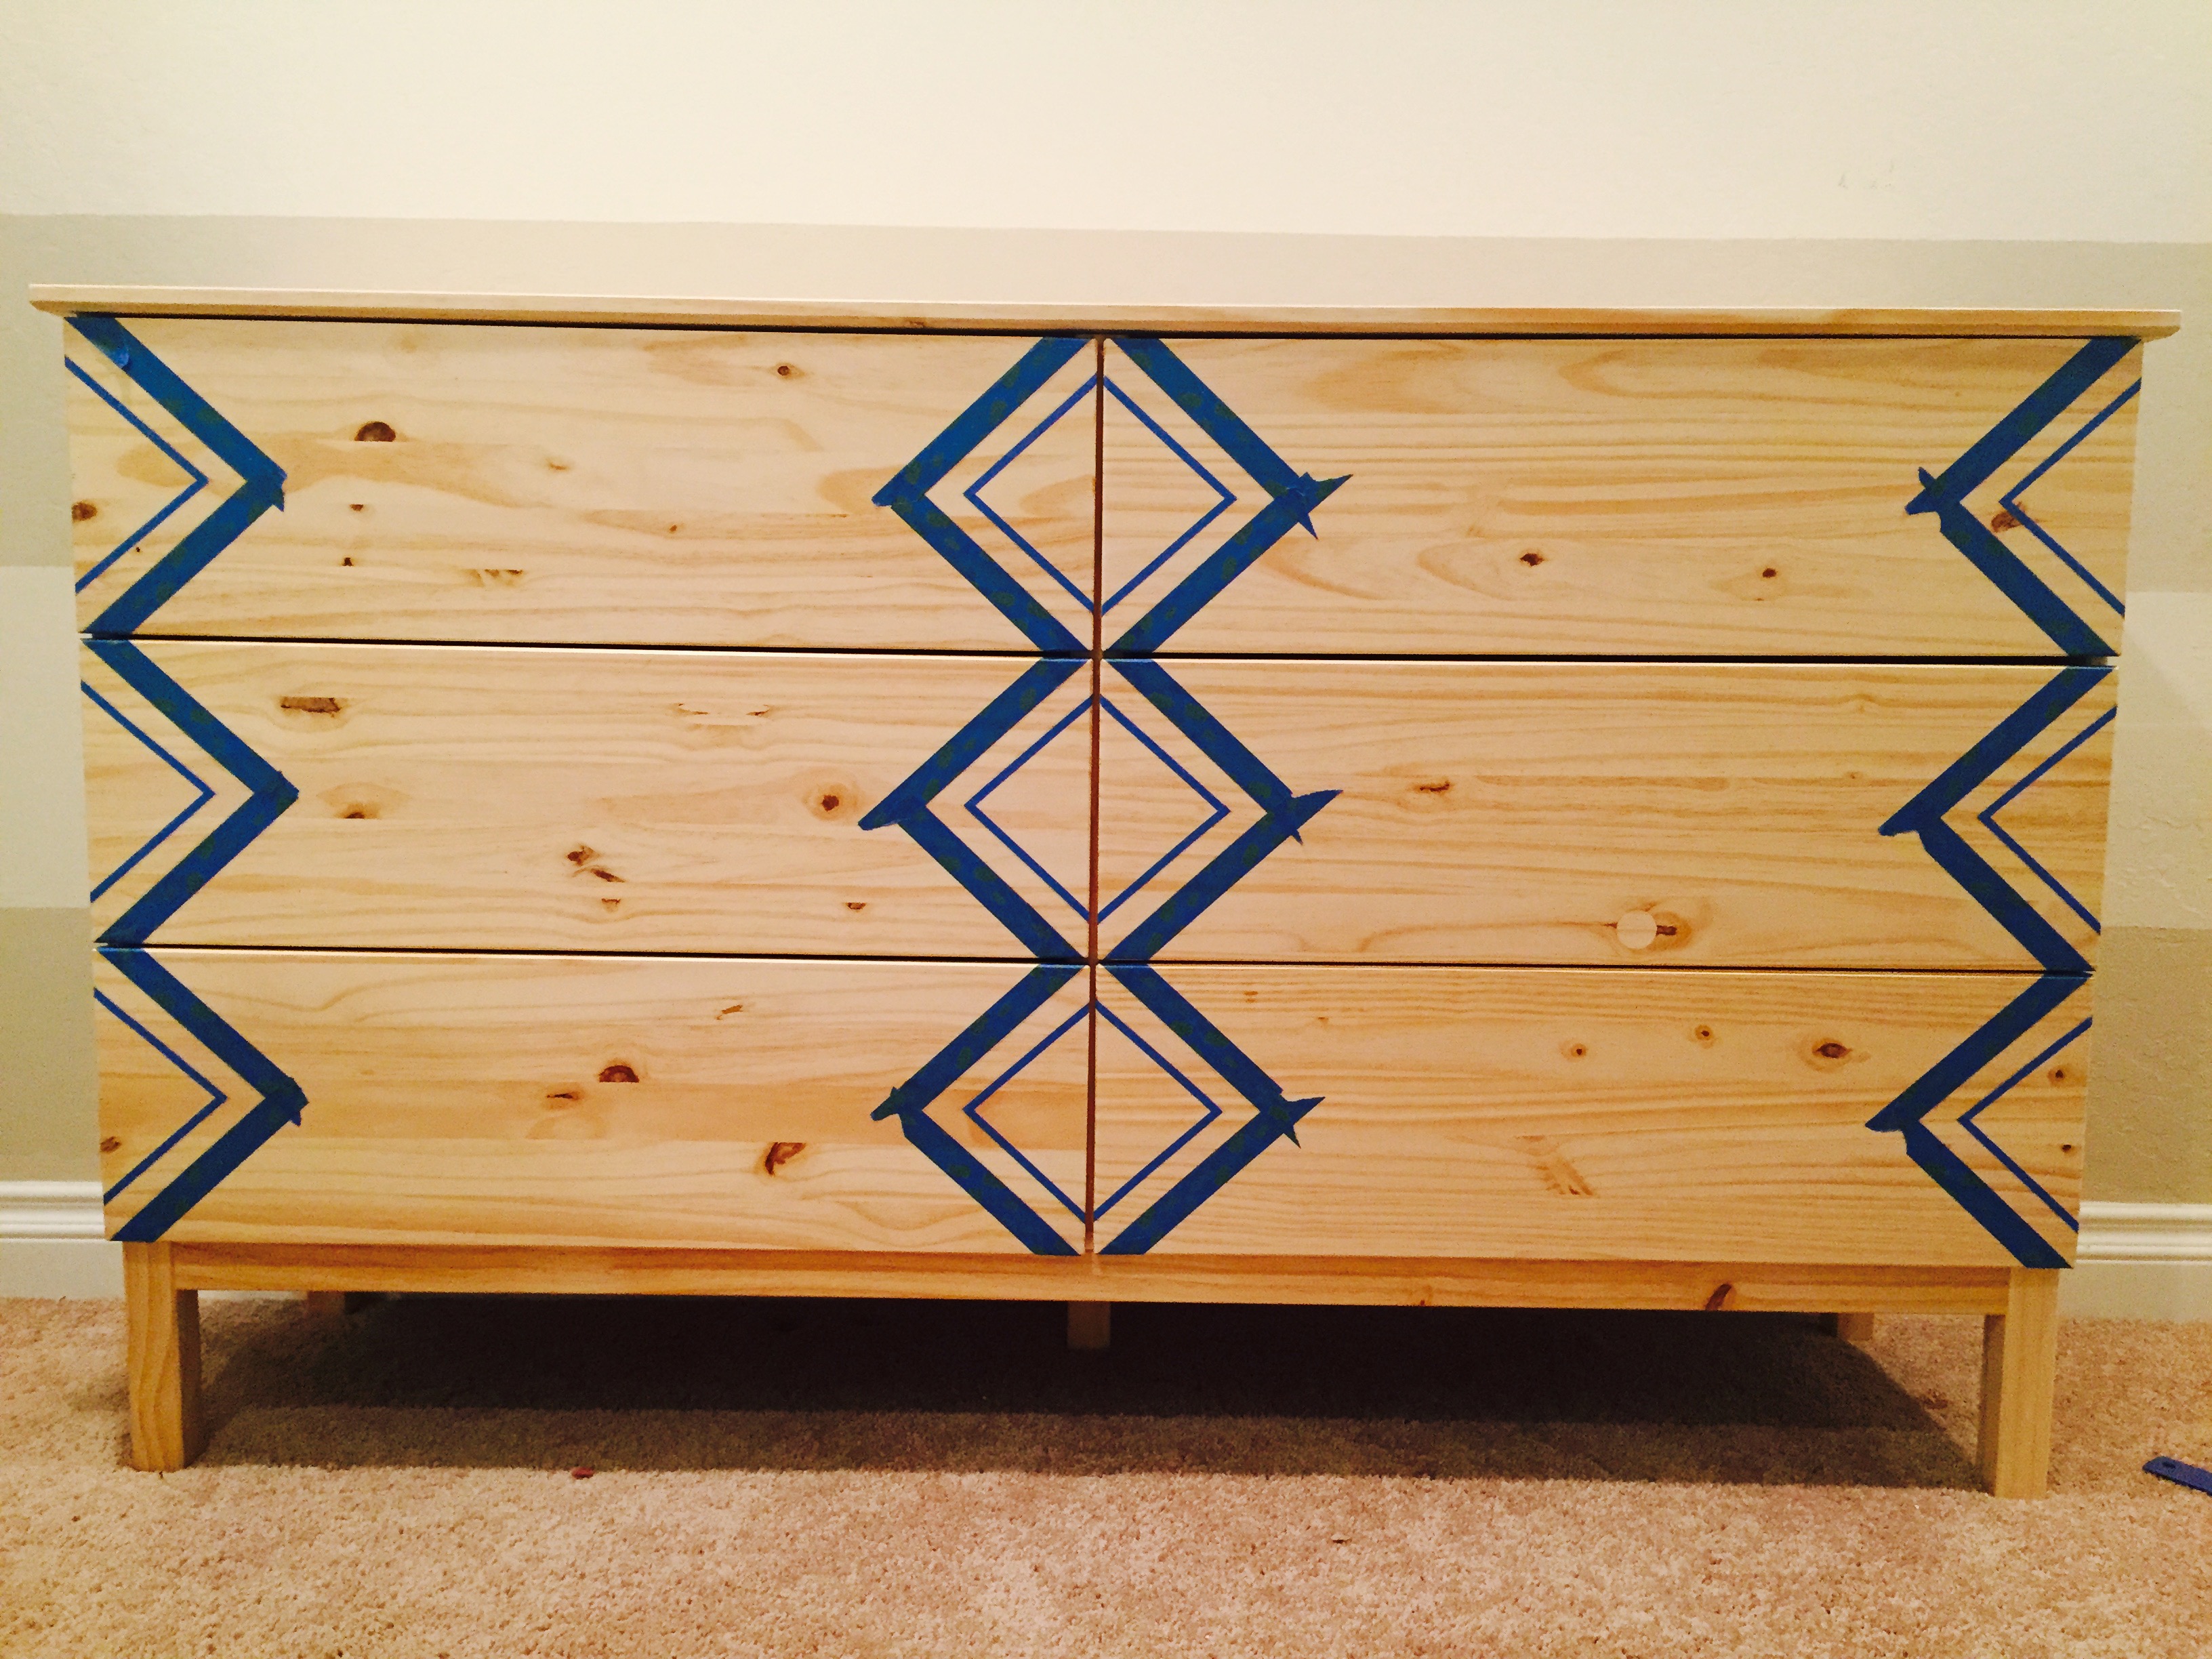
- Now, tape off your triangles. First, the outer triangles with you 1″ blue tape (inner edge of your tape on the OUTSIDE of the pencil mark).
- Then tape off your inner triangle with your .25″ blue tape (OUTER edge of the blue tape on the inner edge of your pencil mark for the smaller triangle).
Step 4:
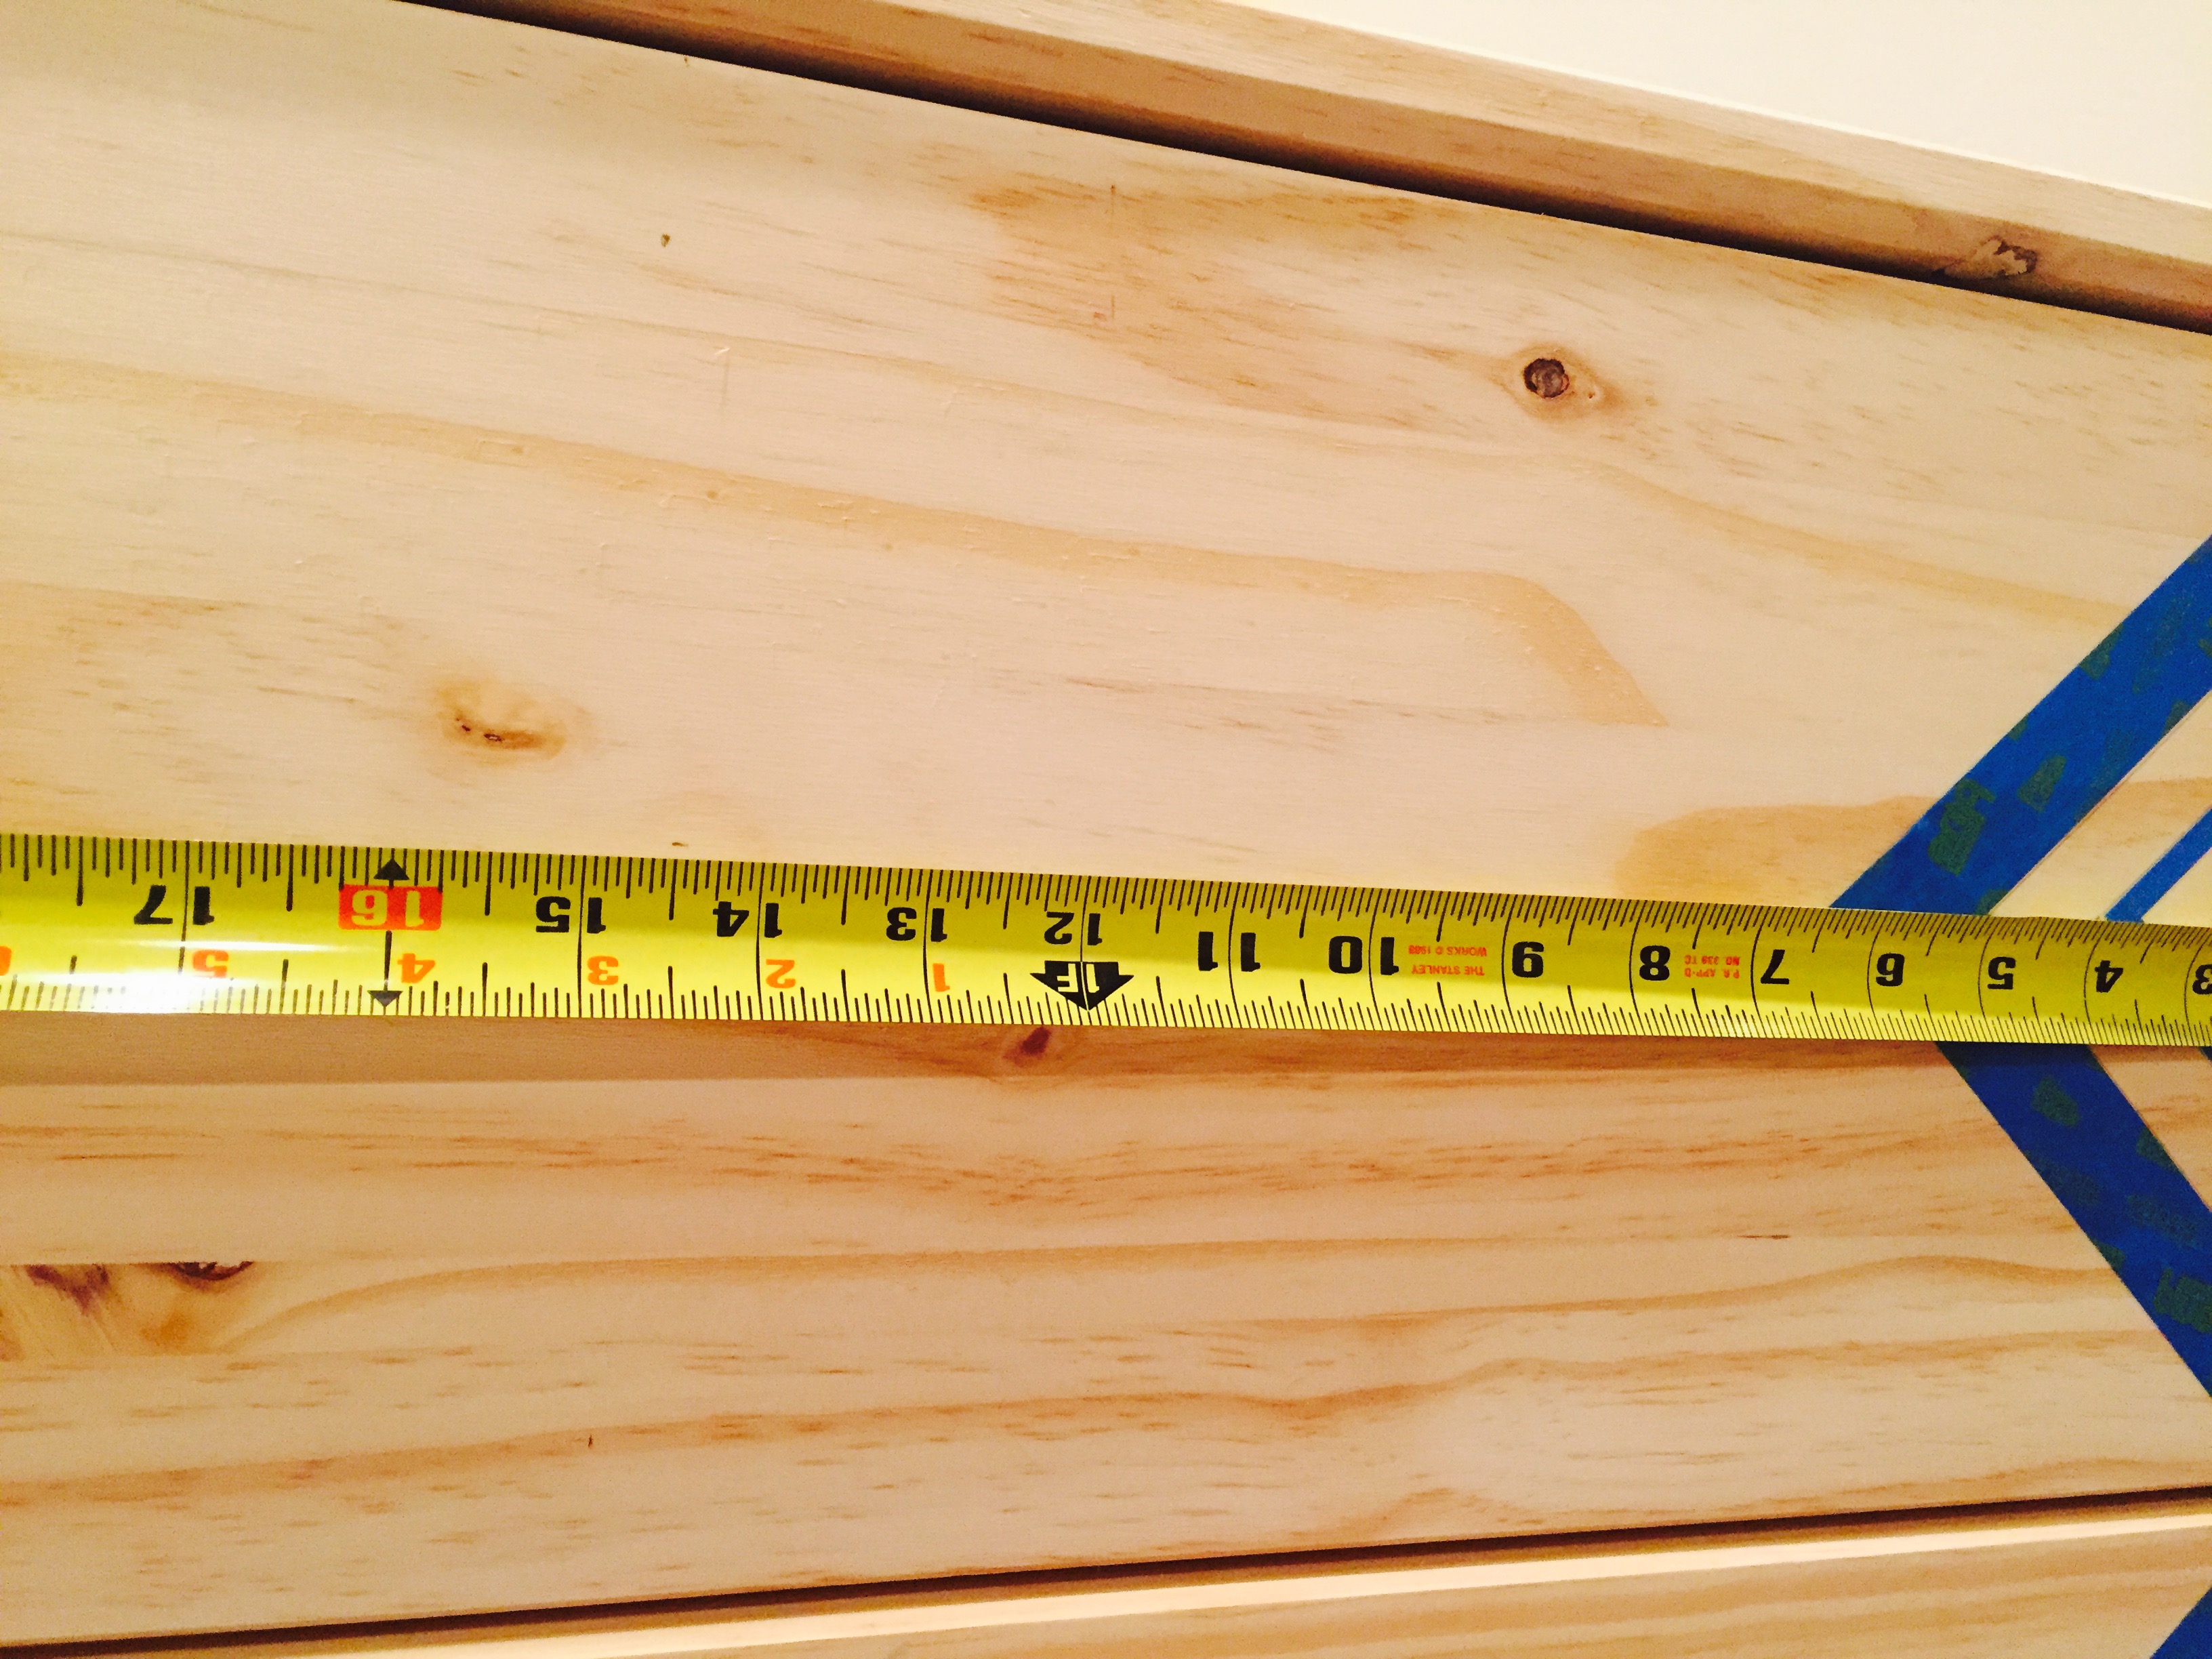
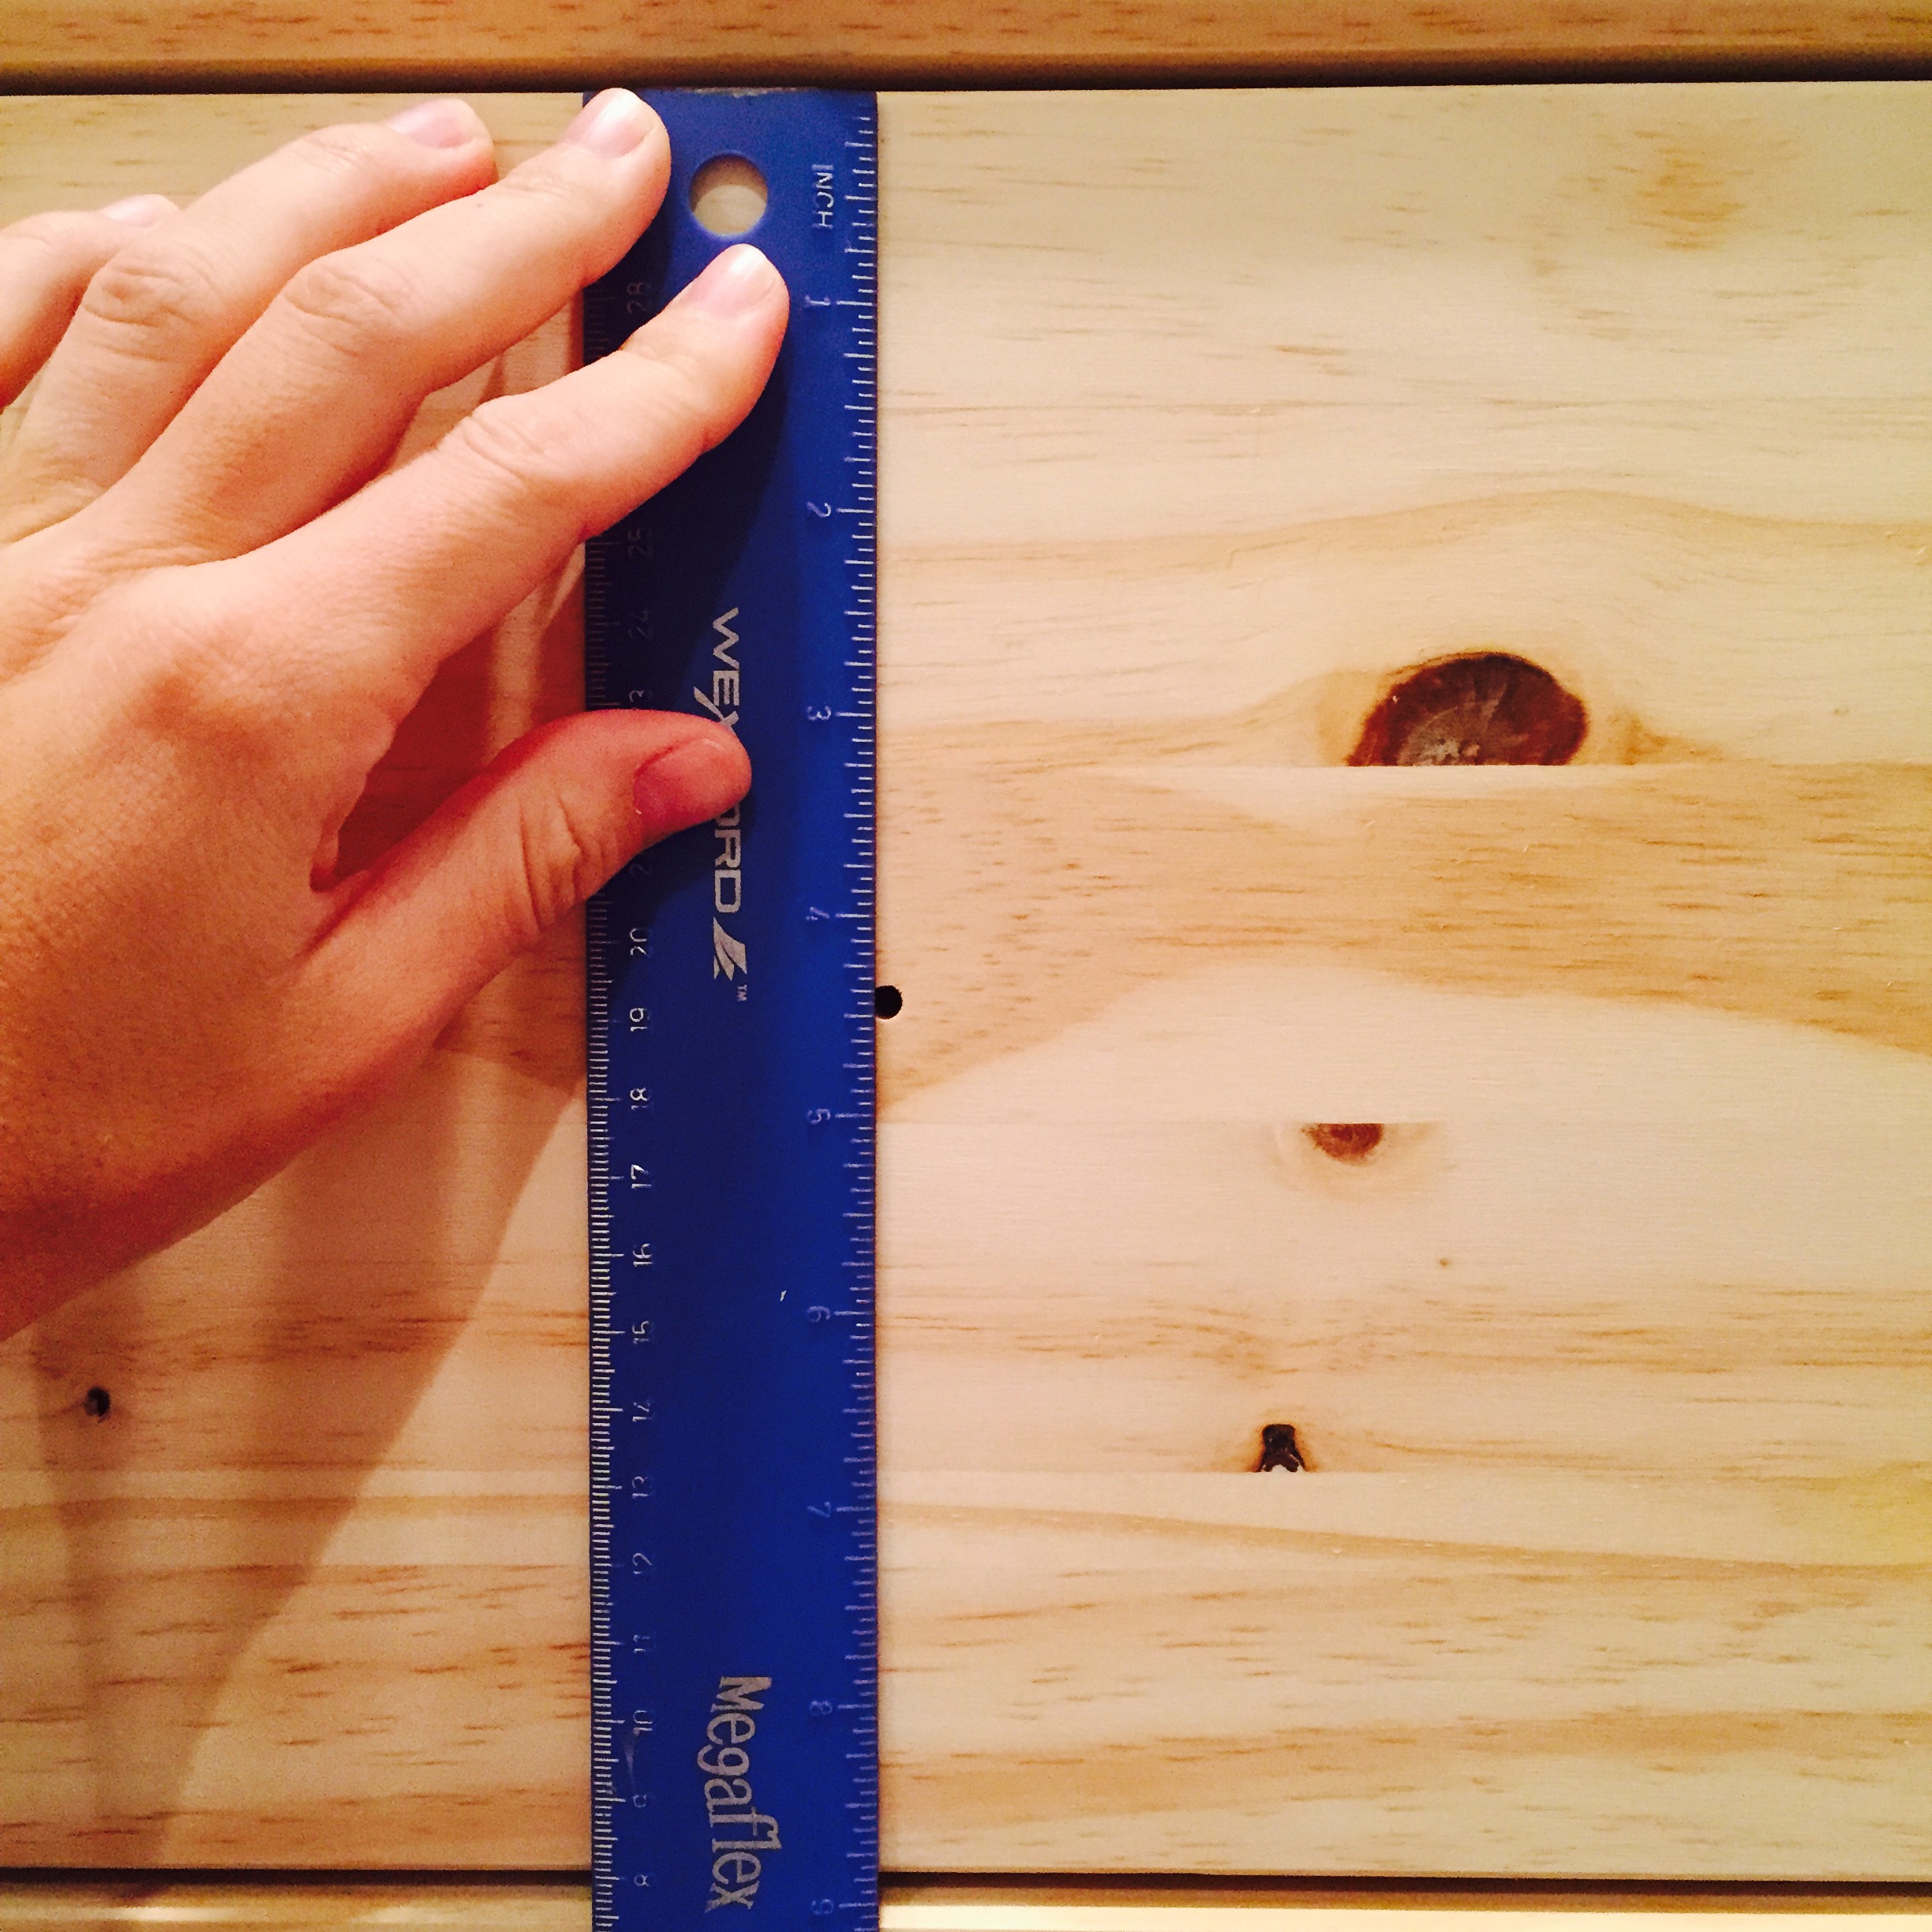
- Now, measure the length and width of the drawer. Make a mark in the EXACT CENTER of the drawer. This will be the center of your large painted diamond.
- Also, make sure to leave pencil marks on the very top and bottom of the drawer when measuring the width – in the center of the width.
- Then, measure 2″ to the right of your CENTER mark, and 2″ to the left. Finally, using your ruler for straight lines, connect the marking on the top of the drawer to the markings 2″ to the right and left of the center. Repeat by connecting the bottom marking to those markings as well, and forming a perfect diamond shape in the very center of your drawer.
Step 5:

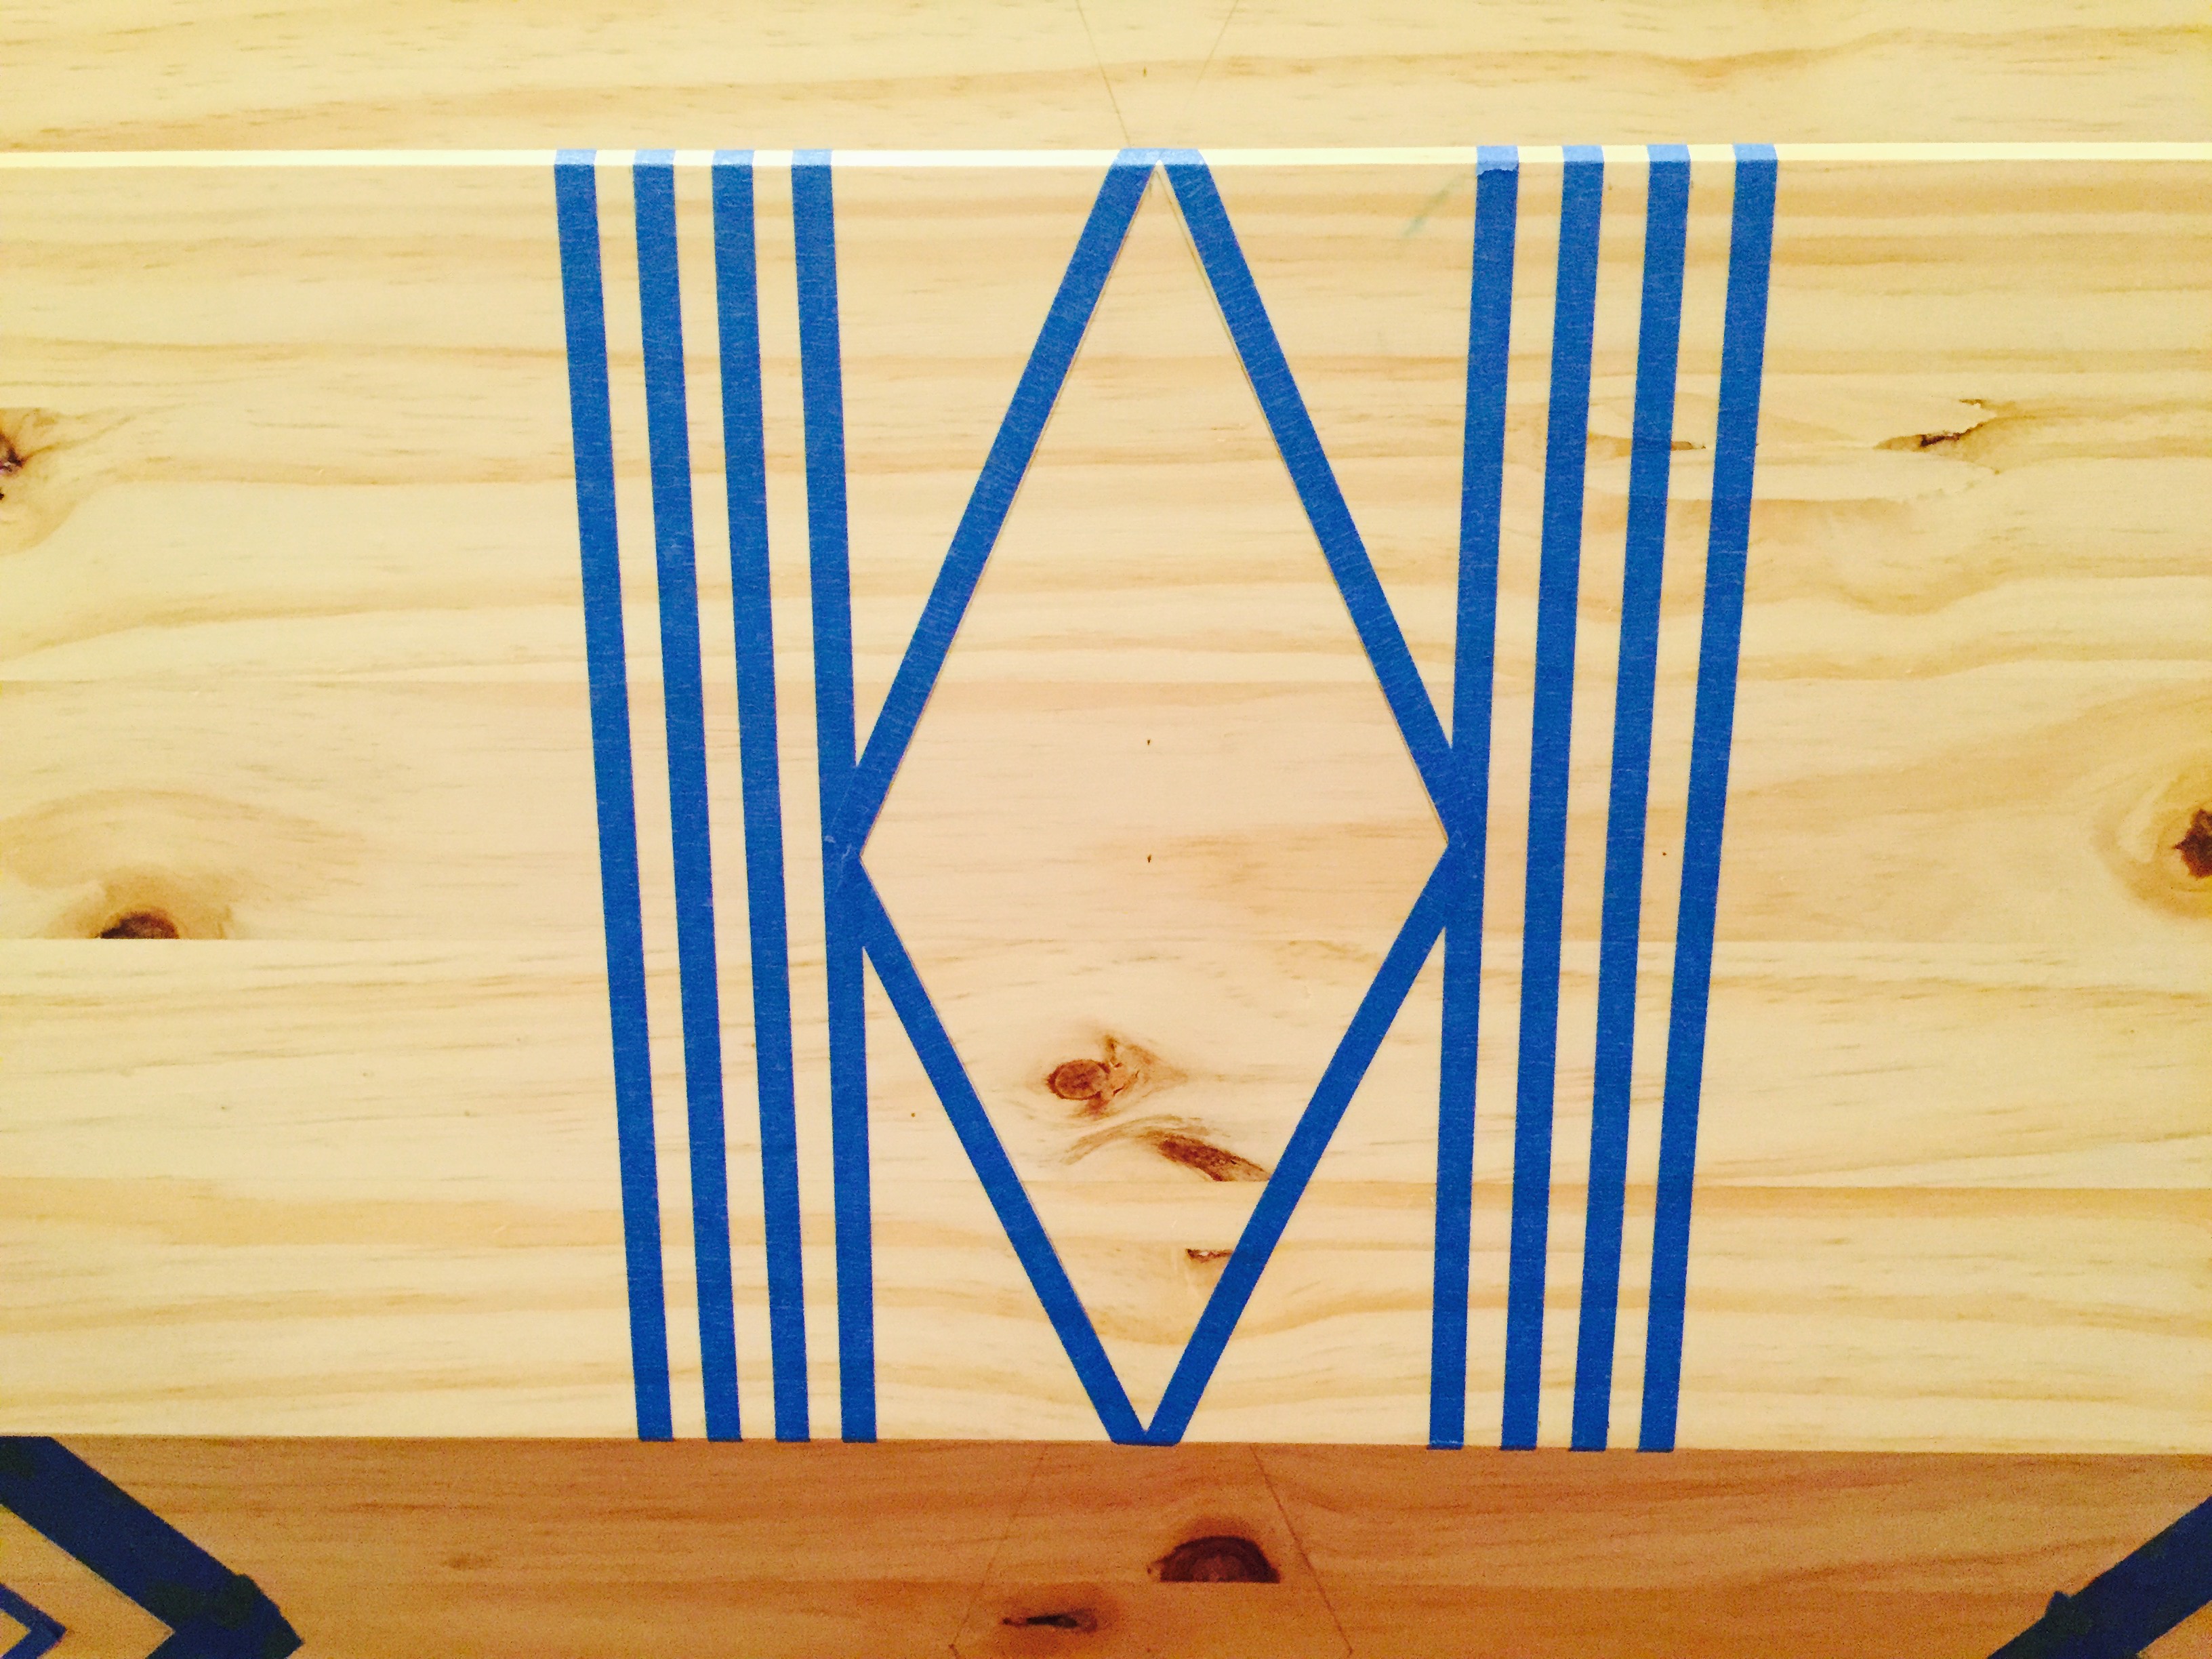
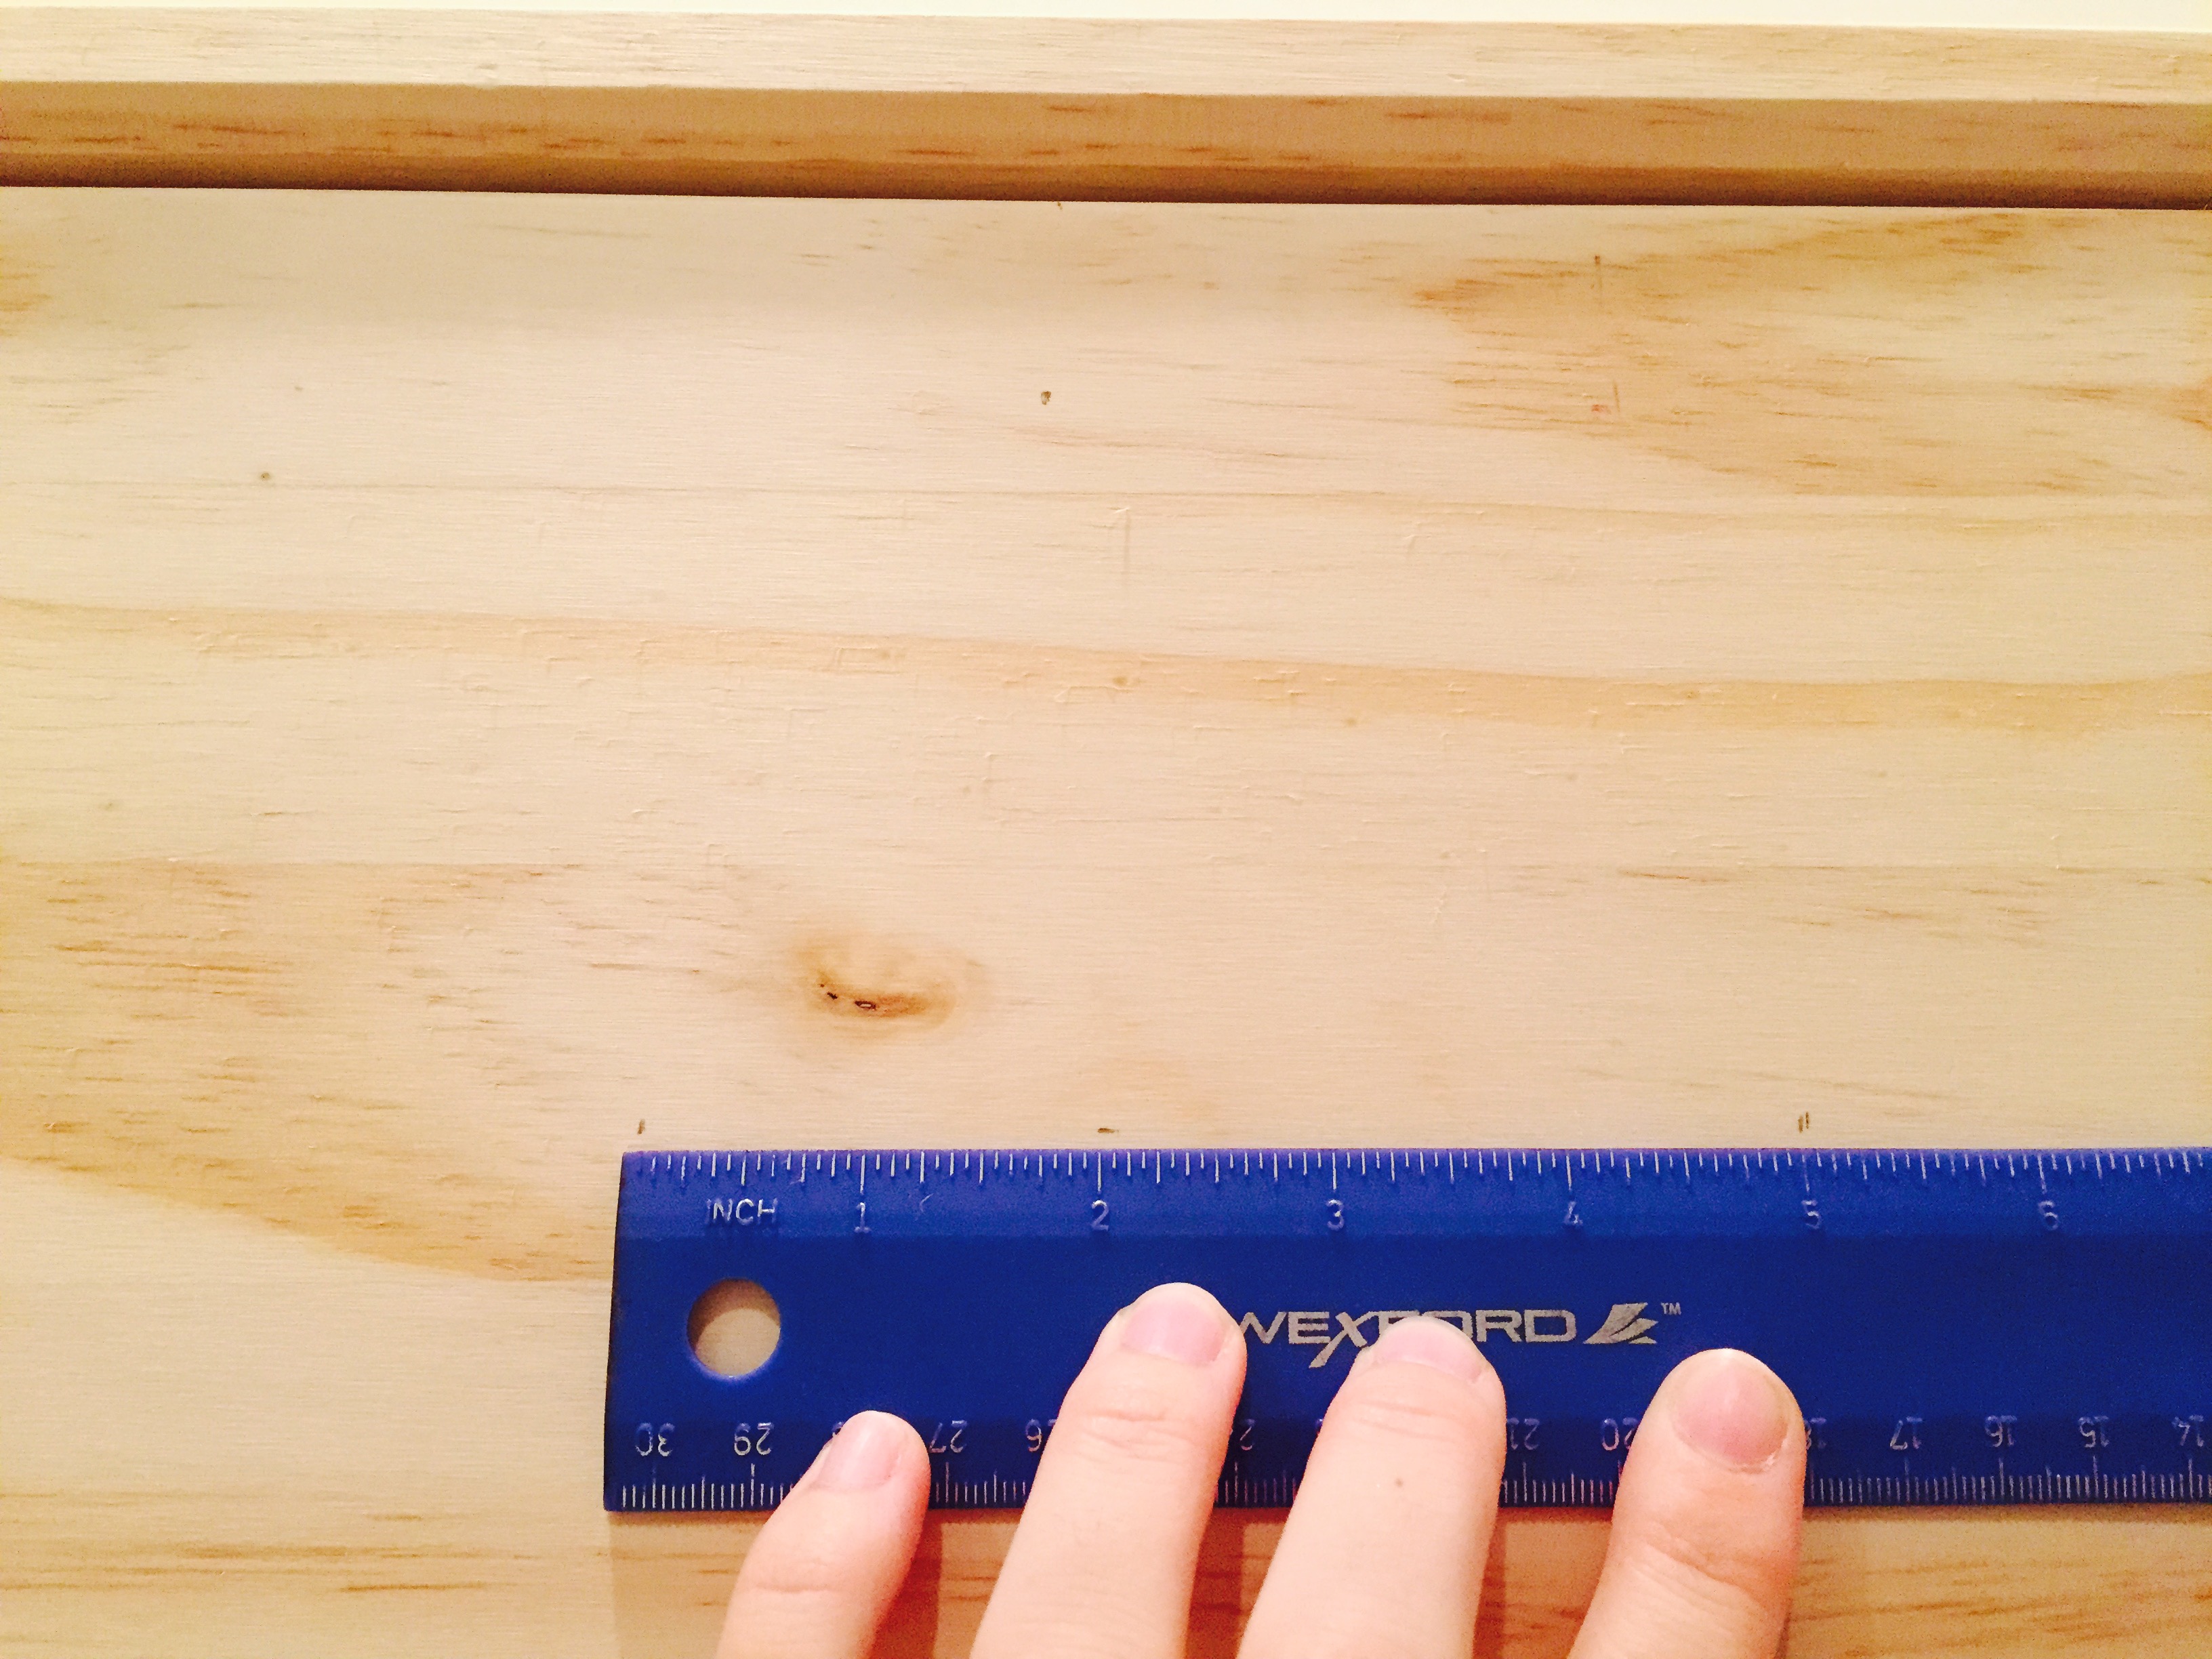
- Here, measure 2″ to the right and left of the markings on the top and bottom of the diamond. Then, take your .25″ tape and make a straight line from the top to the bottom of your drawer.
- The top and bottom marking should be connected by the tape, and the side tips of the diamond should just barely touch the outer edge of the tape.
- Then, measure in .25″ increments moving outward to the left of the left piece of tape, and to the right of the right piece of tape.
- Place a strip of .25″ tape on every other marking (leaving a .25″ space in between each piece of tape, with 4 pieces of tape total).
Step 6:
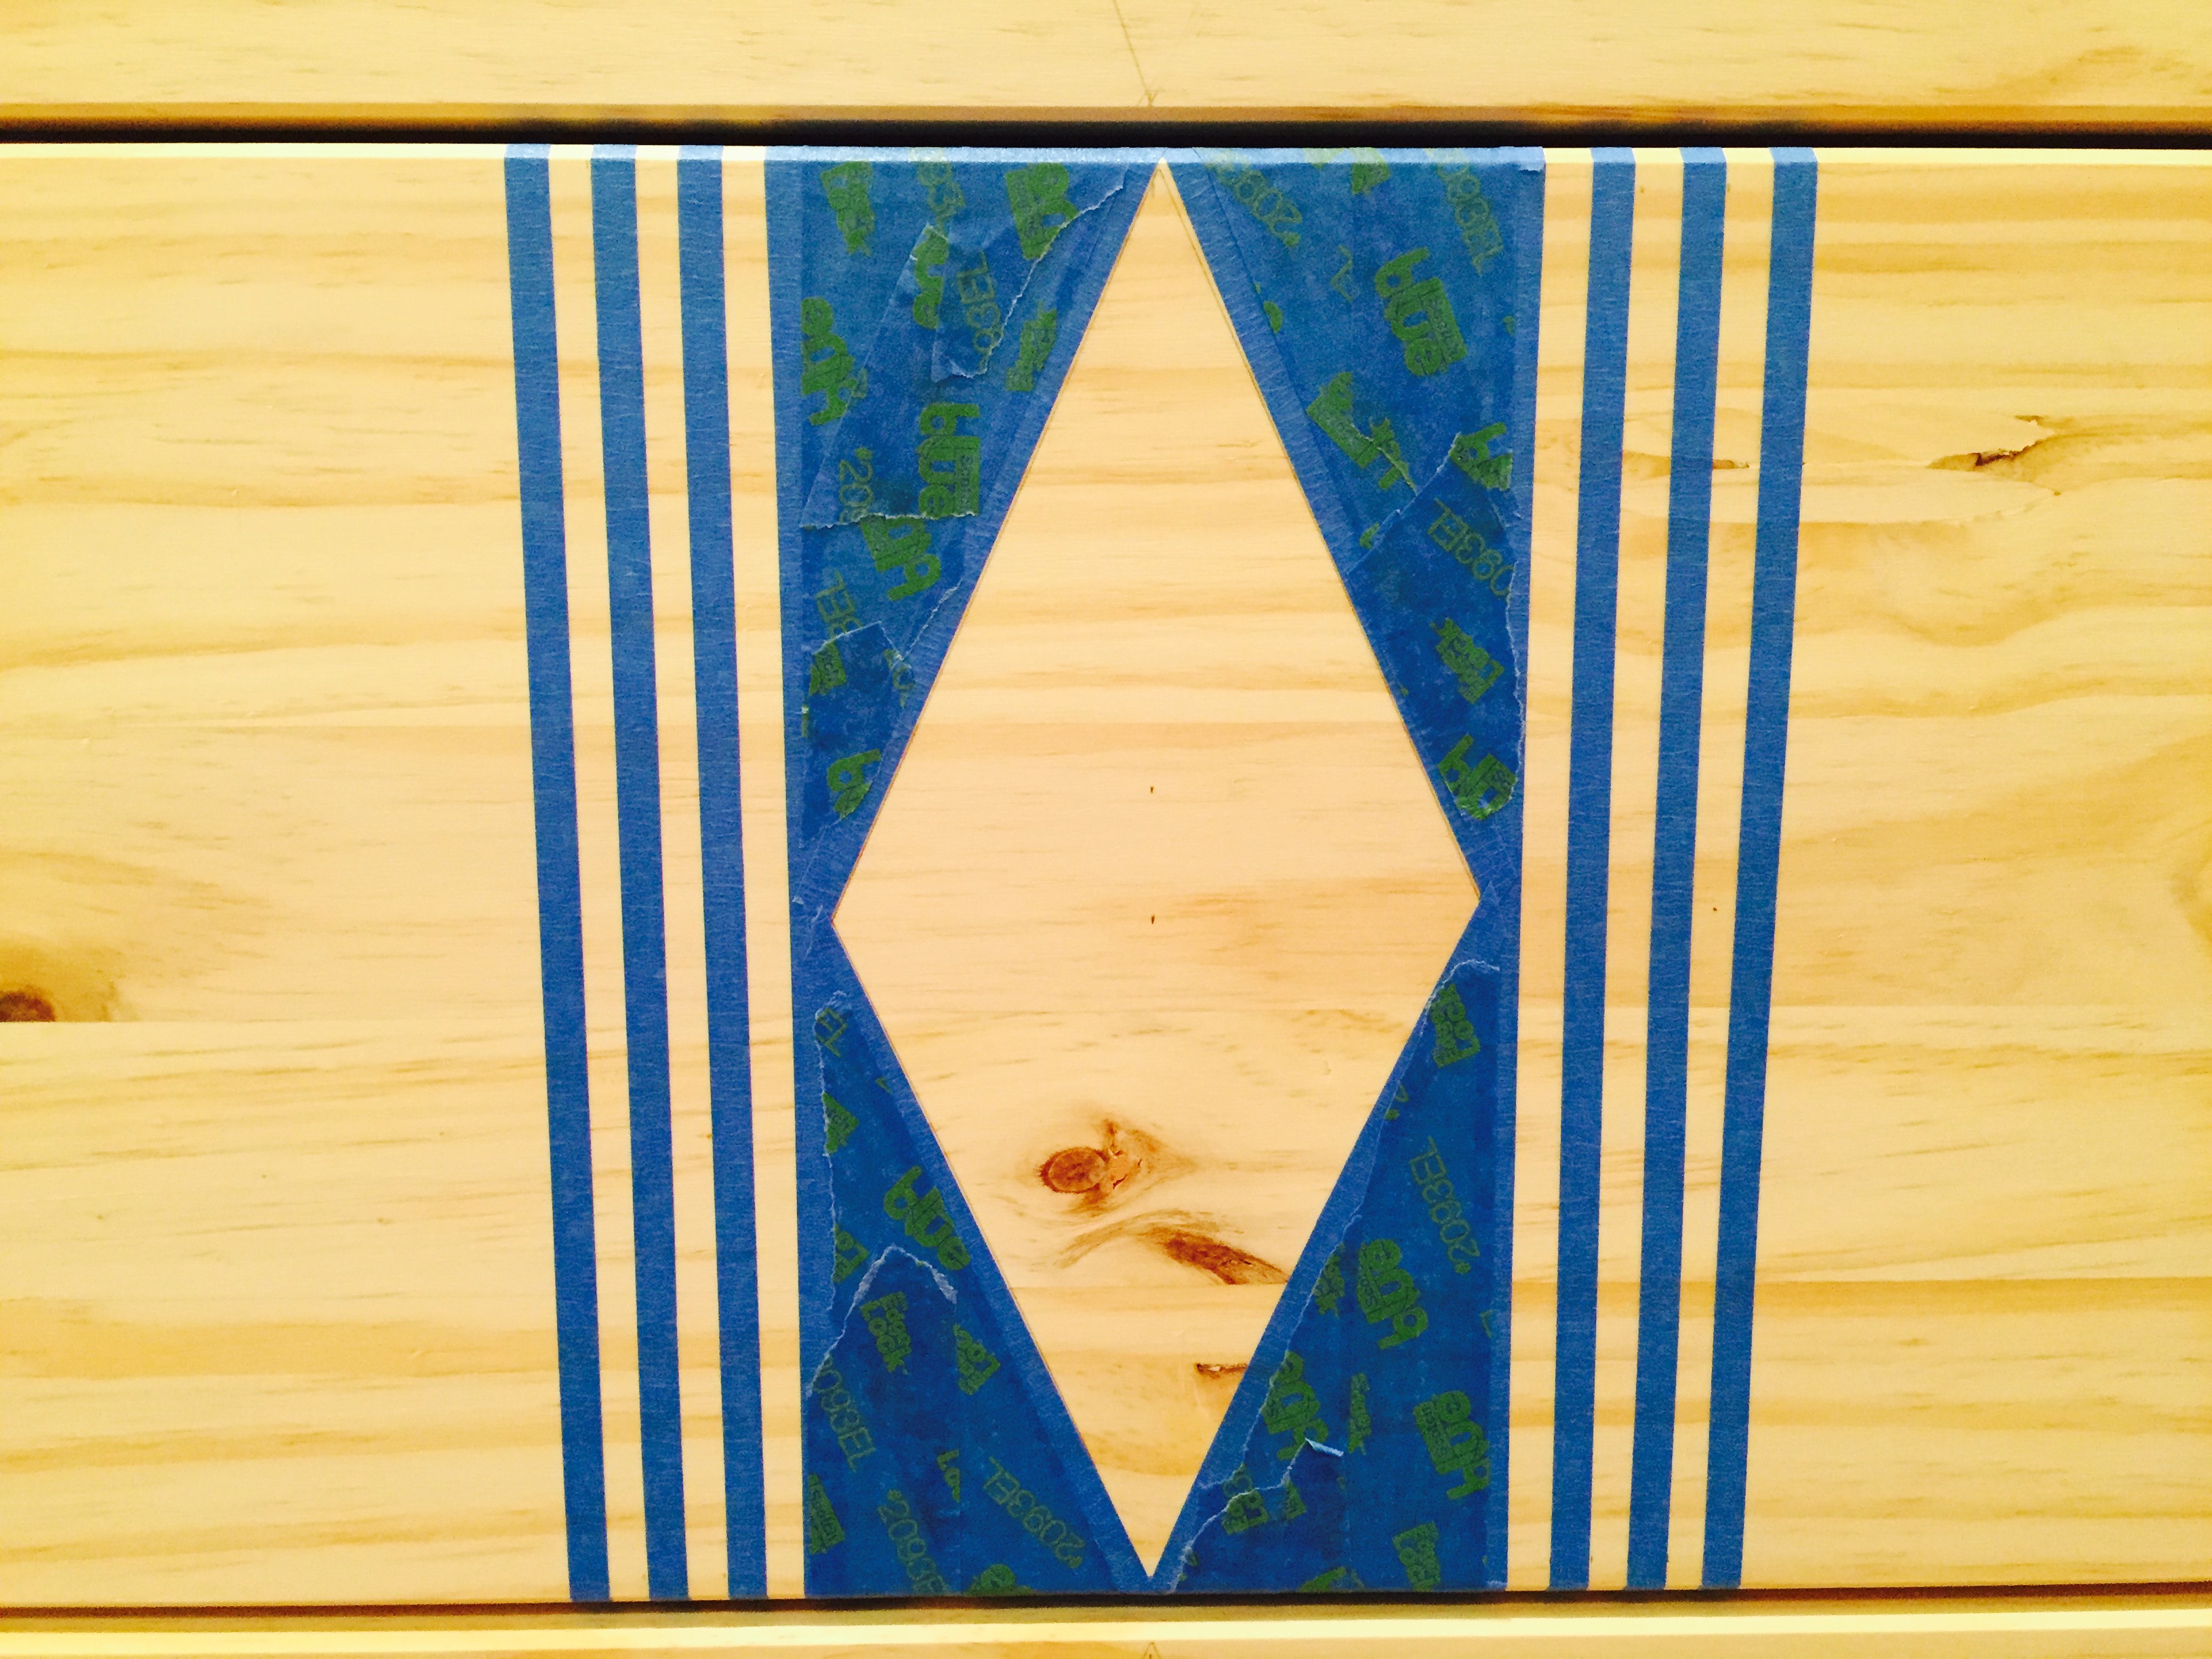
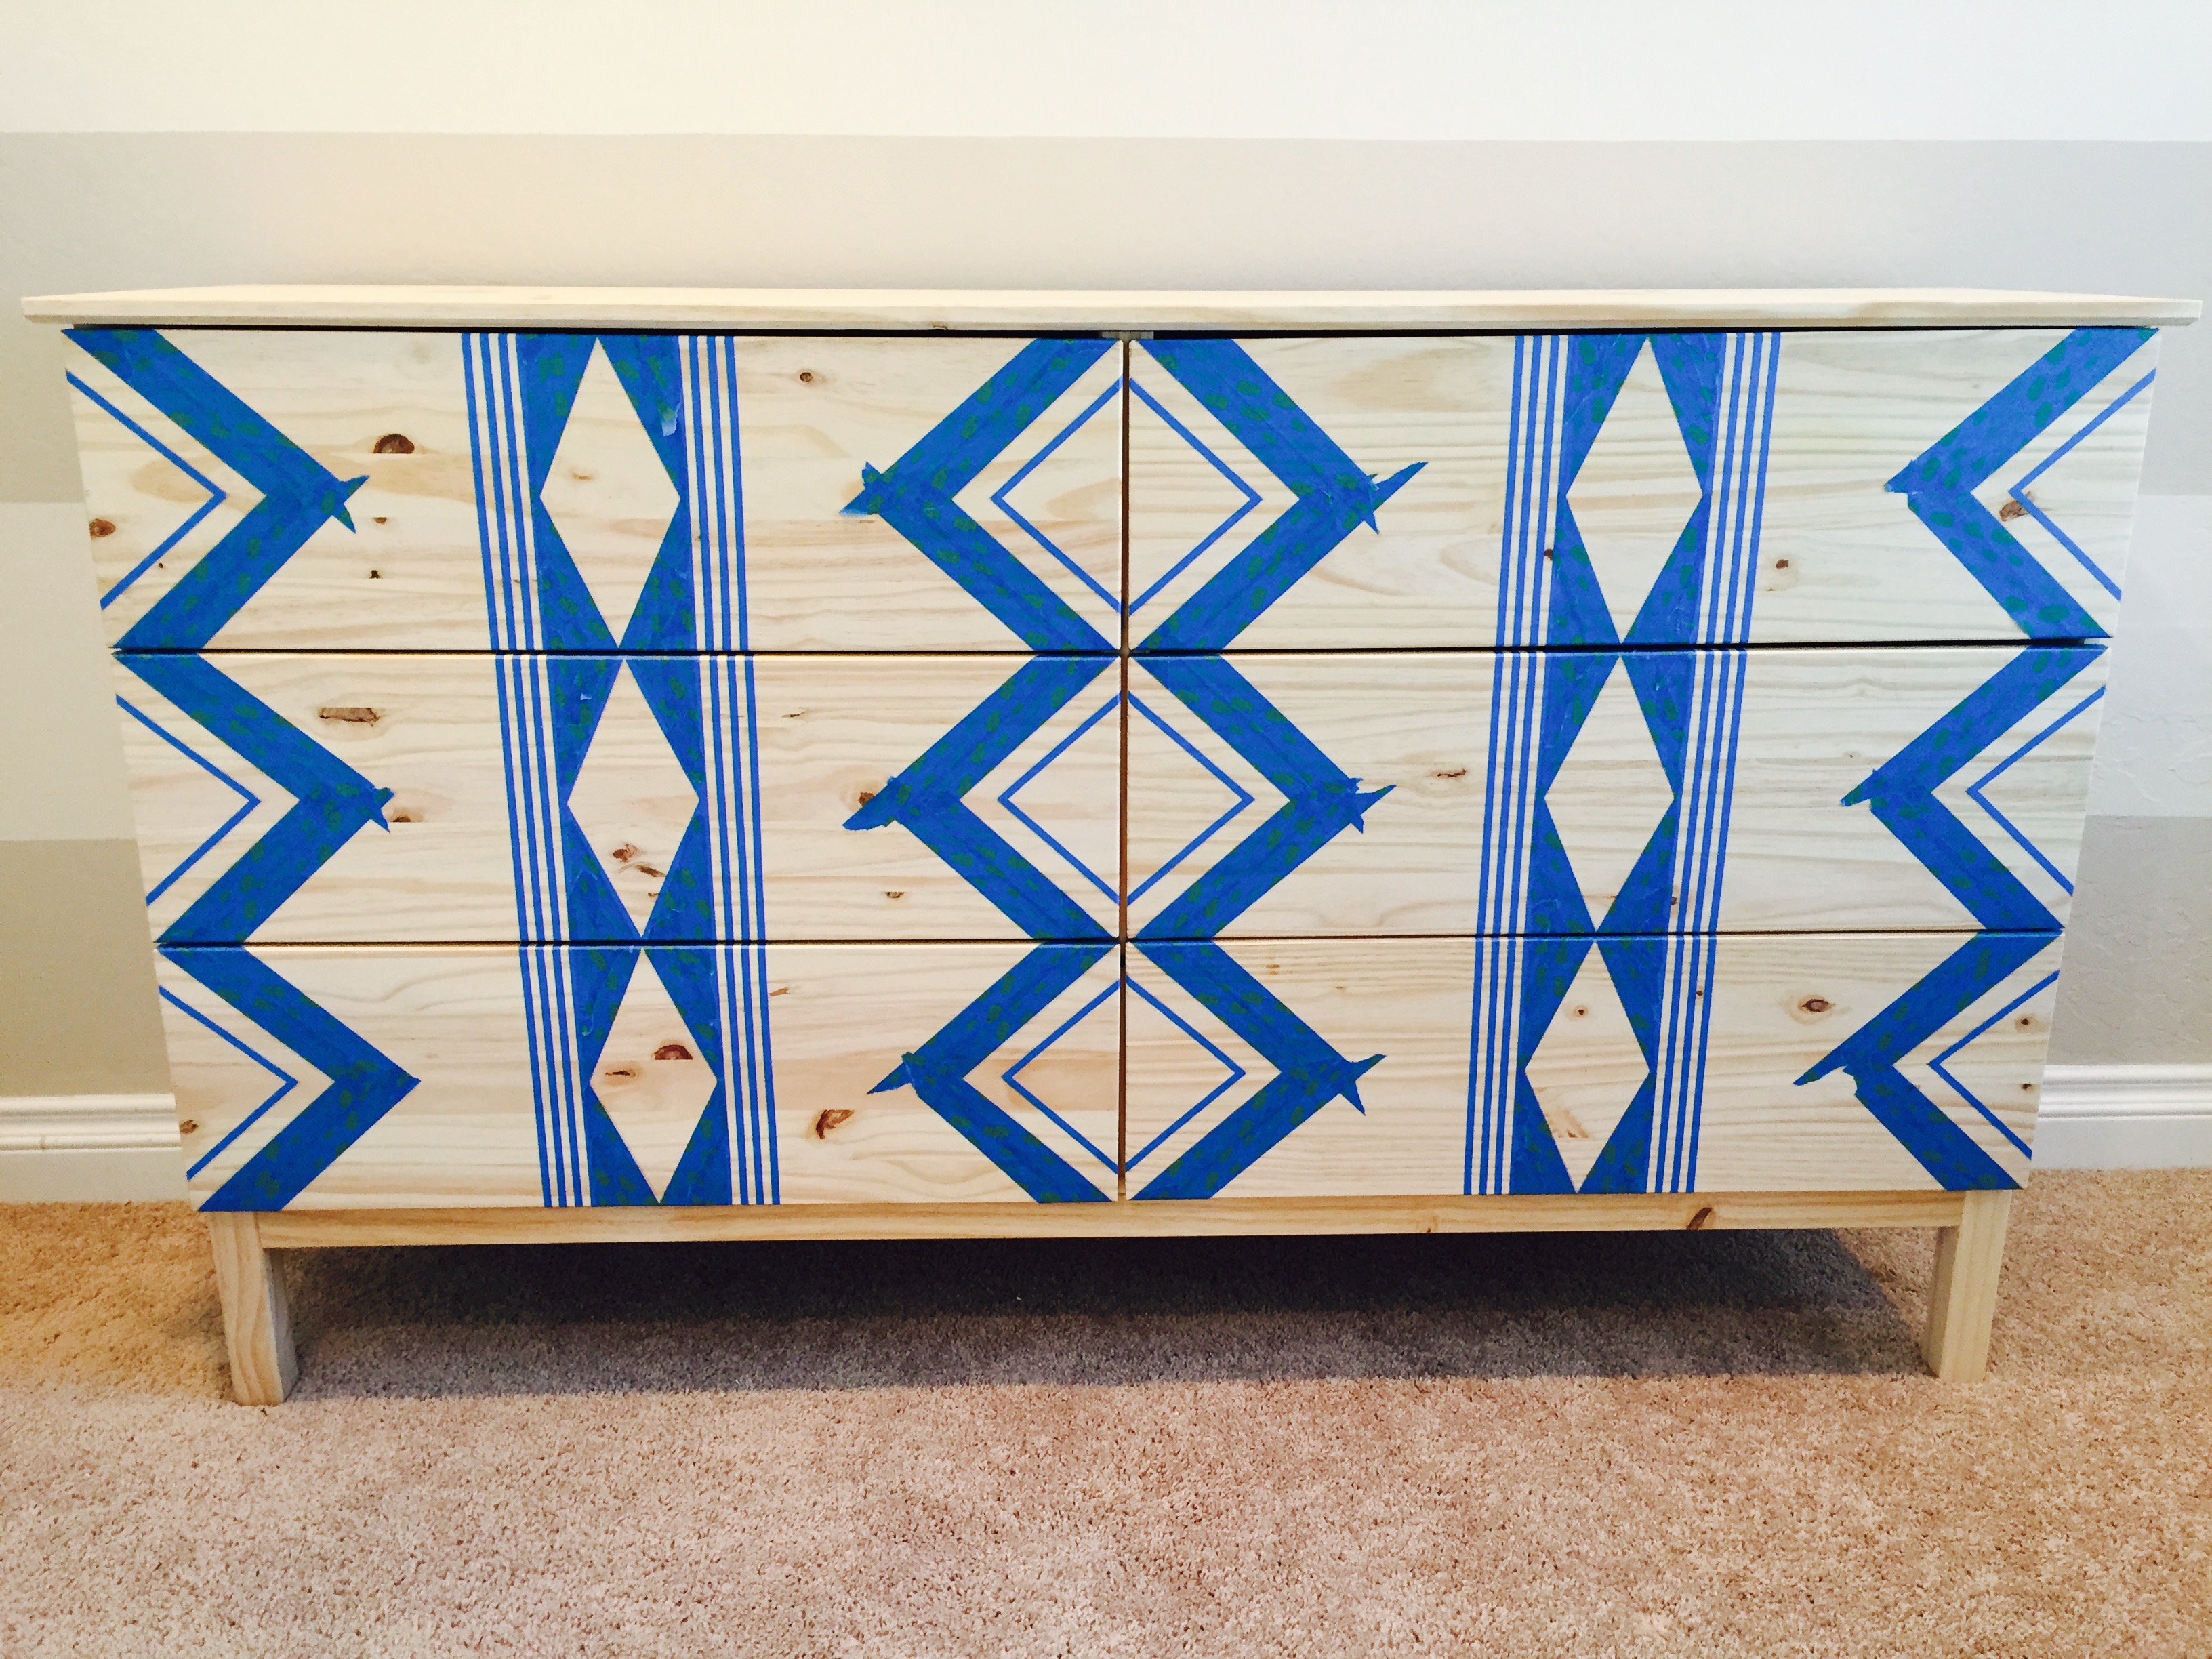
- Finish masking up your dresser by filling in the space in between your diamond and .25″ lines with masking tape. Do the same thing around your large triangles, and put a buffer of masking tape around them to ensure when you paint, no paint leaks onto the part that’s supposed to stay pine!
Step 7:
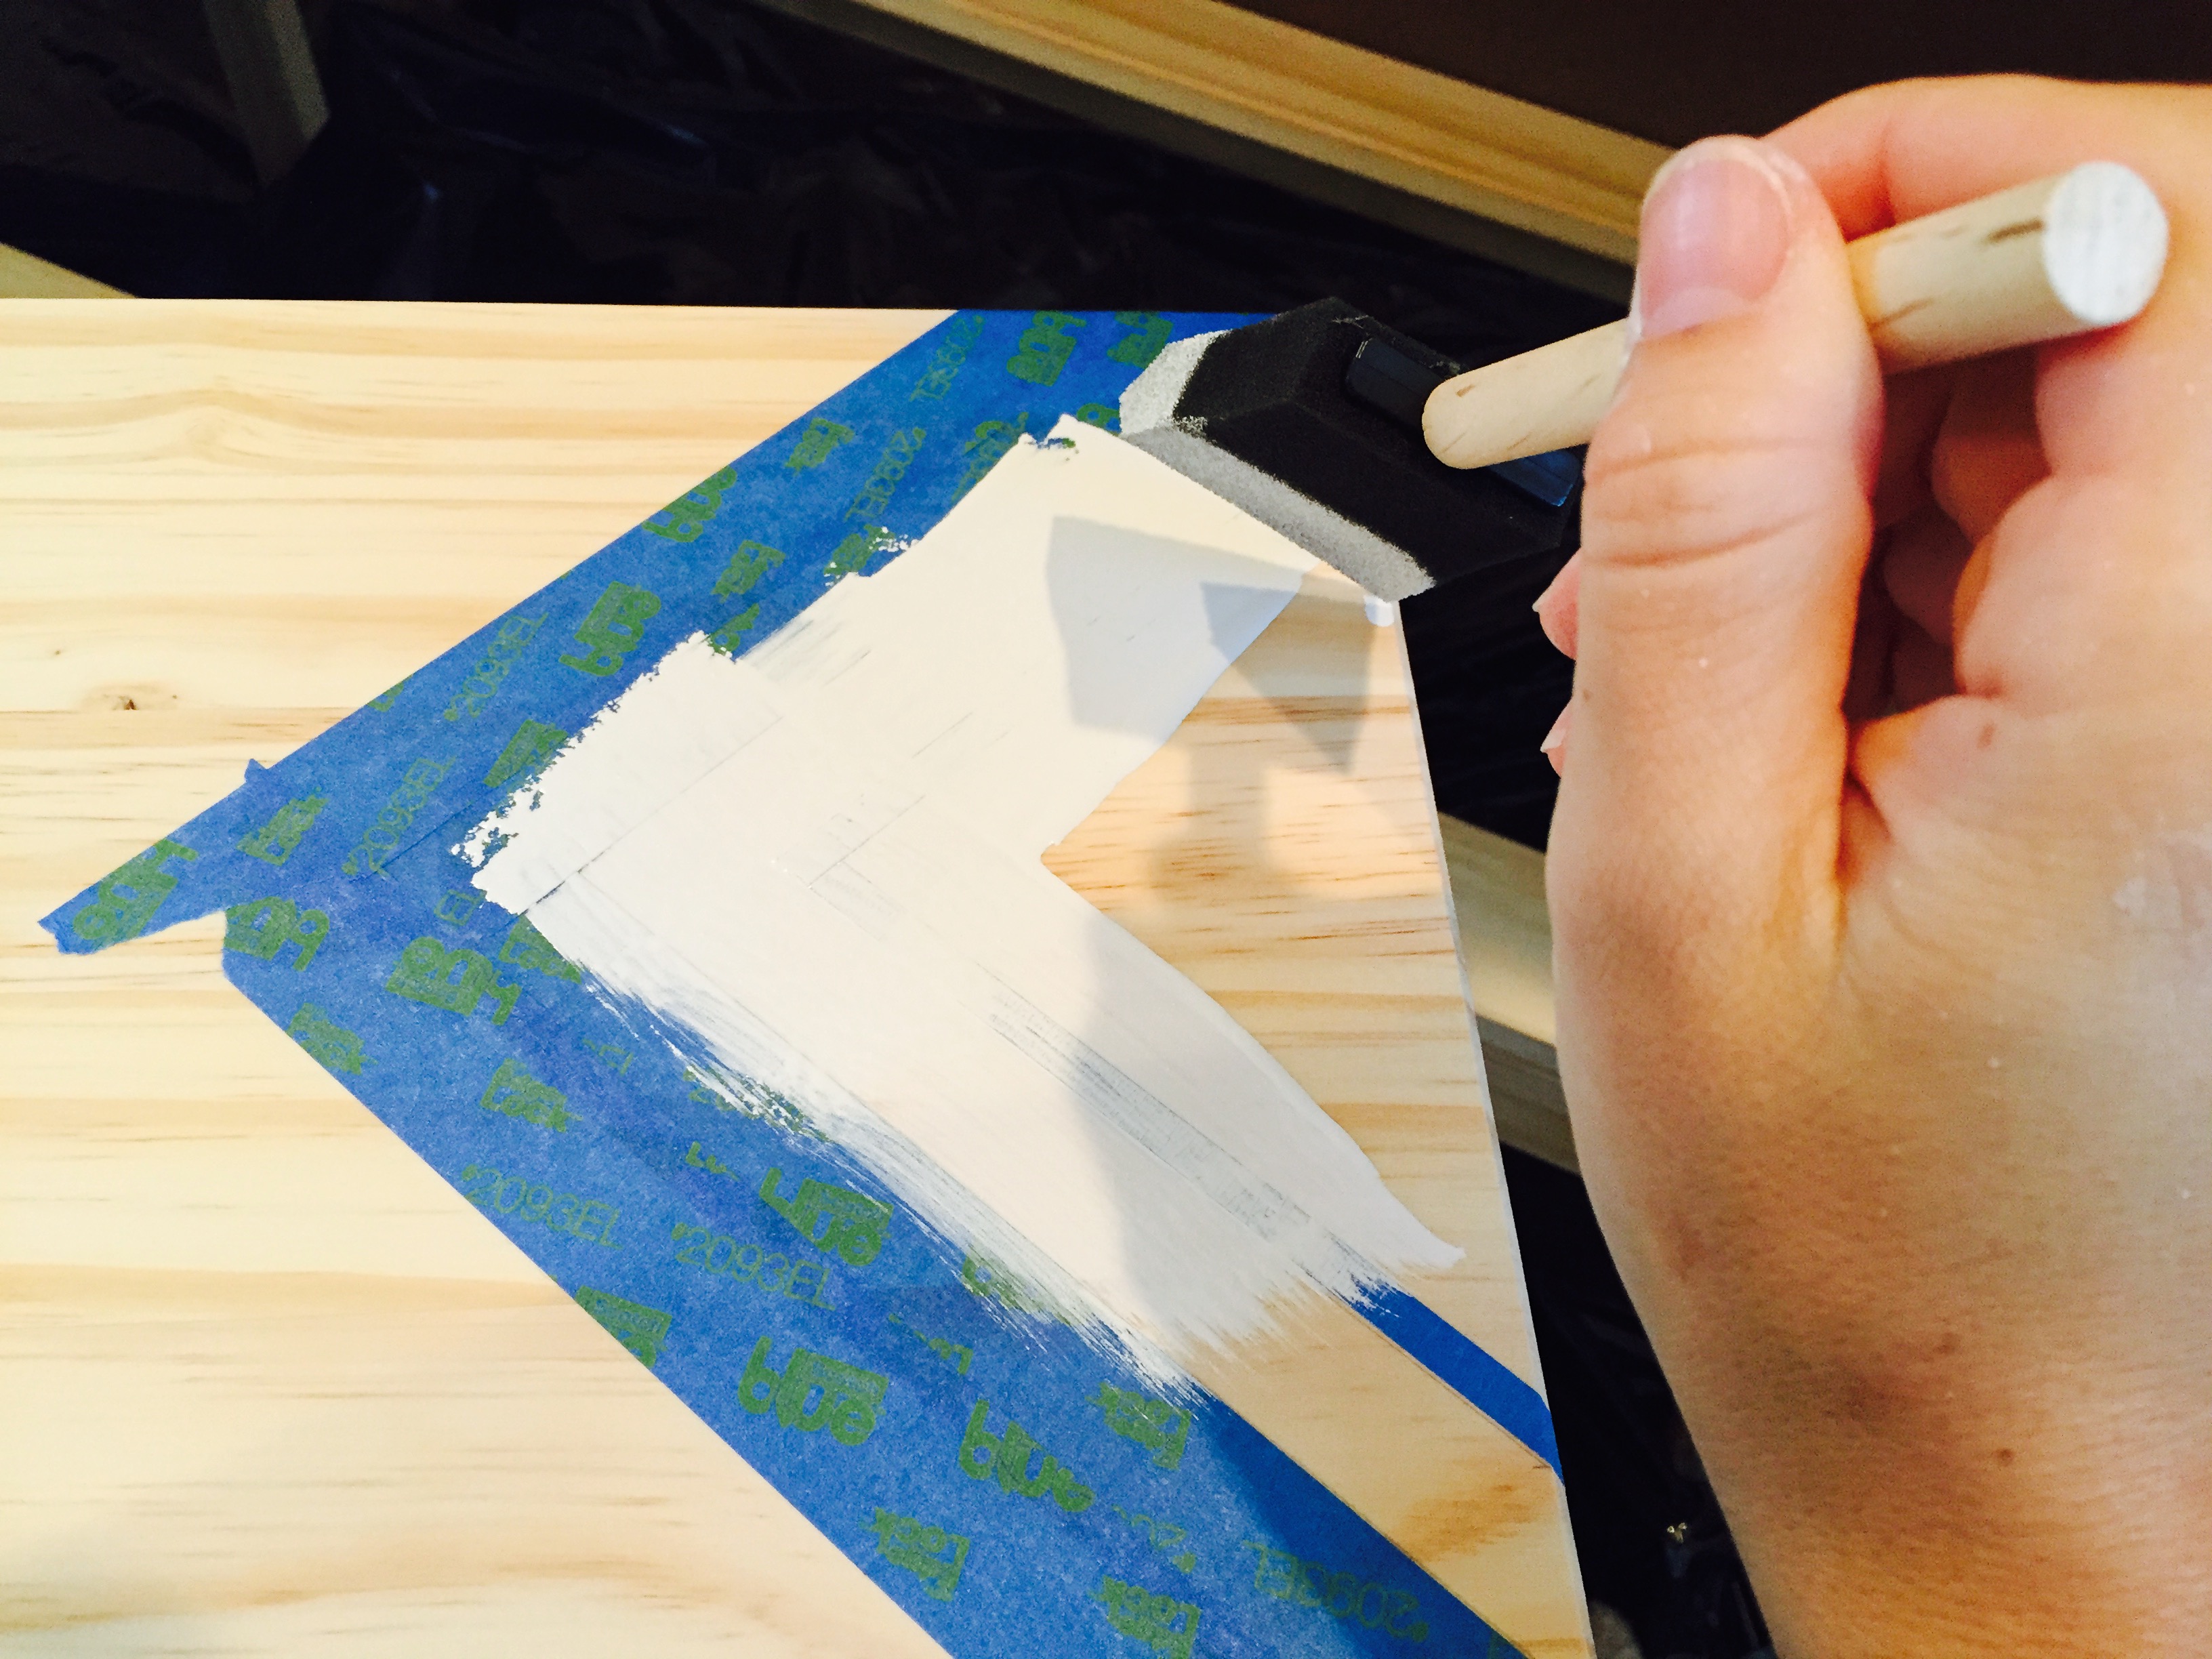
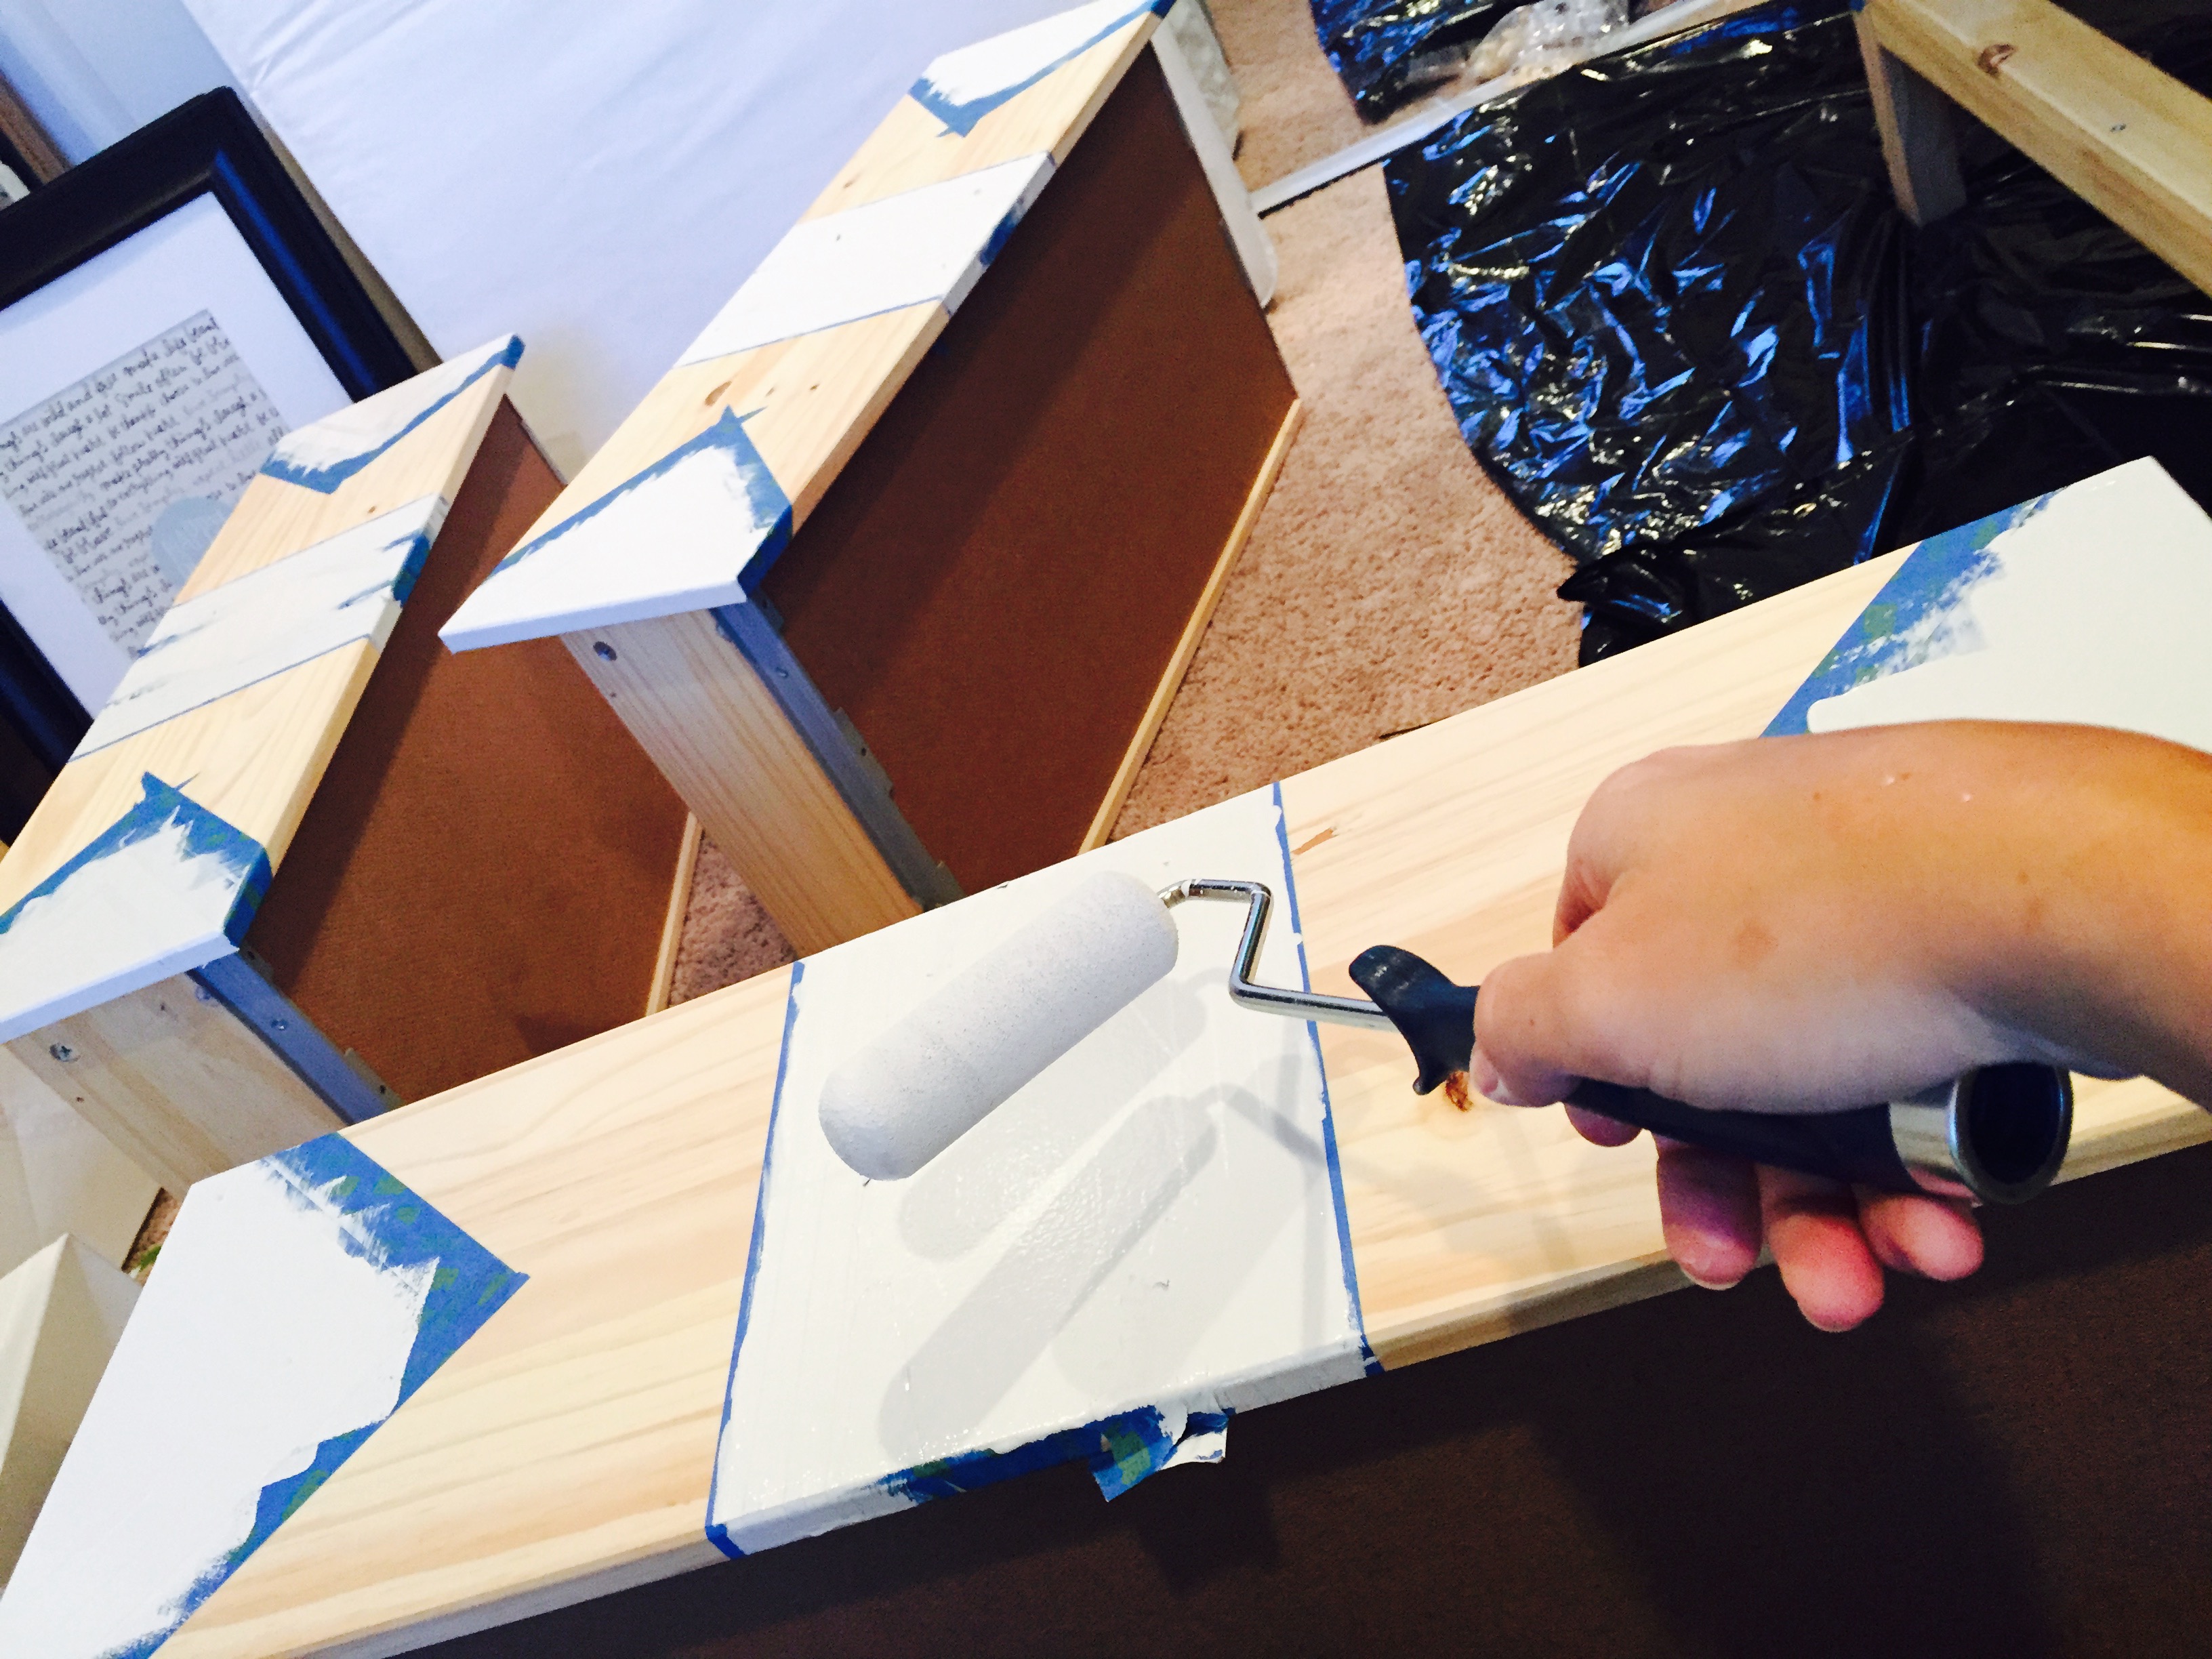
- Now comes the fun part- PAINT! I used my roller to roll over the larger parts I wanted white, and then my foam brush as I got closer to the edges, just to make sure no white got outside of the lines.
- I also painted over the entire top and outside edges of the dresser to make those white as well as the designs on the drawers.
- Paint one cost, then let dry for about 2-3 hours. Then repaint a second coat.
- You should be ok with 2 coats, but if you can still see some pine through the white, wait until coat 2 dries and paint a 3rd coat.
Step 8:
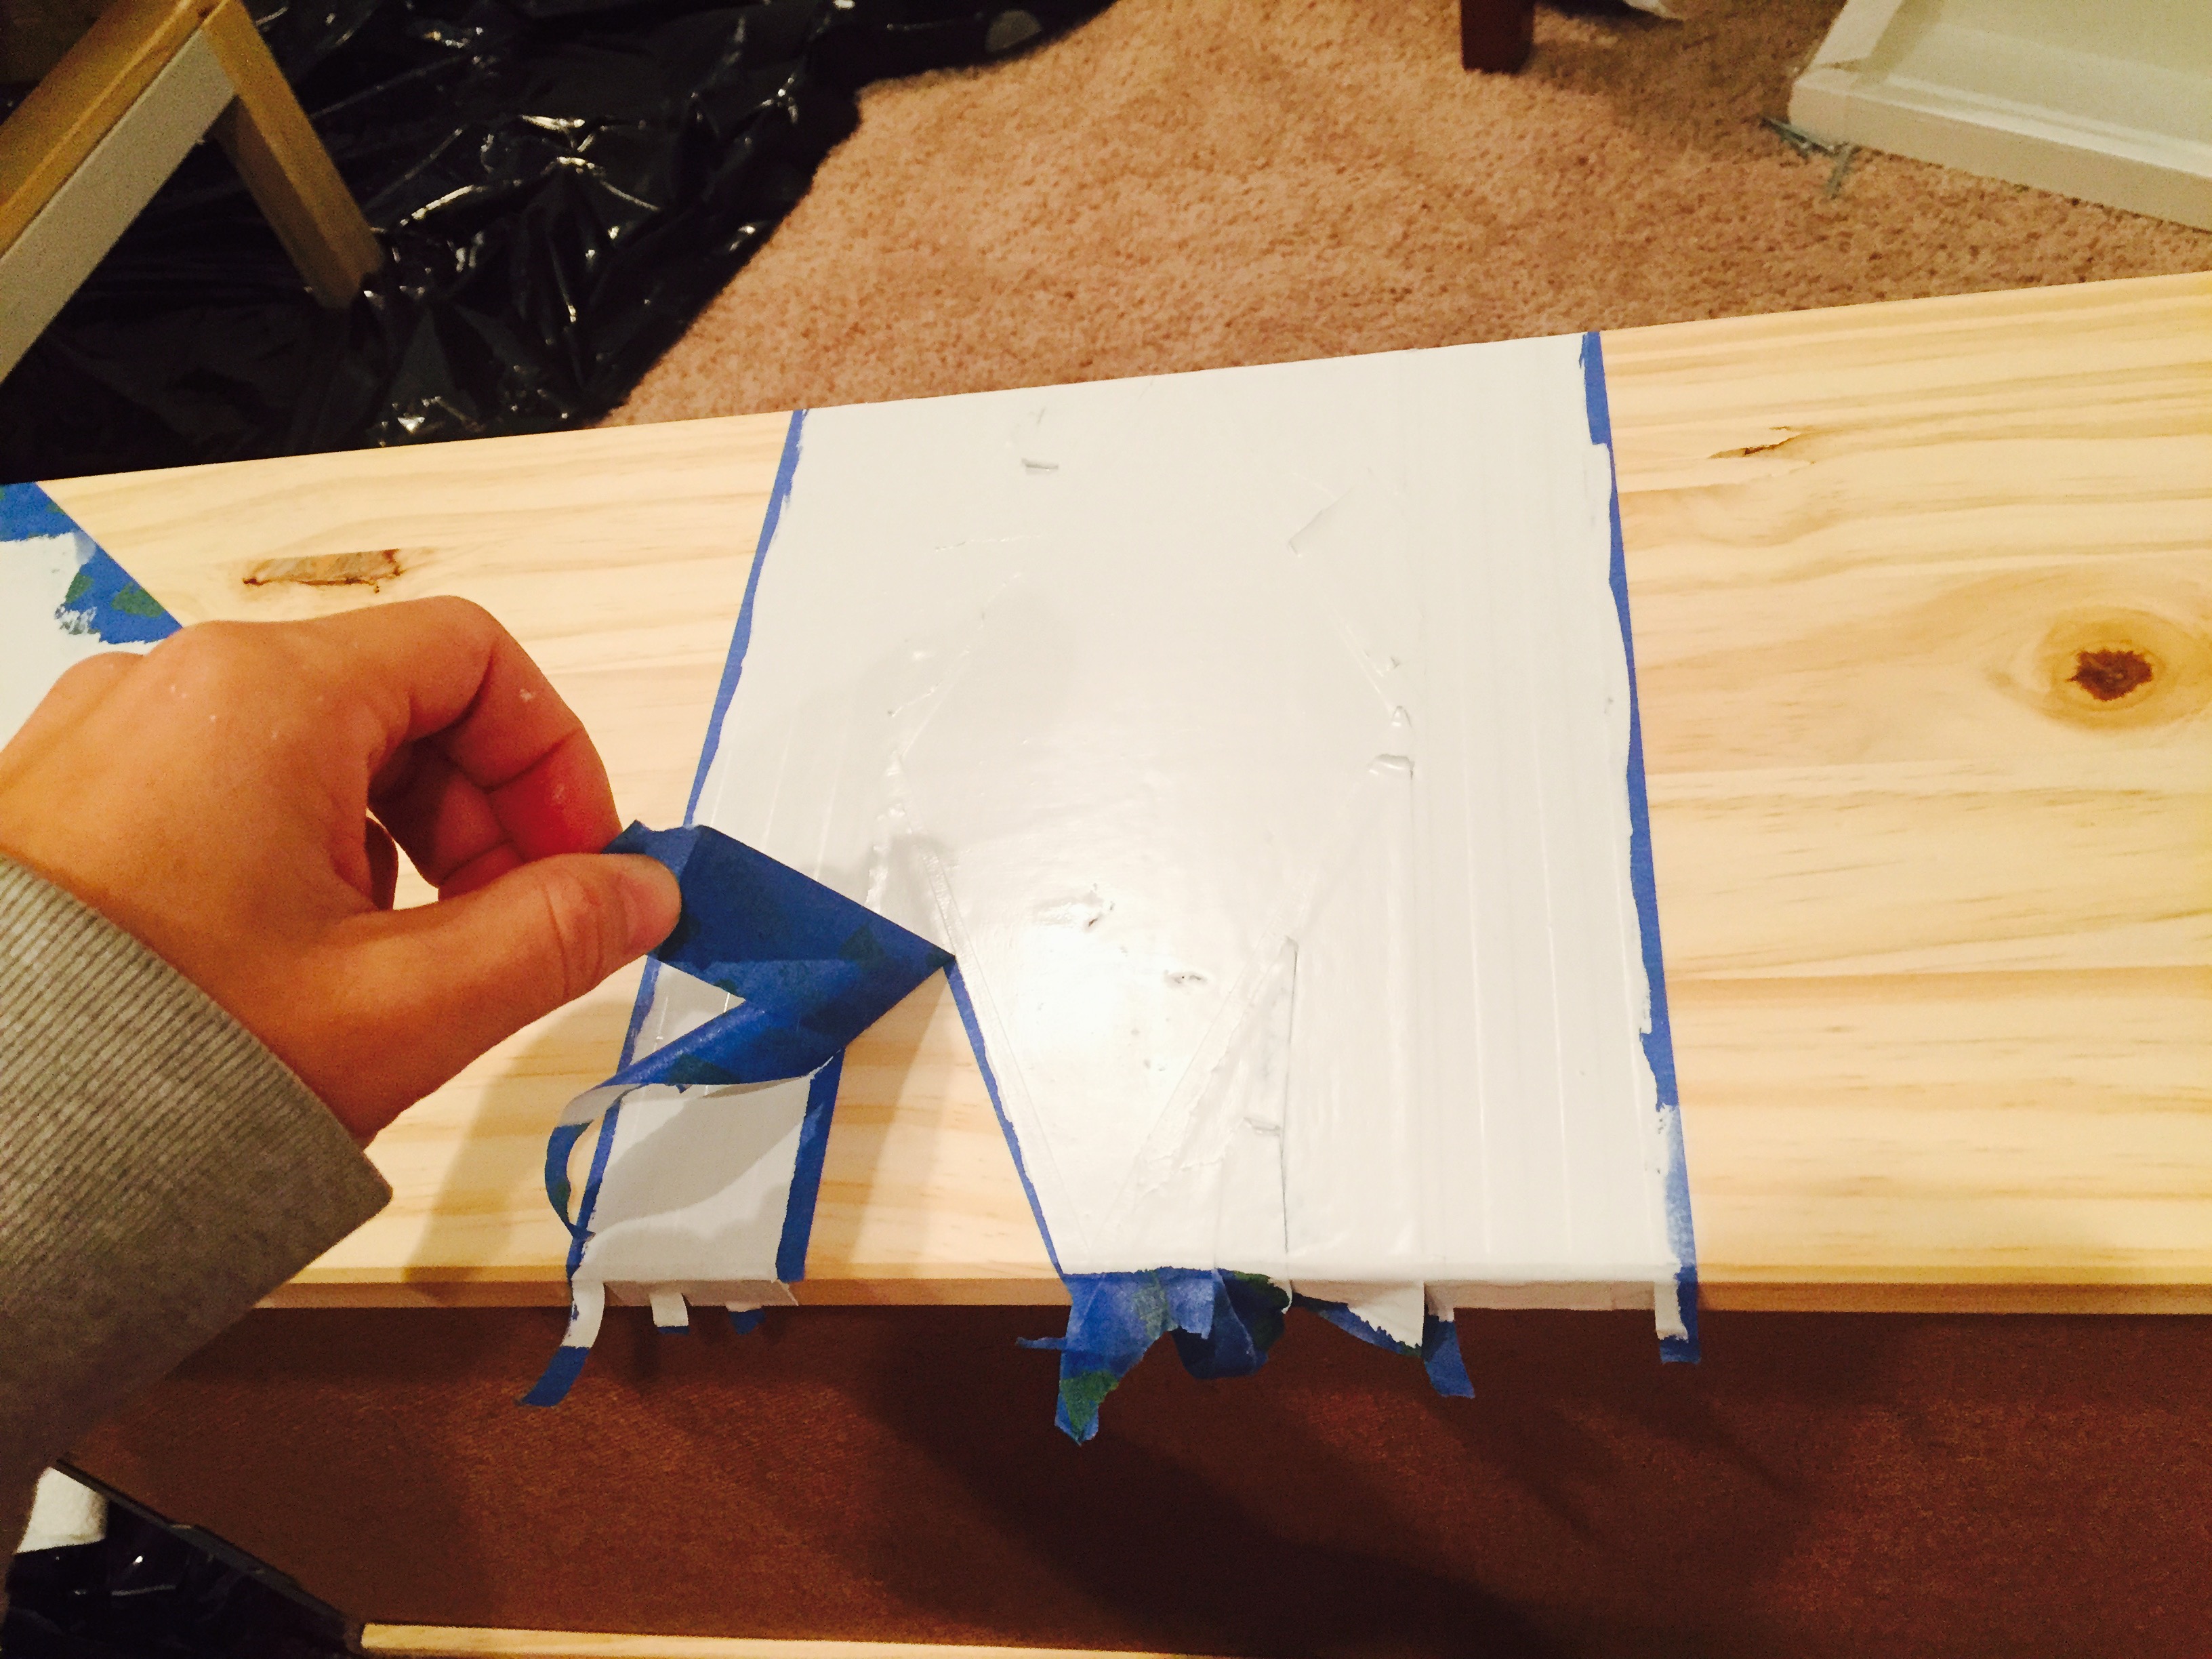
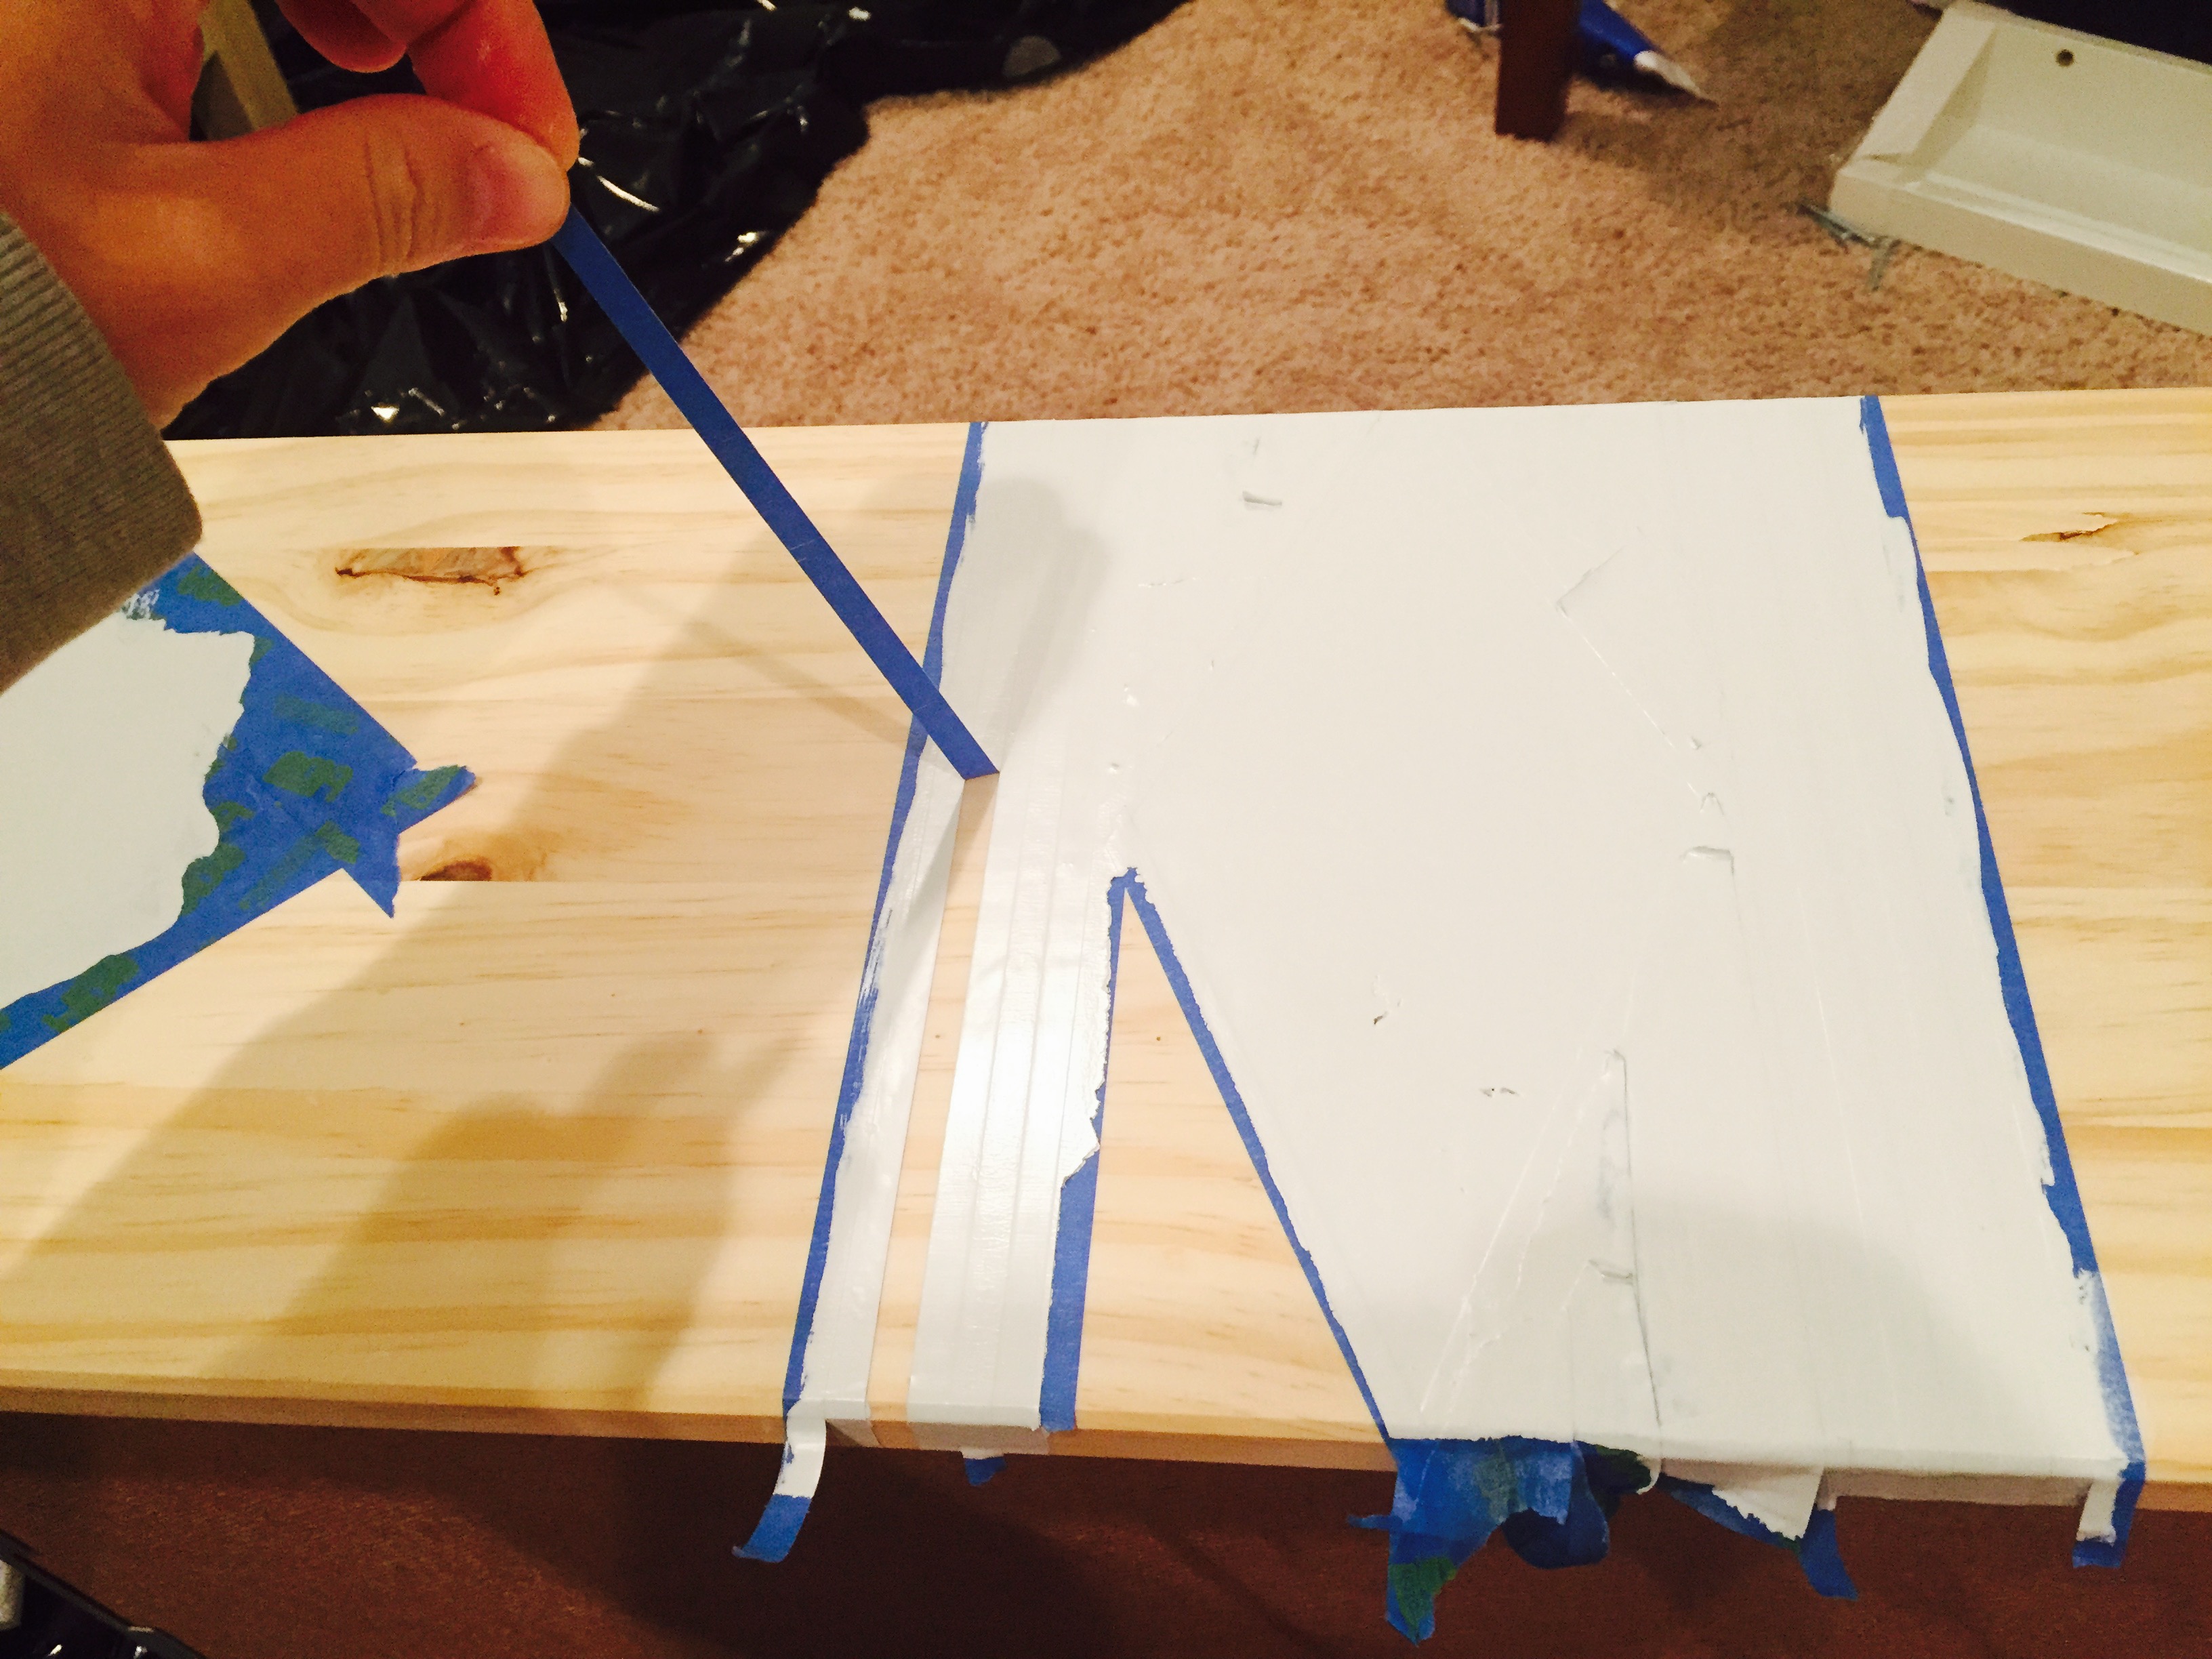
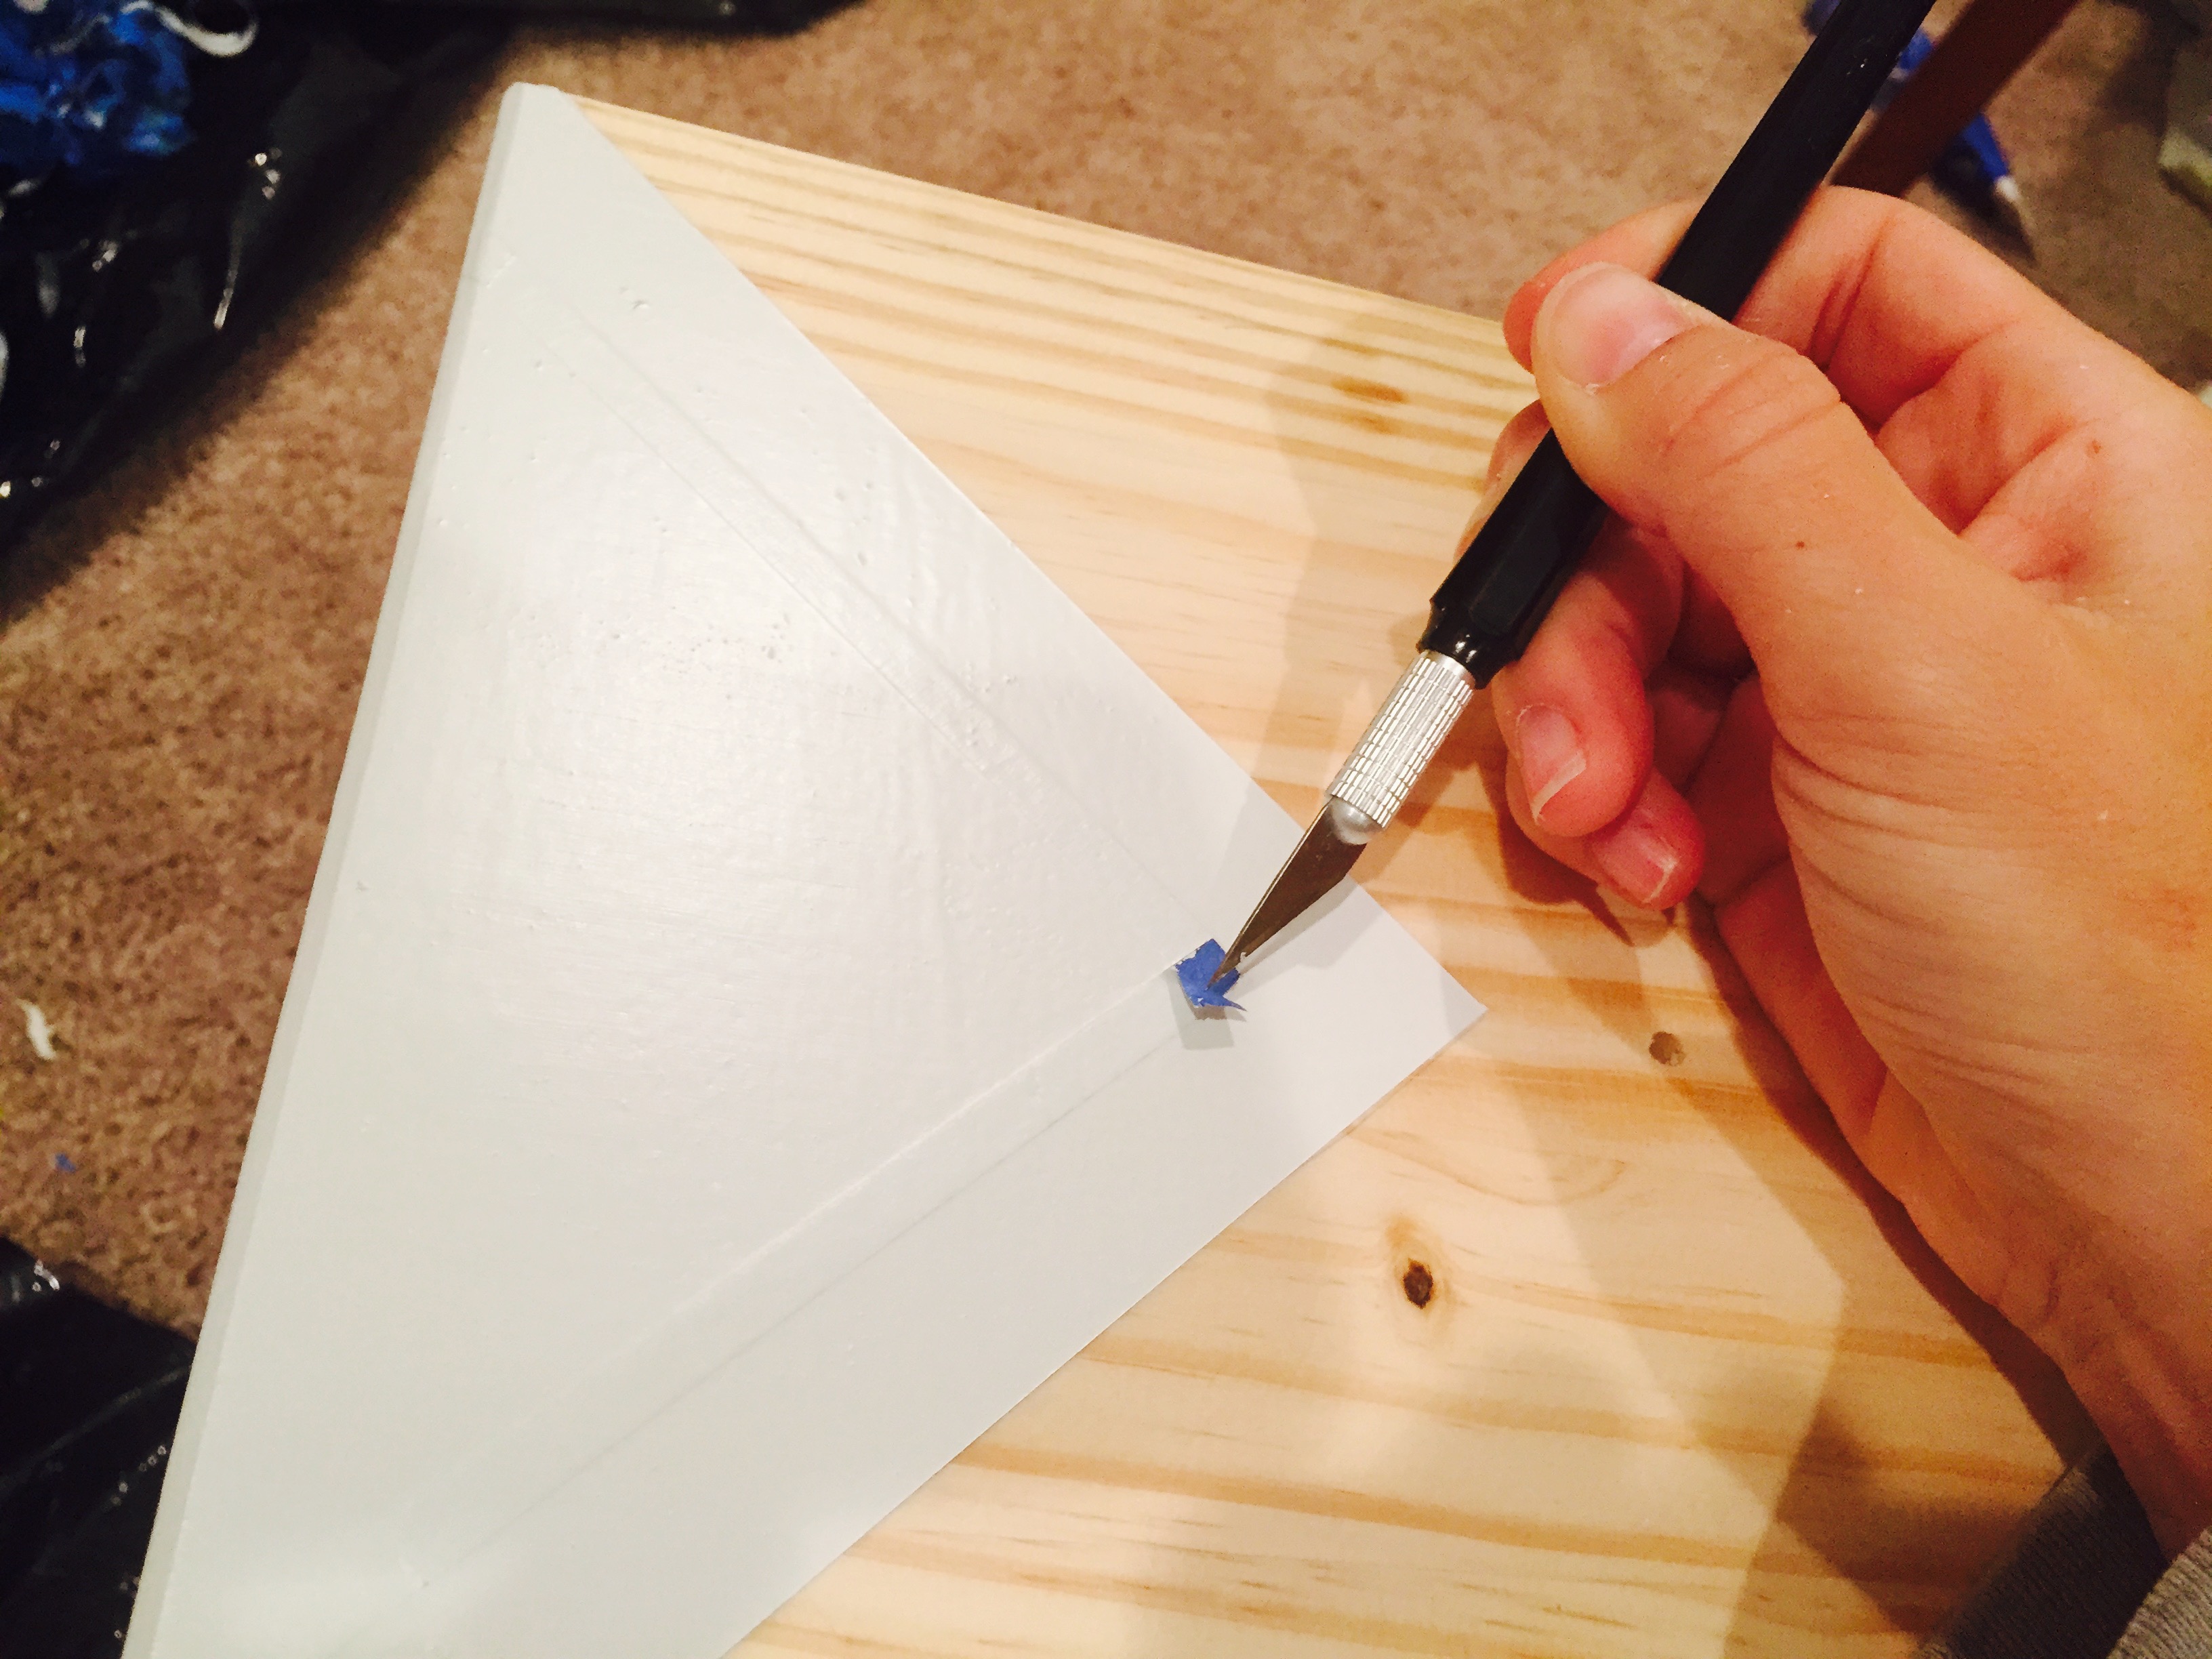
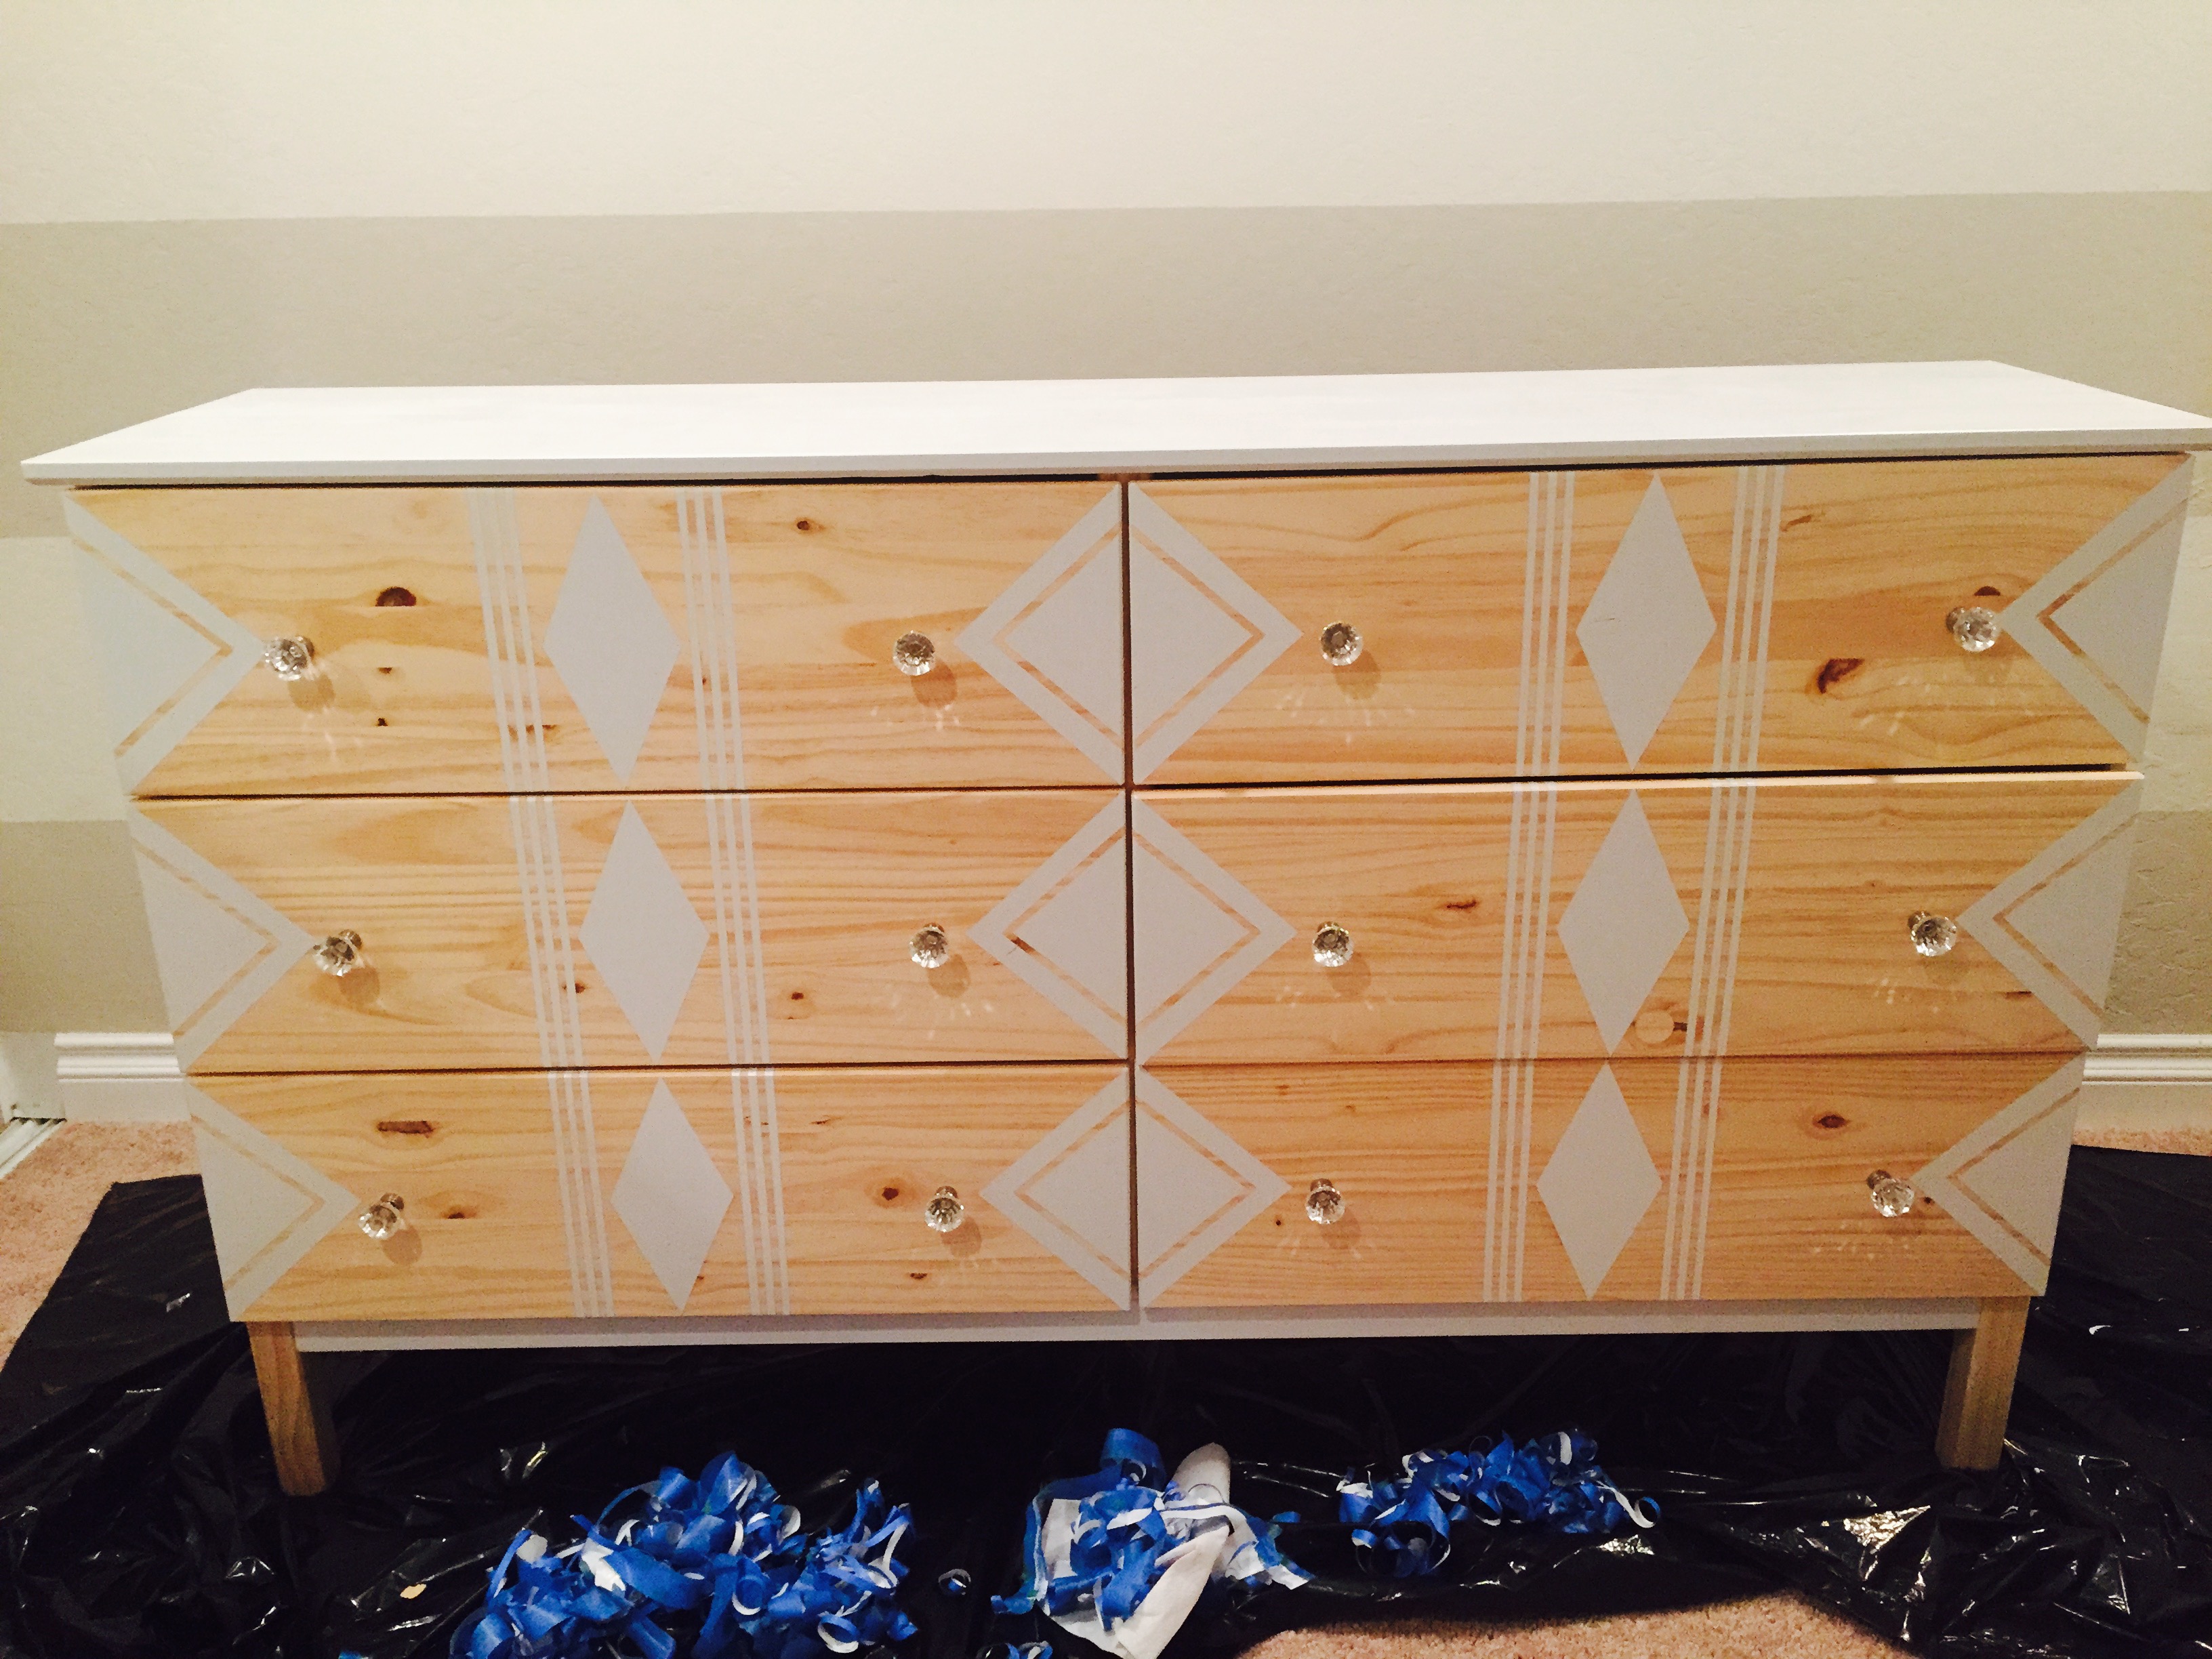
- Finally, once everything is completely dry (I would suggest letting it dry overnight) peel off all the blue tape. In most cases, start from the outer edge (where there is no paint), peel up a corner piece of the tape, and then it’s really easy to peel off.
- In some instances, the tape is harder to peel up (ie: the smaller triangle is completely covered in paint). For these spots, you can take a sharp object (I used and Exacto knife because it’s very fine and very sharp) to left up the corner edge of the tape. Once the edge is curled up, it’s easy to peel the rest of the tape up.
Step 9:
- The finishing touch! This TARVA dresser came with plain pine drawer pulls (2 for each drawer). I threw those out and purchased crystal knob drawer pulls to install instead. This is when you put those on your drawers. There are pre-drilled holes for each drawer knob.
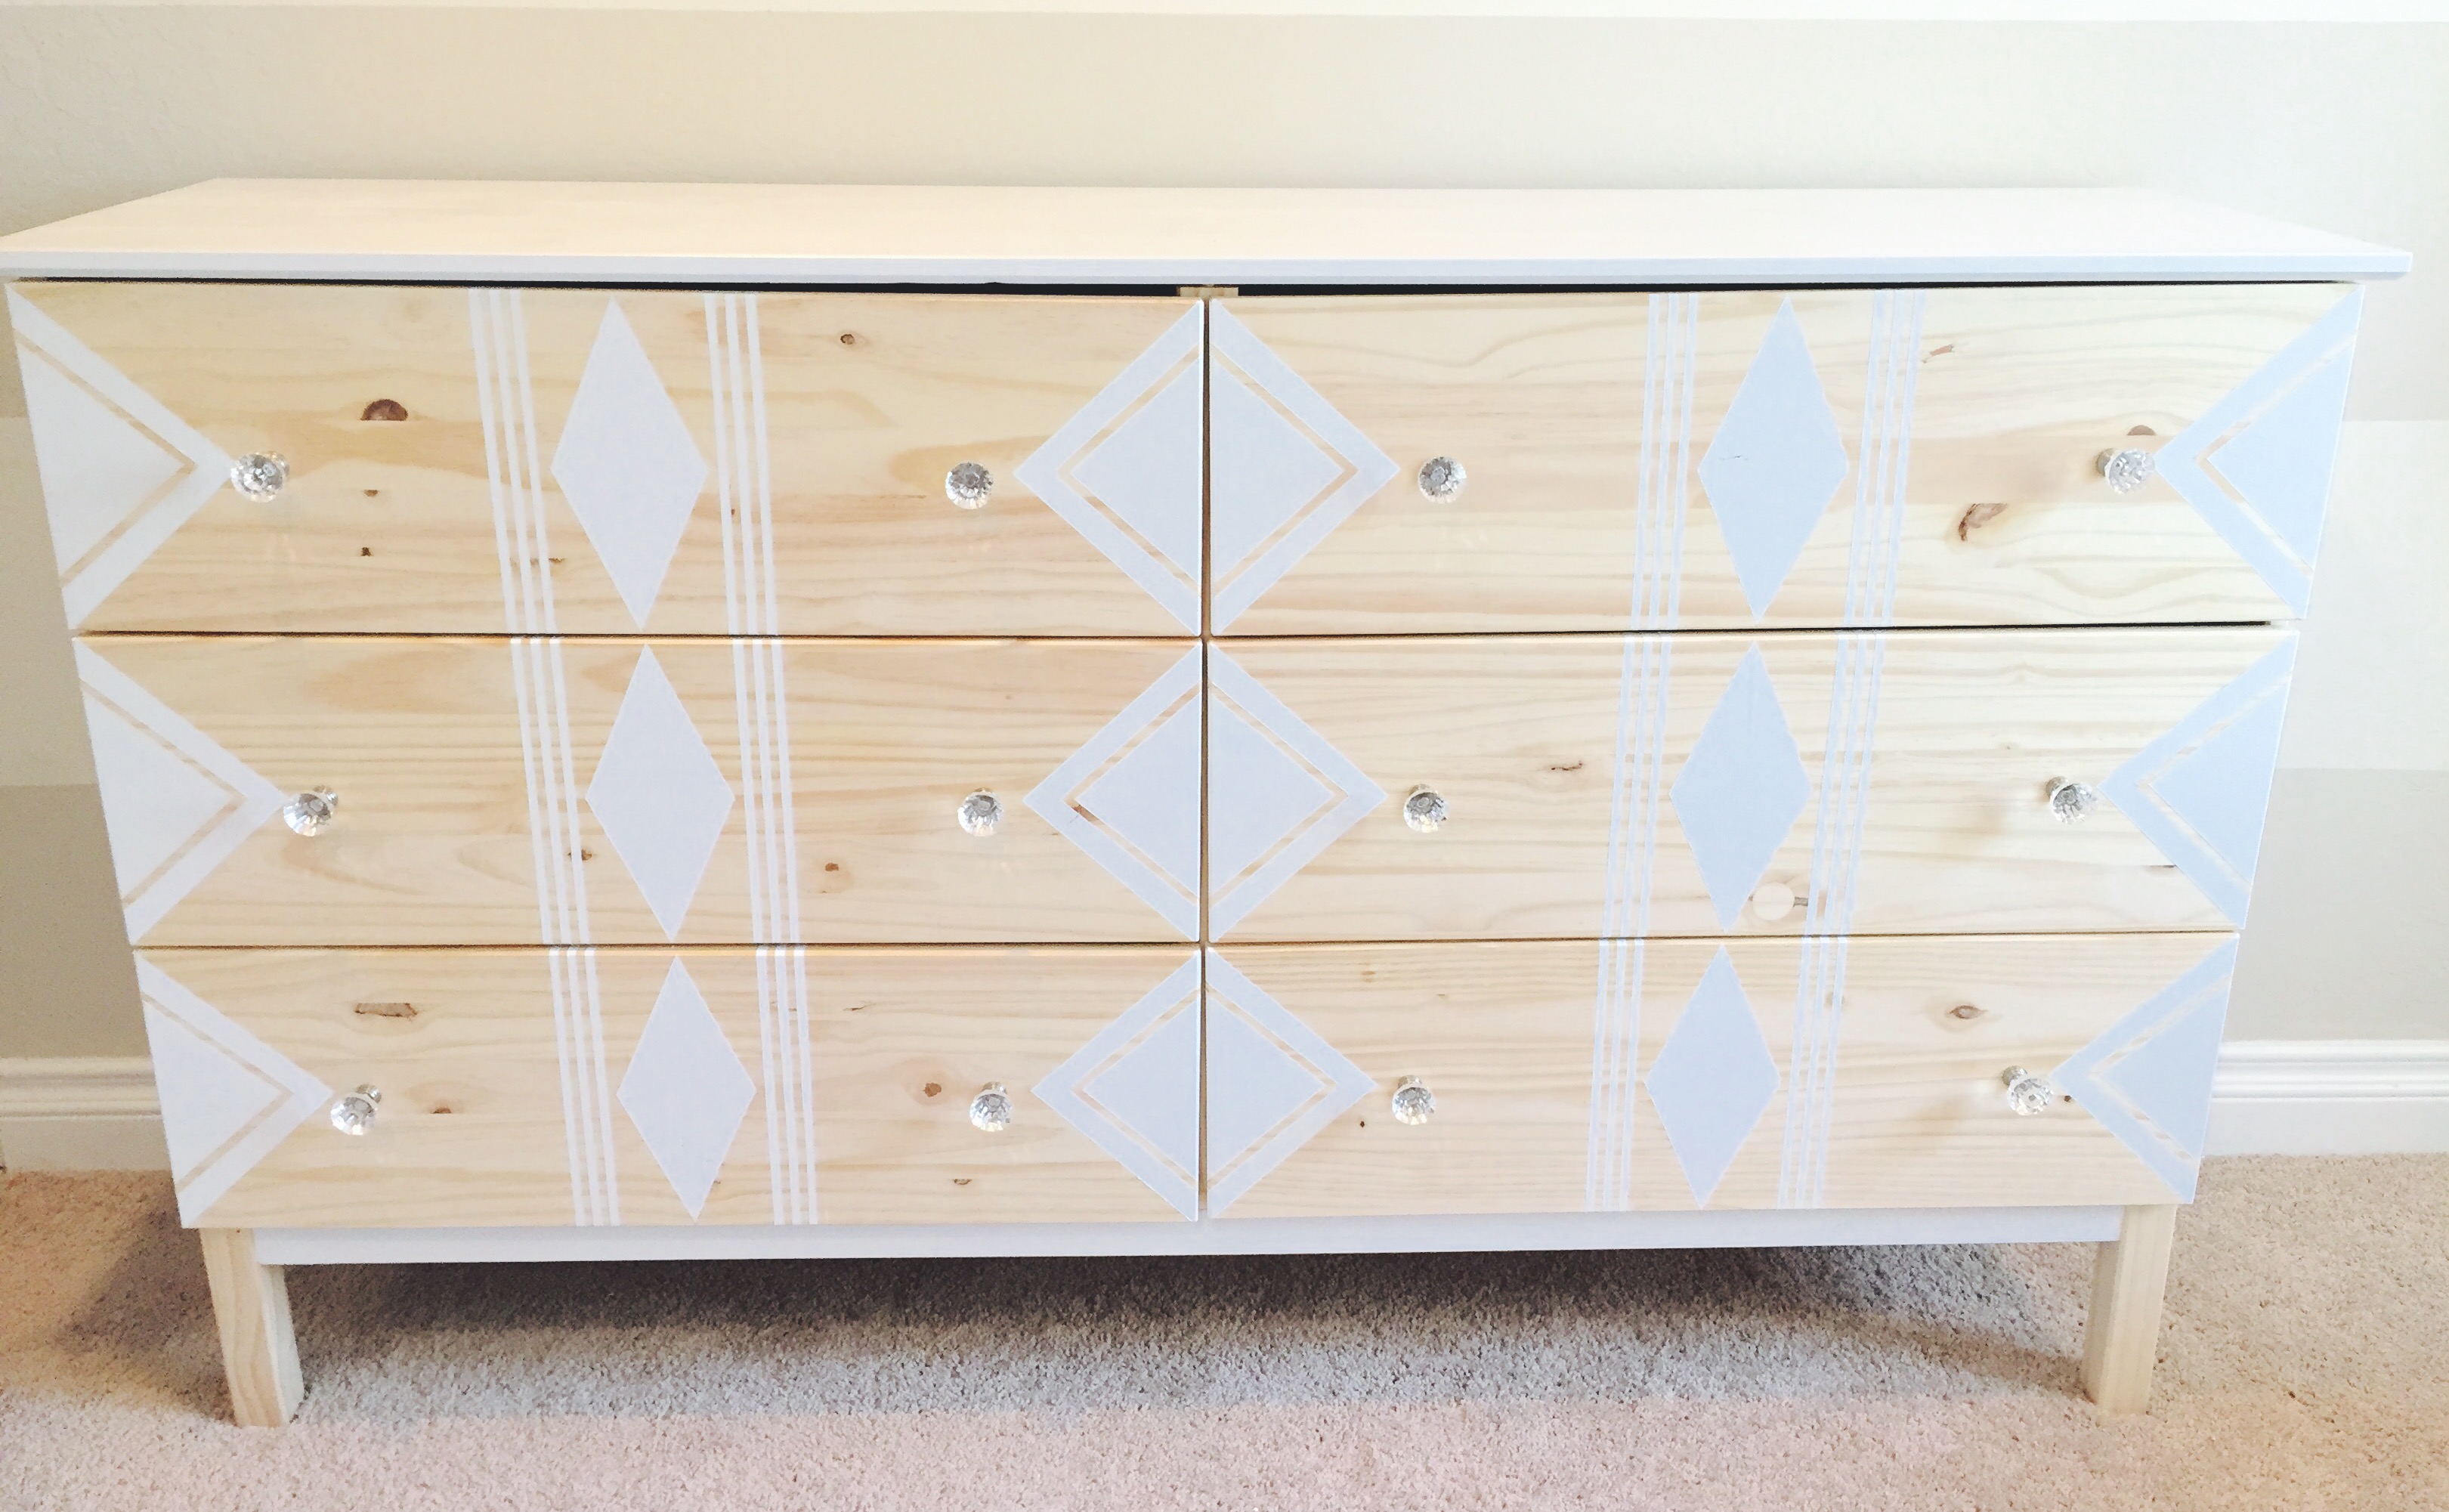
And ta-da!! Take your tarps, paint, and trashed tape away and your dresser is ready for display! Because, let’s be honest, this is more like a piece of art than just a plain old dresser. Did you ever think you could get something so cool from Ikea? Neither did I. That’s why this Ikea hack is so genius!
Disclaimer: If you’re making this for a nursery, please please make sure you use the mounting hardware and mount the dresser to the wall after you’re done painting. Too many times I’ve seen over zealous babies try to open and close drawers by themselves, and climb up them to get something they want. They don’t know their strength yet, and it’s scary to have this heavy thing fall over when they’re just trying to play with it. So there, don’t take any chances and just mount it!
Over the coming months, I’ll reveal more of Bizi Baby’s nursery… little by little. It’s all handmade, and custom for my little guy. But my hard work is your gain, and hopefully will inspire you not just for your own baby’s nursery, but give you ideas for your own domain as well!
Remember, I designed everything with an adult in mind. I’m not one for “baby” rooms, so everything (besides the crib) can be used in any room to serve a different purpose. See the matted frames above the dresser? Yep, those are DIY as well. So stay tuned for more fun design ideas! I can’t wait to show you what I’ve come up with lately!
As for now, I leave you with inspiration to make your own Ikea hack (using my design or one of your own). And if you’re ready to run out to the store, here’s a recap of everything you’ll need to DIY:
Ikea Hack- Dresser Supplies:
- Ikea TARVA 6 drawer chest (unfinished pine)
- You can also make a smaller version using the 3 drawer TARVA or 3 drawer RAST (both cheaper versions, both unfinished pine).
- Crystal Glass Cabinet Knobs (12 pieces)
- 1″ Blue Painter’s Tape (EdgeLock version is my favorite for painting, when available)
- .25″ Blue Painters Tape
- White Oil Based Rustoleum Paint (MUST be oil based, not water based).
- I used the SATIN WHITE finish
- High density sponge roller
- Plastic pan for paint (to dip roller in)
- Foam paint brushes
- Protective sheeting for floor (to use underneath dresser to prevent paint drips onto floor)
HAPPY CRAFTING!!
Leave a Reply