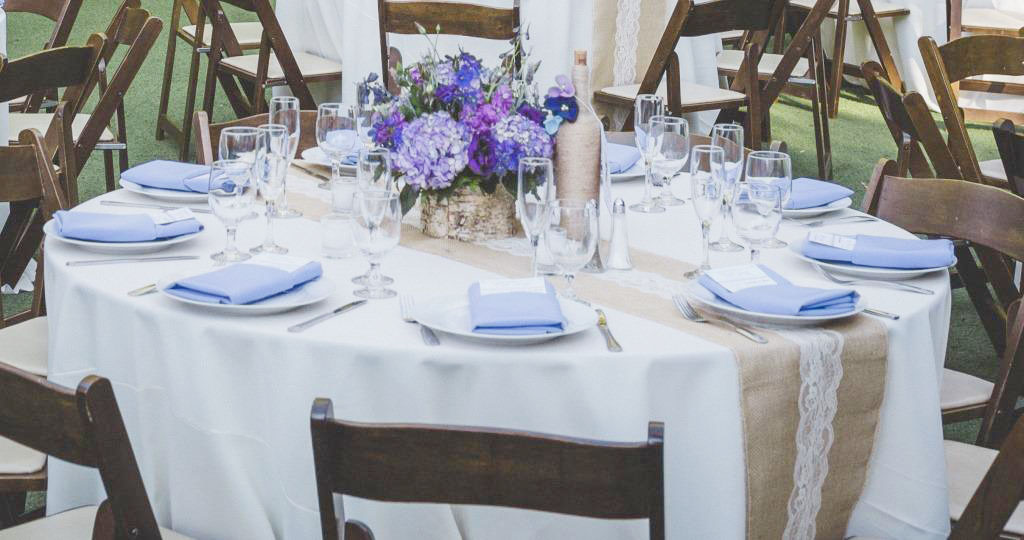
A really hot trend among weddings now seems to be the rustic/vintage vibe. People are in love with the rustic wedding look! Market lights strewn above a lively dance floor. Beautiful table settings set on top of beautiful, dark wood tables. Vintage furniture laid about for the guests to lounge upon. Many people seem to want the earth and party to blend together in elegant sophistication – and who wouldn’t?! It sounds so dreamy, and the all the pictures on Pinterest seem to corroborate that. However, the words rustic and vintage carry a price tag. And when you associate them with a wedding, that price tag is often a hefty one.
I had no idea when I started to plan my wedding how much these supposedly perfect weddings I was seeing on Pinterest were costing. When I had the first meeting with our caterer (who was the one providing all the tables, chairs, and linens) I was astounded. Included in his fee were simple, solid colored linens, tableware, and plastic chairs (yes, I repeat, PLASTIC). I had found the perfect venue, and I was going to have to seat my guests in these beauties:
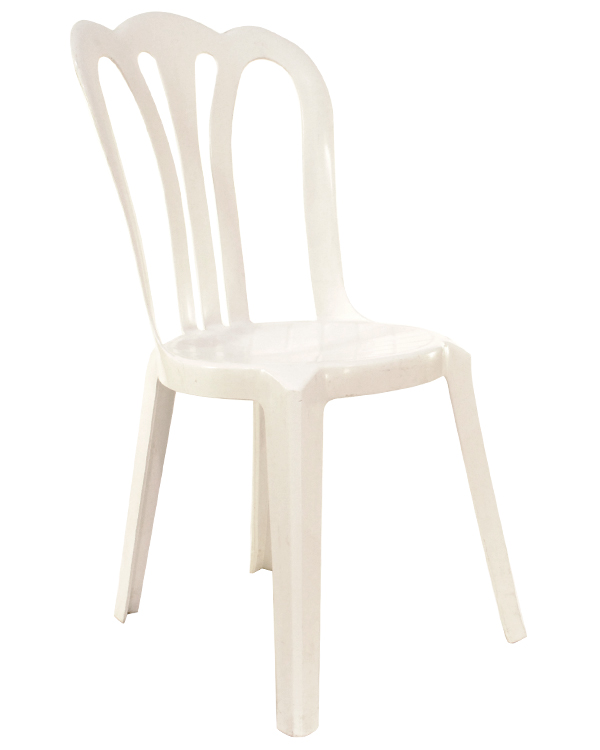
No, not ideal at all. However, it was going to cost $5-15 per chair to upgrade. UGH! Not only that, but if we wanted to upgrade to rustic wood tables without linens, $100 per table. What about burlap table runners? $30 each. My idea of this beautiful rustic wedding was going to cost me a fortune! So just like I did with my floral escort cards and chalkboard signs, I needed to figure out how I could get the vintage vibe myself without going bankrupt.
Rustic Wedding DIY #1 – Burlap And Lace Table Runners
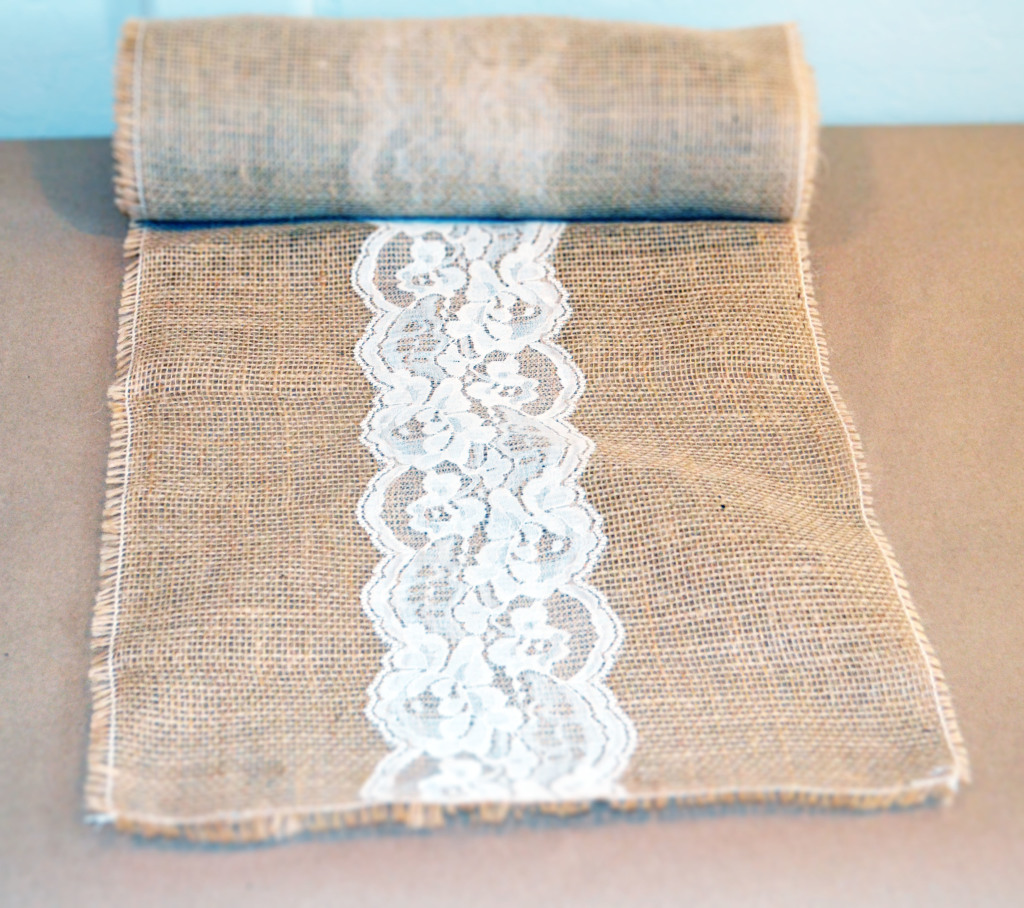
For my wedding, burlap was my best friend. When you’re trying to give your event that rustic vibe, adding burlap and lace is the simplest way to do it. Instead of paying an exorbitant amount to upgrade my tables and linens through my catering company, I thought “Well, if I use the standard ivory linens and source burlap and lace runners myself, I could get the vintage touch I want without being charged up the ying yang”. The problem with this, too, is that if you buy these pre-made, they are still expensive. Yes, you can buy them for $25 instead of the $30 rental charge, but that’s still pricey. Once again, I went hunting.
AMAZINGLY, I found burlap runners on Amazon for less than $10. I also found bulk rolls of burlap, where I could cut numerous runners out at the exact lengths needed. For both the standard rectangular and circular tables at weddings, you’ll need 120” long runners (by about 12-14” wide). I highly recommend the burlap rolls if you’re looking to really cut your costs. You can get up to 30 runners out of one roll.
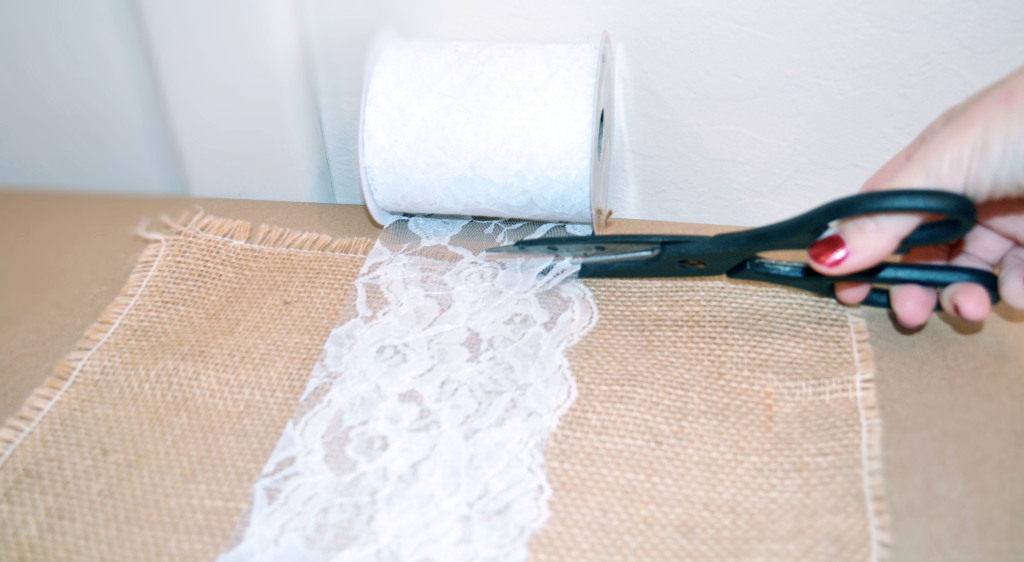
Now, I just needed the lace (and an efficient method to attach the lace to the burlap). Again, Amazon Prime came through with lace in 10 yard rolls (with each runner being 120” in length, you could get 3 runners out of each lace roll). I chose this lace, but if you wanted and even more budget friendly version, try this or this (all in 10 yard rolls).
Once I had all my supplies, I began the process of making the runners. I decided against sewing them together, because the materials were all too delicate and would get caught up in my sewing machine (and take far too long to hand stitch together). I turned to my trusty glue gun, once again.
You have to remember when attaching the lace to the burlap, that both are porous and the glue will seep through. Make sure to cover any surface you have first with kraft paper. I used kraft paper because in the event that some would get stuck to the back of the runner, it wouldn’t be noticeable because the color of the paper matched the color of the burlap.
The Steps to Make You Own Burlap and Lace Table Runners
The Necessary Tools:
- 120” Burlap Runners (individual or bulk roll)
- 10yd Lace Roll (Standard, Thin, or Value)
- Kraft paper
- Hot Glue Gun
- Scissors
- I unrolled the first runner and laid it across the table I was working on, leaving the end closest to me on the table and keeping the other end of the runner rolled up.
- Then, I unrolled the lace a bit and put a line of glue at the edge. I then immediately attached the end with the hot glue to the edge of the runner that was on the table closest to me.
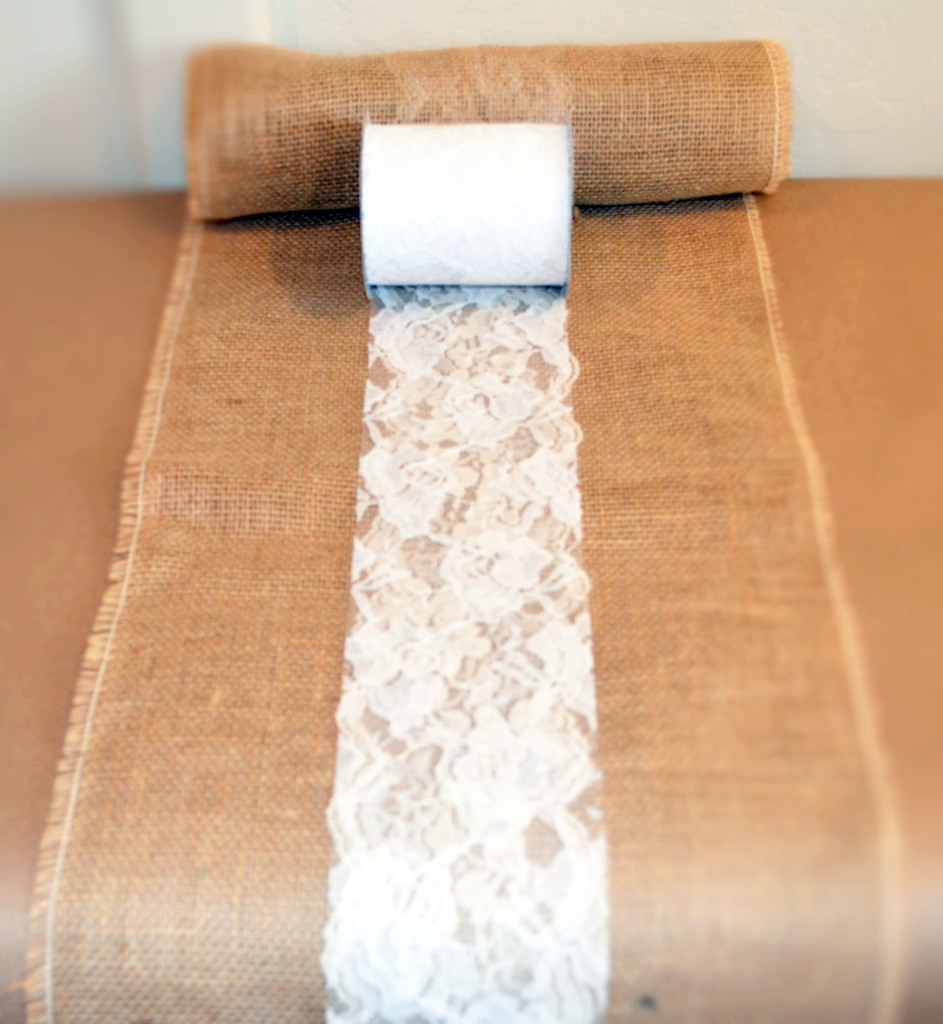
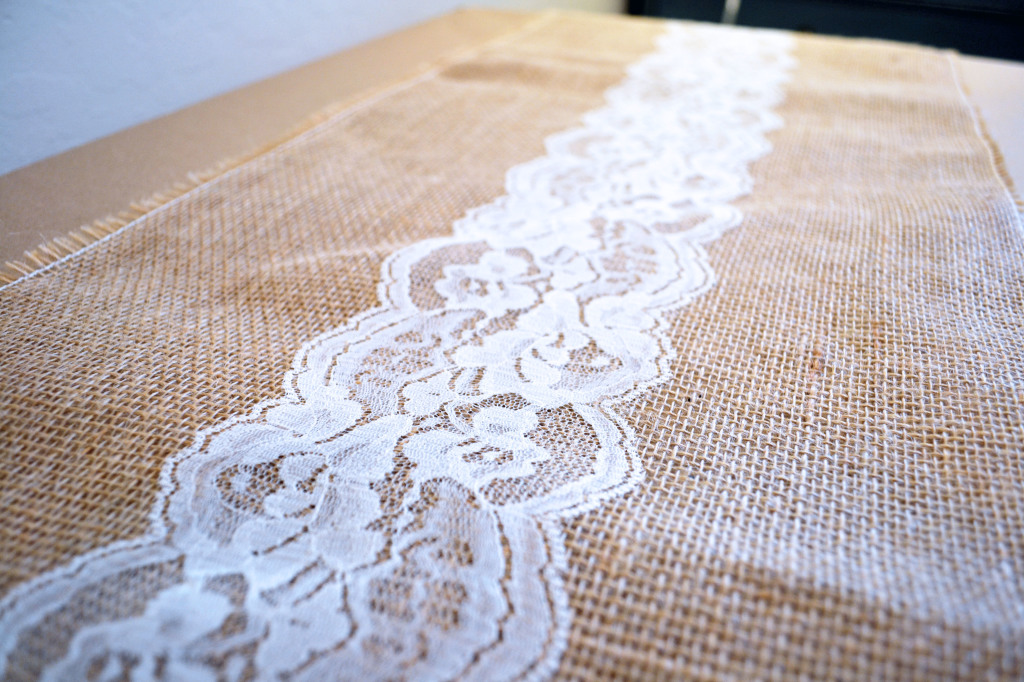
- I proceeded unroll the lace a bit more, and put hot glue on the edges of the lace that faced the burlap (about 6-12” at a time).
- Once the hot glue was applied to the lace, I laid the lace down on top of the burlap and pressed down to adhere them together.
- After each section I glued, I would lift the part I had just glued off of the kraft paper (to ensure it didn’t stick to it) and then pull the runner closer to me.
- The more of the runner I worked on, the more hung off of the side of the table i was working on instead of the opposite side.
- I continued steps 3-5 until I reached the end of the runner. Once I had adhered the sides of the lace to the runner, I cut the lace off the roll and so it would end exactly where the runner ended.
- Then, I put one last line of glue at the end of the lace, to adhere it to the edge of the burlap.
Repeat the above steps for each runner. If you use the supplies listed above, and having an average of 15 tables, your cost for each runner will run between $8 (using the burlap rolls and the less expensive lace) and $16 (for the most expensive individual runners and lace). Obviously, the more tables you have, the less your cost will be for each runner. Conversely, your costs will be a bit higher per runner if you’re making less.
However, think about where you can add burlap and lace. Not only can you use this to add the vintage touch to your guest tables, but the cake table, gift table, place card table, etc can all be embellished with burlap and lace to give your entire venue a more rustic vibe.
Rustic Wedding DIY #2 – Twine Wrapped Bottles and Letters
Twine wrapped accessories can also give your wedding an additional rustic touch. The twine goes perfectly with the burlap color scheme, and creates a continuity throughout your venue. Continuity are what give weddings a strong theme and really make them individualized to the couple.
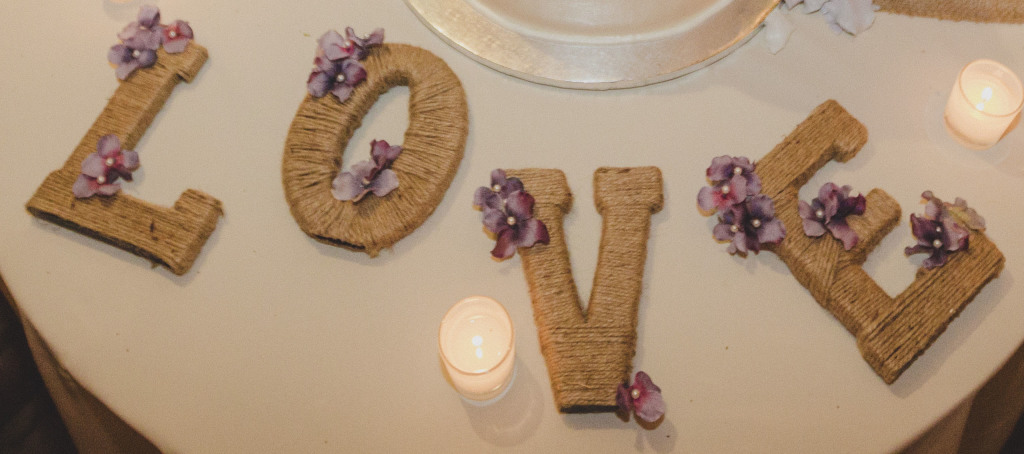
For my wedding, I chose to take old wine bottles, vases, 6” block letters, and a 20” custom monogram to wrap in twine. I used the wine bottles as number holders for each table, the vases for entrance florals, and the block letters and monogram to add personality to the cake table. All were relatively easy to create, and even better, extremely inexpensive yet creative additions to my wedding.
For the bottles, I actually just used wine bottles after we had finished the wine inside (we live near wine country, ok? Don’t judge). However, if you’re not a big wine drinker, you can purchase empty wine bottles straight from Amazon.
For the vase, I used a 6” simple crafting vase. For the block letters, I used paper mache craft letters to spell out L-O-V-E. I ordered my monogram custom from Etsy. And for the twine, I got a huge roll on Amazon for around $8. It was enough to cover everything I wanted in twine, and I still have a surplus to craft more for my friends! Now that I had everything I needed, I got my trusty glue gun out and went to work.
Steps to Create Your Own Twine Wrapped Decorations
The Necessary Tools:
- Wine Bottles (Green or Clear)
- Vase
- Paper Mache Letters (L–O–V–E – each sold individually)
- Custom Monogram
- Twine
- Hot Glue Gun
- Scissors
The steps for all the decorations are relatively the same.
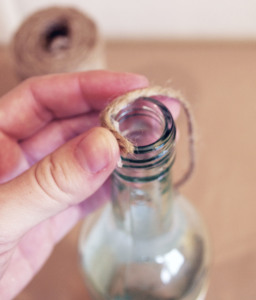
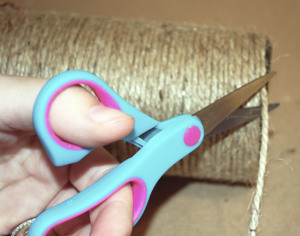
- Take your hot glue gun and put a line of glue at your starting point (for the wine bottles, it would be around the rim of the top of the bottle).
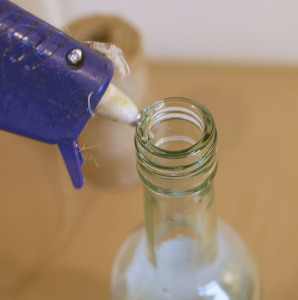
- Then, unwrap the twine and place it where you put the glue to adhere it to the object.
- Continue to wrap the twine down the object. Once you have a few inches wrapped in twine, use your glue gun and put another line of glue right below the wrapped twine.
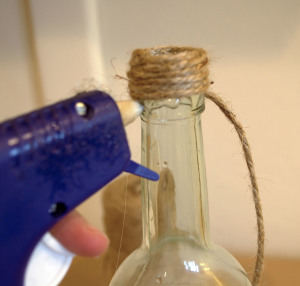
- Now, quickly keep wrapping the object in the twine, and over the glue strip you just made. Thus, adhering more of the twine to the bottle.
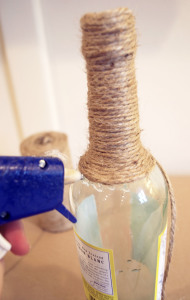
- You’ll want to put a bit of hot glue every 2 or 3 inches, to ensure the twine is thoroughly adhered to your object and won’t unravel. If you put glue under every single part you wrap, it becomes tedious and takes forever. I just recommend spot gluing your twine to your object for durability. This is especially important on any part of your object that curves. If it’s not glued down, it WILL unwind.
- You’ll want to put a bit of hot glue every 2 or 3 inches, to ensure the twine is thoroughly adhered to your object and won’t unravel. If you put glue under every single part you wrap, it becomes tedious and takes forever. I just recommend spot gluing your twine to your object for durability. This is especially important on any part of your object that curves. If it’s not glued down, it WILL unwind.
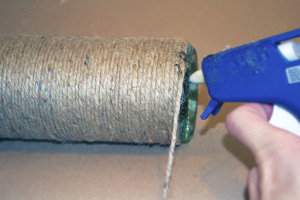
- Once you get to the end of your object, put a last strip of glue where you are going to end your twine. Adhere it to the surface, and cut the twine.
- Now, you have officially finished wrapping your object. You can end here, or you can add embellishments that also go with your color scheme.
- Suggestions here are using hot glue to attach craft pearls, lace appliques, faux flowers that match your color scheme, etc. For my wedding, I used silk flowers and spot glued them to my LOVE letters and monogram. Then, I used felt flowers and pearls and attached them to my wine bottles for some added color.
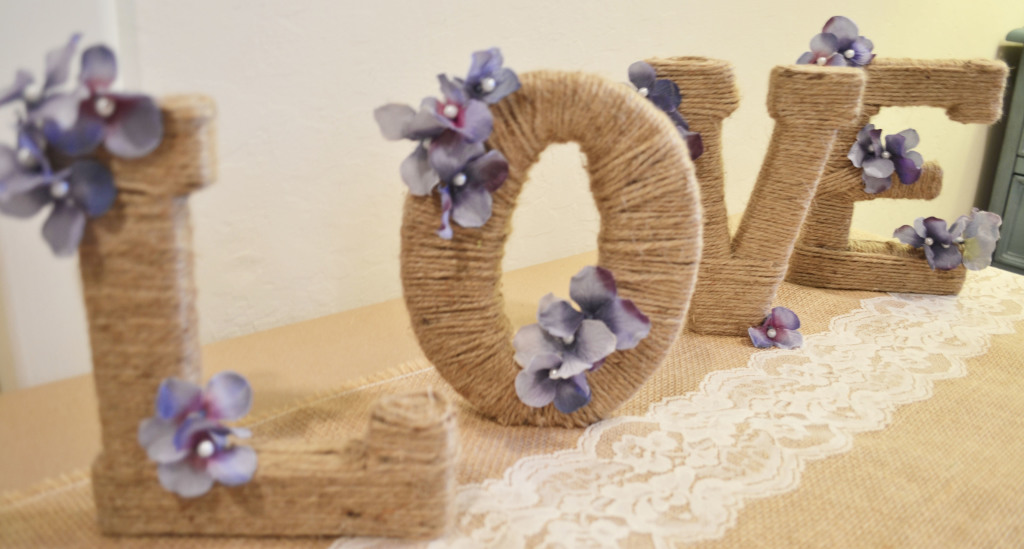
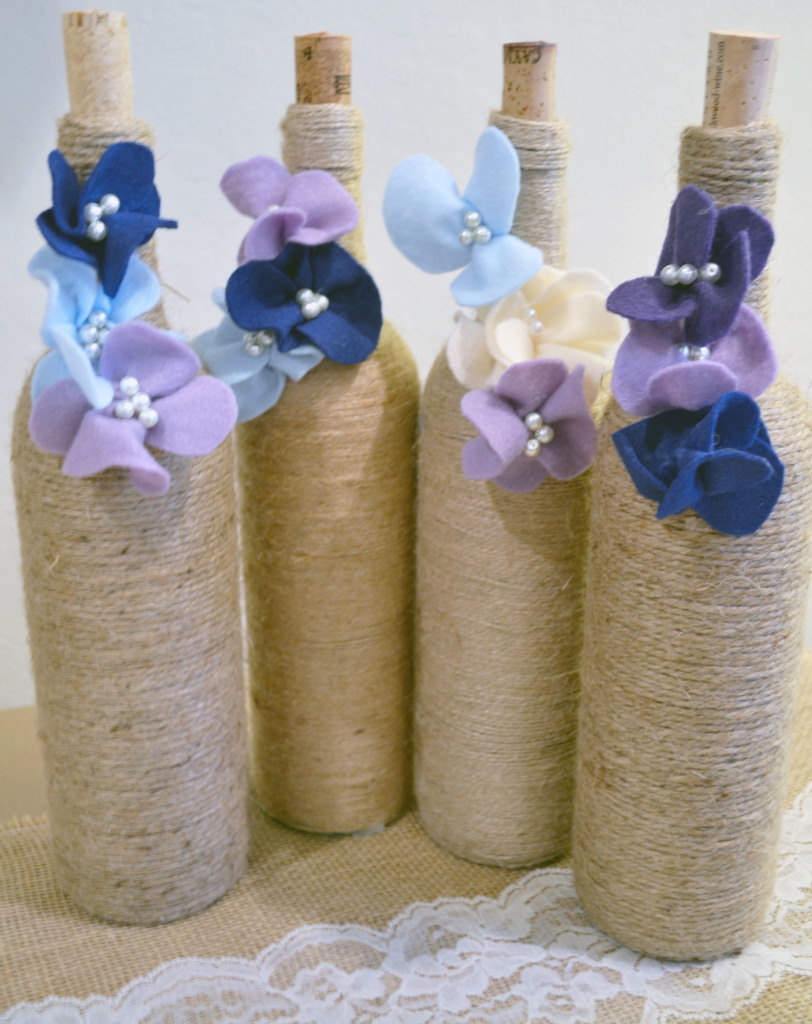
- Suggestions here are using hot glue to attach craft pearls, lace appliques, faux flowers that match your color scheme, etc. For my wedding, I used silk flowers and spot glued them to my LOVE letters and monogram. Then, I used felt flowers and pearls and attached them to my wine bottles for some added color.
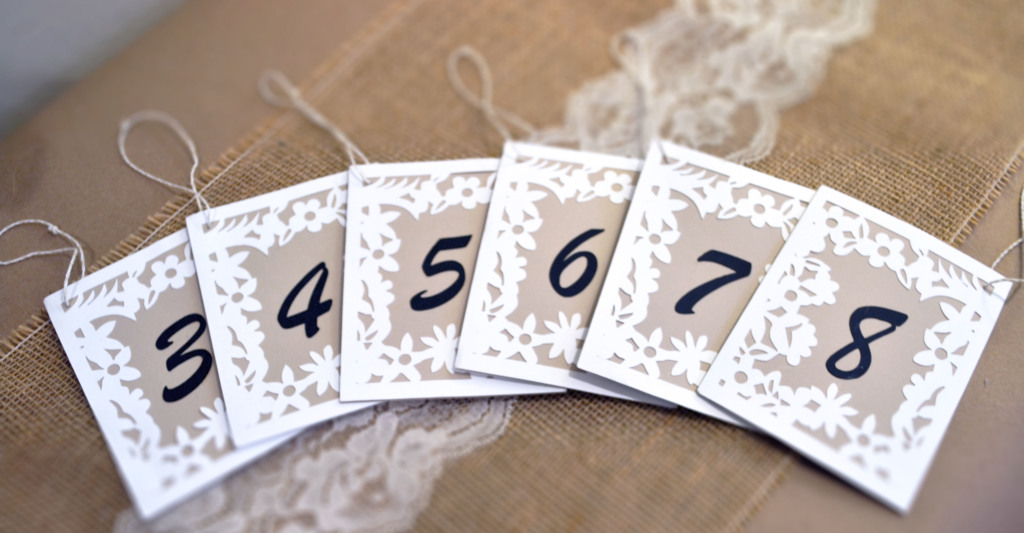
Rustic Wedding DIY #3 – Burlap and Lace Table Numbers
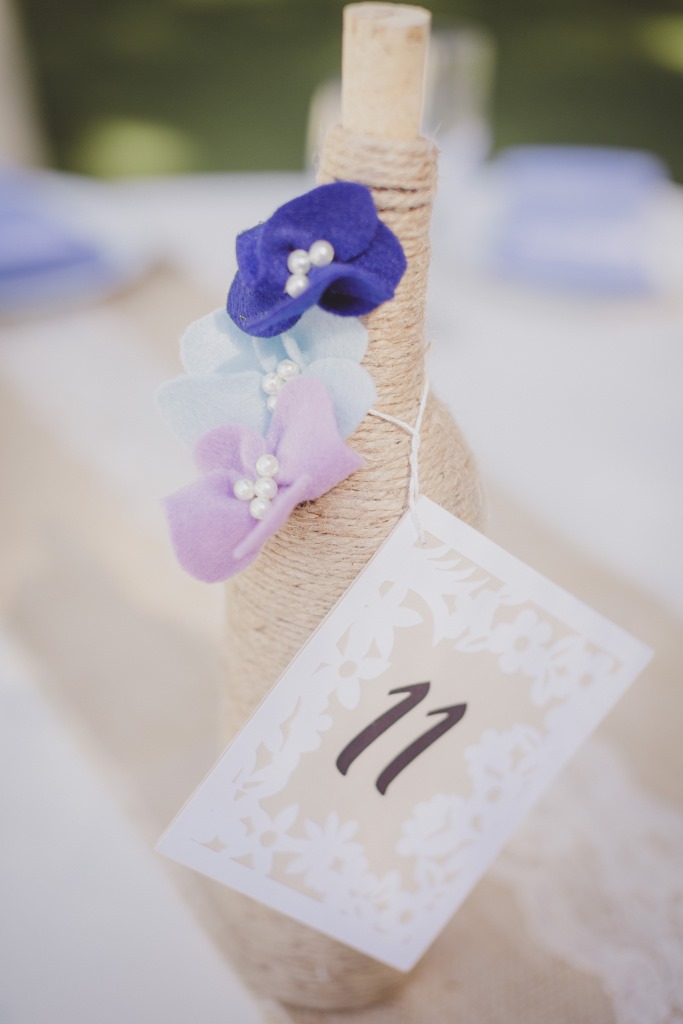
To put the finishing touches on my rustic/vintage decor, I wanted to make sure my table numbers tied in with them whole theme. I had already created my twine wrapped wine bottles to hold the numbers, now I just needed the numbers themselves to go with the rest of the rustic decor.
There were many templates online, and PDFs I could buy and print at home. That probably would have been the easiest, but as I mentioned before with my custom signs, they looked very cookie cutter and I would still have to pay a premium for the printing. So like everything else, I designed the numbers myself.
Since I was adding many little decorations that tied in with the burlap and lace theme, I decided I wanted the numbers to match. However, since the wine bottles were already wrapped in twine, instead of using actual burlap and lace (which I thought would blend in too much with the twine material) I gave the numbers the LOOK of burlap and lace with kraft and white colored cardstock.
Steps to Create Your Own Table Numbers
The Necessary Tools:
- Silhouette Cameo
- Lace Doilies (if not using a Silhouette Cameo)
- Kraft Cardstock
- White Cardstock
- Grey Cardstock
- Scissors
- Glue Stick
- Hot Glue Gun
- OPTIONAL
- Small Hole Punch (if hanging numbers from wine bottles)
- Colored Twine (to attach numbers to wine bottles)
- LightTracer (if tracing numbers by hand)
- Stencil (if stenciling numbers)
- OPTIONAL
With Silhouette Cameo Machine
For this project, you’ll absolutely need a Silhouette Cameo cutting machine. The template I used for the lace outline is extremely intricate, and cannot be cut with scissors alone. If you have this machine, you can download the template here. If you do not, skip to the tutorial BELOW this one. If you do, then, follow these instructions:
- Once you’ve downloaded the template, load it into your Silhouette Cameo program as a new project (8.5×11” document).
- Put a white piece of cardstock on the cutting mat as specified, and load the cutting mat into the machine.
- Make sure your cutting tool is loaded and press “send to printer” to let your Silhouette machine start cutting.
- You will get 4 lace designs per page – enough for 2 table numbers (front and back).
- Remove the paper from the cutting mat, and punch out your lace cutouts. Put them to the side for later.
- Repeat steps 2-4 as many times as need for as many tables as you plan on having (ie: if you’ll be having 15 tables, you’ll need to cut at least 8 pieces of paper with the design template).
- Now, cut your kraft paper in rectangles that will fit perfectly behind your white lacy borders.
- Once you have the desired amount cut (2 per table number), use a glue stick to glue your lace borders on top of the kraft rectangles.
- This steps gets messy (since the lace borders have holes in them). So make sure to lay down kraft paper or scrap paper when you’re applying the glue so it doesn’t get all over the table.
- Finally, in your silhouette program, print and cut as many numbers as you’ll need for tables out of grey cardstock (but make sure you cut enough so that you can have a number on both the FRONT and BACK of each).
- Use a glue stick to glue the numbers in the middle of the kraft paper.
- Last, take your glue gun and glue the back sides of each number together.
- If you’re going to hang these from wine bottles, take a small ⅛” hole punch and punch a small hole in the corner if the table numbers. Then, take your colored twine and make a loop do you can hang your table numbers perfectly!
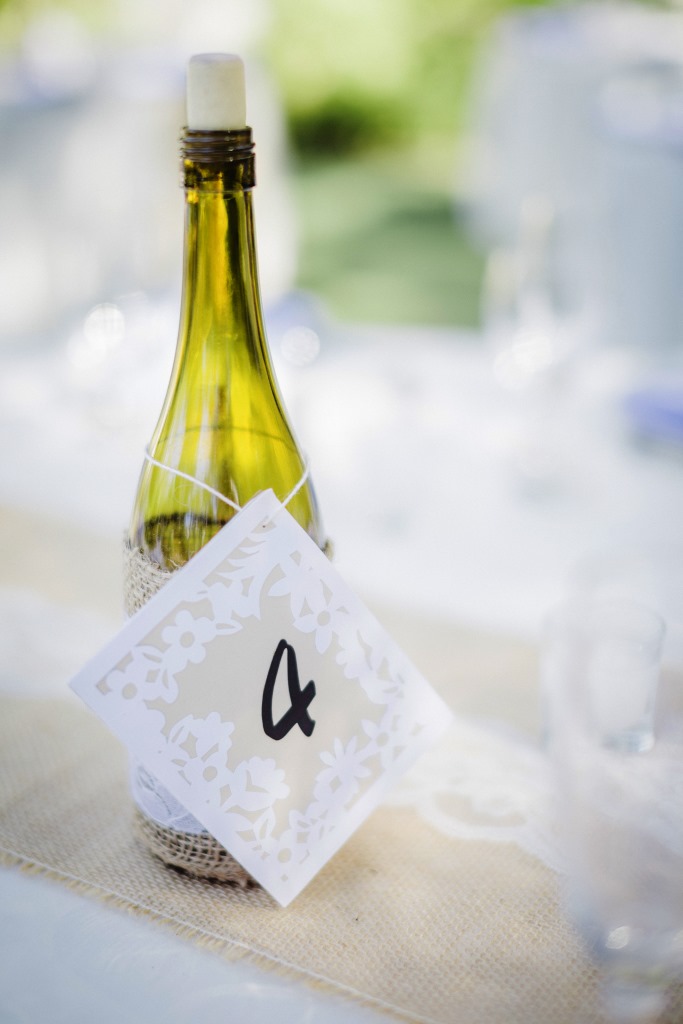
- If you’re going to hang these from wine bottles, take a small ⅛” hole punch and punch a small hole in the corner if the table numbers. Then, take your colored twine and make a loop do you can hang your table numbers perfectly!
Without Silhouette Cameo Machine
If you do not have a cutting machine, that is a-ok. You will not be able to get these EXACT table numbers because of the cutting intricacy, but you can make similar ones.
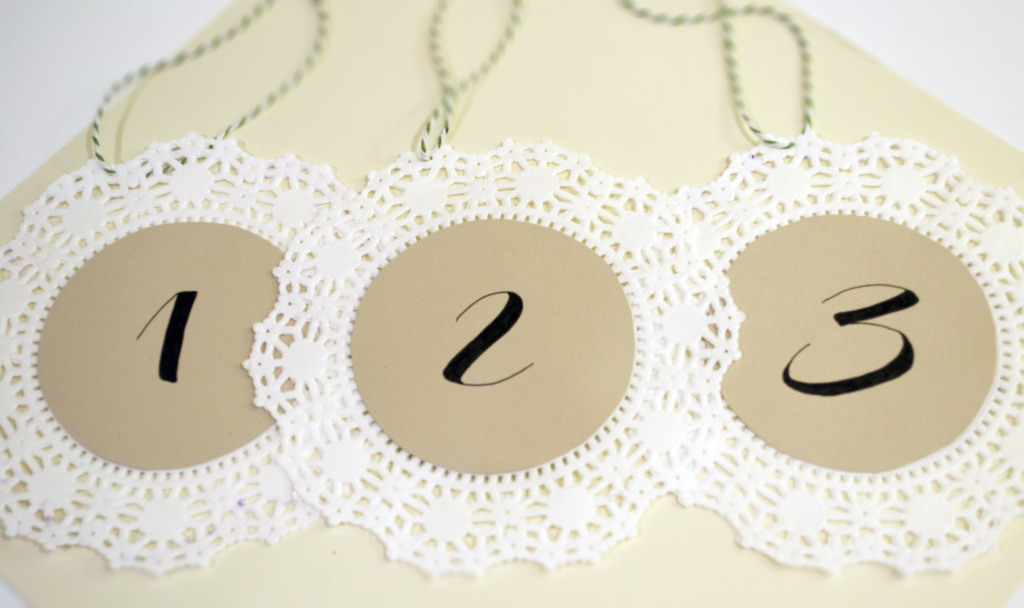
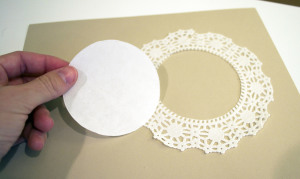
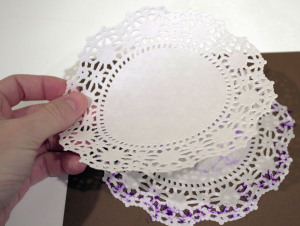
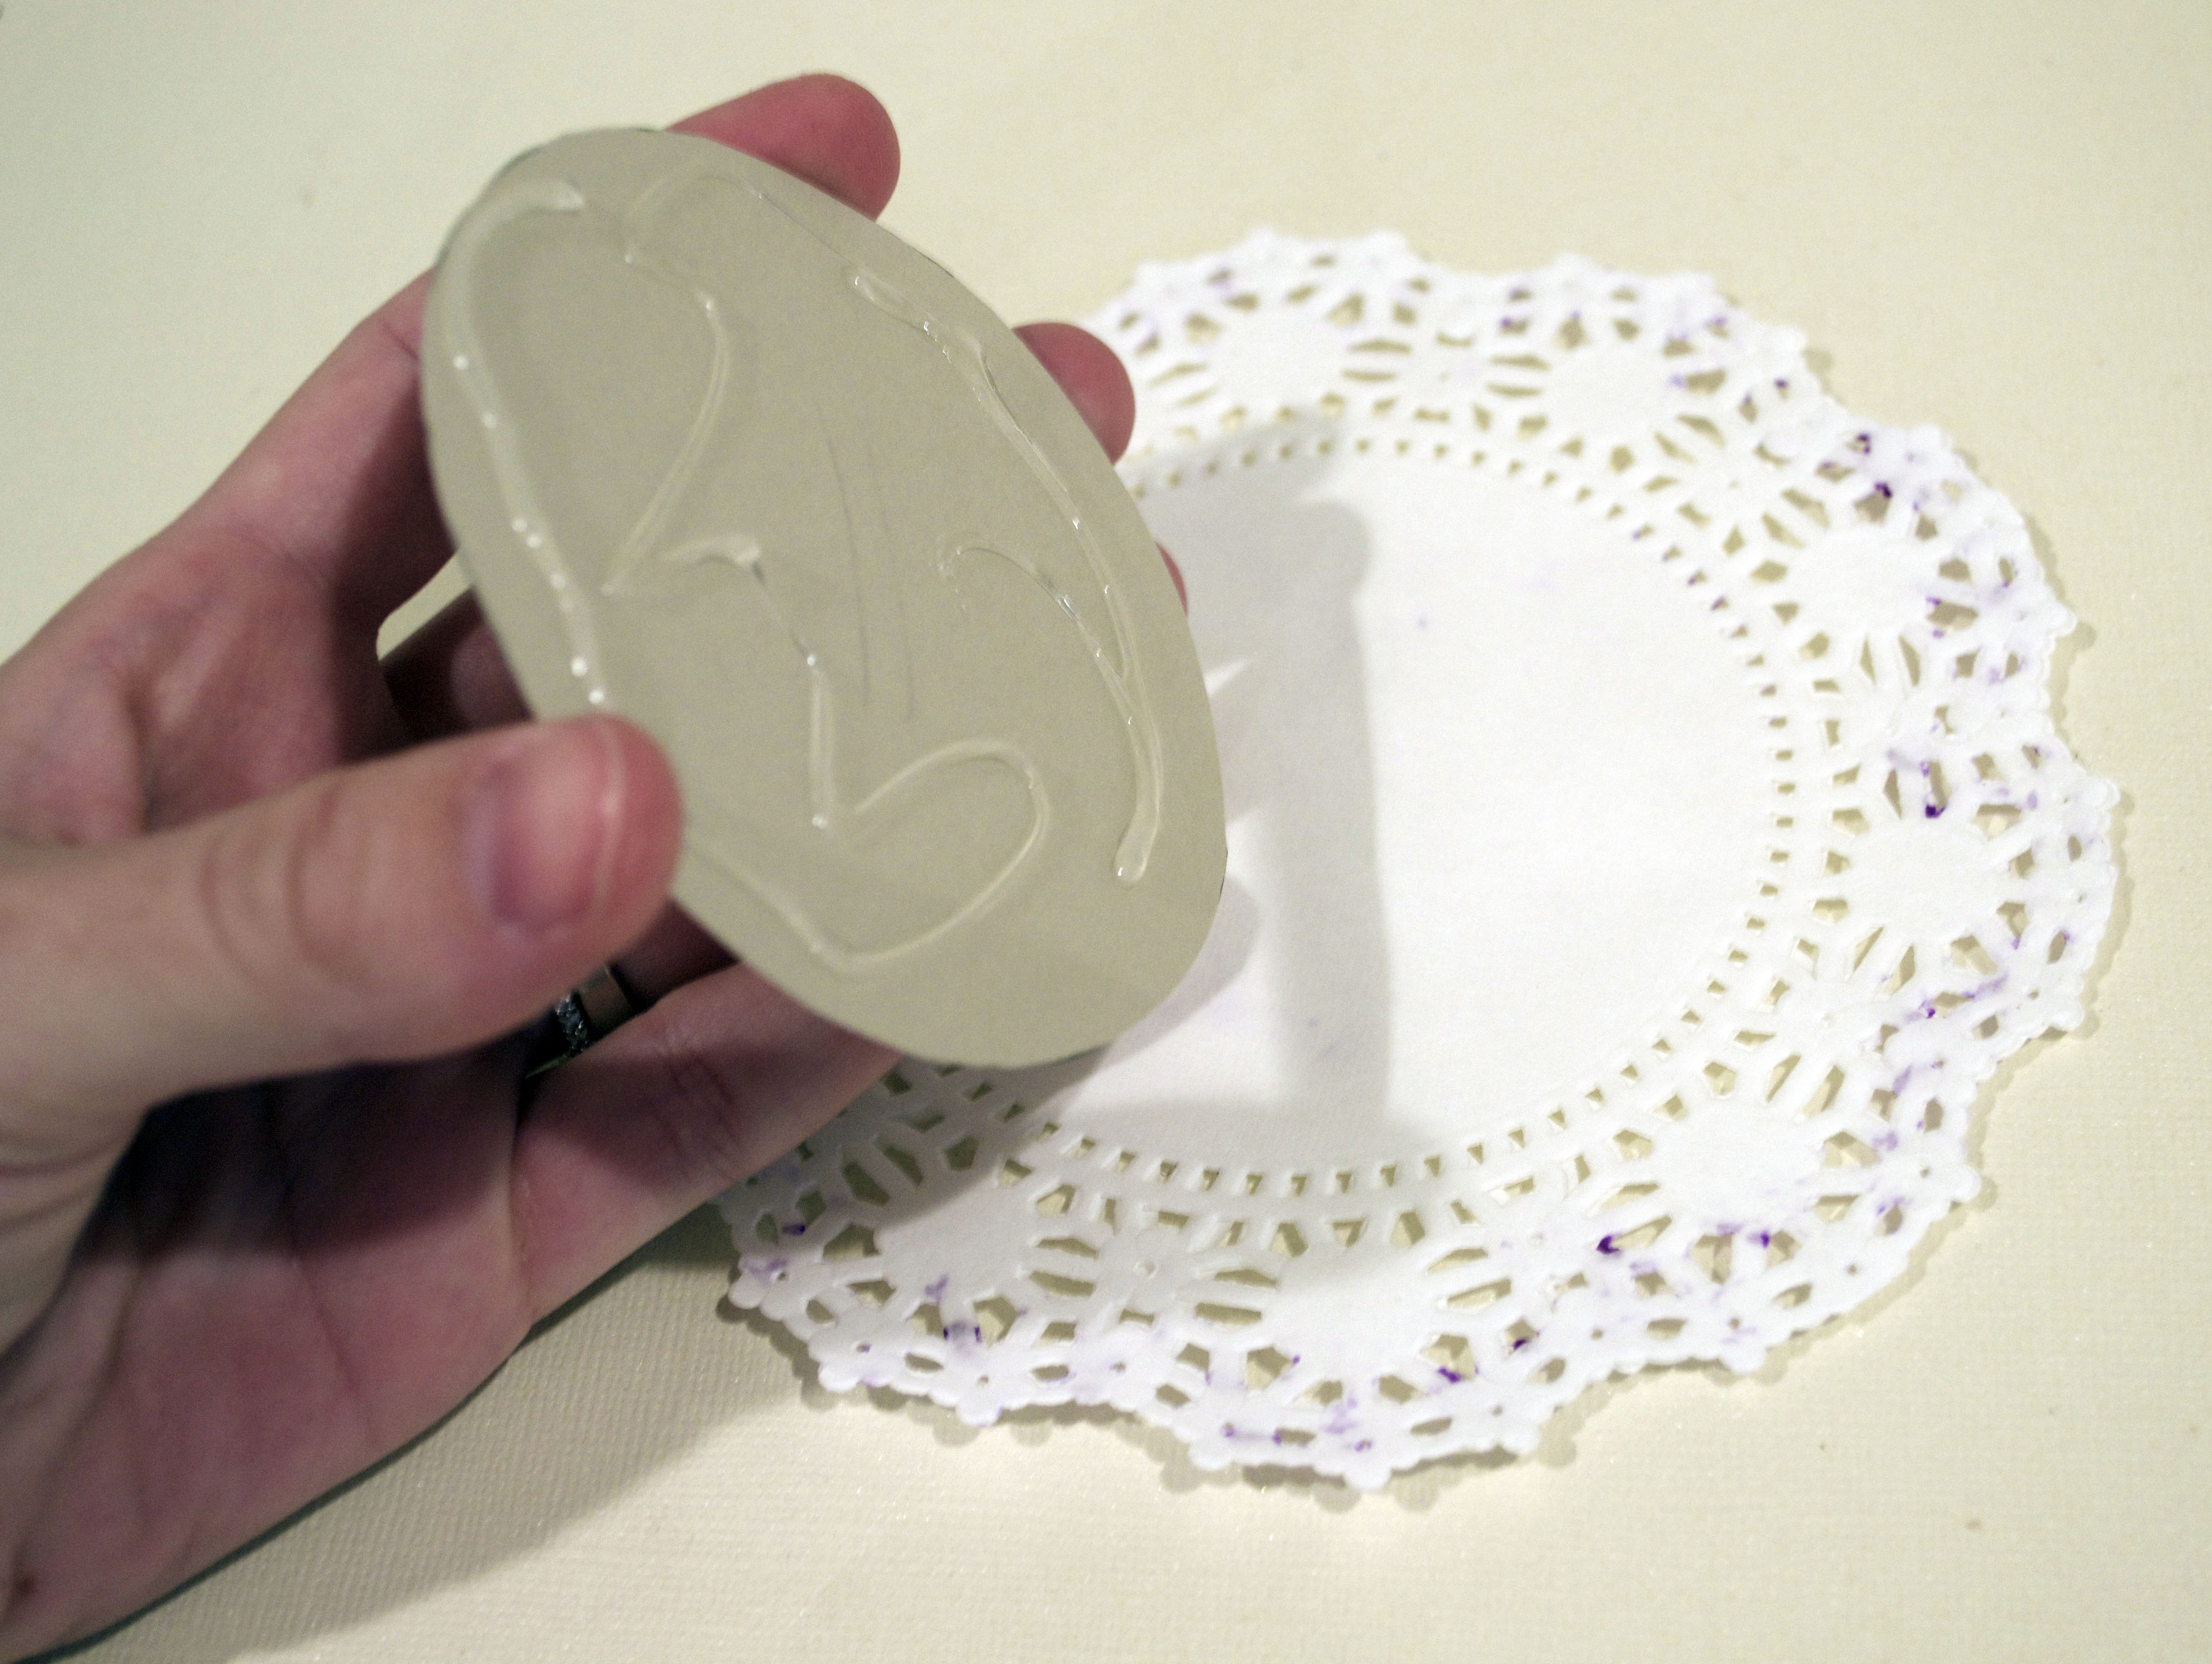
- Without cutting your own lace, you can start with round lace doilies (you can purchase here). Make sure you purchase doilies that are between 4-6” in total diameter (or they’ll be enormous). The ones here are 6″.
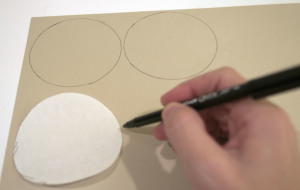
- Cut the center out of one of the doilies and trace it onto your kraft cardstck. This will give you perfect circles to fit in the center of the doilies.
- Carefully, with a glue stick (anything thicker will wrinkle the doily) glue 2 doilies together, back to back.
- This makes the doilies sturdier and gives them a more professional look.
- This makes the doilies sturdier and gives them a more professional look.
- Now, you can take 2 approaches with the numbers:
- You can write them on the middle of the circles yourself, with a black pen. You can even use my calligraphy tutorial to trace the numbers directly onto your cardstock circles prior to gluing them onto your doilies (this is the method I prefer. It looks cleaner and more professional). You’ll need a LightTracer for this method.
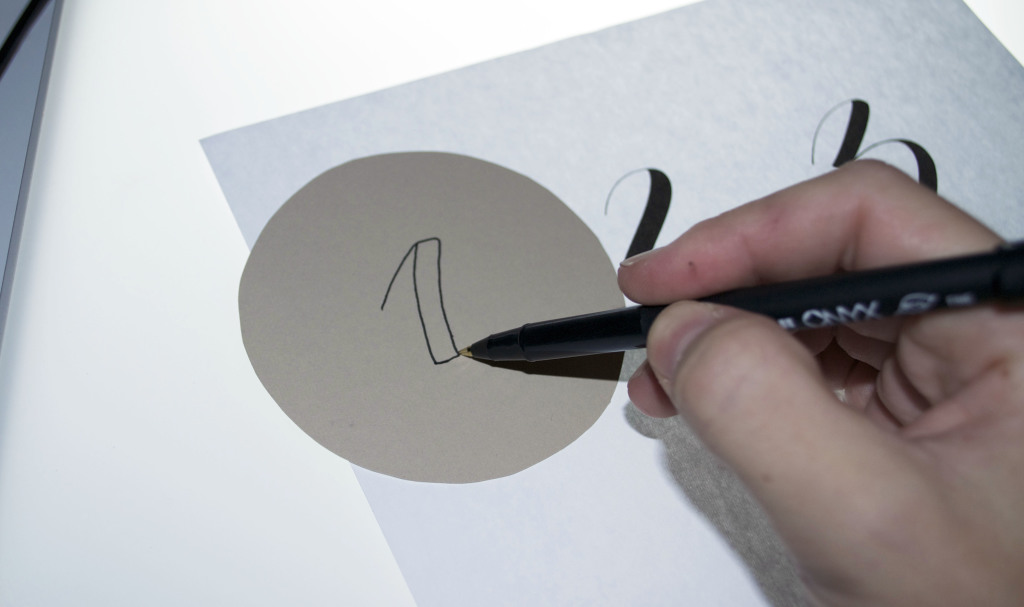
- You can use stencils to trace your numbers on grey cardstock (trace the numbers on backwards so when you cut them out, any trace lines will be on the backside of the number that gets glued to your kraft circle).
- You can write them on the middle of the circles yourself, with a black pen. You can even use my calligraphy tutorial to trace the numbers directly onto your cardstock circles prior to gluing them onto your doilies (this is the method I prefer. It looks cleaner and more professional). You’ll need a LightTracer for this method.
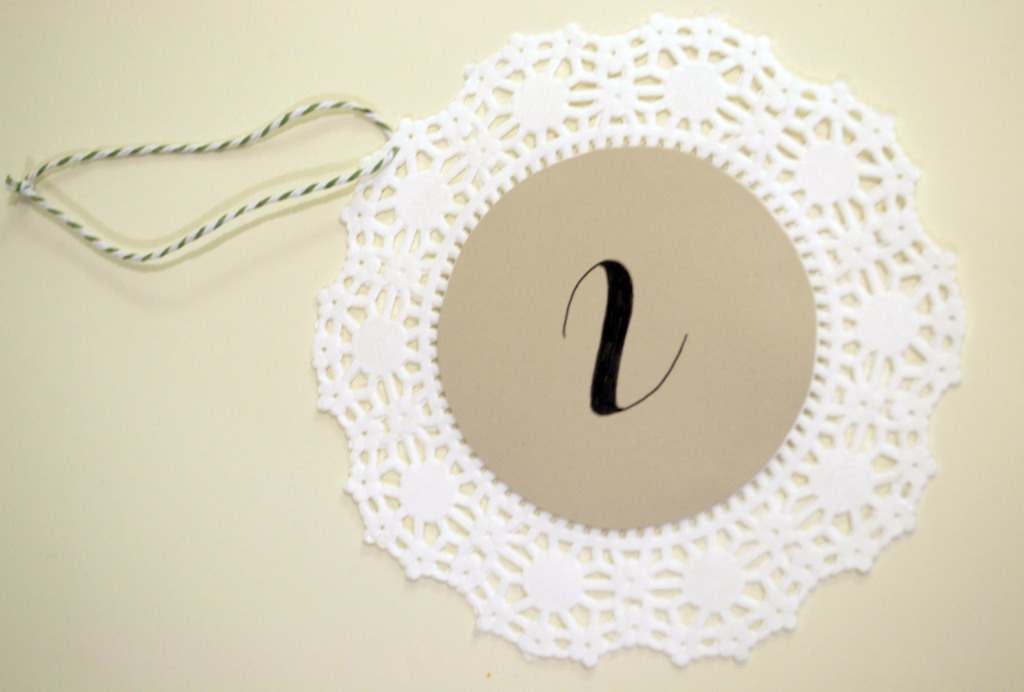
- Now, glue the kraft circles with the numbers onto each side of the doily, so that you have the same table number on both sides.

- Last, take your colored twine and loop it through the lace, so you can hang the number from your wine bottles (if so desired).
DIY Rustic Wedding – It’s all in the Details
Obviously, the decorations above are not the only additions you can make to give your event that romantic, rustic feel you so desire – but they’re a great start! Burlap and lace give every event the earthy, yet romantic and sophisticated vibe one can only hope for!
If you get all the supplies listed in these tutorials, you’ll have a lot of leftover materials. And if you’re creative like me, you can take these and run with them. Add lace to mason jars for party favors. Put tine ribbons around your napkins instead of napkin holders. Enjoy playing with all the things you can do to give your wedding the feel you desire (on a budget) without anyone knowing you didn’t spend a fortune.
And again, to sum everything up, here is a quick supply list – in case you’re looking to DIY your own rustic wedding. Happy crafting!
Easy Supply List:
Burlap and Lace Runners
- 120” Burlap Runners (individual or bulk roll)
- 10yd Lace Roll (Standard, Thin, or Value)
- Kraft paper
- Hot Glue Gun
- Scissors
Twine Wrapped Decorations
- Wine Bottles (Green or Clear)
- Vase
- Paper Mache Letters (L–O–V–E – each sold individually)
- Custom Monogram
- Twine
- Hot Glue Gun
- Scissors
Lacey Table Numbers
- Silhouette Cameo
- Lace Doilies (if not using a Silhouette Cameo)
- Kraft Cardstock
- White Cardstock
- Grey Cardstock
- Scissors
- Glue Stick
- Hot Glue Gun
- OPTIONAL
- Small Hole Punch (if hanging numbers from wine bottles)
- Colored Twine (to attach numbers to wine bottles)
- LightTracer (if tracing numbers by hand)
- Stencil (if stenciling numbers)
- OPTIONAL
I definitely love this post! It is what I was looking for my sister’s wedding! Thanks you rules!
Yay! Thanks, Giovanna 🙂 So happy it helps you!
Just found this after spending hours on Pinterest. Can’t believe how many creative ideas I will be able to use for my wedding!!! Thank you so much for posting this and with the step by step instructions even this un-crafty girl shouldn’t have any trouble. Thanks again!!
Hey Debra- YAY! That’s EXACTLY why I wrote this post. Enjoy, and good luck with all the wedding planning. Enjoy every minute 🙂 XO
I used your tutorial to make burlap and lace runners for my daughter’s wedding. I needed two different lengths, one for the 6′ rounds and another for the 8′ rectangular. They turned out great. One suggestion for keeping it as easy as possible is to get a roll of burlap that is 14″ wide and has been stitched lengthwise. That way when you cut your pieces you’ll only need to either sew or pre-treat the ends to prevent fraying. Burlap loves to fray! I also pinned the lace to the runner before glueing just because I’m too worried I’ll mess up the centering otherwise. I also used a large box that I cut and laid flat instead of craft paper underneath the burlap while glueing. Thanks for posting all your ideas!