
Ah, finally. The last of my wedding posts. You’re either sad or relieved that this string of posts is ending. The last little nugget from my DIY wedding are my DIY bridesmaid gifts.
Nobody really realizes this, but gifts for your bridal party are one of the hardest things to come up with. You’re so busy crafting up the details for the day and your ensemble, that bridal party gifts become almost an afterthought. And if you wait until the last minute to get these, they can be QUITE pricey.
If you’re reading this post any you’re anything like me, all my bridesmaids were TOTALLY different. I had 5 total: my 2 sisters, 2 friends from college, and one friend from San Francisco. All have completely different personalities, likes and dislikes, and figures.
Yet, it’s almost considered rude to get different bridesmaids different thank you gifts. What if one ends up being more expensive than another? Or what if Sally likes the gift you gave to Jane better than the one you gave her? And trying to think of a different gift for each person would take lots of time, which is something you have very little of when you’re planning a wedding.
Why DIY Bridesmaid Gifts?
I know what you’re thinking. If it’s so costly and takes so much time, why not just cut out the bridal party gifts altogether? Well, not giving your bridesmaids ANYTHING at all is considered rude. You have to remember, they just spent hundreds of dollars on a dress for your wedding that they’ll probably never wear again, more $$ on a gift for your wedding AND another for your shower, and again MORE of their time and $$ flying to and from your wedding AND bachelorette party.
The only way to eliminate the cost of the bridal party gifts, is to not have a bridal party – period! And since most people have at least one person standing up on that alter with them during the big day, a present for those in your bridal party is the least you can do.
However, I do understand the need to keep a tight budget. And when I researched “bridesmaid gifts” online, many of the traditional customized robes and bags came up at the forefront. And with those costing $40-$50 each, I wanted to look for other options.
Don’t get me wrong I wasn’t opposed to spending $40-$50 per bridesmaid as a thank you, but I just didn’t want to spend it all in one place. I had been in weddings before where the bride presented me with a bag FULL of goodies, which is the route I wanted to take. If I wanted to get a bag full of thank yous for each girl, I was going to have to find less expensive alternatives.
This is where my DIY bridesmaid gifts came to mind. For what it was going to cost me to buy one personalized bag from an online retailer, I could make my own bags (with matching makeup bags) and be able to fill them with other trinkets.
It actually turned out to be quite easy! Below, I should you exactly how I made my DIY bridesmaid gifts in the hopes that you can use this inspiration for your wedding, too.
Steps to Make Your Own Quilted Fabric Tote Bags
Supply List:
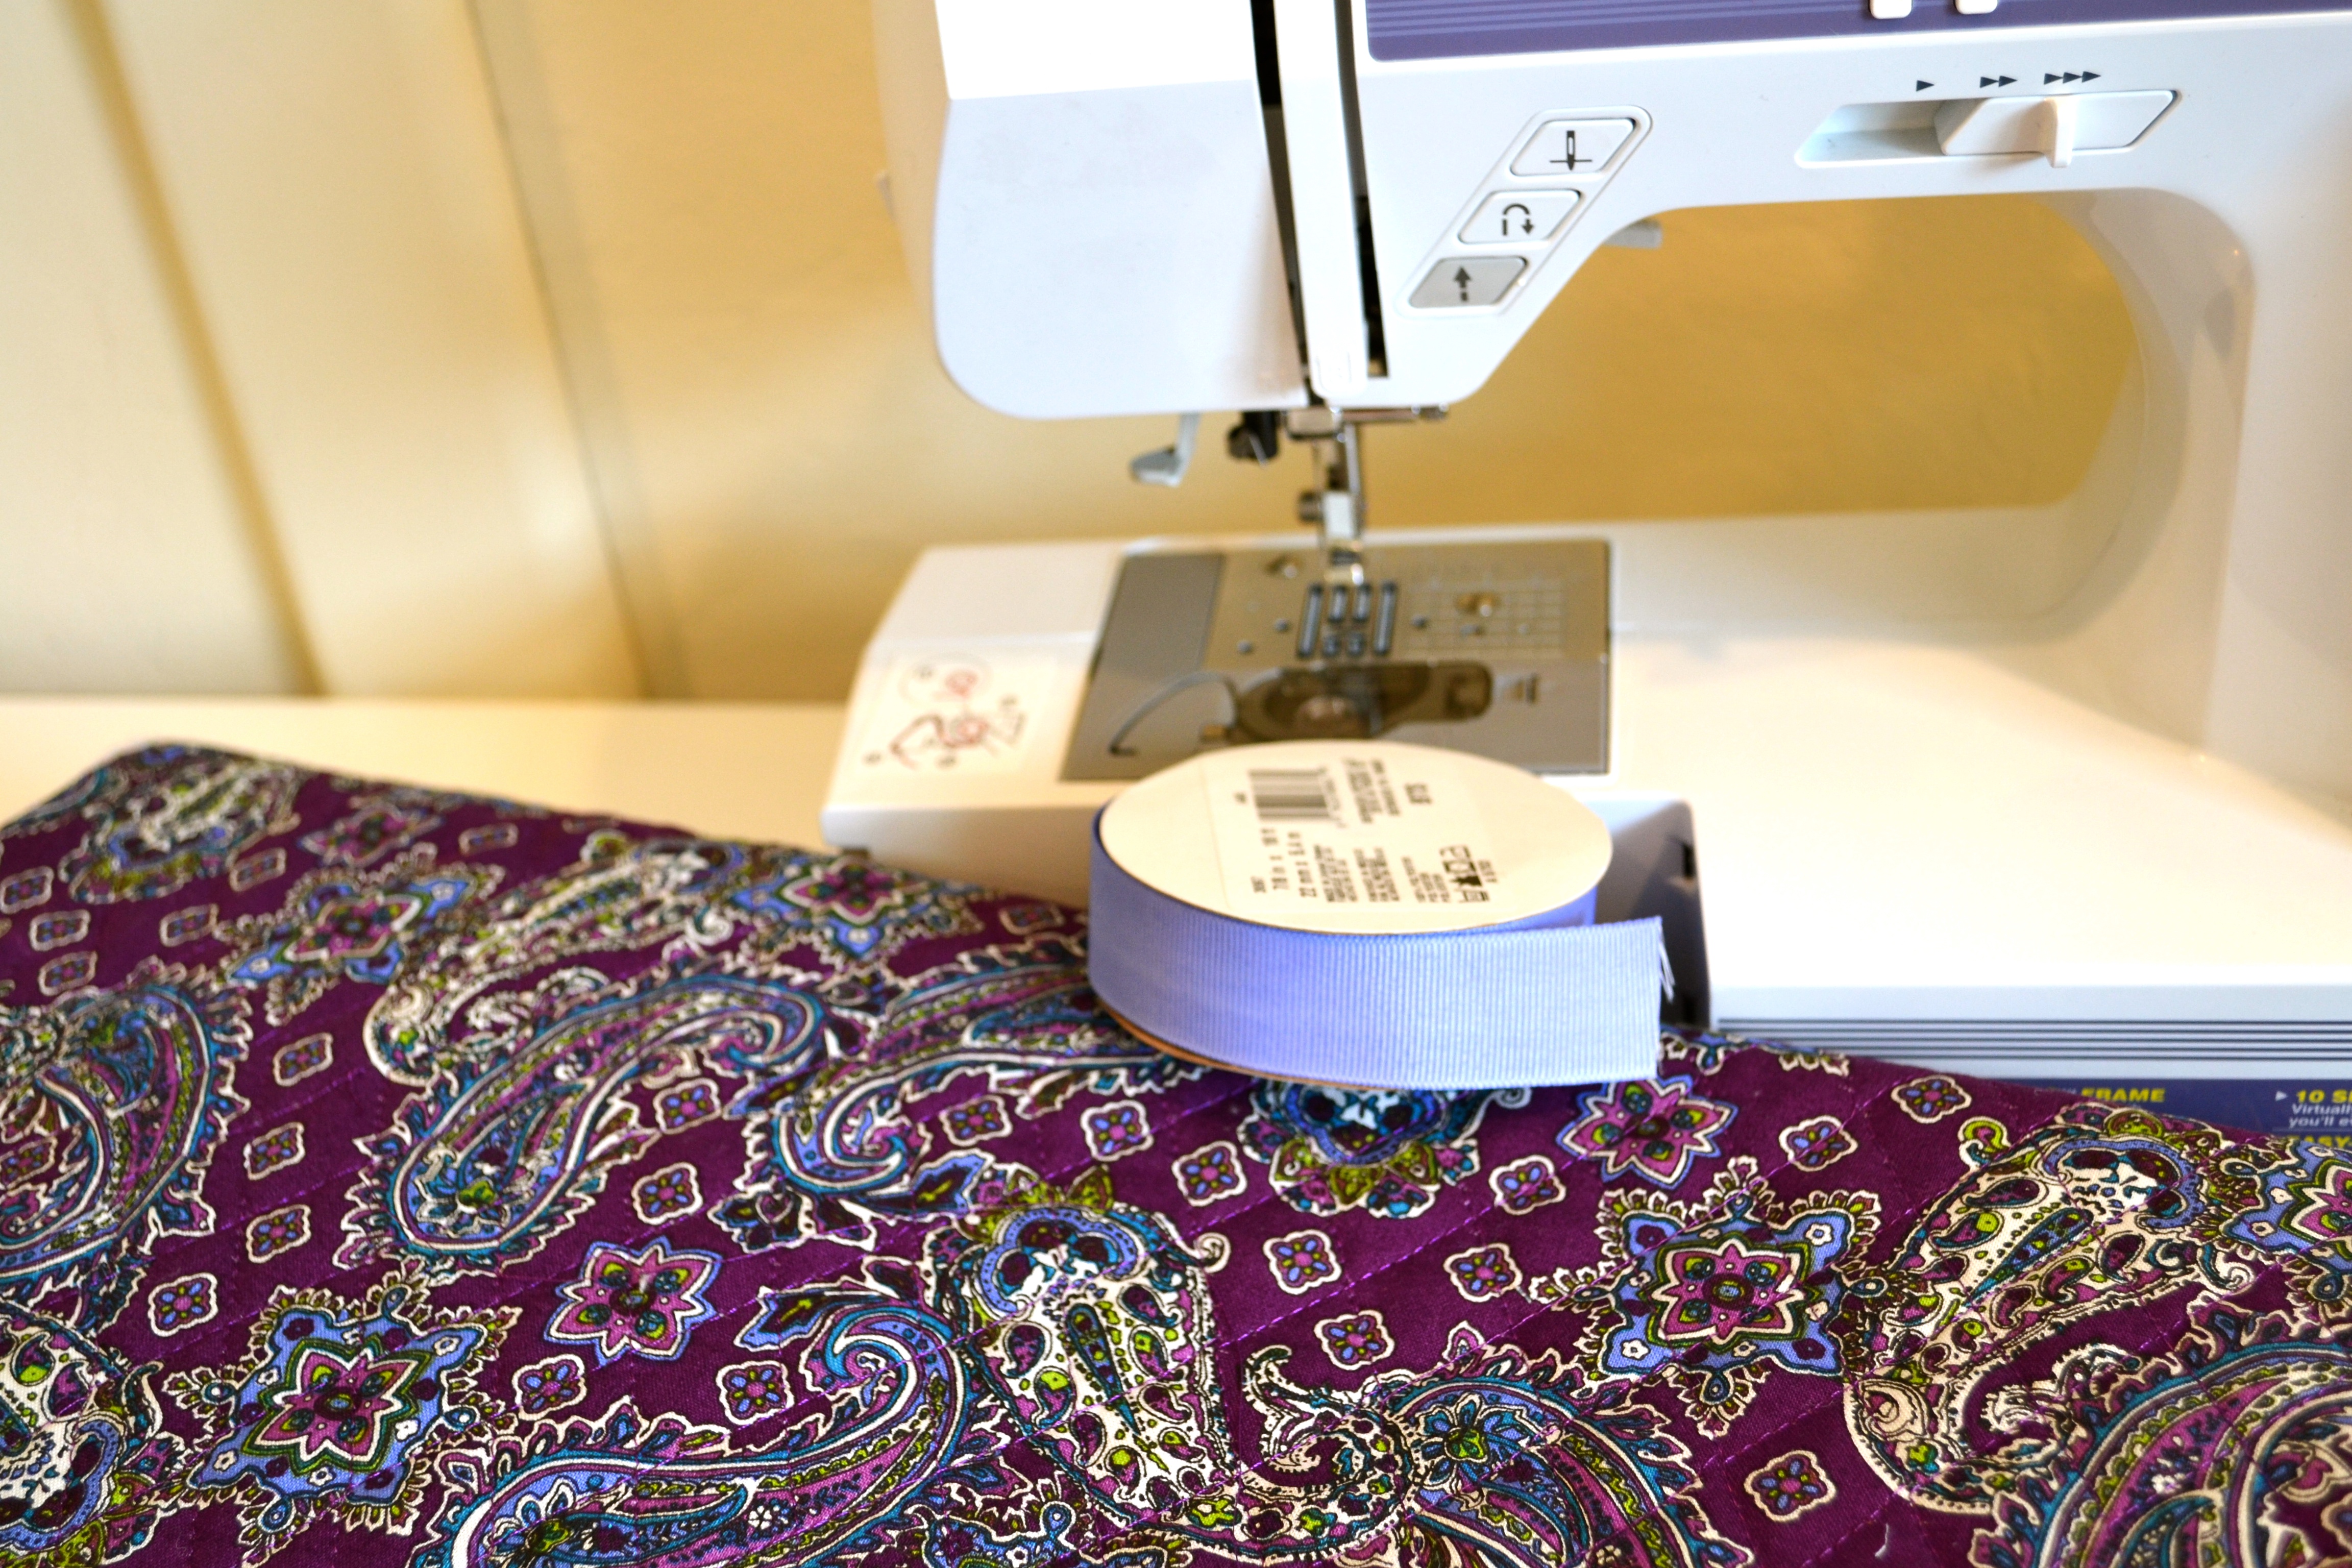
- Double Faced Quilted Fabric (this pattern is similar to the paisley one I used)
- This is also a cute fabric for bridesmaids (from fabric.com – great site for quilted fabrics)
- 1.5” grosgrain ribbon
- Sewing Machine
- Thread
- Needle
- Fabric Pen (optional)
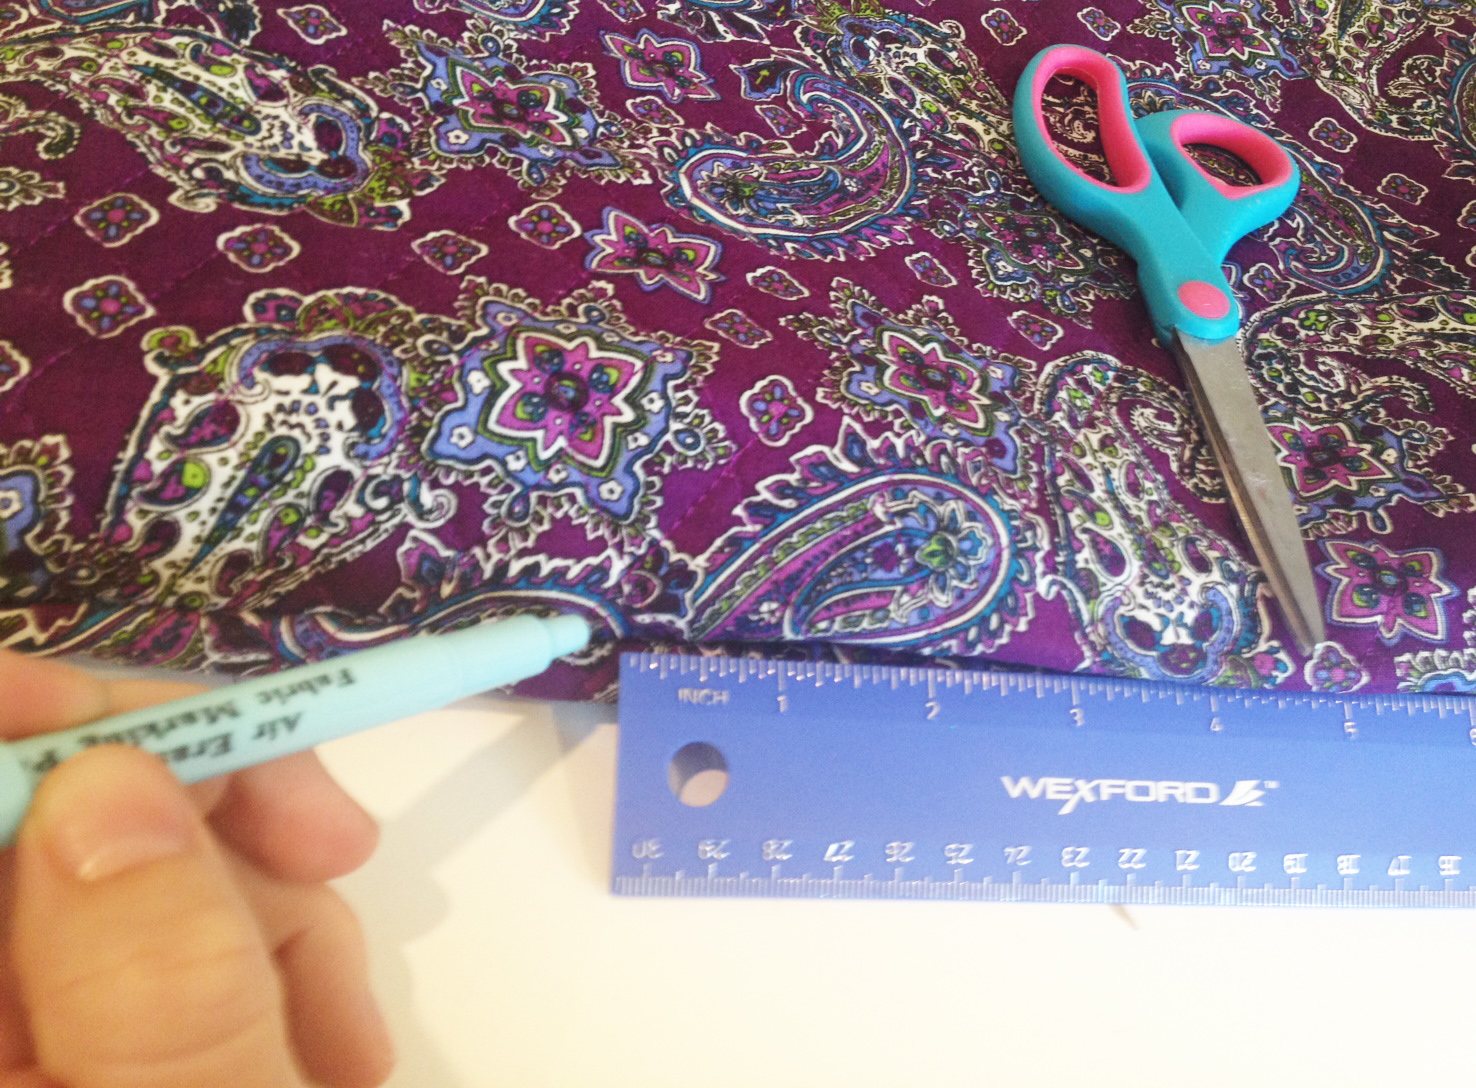
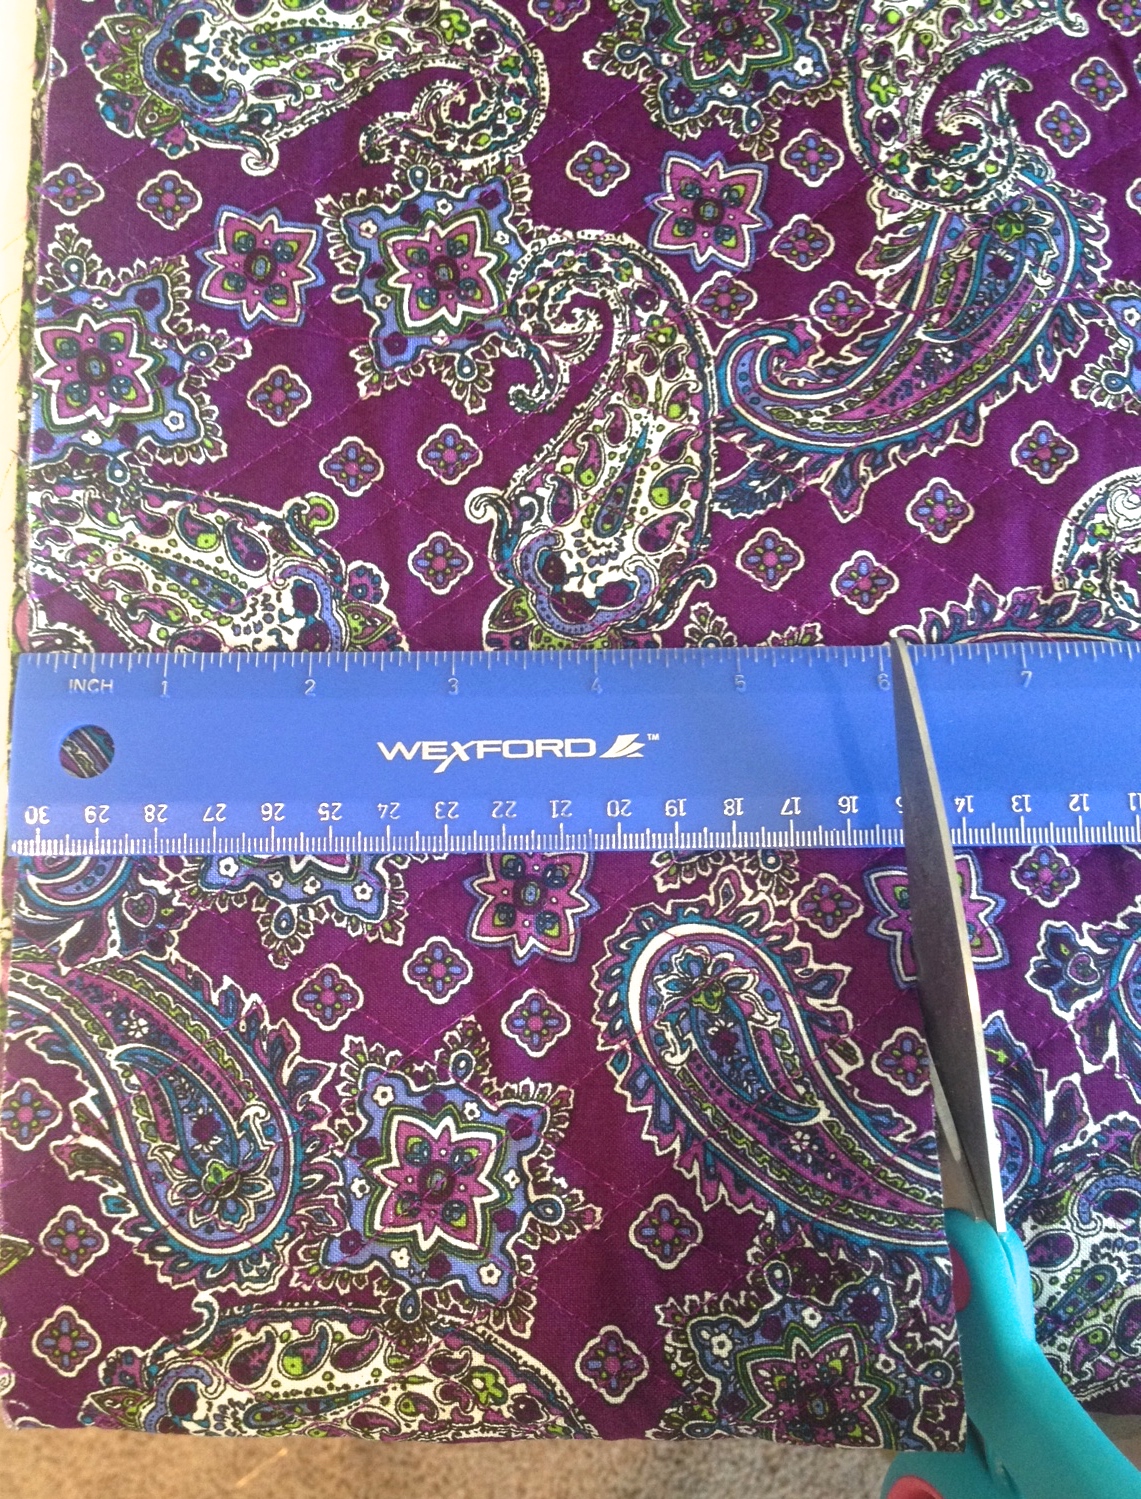
Step 1:
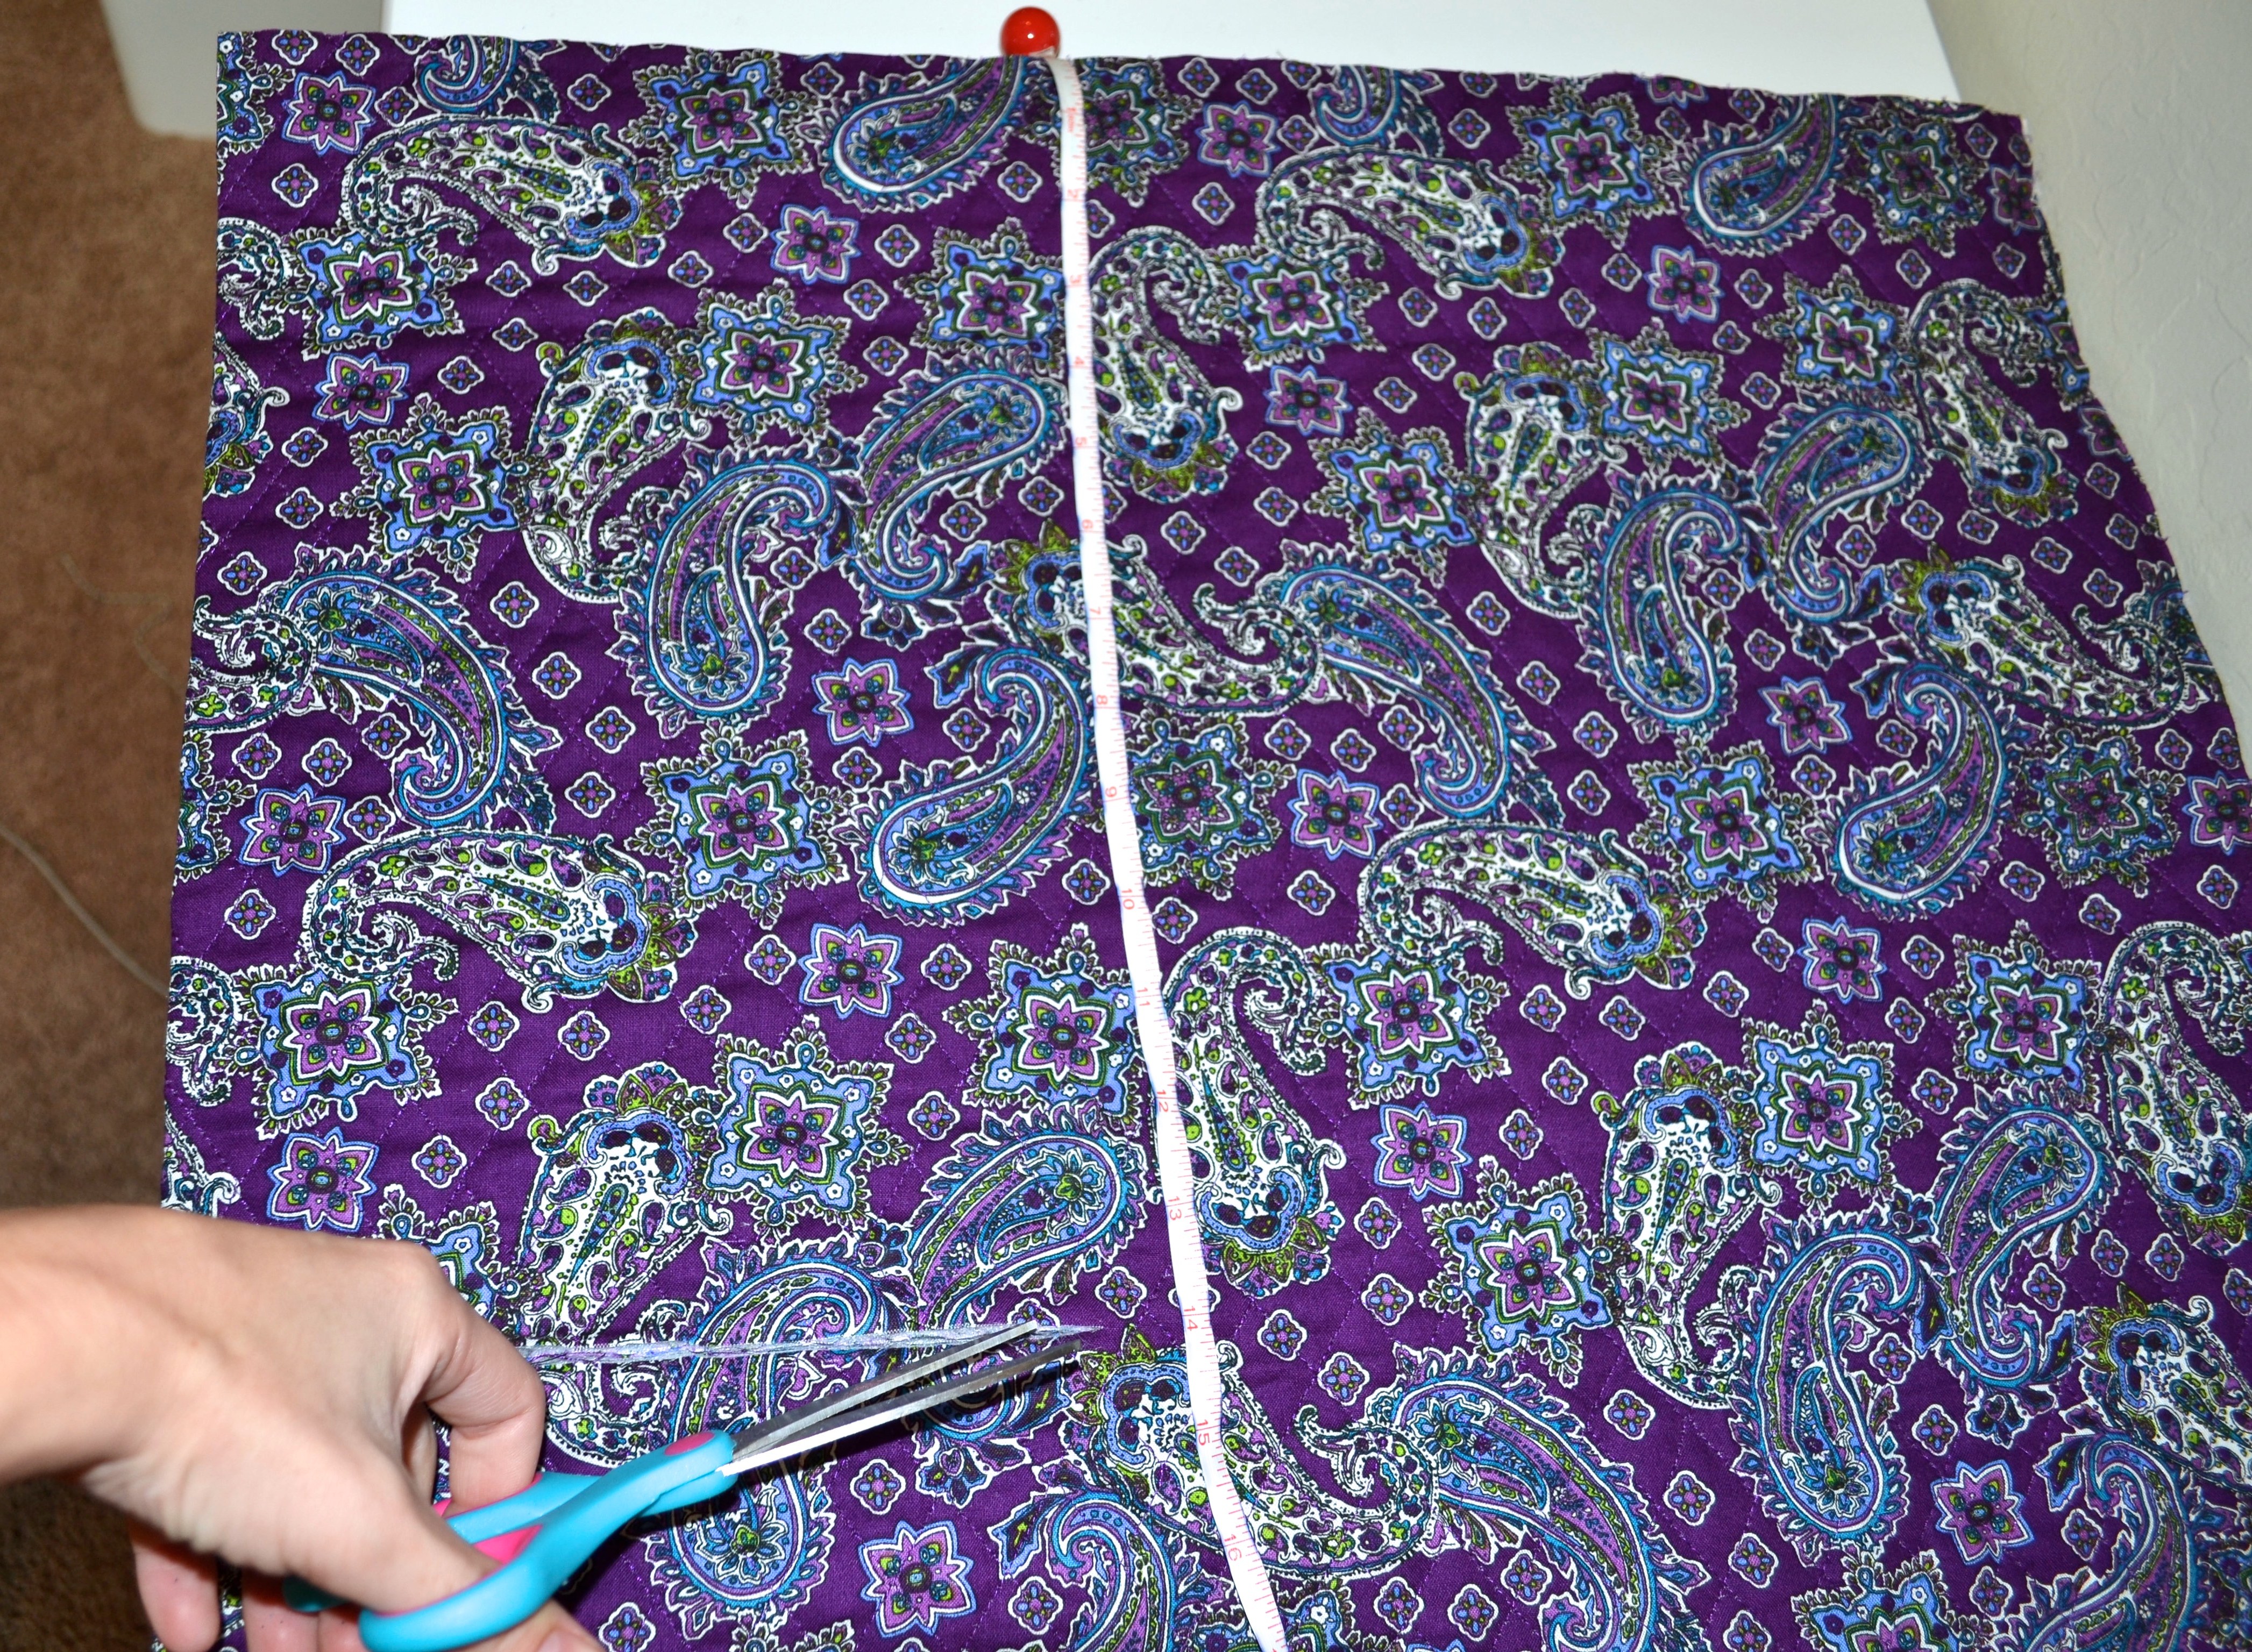
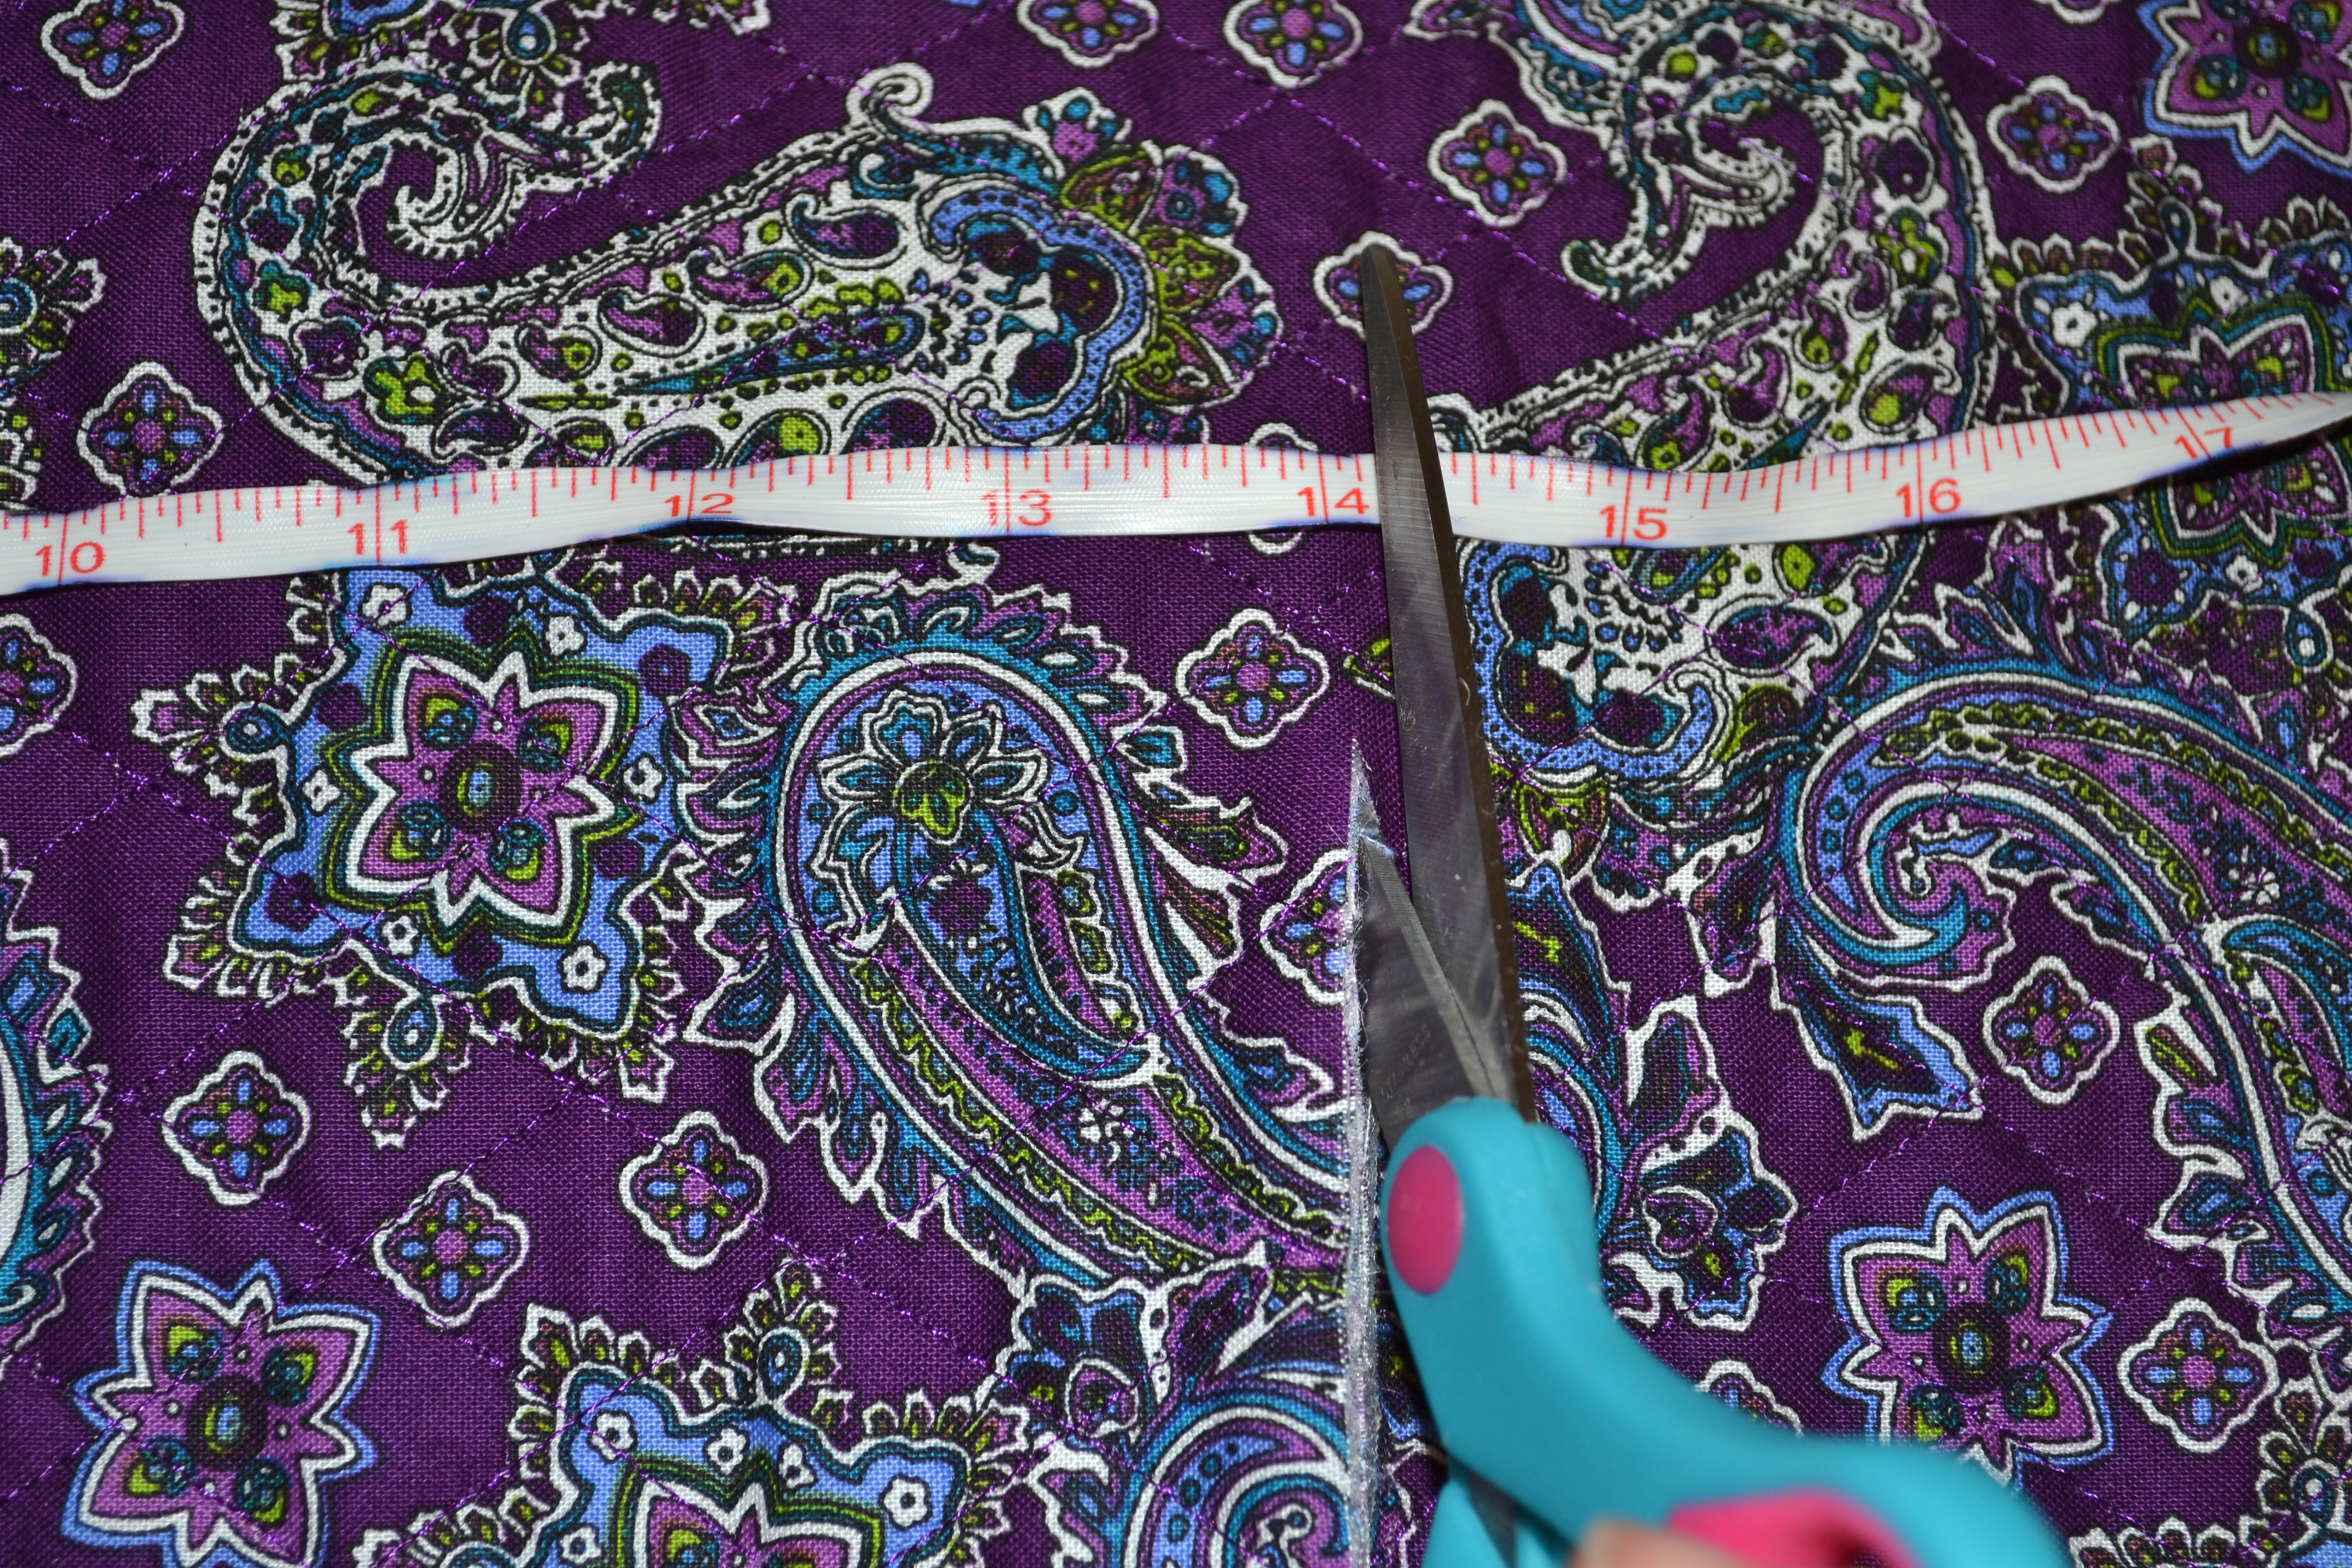
- Keep the fabric folded in half, the way it came off the bolt. Measure 14” length, and cut across.
Step 2:
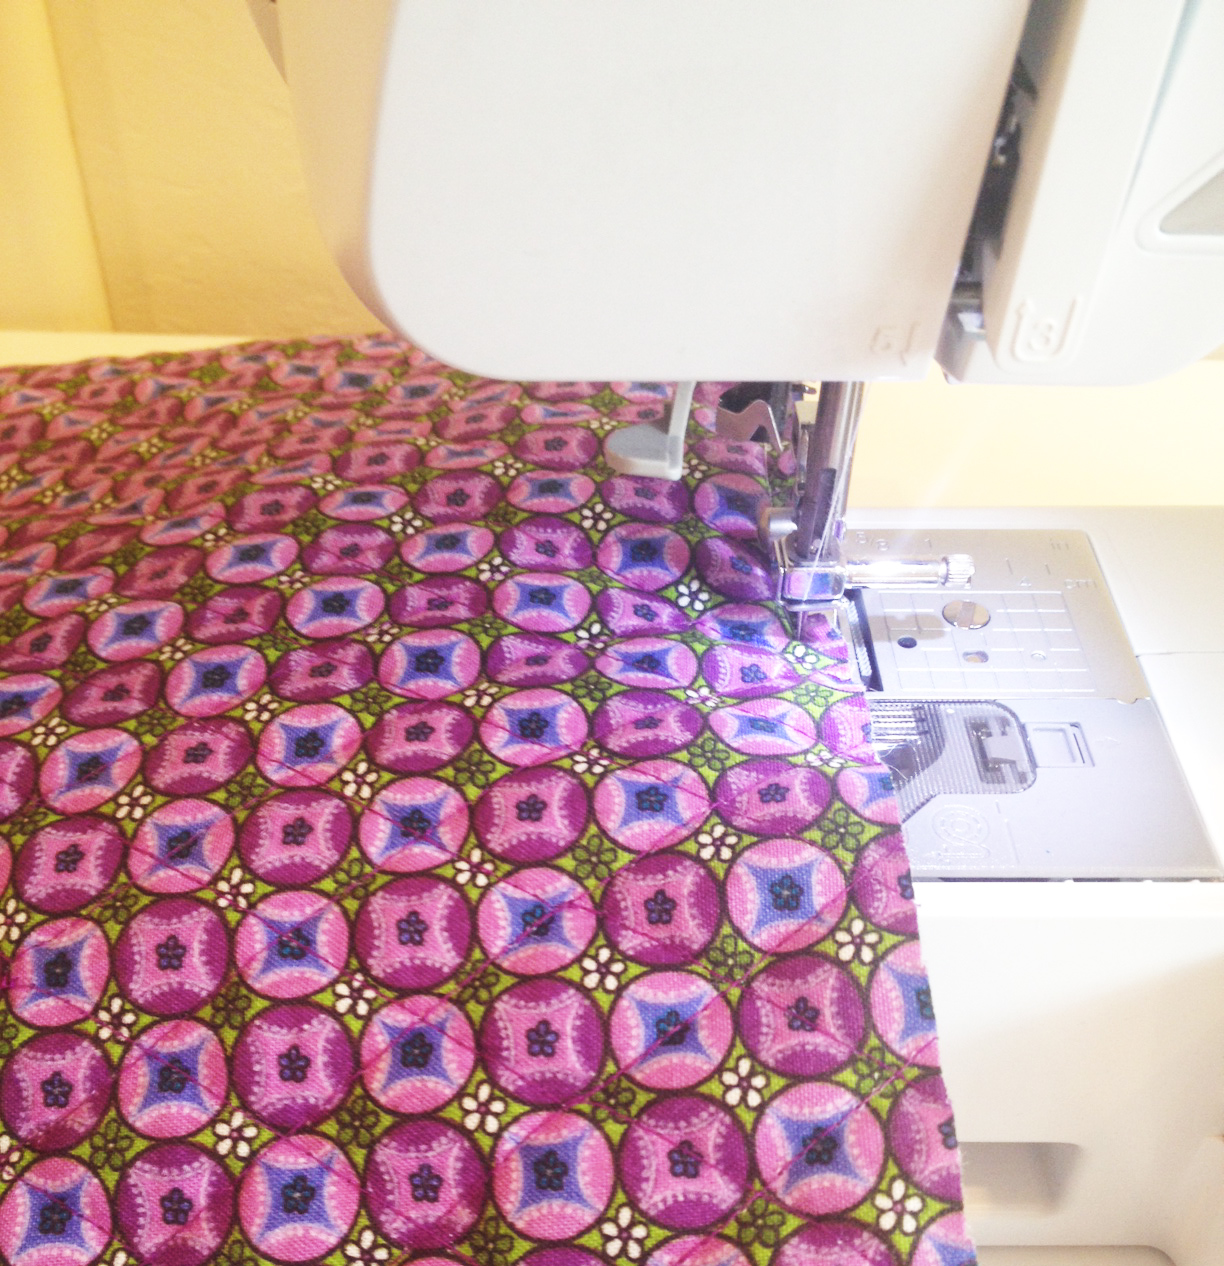
- Turn the fabric so that the side you want to be on the INSIDE of your bag is face up, and the sides you want to be on the OUTSIDE of your back are face to face towards each other.
- Put it through your sewing machine so that you sew along the 2 short edges and one of the long edges (one of the short edges should still be attached at the fold).
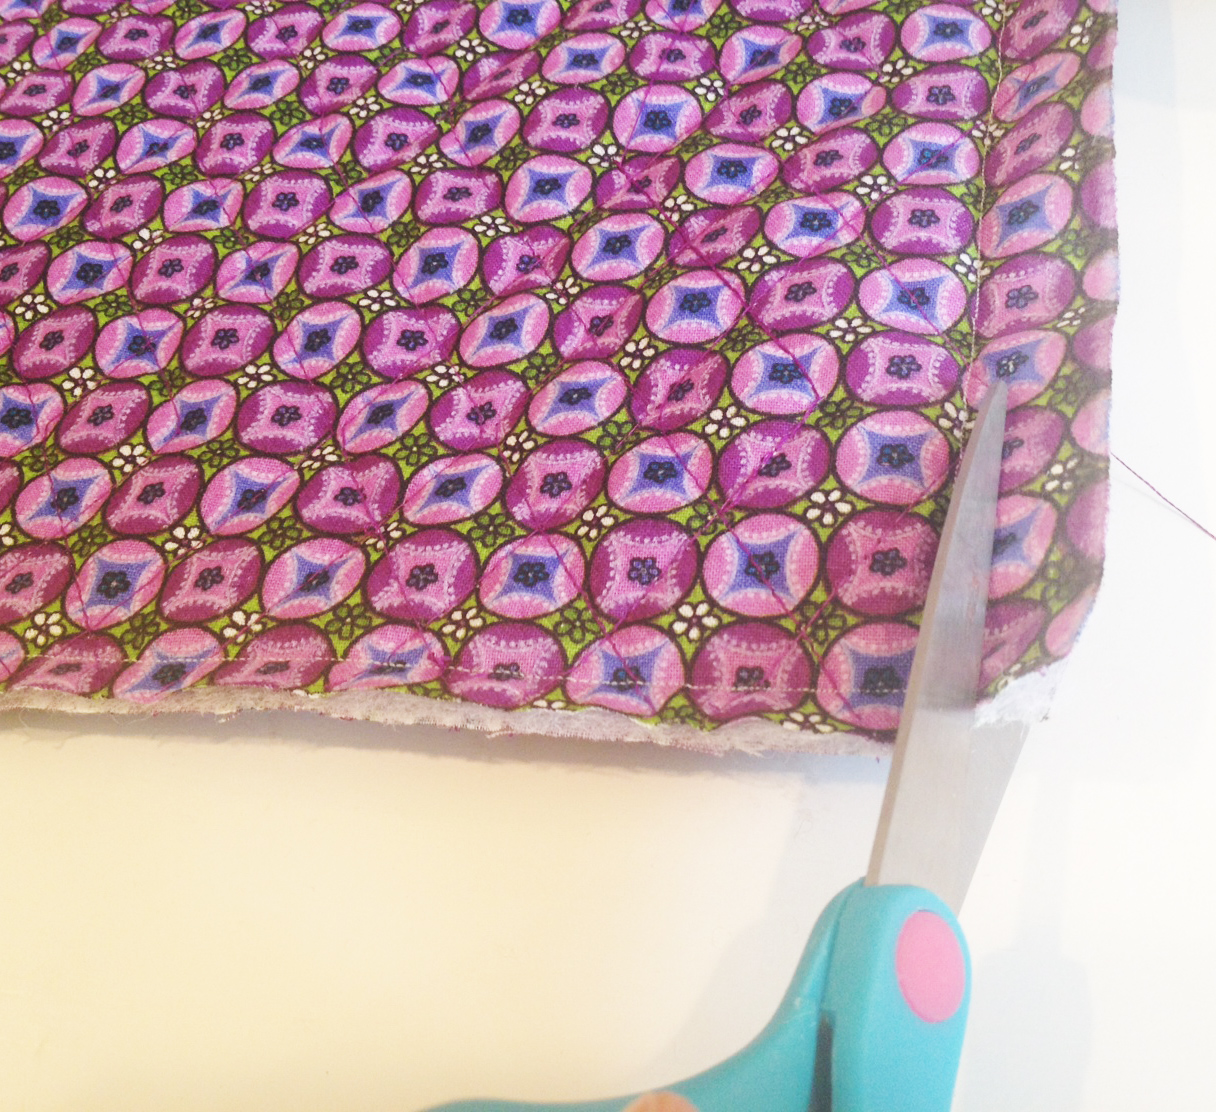
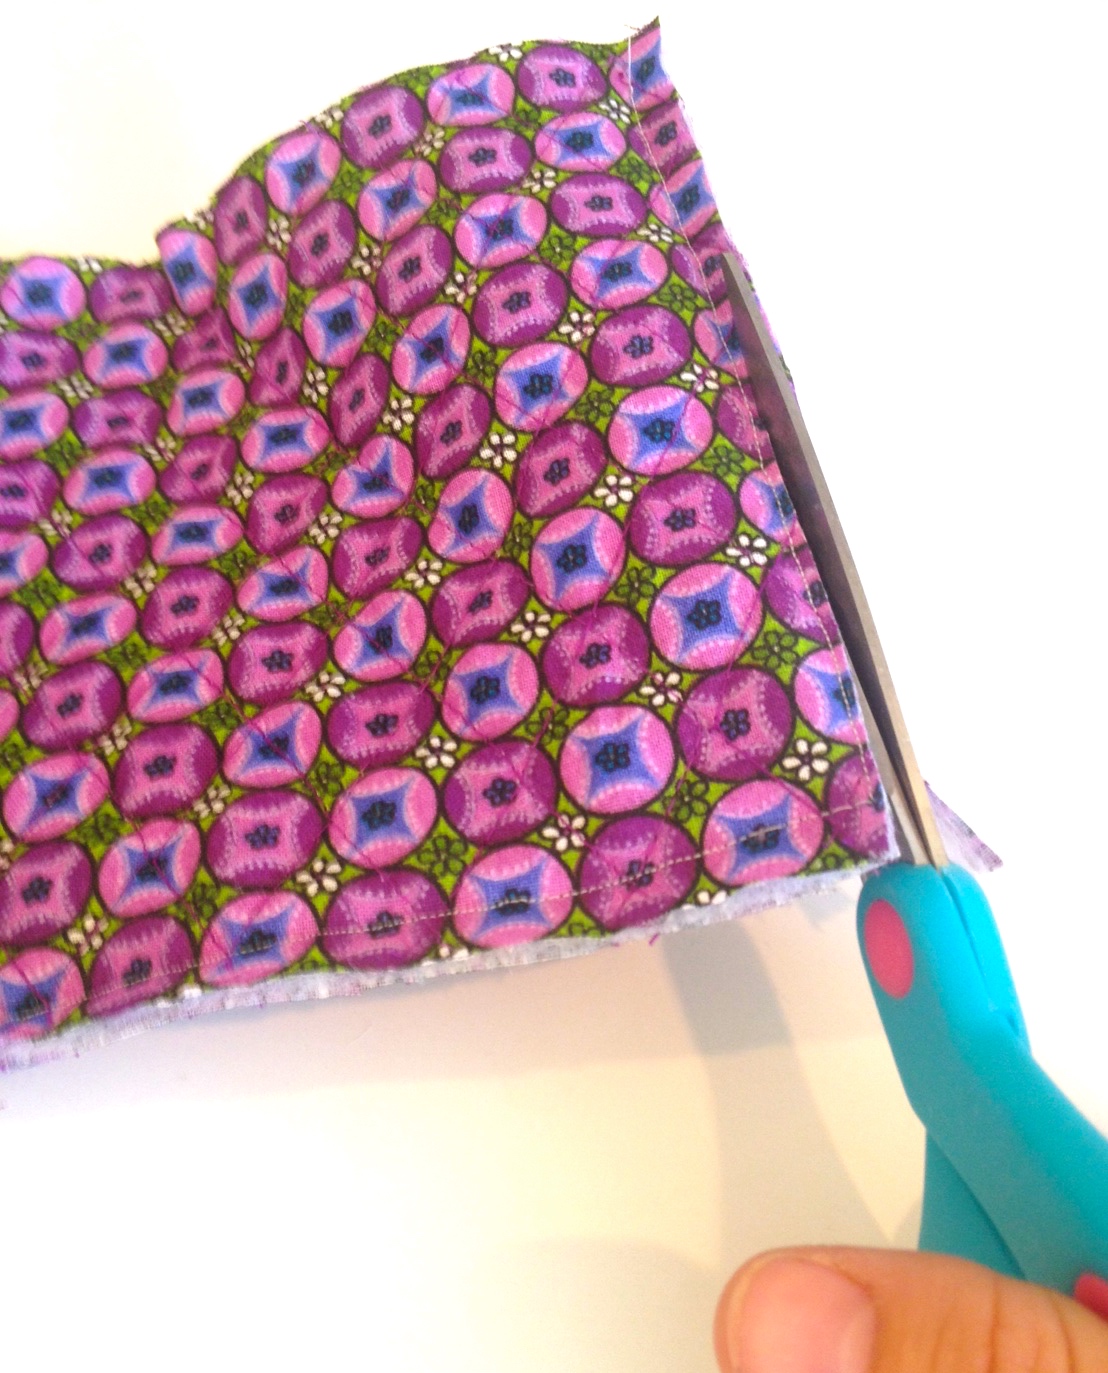
- Cut off the excess fabric from around your seams.
Step 3:
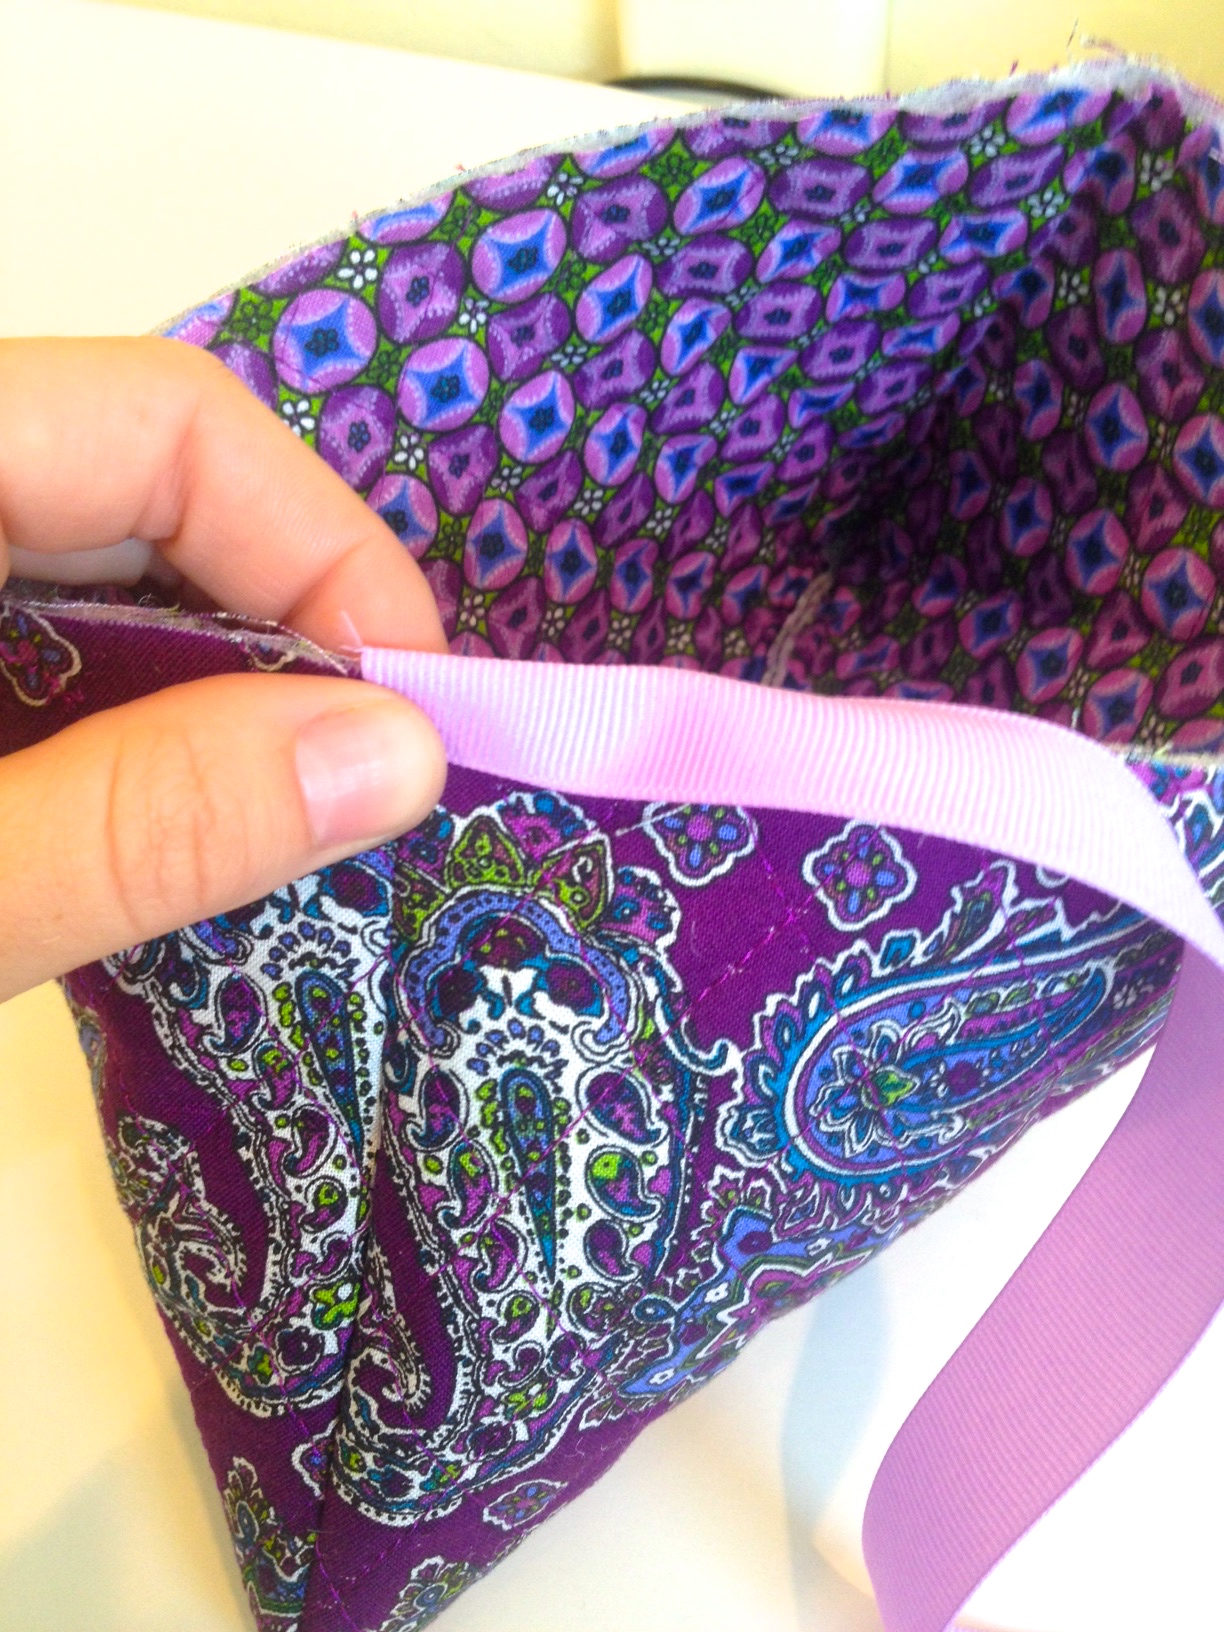
- Turn your bag right side out (so the fabric you want on the OUTSIDE of the back is actually on the OUTSIDE).
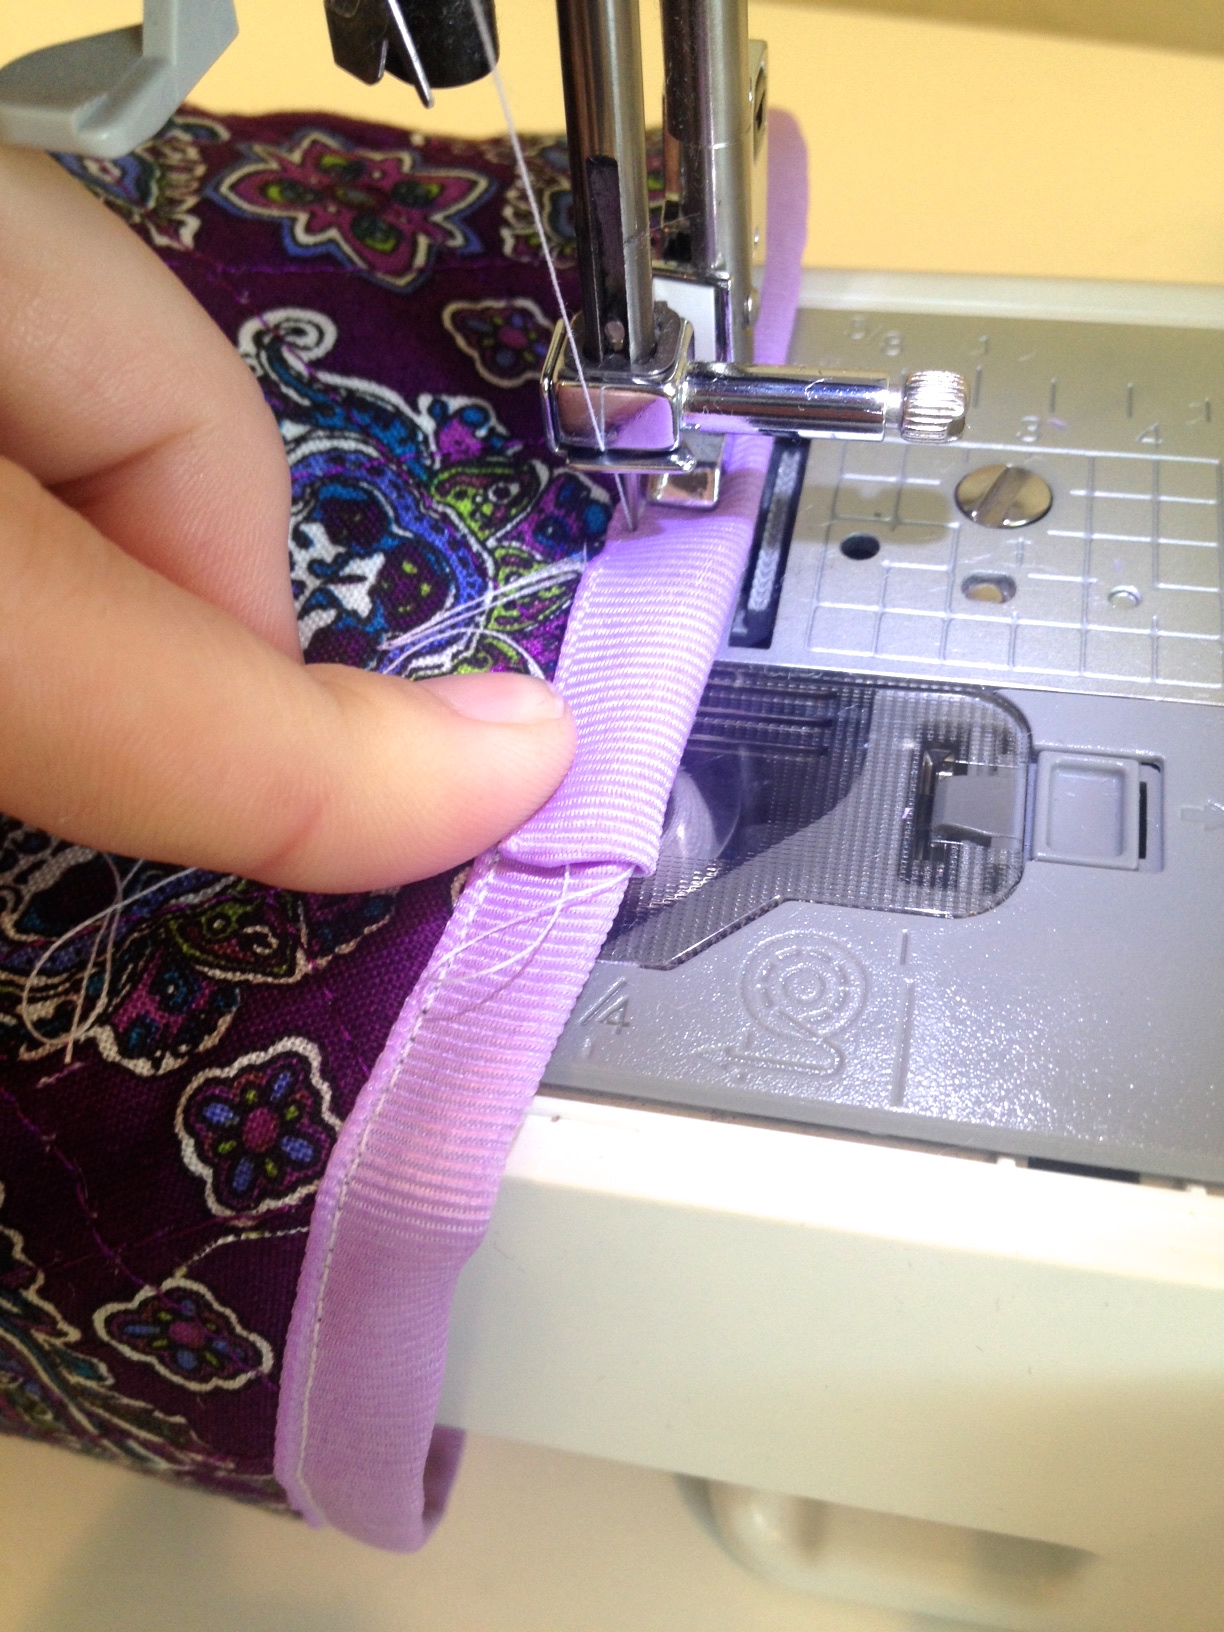
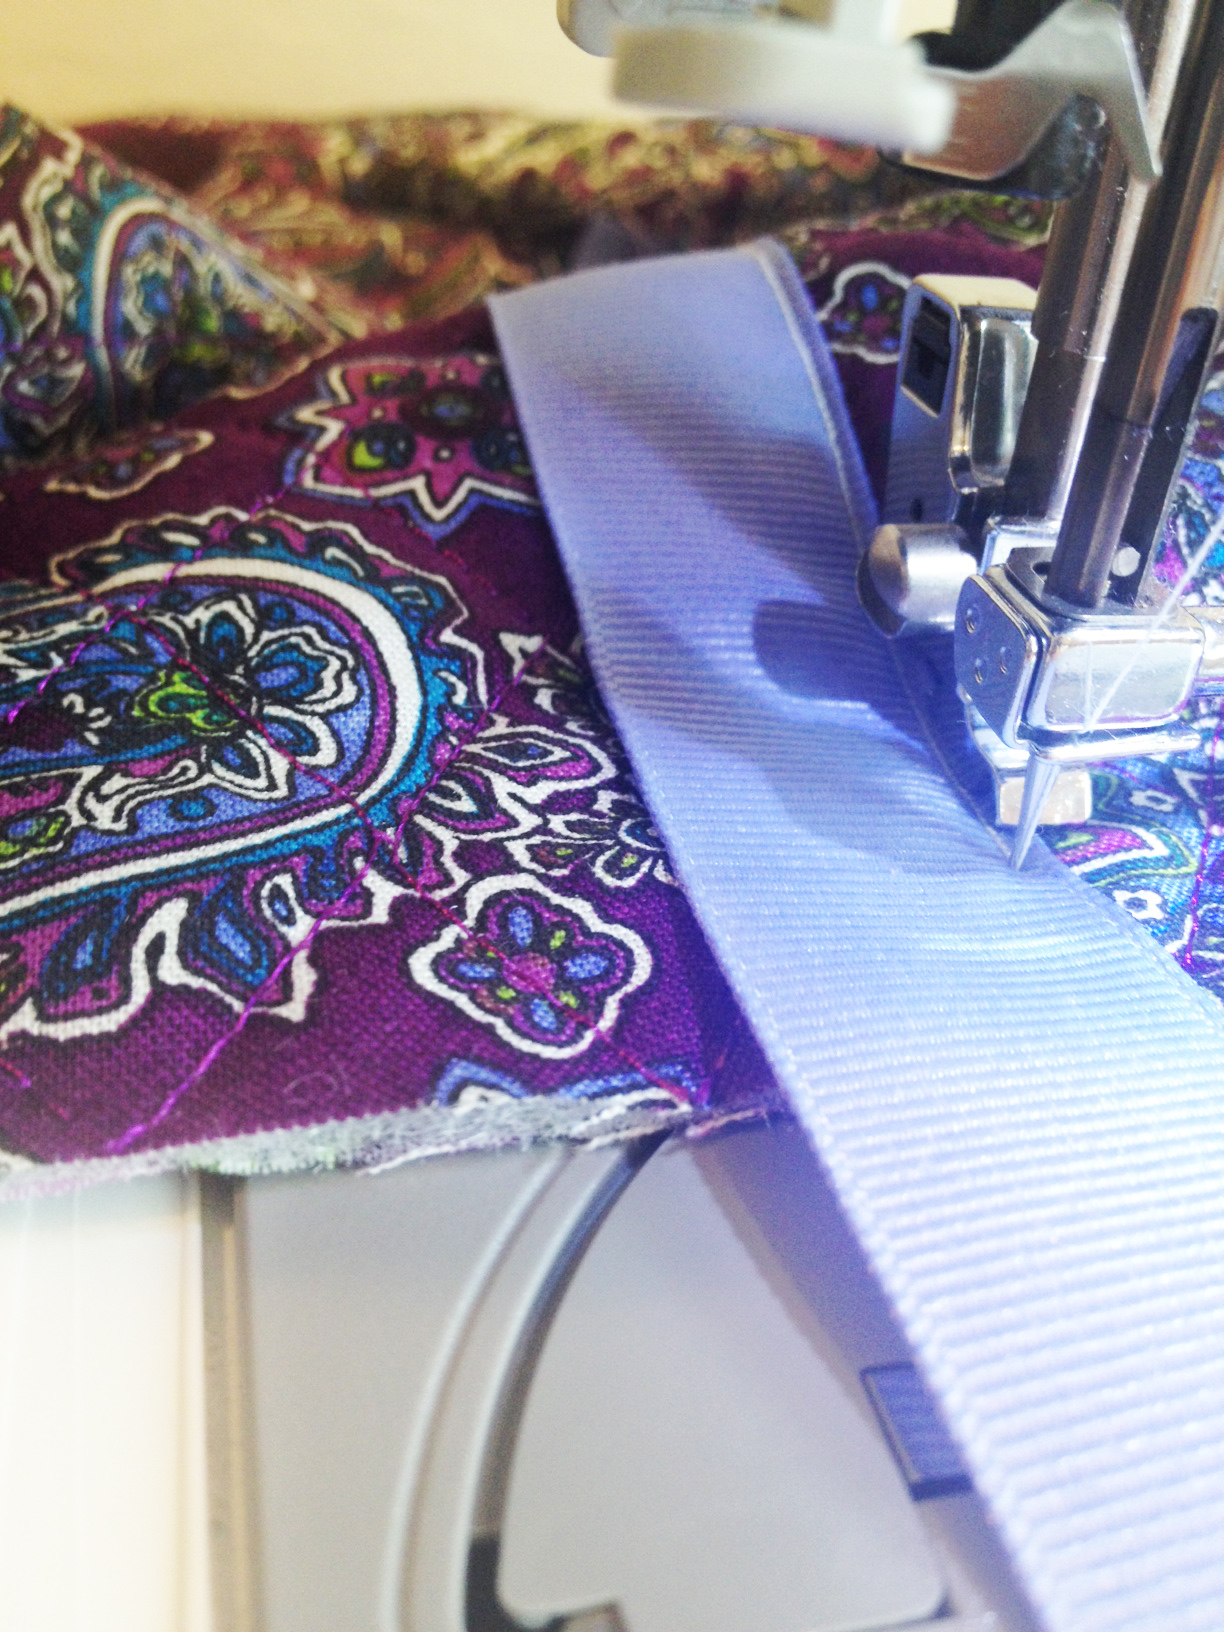
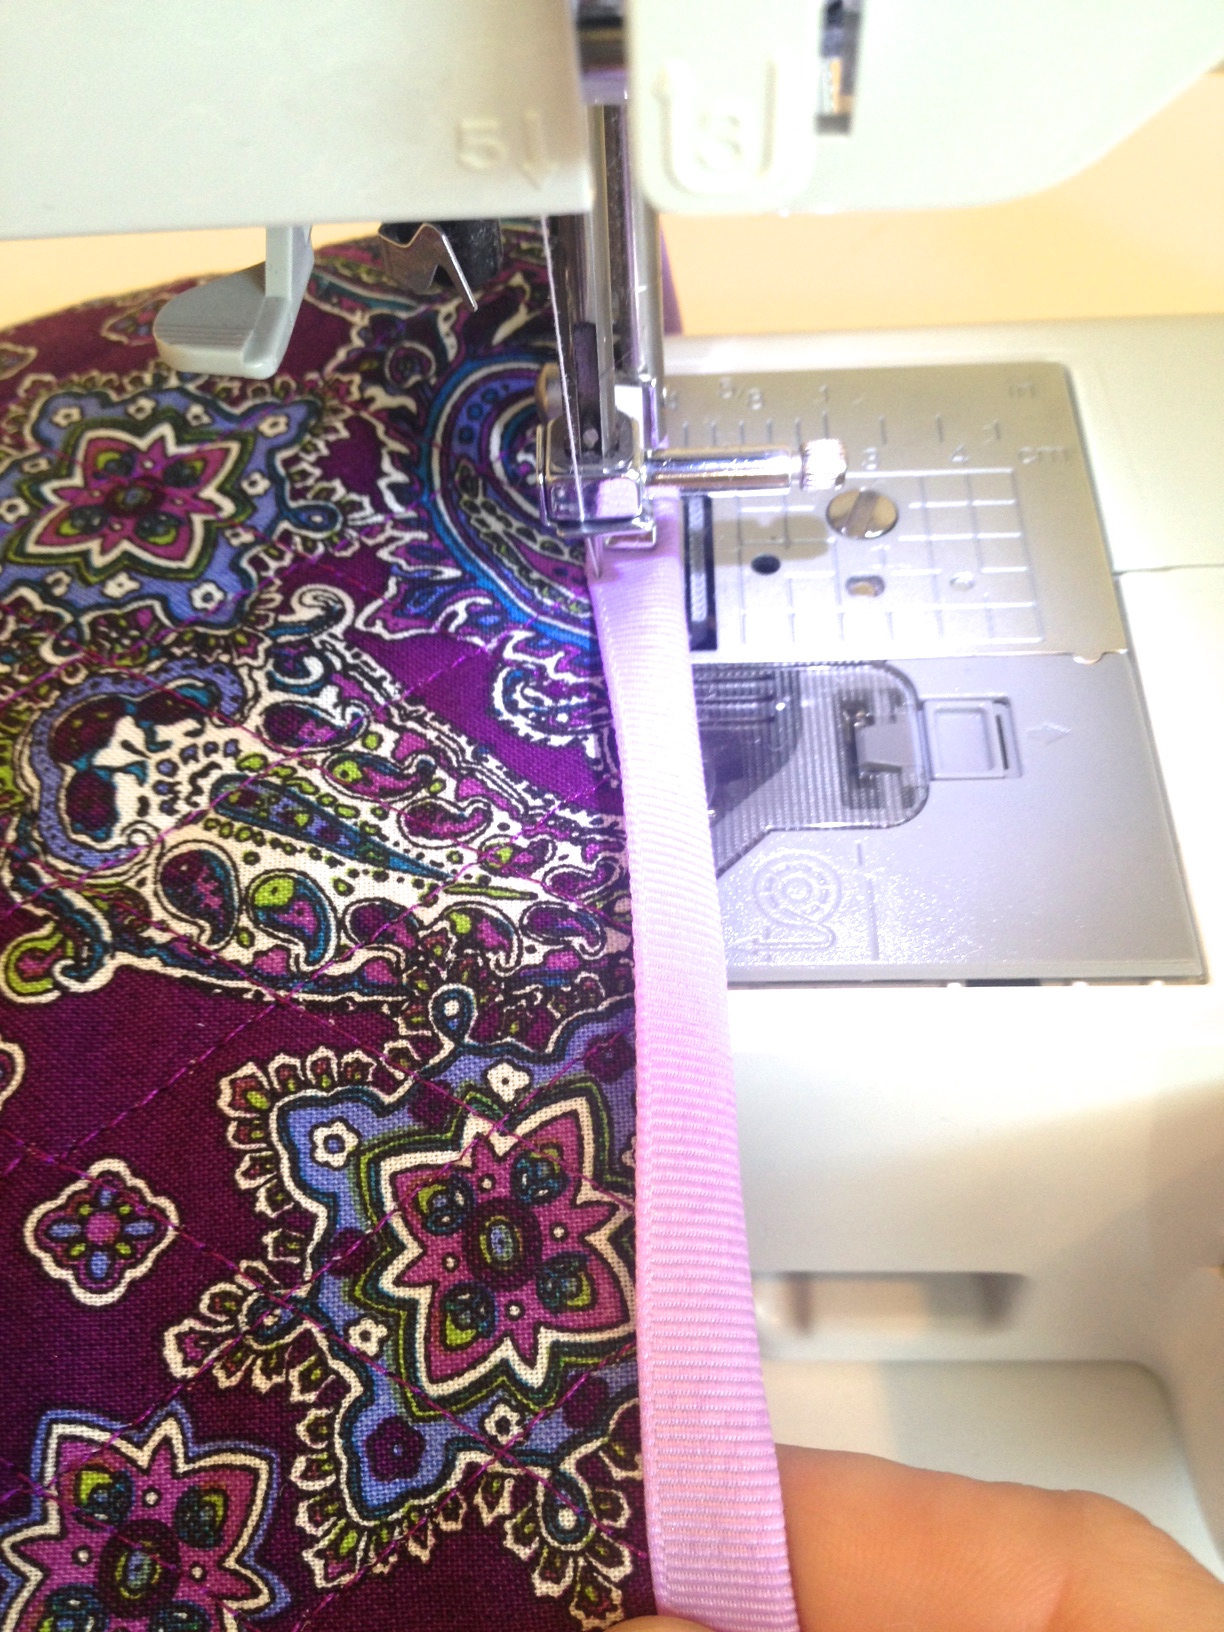
- Take your grosgrain ribbon, and fold it in half over the top edge (starting at one of the side seams).
- Put it under your sewing machine, so that you sew the ribbon across the top edge of the bag (and make sure it sews the ribbon down on both sides of the fabric).
Step 4:
- Once you get back to the original seam (where you started sewing your ribbon, cut the ribbon and fold it under itself.
- Sew the last inch so that the ribbon is tucked into itself, leaving a smooth seam.
Step 5:
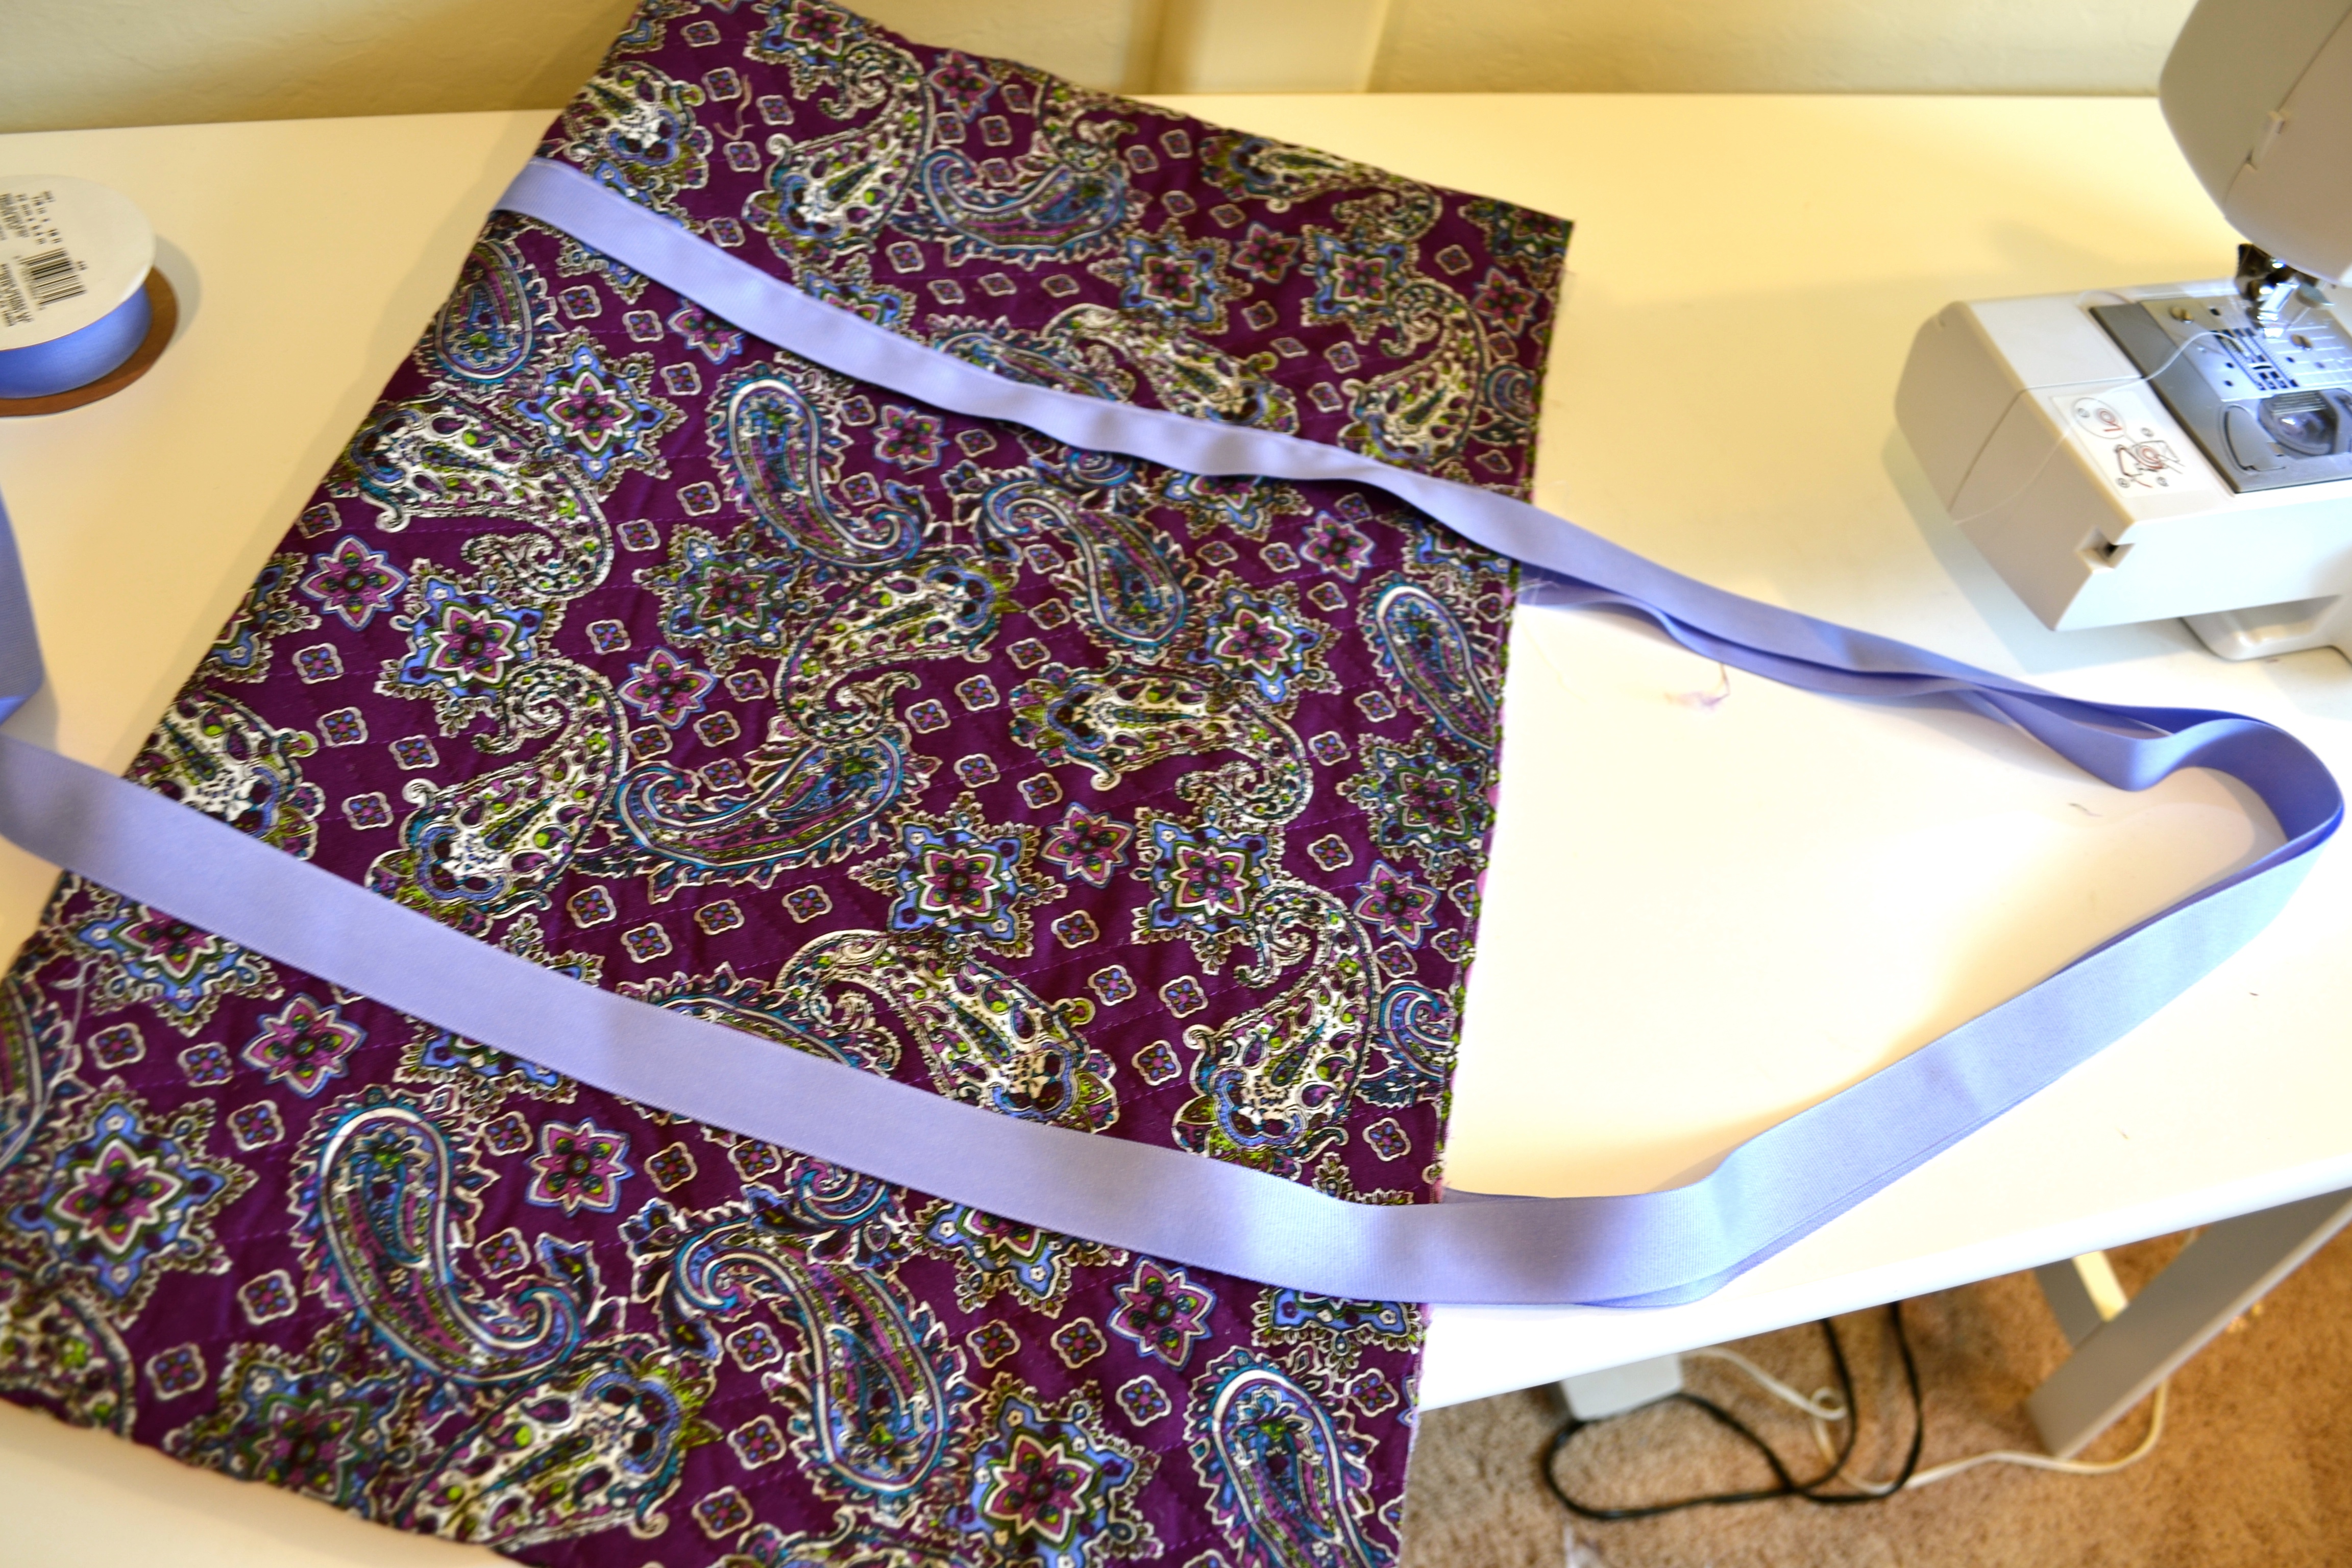
- Now, measure evenly across your fabric and mark on the bottom seam of the bag where you want your handles to go. An easy way to do this is to measure the entire length of the bag, and divide that number in half (this is the center point of your bag). Then, divide that number in half again (to get X). Go (X) many inches away from the center to the right side, and make your mark. Then, go (X) many inches away from the center to the left side, and make your mark. Then, you will have evenly spaced bag handles.
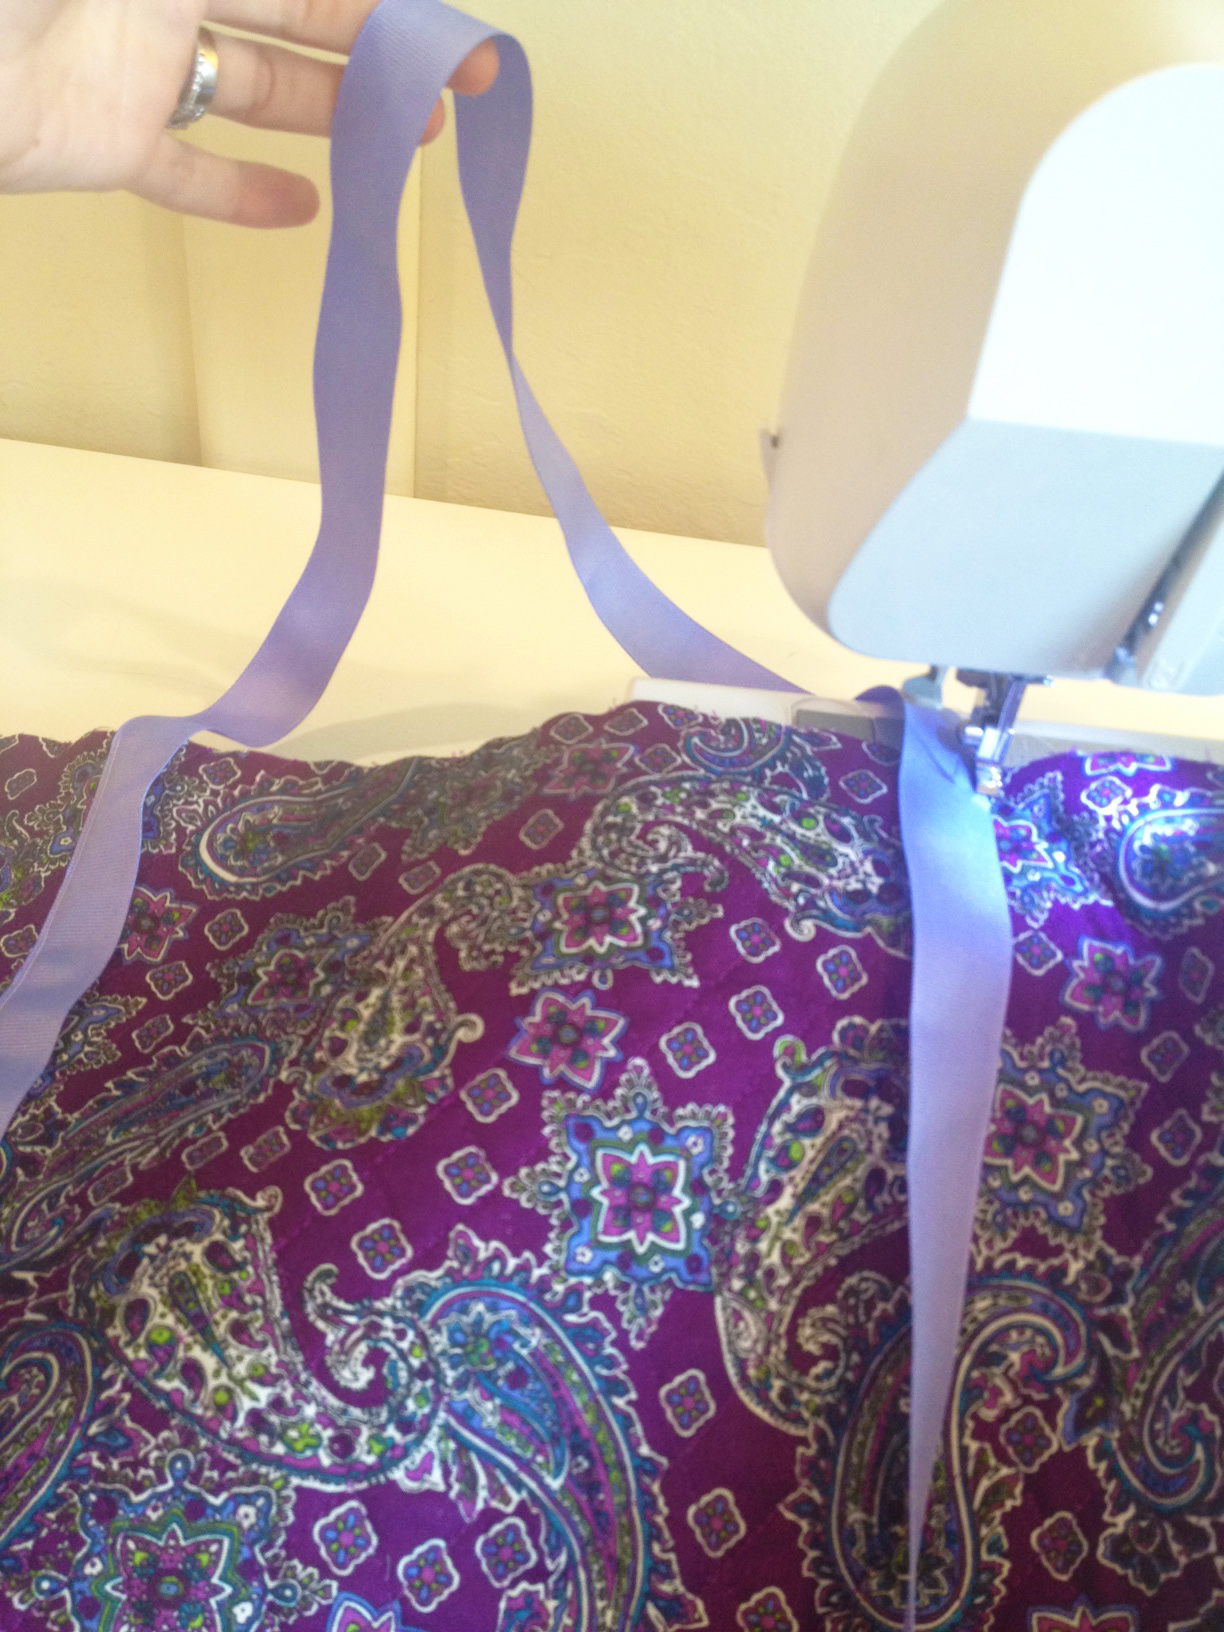
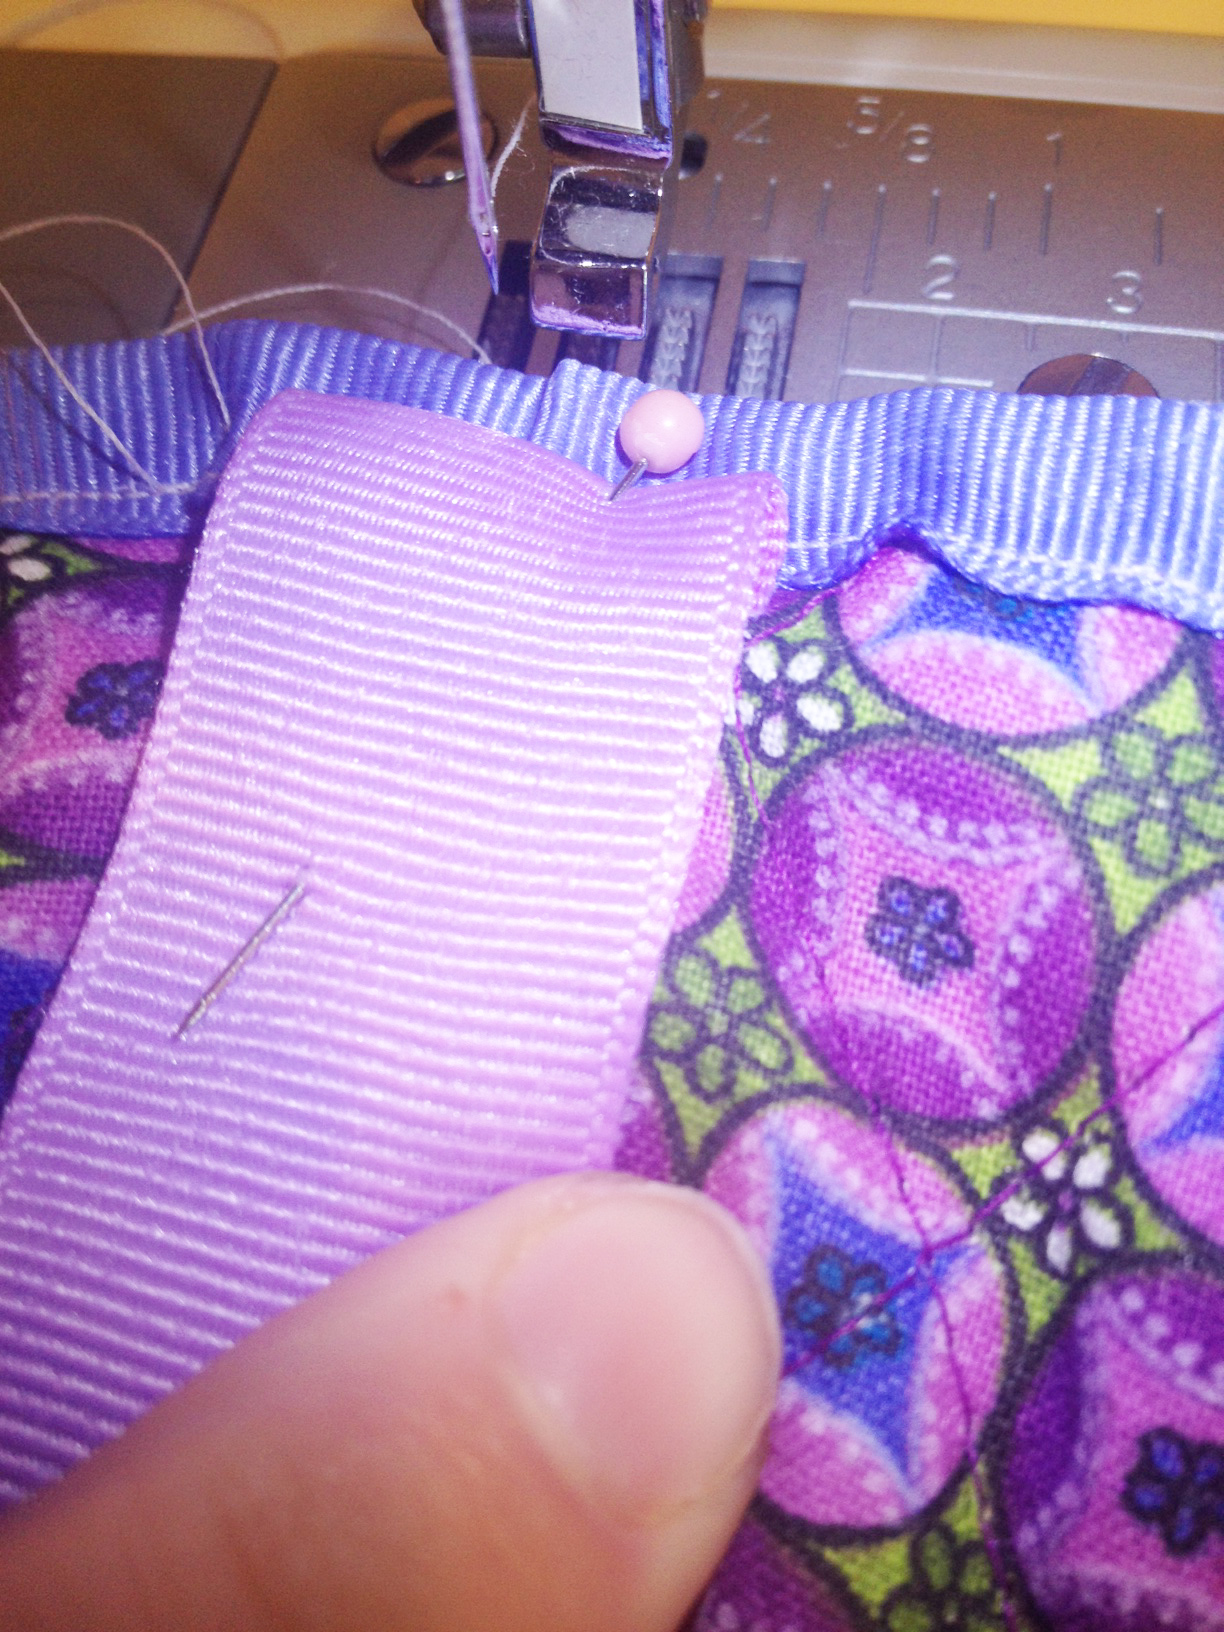
- Take your grosgrain ribbon and place it on one of the marks you just made. Place the entire bag and ribbon into your sewing machine and sew the ribbon down on one side.
- Continue sewing until you reach the top of the bag.
Step 6:
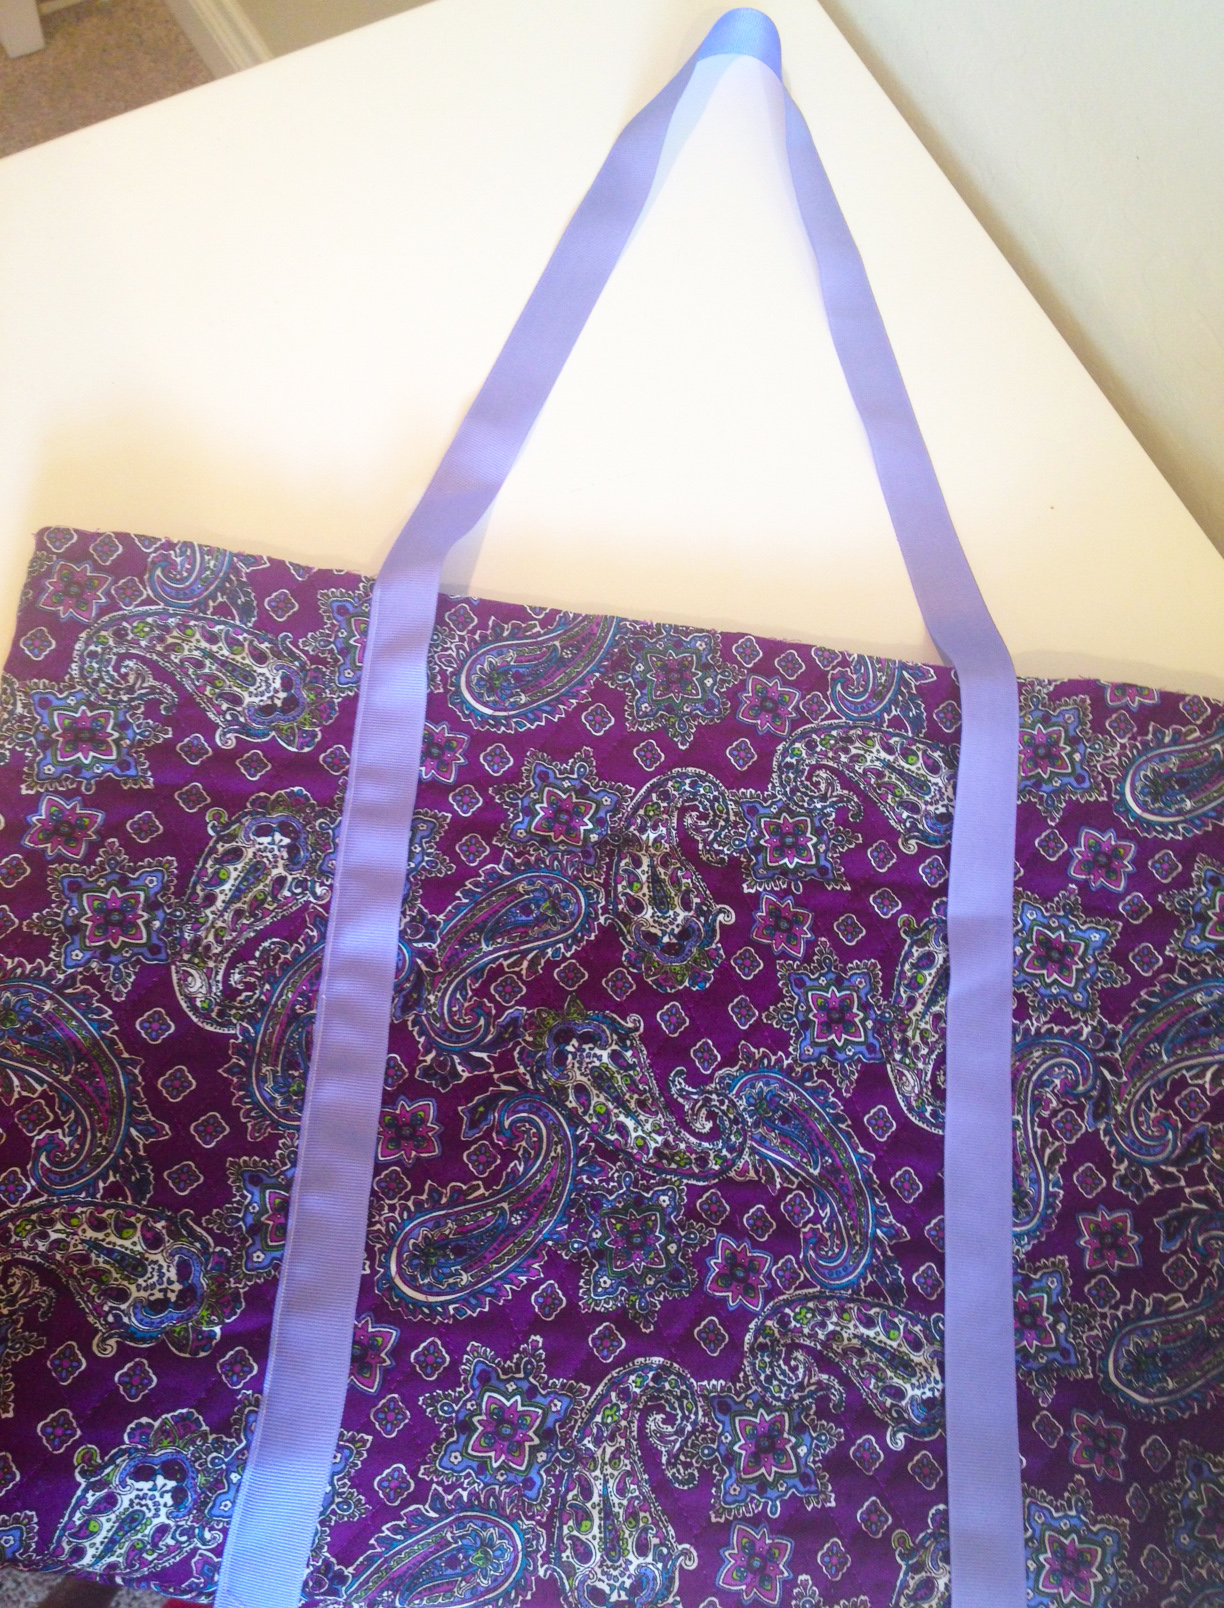
- Once you’ve reached the top of the bag, loop the ribbon around the same side of the bag, and to the other marking you’ve made (leaving enough ribbon for an adequate handle above the top of the bag).
- Continue sewing the ribbon down on that marking side.
Step 7:
- Continue sewing the ribbon all the way onto the opposite side of the bag, along the same marking lines.
- Again, once you’ve reach the top of the bag on the opposite side, loop the ribbon around to make a handle (just as you did on the other side).
- Continue sewing the ribbon down until you reach the seam where you started sewing the ribbon.
Step 8:
- Again, just as you did with the ribbon at the top of the bag, cut it and fold it under itself. Then, continue sewing the last inch of the ribbon down so that you have a nice, smooth seam at the bottom of the ribbon.
Step 9:
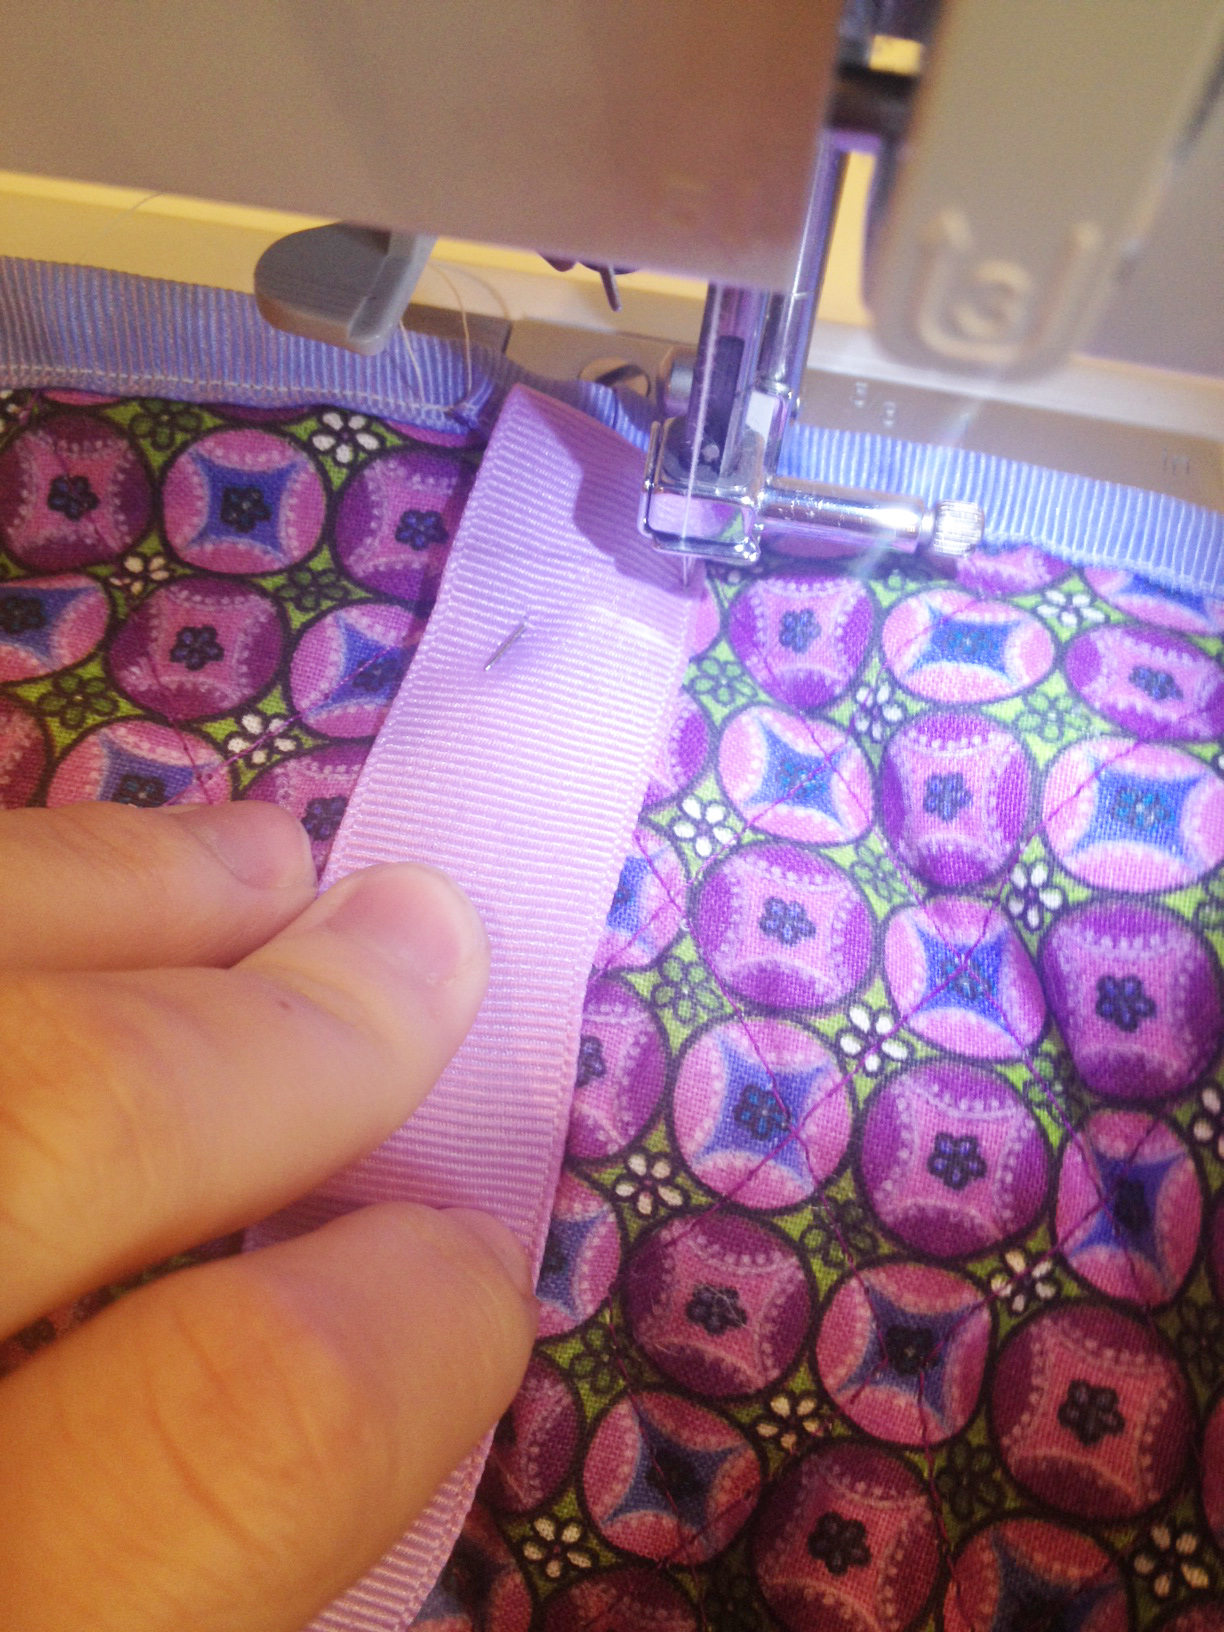
- Only one side of every piece of ribbon will now be sewn onto the bag. Use your sewing machine to sew down the sides of the ribbon you did not get to with the first run.
Step 10:
- Once again, turn the bag inside out.
- Place your ribbon at the top edge of one of the inside side seams, and tuck the ribbon under itself (for another smooth edge).
- Place it under your sewing machine and sew the ribbon over the inside seams.
- You’ll have to adjust your bag when going from the side, to the bottom, and then back up the other side. And you may not be able to sew completely into the corners with your machine. That is OK. Sew what you can down, and I’ll explain the rest in a minute.
Step 11:
- Once you get up to the top of the bag on the opposite side, again, fold the ribbon under itself for a smooth edge.
- Repeat everything you just did to the sides of the ribbon you did not get to sew down with your first run, and make sure all sides are sewn down to cover the inside seams.
Step 12:
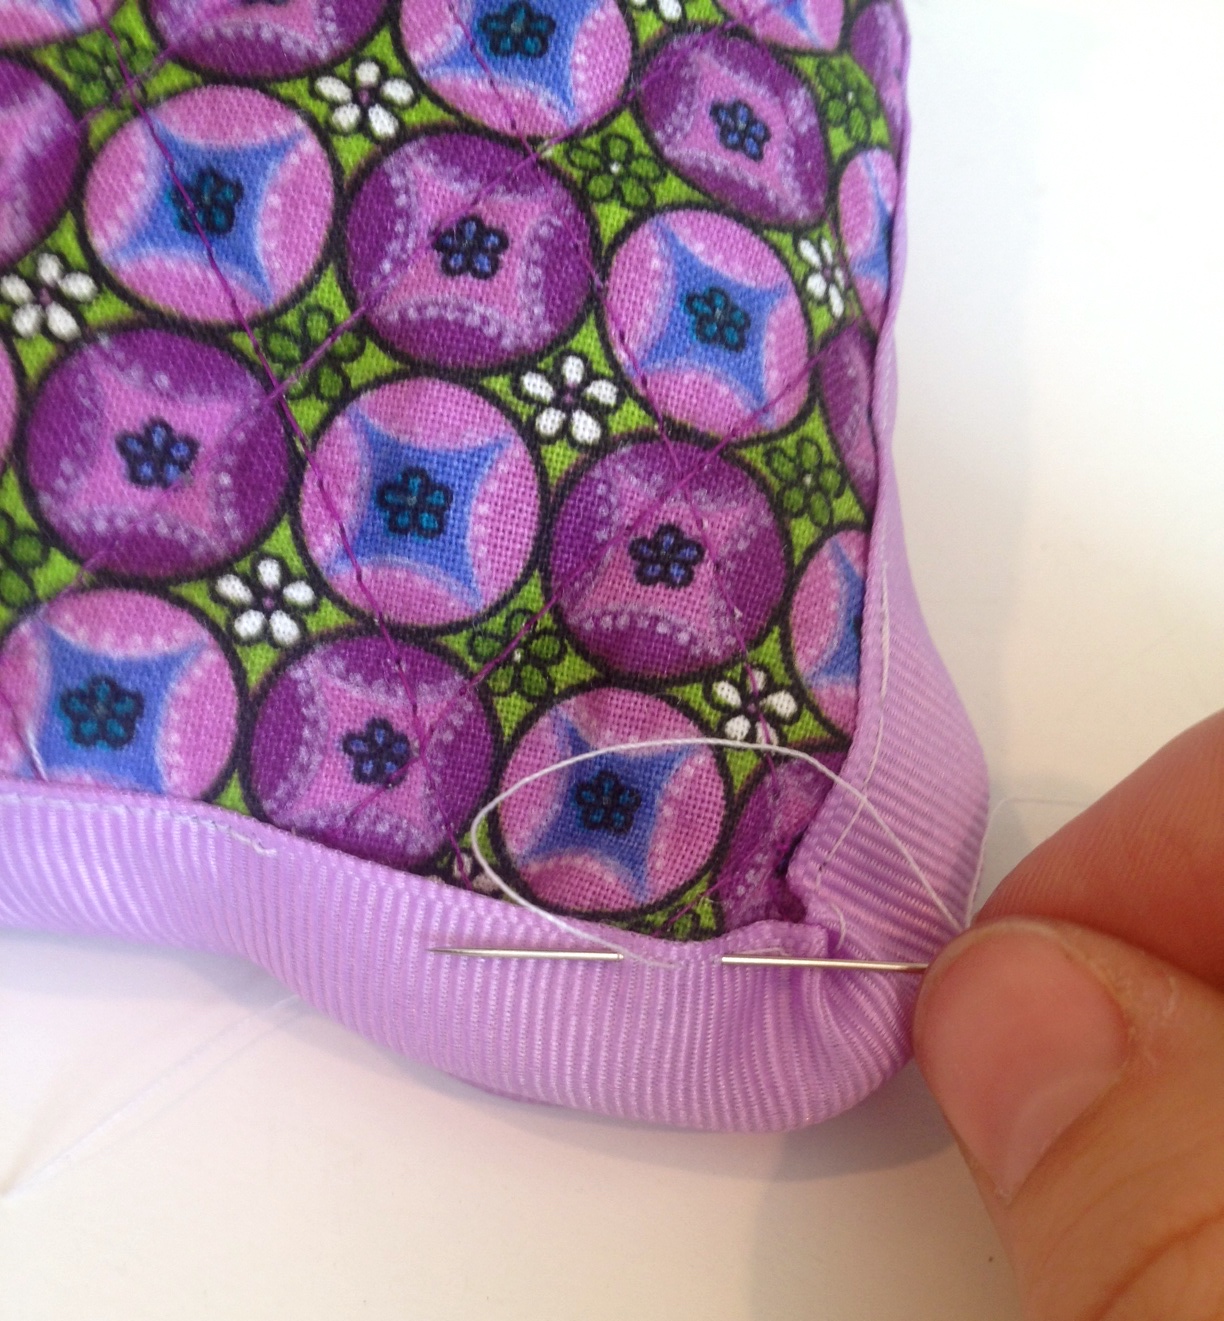
- Last, but not least, if you could not reach the edges of the inside seams with you sewing machine, don’t worry!
- Take your needle and thread and stitch the sides you could not reach down with a simple linear stitch.
- NOBODY can see into the bottom corners of the bag when it is turned right side out, so they cannot see what these stitches look like.
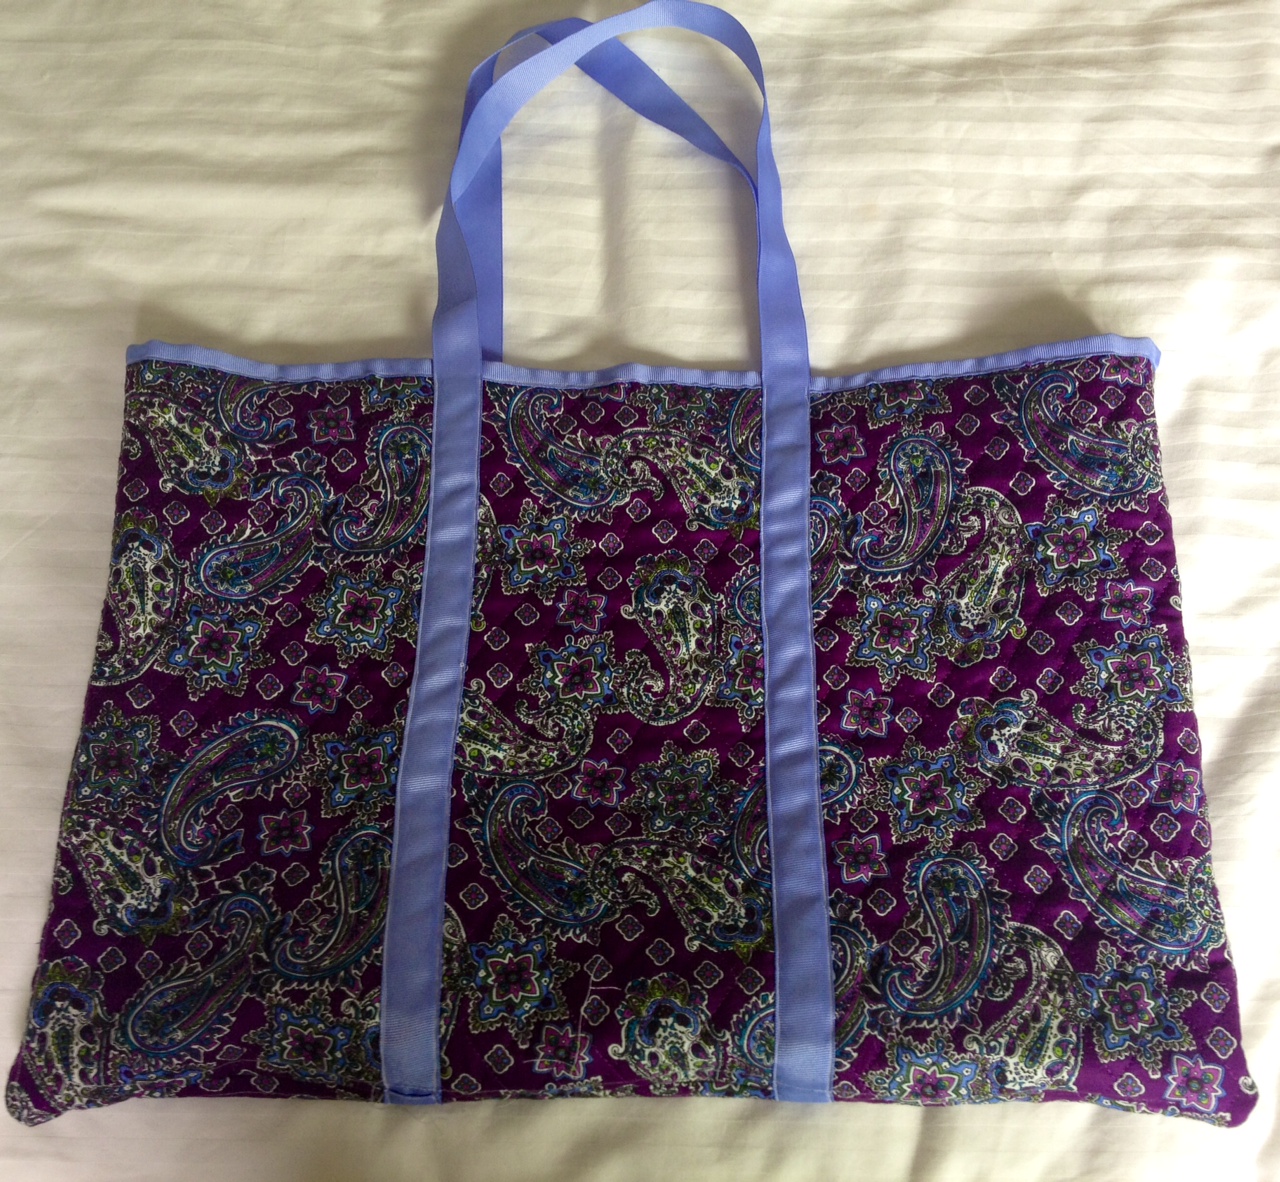

Voi La! Kind of intricate, as in it takes a lot of explaining for each step. But when you’re doing this yourself at home, it’s actually quite simple once you understand the steps themselves. Keep at it, and the bags come out adorable!
Steps to Make Your Own Quilted Fabric Makeup Bags
Supply List:
- Quilted Fabric (see link above for more options)
- 1.5” grosgrain ribbon
- Sewing Machine
- Thread
- Needle
- 12” Zipper (may be able to get more competitive pricing here – through fabric.com)
Step 1:
- Fold your fabric in half and measure a piece that is 6 x 21” long, and cut it out.
- Make sure you cut out so that both sides along the fold are cut, for the FRONT and BACK of the bag.
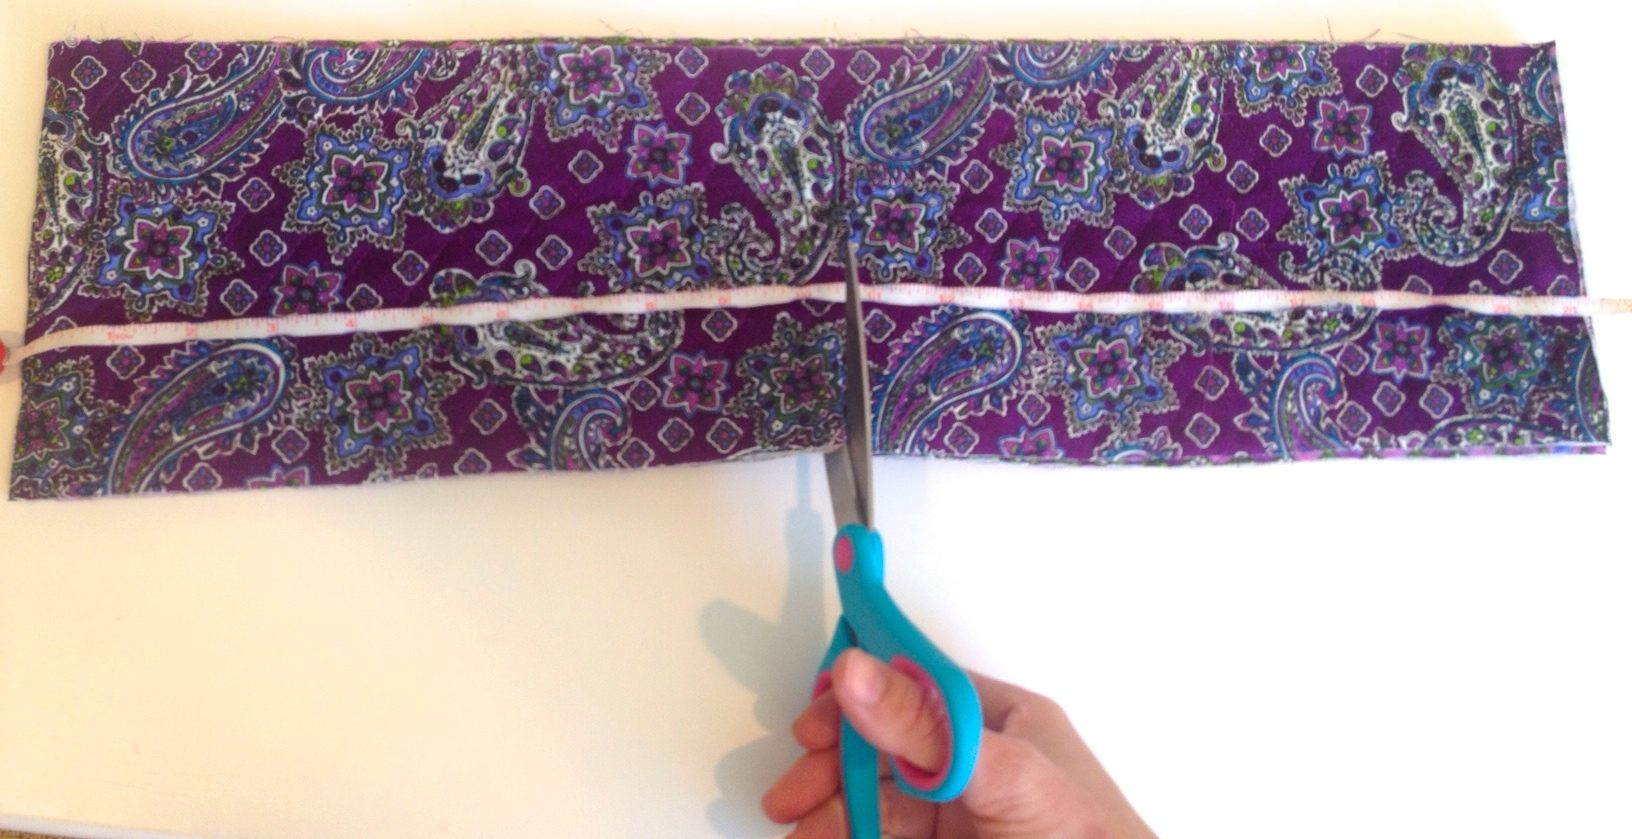
- Cut this piece of fabric in HALF (10.5″ long each) This will make 2 makeup bags.
Step 2:

- Turn the fabric so that the side you want to be on the INSIDE of your bag is face up, and the sides you want to be on the OUTSIDE of your back are face to face towards each other.
- Put it through your sewing machine so that you sew along the 2 short edges and one of the long edges (one of the short edges should still be attached at the fold).
- Cut off the excess fabric from around your seams.
Step 3:
- Turn your bag right side out (so the fabric you want on the OUTSIDE of the back is actually on the OUTSIDE).
- Take your grosgrain ribbon, and fold it in half over the top edge (starting at one of the side seams).
- Put it under your sewing machine, so that you sew the ribbon across the top edge of the bag (and make sure it sews the ribbon down on both sides of the fabric).
Step 4:
- Once you get back to the original seam (where you started sewing your ribbon, cut the ribbon and fold it under itself.
- Sew the last inch so that the ribbon is tucked into itself, leaving a smooth seam.
Step 5:
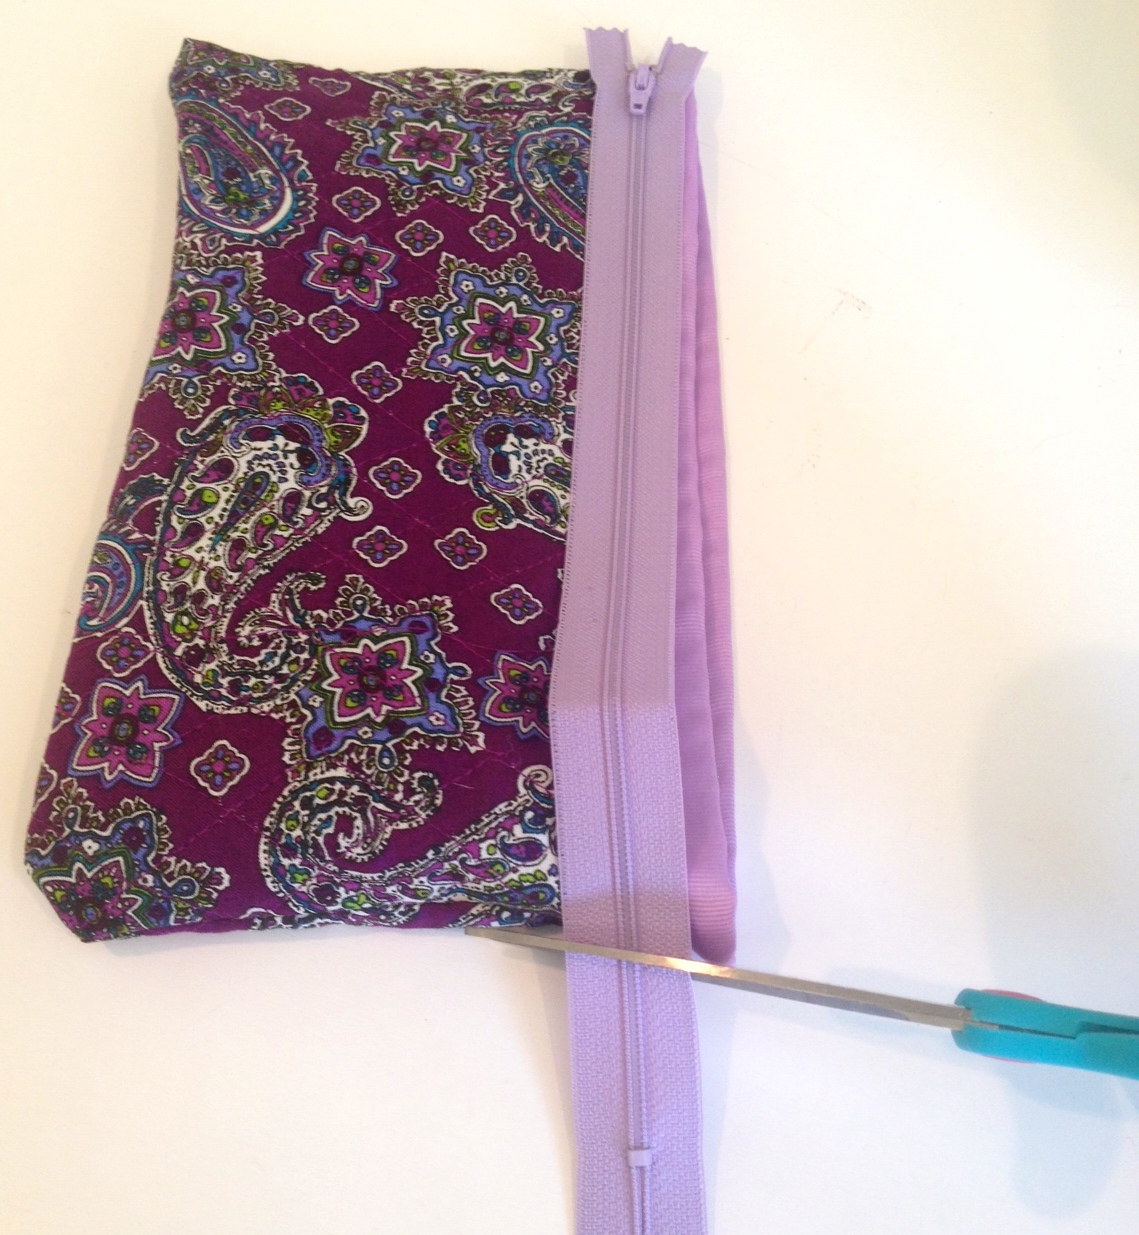
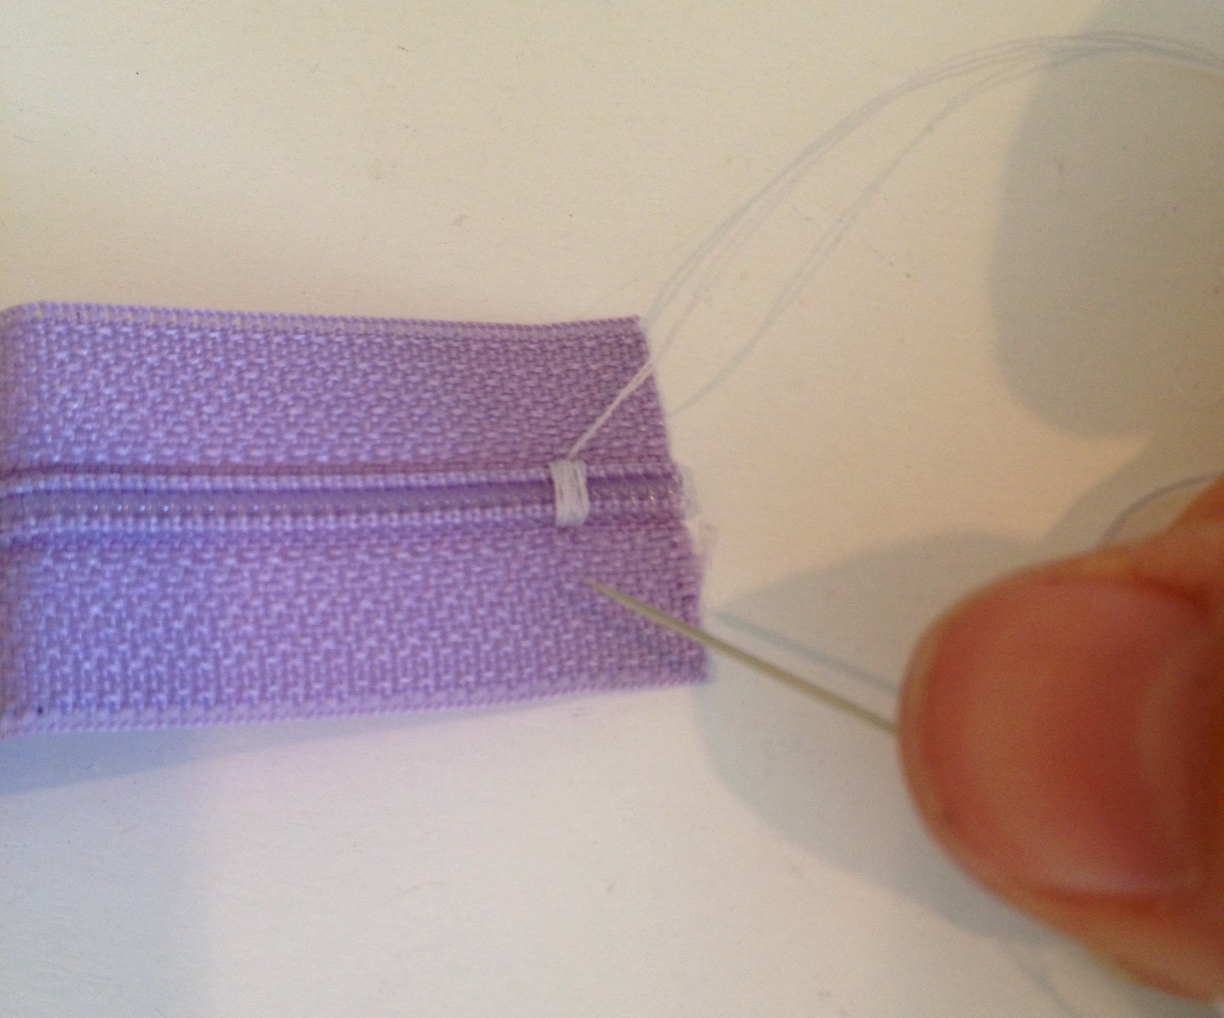
- Take your zipper and hold it up to your bag to ensure it’s the proper size.
- If it’s not, cut it so that it will fit, and sew thread around the edge of the zipper you cut to ensure it will won’t unzip itself.
Step 6:
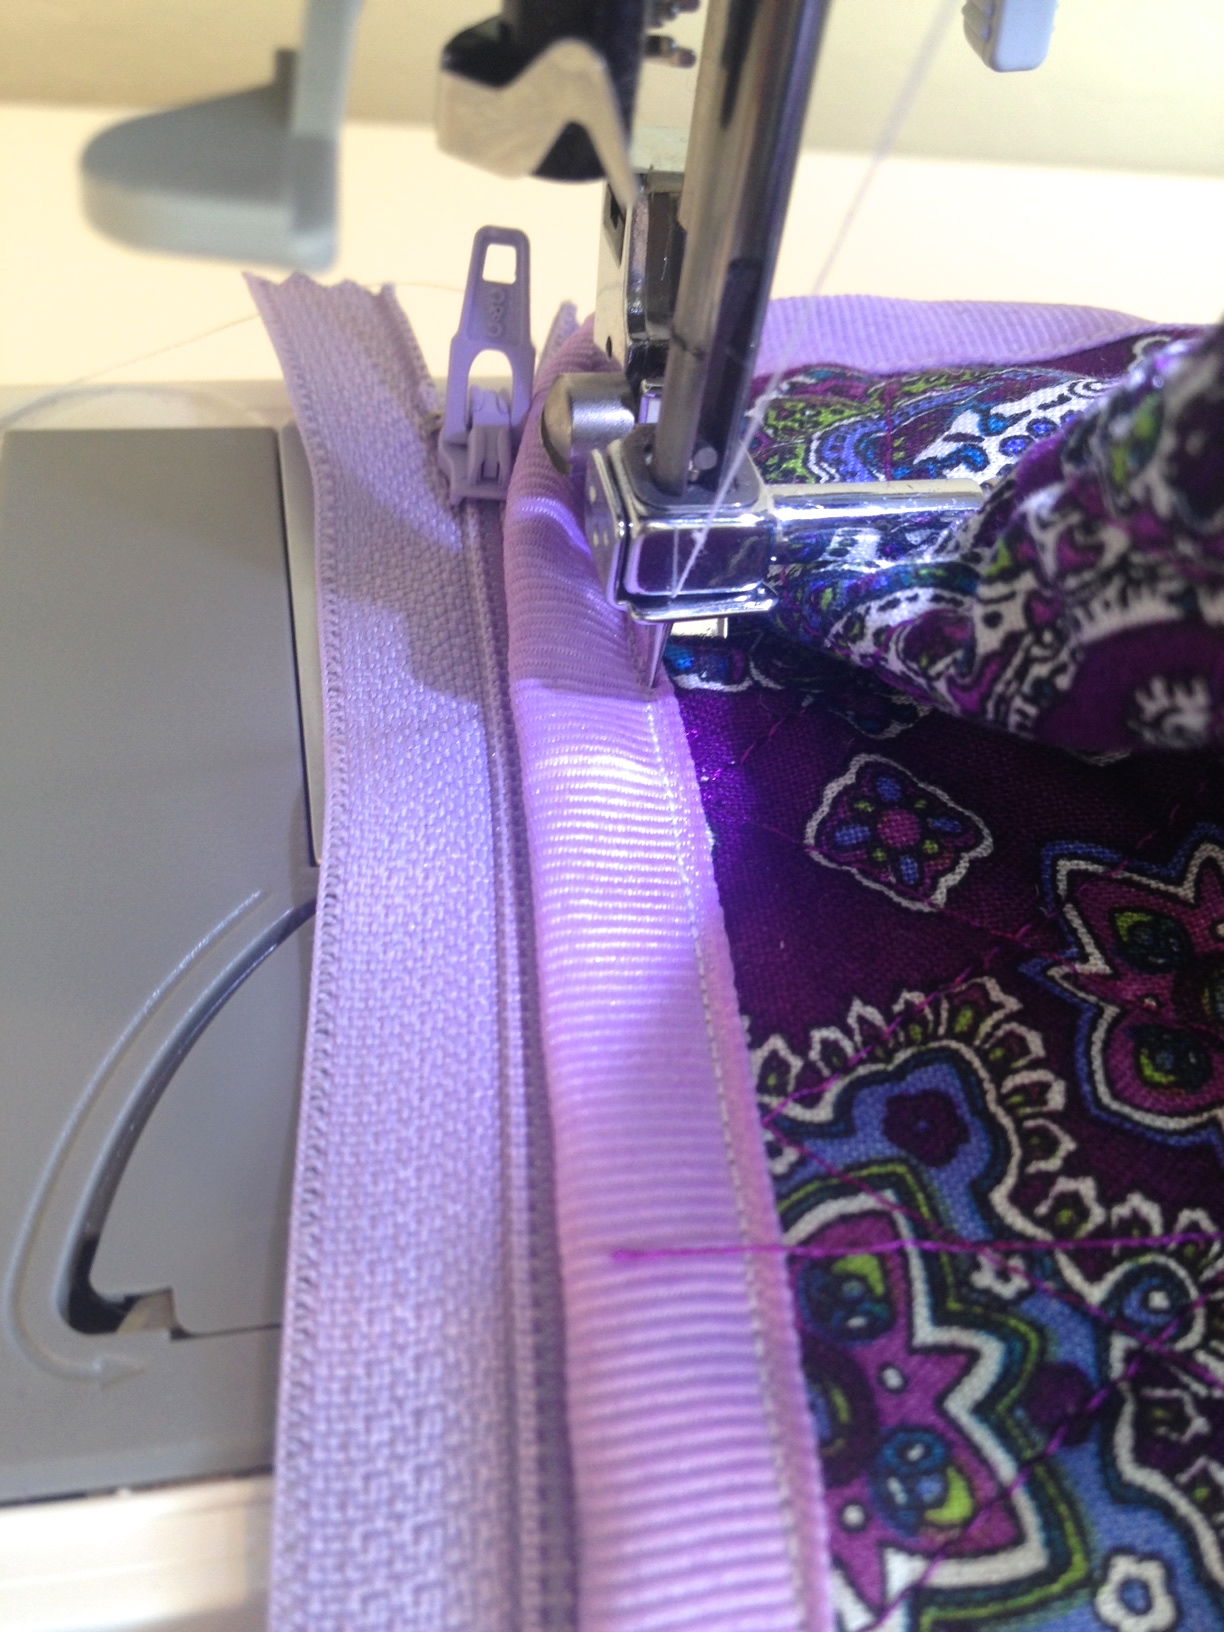
- Put one side of the zipper along the inside of the top edge (against the ribbon on the inside of the bag) and from the outside, sew it down.
Step 7:
- Repeat step 6 on the other side of the bag, for the other side of the zipper. Hold it down against the inside edge of the top of the bag, and sew the zipper down from the outside.
Step 8:
- Now, once again, turn the bag inside out.
- Place your ribbon at the top edge of one of the inside side seams, and tuck the ribbon under itself (for another smooth edge).
- Place it under your sewing machine and sew the ribbon over the inside seams.
- You’ll have to adjust your bag when going from the side, to the bottom, and then back up the other side. And you may not be able to sew completely into the corners with your machine. That is OK. Sew what you can down, and I’ll explain the rest in a minute.
Step 11:
- Once you get up to the top of the bag on the opposite side, again, fold the ribbon under itself for a smooth edge.
- Repeat everything you just did to the sides of the ribbon you did not get to sew down with your first run, and make sure all sides are sewn down to cover the inside seams.
Step 12:
- Last, but not least, if you could not reach the edges of the inside seams with you sewing machine, don’t worry!
- Take your needle and thread and stitch the sides you could not reach down with a simple linear stitch.
- NOBODY can see into the bottom corners of the bag when it is turned right side out, so they cannot see what these stitches look like.
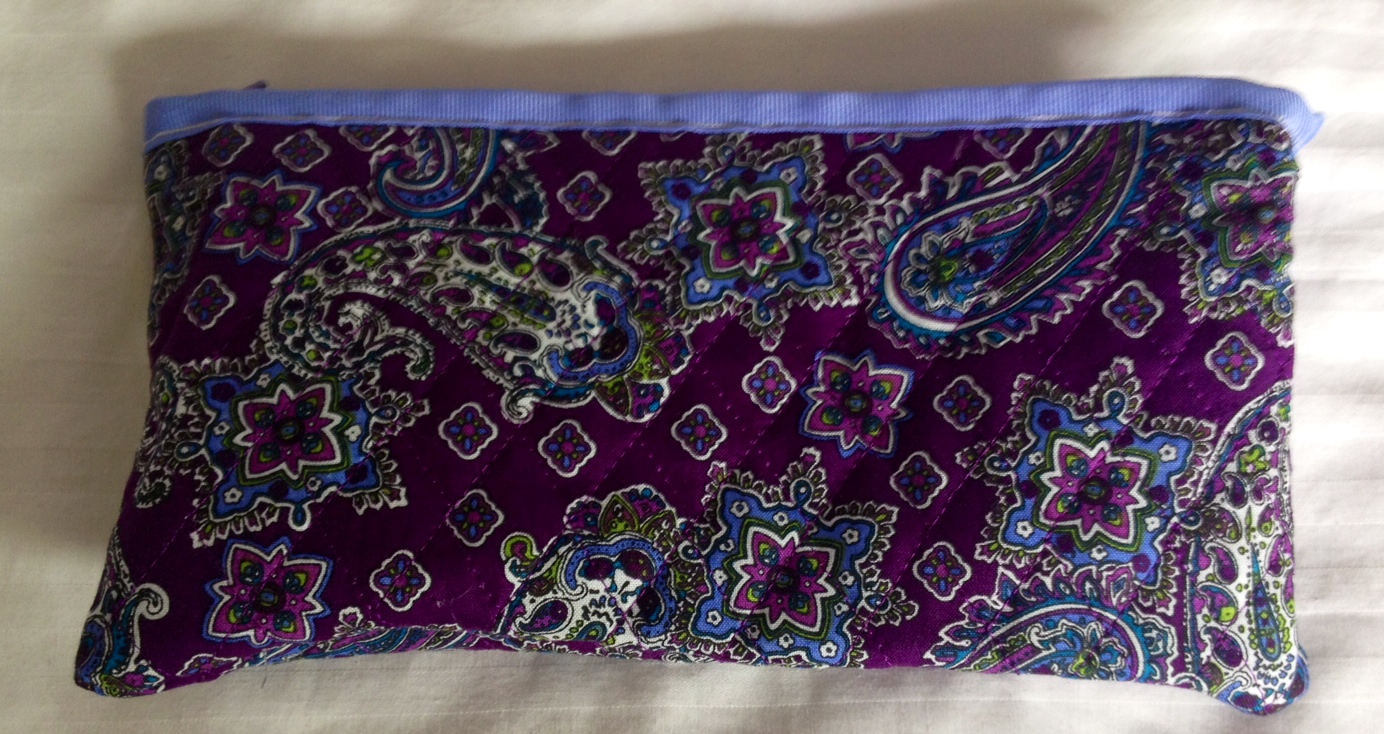
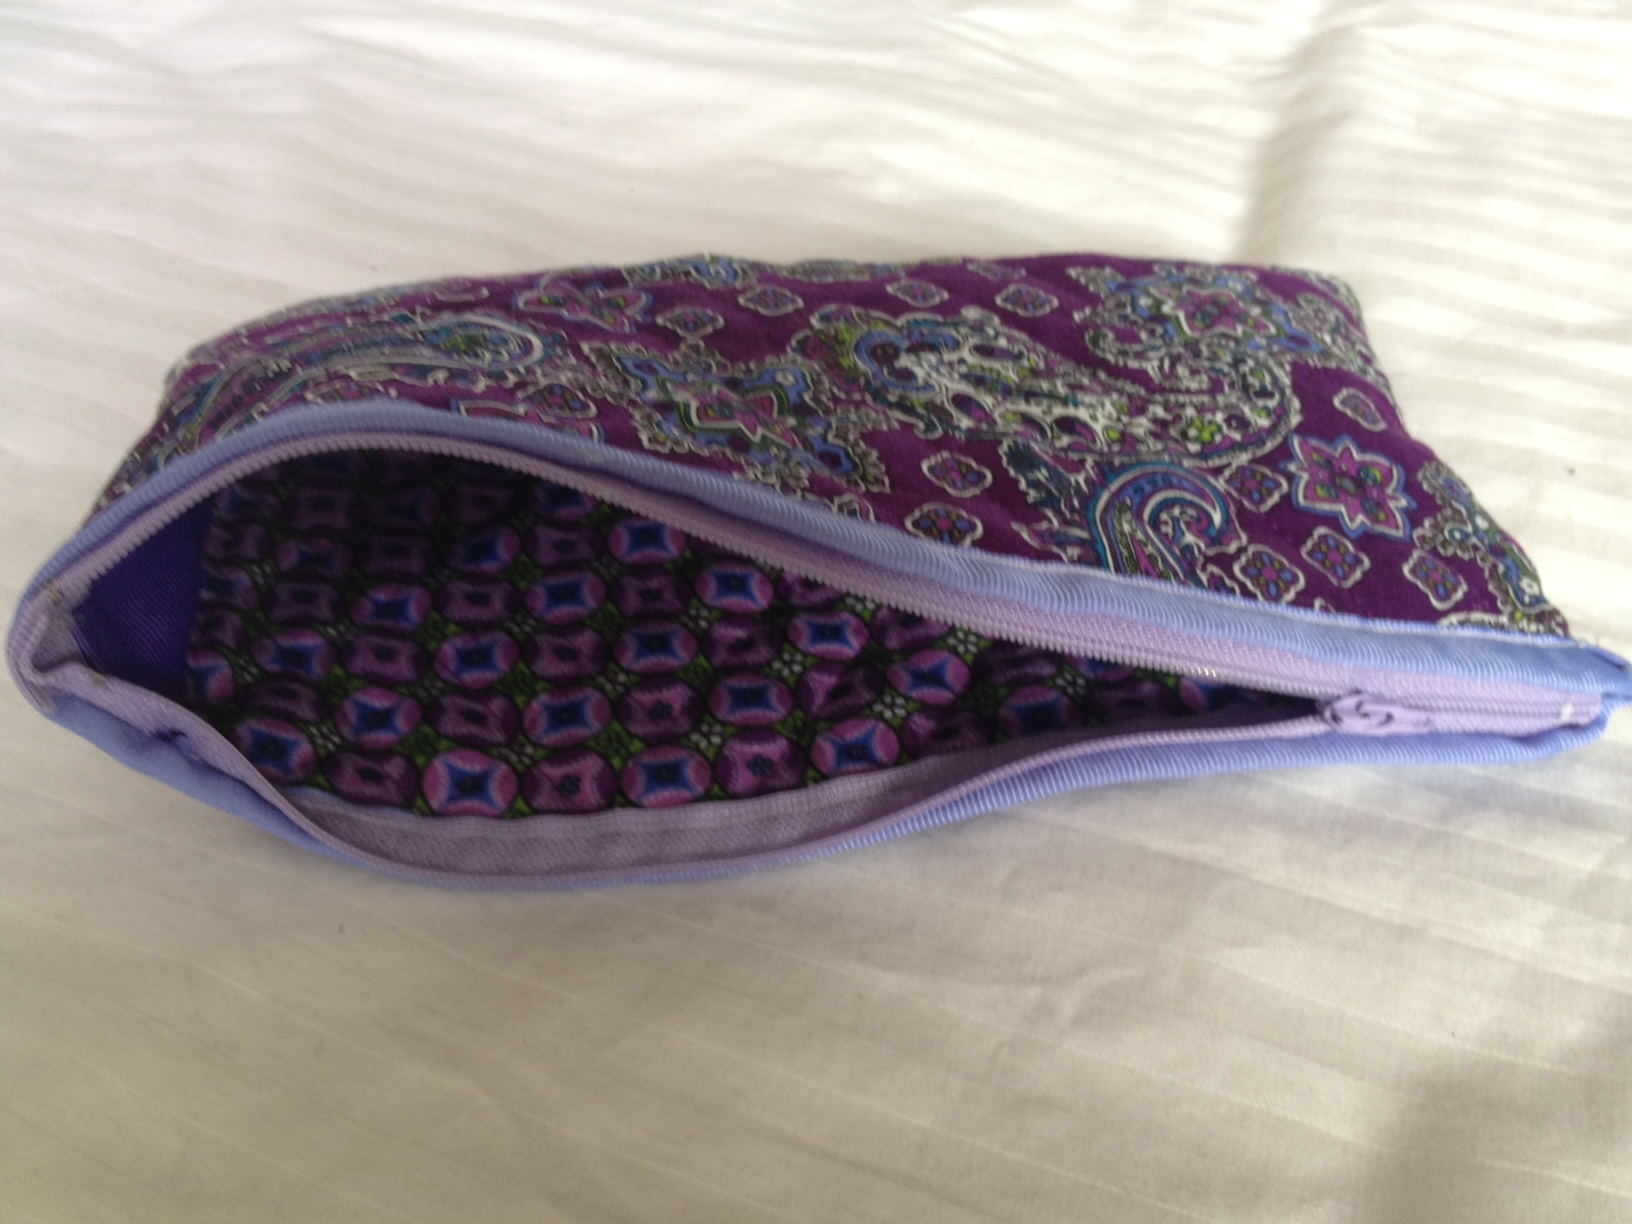
Ta da! So cute, right? Once you’re done, you can add a quick touch by getting iron on letters and putting each person’s first initial on the bags, or embroidering it yourself (I ended up doing the latter). Or just get rid of all the fluff and keep it simple. These bags are cute enough that they stand out on their own, and your bridesmaids won’t believe you made them yourself! It’ll add that extra special touch that means oh so much.
Other Items I Put In My DIY Bridesmaid Gifts
Once I was finished with my quilted bags, and after I gave myself a huge pat on the back, I went searching for other items to fill the bag.
Of course, I still wasn’t ready to give up on my idea for matching “robes” to get ready in. But already having spent $20 per person on the bags, I wasn’t left with a huge budget to spend. So again, I went searching and found the CUTEST rompers on sale for $15 each…
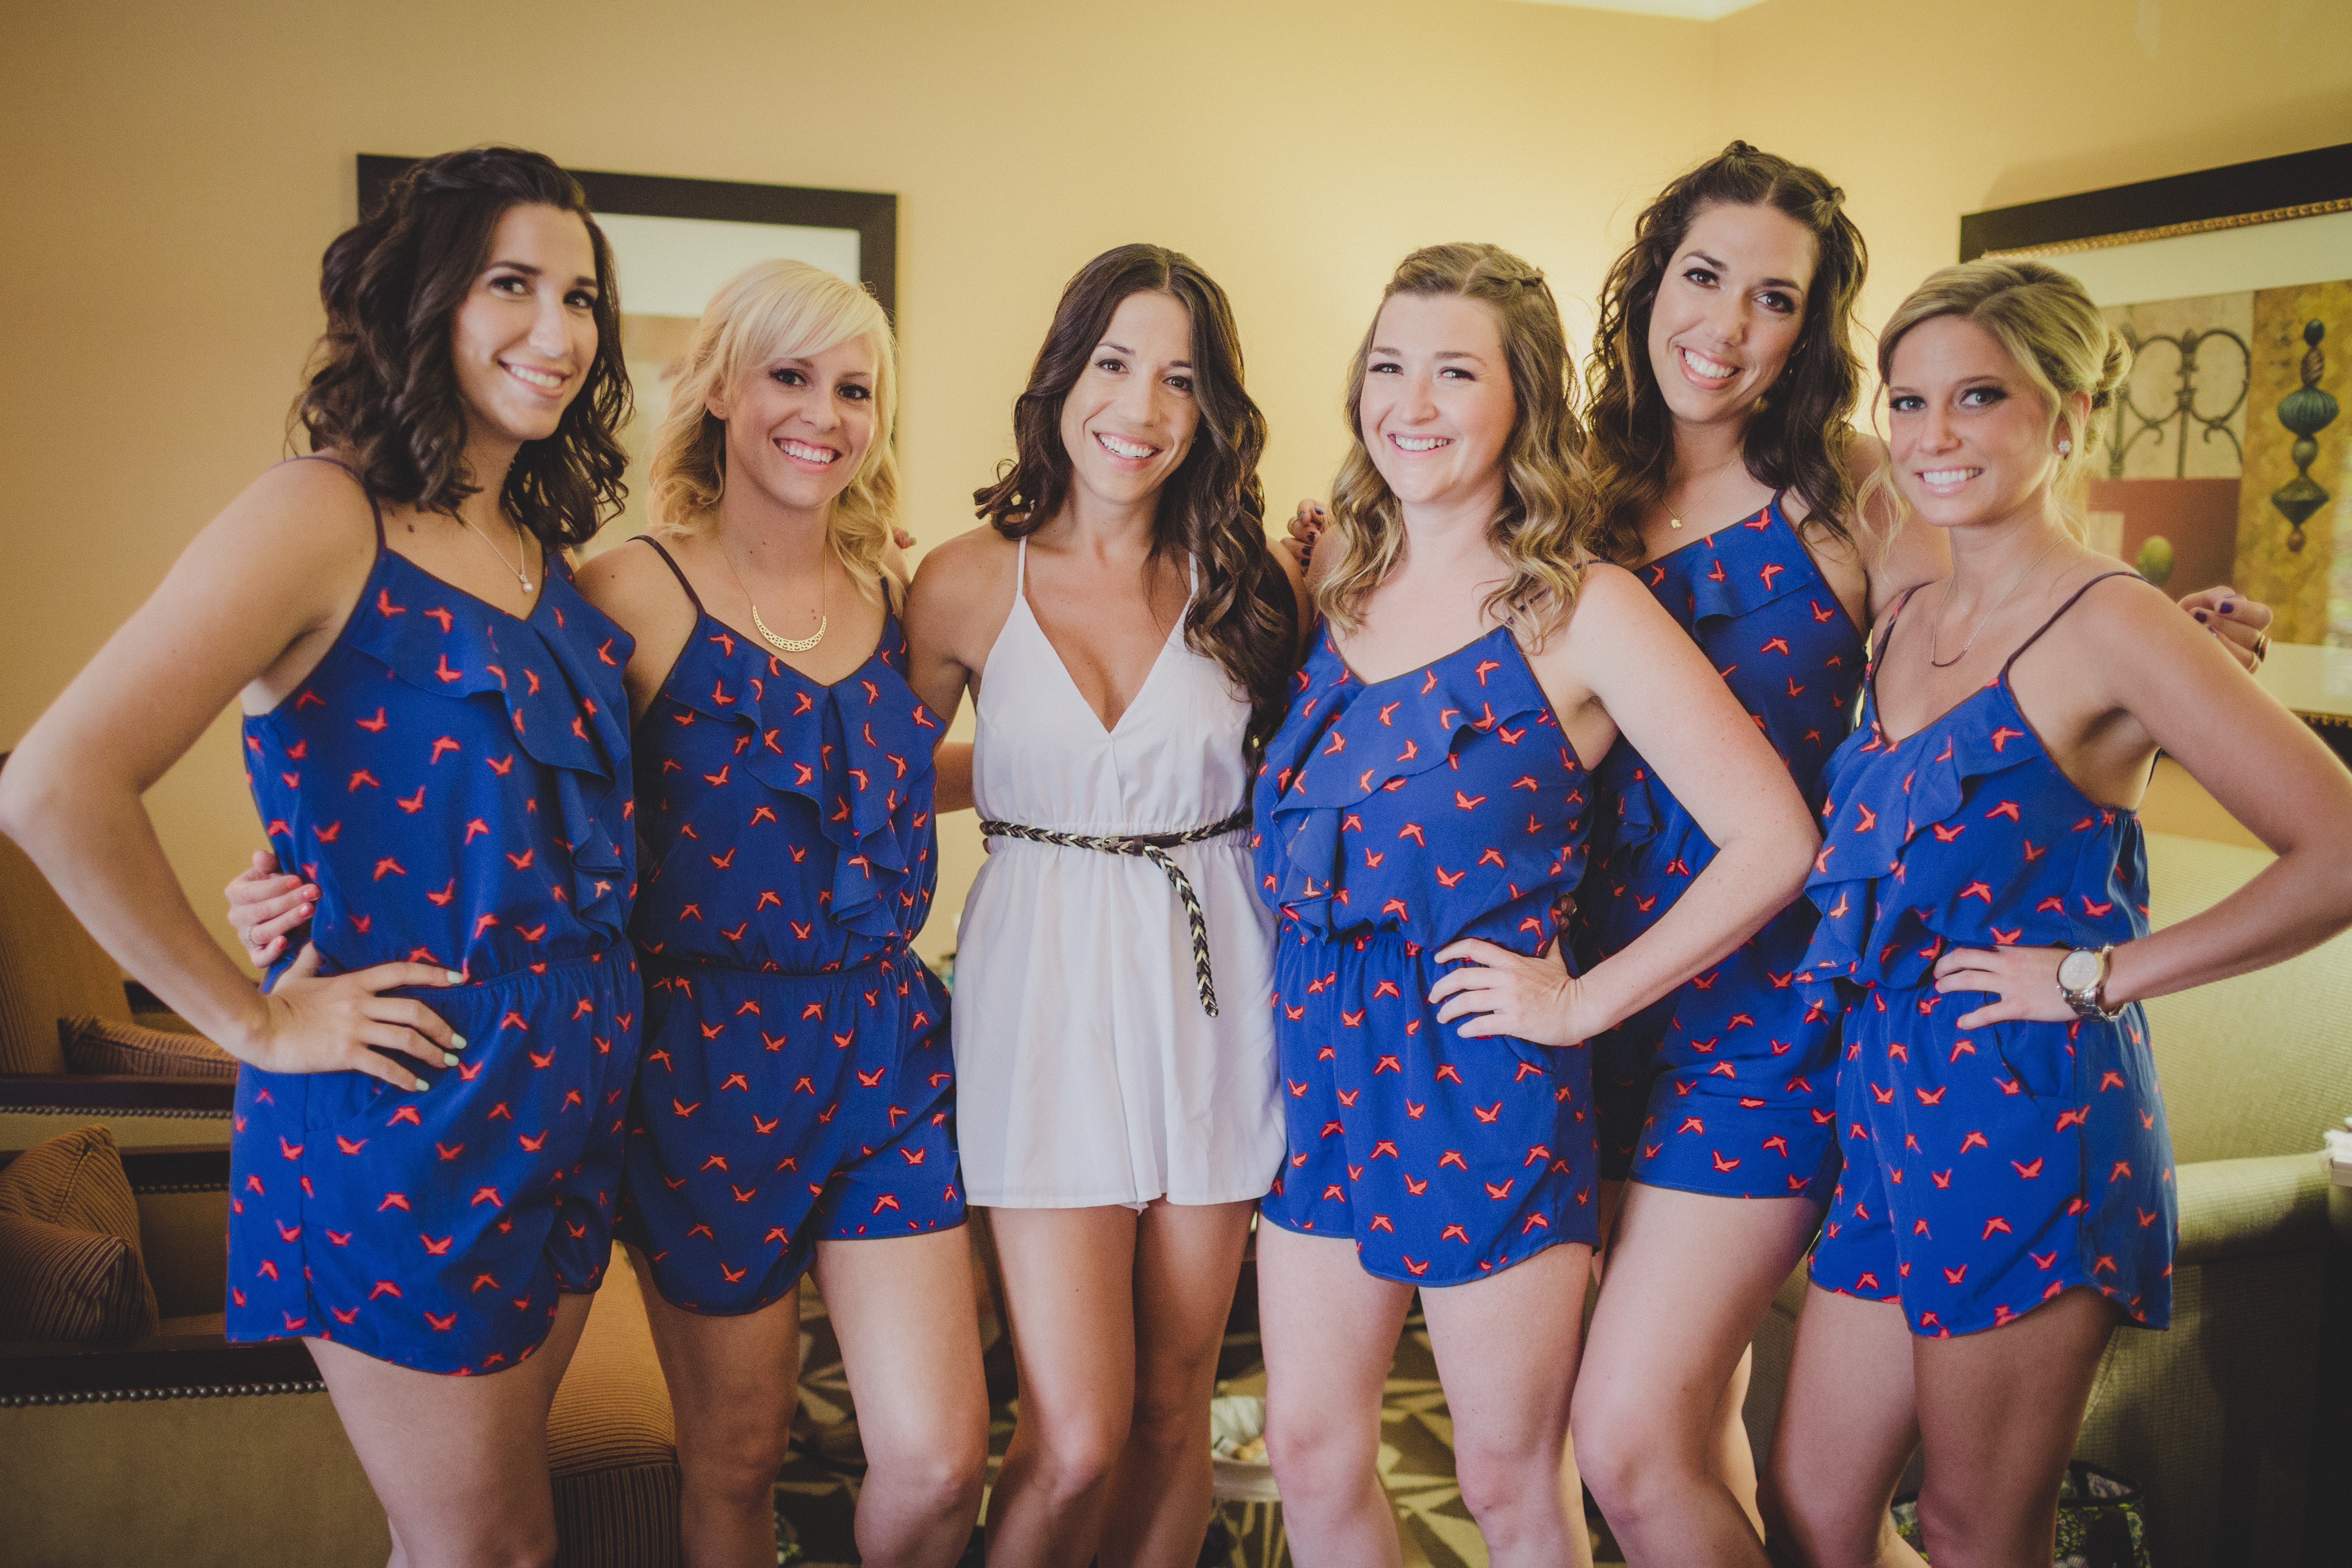
(they are currently out of stock, but you can find similar ones here).
I bought one in the sizes each girl would need, and then a white one for myself. Ok $35 in and so far I had matching “getting ready” rompers for all, and hand made quilted bags and totes. Score!
But I needed a couple other things to complete the gift. Champagne for each girl was a given – $5 more. $40 in…$10 in the budget left to spend. And then I remembered a cool present I’d bought for myself just a few months prior…

They were the most genius thing I’d ever seen! Not only did they come with slippers your size, that had rubber, non-slip bottoms AND folded up easily into your purse…but they came with a small clutch you could use to carry them in. They were a 2 in 1 present. And what do you know… each one costs about $10.
Perfect! I swooped one up in each girls’ shoe size, put them in the new bags I had made – along with the romper and champagne – and was done. Simple, easy, and each girl was sure to be pleased.
You never know how people are going to take to a gift you give them. Unless they specifically ask for it, gifts are such a crapshoot. All my bridesmaids seemed to like the gift I had given them, but then again, they could just be playing nice. After all, it was my wedding day and they weren’t going to say anything negative to hurt me.
However, I KNEW the DIY bridesmaid gifts were a success when I went to meet up with one of my bridesmaids for drinks a few months after my wedding. Much to my surprise when I noticed that she was carrying the very tote I had made her! I squealed, “WOW! You actually use it!” to which she replied, “I love it! I use it all the time. It’s a great bag.”
Jackpot! I had officially achieved my goal of giving my bridesmaids a thoughtful keepsake that they could utilize long after my wedding, WITHOUT spending a fortune on the cookie cutter bags that were online. Hopefully you, too, can get some inspiration from this post to make your own DIY bridesmaid gifts.
And just in case you need all the information in one place, below are all the supplies you’ll need to make your bridal party their own quilted totes and makeup bags.
Supply List for Quilted Totes and Makeup Bags:
- Quilted Fabric (similar to the fabric paisley pattern I used)
- This is also a cute pattern for bridesmaid totes
- 1.5” grosgrain ribbon
- Sewing Machine
- Thread
- Needle
- 12” Zipper (may be able to get more competitive pricing here – through fabric.com)
- Fabric Pen (optional)
Ideas For Things to Put Inside the Bags:
- Rompers
- Dr. Scholls Foldaway Flats
- Champagne
- Thank You Card
- Secret Brush Flask(REALLY cool idea, but cost $25 ea and was out of my budget)
I love your blog.. very nice colors & theme. Did you design this website
yourself or did you hire someone to do it for you? Plz answer back as
I’m looking to construct my own blog and would like to find out where u got this from.
many thanks
I LOVE the rompers a you and your bridesmaids wore, I know you said they were out of stock when you wrote this post, anyway they are back in stock or you could tell me which ones/where you got them from?!? I have been searching high and low online for rompers for my bridesmaids and haven’t been able to find anything nearly as cute as the ones you had! Any help would be greatly appreciated 🙂
Hi Carolyn! Thanks so much for the compliment! Unfortunately, these rompers never came back in stock. They were from Necessary Clothing (http://www.necessaryclothing.com/) and I think I got them on a closeout sale. I link to some pretty cheap/cute ones in this post, so try those. If those aren’t what you like, search Amazon. I usually have the best luck finding what I need on there. Or maybe try Forever 21. Good luck!
Once the stored fat reserves are burned, the calorie consumption must increase in order for the individual
to survive – one cannot survive on a 500 calorie per
day diet. It is only safe to lose up to two pounds a week, not seven or more
unless under medical supervision. HCG compound not approved for over-the-counter sales.
There are also HCG approved cosmetics available in anti-aging lines.
Ensure that you put away any sugary stuff such as very sugary foods, foods that are processed
and or any other heavily starched foodstuffs For example a meal that entails, 100g lean meat, fish or chicken, with a vegetable like spinach
or cabbage is allowed.